fuel KIA Soul 2010 1.G User Guide
[x] Cancel search | Manufacturer: KIA, Model Year: 2010, Model line: Soul, Model: KIA Soul 2010 1.GPages: 314, PDF Size: 6.39 MB
Page 107 of 314

435
Features of your vehicle
D150204BHM-EEFuel gaugeThe fuel gauge indicates the approxi-
mate amount of fuel remaining in the fuel
tank.
The fuel tank capacity is given in sec-
tion 8.The fuel gauge is supplemented by
a low fuel warning light, which will illumi-
nate when the fuel tank is nearly empty.
On inclines or curves, the fuel gauge
pointer may fluctuate or the low fuel
warning light may come on earlier than
usual due to the movement of fuel in the
tank.
D150205AAMOdometer/Tripmeter (if equipped)Odometer, tripmeter A or B can be
selected by pressing the TRIP button for
less than 1 second.
OAM049034
OAM049035
WARNING
- Fuel gauge
Running out of fuel can expose
vehicle occupants to danger.
You must stop and obtain addition-
al fuel as soon as possible after the
warning light comes on or when the
gauge indicator comes close to the
E level.
CAUTION
Avoid driving with a very low fuel level. Running out of fuel couldcause the engine to misfire, damag-ing catalytic converter.
Page 108 of 314
Features of your vehicle36
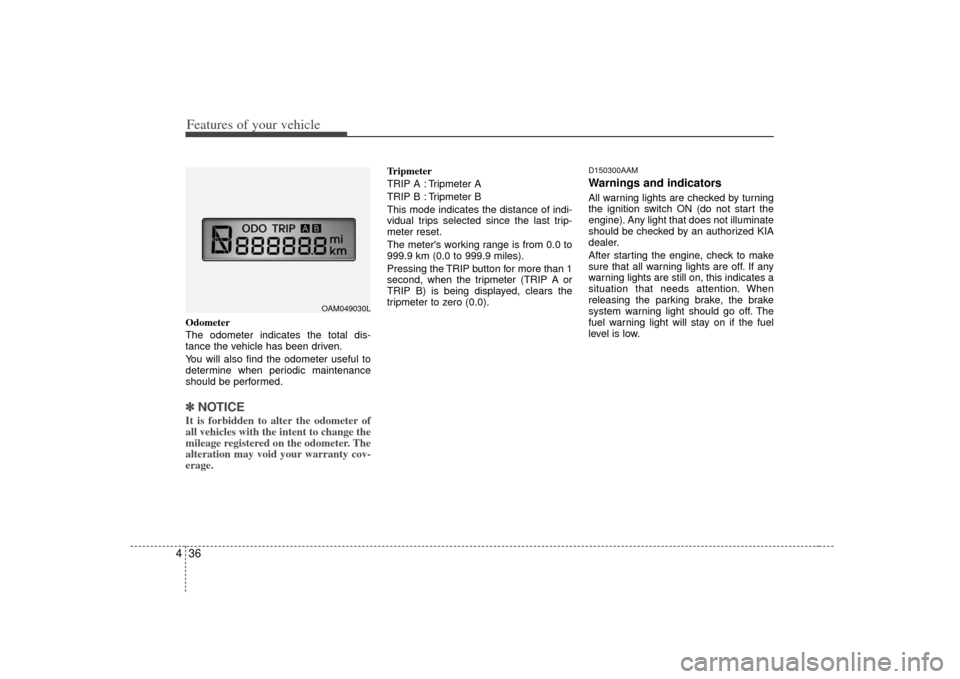
4Odometer
The odometer indicates the total dis-
tance the vehicle has been driven.
You will also find the odometer useful to
determine when periodic maintenance
should be performed.✽ ✽
NOTICEIt is forbidden to alter the odometer of
all vehicles with the intent to change the
mileage registered on the odometer. The
alteration may void your warranty cov-
erage.
Tripmeter
TRIP A : Tripmeter A
TRIP B : Tripmeter B
This mode indicates the distance of indi-
vidual trips selected since the last trip-
meter reset.
The meter's working range is from 0.0 to
999.9 km (0.0 to 999.9 miles).
Pressing the TRIP button for more than 1
second, when the tripmeter (TRIP A or
TRIP B) is being displayed, clears the
tripmeter to zero (0.0).
D150300AAMWarnings and indicatorsAll warning lights are checked by turning
the ignition switch ON (do not start the
engine). Any light that does not illuminate
should be checked by an authorized KIA
dealer.
After starting the engine, check to make
sure that all warning lights are off. If any
warning lights are still on, this indicates a
situation that needs attention. When
releasing the parking brake, the brake
system warning light should go off. The
fuel warning light will stay on if the fuel
level is low.
OAM049030L
Page 115 of 314

443
Features of your vehicle
D150317AAMImmobilizer indicatorThis indicator illuminates when the
immobilizer key is inserted and turned to
the ON position to start the engine.
At this time, you can start the engine. The
indicator goes out after the engine is run-
ning.
If this indicator blinks when the ignition
switch is in the ON position before start-
ing the engine, have the system checked
by an authorized KIA dealer.
D150318AHMLow fuel level warning lightThis warning light indicates the fuel tank
is nearly empty. When it comes on, you
should add fuel as soon as possible.
Driving with the fuel level warning light on
or with the fuel level below “E” can cause
the engine to misfire and damage the
catalytic converter (if equipped).D150319AUNLow washer fluid levelwarning light (if equipped)This warning light indicates the washer
fluid reservoir is near empty. Refill the
washer fluid as soon as possible.
D150320AHM-EU-U1Malfunction indicator (MIL) (check engine light) (if equipped)This indicator light is part of the Engine
Control System which monitors various
emission control system components. If
this light illuminates while driving, it indi-
cates that a potential malfunction has
been detected somewhere in the emis-
sion control system.
This light will also illuminate when the
ignition switch is turned to the ON posi-
tion, and will go out in a few seconds
after the engine is started. If it illuminates
while driving, or does not illuminate when
the ignition switch is turned to the ON
position, take your vehicle to the nearest
authorized KIA dealer and have the sys-
tem checked.
Generally, your vehicle will continue to be
drivable, but have the system checked by
an authorized KIA dealer promptly.
Page 116 of 314
Features of your vehicle44
4
D150323AAM-EUESC (Electronic Stability
Control) indicator (if equipped)The ESC indicator will illuminate when
the ignition switch is turned ON, but
should go off after approximately 3 sec-
onds. When the ESC is on, it monitors
the driving conditions and under normal
driving conditions, the ESC indicator will
remain off. When a slippery or low trac-
tion condition is encountered, the ESC
will operate, and the ESC indicator will
blink to indicate the ESC is operating.
If this indicator illuminates and stays on,
the ESC may have malfunctioned. Take
your vehicle to an authorized KIA dealer
and have the system checked.
D150324AAM-EUESC OFF indicator (if equipped)The ESC OFF indicator will illuminate
when the ignition switch is turned ON,
but should go off after approximately 3
seconds. To switch to ESC OFF mode,
press the ESC OFF button. The ESC
OFF indicator will illuminate indicating
the ESC is deactivated.
CAUTION
If the Emission Control System
Malfunction Indicator Light illumi- nates, potential catalytic converterdamage is possible. This couldresult in loss of engine power. Have the Engine Control System inspect-ed as soon as possible by anauthorized KIA dealer.
CAUTION
Prolonged driving with the EmissionControl System MalfunctionIndicator Light illuminated may cause damage to the emission con-trol systems which could effect dri- vability and/or fuel economy.
Page 187 of 314

Driving your vehicle12
5R (Reverse)
Use this position to drive the vehicle
backward. N (Neutral)
The wheels and transaxle are not
engaged. The vehicle will roll freely even
on the slightest incline unless the parking
brake or service brakes are applied.
D (Drive)
This is the normal forward driving posi-
tion. The transaxle will automatically shift
through a 4-gear sequence, providing the
best fuel economy and power.
For extra power when passing another
vehicle or climbing grades, depress the
accelerator fully, at which time the
transaxle will automatically downshift to
the next lower gear.
✽ ✽
NOTICEAlways come to a complete stop before
shifting into D (Drive).
2 (Second Gear)
Use 2 (Second Gear) for more power
when climbing hills and for increased
braking when going down hills. This posi-
tion also helps reduce wheel spin on
slippery surfaces. When the shift lever is
placed in 2 (Second Gear), the transaxle
will automatically shift from first to sec-
ond gear.
L (Low)
Move the shift lever to this position in
hard pulling situations and for climbing
steep grades.
CAUTION
The transaxle may be damaged if
you shift into P (Park) while thevehicle is in motion.
CAUTION
Always come to a complete stopbefore shifting into or out of R (Reverse); you may damage thetransaxle if you shift into R(Reverse) while the vehicle is in motion, except when “Rocking thevehicle” explained in this section.
CAUTION
Do not exceed the recommendedmaximum speed in 2 (Second Gear)or L (Low). Operating the vehicle above the maximum speed recom-mended for 2 (Second Gear) or L (Low) may cause excessive heatwhich could damage the automatic transaxle.
Page 205 of 314
Driving your vehicle30
5E100000AHM-ECYour vehicle's fuel economy depends
mainly on your style of driving, where you
drive and when you drive.
Each of these factors affects how many
kilometers (miles) you can get from a liter
(gallon) of fuel. To operate your vehicle
as economically as possible, use the fol-
lowing driving suggestions to help save
money in both fuel and repairs:
Drive smoothly. Accelerate at a moder-
ate rate. Don't make "jack-rabbit" starts
or full-throttle shifts and maintain a
steady cruising speed. Don't race
between stoplights. Try to adjust your
speed to the traffic so you don't have to
change speeds unnecessarily. Avoid
heavy traffic whenever possible.
Always maintain a safe distance from
other vehicles so you can avoid unnec-
essary braking. This also reduces
brake wear.
Drive at a moderate speed. The faster you drive, the more fuel your vehicle
uses. Driving at a moderate speed,
especially on the highway, is one of the
most effective ways to reduce fuel con-
sumption. Don't "ride" the brake pedal. This can
increase fuel consumption and also
increase wear on these components.
In addition, driving with your foot rest-
ing on the brake pedal may cause the
brakes to overheat, which reduces
their effectiveness and may lead to
more serious consequences.
Take care of your tires. Keep them inflated to the recommended pressure.
Incorrect inflation, either too much or
too little, results in unnecessary tire
wear. Check the tire pressures at least
once a month.
Be sure that the wheels are aligned correctly. Improper alignment can
result from hitting curbs or driving too
fast over irregular surfaces. Poor align-
ment causes faster tire wear and may
also result in other problems as well as
greater fuel consumption. Keep your vehicle in good condition.
For better fuel economy and reduced
maintenance costs, maintain your vehi-
cle in accordance with the mainte-
nance schedule in section 7. If you
drive your vehicle in severe conditions,
more frequent maintenance is required
(see section 7 for details).
Keep your vehicle clean. For maximum service, your vehicle should be kept
clean and free of corrosive materials. It
is especially important that mud, dirt,
ice, etc. not be allowed to accumulate
on the underside of the vehicle. This
extra weight can result in increased
fuel consumption and also contribute
to corrosion.
Travel lightly. Don't carry unnecessary weight in your vehicle. Weight reduces
fuel economy.
Don't let the engine idle longer than necessary. If you are waiting (and not
in traffic), turn off your engine and
restart only when you're ready to go.ECONOMICAL OPERATION
Page 206 of 314
531
Driving your vehicle
Remember, your vehicle does notrequire extended warm-up. After the
engine has started, allow the engine to
run for 10 to 20 seconds prior to plac-
ing the vehicle in gear. In very cold
weather, however, give your engine a
slightly longer warm-up period.
Don't "lug" or "over-rev" the engine. Lugging is driving too slowly in a very
high gear resulting in engine bucking. If
this happens, shift to a lower gear.
Over-revving is racing the engine
beyond its safe limit. This can be avoid-
ed by shifting at the recommended
speed. Use your air conditioning sparingly.
The air conditioning system is operat-
ed by engine power so your fuel econ-
omy is reduced when you use it.
Open windows at high speeds can reduce fuel economy.
Fuel economy is less in crosswinds and headwinds. To help offset some of
this loss, slow down when driving in
these conditions.
Keeping a vehicle in good operating con-
dition is important both for economy and
safety. Therefore, have an authorized KIA
dealer perform scheduled inspections
and maintenance.
WARNING
- Engine off dur- ing motion
Never turn the engine off to coast
down hills or anytime the vehicle is
in motion. The power steering and
power brakes will not function
properly without the engine run-
ning. Instead, keep the engine on
and downshift to an appropriate
gear for engine braking effect. In
addition, turning off the ignition
while driving could engage the
steering wheel lock resulting in
loss of vehicle steering which
could cause serious injury or
death.
Page 211 of 314

Driving your vehicle36
5E110700AHMHighway drivingTiresAdjust the tire inflation pressures to
specification. Low tire inflation pressures
will result in overheating and possible
failure of the tires.
Avoid using worn or damaged tires which
may result in reduced traction or tire fail-
ure.✽ ✽
NOTICENever exceed the maximum tire inflation
pressure shown on the tires.
Fuel, engine coolant and engine oilHigh speed travel consumes more fuel
than urban motoring. Do not forget to
check both the engine coolant and
engine oil.Drive beltA loose or damaged drive belt may result
in overheating of the engine.
WARNING
Underinflated or overinflated
tires can cause poor handling,
loss of vehicle control, and sud-
den tire failure leading to acci-
dents, injuries, and even death.
Always check tires for proper
inflation before driving. For prop-
er tire pressures, refer to “Tires
and wheels” in section 8.
Driving on tires with no or insuffi- cient tread is dangerous. Worn-
out tires can result in loss of
vehicle control, collisions, injury,
and even death. Worn-out tires
should be replaced as soon as
possible and should never be
used for driving. Always check
the tire tread before driving your
car. For further information and
tread limits, refer to “Tires and
wheels” in section 7.
Page 217 of 314

Driving your vehicle42
5
E150200AUNCertification label
The certification label is located on
the driver's door sill at the center pil-
lar.
This label shows the maximum
allowable weight of the fully loaded
vehicle. This is called the GVWR
(Gross Vehicle Weight Rating). The
GVWR includes the weight of the
vehicle, all occupants, fuel and
cargo.
This label also tells you the maxi-
mum weight that can be supported
by the front and rear axles, called
Gross Axle Weight Rating (GAWR). To find out the actual loads on your
front and rear axles, you need to go
to a weigh station and weigh your
vehicle. Your dealer can help you with
this. Be sure to spread out your load
equally on both sides of the center-
line.
C190F03JM
Item Description Total
A Vehicle Capacity 385 kg
Weight (849 lbs)
Subtract Occupant
B Weight 365 kg
73 kg (161 lbs) × 5 (805 lbs)
C
Available Cargo and
20 kg
Luggage weight (44 lbs)
ABC
Example 3
OEN056020
WARNING -
Over loading
Never exceed the GVWR for your vehicle, the GAWR for
either the front or rear axle
and vehicle capacity weight.
Exceeding these ratings can
cause an accident or vehicle
damage. You can calculate the
weight of your load by weigh-
ing the items (or people)
before putting them in the
vehicle. Be careful not to over-
load your vehicle.
(Continued)
Page 219 of 314

Driving your vehicle44
5E160000AUNThis section will guide you in the proper
loading of your vehicle and/or trailer, to
keep your loaded vehicle weight within its
design rating capability, with or without a
trailer. Properly loading your vehicle will
provide maximum return of the vehicle
design performance. Before loading your
vehicle, familiarize yourself with the fol-
lowing terms for determining your vehi-
cle's weight ratings, with or without a
trailer, from the vehicle's specifications
and the certification label:E160100AUNBase curb weight
This is the weight of the vehicle including
a full tank of fuel and all standard equip-
ment. It does not include passengers,
cargo, or optional equipment.E160200AUNVehicle curb weight
This is the weight of your new vehicle
when you picked it up from your dealer
plus any aftermarket equipment.
E160300AUNCargo weight
This figure includes all weight added to
the Base Curb Weight, including cargo
and optional equipment.E160400AUNGAW (Gross axle weight)
This is the total weight placed on each
axle (front and rear) - including vehicle
curb weight and all payload.E160500AUNGAWR (Gross axle weight rating)This is the maximum allowable weight
that can be carried by a single axle (front
or rear). These numbers are shown on
the certification label.
The total load on each axle must never
exceed its GAWR.E160600AUNGVW (Gross vehicle weight)
This is the Base Curb Weight plus actual
Cargo Weight plus passengers.
E160700AUN-EUGVWR (Gross vehicle weight rating)
This is the maximum allowable weight of
the fully loaded vehicle (including all
options, equipment, passengers and
cargo). The GVWR is shown on the cer-
tification label located on the driver’s
door sill.
VEHICLE WEIGHT