seat adjustment KIA Soul 2010 1.G Owner's Manual
[x] Cancel search | Manufacturer: KIA, Model Year: 2010, Model line: Soul, Model: KIA Soul 2010 1.GPages: 314, PDF Size: 6.39 MB
Page 17 of 314
Safety features of your vehicle43
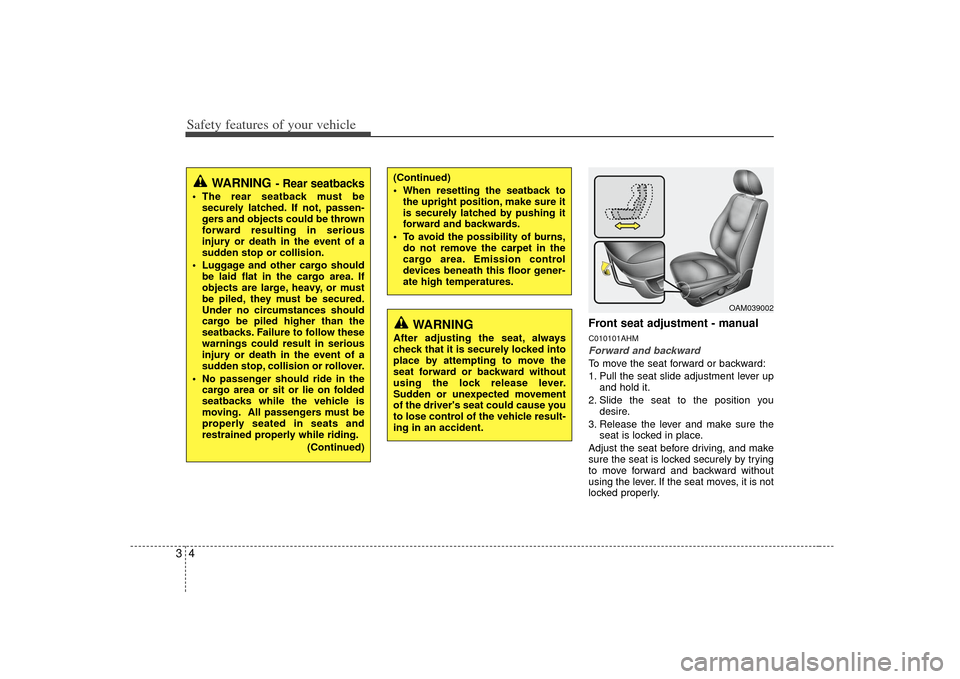
Front seat adjustment - manualC010101AHMForward and backwardTo move the seat forward or backward:
1. Pull the seat slide adjustment lever upand hold it.
2. Slide the seat to the position you desire.
3. Release the lever and make sure the seat is locked in place.
Adjust the seat before driving, and make
sure the seat is locked securely by trying
to move forward and backward without
using the lever. If the seat moves, it is not
locked properly.
(Continued)
When resetting the seatback to the upright position, make sure it
is securely latched by pushing it
forward and backwards.
To avoid the possibility of burns, do not remove the carpet in the
cargo area. Emission control
devices beneath this floor gener-
ate high temperatures.
WARNING
- Rear seatbacks
The rear seatback must besecurely latched. If not, passen-
gers and objects could be thrown
forward resulting in serious
injury or death in the event of a
sudden stop or collision.
Luggage and other cargo should be laid flat in the cargo area. If
objects are large, heavy, or must
be piled, they must be secured.
Under no circumstances should
cargo be piled higher than the
seatbacks. Failure to follow these
warnings could result in serious
injury or death in the event of a
sudden stop, collision or rollover.
No passenger should ride in the cargo area or sit or lie on folded
seatbacks while the vehicle is
moving. All passengers must be
properly seated in seats and
restrained properly while riding.
(Continued)
WARNING
After adjusting the seat, always
check that it is securely locked into
place by attempting to move the
seat forward or backward without
using the lock release lever.
Sudden or unexpected movement
of the driver's seat could cause you
to lose control of the vehicle result-
ing in an accident.
OAM039002
Page 19 of 314
Safety features of your vehicle63
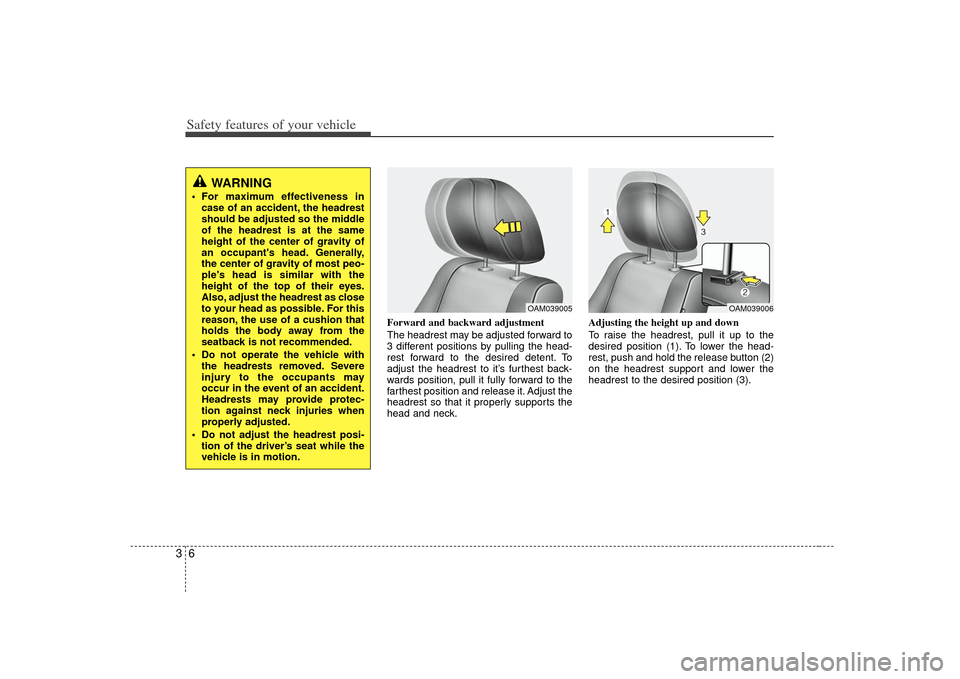
Forward and backward adjustment
The headrest may be adjusted forward to
3 different positions by pulling the head-
rest forward to the desired detent. To
adjust the headrest to it’s furthest back-
wards position, pull it fully forward to the
farthest position and release it. Adjust the
headrest so that it properly supports the
head and neck.Adjusting the height up and down
To raise the headrest, pull it up to the
desired position (1). To lower the head-
rest, push and hold the release button (2)
on the headrest support and lower the
headrest to the desired position (3).
WARNING
For maximum effectiveness in
case of an accident, the headrest
should be adjusted so the middle
of the headrest is at the same
height of the center of gravity of
an occupant's head. Generally,
the center of gravity of most peo-
ple's head is similar with the
height of the top of their eyes.
Also, adjust the headrest as close
to your head as possible. For this
reason, the use of a cushion that
holds the body away from the
seatback is not recommended.
Do not operate the vehicle with the headrests removed. Severe
injury to the occupants may
occur in the event of an accident.
Headrests may provide protec-
tion against neck injuries when
properly adjusted.
Do not adjust the headrest posi- tion of the driver’s seat while the
vehicle is in motion.
OAM039006
OAM039005
Page 22 of 314
39
Safety features of your vehicle
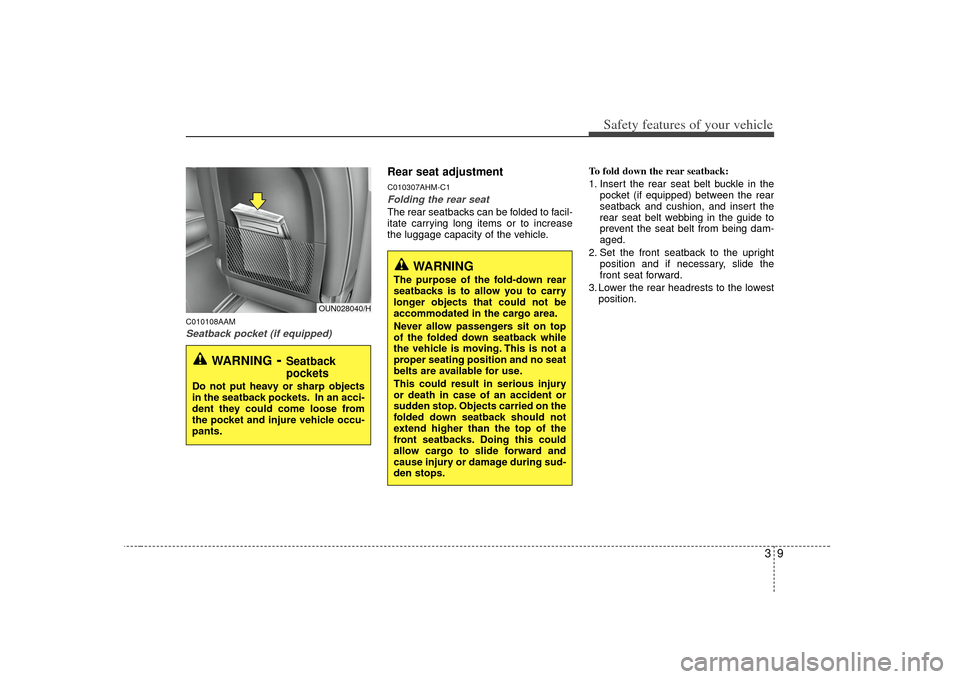
C010108AAMSeatback pocket (if equipped)
Rear seat adjustmentC010307AHM-C1Folding the rear seatThe rear seatbacks can be folded to facil-
itate carrying long items or to increase
the luggage capacity of the vehicle.To fold down the rear seatback:
1. Insert the rear seat belt buckle in the
pocket (if equipped) between the rear
seatback and cushion, and insert the
rear seat belt webbing in the guide to
prevent the seat belt from being dam-
aged.
2. Set the front seatback to the upright position and if necessary, slide the
front seat forward.
3. Lower the rear headrests to the lowest position.
WARNING
- Seatback
pockets
Do not put heavy or sharp objects
in the seatback pockets. In an acci-
dent they could come loose from
the pocket and injure vehicle occu-
pants.
OUN028040/H
WARNING
The purpose of the fold-down rear
seatbacks is to allow you to carry
longer objects that could not be
accommodated in the cargo area.
Never allow passengers sit on top
of the folded down seatback while
the vehicle is moving. This is not a
proper seating position and no seat
belts are available for use.
This could result in serious injury
or death in case of an accident or
sudden stop. Objects carried on the
folded down seatback should not
extend higher than the top of the
front seatbacks. Doing this could
allow cargo to slide forward and
cause injury or damage during sud-
den stops.
Page 28 of 314
315
Safety features of your vehicle
✽
✽NOTICEIf you are not able to pull out the seat
belt from the retractor, firmly pull the
belt out and release it. Then you will be
able to pull the belt out smoothly.
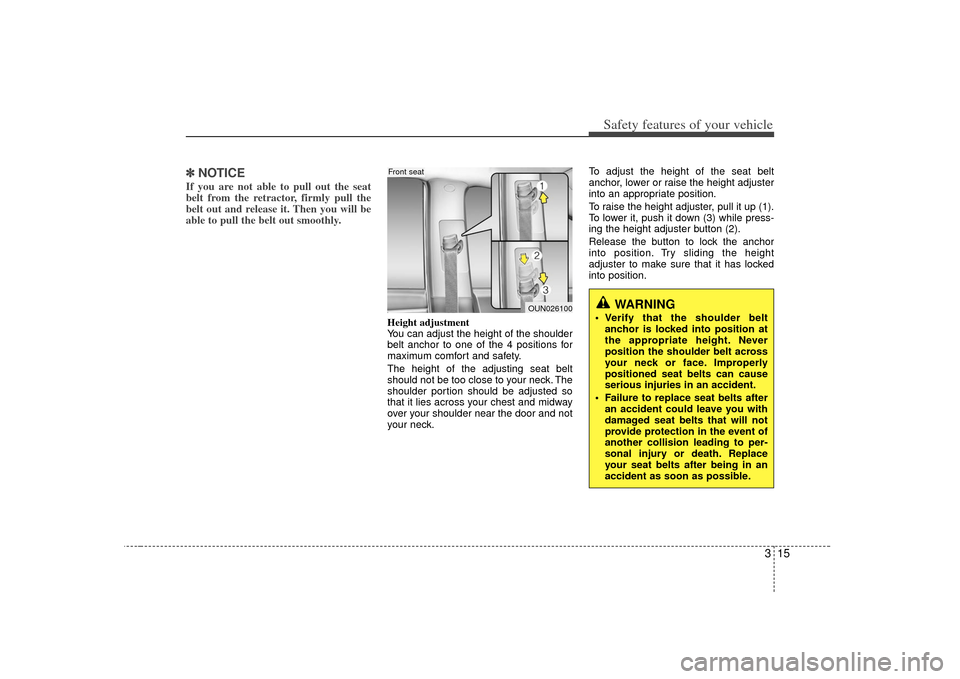
Height adjustment
You can adjust the height of the shoulder
belt anchor to one of the 4 positions for
maximum comfort and safety.
The height of the adjusting seat belt
should not be too close to your neck. The
shoulder portion should be adjusted so
that it lies across your chest and midway
over your shoulder near the door and not
your neck. To adjust the height of the seat belt
anchor, lower or raise the height adjuster
into an appropriate position.
To raise the height adjuster, pull it up (1).
To lower it, push it down (3) while press-
ing the height adjuster button (2).
Release the button to lock the anchor
into position. Try sliding the height
adjuster to make sure that it has locked
into position.
WARNING
Verify that the shoulder belt
anchor is locked into position at
the appropriate height. Never
position the shoulder belt across
your neck or face. Improperly
positioned seat belts can cause
serious injuries in an accident.
Failure to replace seat belts after an accident could leave you with
damaged seat belts that will not
provide protection in the event of
another collision leading to per-
sonal injury or death. Replace
your seat belts after being in an
accident as soon as possible.
OUN026100
Front seat
Page 100 of 314
Features of your vehicle28
4D140100AHMInside rearview mirrorAdjust the rearview mirror so that the
center view through the rear window is
seen. Make this adjustment before you
start driving.
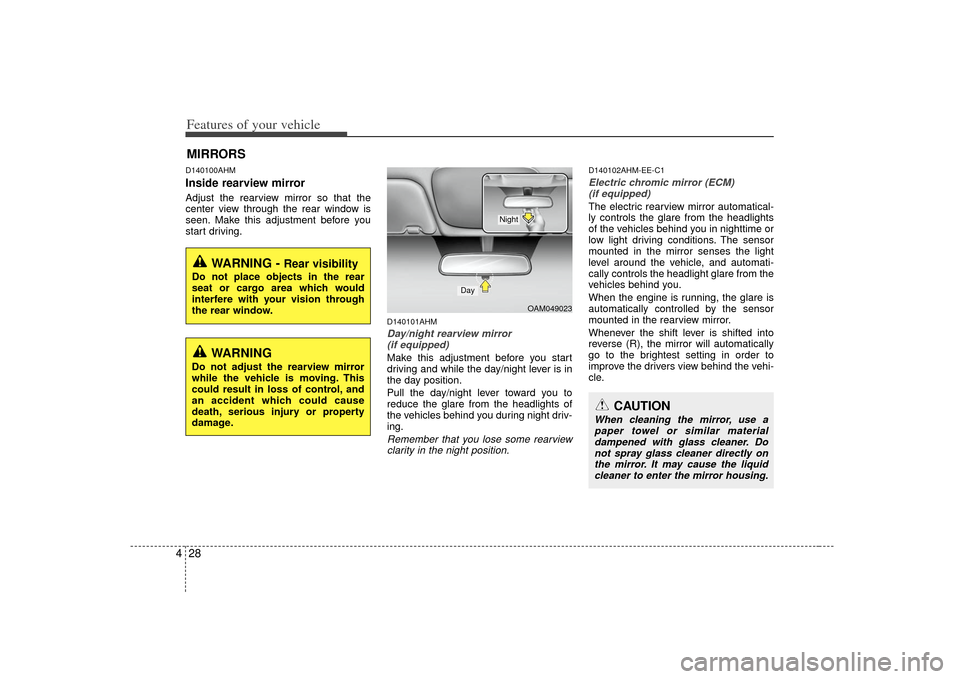
D140101AHMDay/night rearview mirror
(if equipped)Make this adjustment before you start
driving and while the day/night lever is in
the day position.
Pull the day/night lever toward you to
reduce the glare from the headlights of
the vehicles behind you during night driv-
ing.Remember that you lose some rearviewclarity in the night position.
D140102AHM-EE-C1Electric chromic mirror (ECM) (if equipped)The electric rearview mirror automatical-
ly controls the glare from the headlights
of the vehicles behind you in nighttime or
low light driving conditions. The sensor
mounted in the mirror senses the light
level around the vehicle, and automati-
cally controls the headlight glare from the
vehicles behind you.
When the engine is running, the glare is
automatically controlled by the sensor
mounted in the rearview mirror.
Whenever the shift lever is shifted into
reverse (R), the mirror will automatically
go to the brightest setting in order to
improve the drivers view behind the vehi-
cle.
MIRRORS
WARNING -
Rear visibility
Do not place objects in the rear
seat or cargo area which would
interfere with your vision through
the rear window.
CAUTION
When cleaning the mirror, use a paper towel or similar materialdampened with glass cleaner. Do not spray glass cleaner directly onthe mirror. It may cause the liquid cleaner to enter the mirror housing.
WARNING
Do not adjust the rearview mirror
while the vehicle is moving. This
could result in loss of control, and
an accident which could cause
death, serious injury or property
damage.
OAM049023
Day
Night