change wheel KIA Soul 2014 2.G Owner's Manual
[x] Cancel search | Manufacturer: KIA, Model Year: 2014, Model line: Soul, Model: KIA Soul 2014 2.GPages: 500, PDF Size: 13.89 MB
Page 22 of 500
Safety features of your vehicle
63
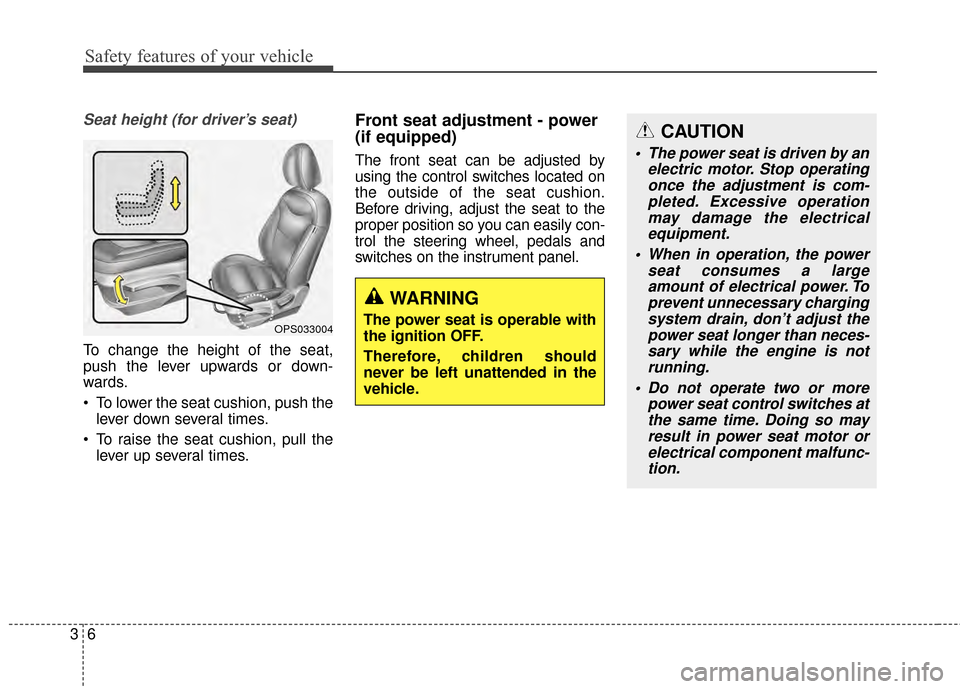
Seat height (for driver’s seat)
To change the height of the seat,
push the lever upwards or down-
wards.
To lower the seat cushion, push thelever down several times.
To raise the seat cushion, pull the lever up several times.
Front seat adjustment - power
(if equipped)
The front seat can be adjusted by
using the control switches located on
the outside of the seat cushion.
Before driving, adjust the seat to the
proper position so you can easily con-
trol the steering wheel, pedals and
switches on the instrument panel.
CAUTION
The power seat is driven by an electric motor. Stop operatingonce the adjustment is com-pleted. Excessive operationmay damage the electricalequipment.
When in operation, the power seat consumes a largeamount of electrical power. Toprevent unnecessary chargingsystem drain, don’t adjust thepower seat longer than neces-sary while the engine is notrunning.
Do not operate two or more power seat control switches atthe same time. Doing so mayresult in power seat motor orelectrical component malfunc-tion.
WARNING
The power seat is operable with
the ignition OFF.
Therefore, children should
never be left unattended in the
vehicle.OPS033004
Page 129 of 500
443
Features of your vehicle
Electric power steering (EPS)
The power steering uses a motor to
assist you in steering the vehicle. If
the engine is off or if the power steer-
ing system becomes inoperative, the
vehicle may still be steered, but it will
require increased steering effort.
The motor driven power steering is
controlled by a power steering con-
trol unit which senses the steering
wheel torque and vehicle speed to
command the motor.
The steering becomes heavier as
the vehicle’s speed increases and
becomes lighter as the vehicle’s
speed decreases for optimum steer-
ing control.
Should you notice any change in the
effort required to steer during normal
vehicle operation, have the power
steering checked by an authorized
Kia dealer.
✽ ✽NOTICE
The following symptoms may occur
during normal vehicle operation:
• The EPS warning light does not
illuminate.
• The steering gets heavy immedi- ately after turning the ignition
switch on. This happens as the sys-
tem performs the EPS system
diagnostics. When the diagnostics
are completed, the steering wheel
will return to its normal condition.
• A click noise may be heard from the EPS relay after the ignition
switch is turned to the ON or
LOCK (OFF) position.
• A motor noise may be heard when the vehicle is at a stop or at a low
driving speed.
• If the Electric Power Steering System does not operate normally,
the warning light will illuminate on
the instrument cluster. The steer-
ing wheel may become difficult to
control or operate abnormally.
Take your vehicle to an authorized
Kia dealer and have the vehicle
checked as soon as possible. (Continued)
STEERING WHEEL
CAUTION
If the Electric Power Steering
System does not operate nor-mally, the warning light willilluminate on the instrumentcluster. The steering wheelmay require increased steer-ing effort. Take your vehicle toan authorized Kia dealer andhave the vehicle checked assoon as possible.
When you operate the steering wheel in low temperature,noise may occur. If temperaturerises, the noise will likely disap-pear. This is a normal condition.
When the vehicle is stationary, when the steering wheel isturned all the way to the left orright continuously, the steer-ing wheel becomes harder toturn. The power assist is limit-ed to protect the motor fromoverheating.
As time passes, the steeringwheel return to its normalcondition.
Page 130 of 500
Features of your vehicle
44
4
(Continued)
• When you operate the steering
wheel in low temperature, abnor-
mal noise may occur. If tempera-
ture rises, the noise will likely dis-
appear. This is a normal condition.
• When the charging system warn- ing light comes on due to the low
voltage (When the alternator or
battery) does not operate normal-
ly or it malfunctions), the steering
wheel may require increased
steering effort.Tilt and telescopic steering
Tilt and telescopic steering allows
you to adjust the steering wheel
before you drive. You can also raise it
to give your legs more room when
you exit and enter the vehicle.
The steering wheel should be posi-
tioned so that it is comfortable for
you to drive, while permitting you to
see the instrument panel warning
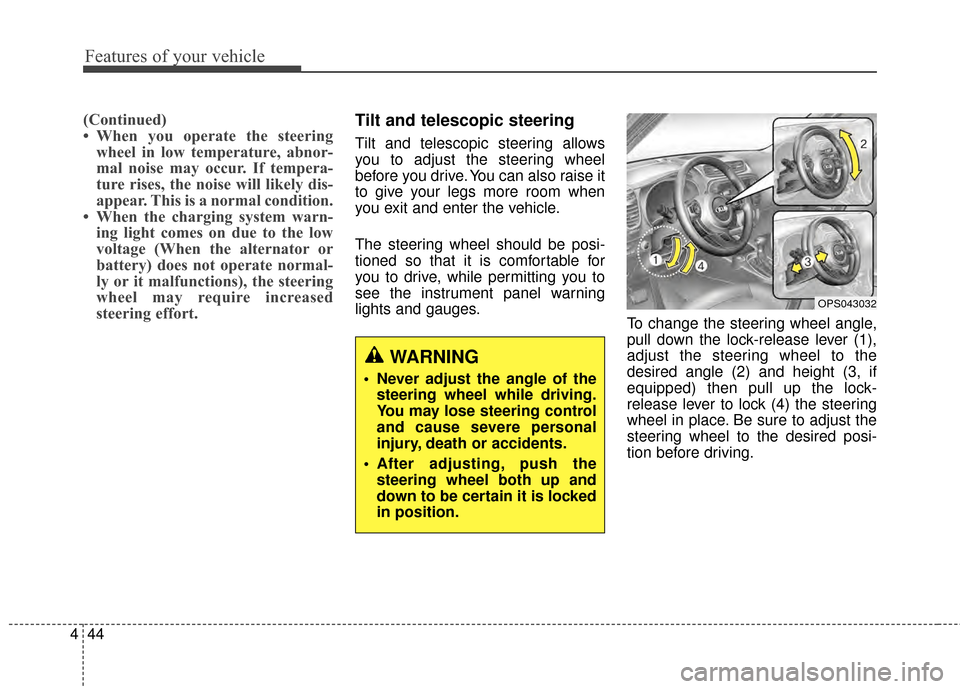
lights and gauges. To change the steering wheel angle,
pull down the lock-release lever (1),
adjust the steering wheel to the
desired angle (2) and height (3, if
equipped) then pull up the lock-
release lever to lock (4) the steering
wheel in place. Be sure to adjust the
steering wheel to the desired posi-
tion before driving.
WARNING
Never adjust the angle of the
steering wheel while driving.
You may lose steering control
and cause severe personal
injury, death or accidents.
After adjusting, push the steering wheel both up and
down to be certain it is locked
in position.
OPS043032
Page 132 of 500
Features of your vehicle
46
4
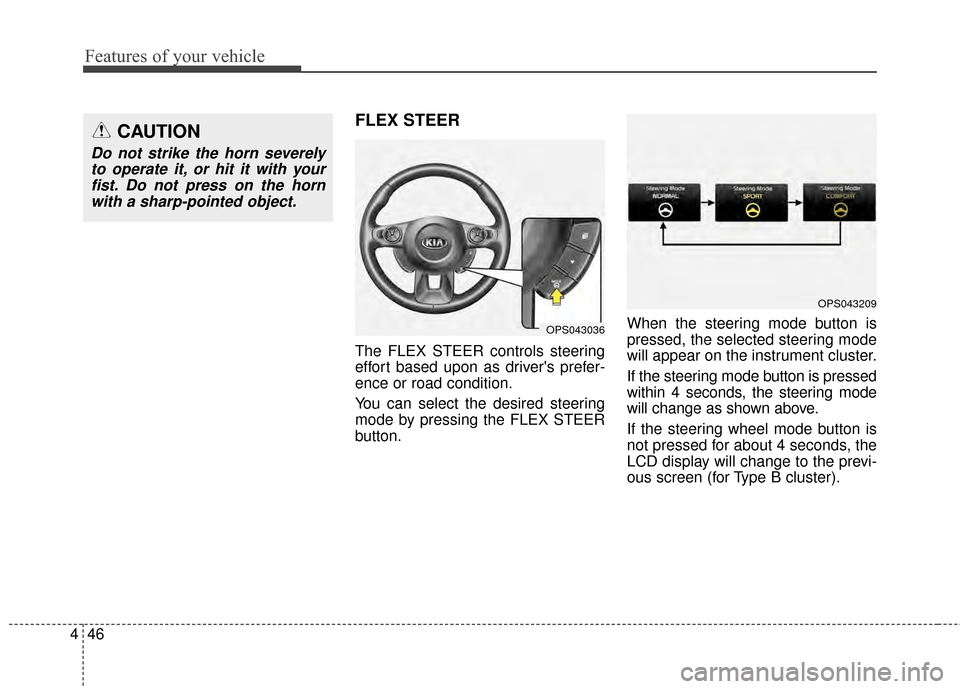
FLEX STEER
The FLEX STEER controls steering
effort based upon as driver's prefer-
ence or road condition.
You can select the desired steering
mode by pressing the FLEX STEER
button. When the steering mode button is
pressed, the selected steering mode
will appear on the instrument cluster.
If the steering mode button is pressed
within 4 seconds, the steering mode
will change as shown above.
If the steering wheel mode button is
not pressed for about 4 seconds, the
LCD display will change to the previ-
ous screen (for Type B cluster).
CAUTION
Do not strike the horn severely
to operate it, or hit it with yourfist. Do not press on the hornwith a sharp-pointed object.
OPS043036
OPS043209
Page 134 of 500
Features of your vehicle
48
4
CAUTION
For your safety, if you press
the steering mode buttonwhile operating the steeringwheel, but the steering effortwill not change immediately.After operating the steeringwheel, the steering effort willchange automatically to theselected mode.
Use caution when changing the steering mode while driving.
When the electronic power steering is not operating prop-erly, the flex steering wheelwill not work.
Page 141 of 500
455
Features of your vehicle
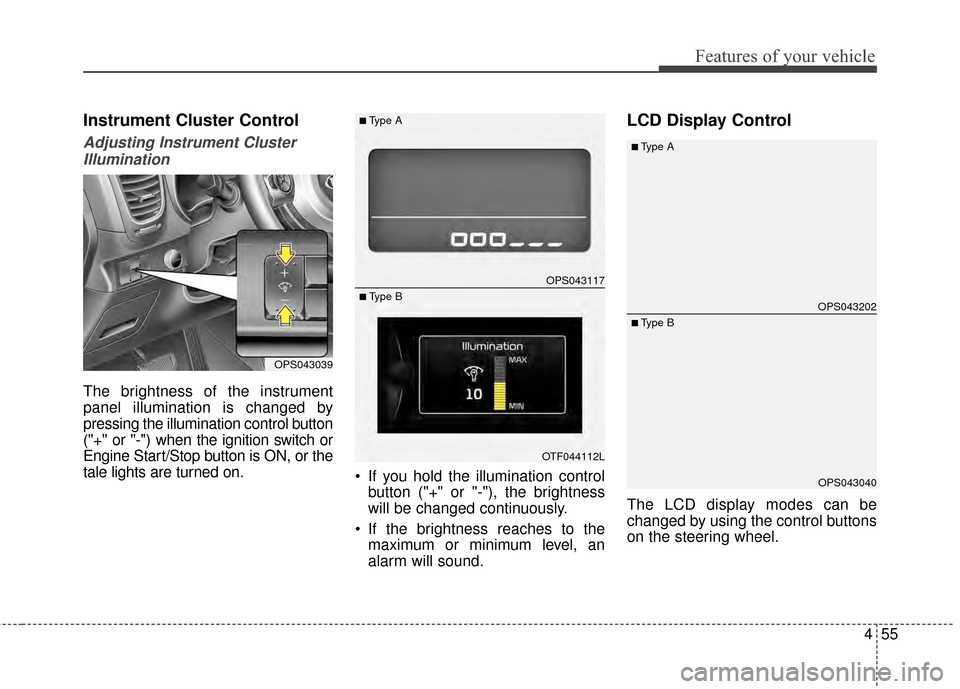
Instrument Cluster Control
Adjusting Instrument ClusterIllumination
The brightness of the instrument
panel illumination is changed by
pressing the illumination control button
("+" or "-") when the ignition switch or
Engine Start/Stop button is ON, or the
tale lights are turned on. If you hold the illumination control
button ("+" or "-"), the brightness
will be changed continuously.
If the brightness reaches to the maximum or minimum level, an
alarm will sound.
LCD Display Control
The LCD display modes can be
changed by using the control buttons
on the steering wheel.
OPS043039
OPS043117
OTF044112L
■Type A
■ Type BOPS043202
OPS043040
■Type A
■ Type B
Page 145 of 500
459
Features of your vehicle
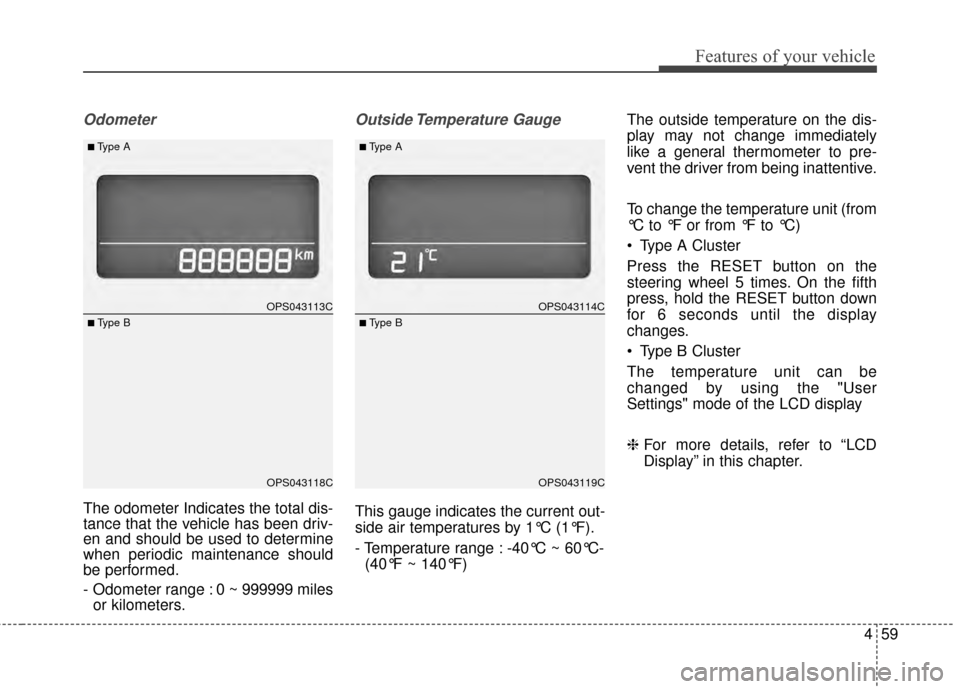
Odometer
The odometer Indicates the total dis-
tance that the vehicle has been driv-
en and should be used to determine
when periodic maintenance should
be performed.
- Odometer range : 0 ~ 999999 milesor kilometers.
Outside Temperature Gauge
This gauge indicates the current out-
side air temperatures by 1°C (1°F).
- Temperature range : -40°C ~ 60°C-
(40°F ~ 140°F) The outside temperature on the dis-
play may not change immediately
like a general thermometer to pre-
vent the driver from being inattentive.
To change the temperature unit (from
°C to °F or from °F to °C)
Type A Cluster
Press the RESET button on the
steering wheel 5 times. On the fifth
press, hold the RESET button down
for 6 seconds until the display
changes.
Type B Cluster
The temperature unit can be
changed by using the "User
Settings" mode of the LCD display
❈
For more details, refer to “LCD
Display” in this chapter.
OPS043113C
OPS043118C
■Type A
■ Type B
OPS043114C
OPS043119C
■Type A
■ Type B
Page 159 of 500
473
Features of your vehicle
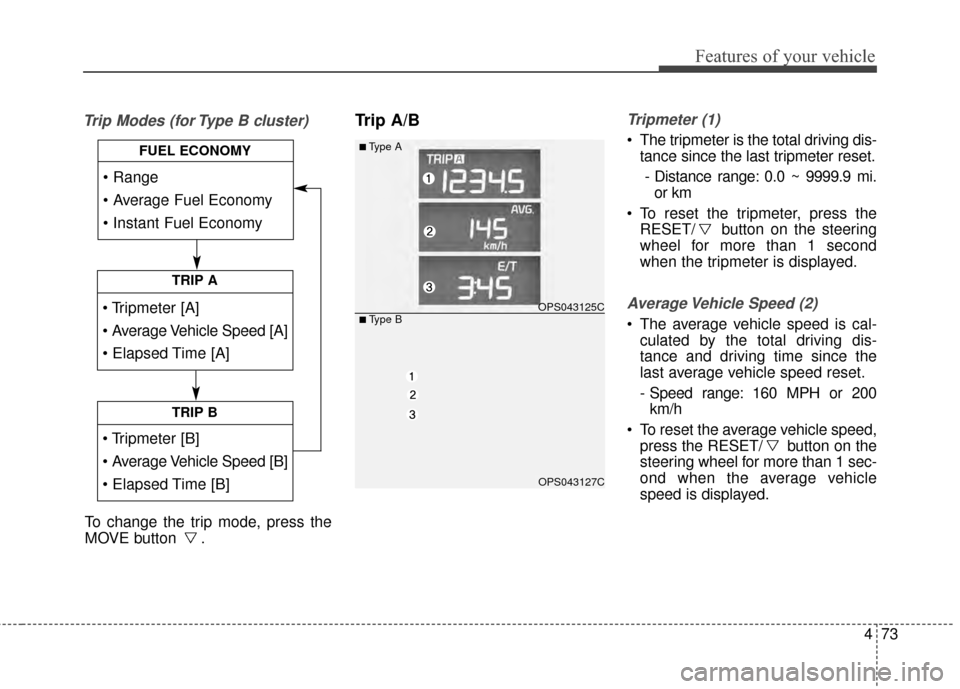
Trip Modes (for Type B cluster)Trip A/BTripmeter (1)
The tripmeter is the total driving dis-tance since the last tripmeter reset.
- Distance range: 0.0 ~ 9999.9 mi. or km
To reset the tripmeter, press the RESET/ button on the steering
wheel for more than 1 second
when the tripmeter is displayed.
Average Vehicle Speed (2)
The average vehicle speed is cal-culated by the total driving dis-
tance and driving time since the
last average vehicle speed reset.
- Speed range: 160 MPH or 200km/h
To reset the average vehicle speed, press the RESET/ button on the
steering wheel for more than 1 sec-
ond when the average vehicle
speed is displayed.
TRIP A
TRIP B
FUEL ECONOMY
To change the trip mode, press the
MOVE button .
■Type A
OPS043125C
OPS043127C
■ Type B
Page 193 of 500
4107
Features of your vehicle
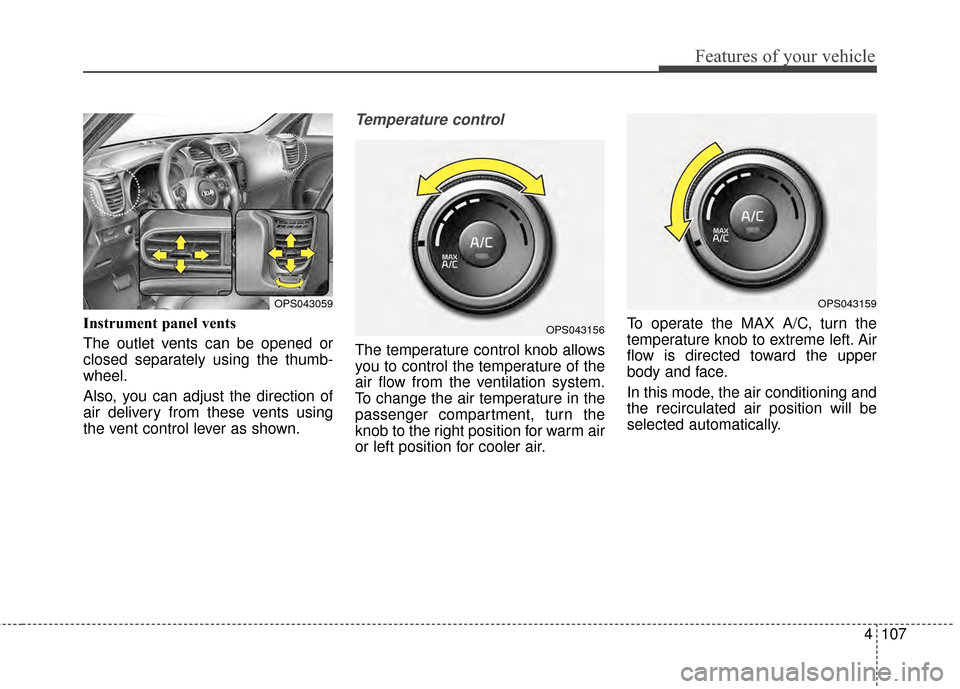
Instrument panel vents
The outlet vents can be opened or
closed separately using the thumb-
wheel.
Also, you can adjust the direction of
air delivery from these vents using
the vent control lever as shown.
Temperature control
The temperature control knob allows
you to control the temperature of the
air flow from the ventilation system.
To change the air temperature in the
passenger compartment, turn the
knob to the right position for warm air
or left position for cooler air.To operate the MAX A/C, turn the
temperature knob to extreme left. Air
flow is directed toward the upper
body and face.
In this mode, the air conditioning and
the recirculated air position will be
selected automatically.
OPS043059
OPS043156
OPS043159
Page 265 of 500
4179
Features of your vehicle
PHONE(IF EQUIPPED)
Before using the Bluetooth®Wireless
Technology phone features
Bluetooth®Wireless
Technology phone, you must first
pair and connect the
Bluetooth®
Wireless Technology mobile phone.
connected, it is not possible to
enter Phone mode. Once a phone
is paired or connected, the guid-
ance screen will be displayed.
tion (IGN/ACC ON), the
Bluetooth®
Wireless Technology phone will be
automatically connected. Even if
you are outside, the
Bluetooth®
Wireless Technology phone will be
automatically connected once you
are in the vicinity of the vehicle. If
you do not want automatic
Bluetooth®Wireless Technology
phone connection, set the
Bluetooth®Wireless Technology
power to OFF
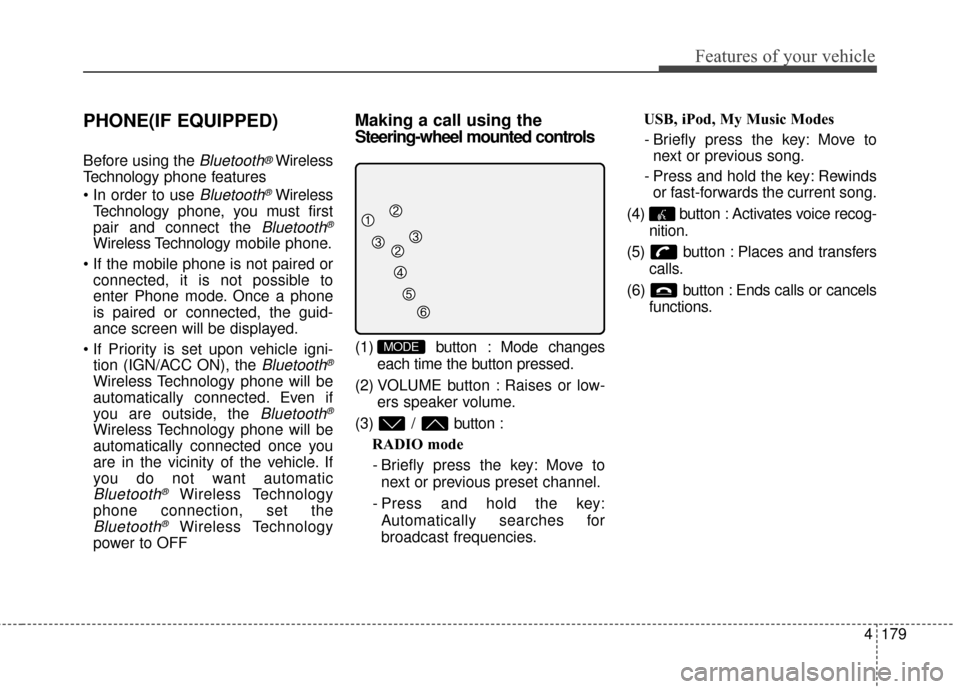
Making a call using the
Steering-wheel mounted controls
(1) button : Mode changes
each time the button pressed.
(2) VOLUME button : Raises or low- ers speaker volume.
(3) / button : RADIO mode
- Briefly press the key: Move to next or previous preset channel.
- Press and hold the key: Automatically searches for
broadcast frequencies. USB, iPod, My Music Modes
- Briefly press the key: Move to next or previous song.
- Press and hold the key: Rewinds or fast-forwards the current song.
(4) button : Activates voice recog- nition.
(5) button : Places and transfers calls.
(6) button : Ends calls or cancels functions.MODE