KIA SOUL EV 2018 Owners Manual
Manufacturer: KIA, Model Year: 2018, Model line: SOUL EV, Model: KIA SOUL EV 2018Pages: 496, PDF Size: 15.13 MB
Page 251 of 496
Features of your vehicle
120
4
During mild weather or under condi-
tions where the operation of the seat
warmer is not needed, keep the
switches in the "OFF" position.
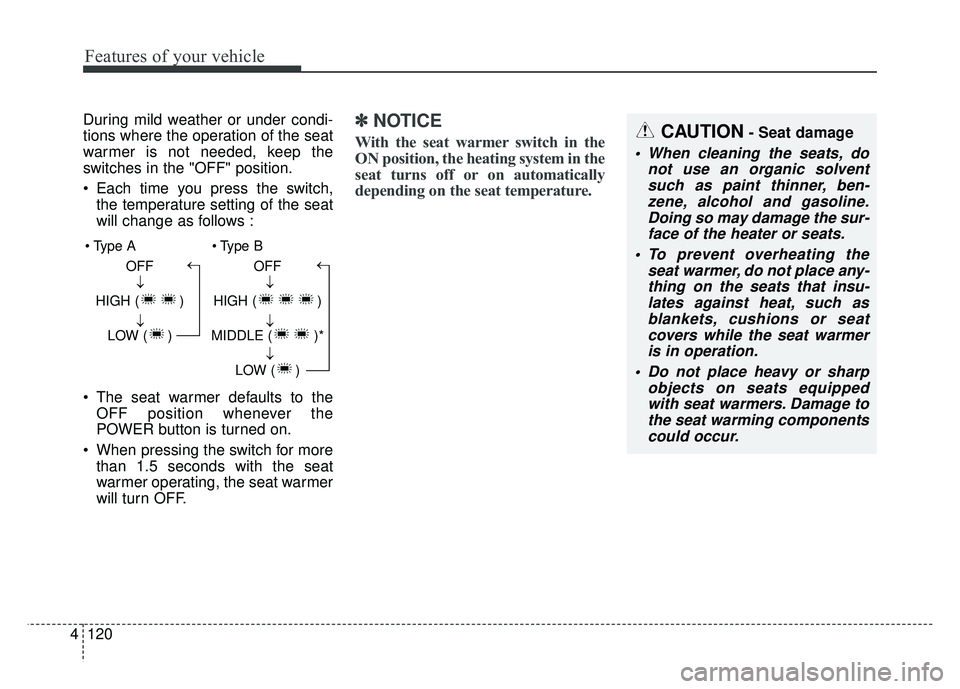
Each time you press the switch,
the temperature setting of the seat
will change as follows :
The seat warmer defaults to the OFF position whenever the
POWER button is turned on.
When pressing the switch for more than 1.5 seconds with the seat
warmer operating, the seat warmer
will turn OFF.✽ ✽ NOTICE
With the seat warmer switch in the
ON position, the heating system in the
seat turns off or on automatically
depending on the seat temperature.
OFF
HIGH ( ) LOW ( )→→→ OFF
HIGH ( )
MIDDLE ( )* LOW ( )
→→→→
CAUTION- Seat damage
When cleaning the seats, donot use an organic solventsuch as paint thinner, ben-zene, alcohol and gasoline.Doing so may damage the sur-face of the heater or seats.
To prevent overheating the seat warmer, do not place any-thing on the seats that insu-lates against heat, such asblankets, cushions or seatcovers while the seat warmeris in operation.
Do not place heavy or sharp objects on seats equippedwith seat warmers. Damage tothe seat warming componentscould occur.
Page 252 of 496
4121
Features of your vehicle
✽
✽NOTICE
Be careful not to spill liquid such as
water or beverages on the seat. If you
spill some liquid, wipe the seat with a
dry towel. Before using the seat
warmer, dry the seat completely.
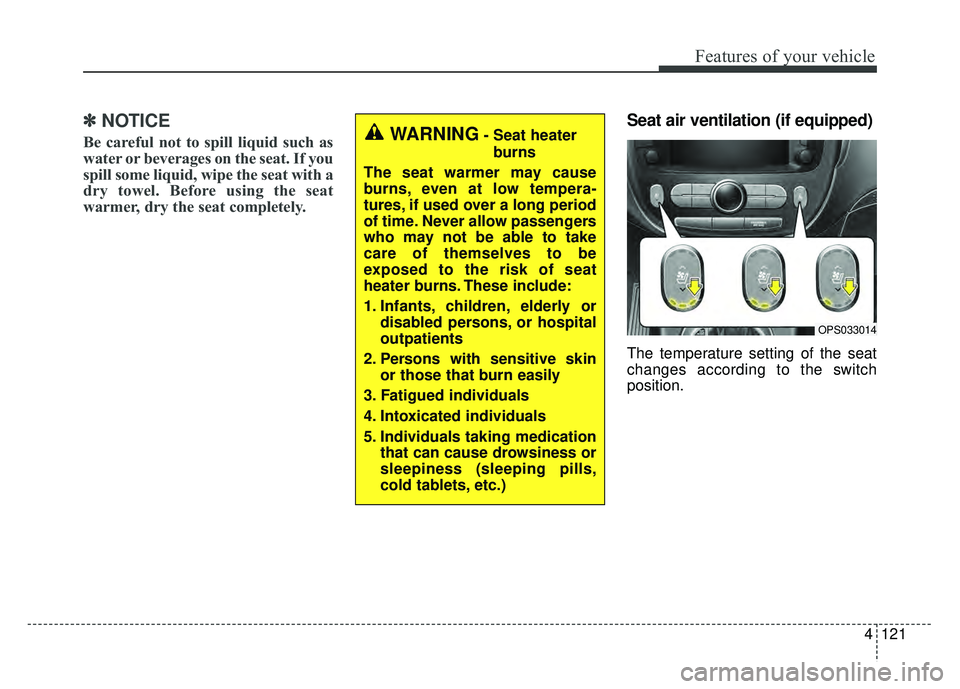
Seat air ventilation (if equipped)
The temperature setting of the seat
changes according to the switch
position.
WARNING- Seat heater
burns
The seat warmer may cause
burns, even at low tempera-
tures, if used over a long period
of time. Never allow passengers
who may not be able to take
care of themselves to be
exposed to the risk of seat
heater burns. These include:
1. Infants, children, elderly or disabled persons, or hospital
outpatients
2. Persons with sensitive skin or those that burn easily
3. Fatigued individuals
4. Intoxicated individuals
5. Individuals taking medication that can cause drowsiness or
sleepiness (sleeping pills,
cold tablets, etc.)
OPS033014
Page 253 of 496
Features of your vehicle
122
4
If you want to cool your seat cush-
ion, press the switch (blue color).
Each time you press the button, the airflow will change as follows:
When pressing the switch for more than 1.5 seconds with the seat air
ventilation operating, the seat air
ventilation will turn OFF.
The seat air ventilation defaults to the OFF position whenever the
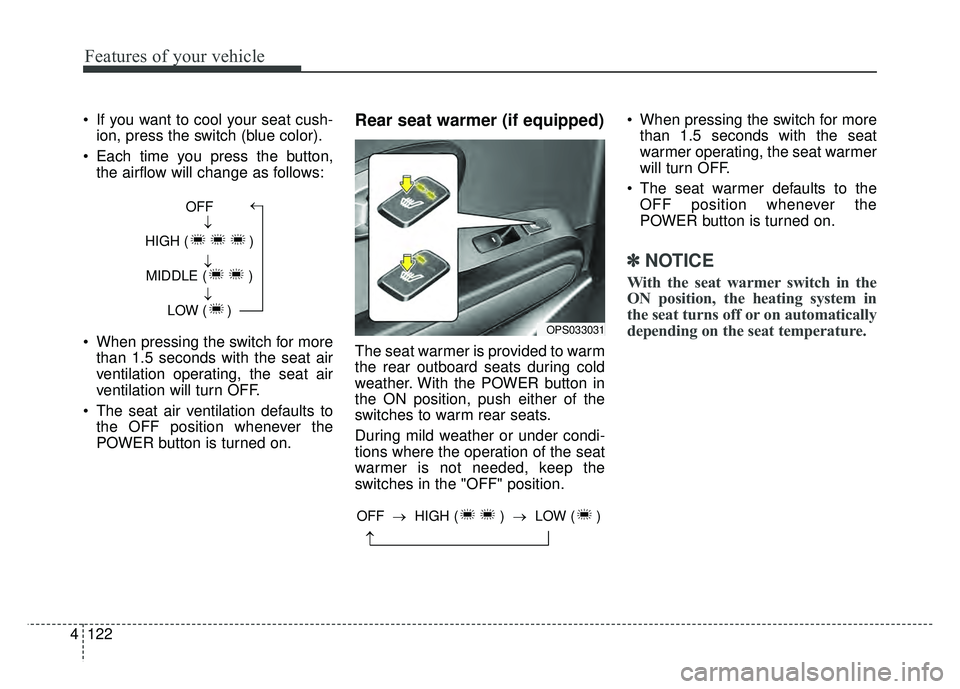
POWER button is turned on.Rear seat warmer (if equipped)
The seat warmer is provided to warm
the rear outboard seats during cold
weather. With the POWER button in
the ON position, push either of the
switches to warm rear seats.
During mild weather or under condi-
tions where the operation of the seat
warmer is not needed, keep the
switches in the "OFF" position. When pressing the switch for more
than 1.5 seconds with the seat
warmer operating, the seat warmer
will turn OFF.
The seat warmer defaults to the OFF position whenever the
POWER button is turned on.
✽ ✽ NOTICE
With the seat warmer switch in the
ON position, the heating system in
the seat turns off or on automatically
depending on the seat temperature.
OFF
HIGH ( ) MIDDLE ( ) LOW ( )→→→→
OPS033031
→
OFF → HIGH ( ) →LOW ( )
Page 254 of 496
4123
Features of your vehicle
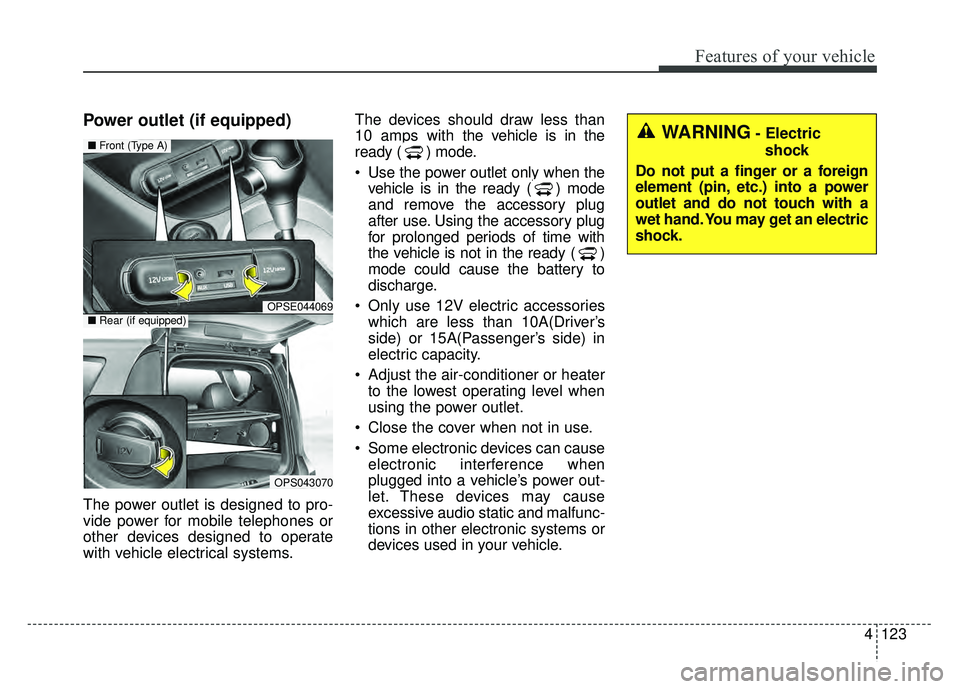
Power outlet (if equipped)
The power outlet is designed to pro-
vide power for mobile telephones or
other devices designed to operate
with vehicle electrical systems.The devices should draw less than
10 amps with the vehicle is in the
ready ( ) mode.
Use the power outlet only when the
vehicle is in the ready ( ) mode
and remove the accessory plug
after use. Using the accessory plug
for prolonged periods of time with
the vehicle is not in the ready ( )
mode could cause the battery to
discharge.
Only use 12V electric accessories which are less than 10A(Driver’s
side) or 15A(Passenger’s side) in
electric capacity.
Adjust the air-conditioner or heater to the lowest operating level when
using the power outlet.
Close the cover when not in use.
Some electronic devices can cause electronic interference when
plugged into a vehicle’s power out-
let. These devices may cause
excessive audio static and malfunc-
tions in other electronic systems or
devices used in your vehicle.
OPSE044069
OPS043070
■ Front (Type A)
■Rear (if equipped)
WARNING- Electric
shock
Do not put a finger or a foreign
element (pin, etc.) into a power
outlet and do not touch with a
wet hand. You may get an electric
shock.
Page 255 of 496
Features of your vehicle
124
4
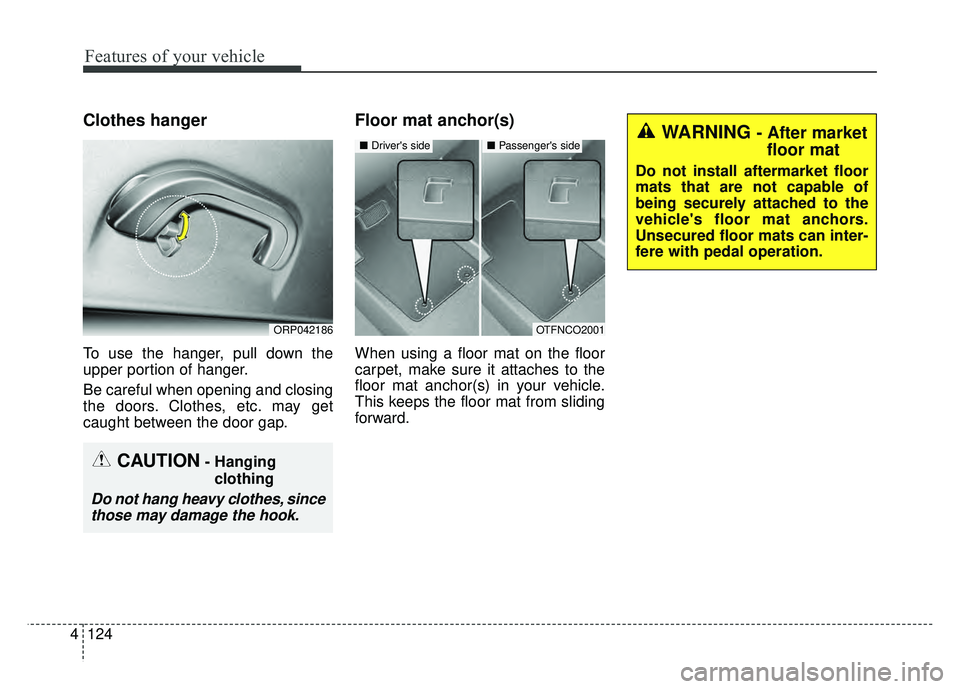
Clothes hanger
To use the hanger, pull down the
upper portion of hanger.
Be careful when opening and closing
the doors. Clothes, etc. may get
caught between the door gap.
Floor mat anchor(s)
When using a floor mat on the floor
carpet, make sure it attaches to the
floor mat anchor(s) in your vehicle.
This keeps the floor mat from sliding
forward.
ORP042186
CAUTION- Hanging
clothing
Do not hang heavy clothes, sincethose may damage the hook.
OTFNCO2001
■ Driver's side■ Passenger's sideWARNING - After market
floor mat
Do not install aftermarket floor
mats that are not capable of
being securely attached to the
vehicle's floor mat anchors.
Unsecured floor mats can inter-
fere with pedal operation.
Page 256 of 496
4125
Features of your vehicle
The following must be observed
when installing ANY floormat to the
vehicle.
Ensure that the floormats aresecurely attached to the vehicle's
floormat anchor(s) before driving
the vehicle.
Do not use ANY floormat that can- not be firmly attached to the vehi-
cle's floormat anchors.
Do not stack floormats on top of one another (e.g. all-weather rub-
ber mat on top of a carpeted floor-
mat). Only a single floormat should
be installed in each position.
IMPORTANT - Your vehicle was
manufactured with driver's side floor-
mat anchors that are designed to
securely hold the floormat in place.
To avoid any interference with pedal
operation, Kia recommends that only
the Kia floormat designed for use in
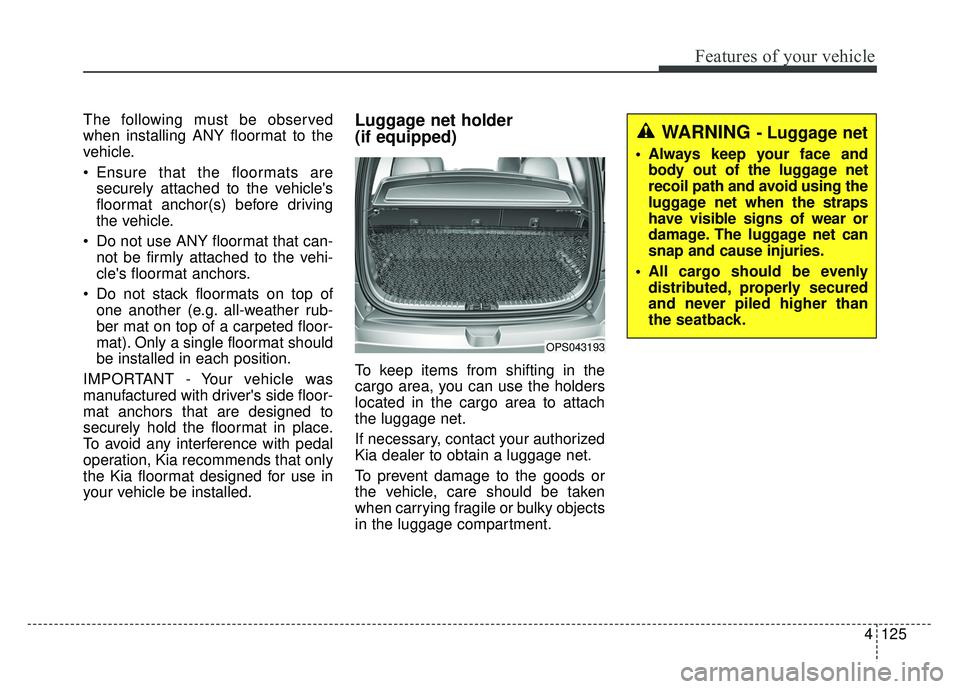
your vehicle be installed.Luggage net holder
(if equipped)
To keep items from shifting in the
cargo area, you can use the holders
located in the cargo area to attach
the luggage net.
If necessary, contact your authorized
Kia dealer to obtain a luggage net.
To prevent damage to the goods or
the vehicle, care should be taken
when carrying fragile or bulky objects
in the luggage compartment.
OPS043193
WARNING - Luggage net
Always keep your face and body out of the luggage net
recoil path and avoid using the
luggage net when the straps
have visible signs of wear or
damage. The luggage net can
snap and cause injuries.
All cargo should be evenly distributed, properly secured
and never piled higher than
the seatback.
Page 257 of 496
Features of your vehicle
126
4
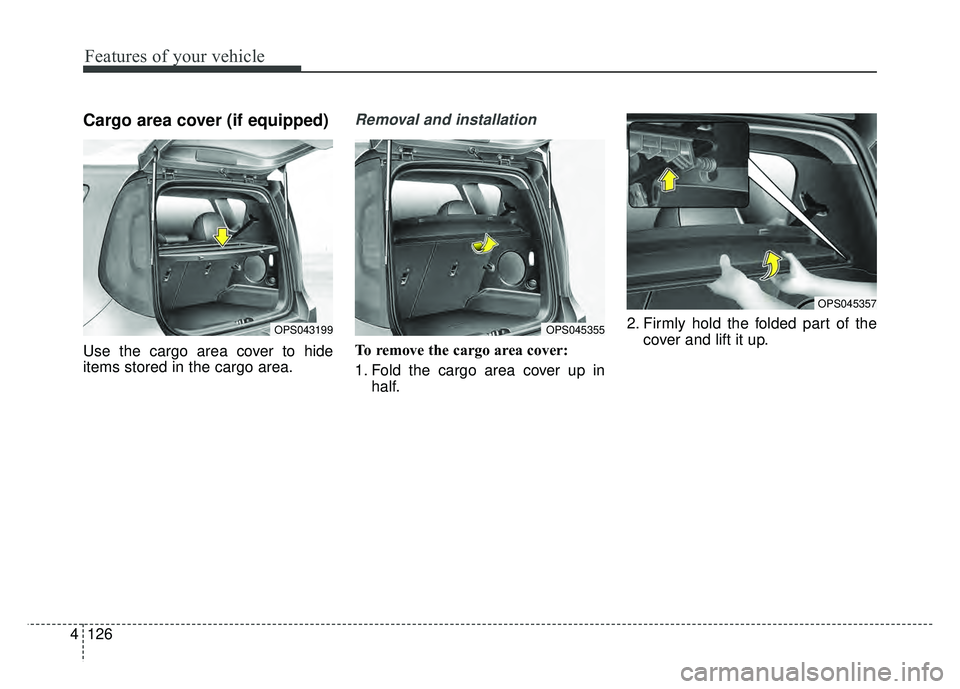
Cargo area cover (if equipped)
Use the cargo area cover to hide
items stored in the cargo area.
Removal and installation
To remove the cargo area cover:
1. Fold the cargo area cover up in
half. 2. Firmly hold the folded part of the
cover and lift it up.
OPS043199OPS045355
OPS045357
Page 258 of 496
4127
Features of your vehicle
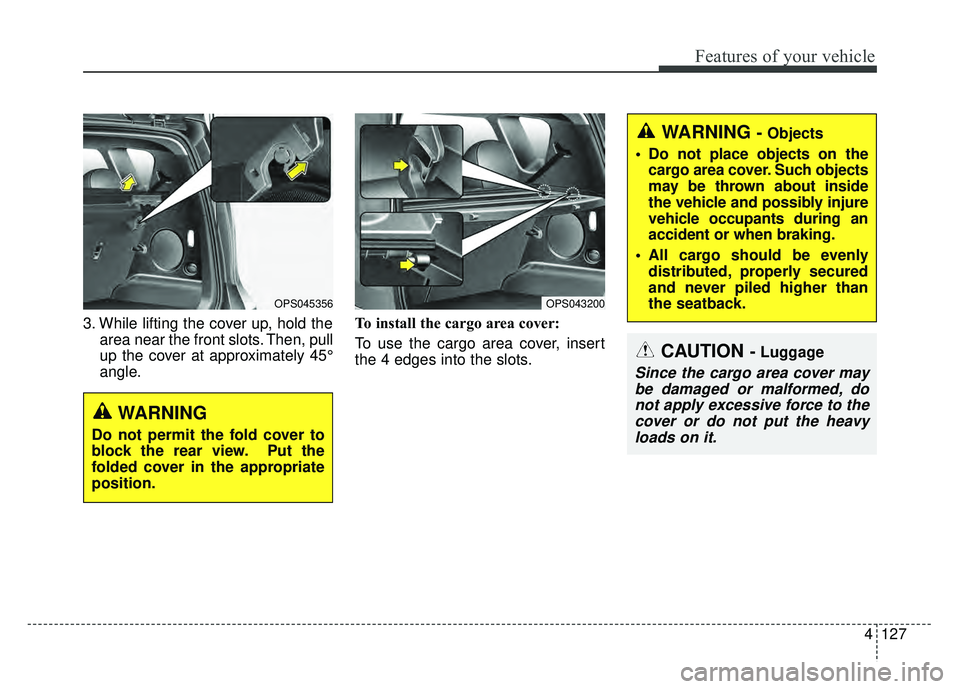
3. While lifting the cover up, hold thearea near the front slots. Then, pull
up the cover at approximately 45°
angle. To install the cargo area cover:
To use the cargo area cover, insert
the 4 edges into the slots.
OPS043200
WARNING - Objects
Do not place objects on the cargo area cover. Such objects
may be thrown about inside
the vehicle and possibly injure
vehicle occupants during an
accident or when braking.
All cargo should be evenly distributed, properly secured
and never piled higher than
the seatback.
CAUTION - Luggage
Since the cargo area cover maybe damaged or malformed, donot apply excessive force to thecover or do not put the heavyloads on it.
WARNING
Do not permit the fold cover to
block the rear view. Put the
folded cover in the appropriate
position.
OPS045356
Page 259 of 496
Features of your vehicle
128
4
AUDIO SYSTEM
If you install aftermarket HID head
lamps, your vehicle’s audio and elec-
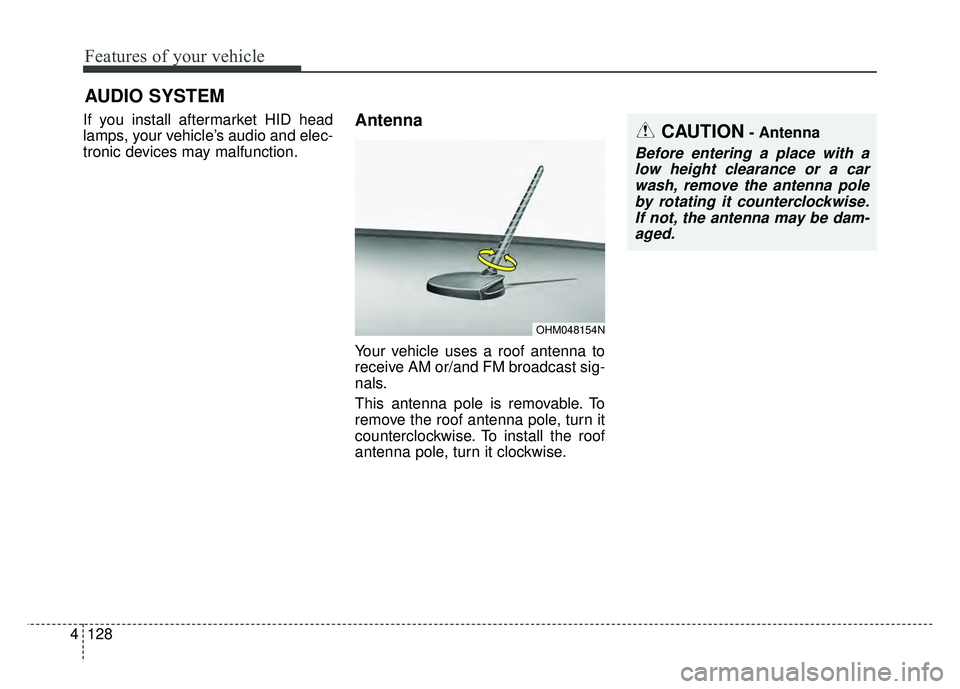
tronic devices may malfunction.Antenna
Your vehicle uses a roof antenna to
receive AM or/and FM broadcast sig-
nals.
This antenna pole is removable. To
remove the roof antenna pole, turn it
counterclockwise. To install the roof
antenna pole, turn it clockwise.
OHM048154N
CAUTION- Antenna
Before entering a place with a
low height clearance or a carwash, remove the antenna poleby rotating it counterclockwise.If not, the antenna may be dam-aged.
Page 260 of 496
4129
Features of your vehicle
When reinstalling your roof anten-na pole, it is important that it is fully
tightened to ensure proper recep-
tion.
When cargo is loaded on the roof rack, do not place the cargo near
the antenna pole to ensure proper
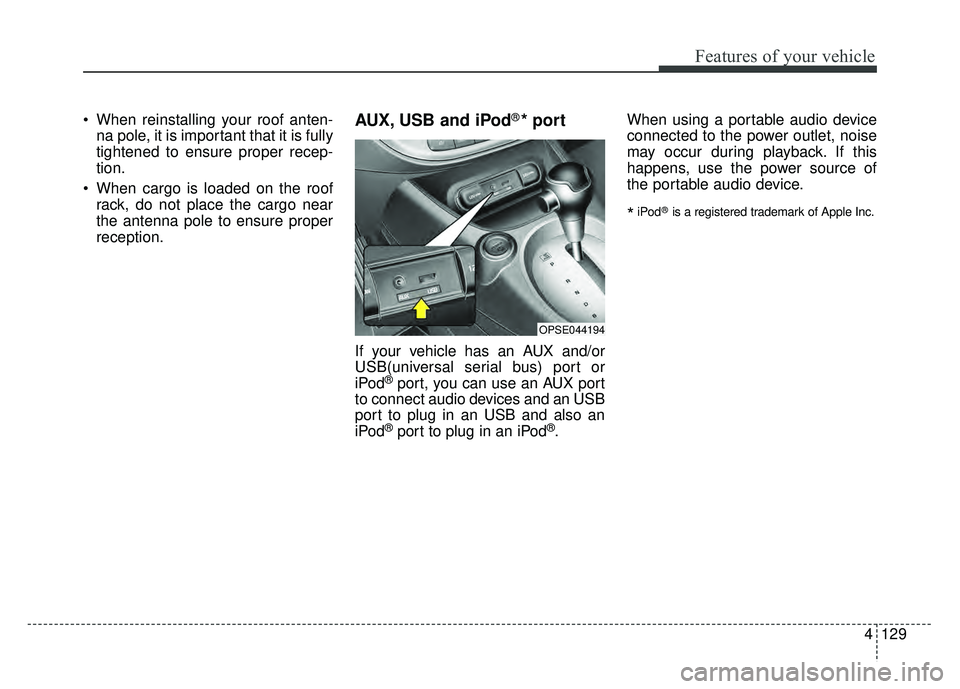
reception.AUX, USB and iPod®* port
If your vehicle has an AUX and/or
USB(universal serial bus) port or
iPod
®port, you can use an AUX port
to connect audio devices and an USB
port to plug in an USB and also an
iPod
®port to plug in an iPod®. When using a portable audio device
connected to the power outlet, noise
may occur during playback. If this
happens, use the power source of
the portable audio device.
*iPod®is a registered trademark of Apple Inc.
OPSE044194