check engine light KIA SOUL EV 2018 Owners Manual
[x] Cancel search | Manufacturer: KIA, Model Year: 2018, Model line: SOUL EV, Model: KIA SOUL EV 2018Pages: 496, PDF Size: 15.13 MB
Page 51 of 496
46
The Pedestrian Warning System
generates engine sound for pedestri-
ans to hear vehicle sound because
there is little sound while the Electric
Vehicle (EV) is operating.
If the vehicle is moving at a slow
speed, the Pedestrian Warning
System will be operated.
- When the reduction gear is shiftedto [R], the Pedestrian Warning
System will be operated immedi-
ately.
The vehicle generates little sound. Be aware of your driving environ-
ment and drive safely.
After you park the vehicle or while you are waiting at a traffic light,
check whether there are kids or
obstacles around the vehicle.
Check if there is something behind the vehicle when driving in
reverse. Pedestrians may not hear
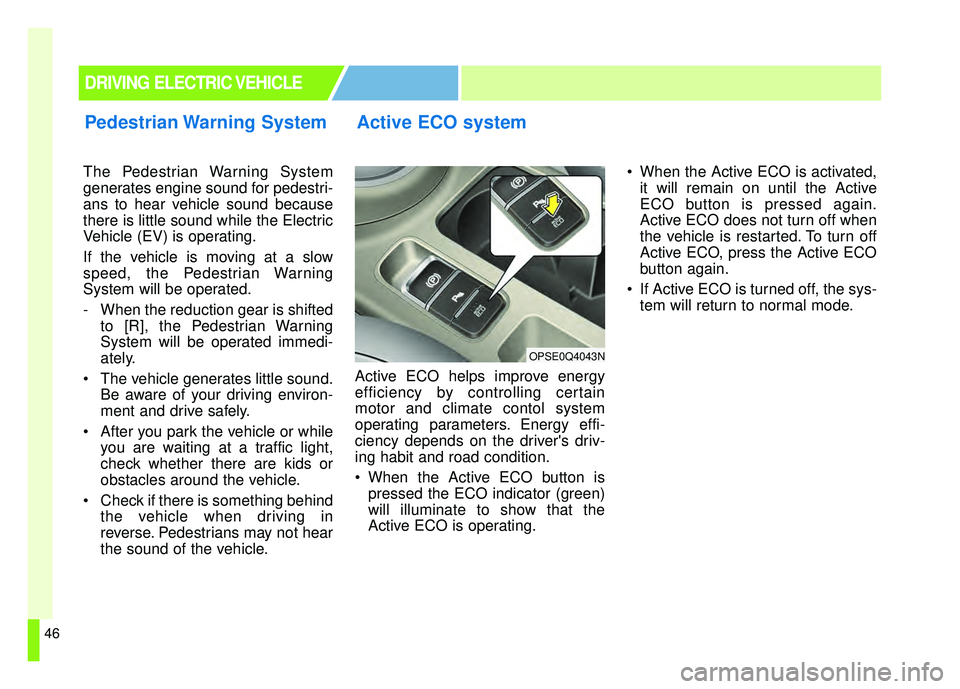
the sound of the vehicle. Active ECO helps improve energy
efficiency by controlling certain
motor and climate contol system
operating parameters. Energy effi-
ciency depends on the driver's driv-
ing habit and road condition.
When the Active ECO button is
pressed the ECO indicator (green)
will illuminate to show that the
Active ECO is operating. When the Active ECO is activated,
it will remain on until the Active
ECO button is pressed again.
Active ECO does not turn off when
the vehicle is restarted. To turn off
Active ECO, press the Active ECO
button again.
If Active ECO is turned off, the sys- tem will return to normal mode.
Pedestrian Warning System Active ECO system
DRIVING ELECTRIC VEHICLE
OPSE0Q4043N
Page 153 of 496
Features of your vehicle
22
4
Opening the hood
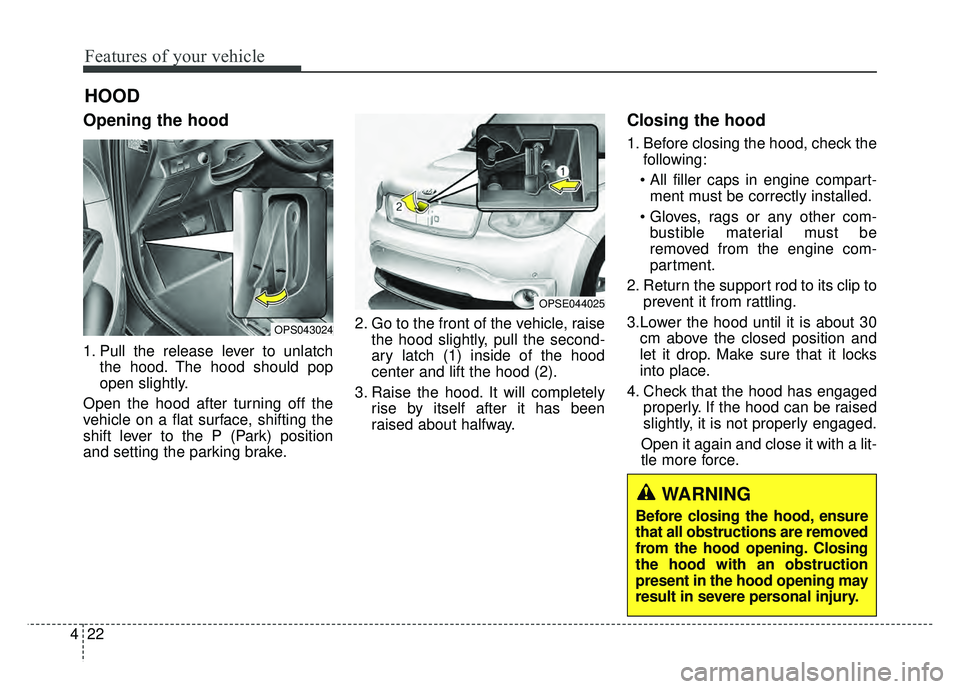
1. Pull the release lever to unlatch
the hood. The hood should pop
open slightly.
Open the hood after turning off the
vehicle on a flat surface, shifting the
shift lever to the P (Park) position
and setting the parking brake. 2. Go to the front of the vehicle, raise
the hood slightly, pull the second-
ary latch (1) inside of the hood
center and lift the hood (2).
3. Raise the hood. It will completely rise by itself after it has been
raised about halfway.
Closing the hood
1. Before closing the hood, check thefollowing:
ment must be correctly installed.
bustible material must be
removed from the engine com-
partment.
2. Return the support rod to its clip to prevent it from rattling.
3.Lower the hood until it is about 30 cm above the closed position and
let it drop. Make sure that it locks
into place.
4. Check that the hood has engaged properly. If the hood can be raised
slightly, it is not properly engaged.
Open it again and close it with a lit-
tle more force.
HOOD
OPS043024
OPSE044025
WARNING
Before closing the hood, ensure
that all obstructions are removed
from the hood opening. Closing
the hood with an obstruction
present in the hood opening may
result in severe personal injury.
Page 318 of 496
Driving your vehicle
65
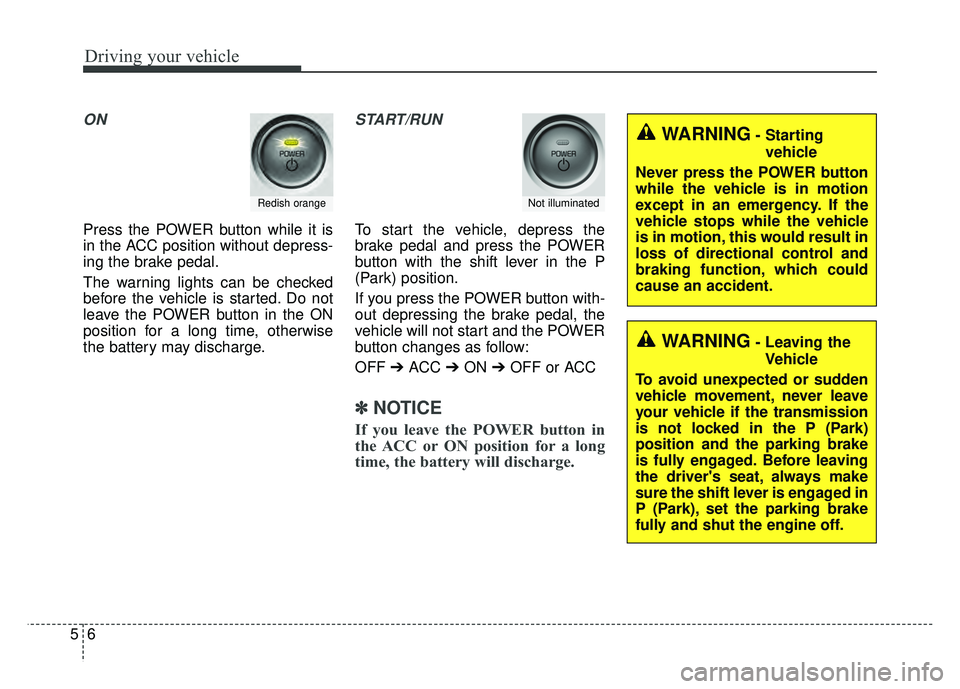
ON
Press the POWER button while it is
in the ACC position without depress-
ing the brake pedal.
The warning lights can be checked
before the vehicle is started. Do not
leave the POWER button in the ON
position for a long time, otherwise
the battery may discharge.
START/RUN
To start the vehicle, depress the
brake pedal and press the POWER
button with the shift lever in the P
(Park) position.
If you press the POWER button with-
out depressing the brake pedal, the
vehicle will not start and the POWER
button changes as follow:
OFF ➔ACC ➔ON ➔OFF or ACC
✽ ✽
NOTICE
If you leave the POWER button in
the ACC or ON position for a long
time, the battery will discharge.
Redish orangeNot illuminated
WARNING- Starting
vehicle
Never press the POWER button
while the vehicle is in motion
except in an emergency. If the
vehicle stops while the vehicle
is in motion, this would result in
loss of directional control and
braking function, which could
cause an accident.
WARNING- Leaving the Vehicle
To avoid unexpected or sudden
vehicle movement, never leave
your vehicle if the transmission
is not locked in the P (Park)
position and the parking brake
is fully engaged. Before leaving
the driver's seat, always make
sure the shift lever is engaged in
P (Park), set the parking brake
fully and shut the engine off.
Page 373 of 496
67
What to do in an emergency
5. Start the vehicle with the boosterbattery and the auxiliary battery
begins to charge when EV ready
light glows, then start the vehicle
with the discharged battery. If the
first starting attempt is not suc-
cessful, wait a few minutes before
making another attempt in order to
allow the discharged battery to
recharge.
If the cause of your battery discharg-ing is not apparent, you should haveyour vehicle checked by an author-ized Kia dealer.
Push-starting
Your reduction gear equipped vehicle
should not be push-started.
WARNING- Tow starting
vehicle
Never tow a vehicle to start it
because the sudden surge for-
ward when the engine starts
could cause a collision with the
towing vehicle.
Page 487 of 496
I3
Index
Brake system. . . . . . . . . . . . . . . . . . . . . . . . . . . . . . . . . 5-17Anti-lock brake system (ABS) . . . . . . . . . . . . . . . . . 5-23
Electronic parking brake (EPB) . . . . . . . . . . . . . . . . 5-19
Electronic stability control (ESC) . . . . . . . . . . . . . . 5-25
Hill-start assist control (HAC) . . . . . . . . . . . . . . . . . 5-30
Power brakes . . . . . . . . . . . . . . . . . . . . . . . . . . . . . . 5-17
Vehicle stability management (VSM) . . . . . . . . . . . 5-29
Brakes fluid. . . . . . . . . . . . . . . . . . . . . . . . . . . . . . . . . . 7-24\
Bulb replacement . . . . . . . . . . . . . . . . . . . . . . . . . . . . . 7-63
Bulb wattage . . . . . . . . . . . . . . . . . . . . . . . . . . . . . . . . . . 8-4
Camera see the Rear camera display . . . . . . . . . . . . . . 4-80
Capacities (Lubricants) . . . . . . . . . . . . . . . . . . . . . . . . . . 8-6
Care Care of seat belts . . . . . . . . . . . . . . . . . . . . . . . . . . . 3-25
Exterior care . . . . . . . . . . . . . . . . . . . . . . . . . . . . . . . 7-73
Interior care . . . . . . . . . . . . . . . . . . . . . . . . . . . . . . . 7-78
Tire care . . . . . . . . . . . . . . . . . . . . . . . . . . . . . . . . . . 7-36\
Care of seat belts . . . . . . . . . . . . . . . . . . . . . . . . . . . . . 3-25
Cargo area cover . . . . . . . . . . . . . . . . . . . . . . . . . . . . . 4-126
Center console storage . . . . . . . . . . . . . . . . . . . . . . . . 4-116
Central door lock switch. . . . . . . . . . . . . . . . . . . . . . . . 4-13
Chains - Tire . . . . . . . . . . . . . . . . . . . . . . . . . . . . . . . . . 5-46
Checking tire inflation pressure . . . . . . . . . . . . . . . . . . 7-37 Child restraint system . . . . . . . . . . . . . . . . . . . . . . . . . . 3-26
Lower anchor system . . . . . . . . . . . . . . . . . . . . . . . . 3-32
Seat belt . . . . . . . . . . . . . . . . . . . . . . . . . . . . . . . . . . 3-27\
Tether anchor system . . . . . . . . . . . . . . . . . . . . . . . . 3-31
Child-protector rear door lock . . . . . . . . . . . . . . . . . . . 4-13
Clean air . . . . . . . . . . . . . . . . . . . . . . . . . . . . . . . . . . . 4-\
114
Climate control air filter . . . . . . . . . . . . . . . . . . . . . . . . 7-27
Clothes hanger . . . . . . . . . . . . . . . . . . . . . . . . . . . . . . 4-124
Combined instrument, see instrument cluster . . . . . . . 4-40
Coolant . . . . . . . . . . . . . . . . . . . . . . . . . . . . . . . . . . . . \
. 7-21
Cooling fluid, see engine coolant . . . . . . . . . . . . . . . . . 7-21
Cruise control system . . . . . . . . . . . . . . . . . . . . . . . . . . 5-33 To set cruise control speed . . . . . . . . . . . . . . . . . . . . 5-34
Cup holder . . . . . . . . . . . . . . . . . . . . . . . . . . . . . . . . . 4-118
Curtain air bag . . . . . . . . . . . . . . . . . . . . . . . . . . . . . . . 3-50
Dashboard illumination, see instrument panel illumination. . . . . . . . . . . . . . . . . . . . . . . . . . . 4-41
Dashboard, see instrument cluster . . . . . . . . . . . . . . . . 4-40
Day/night rearview mirror . . . . . . . . . . . . . . . . . . . . . . 4-35
Daytime running light . . . . . . . . . . . . . . . . . . . . . . . . . 4-81
Defogging (Windscreen). . . . . . . . . . . . . . . . . . . . . . . 4-111
Defogging (Windshield) . . . . . . . . . . . . . . . . . . . . . . . 4-111
Defogging logic . . . . . . . . . . . . . . . . . . . . . . . . . . . . . 4-114
C
D