tow KIA SOUL EV 2018 Owners Manual
[x] Cancel search | Manufacturer: KIA, Model Year: 2018, Model line: SOUL EV, Model: KIA SOUL EV 2018Pages: 496, PDF Size: 15.13 MB
Page 5 of 496
2
1
Table of contents
3
4
5
6
7
8I
IntroductionVehicle data collection and event data recorders
Electric Vehicle GuideReview of Electric Vehicle / High voltage battery / Charge / Driving Electric Vehicle / Etc.
Your vehicle at a glance
Exterior overview / Interior overview / Instrument panel overview / Moto\
r room compartment
Safety features of your vehicle
Seats / Seat belts / Child restraint system / Air bag
Features of your vehicleSmart key / Door locks / Tailgate / Windows / Steering wheel / Mirrors / Instrument cluster / Lighting / Etc.
Driving your vehicleBefore driving / POWER button / Active ECO system / Reduction gear / Brake system / Etc.
What to do in an emergencyRoad warning / Emergency while driving / Emergency starting / Vehicle overheat / TPMS / Flat tire / Towing / Etc.
MaintenanceMotor room compartment / Maintenance service / Coolant / Brake fluid / Washer fluid / Lights bulbs / Etc.
Specifications, Consumer information and Reporting safety defects
Index
Page 62 of 496
57
If the vehicle is flooded with water,
immediately turn OFF the vehicle
and evacuate to a safe place.
Contact the fire department or an
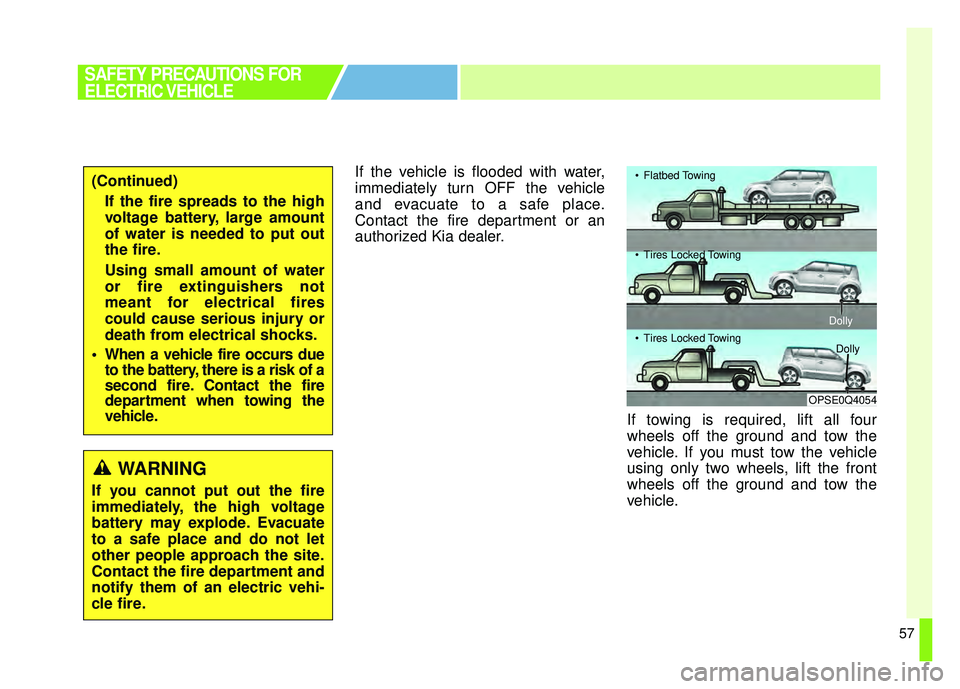
authorized Kia dealer.If towing is required, lift all four
wheels off the ground and tow the
vehicle. If you must tow the vehicle
using only two wheels, lift the front
wheels off the ground and tow the
vehicle.
SAFETY PRECAUTIONS FOR
ELECTRIC VEHICLE
OPSE0Q4054
Flatbed Towing
Tires Locked Towing
DollyDolly
Tires Loc
ked Towing
(Continued)
If the fire spreads to the high
voltage battery, large amount
of water is needed to put out
the fire.
Using small amount of water
or fire extinguishers not
meant for electrical fires
could cause serious injury or
death from electrical shocks.
When a vehicle fire occurs due to the battery, there is a risk of a
second fire. Contact the fire
department when towing the
vehicle.
WARNING
If you cannot put out the fire
immediately, the high voltage
battery may explode. Evacuate
to a safe place and do not let
other people approach the site.
Contact the fire department and
notify them of an electric vehi-
cle fire.
Page 63 of 496
58
Other Precautions for
Electric Vehicle
When you paint or apply heattreatment to the vehicle as a result
of an accident, the performance of
the high voltage battery can be
reduced.
If heat treatment is required, we
recommend that you contact an
authorized Kia dealer.
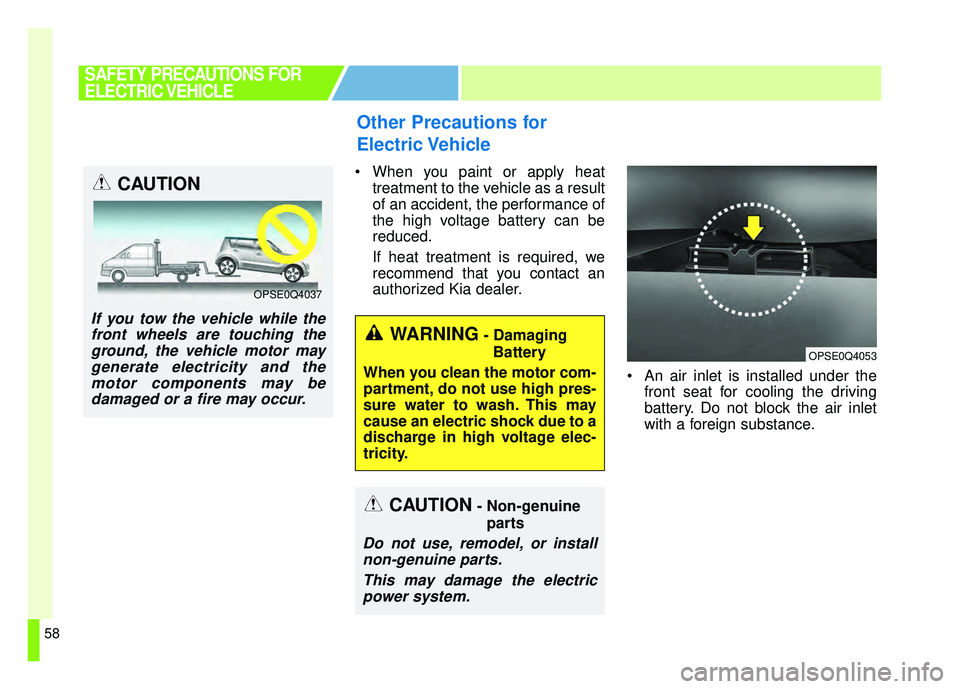
An air inlet is installed under thefront seat for cooling the driving
battery. Do not block the air inlet
with a foreign substance.
SAFETY PRECAUTIONS FOR
ELECTRIC VEHICLE
OPSE0Q4053
CAUTION- Non-genuine
parts
Do not use, remodel, or installnon-genuine parts.
This may damage the electricpower system.
WARNING- Damaging
Battery
When you clean the motor com-
partment, do not use high pres-
sure water to wash. This may
cause an electric shock due to a
discharge in high voltage elec-
tricity.
CAUTION
If you tow the vehicle while the front wheels are touching theground, the vehicle motor maygenerate electricity and themotor components may bedamaged or a fire may occur.
OPSE0Q4037
Page 81 of 496
Safety features of your vehicle
83
✽
✽
NOTICE
If you recline the seatback towards
the front with the headrest and seat
cushion raised, the headrest may
come in contact with the sunvisor or
other parts of the vehicle.
Removal and installation
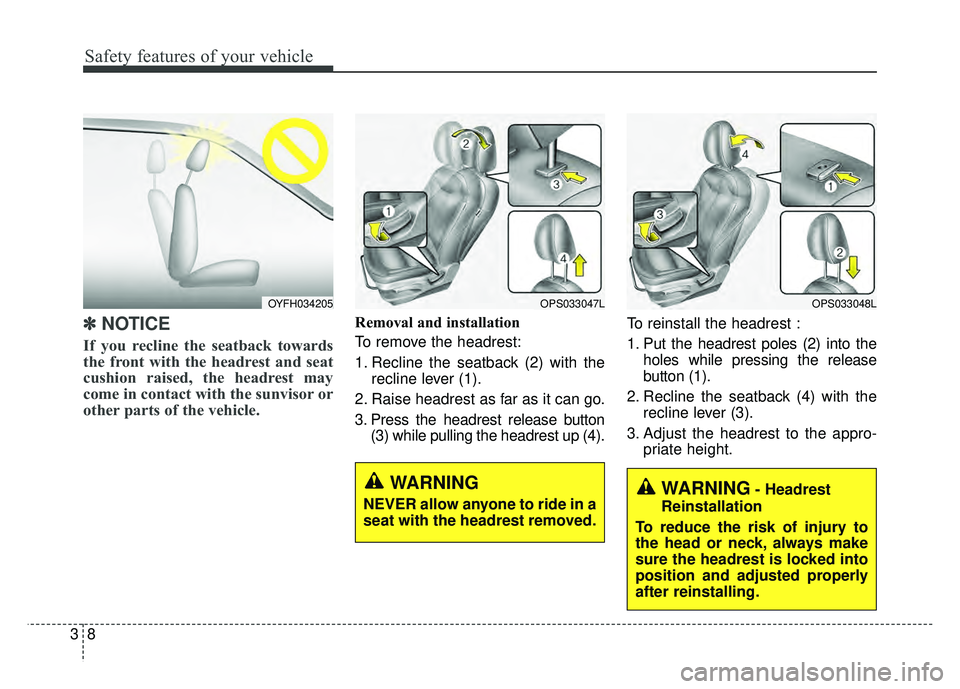
To remove the headrest:
1. Recline the seatback (2) with the
recline lever (1).
2. Raise headrest as far as it can go.
3. Press the headrest release button (3) while pulling the headrest up (4). To reinstall the headrest :
1. Put the headrest poles (2) into the
holes while pressing the release
button (1).
2. Recline the seatback (4) with the recline lever (3).
3. Adjust the headrest to the appro- priate height.
OYFH034205OPS033047L
WARNING
NEVER allow anyone to ride in a
seat with the headrest removed.
OPS033048L
WARNING- Headrest
Reinstallation
To reduce the risk of injury to
the head or neck, always make
sure the headrest is locked into
position and adjusted properly
after reinstalling.
Page 83 of 496
Safety features of your vehicle
10
3
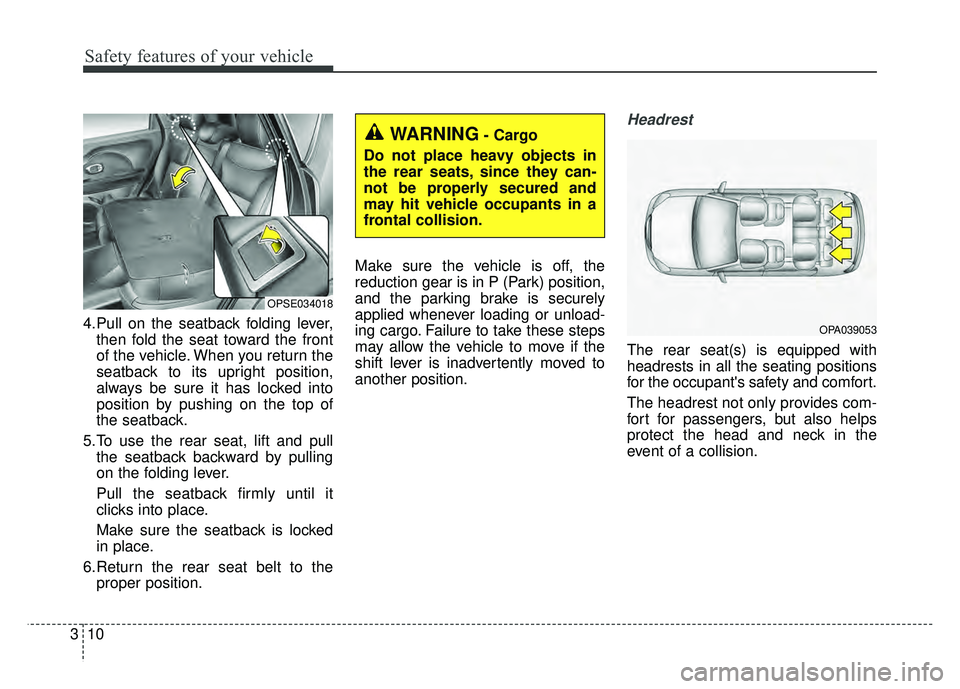
4.Pull on the seatback folding lever,
then fold the seat toward the front
of the vehicle. When you return the
seatback to its upright position,
always be sure it has locked into
position by pushing on the top of
the seatback.
5.To use the rear seat, lift and pull the seatback backward by pulling
on the folding lever.
Pull the seatback firmly until it
clicks into place.
Make sure the seatback is locked
in place.
6.Return the rear seat belt to the proper position. Make sure the vehicle is off, the
reduction gear is in P (Park) position,
and the parking brake is securely
applied whenever loading or unload-
ing cargo. Failure to take these steps
may allow the vehicle to move if the
shift lever is inadvertently moved to
another position.
Headrest
The rear seat(s) is equipped with
headrests in all the seating positions
for the occupant's safety and comfort.
The headrest not only provides com-
fort for passengers, but also helps
protect the head and neck in the
event of a collision.
OPSE034018
WARNING- Cargo
Do not place heavy objects in
the rear seats, since they can-
not be properly secured and
may hit vehicle occupants in a
frontal collision.
OPA039053
Page 92 of 496
319
Safety features of your vehicle
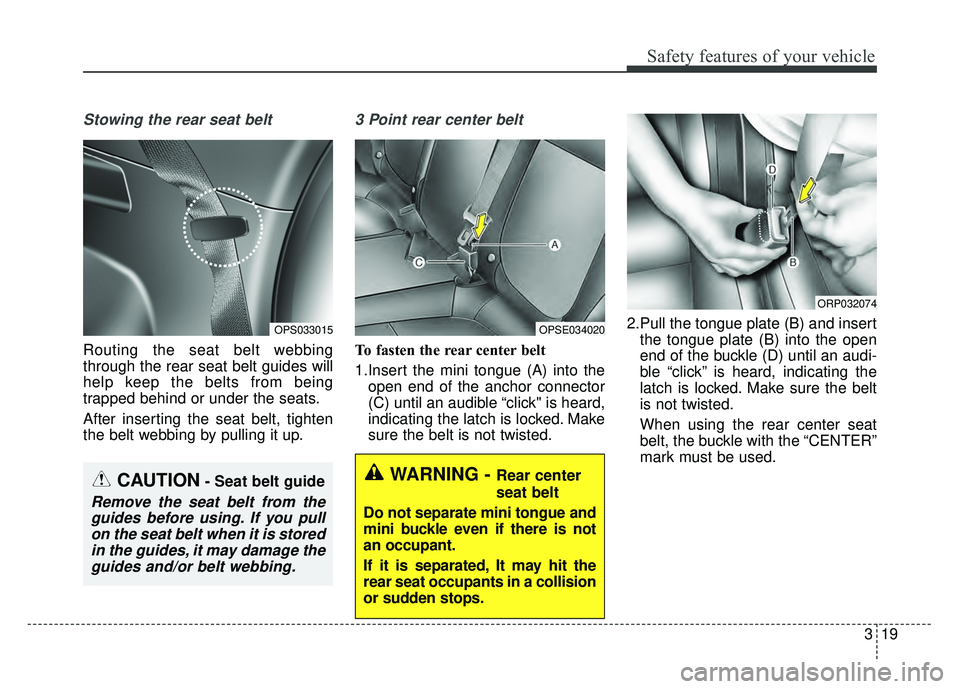
Stowing the rear seat belt
Routing the seat belt webbing
through the rear seat belt guides will
help keep the belts from being
trapped behind or under the seats.
After inserting the seat belt, tighten
the belt webbing by pulling it up.
3 Point rear center belt
To fasten the rear center belt
1.Insert the mini tongue (A) into theopen end of the anchor connector
(C) until an audible “click" is heard,
indicating the latch is locked. Make
sure the belt is not twisted. 2.Pull the tongue plate (B) and insert
the tongue plate (B) into the open
end of the buckle (D) until an audi-
ble “click” is heard, indicating the
latch is locked. Make sure the belt
is not twisted.
When using the rear center seat
belt, the buckle with the “CENTER”
mark must be used.
CAUTION- Seat belt guide
Remove the seat belt from theguides before using. If you pullon the seat belt when it is storedin the guides, it may damage theguides and/or belt webbing.
OPS033015OPSE034020
WARNING - Rear center
seat belt
Do not separate mini tongue and
mini buckle even if there is not
an occupant.
If it is separated, It may hit the
rear seat occupants in a collision
or sudden stops.
ORP032074
Page 103 of 496
Safety features of your vehicle
30
3
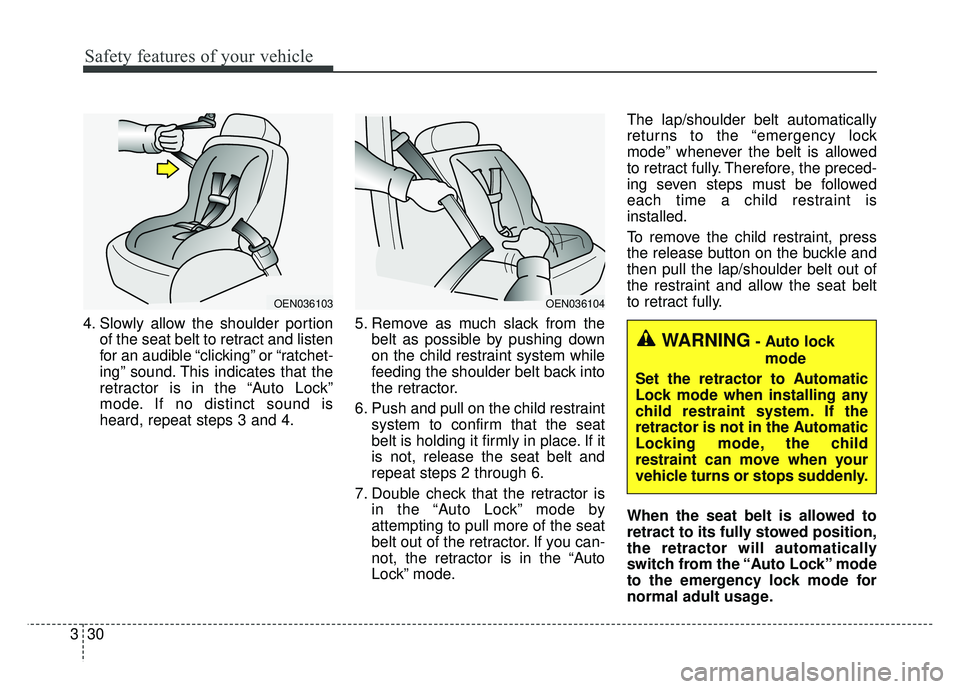
4. Slowly allow the shoulder portion
of the seat belt to retract and listen
for an audible “clicking” or “ratchet-
ing” sound. This indicates that the
retractor is in the “Auto Lock”
mode. If no distinct sound is
heard, repeat steps 3 and 4. 5. Remove as much slack from the
belt as possible by pushing down
on the child restraint system while
feeding the shoulder belt back into
the retractor.
6. Push and pull on the child restraint system to confirm that the seat
belt is holding it firmly in place. If it
is not, release the seat belt and
repeat steps 2 through 6.
7. Double check that the retractor is in the “Auto Lock” mode by
attempting to pull more of the seat
belt out of the retractor. If you can-
not, the retractor is in the “Auto
Lock” mode. The lap/shoulder belt automatically
returns to the “emergency lock
mode” whenever the belt is allowed
to retract fully. Therefore, the preced-
ing seven steps must be followed
each time a child restraint is
installed.
To remove the child restraint, press
the release button on the buckle and
then pull the lap/shoulder belt out of
the restraint and allow the seat belt
to retract fully.
When the seat belt is allowed to
retract to its fully stowed position,
the retractor will automatically
switch from the “Auto Lock” mode
to the emergency lock mode for
normal adult usage.
OEN036104OEN036103
WARNING- Auto lock
mode
Set the retractor to Automatic
Lock mode when installing any
child restraint system. If the
retractor is not in the Automatic
Locking mode, the child
restraint can move when your
vehicle turns or stops suddenly.
Page 115 of 496
Safety features of your vehicle
42
3
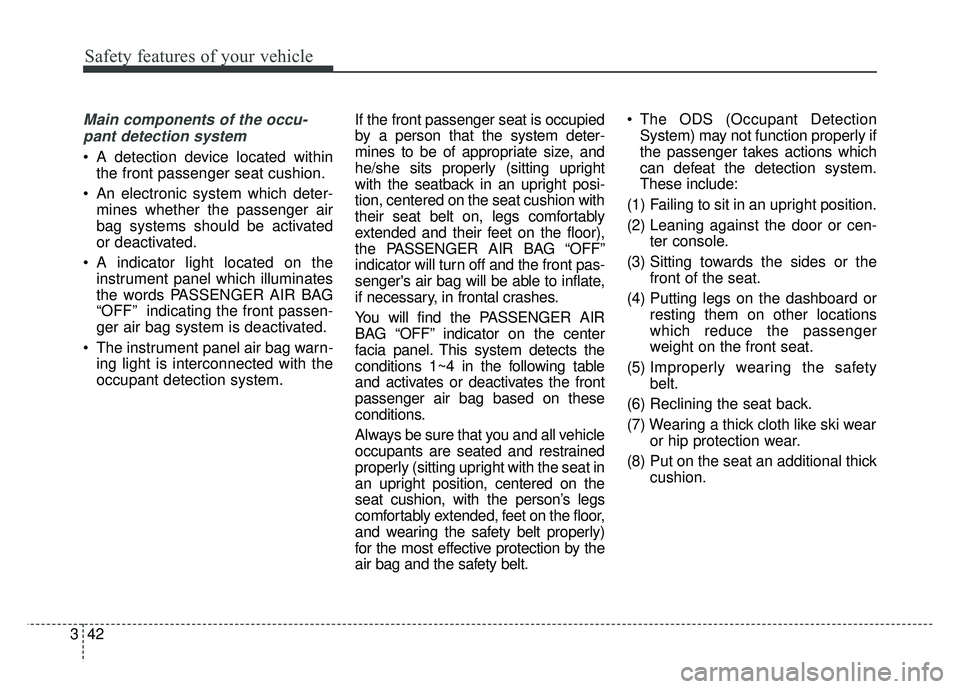
Main components of the occu-
pant detection system
A detection device located within the front passenger seat cushion.
An electronic system which deter- mines whether the passenger air
bag systems should be activated
or deactivated.
A indicator light located on the instrument panel which illuminates
the words PASSENGER AIR BAG
“OFF” indicating the front passen-
ger air bag system is deactivated.
The instrument panel air bag warn- ing light is interconnected with the
occupant detection system. If the front passenger seat is occupied
by a person that the system deter-
mines to be of appropriate size, and
he/she sits properly (sitting upright
with the seatback in an upright posi-
tion, centered on the seat cushion with
their seat belt on, legs comfortably
extended and their feet on the floor),
the PASSENGER AIR BAG “OFF”
indicator will turn off and the front pas-
senger's air bag will be able to inflate,
if necessary, in frontal crashes.
You will find the PASSENGER AIR
BAG “OFF” indicator on the center
facia panel. This system detects the
conditions 1~4 in the following table
and activates or deactivates the front
passenger air bag based on these
conditions.
Always be sure that you and all vehicle
occupants are seated and restrained
properly (sitting upright with the seat in
an upright position, centered on the
seat cushion, with the person’s legs
comfortably extended, feet on the floor,
and wearing the safety belt properly)
for the most effective protection by the
air bag and the safety belt. The ODS (Occupant Detection
System) may not function properly if
the passenger takes actions which
can defeat the detection system.
These include:
(1) Failing to sit in an upright position.
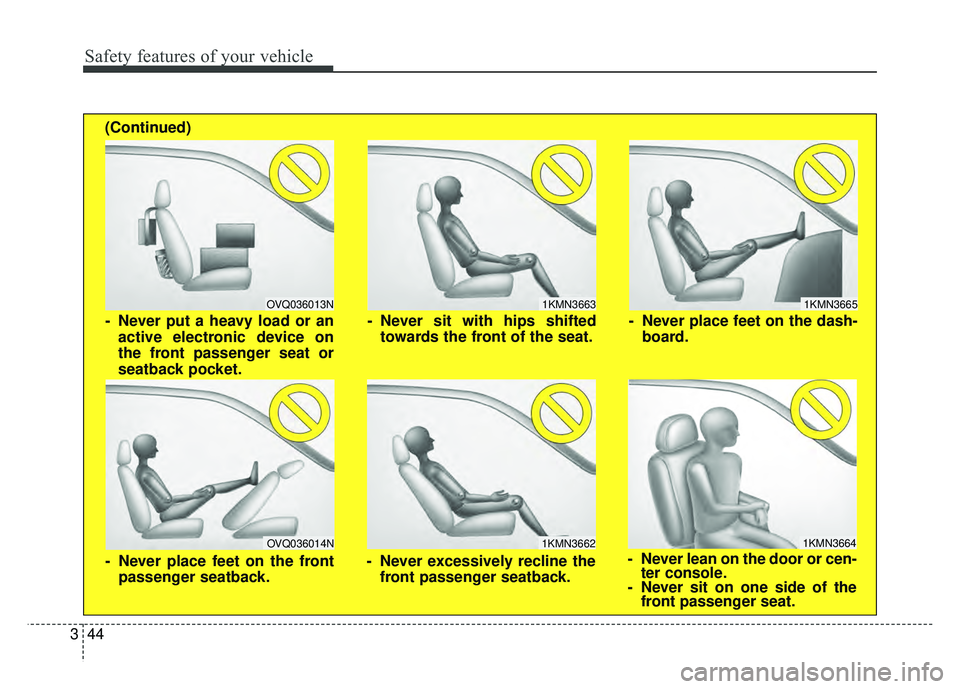
(2) Leaning against the door or cen- ter console.
(3) Sitting towards the sides or the front of the seat.
(4) Putting legs on the dashboard or resting them on other locations
which reduce the passenger
weight on the front seat.
(5) Improperly wear ing the safety
belt.
(6) Reclining the seat back.
(7) Wearing a thick cloth like ski wear or hip protection wear.
(8) Put on the seat an additional thick cushion.
Page 117 of 496
Safety features of your vehicle
44
3
1KMN3663
1KMN3664
1KMN3665
- Never sit with hips shifted
towards the front of the seat.
- Never lean on the door or cen-ter console.
- Never sit on one side of the front passenger seat.
- Never place feet on the dash-
board.
OVQ036013N
1KMN3662
- Never put a heavy load or anactive electronic device on
the front passenger seat or
seatback pocket.
- Never excessively recline thefront passenger seatback.
OVQ036014N
- Never place feet on the frontpassenger seatback.
(Continued)
Page 127 of 496
Safety features of your vehicle
54
3
Side and/or curtain air bags
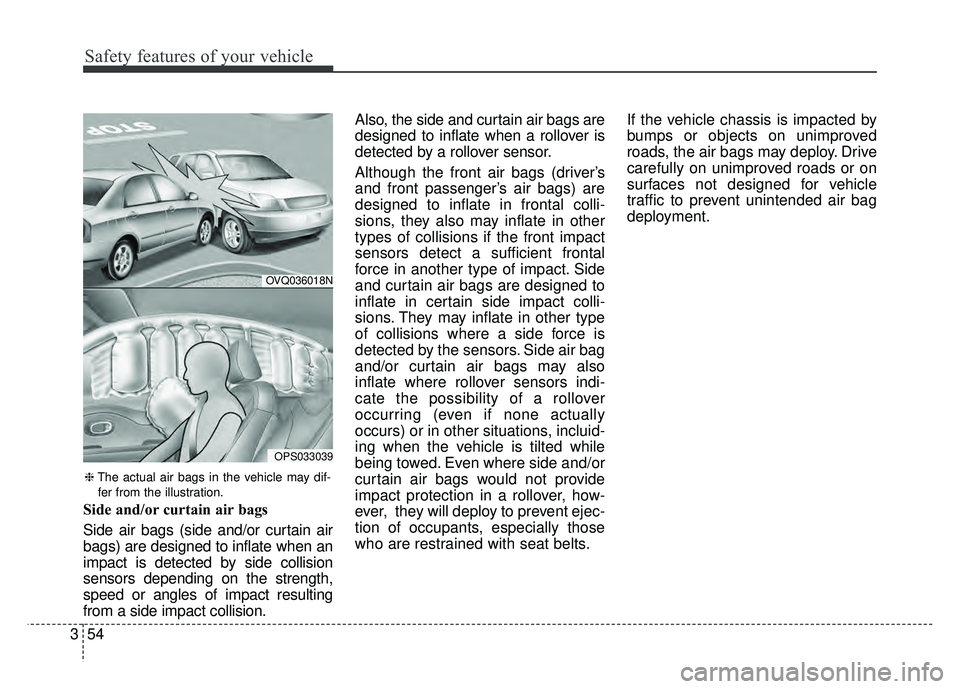
Side air bags (side and/or curtain air
bags) are designed to inflate when an
impact is detected by side collision
sensors depending on the strength,
speed or angles of impact resulting
from a side impact collision. Also, the side and curtain air bags are
designed to inflate when a rollover is
detected by a rollover sensor.
Although the front air bags (driver’s
and front passenger’s air bags) are
designed to inflate in frontal colli-
sions, they also may inflate in other
types of collisions if the front impact
sensors detect a sufficient frontal
force in another type of impact. Side
and curtain air bags are designed to
inflate in certain side impact colli-
sions. They may inflate in other type
of collisions where a side force is
detected by the sensors. Side air bag
and/or curtain air bags may also
inflate where rollover sensors indi-
cate the possibility of a rollover
occurring (even if none actually
occurs) or in other situations, incluid-
ing when the vehicle is tilted while
being towed. Even where side and/or
curtain air bags would not provide
impact protection in a rollover, how-
ever, they will deploy to prevent ejec-
tion of occupants, especially those
who are restrained with seat belts.
If the vehicle chassis is impacted by
bumps or objects on unimproved
roads, the air bags may deploy. Drive
carefully on unimproved roads or on
surfaces not designed for vehicle
traffic to prevent unintended air bag
deployment.
OVQ036018N
OPS033039
❈
The actual air bags in the vehicle may dif-
fer from the illustration.