load capacity KIA Spectra 2008 2.G Owner's Manual
[x] Cancel search | Manufacturer: KIA, Model Year: 2008, Model line: Spectra, Model: KIA Spectra 2008 2.GPages: 298, PDF Size: 5.38 MB
Page 119 of 298
3 109
Knowing your vehicle
✽
NOTICE
• To assure proper operation of the
unit, keep the vehicle interior tem-
perature within a normal range by
using the vehicle's air conditioning
or heating system.
• When replacing the fuse, replace it
with a fuse having the correct
capacity.
• All stored bookmarks are all
erased when the car battery is dis-
connected or power to the vehicle
is lost. If this occurs, the book-
marks will have to be reset.
• This equipment is designed to be
used only in a 12 volt DC battery
system with negative ground.
• This unit is made of precision
parts. Do not attempt to disassem-
ble or adjust any parts.
• Do not expose this equipment
(including the speakers and CD)
to water or excessive moisture.
1
2
3
4
5
6
7
8
9
CAUTION
• Do not insert warped or poor
quality discs into the CD play-
er as damage to the unit may
occur.
• Do not insert anything like
coins into the player slot as
damage to the unit may occur.
• Do not place beverages close
to the audio system. The play-
back mechanism may be dam-
aged if you spill them.
• Do not strike or allow anything
to impact the audio system,
damage to the system mecha-
nisms could occur.
• Off-road or rough surface
driving may cause the com-
pact disc to skip. Do not use
the compact disc when driv-
ing in such conditions as
damage to the compact disc
face could occur.
(Continued)
(Continued)
• Do not attempt to grab or pull
the compact disc out while the
disc is being pulled into the
audio unit by the self-loading
mechanism. Damage to the
audio unit and compact disc
could occur.
• Avoid using recorded com-
pact discs in your audio unit.
Original compact discs are
recommended for best
results.
WARNING
When driving your vehicle, be
sure to keep the volume of the
unit set low enough to allow you
to hear sounds coming from the
outside.
Page 127 of 298
3 117
Knowing your vehicle
1
2
3
4
5
6
7
8
9
✽
NOTICE
• To assure proper operation of the
unit, keep the vehicle interior tem-
perature within a normal range by
using the vehicle's air conditioning
or heating system.
• When replacing the fuse, replace it
with a fuse having the correct
capacity.
• All stored bookmarks are all
erased when the car battery is dis-
connected or power to the vehicle
is lost. If this occurs, the book-
marks will have to be reset.
• This equipment is designed to be
used only in a 12 volt DC battery
system with negative ground.
• This unit is made of precision
parts. Do not attempt to disassem-
ble or adjust any parts.
• Do not expose this equipment
(including the speakers and tape)
to water or excessive moisture.CAUTION
• Do not insert warped or poor
quality discs into the CD play-
er as damage to the unit may
occur.
• Do not insert anything like
coins into the player slot as
damage to the unit may occur.
• Do not place beverages close
to the audio system. The play-
back mechanism may be dam-
aged if you spill them.
• Do not strike or allow anything
to impact the audio system,
damage to the system mecha-
nisms could occur.
• Off-road or rough surface
driving may cause the com-
pact disc to skip. Do not use
the compact disc when driv-
ing in such conditions as
damage to the compact disc
face could occur.
(Continued)
(Continued)
• Do not attempt to grab or pull
the compact disc out while the
disc is being pulled into the
audio unit by the self-loading
mechanism. Damage to the
audio unit and compact disc
could occur.
• Avoid using recorded com-
pact discs in your audio unit.
Original compact discs are
recommended for best
results.
WARNING
When driving your vehicle, be
sure to keep the volume of the
unit set low enough to allow you
to hear sounds coming from the
outside.
Page 201 of 298
511
Driving tips
1
2
3
4
5
6
7
8
9
VEHICLE LOAD LIMIT
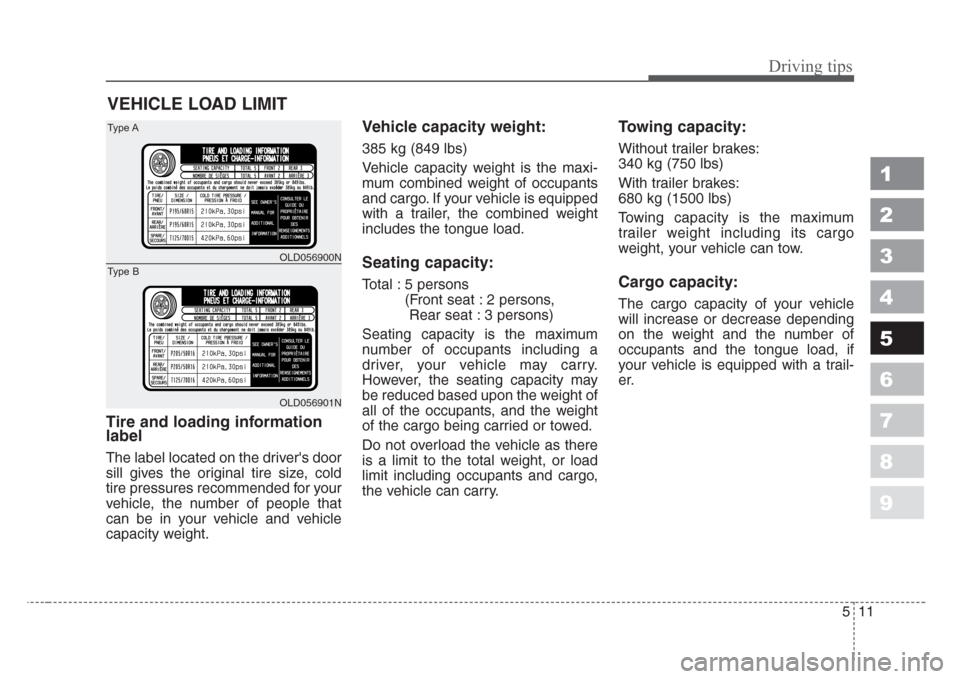
Tire and loading information
label
The label located on the driver's door
sill gives the original tire size, cold
tire pressures recommended for your
vehicle, the number of people that
can be in your vehicle and vehicle
capacity weight.
Vehicle capacity weight:
385 kg (849 lbs)
Vehicle capacity weight is the maxi-
mum combined weight of occupants
and cargo. If your vehicle is equipped
with a trailer, the combined weight
includes the tongue load.
Seating capacity:
Total : 5 persons
(Front seat : 2 persons,
Rear seat : 3 persons)
Seating capacity is the maximum
number of occupants including a
driver, your vehicle may carry.
However, the seating capacity may
be reduced based upon the weight of
all of the occupants, and the weight
of the cargo being carried or towed.
Do not overload the vehicle as there
is a limit to the total weight, or load
limit including occupants and cargo,
the vehicle can carry.
Towing capacity:
Without trailer brakes:
340 kg (750 lbs)
With trailer brakes:
680 kg (1500 lbs)
Towing capacity is the maximum
trailer weight including its cargo
weight, your vehicle can tow.
Cargo capacity:
The cargo capacity of your vehicle
will increase or decrease depending
on the weight and the number of
occupants and the tongue load, if
your vehicle is equipped with a trail-
er.
OLD056900N
OLD056901N
Type A
Type B
Page 202 of 298
Driving tips
12 5
1
2
3
4
5
6
7
8
9
Steps for determining correct
load limit
1. Locate the statement "The com-
bined weight of occupants and
cargo should never exceed XXX
kg or XXX lbs.'' on your vehicle's
placard.
2. Determine the combined weight of
the driver and passengers that will
be riding in your vehicle.
3. Subtract the combined weight of
the driver and passengers from
XXX kg or XXX lbs.
4. The resulting figure equals the
available amount of cargo and lug-
gage load capacity. For example, if
the "XXX" amount equals 635 kg
(1400 lbs.), and there will be five
68 kg (150 lbs.) passengers in
your vehicle, the amount of avail-
able cargo and luggage load
capacity is 295 kg (650 lbs.).
(635-340 (5 x 68) = 295 kg or
1400-750 (5 x 150) = 650 lbs.)5. Determine the combined weight of
luggage and cargo being loaded
on the vehicle. That weight may
not safely exceed the available
cargo and luggage load capacity
calculated in Step 4.
6. If your vehicle will be towing a trail-
er, load from your trailer will be
transferred to your vehicle. Consult
this manual to determine how this
reduces the available cargo and
luggage load capacity of your
vehicle.
WARNING- Load distribu-
tor
Your vehicle may become unsta-
ble while towing if your vehicle is
overloaded to one side. Make
sure that the load in the vehicle is
distributed equally to each side
of the centerline.
Page 204 of 298
Driving tips
14 5
1
2
3
4
5
6
7
8
9
Refer to your vehicle's tire and load-
ing information label for specific
information about your vehicle's
capacity weight and seating posi-
tions. The combined weight of the
driver, passengers and cargo should
never exceed your vehicle's capacity
weight.
Vehicle certification
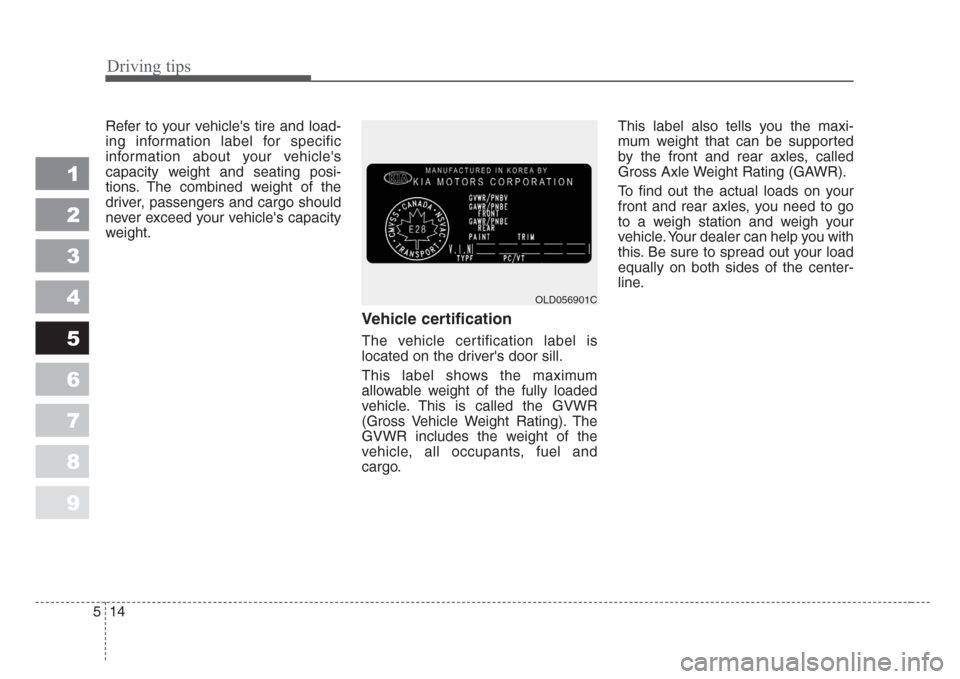
The vehicle certification label is
located on the driver's door sill.
This label shows the maximum
allowable weight of the fully loaded
vehicle. This is called the GVWR
(Gross Vehicle Weight Rating). The
GVWR includes the weight of the
vehicle, all occupants, fuel and
cargo.This label also tells you the maxi-
mum weight that can be supported
by the front and rear axles, called
Gross Axle Weight Rating (GAWR).
To find out the actual loads on your
front and rear axles, you need to go
to a weigh station and weigh your
vehicle. Your dealer can help you with
this. Be sure to spread out your load
equally on both sides of the center-
line.
OLD056901C
Page 205 of 298
515
Driving tips
1
2
3
4
5
6
7
8
9
The label will help you decide how
much cargo and installed equipment
your vehicle can carry.
If you carry items inside your vehicle
- like suitcases, tools, packages, or
anything else - they are moving as
fast as the vehicle. If you have to stop
or turn quickly, or if there is a crash,
the items will keep going and can
cause an injury if they strike the driv-
er or a passenger.
WARNING - Over loading
• Never exceed the GVWR for
your vehicle, the GAWR for
either the front or rear axle
and vehicle capacity weight.
Exceeding these ratings can
cause an accident or vehicle
damage. You can calculate the
weight of your load by weigh-
ing the items (or people)
before putting them in the
vehicle. Be careful not to over-
load your vehicle.
• If you overload your vehicle,
the tires can suddenly and
without warning fail. The over-
loading can also make your
vehicle unstable and dramati-
cally increase braking dis-
tance. This could cause you to
lose control and crash.WARNING - Loose cargo
Items you carry inside your
vehicle can strike and injure
occupants in a sudden stop or
sharp turn, or in a crash.
• Put items in the trunk of your
vehicle. Try to spread the
weight evenly.
• Never stack items, like suit-
cases, inside the occupant
compartment.
• Do not leave an unsecured
child restraint in your vehicle,
since it can injure occupants
in a crash.
• When you carry something
inside the vehicle, secure it.CAUTION
• Overloading your vehicle may
cause damage. Repairs would
not be covered by your war-
ranty. Do not overload your
vehicle.
• Using heavier suspension
components to get added
durability might not change
your weight ratings. Ask your
dealer to help you load your
vehicle the right way.ignored.
Page 207 of 298
517
Driving tips
1
2
3
4
5
6
7
8
9
Calculating the load your vehicle
can tow
1. Use the appropriate maximum
GCWR chart (in the Weight of the
Trailer section in this chapter) for
your type of drive system and
transmission.
2. Weigh your vehicle.
3. Subtract the weight of your vehicle
from the maximum GCWR in the
chart. This is the maximum trailer
weight your vehicle can tow. It
must be below the maximum trail-
er weight shown in the chart. Note
that the maximum trailer weight
your vehicle can tow depends on
the total weight of any cargo, pas-
sengers and available equipment
in the vehicle.To identify what the vehicle trailering
capacity is for your vehicle, you
should read the information in
“Weight of the Trailer” that appears
later in this section. Remember that
trailering is different than just driving
your vehicle by itself. Trailering caus-
es major changes in handling, dura-
bility, and fuel economy. Successful,
safe trailering requires correct equip-
ment, and cautious driving.
WARNING- Towing a
trailer
If you don't use the correct
equipment or you drive improp-
erly, you can lose control when
you pull a trailer. For example, if
the trailer is too heavy, the
brakes may fail, and would at
least be ineffective to promptly
stop the vehicle. You and your
passenger could be seriously or
fatally injured. We do not recom-
mend towing a trailer. However,
in the event there is a need to
tow a trailer, such as in an emer-
gency, follow all the steps in this
section.
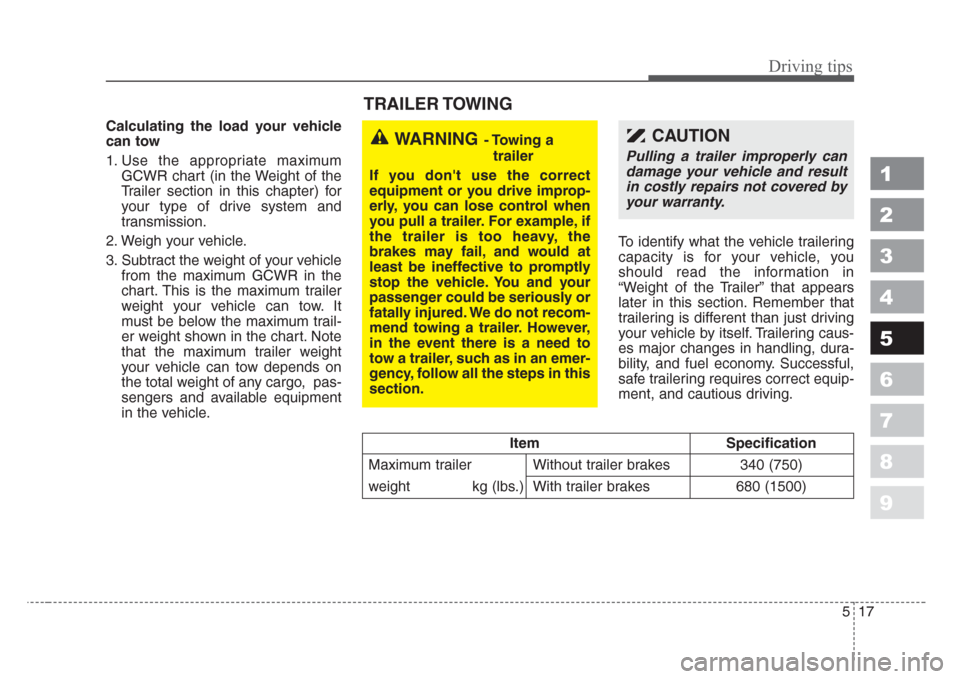
Item Specification
Maximum trailer Without trailer brakes 340 (750)
weight kg (lbs.) With trailer brakes 680 (1500)
TRAILER TOWING
CAUTION
Pulling a trailer improperly can
damage your vehicle and result
in costly repairs not covered by
your warranty.
Page 241 of 298
625
In case of an emergency
1
2
3
4
5
6
7
8
9
The compact spare should be inflat-
ed to 420 kPa (60 psi).
✽
NOTICE
Check the inflation pressure after
installing the spare tire. Adjust it to
the specified pressure, as necessary.
When using a compact spare tire,
observe the following precautions:
• Under no circumstances should
you exceed 80 km/h (50 mph); a
higher speed could damage the
tire.
• Ensure that you drive slowly
enough for the road conditions to
avoid all hazards. Any road hazard,
such as a pothole or debris, could
seriously damage the compact
spare.
• Any continuous road use of this tire
could result in tire failure, loss of
vehicle control, and possible per-
sonal injury.
• Do not exceed the vehicle’s maxi-
mum load rating or the load-carry-
ing capacity shown on the sidewall
of the compact spare tire.
• Avoid driving over obstacles. The
compact spare tire diameter is
smaller than the diameter of a con-
ventional tire and reduces the
ground clearance approximately
25 mm (1 inch), which could result
in damage to the vehicle.• Do not take this vehicle through an
automatic car wash.
• This tire should not be installed on
the front axle if the vehicle must be
driven in snow or on ice.
• Do not use the compact spare tire
on any other vehicle because this
tire has been designed especially
for your vehicle.
• The compact spare tire’s tread life
is shorter than a regular tire.
Inspect your compact spare tire
regularly and replace worn com-
pact spare tires with the same size
and design, mounted on the same
wheel.CAUTION - Compact
spare
This spare tire should be used
only for VERY short distances.
Compact spares should NEVER
be used for long drives or
extended distances.
Page 276 of 298
731
Maintenance
1
2
3
4
5
6
7
8
9
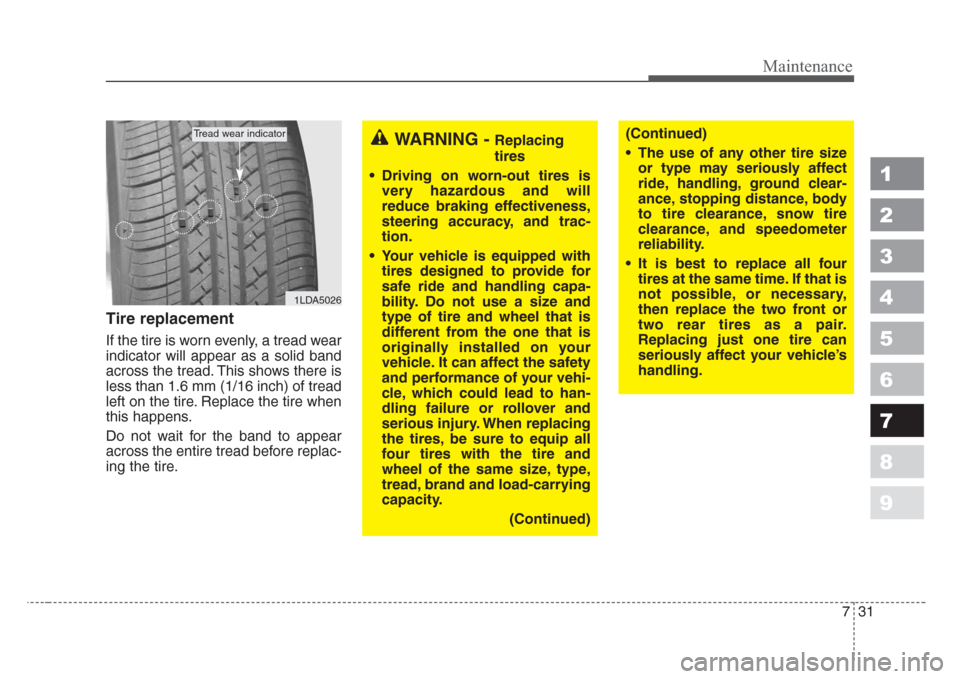
Tire replacement
If the tire is worn evenly, a tread wear
indicator will appear as a solid band
across the tread. This shows there is
less than 1.6 mm (1/16 inch) of tread
left on the tire. Replace the tire when
this happens.
Do not wait for the band to appear
across the entire tread before replac-
ing the tire.
1LDA5026
Tread wear indicatorWARNING - Replacing
tires
• Driving on worn-out tires is
very hazardous and will
reduce braking effectiveness,
steering accuracy, and trac-
tion.
• Your vehicle is equipped with
tires designed to provide for
safe ride and handling capa-
bility. Do not use a size and
type of tire and wheel that is
different from the one that is
originally installed on your
vehicle. It can affect the safety
and performance of your vehi-
cle, which could lead to han-
dling failure or rollover and
serious injury. When replacing
the tires, be sure to equip all
four tires with the tire and
wheel of the same size, type,
tread, brand and load-carrying
capacity.
(Continued)(Continued)
• The use of any other tire size
or type may seriously affect
ride, handling, ground clear-
ance,stopping distance, body
to tire clearance,snow tire
clearance, and speedometer
reliability.
• It is best to replace all four
tires at the same time. If that is
not possible, or necessary,
then replace the two front or
two rear tires as a pair.
Replacing just one tire can
seriously affect your vehicle’s
handling.
Page 282 of 298
737
Maintenance
1
2
3
4
5
6
7
8
9
Cold Tire Pressure: The amount of
air pressure in a tire, measured in
pounds per square inch (psi) or kilo-
pascals (kPa) before a tire has built
up heat from driving.
Curb Weight: This means the weight
of a motor vehicle with standard and
optional equipment including the
maximum capacity of fuel, oil and
coolant, but without passengers and
cargo.
DOT Markings: The DOT code
includes the Tire Identification
Number (TIN), an alphanumeric des-
ignator which can also identify the
tire manufacturer, production plant,
brand and date of production.
GVWR: Gross Vehicle Weight Rating
GAWR FRT: Gross Axle Weight
Rating for the front Axle.
GAWR RR: Gross Axle Weight
Rating for the rear axle.Intended Outboard Sidewall: The
side of an asymmetrical tire, that
must always face outward when
mounted on a vehicle.
Kilopascal (kPa): The metric unit for
air pressure.
Load Index: An assigned number
ranging from 1 to 279 that corre-
sponds to the load carrying capacity
of a tire.
Maximum Inflation Pressure: The
maximum air pressure to which a
cold tire may be inflated. The maxi-
mum air pressure is molded onto the
sidewall.
Maximum Load Rating: The load
rating for a tire at the maximum per-
missible inflation pressure for that
tire.
Maximum Loaded Vehicle Weight:
The sum of curb weight; accessory
weight; vehicle capacity weight; and
production options weight.
Normal Occupant Weight: The
number of occupants a vehicle is
designed to seat multiplied by 68 kg
(150 pounds).Occupant Distribution: Designated
seating positions.
Outward Facing Sidewall:The side
of a asymmetrical tire that has a par-
ticular side that faces outward when
mounted on a vehicle. The outward
facing sidewall bears white lettering
or bears manufacturer, brand, and/or
model name molding that is higher or
deeper than the same moldings on
the inner facing sidewall.
Passenger (P-Metric) Tire: A tire
used on passenger cars and some
light duty trucks and multipurpose
vehicles.
Recommended Inflation Pressure:
Vehicle manufacturer's recommend-
ed tire inflation pressure and shown
on the tire placard.
Radial Ply tire: A pneumatic tire in
which the ply cords that extend to the
beads are laid at 90 degrees to the
centerline of the tread.
Rim: A metal support for a tire and
upon which the tire beads are seat-
ed.
Sidewall: The portion of a tire
between the tread and the bead.