door lock KIA Sportage 2009 JE_ / 2.G User Guide
[x] Cancel search | Manufacturer: KIA, Model Year: 2009, Model line: Sportage, Model: KIA Sportage 2009 JE_ / 2.GPages: 371, PDF Size: 3.5 MB
Page 22 of 371
313
Knowing your vehicle
1
2
3
4
5
6
7
8
9
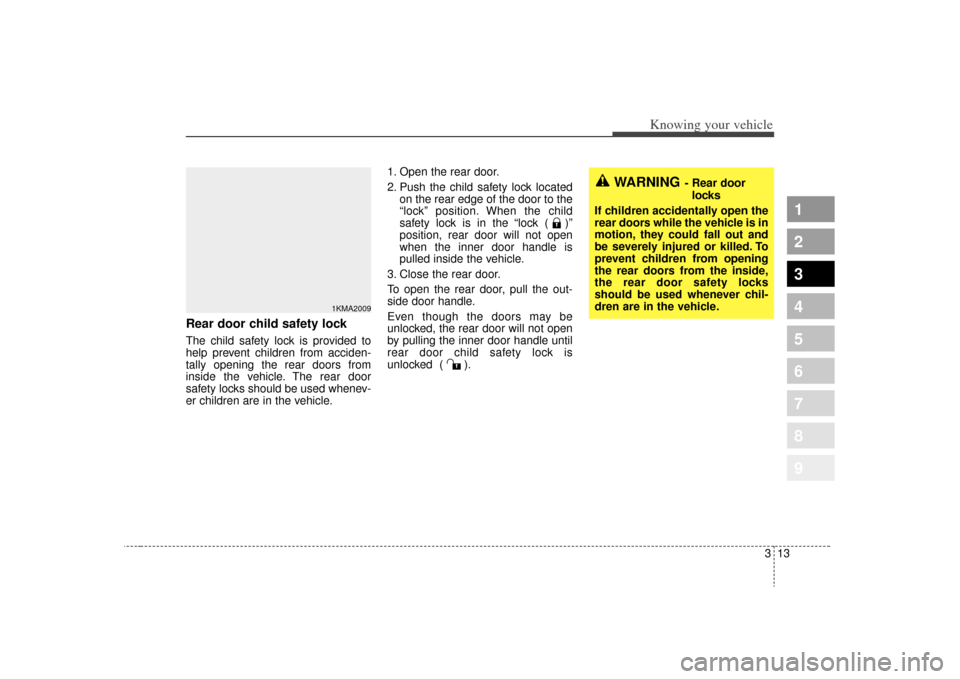
Rear door child safety lockThe child safety lock is provided to
help prevent children from acciden-
tally opening the rear doors from
inside the vehicle. The rear door
safety locks should be used whenev-
er children are in the vehicle.1. Open the rear door.
2. Push the child safety lock located
on the rear edge of the door to the
“lock” position. When the child
safety lock is in the “lock ( )”
position, rear door will not open
when the inner door handle is
pulled inside the vehicle.
3. Close the rear door.
To open the rear door, pull the out-
side door handle.
Even though the doors may be
unlocked, the rear door will not open
by pulling the inner door handle until
rear door child safety lock is
unlocked ( ).
WARNING
- Rear door locks
If children accidentally open the
rear doors while the vehicle is in
motion, they could fall out and
be severely injured or killed. To
prevent children from opening
the rear doors from the inside,
the rear door safety locks
should be used whenever chil-
dren are in the vehicle.
1KMA2009
Page 23 of 371
Knowing your vehicle14
3
1
2
3
4
5
6
7
8
9
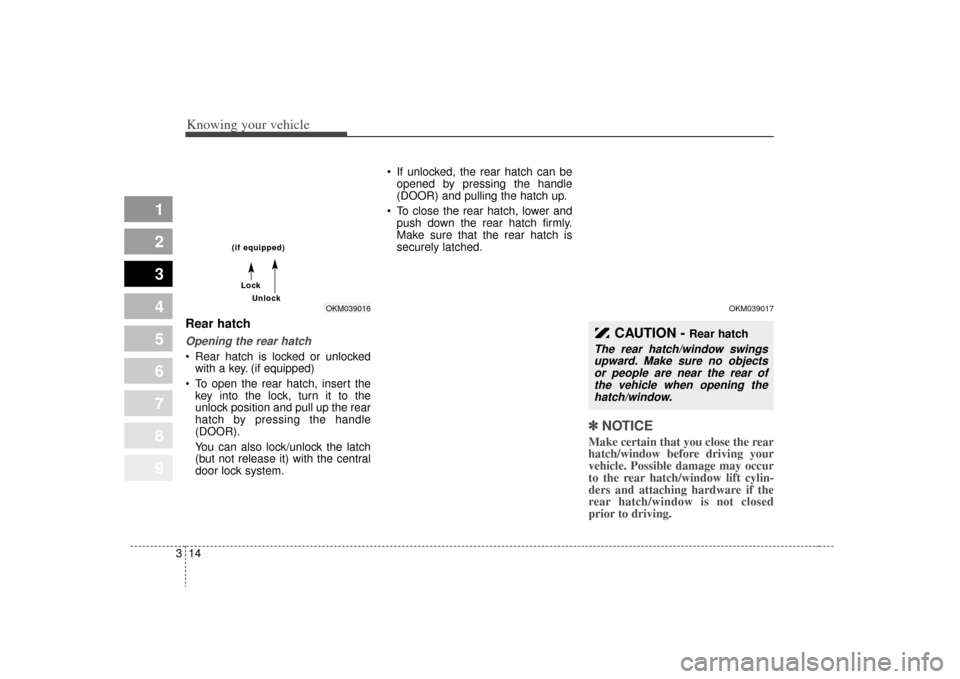
Rear hatchOpening the rear hatch Rear hatch is locked or unlocked
with a key. (if equipped)
To open the rear hatch, insert the key into the lock, turn it to the
unlock position and pull up the rear
hatch by pressing the handle
(DOOR).
You can also lock/unlock the latch
(but not release it) with the central
door lock system. If unlocked, the rear hatch can be
opened by pressing the handle
(DOOR) and pulling the hatch up.
To close the rear hatch, lower and push down the rear hatch firmly.
Make sure that the rear hatch is
securely latched.
✽ ✽ NOTICEMake certain that you close the rear
hatch/window before driving your
vehicle. Possible damage may occur
to the rear hatch/window lift cylin-
ders and attaching hardware if the
rear hatch/window is not closed
prior to driving.
CAUTION -
Rear hatch
The rear hatch/window swings
upward. Make sure no objectsor people are near the rear ofthe vehicle when opening thehatch/window.
OKM039017
OKM039016
Loc
Loc
k
k
Unloc
Unloc
k
k
(if equipped)
(if equipped)
Page 25 of 371
Knowing your vehicle16
3
1
2
3
4
5
6
7
8
9
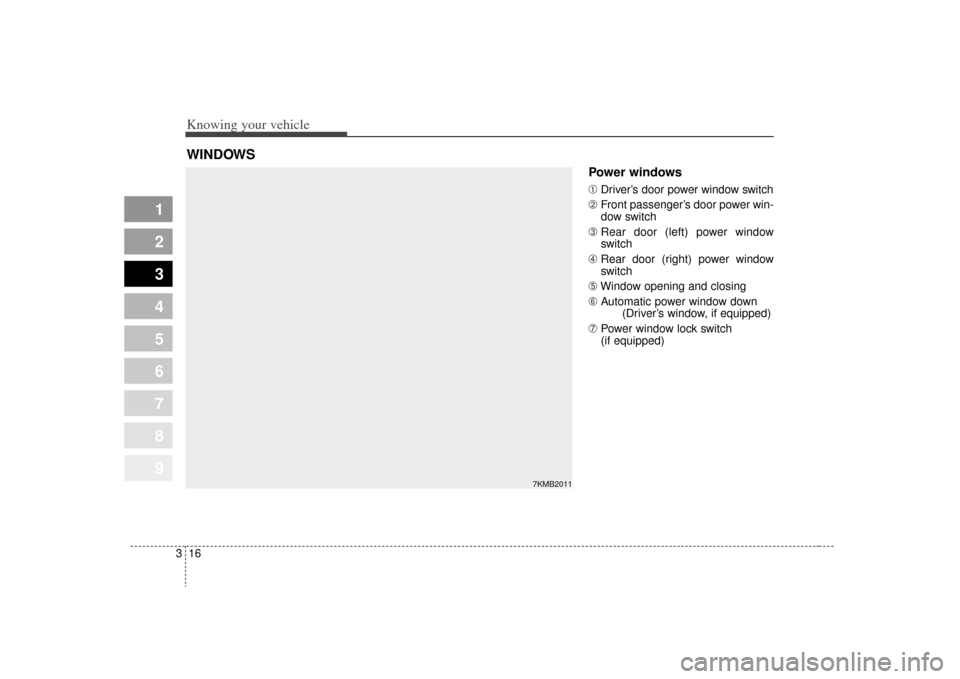
Power windows ➀ Driver’s door power window switch
➁ Front passenger’s door power win-
dow switch
➂ Rear door (left) power window
switch
➃ Rear door (right) power window
switch
➄ Window opening and closing
\b Automatic power window down
(Driver’s window, if equipped)
➆ Power window lock switch
(if equipped)
WINDOWS
7KMB2011
Page 26 of 371
317
Knowing your vehicle
1
2
3
4
5
6
7
8
9
The ignition switch must be in the ON
position for power windows to oper-
ate. Each door has a power window
switch that controls that door’s win-
dow. However, the driver has a power
window lock switch which can block
the operation of passenger windows.
The power windows can be operated
for approximately 30 seconds after
the ignition key is removed or turned
to the ACC or LOCK position.
However, if the front doors are
opened, the power windows cannot
be operated even within the 30 sec-
onds after the ignition key removal.
✽ ✽NOTICEWhile driving with the rear windows
down or with the sunroof (if
equipped) in an open (or partially
open) position, your vehicle may
demonstrate a wind buffeting or
pulsation noise. This noise is a nor-
mal occurrence and can be reduced
or eliminated by taking the follow-
ing actions. If the noise occurs with
one or both of the rear windows
down, partially lower both front
windows approximately one inch. If
you experience the noise with the
sunroof open, slightly reduce the
size of the sunroof opening. ✽ ✽NOTICE• To prevent the power window sys-
tem from the possibility of dam-
age, do not open or close two win-
dows at the same time. This will
also ensure the longevity of the
fuse. (Continued)(Continued)
• Never try to operate the main
switch on the driver's door and the
individual door window switch in
opposing directions at the same
time. If this is done, the window
will stop and cannot be opened or
closed.
CAUTION -
Windows
Always double check to make
sure all arms, hands, head andother obstructions are safelyout of the way before closing awindow.
Do not allow children to play with the power windows. Keepthe driver’s door power win-dow lock switch in the LOCKposition (depressed). Seriousinjury can result from uninten-tional window operation bythe child.
Do not extend face or arms outside through the windowopening while driving.
Page 27 of 371
Knowing your vehicle18
3
1
2
3
4
5
6
7
8
9
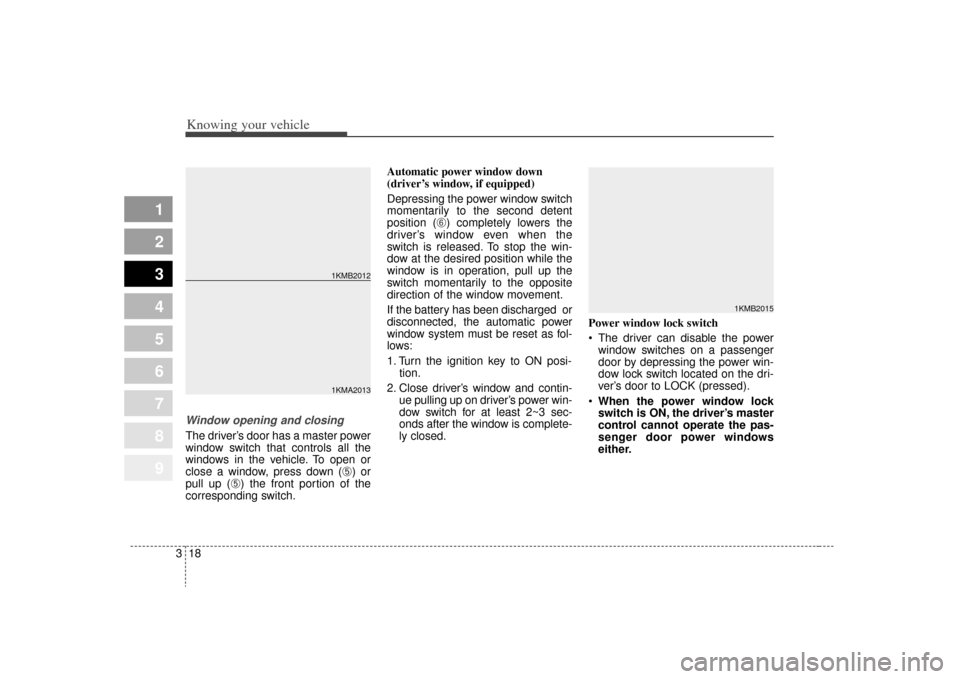
Window opening and closingThe driver’s door has a master power
window switch that controls all the
windows in the vehicle. To open or
close a window, press down (
➄) or
pull up (
➄) the front portion of the
corresponding switch. Automatic power window down
(driver’s window, if equipped)
Depressing the power window switch
momentarily to the second detent
position (
\b) completely lowers the
driver’s window even when the
switch is released. To stop the win-
dow at the desired position while the
window is in operation, pull up the
switch momentarily to the opposite
direction of the window movement.
If the battery has been discharged or
disconnected, the automatic power
window system must be reset as fol-
lows:
1. Turn the ignition key to ON posi- tion.
2. Close driver’s window and contin- ue pulling up on driver’s power win-
dow switch for at least 2~3 sec-
onds after the window is complete-
ly closed. Power window lock switch
The driver can disable the power
window switches on a passenger
door by depressing the power win-
dow lock switch located on the dri-
ver’s door to LOCK (pressed).
When the power window lock
switch is ON, the driver’s master
control cannot operate the pas-
senger door power windows
either.
1KMA20131KMB2012
1KMB2015
Page 47 of 371
Knowing your vehicle38
3
1
2
3
4
5
6
7
8
9
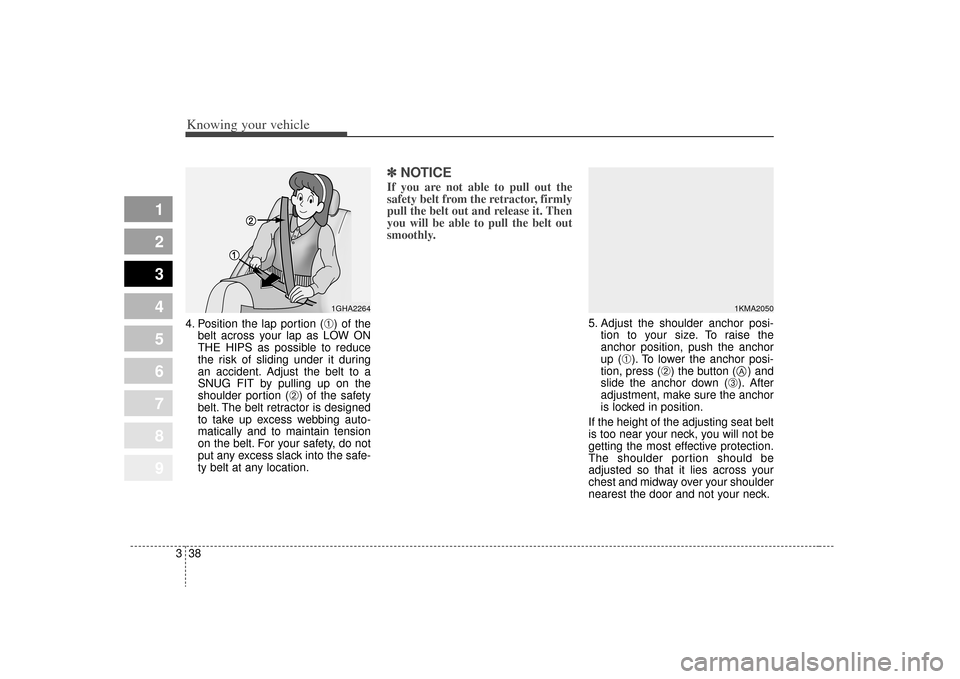
4. Position the lap portion (
➀) of the
belt across your lap as LOW ON
THE HIPS as possible to reduce
the risk of sliding under it during
an accident. Adjust the belt to a
SNUG FIT by pulling up on the
shoulder portion (
➁) of the safety
belt. The belt retractor is designed
to take up excess webbing auto-
matically and to maintain tension
on the belt. For your safety, do not
put any excess slack into the safe-
ty belt at any location.
✽ ✽ NOTICEIf you are not able to pull out the
safety belt from the retractor, firmly
pull the belt out and release it. Then
you will be able to pull the belt out
smoothly.
5. Adjust the shoulder anchor posi-
tion to your size. To raise the
anchor position, push the anchor
up (
➀). To lower the anchor posi-
tion, press (
➁) the button ( ) and
slide the anchor down (
➂). After
adjustment, make sure the anchor
is locked in position.
If the height of the adjusting seat belt
is too near your neck, you will not be
getting the most effective protection.
The shoulder portion should be
adjusted so that it lies across your
chest and midway over your shoulder
nearest the door and not your neck.
1GHA2264
1KMA2050A
Page 78 of 371
369
1
2
3
4
5
6
7
8
9
Knowing your vehicle
The curtain airbag deploymentoccurs only on the side of the vehi-
cle affected by the impact.
The side airbags (side and curtain airbags) are not designed to
deploy during collisions from the
front or rear of the vehicle or in
most rollover situations.
The curtain airbags are designed to deploy only during certain side-
impact collisions, depending on the
crash severity, angle, speed and
impact. The curtain airbags are not
designed to deploy in all side
impact situations.
WARNING
In order for side airbags (sideand curtain airbags) to pro-
vide their best protection,
occupants should sit in an
upright position with the seat
belts properly fastened.
Children must be seated in the proper child restraint system.
Make sure to secure the child
restraint system in a locked
position.
(Continued)
(Continued)
Advise occupants not to leantheir heads or bodies onto
doors, and not to place
objects between the doors
and them since this may
defeat operation of the side
airbags.
Never try to open or repair any components of the side cur-
tain airbag system. This
should only be done by an
authorized Kia dealer.
Failure to follow the above men-
tioned instructions can result in
injury or death to the vehicle
occupants in an accident.
Page 90 of 371
381
1
2
3
4
5
6
7
8
9
Knowing your vehicle
Closing the hood1. Before closing the hood, check thefollowing:
ment must be correctly installed.
bustible material must be
removed from the engine com-
partment.
2. Secure the support rod in its clip.
3. Lower the hood to about 30 cm (12 inches) height and then let it
drop to properly lock in place.
Make sure the hood is properly
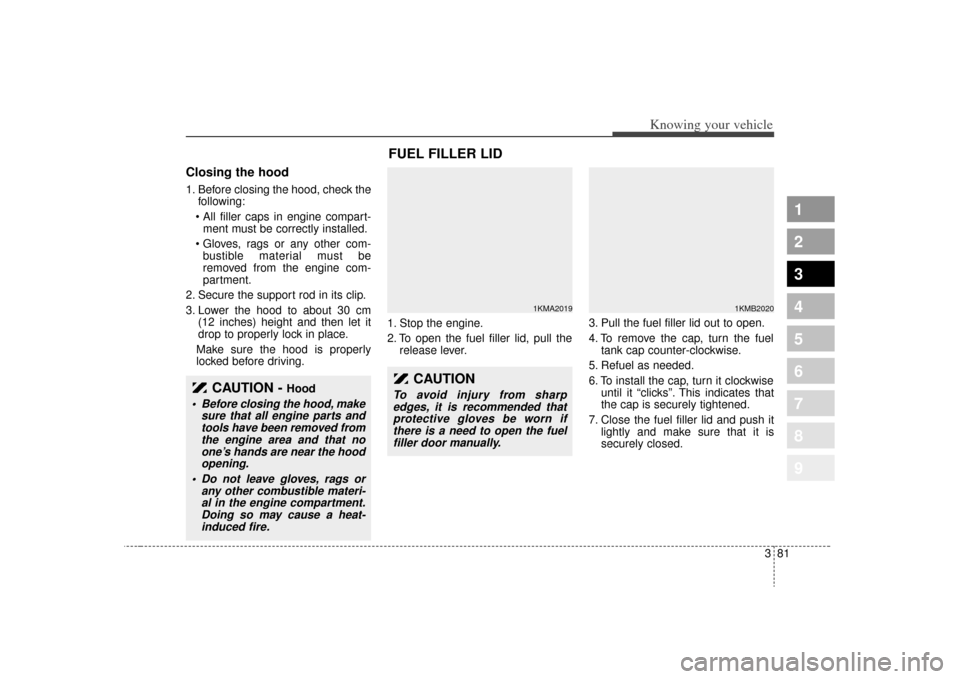
locked before driving. 1. Stop the engine.
2. To open the fuel filler lid, pull the
release lever. 3. Pull the fuel filler lid out to open.
4. To remove the cap, turn the fuel
tank cap counter-clockwise.
5. Refuel as needed.
6. To install the cap, turn it clockwise until it “clicks”. This indicates that
the cap is securely tightened.
7. Close the fuel filler lid and push it lightly and make sure that it is
securely closed.
CAUTION -
Hood
Before closing the hood, makesure that all engine parts andtools have been removed fromthe engine area and that noone’s hands are near the hoodopening.
Do not leave gloves, rags or any other combustible materi-al in the engine compartment.Doing so may cause a heat-induced fire.
FUEL FILLER LID
1KMA2019
1KMB2020
CAUTION
To avoid injury from sharpedges, it is recommended thatprotective gloves be worn ifthere is a need to open the fuelfiller door manually.
Page 97 of 371
Knowing your vehicle88
3
1
2
3
4
5
6
7
8
9
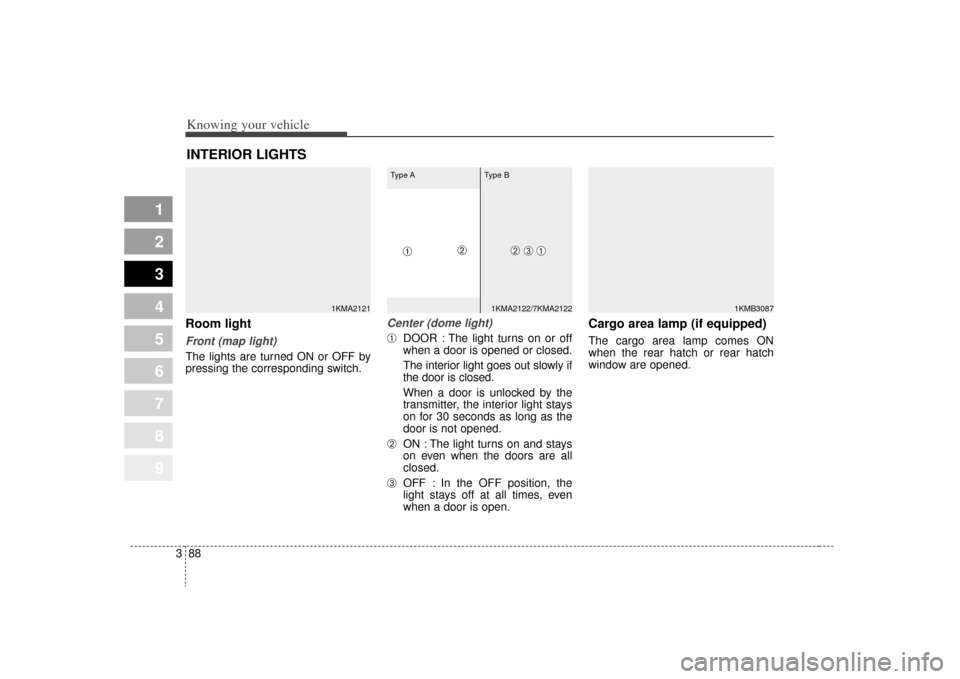
Room lightFront (map light)The lights are turned ON or OFF by
pressing the corresponding switch.
Center (dome light)➀
DOOR : The light turns on or off
when a door is opened or closed.
The interior light goes out slowly if
the door is closed.
When a door is unlocked by the
transmitter, the interior light stays
on for 30 seconds as long as the
door is not opened.
➁
ON : The light turns on and stays
on even when the doors are all
closed.
➂
OFF : In the OFF position, the
light stays off at all times, even
when a door is open.
Cargo area lamp (if equipped)The cargo area lamp comes ON
when the rear hatch or rear hatch
window are opened.
INTERIOR LIGHTS
1KMA2121
1KMB3087
1KMA2122/7KMA2122
➀
➂
➁
Type A Type B
➀
➁
Page 149 of 371
Driving your vehicle24
1
2
3
4
5
6
7
8
9
Illuminated ignition switch
(if equipped)Whenever a door is opened, the igni-
tion switch will be illuminated for your
convenience, provided the ignition
switch is not in the ON position. The
light will go off approximately 10 sec-
onds after closing the door or when
the ignition switch is turned on.
Ignition switch and anti-theft
steering column lock
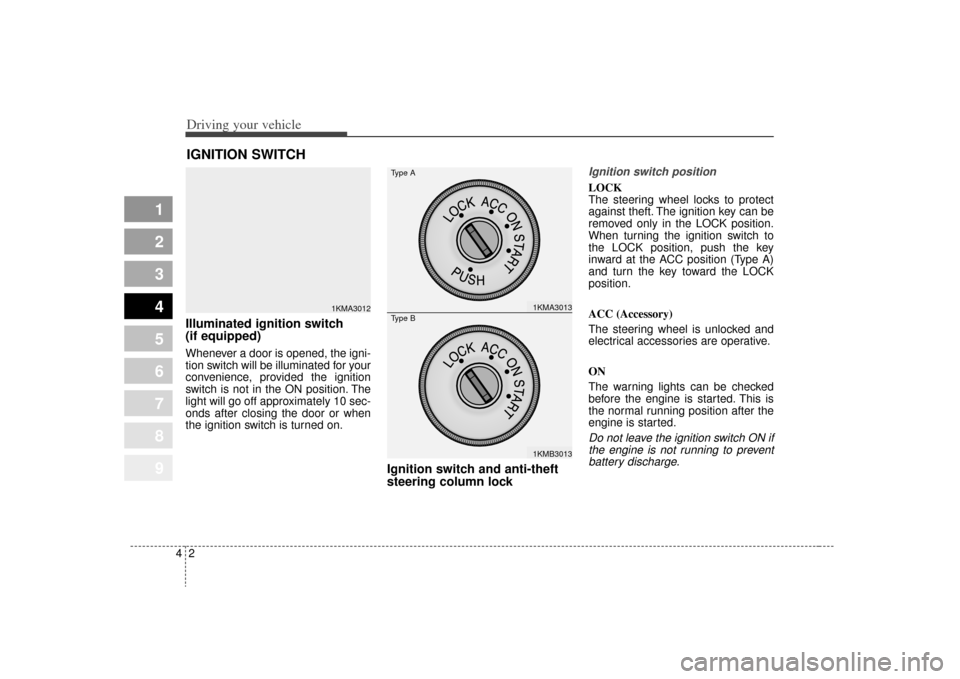
Ignition switch positionLOCK
The steering wheel locks to protect
against theft. The ignition key can be
removed only in the LOCK position.
When turning the ignition switch to
the LOCK position, push the key
inward at the ACC position (Type A)
and turn the key toward the LOCK
position.
ACC (Accessory)
The steering wheel is unlocked and
electrical accessories are operative.
ON
The warning lights can be checked
before the engine is started. This is
the normal running position after the
engine is started.Do not leave the ignition switch ON ifthe engine is not running to preventbattery discharge.
IGNITION SWITCH
1KMA3012
1KMA30131KMB3013
Type AType B