heater KIA Sportage 2009 JE_ / 2.G Owner's Manual
[x] Cancel search | Manufacturer: KIA, Model Year: 2009, Model line: Sportage, Model: KIA Sportage 2009 JE_ / 2.GPages: 371, PDF Size: 3.5 MB
Page 28 of 371
319
Knowing your vehicle
1
2
3
4
5
6
7
8
9
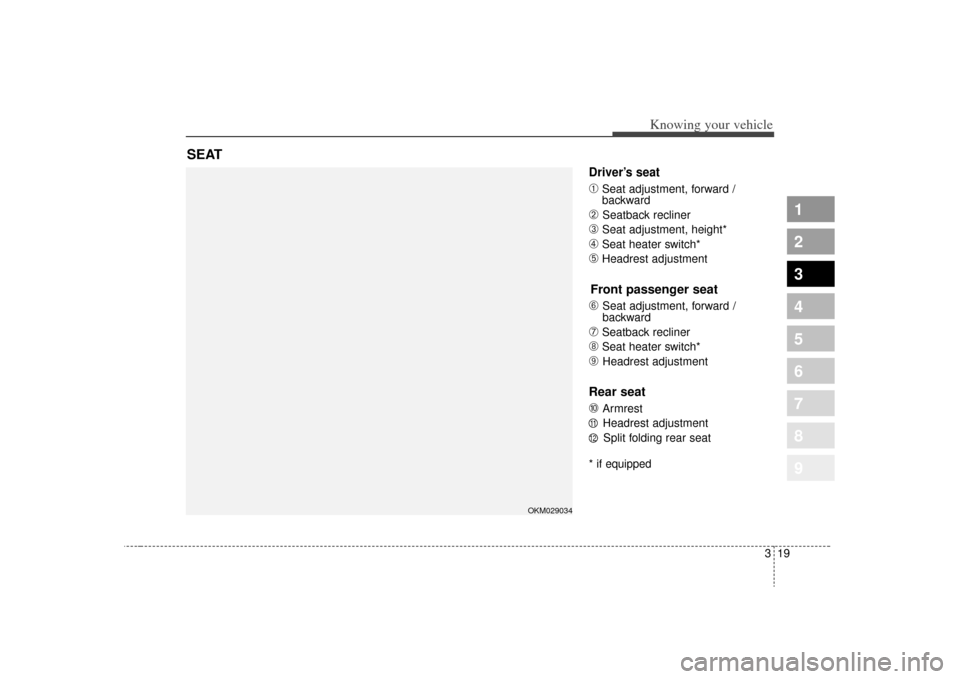
Driver’s seat➀
Seat adjustment, forward /
backward
➁
Seatback recliner
➂
Seat adjustment, height*
➃
Seat heater switch*
➄
Headrest adjustment
Front passenger seat
\b
Seat adjustment, forward /
backward
➆
Seatback recliner
➇
Seat heater switch*
➈
Headrest adjustment
Rear seat
\f
Armrest Headrest adjustment Split folding rear seat
* if equipped
SEAT
1112
OKM029034
Page 32 of 371
323
Knowing your vehicle
1
2
3
4
5
6
7
8
9
Warming the front seats(if equipped)The front seats can be electrically
heated individually when the ignition
switch is ON. When you depress the
seat warmer switch, a thermostat
regulates seat temperature. To deac-
tivate the heating system, depress
the switch once again.
✽ ✽ NOTICE• The seat warmer will not operate
if ambient temperature is above
37±3°C (98.5±5.5°F).
• If the seat warmer doesn't work when the ambient temperature is
below 28±3.5°C (82.5±5.5°F), have
the system checked by an autho-
rized dealer.✽ ✽ NOTICE• When cleaning the seats, do not
use an organic solvent such as
thinner, benzene, alcohol and
gasoline. Doing so may damage
the surface of the heater or seats.
• To prevent overheating the seat warmer, do not place blankets,
cushions or seat covers on the
seats while the seat warmer is in
operation.
• Do not place heavy or sharp objects on seats equipped with
seat warmers. Damage to the seat
warming components could occur.
WARNING
- Seat heater
burns
Passengers should use extreme
caution when using seat warm-
ers due to the possibility of
excess heating or burns. In par-
ticular, the driver must exercise
extreme care for the following
types of passengers:
1. Infants, children, elderly or handicapped persons, or hos-
pital outpatients
2. Persons with sensitive skin or those that burn easily
3. Fatigued individuals
4. Intoxicated individuals
5. Individuals taking medication that can cause drowsiness or
sleepiness (sleeping pills,
cold tablets, etc.)
1KMA2039
Page 95 of 371
Knowing your vehicle86
3
1
2
3
4
5
6
7
8
9
Outside rearview mirror heater
(if equipped) The outside rearview mirror heater is
actuated in connection with the rear
window defroster. To heat the outside
rearview mirror glass, push the but-
ton for the rear window defroster.
The rearview mirror heater (and rear
window defroster) will not operate
unless the engine is running.
The outside rearview mirror glass will
be heated for defrosting or defogging
and will give you improved rear
vision in inclement weather condi-
tions. Push the button again to turn
the heater off. The outside rearview
mirror heater automatically turns off
after 20 minutes.
Inside rearview mirrorAdjust the rearview mirror to center
on the view through the rear window.
Make this adjustment before you
start driving.
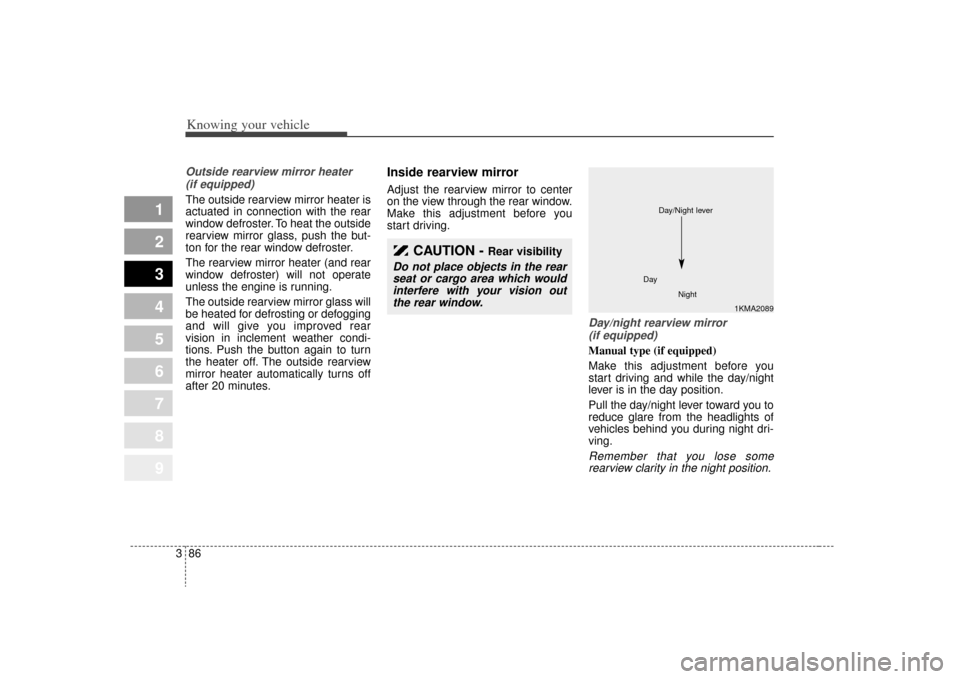
Day/night rearview mirror (if equipped) Manual type (if equipped)
Make this adjustment before you
start driving and while the day/night
lever is in the day position.
Pull the day/night lever toward you to
reduce glare from the headlights of
vehicles behind you during night dri-
ving.Remember that you lose somerearview clarity in the night position.
CAUTION -
Rear visibility
Do not place objects in the rearseat or cargo area which wouldinterfere with your vision outthe rear window.
1KMA2089
Day
Night
Day/Night lever
Page 104 of 371
395
1
2
3
4
5
6
7
8
9
Knowing your vehicle
✽ ✽NOTICE• Use when the engine is running,
and remove a plug from the power
outlet after using the electric
appliance. Using when the engine
stops or remaining the electric
appliance with plugged in for
many hours may cause the battery
to be discharged.
• Only use 12V electric appliances which are less than 10A in electric
capacity.
• Adjust the air-conditioner or heater to the lowest operating level
when you have to use the power
socket.
• Close the cover when not in use.
• Some electronic devices can cause electronic interference when
plugged into a vehicle’s power out-
let. These devices may cause exces-
sive audio static and malfunctions
in other electronic systems or
devices used in your vehicle.
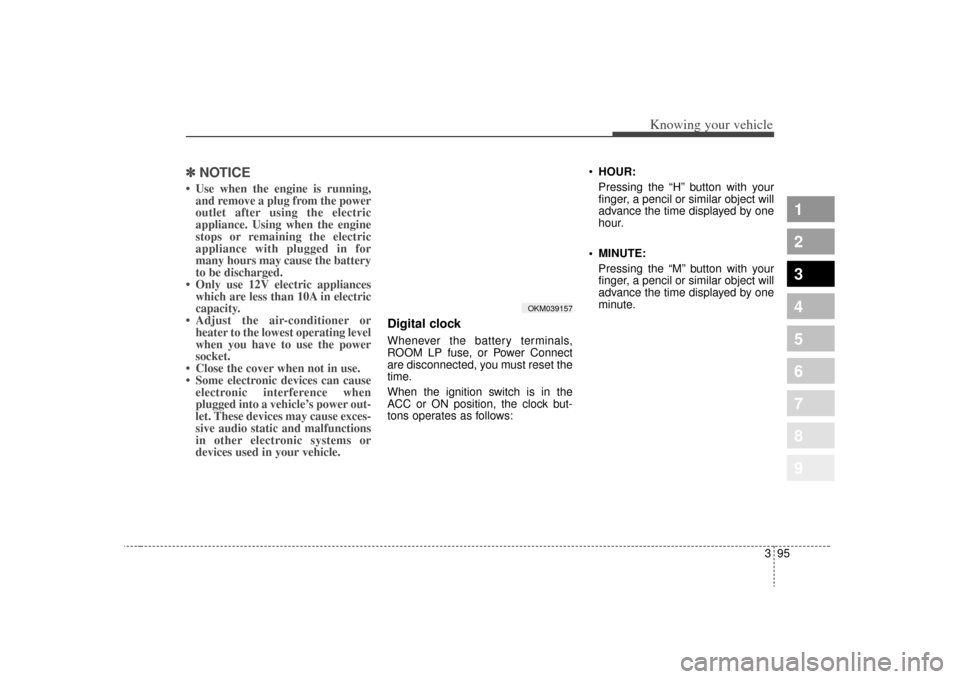
Digital clockWhenever the battery terminals,
ROOM LP fuse, or Power Connect
are disconnected, you must reset the
time.
When the ignition switch is in the
ACC or ON position, the clock but-
tons operates as follows:
HOUR:
Pressing the “H” button with your
finger, a pencil or similar object will
advance the time displayed by one
hour.
MINUTE: Pressing the “M” button with your
finger, a pencil or similar object will
advance the time displayed by one
minute.
OKM039157
Page 125 of 371
Knowing your vehicle116
3
1
2
3
4
5
6
7
8
9
(Continued)
If you repeat mounting or dis- mounting USB device in ashort period of time, it maybreak the device.
You might hear strange noise when mounting or dismount-ing a USB device.
If you dismount the external USB device during playback inUSB mode, the external USBdevice can be damaged or mal-function. Therefore, mount theexternal USB device when theengine is turned off or inanother mode.
Depending on the type and capacity of the external USBdevice or the type of the filesstored in the device, there is adifference in the time taken forrecognition of the device, butthis is not a trouble and youonly have to wait.
(Continued)
(Continued) Do not use the USB device for other purposes than playingmusic files.
Use of USB accessories such as the recharger or heaterusing USB I/F may lower theperformance or cause trouble.
If you use devices such as the USB hub you purchased sepa-rately, the vehicle’s audio sys-tem may not recognize theUSB device. Connect the USBdevice directly to the multime-dia terminal of the vehicle.
Page 138 of 371
3129
Knowing your vehicle
1
2
3
4
5
6
7
8
9
(Continued) Take cautions for static elec- tricity when mounting or dis-mounting the external USBdevice.
Encoded MP3 PLAYER is not recognizable.
Depending on the condition of the external USB device, theconnected external USBdevice can be unrecognizable.
When the formatted byte/sec- tor setting of External USBdevices is not either 512BYTEor 2048BYTE, then the devicewill not be recognized.
Only the USB device format- ted to FAT 12/16/32.
USB device without USB IF authentication may not be rec-ognizable.
Make sure the USB connection terminal does not come incontact with human body orany object.
(Continued)
(Continued) If you repeat mounting or dis- mounting USB device in ashort period of time, it maybreak the device.
You might hear strange noise when mounting or dismount-ing a USB device.
If you dismount the external USB device during playback inUSB mode, the external USBdevice can be damaged or mal-function. Therefore, mount theexternal USB device when theengine is turned off or inanother mode.
Depending on the type and capacity of the external USBdevice or the type of the filesstored in the device, there is adifference in the time taken forrecognition of the device, butthis is not a trouble and youonly have to wait.
(Continued)
(Continued) Do not use the USB device for other purposes than playingmusic files.
Use of USB accessories such as the recharger or heaterusing USB I/F may lower theperformance or cause trouble.
If you use devices such as the USB hub you purchased sepa-rately, the vehicle’s audio sys-tem may not recognize theUSB device. Connect the USBdevice directly to the multime-dia terminal of the vehicle.
Page 207 of 371
Driving your vehicle60
4
1
2
3
4
5
6
7
8
9
✽ ✽
NOTICE• To prevent damage to the conduc-
tors bonded to the inside surface
of the rear window, never use
sharp instruments or window
cleaners containing abrasives to
clean the window.
• To prevent the battery from being discharged, the rear window
defroster will only operate when
the engine is running.
• If you want to defrost and defog on the front windshield, refer to
“Windshield Defrosting and
Defogging” in this section. To activate the rear window
defroster, press the rear window
defroster button located in the center
console switch panel. The indicator
on the rear window defroster button
illuminates when the defroster is ON.
If there is heavy accumulation of
snow on the rear window, brush it off
before operating the rear defroster. The rear window defroster automati-
cally turns off after 20 minutes or
when the ignition switch is turned off.
To turn off the defroster, press the
rear window defroster button again.
Outside mirror heater
(if equipped)There is no control button for the out-
side mirror heater, instead the out-
side mirror heater automatically
turns on when the rear window
defroster is turned on.Front windshield deicer(if equipped)There is no control button for the
front windshield deicer, instead the
front windshield deicer automatically
turns on when the rear window
defroster is turned on. The hazard warning flasher causes
the rear tail lights and front turn sig-
nal lights to flash on and off, which
serves as a warning to other drivers
to exercise caution when approach-
ing or passing your vehicle.
To activate the flasher, depress the
hazard warning flasher switch. This
switch operates in any ignition switch
position.
To turn the flashers off, depress the
switch again.
HAZARD WARNING FLASHER
OKM049109
Page 230 of 371
483
Driving your vehicle
1
2
3
4
5
6
7
8
9
For maximum defrosting, set thetemperature control to the extreme
right/hot position and the fan speed
control to the highest speed.
If warm air to the floor is desired while defrosting or defogging, set
the mode to the floor-defrost posi-
tion.
Before driving, clear all snow and ice from the windshield, rear win-
dow, outside rear view mirrors, and
all side windows.
Clear all snow and ice from the hood and air inlet in the cowl grill to
improve heater and defroster effi-
ciency and to reduce the probabili-
ty of fogging up inside of the wind-
shield.
Defogging logicManual climate control systemTo reduce the probability of fogging
up the inside of the windshield, the
air intake control is set to the outside
(fresh) air position automatically if
any of following occur.
The mode is selected to the , or while the system is acti-
vated.
The ignition switch is turned on while the mode is selected to the ,or .
The ignition switch is turned off.
The fan is off.
The fan begins to be operated.
Press the air intake control button to
select the recirculated air position
while the ignition switch is on. How to cancel or return defogging
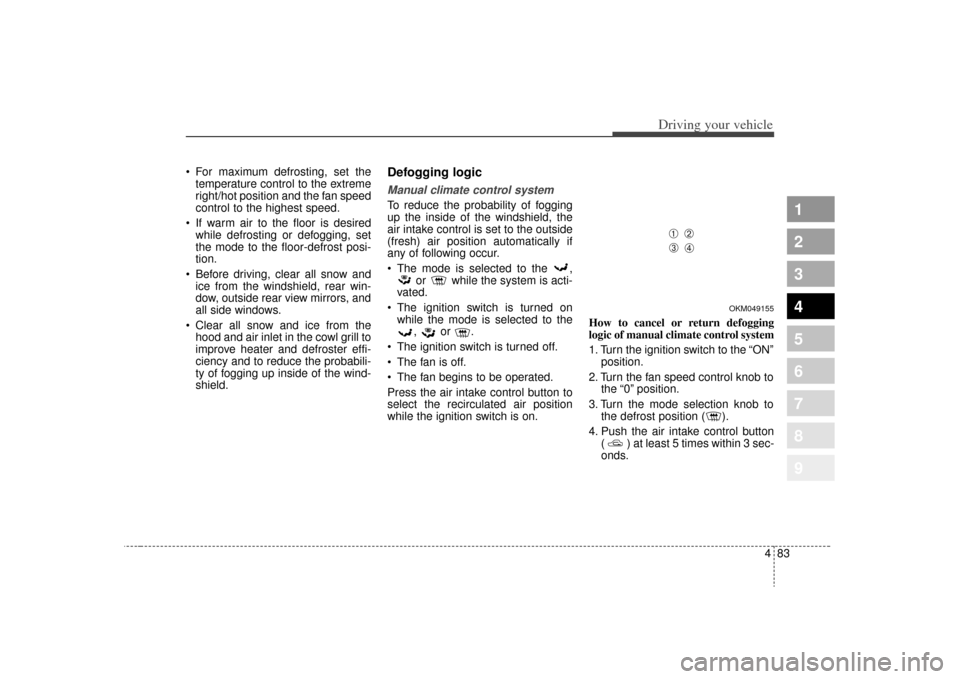
logic of manual climate control system
1. Turn the ignition switch to the “ON”
position.
2. Turn the fan speed control knob to the “0” position.
3. Turn the mode selection knob to the defrost position ( ).
4. Push the air intake control button ( ) at least 5 times within 3 sec-
onds.
OKM049155
➀
➁
➂
➃
Page 287 of 371
63
In case of an emergency
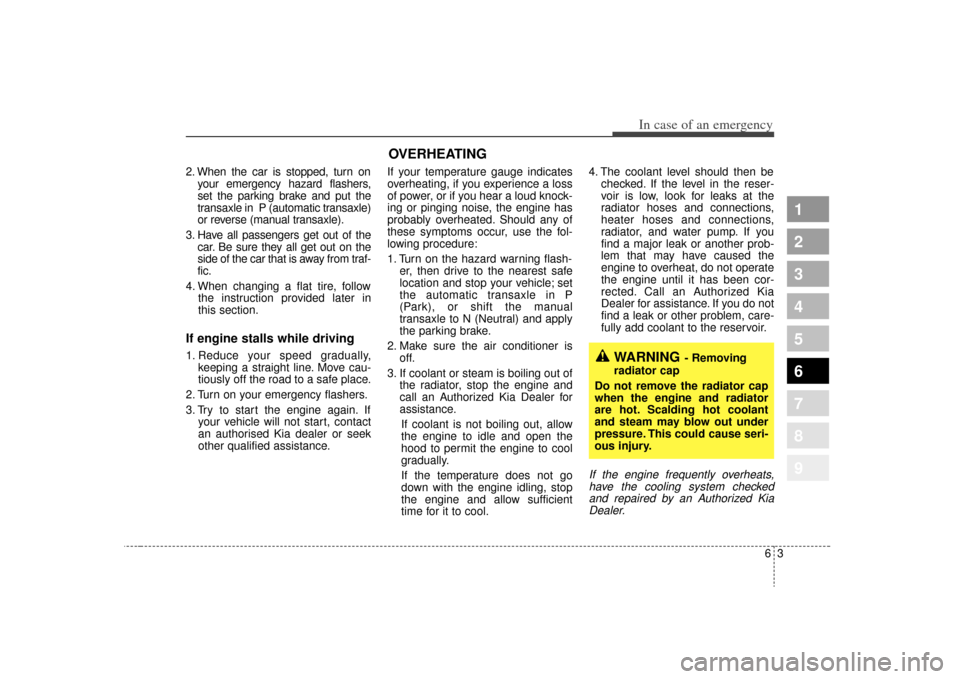
2. When the car is stopped, turn onyour emergency hazard flashers,
set the parking brake and put the
transaxle in P (automatic transaxle)
or reverse (manual transaxle).
3. Have all passengers get out of the car. Be sure they all get out on the
side of the car that is away from traf-
fic.
4. When changing a flat tire, follow the instruction provided later in
this section.If engine stalls while driving1. Reduce your speed gradually,keeping a straight line. Move cau-
tiously off the road to a safe place.
2. Turn on your emergency flashers.
3. Try to start the engine again. If your vehicle will not start, contact
an authorised Kia dealer or seek
other qualified assistance. If your temperature gauge indicates
overheating, if you experience a loss
of power, or if you hear a loud knock-
ing or pinging noise, the engine has
probably overheated. Should any of
these symptoms occur, use the fol-
lowing procedure:
1. Turn on the hazard warning flash-
er, then drive to the nearest safe
location and stop your vehicle; set
the automatic transaxle in P
(Park), or shift the manual
transaxle to N (Neutral) and apply
the parking brake.
2. Make sure the air conditioner is off.
3. If coolant or steam is boiling out of the radiator, stop the engine and
call an Authorized Kia Dealer for
assistance.
If coolant is not boiling out, allow
the engine to idle and open the
hood to permit the engine to cool
gradually.
If the temperature does not go
down with the engine idling, stop
the engine and allow sufficient
time for it to cool. 4. The coolant level should then be
checked. If the level in the reser-
voir is low, look for leaks at the
radiator hoses and connections,
heater hoses and connections,
radiator, and water pump. If you
find a major leak or another prob-
lem that may have caused the
engine to overheat, do not operate
the engine until it has been cor-
rected. Call an Authorized Kia
Dealer for assistance. If you do not
find a leak or other problem, care-
fully add coolant to the reservoir.
If the engine frequently overheats,have the cooling system checkedand repaired by an Authorized KiaDealer.
1
2
3
4
5
6
7
8
9
WARNING
- Removing
radiator cap
Do not remove the radiator cap
when the engine and radiator
are hot. Scalding hot coolant
and steam may blow out under
pressure. This could cause seri-
ous injury.
OVERHEATING
Page 295 of 371
611
In case of an emergency
1
2
3
4
5
6
7
8
9
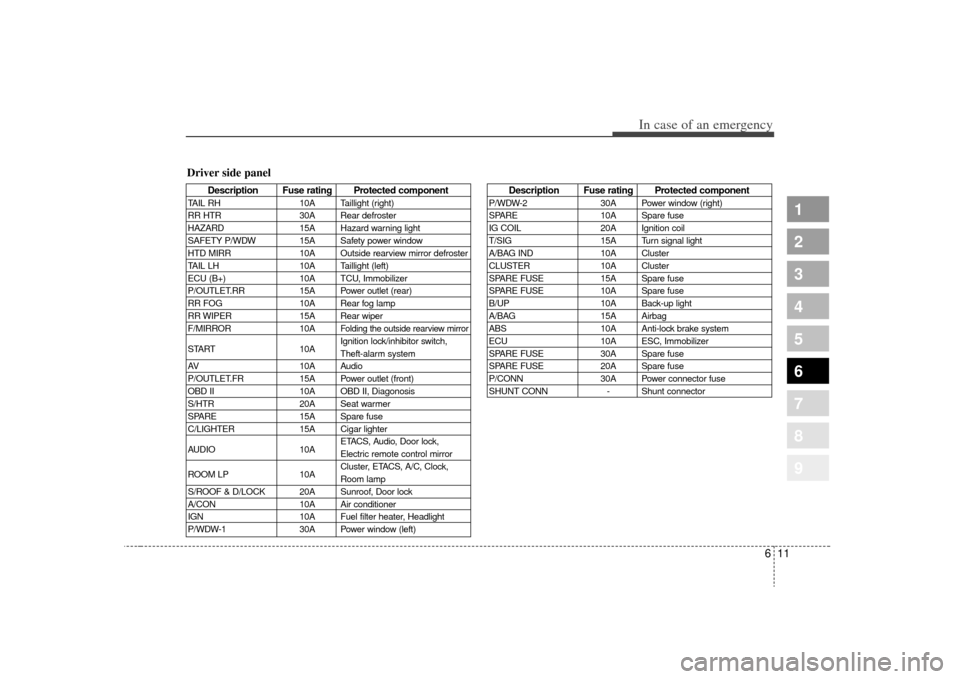
Description Fuse rating Protected component
TAIL RH10A Taillight (right)
RR HTR 30A Rear defroster
HAZARD 15A Hazard warning light
SAFETY P/WDW 15A Safety power window
HTD MIRR 10A Outside rearview mirror defroster
TAIL LH 10A Taillight (left)
ECU (B+) 10A TCU, Immobilizer
P/OUTLET.RR 15A Power outlet (rear)
RR FOG 10A Rear fog lamp
RR WIPER 15A Rear wiper
F/MIRROR 10A
Folding the outside rearview mirror
START10AIgnition lock/inhibitor switch,
Theft-alarm system
AV 10A Audio
P/OUTLET.FR 15A Power outlet (front)
OBD II 10A OBD II, Diagonosis
S/HTR 20A Seat warmer
SPARE 15A Spare fuse
C/LIGHTER 15A Cigar lighter
AUDIO 10AETACS, Audio, Door lock,
Electric remote control mirror
ROOM LP 10ACluster, ETACS, A/C, Clock,
Room lamp
S/ROOF & D/LOCK 20A Sunroof, Door lock
A/CON 10A Air conditioner
IGN 10A Fuel filter heater, Headlight
P/WDW-1 30A Power window (left)
Description Fuse rating Protected component
P/WDW-230A Power window (right)
SPARE 10A Spare fuse
IG COIL 20A Ignition coil
T/SIG 15A Turn signal light
A/BAG IND 10A Cluster
CLUSTER 10A Cluster
SPARE FUSE 15A Spare fuse
SPARE FUSE 10A Spare fuse
B/UP 10A Back-up light
A/BAG 15A Airbag
ABS 10A Anti-lock brake system
ECU 10A ESC, Immobilizer
SPARE FUSE 30A Spare fuse
SPARE FUSE 20A Spare fuse
P/CONN 30A Power connector fuse
SHUNT CONN - Shunt connector
Driver side panel