display KIA Sportage 2012 SL / 3.G Owner's Manual
[x] Cancel search | Manufacturer: KIA, Model Year: 2012, Model line: Sportage, Model: KIA Sportage 2012 SL / 3.GPages: 387, PDF Size: 8.44 MB
Page 6 of 387
I3
Index
Cargo security screen ··················\
··················\
················4-105
Cargo weight ··················\
··················\
··················\
·············5-68
Center console storage ··················\
··················\
················4-98
Central door lock switch ··················\
··················\
·············4-17
Changing tires ··················\
··················\
··················\
·············6-8
Checking tire inflation pressure ··················\
··················\
··7-34
Child restraint system ··················\
··················\
·················3-33\
Auto lock mode ··················\
··················\
··················\
··3-36
Lower anchor system ··················\
··················\
···········3-39
Tether anchor system··················\
··················\
·············3-38
Child-protector rear door lock ··················\
··················\
···4-19
Climate control system (Automatic) ··················\
···········4-88 Air conditioning ··················\
··················\
··················\
·4-94
Automatic heating and air conditioning ·········\
··········4-89
Manual heating and air conditioning ··················\
·····4-90
Climate control system (Manual) ··················\
················4-80 Air conditioning ··················\
··················\
··················\
·4-84
Climate control air filter ··················\
··················\
·······4-87
Heating and air conditioning ··················\
··················\
·4-80
Climate control air filter ··················\
··················\
····4-87, 7-24
Clock (Digital) ··················\
··················\
··················\
·······4-103
Clothes hanger ··················\
··················\
··················\
·······4-103
Combined instrument, see instrument cluster ···············4-45
Compact spare tire ··················\
··················\
··················\
···6-13
Compact spare tire replacement ··················\
··················\
7-36
Cooling fluid, see engine coolant ··················\
················7-18
Crankcase emission control system ··················\
·············7-59
Cruise control system ··················\
··················\
················5-40 Cup holder ··················\
··················\
··················\
·············4-101
Curtain air bag ··················\
··················\
··················\
·········3-60
Dashboard, see instrument cluster ··················\
···············4-45
Dashboard illumination, see instrument panel illumination ··4-46
Defogging (Windshield) ··················\
··················\
············4-95
Defogging logic (Windshield) ··················\
··················\
···4-97
Defroster (Rear window) ··················\
··················\
···········4-79
Defrosting (Windshield) ··················\
··················\
············4-95
Digital clock ··················\
··················\
··················\
···········4-103
Dimensions ················\
··················\
··················\
··················\
8-2
Displays, see instrument cluster ··················\
··················\
4-45
Display illumination, see instrument panel illumination ···4-46
Door locks ··················\
··················\
··················\
·················4-15\
Central door lock switch ··················\
··················\
······4-17
Child-protector rear door lock ··················\
···············4-19
Downhill brake control (DBC) ··················\
··················\
··5-36
Drinks holders, see cup holders ··················\
·················4-10\
1
Driver's air bag ··················\
··················\
··················\
·········3-54
Driving at night ··················\
··················\
··················\
········5-48
Driving in flooded areas ··················\
··················\
············5-49
Driving in the rain ··················\
··················\
··················\
····5-49
D
Page 128 of 387
Features of your vehicle
38
4
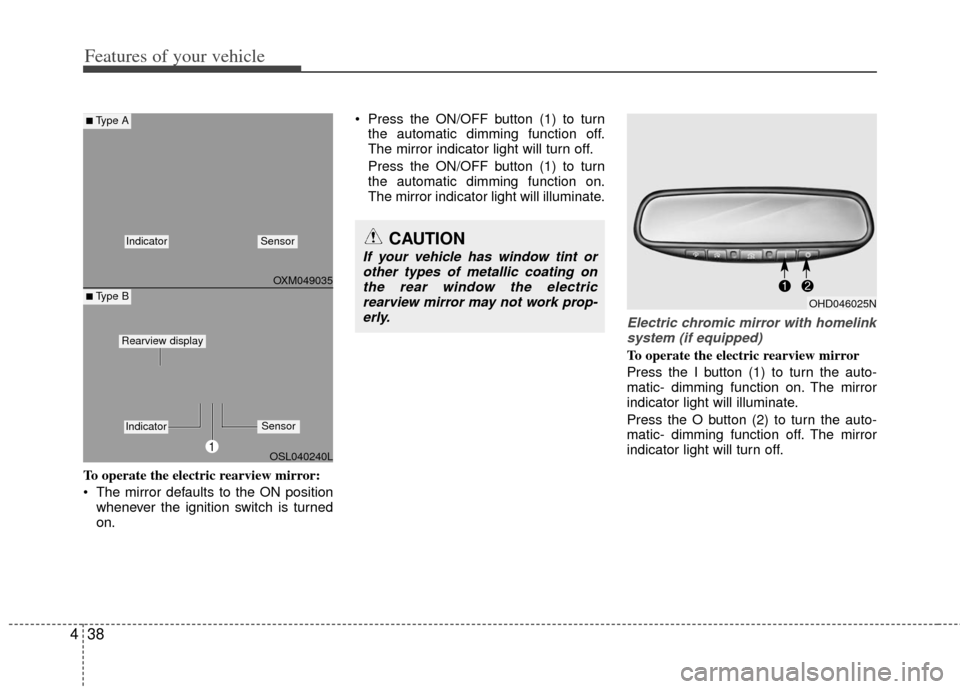
To operate the electric rearview mirror:
The mirror defaults to the ON position
whenever the ignition switch is turned
on. Press the ON/OFF button (1) to turn
the automatic dimming function off.
The mirror indicator light will turn off.
Press the ON/OFF button (1) to turn
the automatic dimming function on.
The mirror indicator light will illuminate.
Electric chromic mirror with homelinksystem (if equipped)
To operate the electric rearview mirror
Press the I button (1) to turn the auto-
matic- dimming function on. The mirror
indicator light will illuminate.
Press the O button (2) to turn the auto-
matic- dimming function off. The mirror
indicator light will turn off.
CAUTION
If your vehicle has window tint or other types of metallic coating onthe rear window the electricrearview mirror may not work prop-erly.
OHD046025N
OXM049035
OSL040240L
■Type A
■ Type B
IndicatorSensor
1
IndicatorSensor
Rearview display
Page 138 of 387
Features of your vehicle
48
4
D150204BHM-EE
Fuel gauge
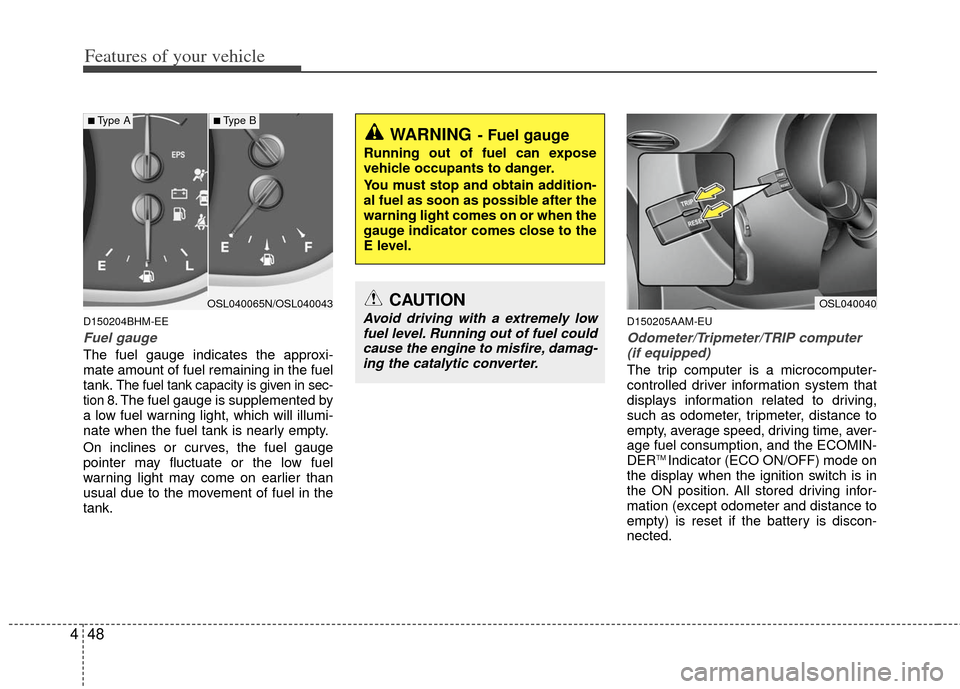
The fuel gauge indicates the approxi-
mate amount of fuel remaining in the fuel
tank.
The fuel tank capacity is given in sec-
tion 8.The fuel gauge is supplemented by
a low fuel warning light, which will illumi-
nate when the fuel tank is nearly empty.
On inclines or curves, the fuel gauge
pointer may fluctuate or the low fuel
warning light may come on earlier than
usual due to the movement of fuel in the
tank.
D150205AAM-EU
Odometer/Tripmeter/TRIP computer (if equipped)
The trip computer is a microcomputer-
controlled driver information system that
displays information related to driving,
such as odometer, tripmeter, distance to
empty, average speed, driving time, aver-
age fuel consumption, and the ECOMIN-
DER
TM Indicator (ECO ON/OFF) mode on
the display when the ignition switch is in
the ON position. All stored driving infor-
mation (except odometer and distance to
empty) is reset if the battery is discon-
nected.
WARNING- Fuel gauge
Running out of fuel can expose
vehicle occupants to danger.
You must stop and obtain addition-
al fuel as soon as possible after the
warning light comes on or when the
gauge indicator comes close to the
E level.
CAUTION
Avoid driving with a extremely low fuel level. Running out of fuel couldcause the engine to misfire, damag-ing the catalytic converter.
OSL040040OSL040065N/OSL040043
■Type A■Type B
Page 139 of 387
449
Features of your vehicle
The odometer is always displayed until
the display is turned off.
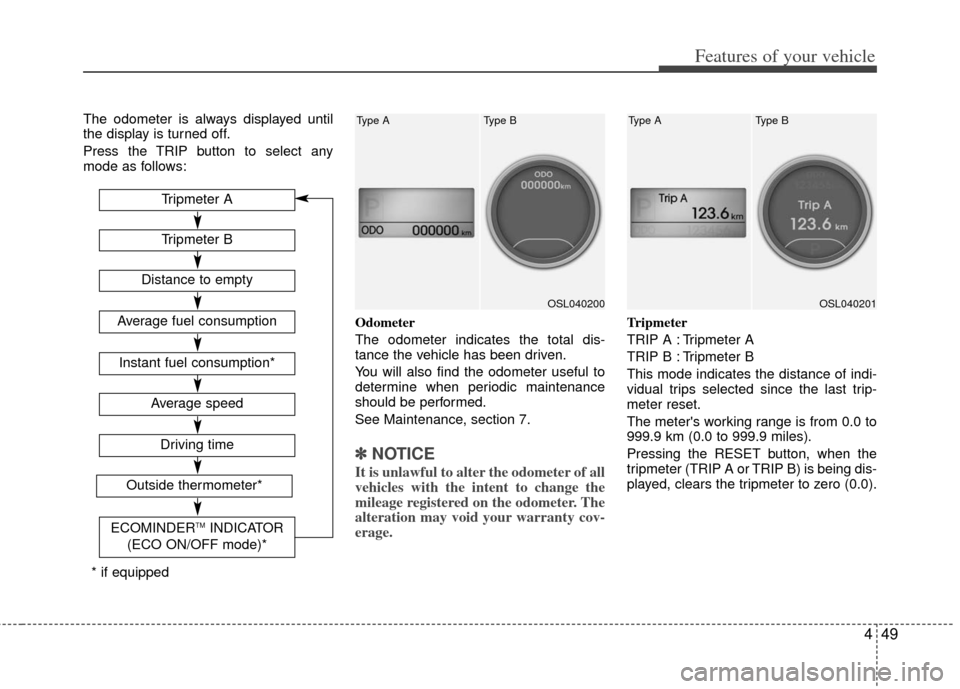
Press the TRIP button to select any
mode as follows:Odometer
The odometer indicates the total dis-
tance the vehicle has been driven.
You will also find the odometer useful to
determine when periodic maintenance
should be performed.
See Maintenance, section 7.
✽ ✽NOTICE
It is unlawful to alter the odometer of all
vehicles with the intent to change the
mileage registered on the odometer. The
alteration may void your warranty cov-
erage.
Tripmeter
TRIP A : Tripmeter A
TRIP B : Tripmeter B
This mode indicates the distance of indi-
vidual trips selected since the last trip-
meter reset.
The meter's working range is from 0.0 to
999.9 km (0.0 to 999.9 miles).
Pressing the RESET button, when the
tripmeter (TRIP A or TRIP B) is being dis-
played, clears the tripmeter to zero (0.0).
Tripmeter B
Average speed
Driving time
ECOMINDERTMINDICATOR
(ECO ON/OFF mode)*
Tripmeter A
Distance to empty
Average fuel consumption
Instant fuel consumption*
Outside thermometer*
* if equipped
OSL040200
Type B
Type AOSL040201
Type B
Type A
Page 140 of 387
Features of your vehicle
50
4
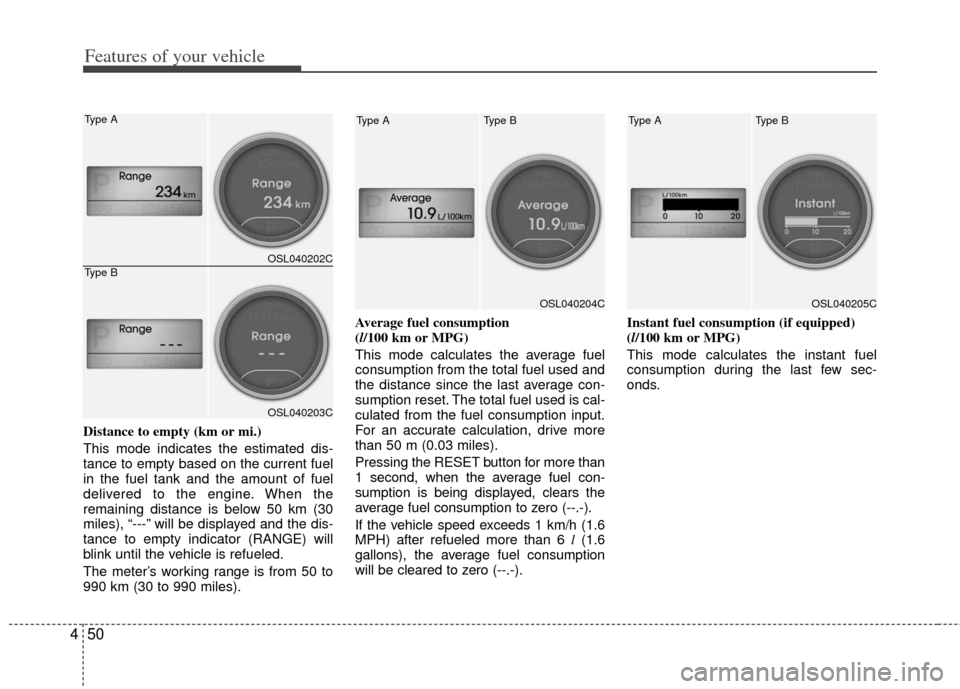
Distance to empty (km or mi.)
This mode indicates the estimated dis-
tance to empty based on the current fuel
in the fuel tank and the amount of fuel
delivered to the engine. When the
remaining distance is below 50 km (30
miles), “---” will be displayed and the dis-
tance to empty indicator (RANGE) will
blink until the vehicle is refueled.
The meter’s working range is from 50 to
990 km (30 to 990 miles). Average fuel consumption
(l/100 km or MPG)
This mode calculates the average fuel
consumption from the total fuel used and
the distance since the last average con-
sumption reset. The total fuel used is cal-
culated from the fuel consumption input.
For an accurate calculation, drive more
than 50 m (0.03 miles).
Pressing the RESET button for more than
1 second, when the average fuel con-
sumption is being displayed, clears the
average fuel consumption to zero (--.-).
If the vehicle speed exceeds 1 km/h (1.6
MPH) after refueled more than 6 l
(1.6
gallons), the average fuel consumption
will be cleared to zero (--.-). Instant fuel consumption (if equipped)
(l/100 km or MPG)
This mode calculates the instant fuel
consumption during the last few sec-
onds.
OSL040204C
Type B
Type AOSL040205C
Type B
Type A
OSL040202C
OSL040203C
Type A
Type B
Page 141 of 387
451
Features of your vehicle
✽
✽NOTICE
• If the vehicle is not on level ground or
the battery power has been interrupt-
ed, the “Distance to empty” function
may not operate correctly.
The trip computer may not register
additional fuel if less than 6 liters (1.6
gallons) of fuel are added to the vehi-
cle.
• The fuel consumption and distance to empty values may vary significantly
based on driving conditions, driving
habits, and condition of the vehicle.
• The distance to empty value is an esti- mate of the available driving distance.
This value may differ from the actual
driving distance available.
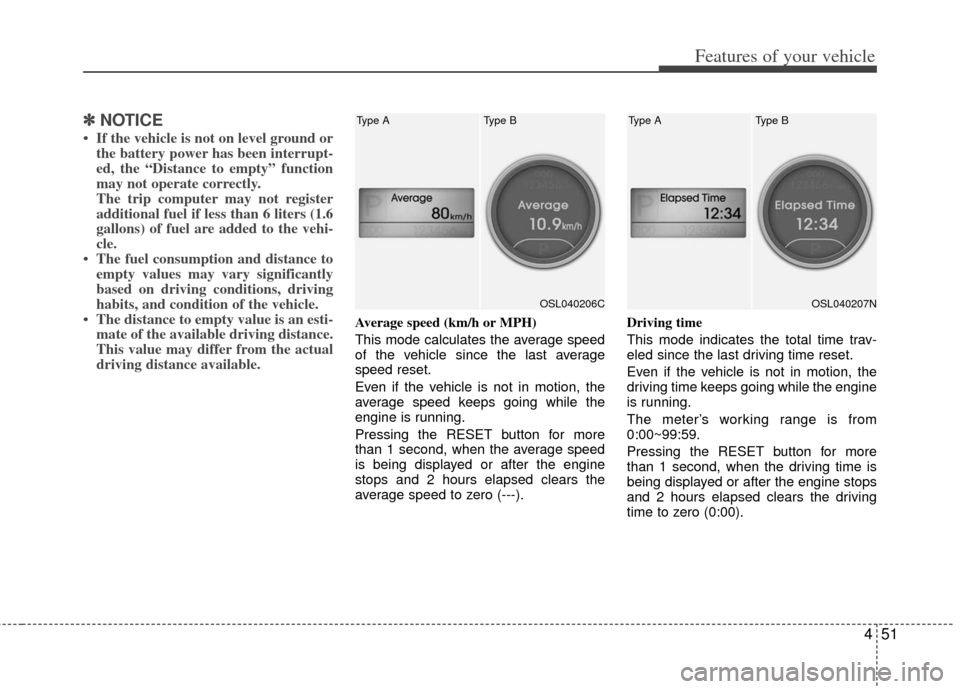
Average speed (km/h or MPH)
This mode calculates the average speed
of the vehicle since the last average
speed reset.
Even if the vehicle is not in motion, the
average speed keeps going while the
engine is running.
Pressing the RESET button for more
than 1 second, when the average speed
is being displayed or after the engine
stops and 2 hours elapsed clears the
average speed to zero (---). Driving time
This mode indicates the total time trav-
eled since the last driving time reset.
Even if the vehicle is not in motion, the
driving time keeps going while the engine
is running.
The meter’s working range is from
0:00~99:59.
Pressing the RESET button for more
than 1 second, when the driving time is
being displayed or after the engine stops
and 2 hours elapsed clears the driving
time to zero (0:00).
OSL040206C
Type B
Type AOSL040207N
Type B
Type A
Page 142 of 387
Features of your vehicle
52
4
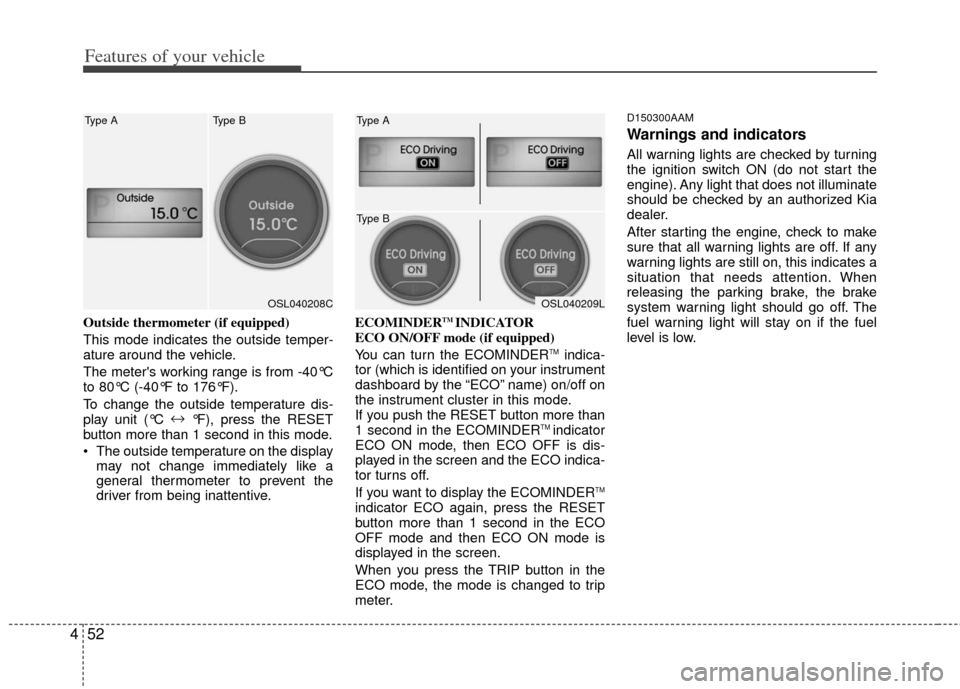
Outside thermometer (if equipped)
This mode indicates the outside temper-
ature around the vehicle.
The meter's working range is from -40°C
to 80°C (-40°F to 176°F).
To change the outside temperature dis-
play unit (°C ↔
°F), press the RESET
button more than 1 second in this mode.
The outside temperature on the display may not change immediately like a
general thermometer to prevent the
driver from being inattentive. ECOMINDERTM INDICATOR
ECO ON/OFF mode (if equipped)
You can turn the ECOMINDER
TMindica-
tor (which is identified on your instrument
dashboard by the “ECO” name) on/off on
the instrument cluster in this mode.
If you push the RESET button more than
1 second in the ECOMINDER
TM indicator
ECO ON mode, then ECO OFF is dis-
played in the screen and the ECO indica-
tor turns off.
If you want to display the ECOMINDER
TM
indicator ECO again, press the RESET
button more than 1 second in the ECO
OFF mode and then ECO ON mode is
displayed in the screen.
When you press the TRIP button in the
ECO mode, the mode is changed to trip
meter.
D150300AAM
Warnings and indicators
All warning lights are checked by turning
the ignition switch ON (do not start the
engine). Any light that does not illuminate
should be checked by an authorized Kia
dealer.
After starting the engine, check to make
sure that all warning lights are off. If any
warning lights are still on, this indicates a
situation that needs attention. When
releasing the parking brake, the brake
system warning light should go off. The
fuel warning light will stay on if the fuel
level is low.
OSL040208C
Type A Type BOSL040209L
Type A
Type B
Page 143 of 387
453
Features of your vehicle
D150301AAM-EU
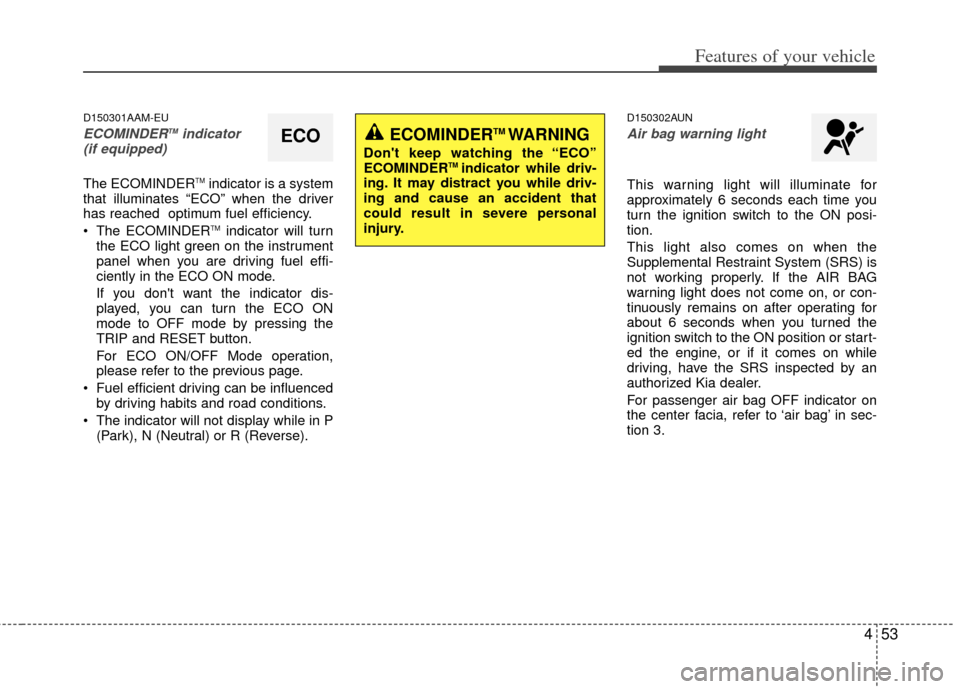
ECOMINDERTMindicator
(if equipped)
The ECOMINDERTMindicator is a system
that illuminates “ECO” when the driver
has reached optimum fuel efficiency.
The ECOMINDER
TMindicator will turn
the ECO light green on the instrument
panel when you are driving fuel effi-
ciently in the ECO ON mode.
If you don't want the indicator dis-
played, you can turn the ECO ON
mode to OFF mode by pressing the
TRIP and RESET button.
For ECO ON/OFF Mode operation,
please refer to the previous page.
Fuel efficient driving can be influenced by driving habits and road conditions.
The indicator will not display while in P (Park), N (Neutral) or R (Reverse).
D150302AUN
Air bag warning light
This warning light will illuminate for
approximately 6 seconds each time you
turn the ignition switch to the ON posi-
tion.
This light also comes on when the
Supplemental Restraint System (SRS) is
not working properly. If the AIR BAG
warning light does not come on, or con-
tinuously remains on after operating for
about 6 seconds when you turned the
ignition switch to the ON position or start-
ed the engine, or if it comes on while
driving, have the SRS inspected by an
authorized Kia dealer.
For passenger air bag OFF indicator on
the center facia, refer to ‘air bag’ in sec-
tion 3.
ECOECOMINDERTM WARNING
Don't keep watching the “ECO”
ECOMINDERTM indicator while driv-
ing. It may distract you while driv-
ing and cause an accident that
could result in severe personal
injury.
Page 146 of 387
Features of your vehicle
56
4
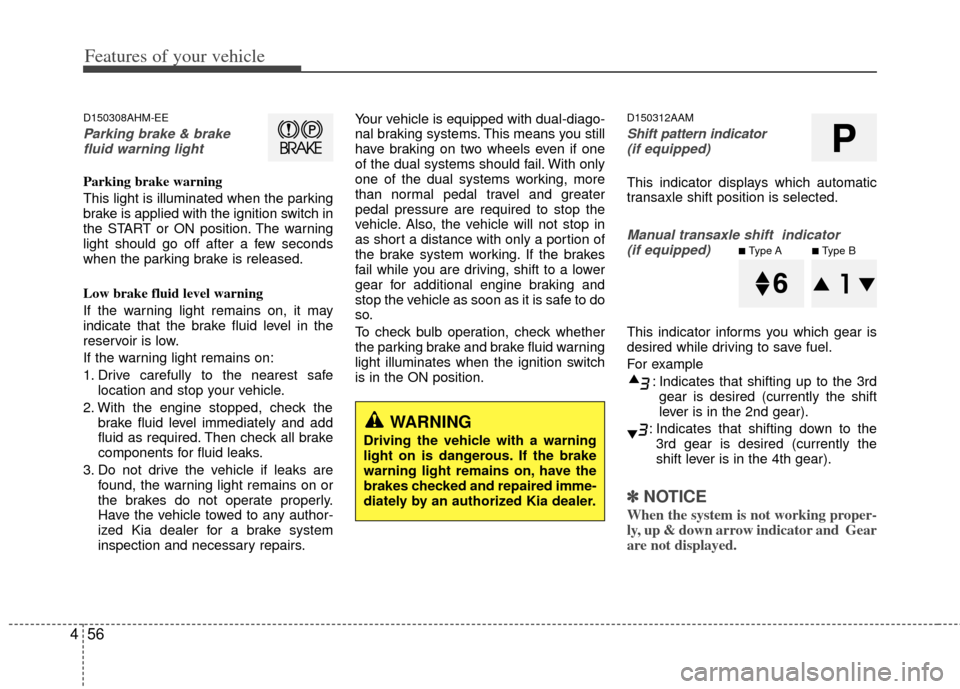
D150308AHM-EE
Parking brake & brake
fluid warning light
Parking brake warning
This light is illuminated when the parking
brake is applied with the ignition switch in
the START or ON position. The warning
light should go off after a few seconds
when the parking brake is released.
Low brake fluid level warning
If the warning light remains on, it may
indicate that the brake fluid level in the
reservoir is low.
If the warning light remains on:
1. Drive carefully to the nearest safe location and stop your vehicle.
2. With the engine stopped, check the brake fluid level immediately and add
fluid as required. Then check all brake
components for fluid leaks.
3. Do not drive the vehicle if leaks are found, the warning light remains on or
the brakes do not operate properly.
Have the vehicle towed to any author-
ized Kia dealer for a brake system
inspection and necessary repairs. Your vehicle is equipped with dual-diago-
nal braking systems. This means you still
have braking on two wheels even if one
of the dual systems should fail. With only
one of the dual systems working, more
than normal pedal travel and greater
pedal pressure are required to stop the
vehicle. Also, the vehicle will not stop in
as short a distance with only a portion of
the brake system working. If the brakes
fail while you are driving, shift to a lower
gear for additional engine braking and
stop the vehicle as soon as it is safe to do
so.
To check bulb operation, check whether
the parking brake and brake fluid warning
light illuminates when the ignition switch
is in the ON position.
D150312AAM
Shift pattern indicator
(if equipped)
This indicator displays which automatic
transaxle shift position is selected.
Manual transaxle shift indicator (if equipped)
This indicator informs you which gear is
desired while driving to save fuel.
For example
: Indicates that shifting up to the 3rdgear is desired (currently the shift
lever is in the 2nd gear).
: Indicates that shifting down to the 3rd gear is desired (currently the
shift lever is in the 4th gear).
✽ ✽ NOTICE
When the system is not working proper-
ly, up & down arrow indicator and Gear
are not displayed.
WARNING
Driving the vehicle with a warning
light on is dangerous. If the brake
warning light remains on, have the
brakes checked and repaired imme-
diately by an authorized Kia dealer.
P
■Type A■Type B
Page 151 of 387
461
Features of your vehicle
4WD LOCK indicator (if equipped)
The 4WD LOCK indicator light is illumi-
nated when the 4WD LOCK button is
pushed. The purpose of this 4WD LOCK
mode is to increase the drive power
when driving on wet pavement, snow-
covered roads and/or off-road. The 4WD
LOCK indicator light is turned off by
pushing the button again.
LCD display warning (if equipped)
Key not in vehicle
If the smart key is not in the vehicle and
if any door is opened or closed with the
ENGINE START/STOP button in the
ACC, ON, or START position, the warn-
ing illuminates on the LCD display. Also,
the chime sounds for 5 seconds when
the smart key is not in the vehicle and the
door is closed.
Always have the smart key with you.
Key not detected
If the smart key is not in the vehicle or is
not detected and you press the ENGINE
START/STOP button, the warning illumi-
nates on the LCD display for 10 seconds.
Also, the immobilizer indicator and the
key holder light blinks for 10 seconds.
Low key battery
If the ENGINE START/STOP button turns
to the OFF position when the smart key
in the vehicle discharges, the warning
illuminates on the LCD display for about
10 seconds. Also, the warning chime
sounds once.
Replace the battery with a new one. Press brake pedal to start engine
If the ENGINE START/STOP button turns
to the ACC position twice by pressing the
button repeatedly without depressing the
brake pedal, the warning illuminates on
the LCD display for about 10 seconds to
indicate that you should depress the
brake pedal to start the engine.
Press cluch pedal to start engine
If the ENGINE START/STOP button turns
to the ACC position twice by pressing the
button repeatedly without depressing the
clutch pedal, the warning illuminates on
the LCD display for about 10 seconds to
indicate that you should depress the
clutch pedal to start the engine.
Remove key
When you turn off the engine with the
smart key in the smart key holder, the
warning illuminates on the LCD display
for about 10 seconds. Also, the smart key
holder light blinks for about 10 seconds.
To remove the smart key push the smart
key once and pull it out from the smart
key holder.
CAUTION
Do not use 4WD LOCK mode on dry
paved roads or highway, it cancause noise, vibration or damage of4WD related parts.