ECO mode KIA Sportage 2013 SL / 3.G User Guide
[x] Cancel search | Manufacturer: KIA, Model Year: 2013, Model line: Sportage, Model: KIA Sportage 2013 SL / 3.GPages: 387, PDF Size: 8.44 MB
Page 140 of 387
Features of your vehicle
50
4
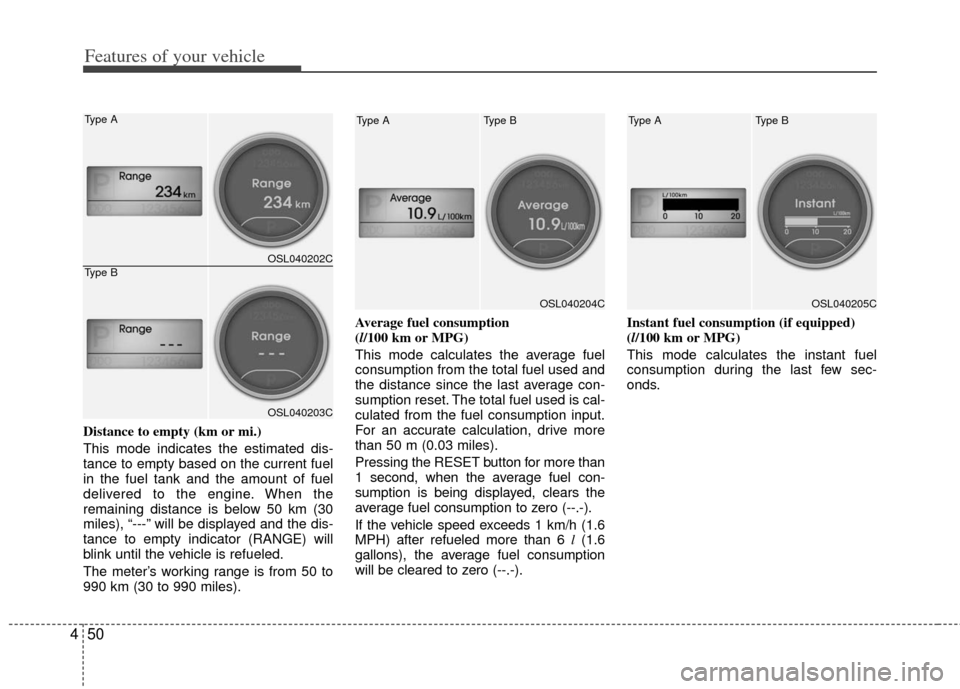
Distance to empty (km or mi.)
This mode indicates the estimated dis-
tance to empty based on the current fuel
in the fuel tank and the amount of fuel
delivered to the engine. When the
remaining distance is below 50 km (30
miles), “---” will be displayed and the dis-
tance to empty indicator (RANGE) will
blink until the vehicle is refueled.
The meter’s working range is from 50 to
990 km (30 to 990 miles). Average fuel consumption
(l/100 km or MPG)
This mode calculates the average fuel
consumption from the total fuel used and
the distance since the last average con-
sumption reset. The total fuel used is cal-
culated from the fuel consumption input.
For an accurate calculation, drive more
than 50 m (0.03 miles).
Pressing the RESET button for more than
1 second, when the average fuel con-
sumption is being displayed, clears the
average fuel consumption to zero (--.-).
If the vehicle speed exceeds 1 km/h (1.6
MPH) after refueled more than 6 l
(1.6
gallons), the average fuel consumption
will be cleared to zero (--.-). Instant fuel consumption (if equipped)
(l/100 km or MPG)
This mode calculates the instant fuel
consumption during the last few sec-
onds.
OSL040204C
Type B
Type AOSL040205C
Type B
Type A
OSL040202C
OSL040203C
Type A
Type B
Page 141 of 387
451
Features of your vehicle
✽
✽NOTICE
• If the vehicle is not on level ground or
the battery power has been interrupt-
ed, the “Distance to empty” function
may not operate correctly.
The trip computer may not register
additional fuel if less than 6 liters (1.6
gallons) of fuel are added to the vehi-
cle.
• The fuel consumption and distance to empty values may vary significantly
based on driving conditions, driving
habits, and condition of the vehicle.
• The distance to empty value is an esti- mate of the available driving distance.
This value may differ from the actual
driving distance available.
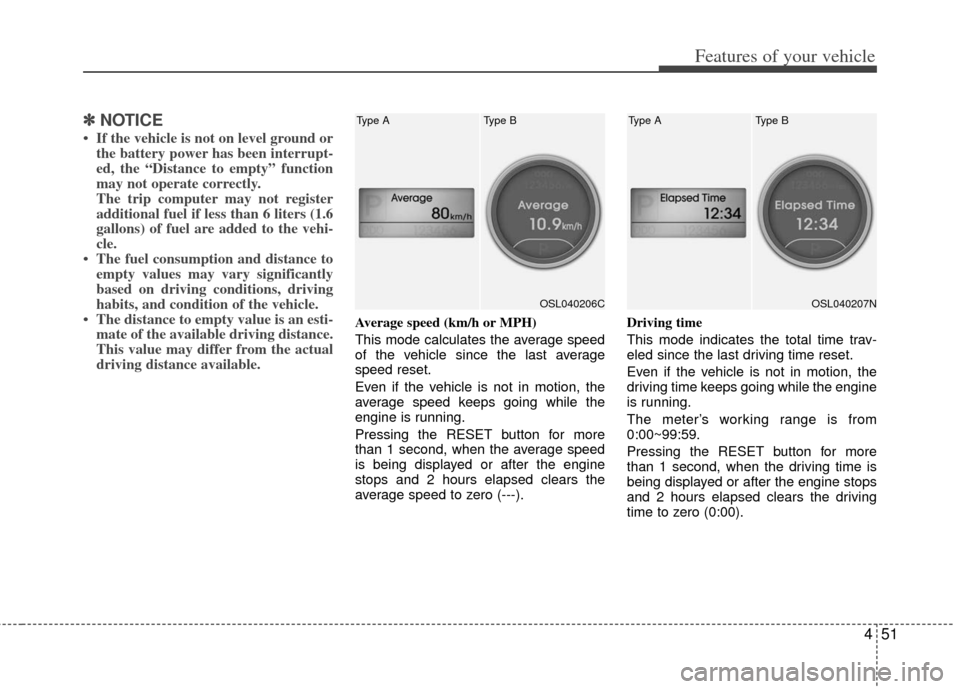
Average speed (km/h or MPH)
This mode calculates the average speed
of the vehicle since the last average
speed reset.
Even if the vehicle is not in motion, the
average speed keeps going while the
engine is running.
Pressing the RESET button for more
than 1 second, when the average speed
is being displayed or after the engine
stops and 2 hours elapsed clears the
average speed to zero (---). Driving time
This mode indicates the total time trav-
eled since the last driving time reset.
Even if the vehicle is not in motion, the
driving time keeps going while the engine
is running.
The meter’s working range is from
0:00~99:59.
Pressing the RESET button for more
than 1 second, when the driving time is
being displayed or after the engine stops
and 2 hours elapsed clears the driving
time to zero (0:00).
OSL040206C
Type B
Type AOSL040207N
Type B
Type A
Page 142 of 387
Features of your vehicle
52
4
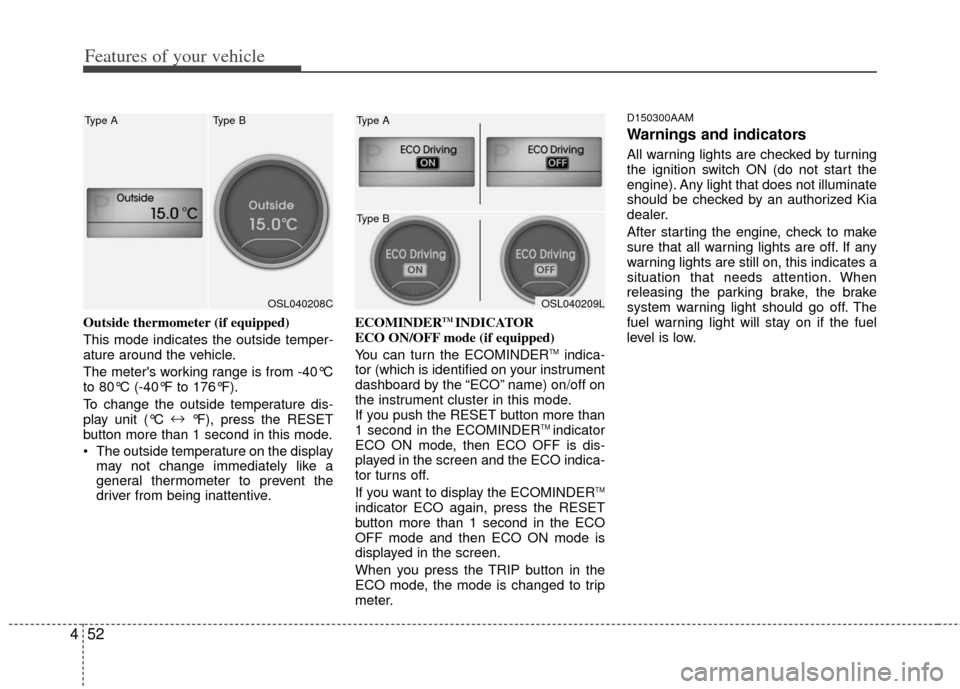
Outside thermometer (if equipped)
This mode indicates the outside temper-
ature around the vehicle.
The meter's working range is from -40°C
to 80°C (-40°F to 176°F).
To change the outside temperature dis-
play unit (°C ↔
°F), press the RESET
button more than 1 second in this mode.
The outside temperature on the display may not change immediately like a
general thermometer to prevent the
driver from being inattentive. ECOMINDERTM INDICATOR
ECO ON/OFF mode (if equipped)
You can turn the ECOMINDER
TMindica-
tor (which is identified on your instrument
dashboard by the “ECO” name) on/off on
the instrument cluster in this mode.
If you push the RESET button more than
1 second in the ECOMINDER
TM indicator
ECO ON mode, then ECO OFF is dis-
played in the screen and the ECO indica-
tor turns off.
If you want to display the ECOMINDER
TM
indicator ECO again, press the RESET
button more than 1 second in the ECO
OFF mode and then ECO ON mode is
displayed in the screen.
When you press the TRIP button in the
ECO mode, the mode is changed to trip
meter.
D150300AAM
Warnings and indicators
All warning lights are checked by turning
the ignition switch ON (do not start the
engine). Any light that does not illuminate
should be checked by an authorized Kia
dealer.
After starting the engine, check to make
sure that all warning lights are off. If any
warning lights are still on, this indicates a
situation that needs attention. When
releasing the parking brake, the brake
system warning light should go off. The
fuel warning light will stay on if the fuel
level is low.
OSL040208C
Type A Type BOSL040209L
Type A
Type B
Page 143 of 387
453
Features of your vehicle
D150301AAM-EU
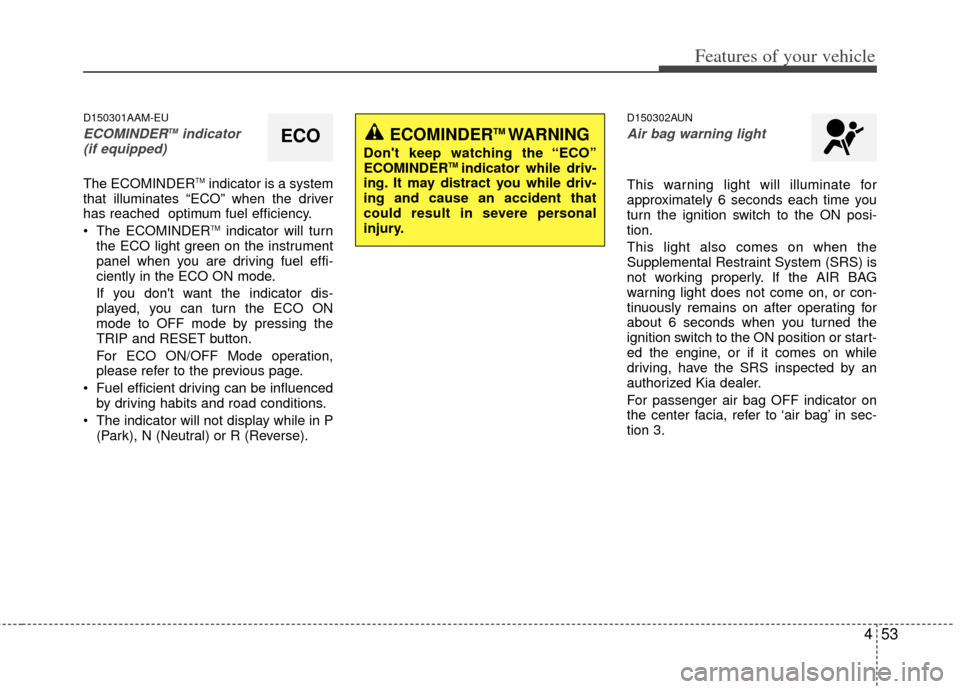
ECOMINDERTMindicator
(if equipped)
The ECOMINDERTMindicator is a system
that illuminates “ECO” when the driver
has reached optimum fuel efficiency.
The ECOMINDER
TMindicator will turn
the ECO light green on the instrument
panel when you are driving fuel effi-
ciently in the ECO ON mode.
If you don't want the indicator dis-
played, you can turn the ECO ON
mode to OFF mode by pressing the
TRIP and RESET button.
For ECO ON/OFF Mode operation,
please refer to the previous page.
Fuel efficient driving can be influenced by driving habits and road conditions.
The indicator will not display while in P (Park), N (Neutral) or R (Reverse).
D150302AUN
Air bag warning light
This warning light will illuminate for
approximately 6 seconds each time you
turn the ignition switch to the ON posi-
tion.
This light also comes on when the
Supplemental Restraint System (SRS) is
not working properly. If the AIR BAG
warning light does not come on, or con-
tinuously remains on after operating for
about 6 seconds when you turned the
ignition switch to the ON position or start-
ed the engine, or if it comes on while
driving, have the SRS inspected by an
authorized Kia dealer.
For passenger air bag OFF indicator on
the center facia, refer to ‘air bag’ in sec-
tion 3.
ECOECOMINDERTM WARNING
Don't keep watching the “ECO”
ECOMINDERTM indicator while driv-
ing. It may distract you while driv-
ing and cause an accident that
could result in severe personal
injury.
Page 149 of 387
459
Features of your vehicle
D150323AAM-EU
ESC (Electronic StabilityControl) indicator
The ESC indicator will illuminate when
the ignition switch is turned ON, but
should go off after approximately 3 sec-
onds. When the ESC is on, it monitors
the driving conditions and under normal
driving conditions, the ESC indicator will
remain off. When a slippery or low trac-
tion condition is encountered, the ESC
will operate, and the ESC indicator will
blink to indicate the ESC is operating.
If this indicator illuminates and stays on,
the ESC may have malfunctioned. Take
your vehicle to an authorized Kia dealer
and have the system checked.
D150324AAM-EU
ESC OFF indicator
The ESC OFF indicator will illuminate
when the ignition switch is turned ON,
but should go off after approximately 3
seconds. To switch to ESC OFF mode,
press the ESC OFF button. The ESC
OFF indicator will illuminate indicating
the ESC is deactivated.
✽ ✽ NOTICE
No system, no matter how advanced, can
compensate for all driver error and/or
driving conditions. Always drive respon-
sibly.
DBC (Downhill brake con-
trol) indicator (if equipped)
The DBC indicator will illuminate when
the DBC button is pressed and the sys-
tem is on.
When driving down a steep hill at a
speed under 35 km/h (22 mph), the DBC
will operate and the DBC indicator will
blink to indicate the DBC is operating.
If the red indicator illuminates, the DBC
system may have malfunctioned. Take
your vehicle to an authorized Kia dealer
and have the system checked.
Page 151 of 387
461
Features of your vehicle
4WD LOCK indicator (if equipped)
The 4WD LOCK indicator light is illumi-
nated when the 4WD LOCK button is
pushed. The purpose of this 4WD LOCK
mode is to increase the drive power
when driving on wet pavement, snow-
covered roads and/or off-road. The 4WD
LOCK indicator light is turned off by
pushing the button again.
LCD display warning (if equipped)
Key not in vehicle
If the smart key is not in the vehicle and
if any door is opened or closed with the
ENGINE START/STOP button in the
ACC, ON, or START position, the warn-
ing illuminates on the LCD display. Also,
the chime sounds for 5 seconds when
the smart key is not in the vehicle and the
door is closed.
Always have the smart key with you.
Key not detected
If the smart key is not in the vehicle or is
not detected and you press the ENGINE
START/STOP button, the warning illumi-
nates on the LCD display for 10 seconds.
Also, the immobilizer indicator and the
key holder light blinks for 10 seconds.
Low key battery
If the ENGINE START/STOP button turns
to the OFF position when the smart key
in the vehicle discharges, the warning
illuminates on the LCD display for about
10 seconds. Also, the warning chime
sounds once.
Replace the battery with a new one. Press brake pedal to start engine
If the ENGINE START/STOP button turns
to the ACC position twice by pressing the
button repeatedly without depressing the
brake pedal, the warning illuminates on
the LCD display for about 10 seconds to
indicate that you should depress the
brake pedal to start the engine.
Press cluch pedal to start engine
If the ENGINE START/STOP button turns
to the ACC position twice by pressing the
button repeatedly without depressing the
clutch pedal, the warning illuminates on
the LCD display for about 10 seconds to
indicate that you should depress the
clutch pedal to start the engine.
Remove key
When you turn off the engine with the
smart key in the smart key holder, the
warning illuminates on the LCD display
for about 10 seconds. Also, the smart key
holder light blinks for about 10 seconds.
To remove the smart key push the smart
key once and pull it out from the smart
key holder.
CAUTION
Do not use 4WD LOCK mode on dry
paved roads or highway, it cancause noise, vibration or damage of4WD related parts.
Page 176 of 387
Features of your vehicle
86
4
✽
✽
NOTICE
• When using the air conditioning sys-
tem, monitor the temperature gauge
closely while driving up hills or in
heavy traffic when outside tempera-
tures are high. Air conditioning sys-
tem operation may cause engine over-
heating. Continue to use the blower
fan but turn the air conditioning sys-
tem off if the temperature gauge indi-
cates engine overheating.
• When opening the windows in humid weather air conditioning may create
water droplets inside the vehicle.
Since excessive water droplets may
cause damage to electrical equipment,
air conditioning should only be used
with the windows closed.
Air conditioning system operation tips
If the vehicle has been parked in direct
sunlight during hot weather, open the
windows for a short time to let the hot
air inside the vehicle escape.
To help reduce moisture inside of the windows on rainy or humid days,
decrease the humidity inside the vehi-
cle by operating the air conditioning
system.
During air conditioning system opera- tion, you may occasionally notice a
slight change in engine speed as the
air conditioning compressor cycles.
This is a normal system operation
characteristic.
Use the air conditioning system every month only for a few minutes to ensure
maximum system performance. When using the air conditioning sys-
tem, you may notice clear water drip-
ping (or even puddling) on the ground
under the passenger side of the vehi-
cle. This is a normal system operation
characteristic.
Operating the air conditioning system in the recirculated air position provides
maximum cooling, however, continual
operation in this mode may cause the
air inside the vehicle to become stale.
During cooling operation, you may occasionally notice a misty air flow
because of rapid cooling and humid air
intake. This is a normal system opera-
tion characteristic.
Page 182 of 387
Features of your vehicle
92
4
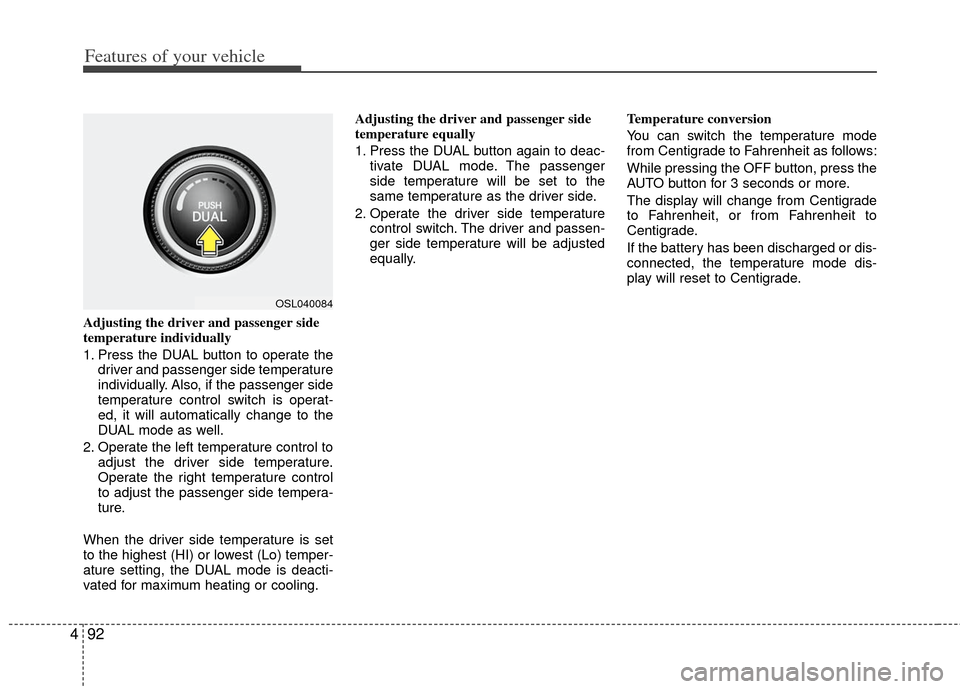
Adjusting the driver and passenger side
temperature individually
1. Press the DUAL button to operate the
driver and passenger side temperature
individually. Also, if the passenger side
temperature control switch is operat-
ed, it will automatically change to the
DUAL mode as well.
2. Operate the left temperature control to adjust the driver side temperature.
Operate the right temperature control
to adjust the passenger side tempera-
ture.
When the driver side temperature is set
to the highest (HI) or lowest (Lo) temper-
ature setting, the DUAL mode is deacti-
vated for maximum heating or cooling. Adjusting the driver and passenger side
temperature equally
1. Press the DUAL button again to deac-
tivate DUAL mode. The passenger
side temperature will be set to the
same temperature as the driver side.
2. Operate the driver side temperature control switch. The driver and passen-
ger side temperature will be adjusted
equally. Temperature conversion
You can switch the temperature mode
from Centigrade to Fahrenheit as follows:
While pressing the OFF button, press the
AUTO button for 3 seconds or more.
The display will change from Centigrade
to Fahrenheit, or from Fahrenheit to
Centigrade.
If the battery has been discharged or dis-
connected, the temperature mode dis-
play will reset to Centigrade.
OSL040084
Page 187 of 387
497
Features of your vehicle
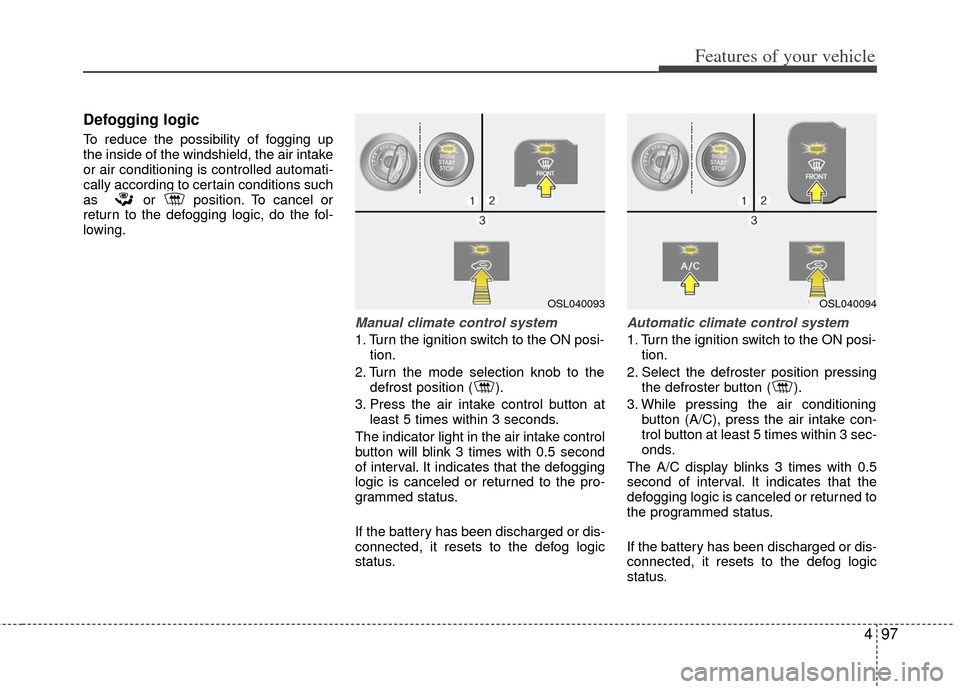
Defogging logic
To reduce the possibility of fogging up
the inside of the windshield, the air intake
or air conditioning is controlled automati-
cally according to certain conditions such
as or position. To cancel or
return to the defogging logic, do the fol-
lowing.
Manual climate control system
1. Turn the ignition switch to the ON posi-tion.
2. Turn the mode selection knob to the defrost position ( ).
3. Press the air intake control button at least 5 times within 3 seconds.
The indicator light in the air intake control
button will blink 3 times with 0.5 second
of interval. It indicates that the defogging
logic is canceled or returned to the pro-
grammed status.
If the battery has been discharged or dis-
connected, it resets to the defog logic
status.
Automatic climate control system
1. Turn the ignition switch to the ON posi- tion.
2. Select the defroster position pressing the defroster button ( ).
3. While pressing the air conditioning button (A/C), press the air intake con-
trol button at least 5 times within 3 sec-
onds.
The A/C display blinks 3 times with 0.5
second of interval. It indicates that the
defogging logic is canceled or returned to
the programmed status.
If the battery has been discharged or dis-
connected, it resets to the defog logic
status.
OSL040093OSL040094
Page 199 of 387
4109
Features of your vehicle
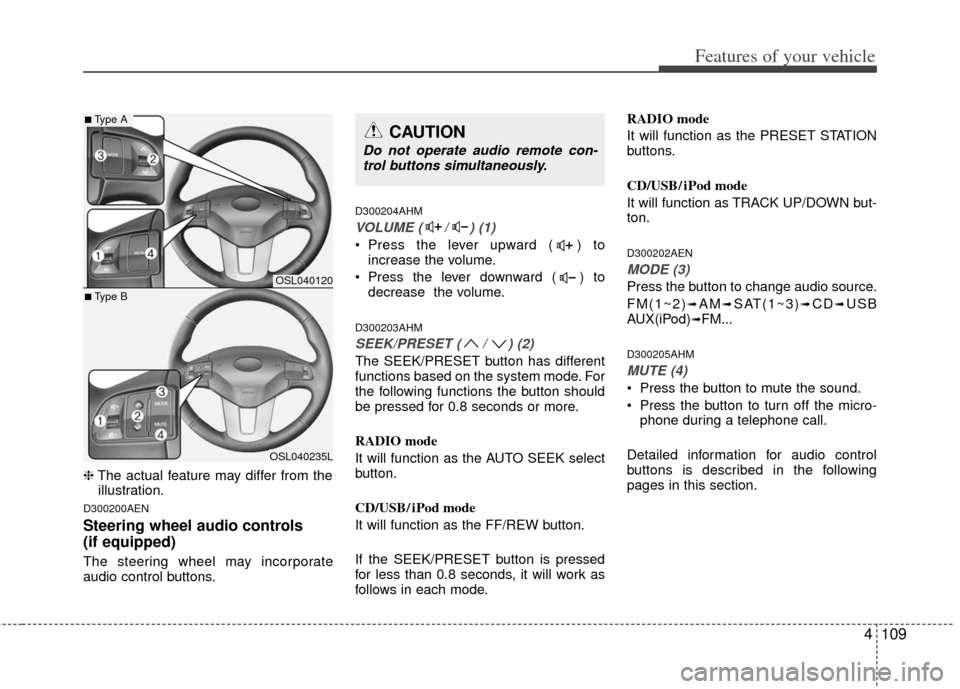
❈The actual feature may differ from the
illustration.
D300200AEN
Steering wheel audio controls
(if equipped)
The steering wheel may incorporate
audio control buttons.
D300204AHM
VOLUME ( / ) (1)
• Press the lever upward ( ) to increase the volume.
Press the lever downward ( ) to decrease the volume.
D300203AHM
SEEK/PRESET ( / ) (2)
The SEEK/PRESET button has different
functions based on the system mode. For
the following functions the button should
be pressed for 0.8 seconds or more.
RADIO mode
It will function as the AUTO SEEK select
button.
CD/USB/ iPod mode
It will function as the FF/REW button.
If the SEEK/PRESET button is pressed
for less than 0.8 seconds, it will work as
follows in each mode. RADIO mode
It will function as the PRESET STATION
buttons.
CD/USB/ iPod mode
It will function as TRACK UP/DOWN but-
ton.
D300202AEN
MODE (3)
Press the button to change audio source.
FM(1~2)
➟AM➟SAT(1~3)➟CD➟USB
AUX(iPod)➟FM...
D300205AHM
MUTE (4)
Press the button to mute the sound.
Press the button to turn off the micro- phone during a telephone call.
Detailed information for audio control
buttons is described in the following
pages in this section.
OSL040120
OSL040235L
■Type A
■Type B
CAUTION
Do not operate audio remote con- trol buttons simultaneously.