headrest KIA Sportage 2014 SL / 3.G Owner's Manual
[x] Cancel search | Manufacturer: KIA, Model Year: 2014, Model line: Sportage, Model: KIA Sportage 2014 SL / 3.GPages: 457, PDF Size: 11.61 MB
Page 17 of 457
Safety features of your vehicle
23
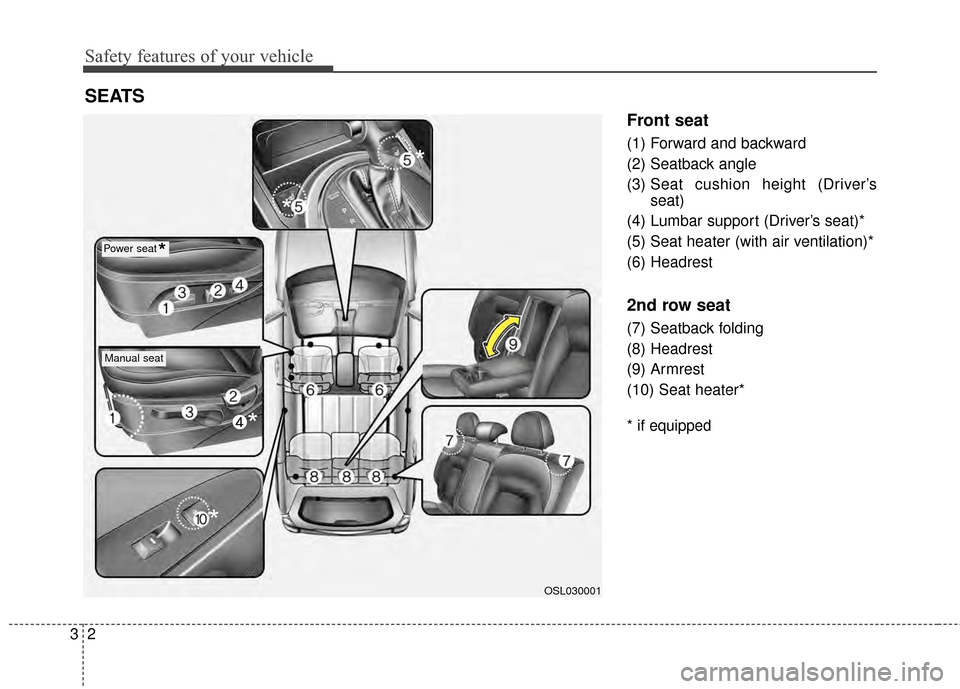
Front seat
(1) Forward and backward
(2) Seatback angle
(3) Seat cushion height (Driver’sseat)
(4) Lumbar support (Driver’s seat)*
(5) Seat heater (with air ventilation)*
(6) Headrest
2nd row seat
(7) Seatback folding
(8) Headrest
(9) Armrest
(10) Seat heater*
* if equipped
SEATS
OSL030001
Manual seat
Power seat
*
* *
*
*
Page 24 of 457
39
Safety features of your vehicle
C010104AHM
Front headrest
The driver's and front passenger's
seats are equipped with a headrest
for the occupant's safety and com-
for t.
The headrest not only provides com-
fort for the driver and front passen-
ger, but also helps protect the head
and neck in the event of a rear colli-
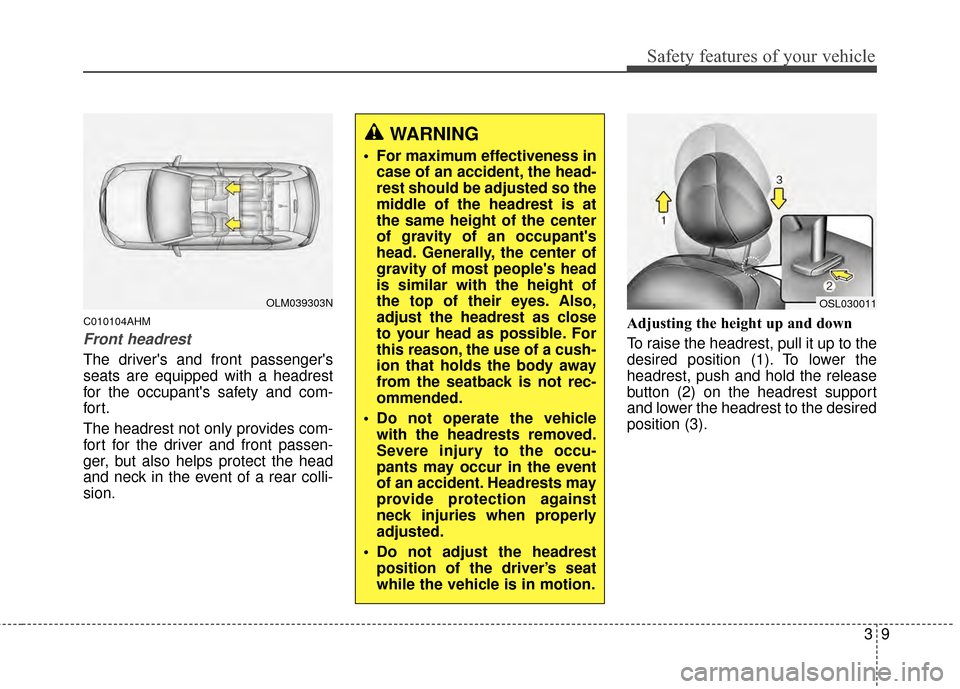
sion.Adjusting the height up and down
To raise the headrest, pull it up to the
desired position (1). To lower the
headrest, push and hold the release
button (2) on the headrest support
and lower the headrest to the desired
position (3).
WARNING
For maximum effectiveness in
case of an accident, the head-
rest should be adjusted so the
middle of the headrest is at
the same height of the center
of gravity of an occupant's
head. Generally, the center of
gravity of most people's head
is similar with the height of
the top of their eyes. Also,
adjust the headrest as close
to your head as possible. For
this reason, the use of a cush-
ion that holds the body away
from the seatback is not rec-
ommended.
Do not operate the vehicle with the headrests removed.
Severe injury to the occu-
pants may occur in the event
of an accident. Headrests may
provide protection against
neck injuries when properly
adjusted.
Do not adjust the headrest position of the driver’s seat
while the vehicle is in motion.
OSL030011OLM039303N
Page 25 of 457
Safety features of your vehicle
10
3
Forward and backward adjustment
(if equipped)
The headrest may be adjusted for-
ward to several different positions by
pulling the headrest foward and
upward at 30 to 45 degrees.
To adjust the headrest to it's furthest
backward position, pull it fully for-
ward to the farthest position and
release it.
Adjust the headrest so that it proper-
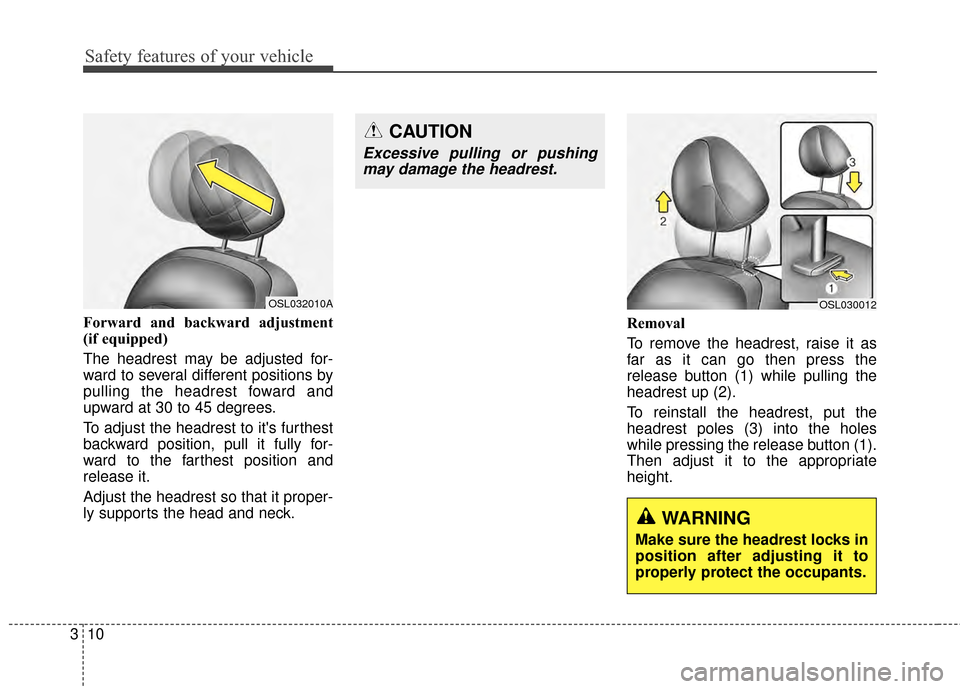
ly supports the head and neck. Removal
To remove the headrest, raise it as
far as it can go then press the
release button (1) while pulling the
headrest up (2).
To reinstall the headrest, put the
headrest poles (3) into the holes
while pressing the release button (1).
Then adjust it to the appropriate
height.
CAUTION
Excessive pulling or pushing
may damage the headrest.
WARNING
Make sure the headrest locks in
position after adjusting it to
properly protect the occupants.
OSL032010AOSL030012
Page 26 of 457
311
Safety features of your vehicle
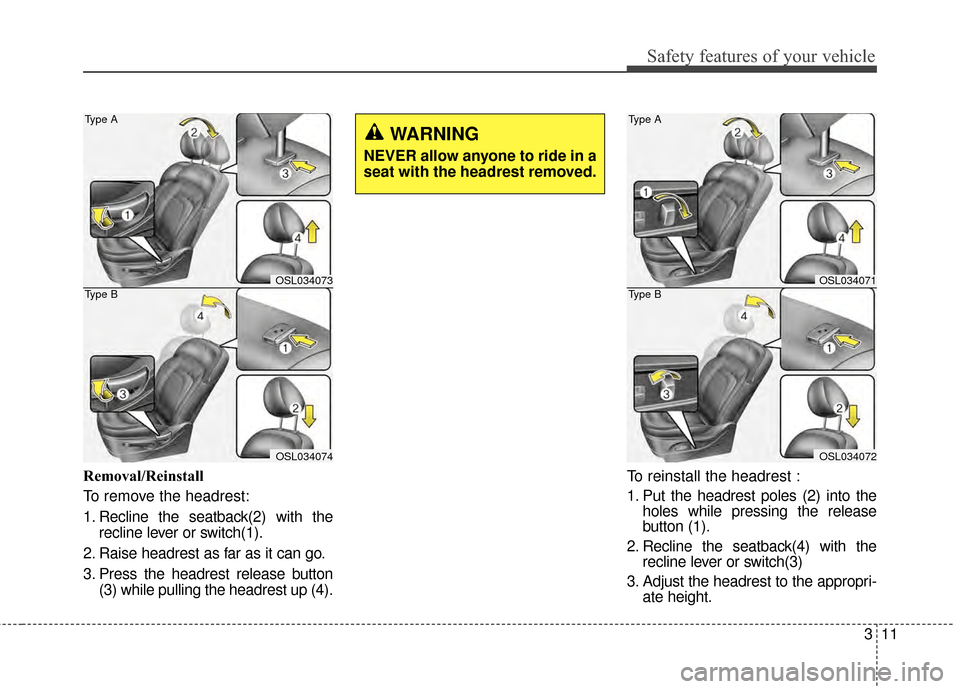
Removal/Reinstall
To remove the headrest:
1. Recline the seatback(2) with therecline lever or switch(1).
2. Raise headrest as far as it can go.
3. Press the headrest release button (3) while pulling the headrest up (4). To reinstall the headrest :
1. Put the headrest poles (2) into the
holes while pressing the release
button (1).
2. Recline the seatback(4) with the recline lever or switch(3)
3. Adjust the headrest to the appropri- ate height.
WARNING
NEVER allow anyone to ride in a
seat with the headrest removed.
OSL034073
OSL034074
Type A
Type BOSL034071
OSL034072
Type A
Type B
Page 27 of 457
Safety features of your vehicle
12
3
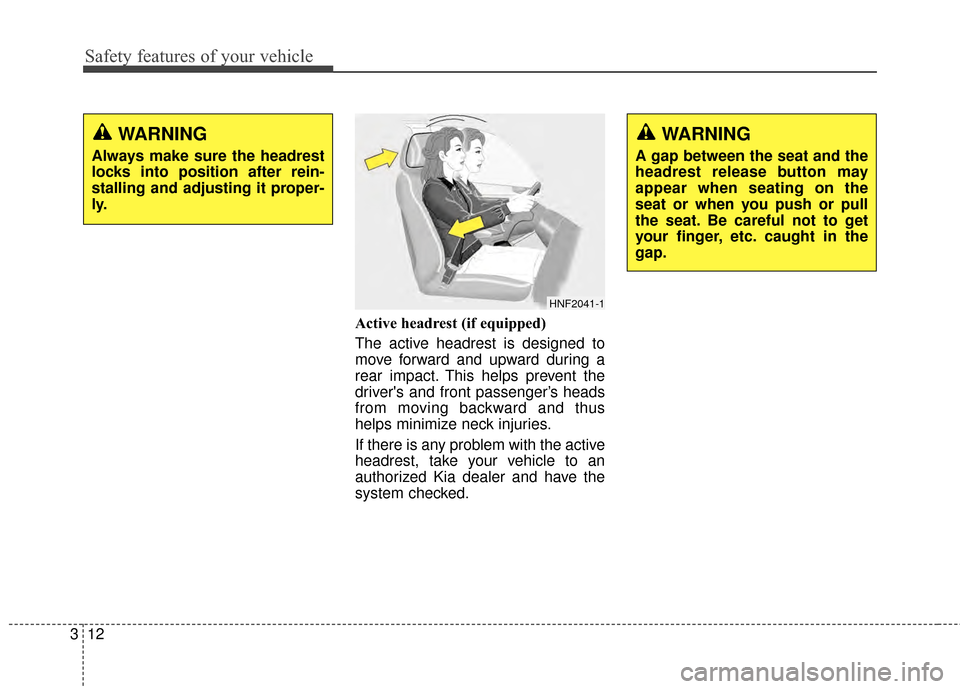
Active headrest (if equipped)
The active headrest is designed to
move forward and upward during a
rear impact. This helps prevent the
driver's and front passenger’s heads
from moving backward and thus
helps minimize neck injuries.
If there is any problem with the active
headrest, take your vehicle to an
authorized Kia dealer and have the
system checked.
HNF2041-1
WARNING
A gap between the seat and the
headrest release button may
appear when seating on the
seat or when you push or pull
the seat. Be careful not to get
your finger, etc. caught in the
gap.
WARNING
Always make sure the headrest
locks into position after rein-
stalling and adjusting it proper-
ly.
Page 32 of 457
317
Safety features of your vehicle
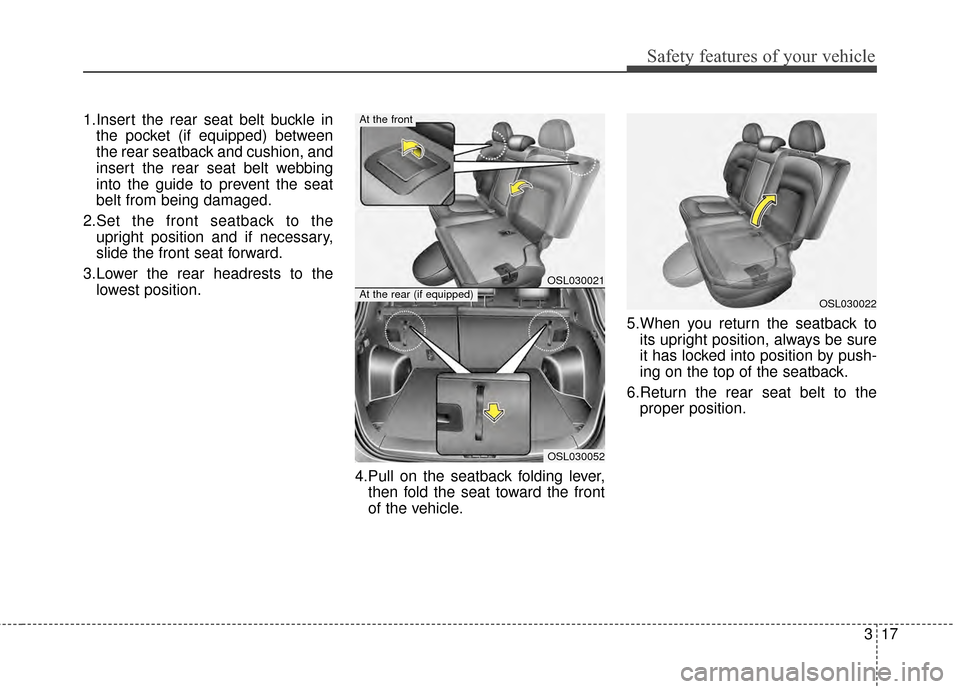
1.Insert the rear seat belt buckle inthe pocket (if equipped) between
the rear seatback and cushion, and
insert the rear seat belt webbing
into the guide to prevent the seat
belt from being damaged.
2.Set the front seatback to the upright position and if necessary,
slide the front seat forward.
3.Lower the rear headrests to the lowest position.
4.Pull on the seatback folding lever,then fold the seat toward the front
of the vehicle. 5.When you return the seatback to
its upright position, always be sure
it has locked into position by push-
ing on the top of the seatback.
6.Return the rear seat belt to the proper position.
OSL030022
OSL030021
OSL030052
At the front
At the rear (if equipped)
Page 34 of 457
319
Safety features of your vehicle
C010303AHM
Headrest
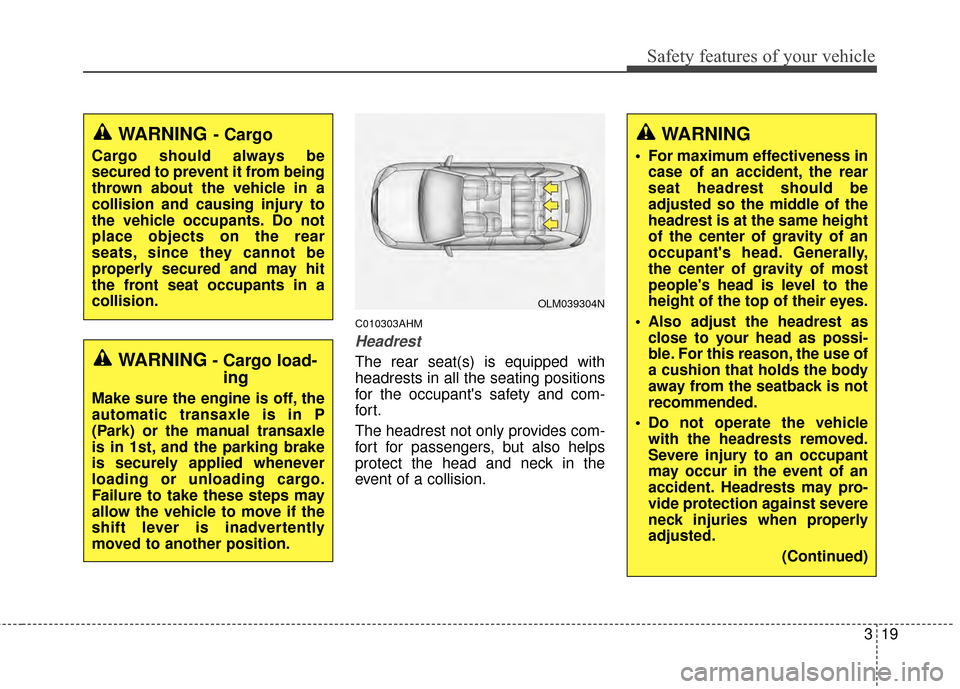
The rear seat(s) is equipped with
headrests in all the seating positions
for the occupant's safety and com-
for t.
The headrest not only provides com-
fort for passengers, but also helps
protect the head and neck in the
event of a collision.
OLM039304N
WARNING
For maximum effectiveness incase of an accident, the rear
seat headrest should be
adjusted so the middle of the
headrest is at the same height
of the center of gravity of an
occupant's head. Generally,
the center of gravity of most
people's head is level to the
height of the top of their eyes.
Also adjust the headrest as close to your head as possi-
ble. For this reason, the use of
a cushion that holds the body
away from the seatback is not
recommended.
Do not operate the vehicle with the headrests removed.
Severe injury to an occupant
may occur in the event of an
accident. Headrests may pro-
vide protection against severe
neck injuries when properly
adjusted.
(Continued)
WARNING- Cargo load-ing
Make sure the engine is off, the
automatic transaxle is in P
(Park) or the manual transaxle
is in 1st, and the parking brake
is securely applied whenever
loading or unloading cargo.
Failure to take these steps may
allow the vehicle to move if the
shift lever is inadvertently
moved to another position.
WARNING- Cargo
Cargo should always be
secured to prevent it from being
thrown about the vehicle in a
collision and causing injury to
the vehicle occupants. Do not
place objects on the rear
seats, since they cannot be
properly secured and may hit
the front seat occupants in a
collision.
Page 35 of 457
Safety features of your vehicle
20
3
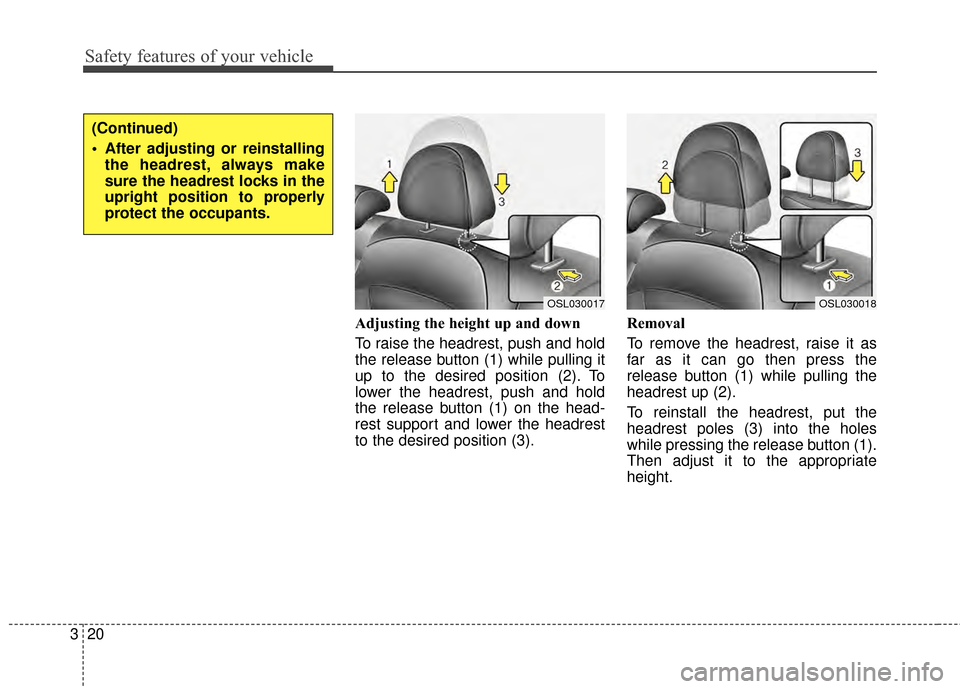
Adjusting the height up and down
To raise the headrest, push and hold
the release button (1) while pulling it
up to the desired position (2). To
lower the headrest, push and hold
the release button (1) on the head-
rest support and lower the headrest
to the desired position (3). Removal
To remove the headrest, raise it as
far as it can go then press the
release button (1) while pulling the
headrest up (2).
To reinstall the headrest, put the
headrest poles (3) into the holes
while pressing the release button (1).
Then adjust it to the appropriate
height.
OSL030018OSL030017
(Continued)
After adjusting or reinstalling
the headrest, always make
sure the headrest locks in the
upright position to properly
protect the occupants.
Page 59 of 457
Safety features of your vehicle
44
3
When the seat belt is allowed to
retract to its fully stowed position,
the retractor will automatically
switch from the “Auto Lock” mode
to the emergency lock mode for
normal adult usage.
C030103AEN
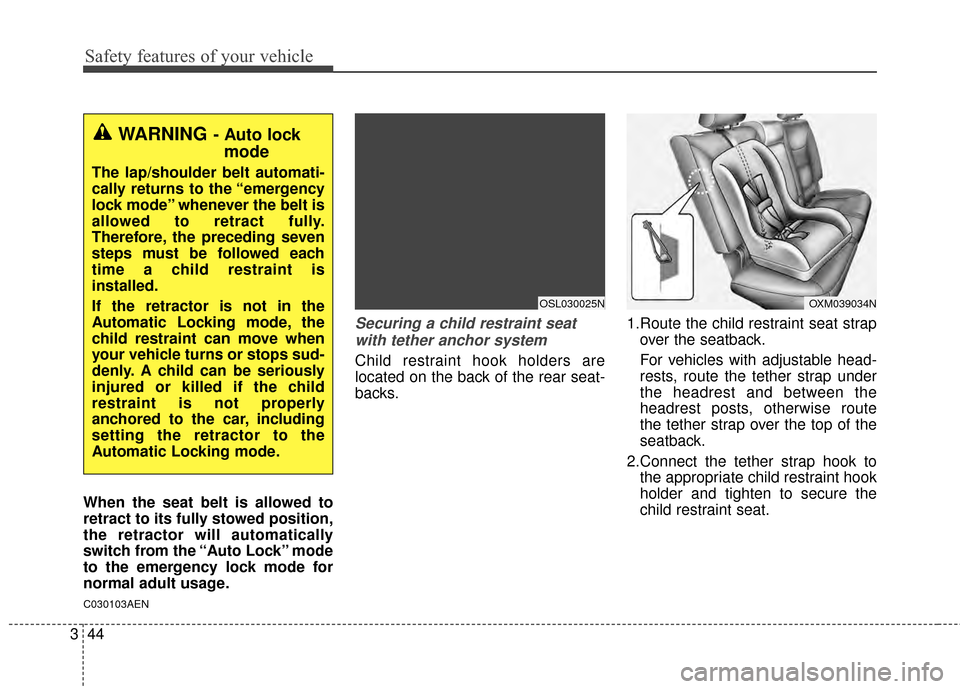
Securing a child restraint seat
with tether anchor system
Child restraint hook holders are
located on the back of the rear seat-
backs. 1.Route the child restraint seat strap
over the seatback.
For vehicles with adjustable head-
rests, route the tether strap under
the headrest and between the
headrest posts, otherwise route
the tether strap over the top of the
seatback.
2.Connect the tether strap hook to the appropriate child restraint hook
holder and tighten to secure the
child restraint seat.
OXM039034NOSL030025N
WARNING- Auto lockmode
The lap/shoulder belt automati-
cally returns to the “emergency
lock mode” whenever the belt is
allowed to retract fully.
Therefore, the preceding seven
steps must be followed each
time a child restraint is
installed.
If the retractor is not in the
Automatic Locking mode, the
child restraint can move when
your vehicle turns or stops sud-
denly. A child can be seriously
injured or killed if the child
restraint is not properly
anchored to the car, including
setting the retractor to the
Automatic Locking mode.