automatic KIA Sportage 2017 QL / 4.G Owner's Guide
[x] Cancel search | Manufacturer: KIA, Model Year: 2017, Model line: Sportage, Model: KIA Sportage 2017 QL / 4.GPages: 595, PDF Size: 16.22 MB
Page 141 of 595
Features of your vehicle
56
4
✽ ✽
NOTICE
After adjustment, sometimes the
lock release lever may not lock the
steering wheel. It is not a malfunc-
tion. This occurs when two gears are
not engaged correctly. In this case,
adjust the steering wheel again and
then lock the steering wheel.
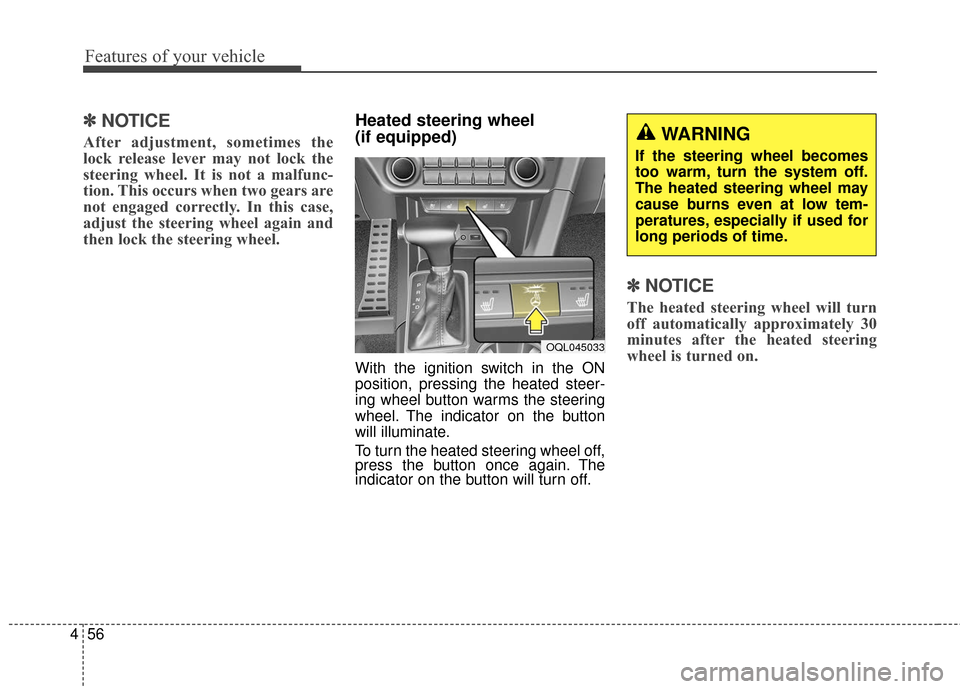
Heated steering wheel
(if equipped)
With the ignition switch in the ON
position, pressing the heated steer-
ing wheel button warms the steering
wheel. The indicator on the button
will illuminate.
To turn the heated steering wheel off,
press the button once again. The
indicator on the button will turn off.
✽ ✽NOTICE
The heated steering wheel will turn
off automatically approximately 30
minutes after the heated steering
wheel is turned on.
WARNING
If the steering wheel becomes
too warm, turn the system off.
The heated steering wheel may
cause burns even at low tem-
peratures, especially if used for
long periods of time.
OQL045033
Page 144 of 595
459
Features of your vehicle
Electric chromatic mirror (ECM) (if equipped)
The electric rearview mirror automat-
ically controls the glare from the
headlights of the vehicles behind you
in nighttime or low light driving condi-
tions. The sensor mounted in the mir-
ror senses the light level around the
vehicle and automatically controls
the headlight glare from the vehicles
behind you.
When the engine is running, the
glare is automatically controlled by
the sensor mounted in the rearview
mirror.
Whenever the shift lever is shifted
into reverse (R), the mirror will auto-
matically go to the brightest setting in
order to improve the drivers view
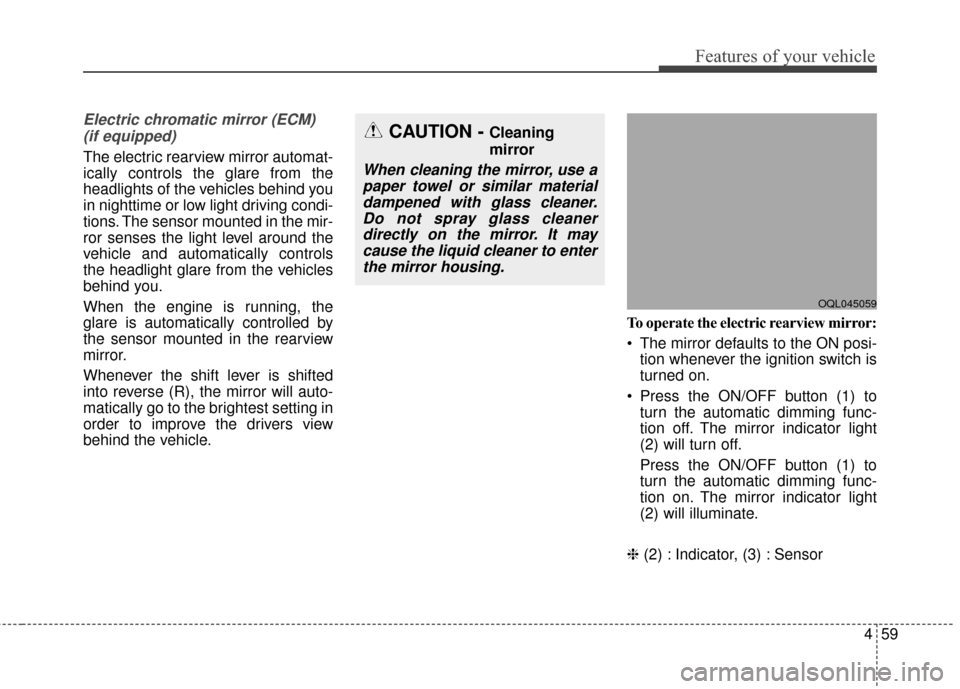
behind the vehicle. To operate the electric rearview mirror:
The mirror defaults to the ON posi-
tion whenever the ignition switch is
turned on.
Press the ON/OFF button (1) to turn the automatic dimming func-
tion off. The mirror indicator light
(2) will turn off.
Press the ON/OFF button (1) to
turn the automatic dimming func-
tion on. The mirror indicator light
(2) will illuminate.
❈ (2) : Indicator, (3) : Sensor
CAUTION - Cleaning
mirror
When cleaning the mirror, use a
paper towel or similar materialdampened with glass cleaner.Do not spray glass cleanerdirectly on the mirror. It maycause the liquid cleaner to enterthe mirror housing.
OQL045059
Page 145 of 595
Features of your vehicle
60
4
Electrochromic mirror with
HomeLink system (if equipped)
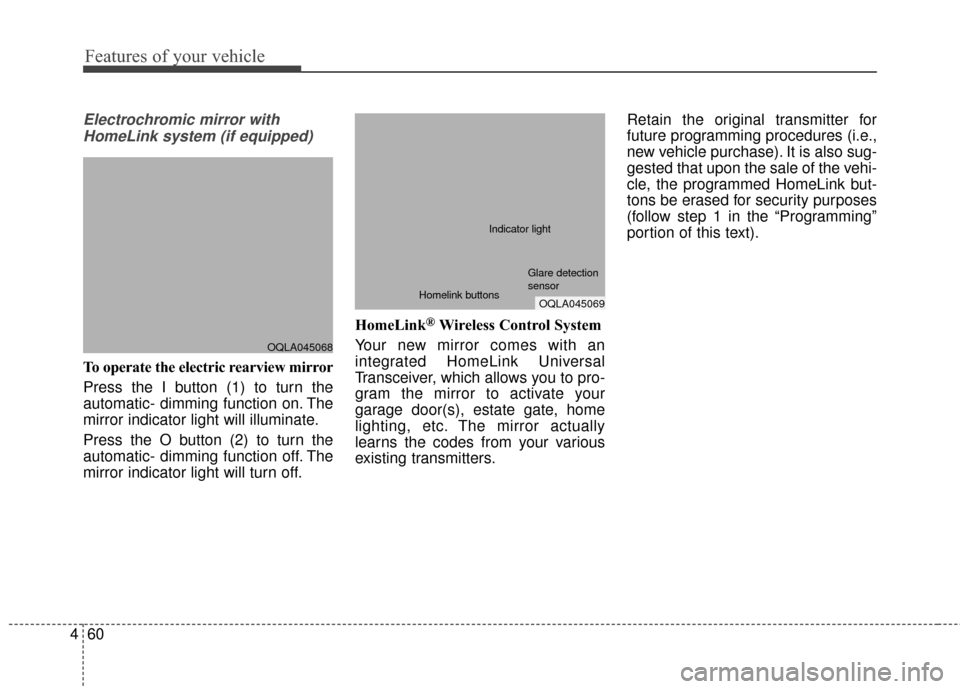
To operate the electric rearview mirror
Press the I button (1) to turn the
automatic- dimming function on. The
mirror indicator light will illuminate.
Press the O button (2) to turn the
automatic- dimming function off. The
mirror indicator light will turn off. HomeLink
®Wireless Control System
Your new mirror comes with an
integrated HomeLink Universal
Transceiver, which allows you to pro-
gram the mirror to activate your
garage door(s), estate gate, home
lighting, etc. The mirror actually
learns the codes from your various
existing transmitters. Retain the original transmitter for
future programming procedures (i.e.,
new vehicle purchase). It is also sug-
gested that upon the sale of the vehi-
cle, the programmed HomeLink but-
tons be erased for security purposes
(follow step 1 in the “Programming”
portion of this text).
OQLA045068
OQLA045069
Glare detection
sensor
Indicator light
Homelink buttons
Page 149 of 595
Features of your vehicle
64
4
Reprogramming a single
HomeLink button
To program a device to HomeLink
using a HomeLink button previously
trained, follow these steps:
1. Press and hold the desired
HomeLink button. Do NOT release
until step 4 has been completed.
2. When the indicator light begins to flash slowly (after 20 seconds),
position the hand-held transmitter
2-8 cm (1 to 3 inches) away from
the HomeLink surface.
3. Press and hold the hand-held transmitter button (or press and
“cycle” - as described in “Canadian
Programming”).
4. The HomeLink indicator light will flash, first slowly and then rapidly.
When the indicator light begins to
flash rapidly, release both buttons.
The previous device has now been
erased and the new device can be
activated by pushing the HomeLink
button that has just been pro-
grammed. This procedure will not
affect any other programmed
HomeLink buttons. Canadian Programming
Garage & gate openers
During programming, your hand-held
transmitter may automatically stop
transmitting. Continue to press and
hold the HomeLink button (note
steps 2 through 4 in the
“Programming” portion of this text)
while you press and re-press
(“cycle”) your handheld transmitter
every two seconds until the frequen-
cy signal has been learned. The indi-
cator light will flash slowly and then
rapidly after several seconds upon
successful training.
Accessories
If you would like additional informa-
tion on the HomeLink Wireless
Control System, HomeLink compati-
ble products, or to purchase other
accessories such as the HomeLink
®
Lighting Package, please contact
HomeLink at 1-800-355-3515 or on
the internet at www.homelink.com.
Page 150 of 595
465
Features of your vehicle
FCC ID: NZLZTVHL3
IC: 4112A-ZTVHL3
This device complies with
Industry Canada licence-exempt
RSS standard(s).
Operation is subject to the following
two conditions:
(1) This device may not cause inter-ference, and
(2) This device must accept any
interference, including interfer-
ence that may cause undesired
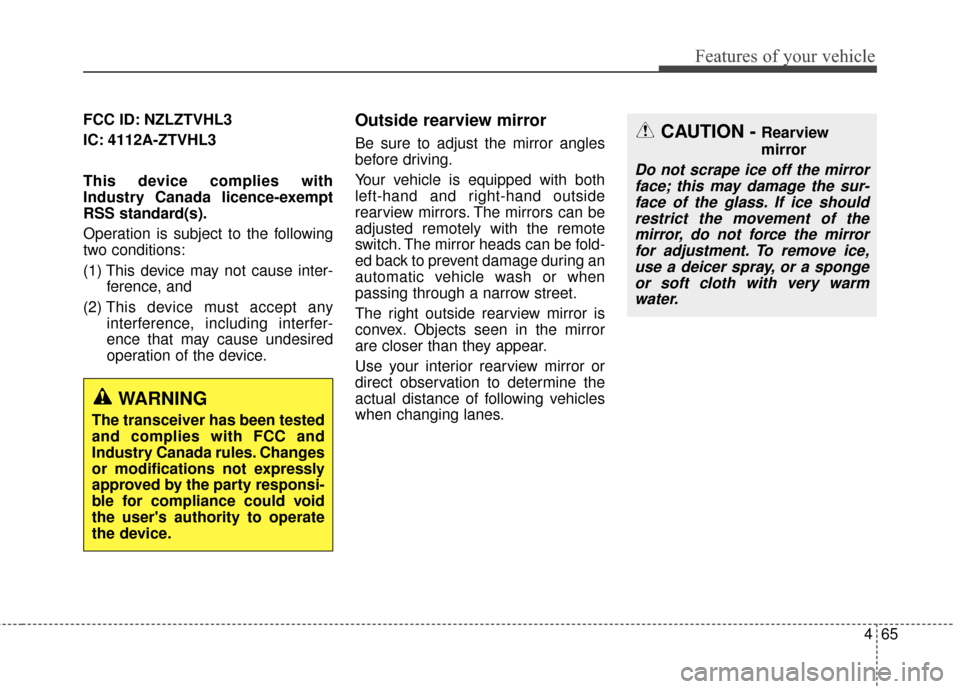
operation of the device.Outside rearview mirror
Be sure to adjust the mirror angles
before driving.
Your vehicle is equipped with both
left-hand and right-hand outside
rearview mirrors. The mirrors can be
adjusted remotely with the remote
switch. The mirror heads can be fold-
ed back to prevent damage during an
automatic vehicle wash or when
passing through a narrow street.
The right outside rearview mirror is
convex. Objects seen in the mirror
are closer than they appear.
Use your interior rearview mirror or
direct observation to determine the
actual distance of following vehicles
when changing lanes.
WARNING
The transceiver has been tested
and complies with FCC and
Industry Canada rules. Changes
or modifications not expressly
approved by the party responsi-
ble for compliance could void
the user's authority to operate
the device.
CAUTION - Rearview
mirror
Do not scrape ice off the mirror face; this may damage the sur-face of the glass. If ice shouldrestrict the movement of themirror, do not force the mirrorfor adjustment. To remove ice,use a deicer spray, or a spongeor soft cloth with very warmwater.
Page 159 of 595
Features of your vehicle
74
4
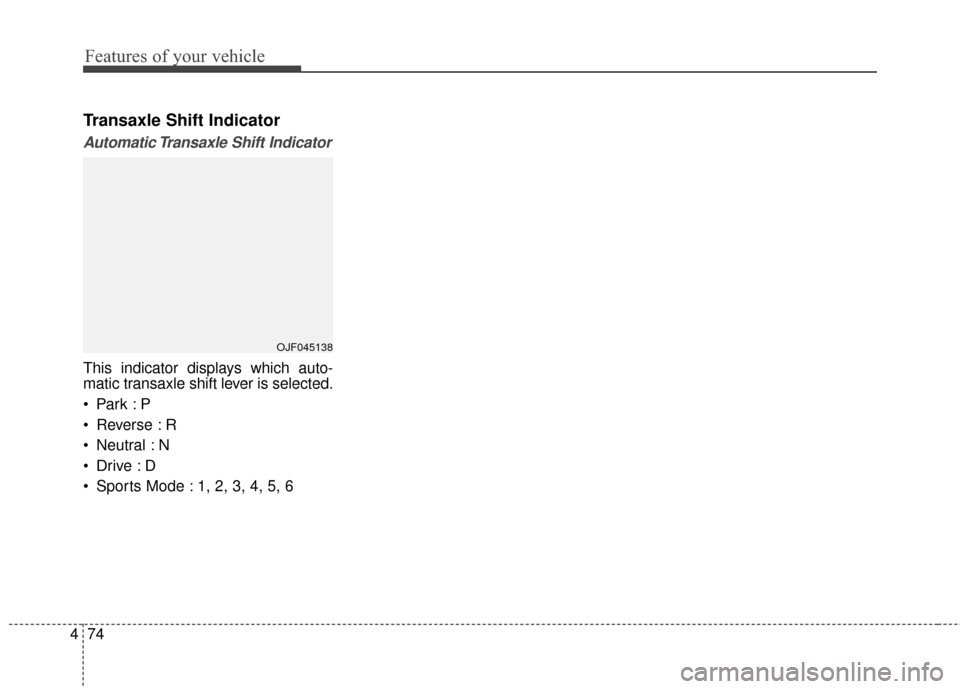
Transaxle Shift Indicator
Automatic Transaxle Shift Indicator
This indicator displays which auto-
matic transaxle shift lever is selected.
Reverse : R
Neutral : N
Sports Mode : 1, 2, 3, 4, 5, 6
OJF045138
Page 165 of 595
Features of your vehicle
80
4
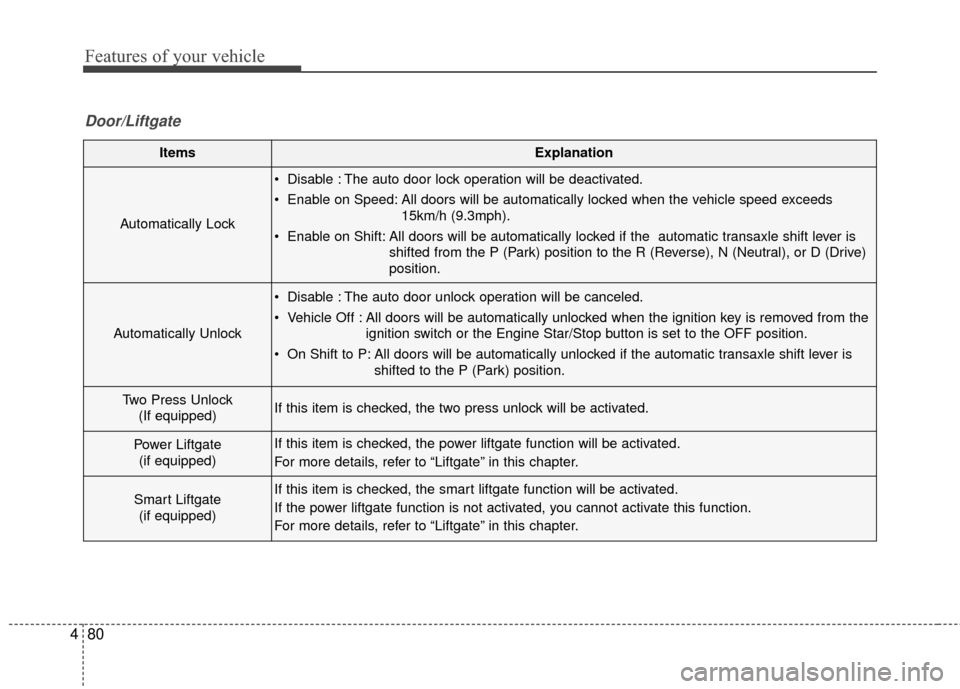
ItemsExplanation
Automatically Lock
Disable : The auto door lock operation will be deactivated.
Enable on Speed: All doors will be automatically locked when the vehicle speed exceeds
15km/h (9.3mph).
Enable on Shift: All doors will be automatically locked if the automatic transaxle shift lever is shifted from the P (Park) position to the R (Reverse), N (Neutral), or D (Drive)
position.
Automatically Unlock
Disable : The auto door unlock operation will be canceled.
Vehicle Off : All doors will be automatically unlocked when the ignition key is removed from theignition switch or the Engine Star/Stop button is set to the OFF position.
On Shift to P: All doors will be automatically unlocked if the automatic transaxle shift lever is shifted to the P (Park) position.
Two Press Unlock(If equipped)If this item is checked, the two press unlock will be activated.
Power Liftgate (if equipped)If this item is checked, the power liftgate function will be activated.
For more details, refer to “Liftgate” in this chapter.
Smart Liftgate (if equipped)If this item is checked, the smart liftgate function will be activated.
If the power liftgate function is not activated, you cannot activate this function.
For more details, refer to “Liftgate” in this chapter.
Door/Liftgate
Page 167 of 595
Features of your vehicle
82
4
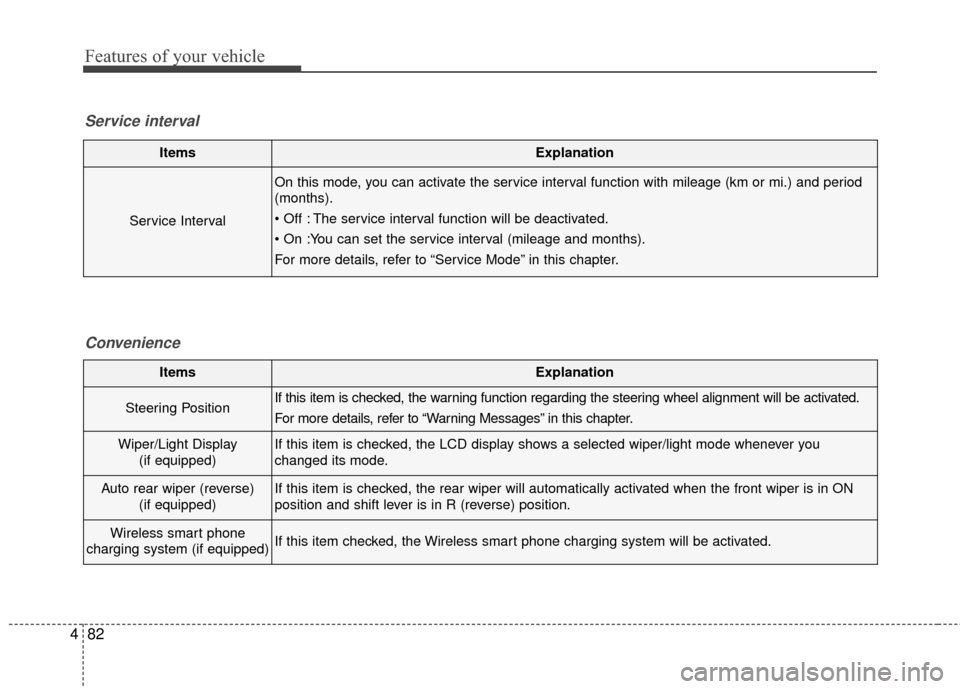
ItemsExplanation
Service Interval
On this mode, you can activate the service interval function with mileage (km or mi.) and period
(months).
The service interval function will be deactivated.
For more details, refer to “Service Mode” in this chapter.
Service interval
Convenience
ItemsExplanation
Steering PositionIf this item is checked, the warning function regarding the steering wheel alignment will be activated.
For more details, refer to “Warning Messages” in this chapter.
Wiper/Light Display(if equipped)If this item is checked, the LCD display shows a selected wiper/light mode whenever you
changed its mode.
Auto rear wiper (reverse) (if equipped)If this item is checked, the rear wiper will automatically activated when the front wiper is in ON
position and shift lever is in R (reverse) position.
Wireless smart phone
charging system (if equipped)If this item checked, the Wireless smart phone charging system will be activated.
Page 168 of 595
483
Features of your vehicle
ItemsExplanation
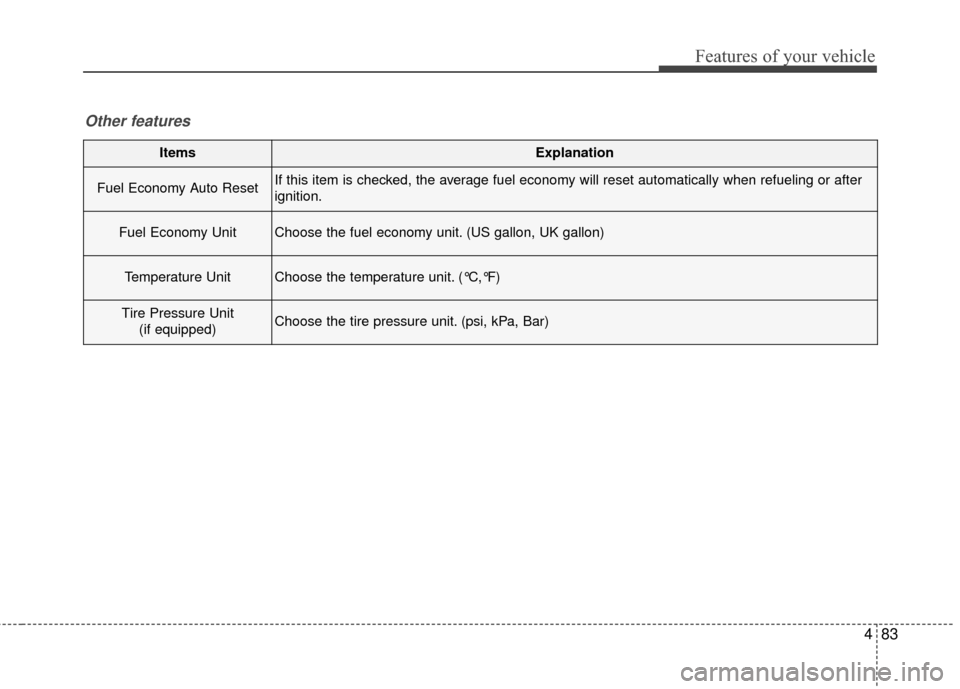
Fuel Economy Auto ResetIf this item is checked, the average fuel economy will reset automatically when refueling or after
ignition.
Fuel Economy UnitChoose the fuel economy unit. (US gallon, UK gallon)
Temperature UnitChoose the temperature unit. (°C,°F)
Tire Pressure Unit(if equipped)Choose the tire pressure unit. (psi, kPa, Bar)
Other features
Page 170 of 595
485
Features of your vehicle
The range may differ from the actu-al driving distance as it is an esti-
mate of the available driving dis-
tance.
The trip computer may not register additional fuel if less than 6 liters
(1.6 gallons) of fuel are added to
the vehicle.
The fuel economy and range may vary significantly based on driving
conditions, driving habits, and con-
dition of the vehicle. Average Fuel Economy (2)
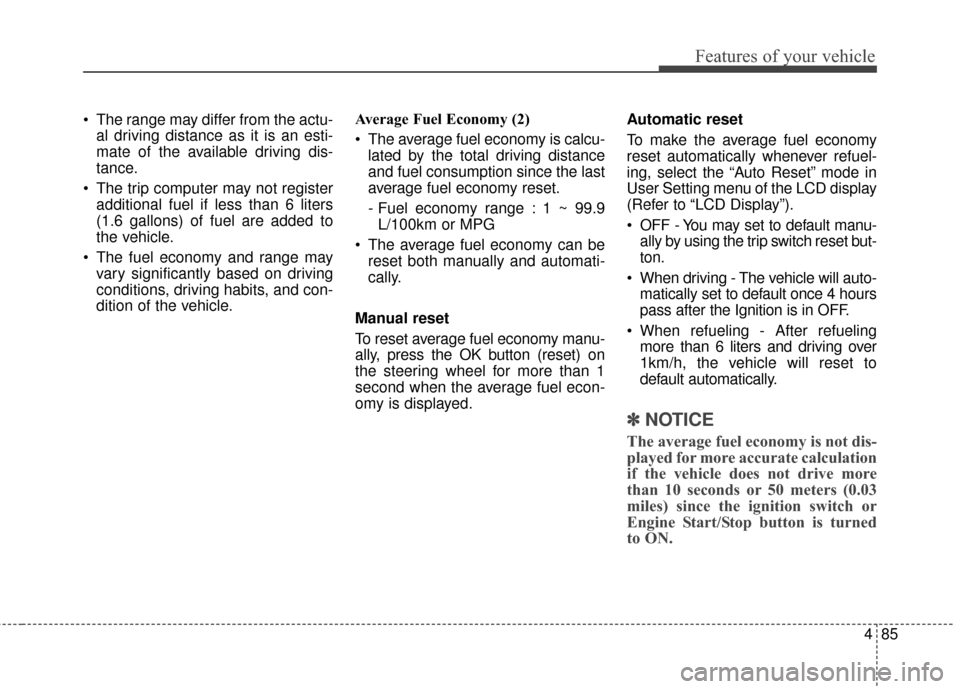
The average fuel economy is calcu-
lated by the total driving distance
and fuel consumption since the last
average fuel economy reset.
- Fuel economy range : 1 ~ 99.9L/100km or MPG
The average fuel economy can be reset both manually and automati-
cally.
Manual reset
To reset average fuel economy manu-
ally, press the OK button (reset) on
the steering wheel for more than 1
second when the average fuel econ-
omy is displayed. Automatic reset
To make the average fuel economy
reset automatically whenever refuel-
ing, select the “Auto Reset” mode in
User Setting menu of the LCD display
(Refer to “LCD Display”).
OFF - You may set to default manu-
ally by using the trip switch reset but-
ton.
When driving - The vehicle will auto- matically set to default once 4 hours
pass after the Ignition is in OFF.
When refueling - After refueling more than 6 liters and driving over
1km/h, the vehicle will reset to
default automatically.
✽ ✽ NOTICE
The average fuel economy is not dis-
played for more accurate calculation
if the vehicle does not drive more
than 10 seconds or 50 meters (0.03
miles) since the ignition switch or
Engine Start/Stop button is turned
to ON.