KIA SPORTAGE 2022 Owners Manual
Manufacturer: KIA, Model Year: 2022, Model line: SPORTAGE, Model: KIA SPORTAGE 2022Pages: 630, PDF Size: 9.69 MB
Page 261 of 630
Features of your vehicle
172
4
To cancel or reset the Auto Defogging
System
Press the front windshield defroster
button for 3 seconds when the igni-
tion switch is in the ON position.
When the Auto Defogging System is
canceled, ADS OFF symbol will blink
3 times and the ADS OFF will be dis-
played on the climate control infor-
mation screen.
When the Auto Defogging System is
reset, ADS OFF symbol will blink 6
times without a signal.
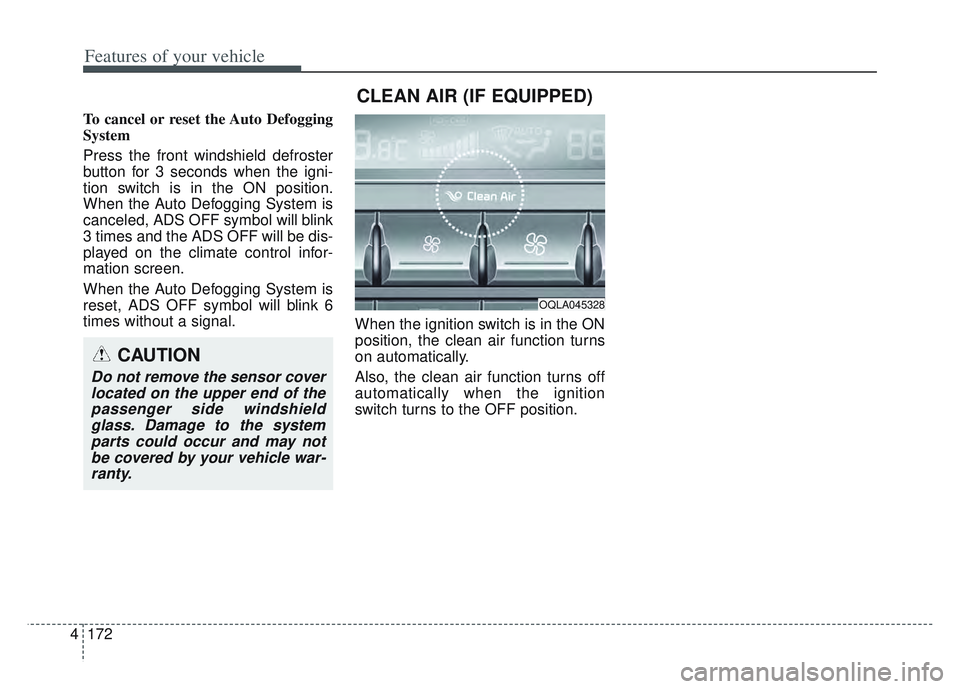
When the ignition switch is in the ON
position, the clean air function turns
on automatically.
Also, the clean air function turns off
automatically when the ignition
switch turns to the OFF position.
OQLA045328
CLEAN AIR (IF EQUIPPED)
CAUTION
Do not remove the sensor cover
located on the upper end of thepassenger side windshieldglass. Damage to the systemparts could occur and may notbe covered by your vehicle war-ranty.
Page 262 of 630
4173
Features of your vehicle
STORAGE COMPARTMENTS
These compartments can be used to
store small items required by the
driver or passengers.
To avoid possible theft, do notleave valuables in the storage
compartment.
Always keep the storage compart- ment covers closed while driving.
Do not attempt to place so many
items in the storage compartment
that the storage compartment
cover can not close securely.Center console storage
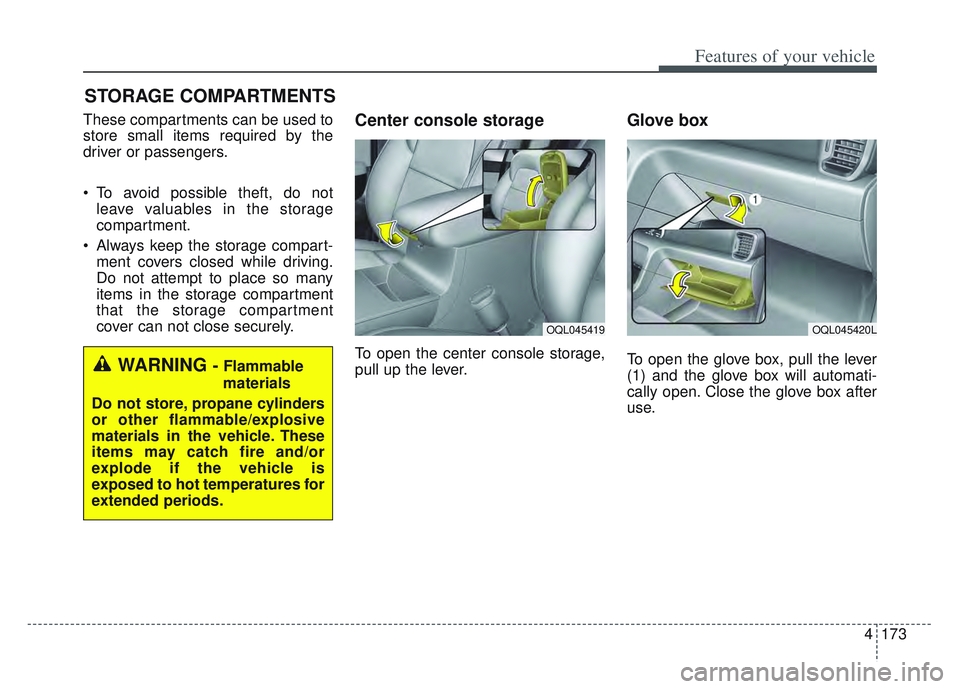
To open the center console storage,
pull up the lever.
Glove box
To open the glove box, pull the lever
(1) and the glove box will automati-
cally open. Close the glove box after
use.WARNING - Flammable
materials
Do not store, propane cylinders
or other flammable/explosive
materials in the vehicle. These
items may catch fire and/or
explode if the vehicle is
exposed to hot temperatures for
extended periods.
OQL045420LOQL045419
Page 263 of 630
Features of your vehicle
174
4
✽ ✽
NOTICE
If the temperature control knob is in
the warm or hot position, warm or
hot air will flow into the glove box.
Sunglass holder
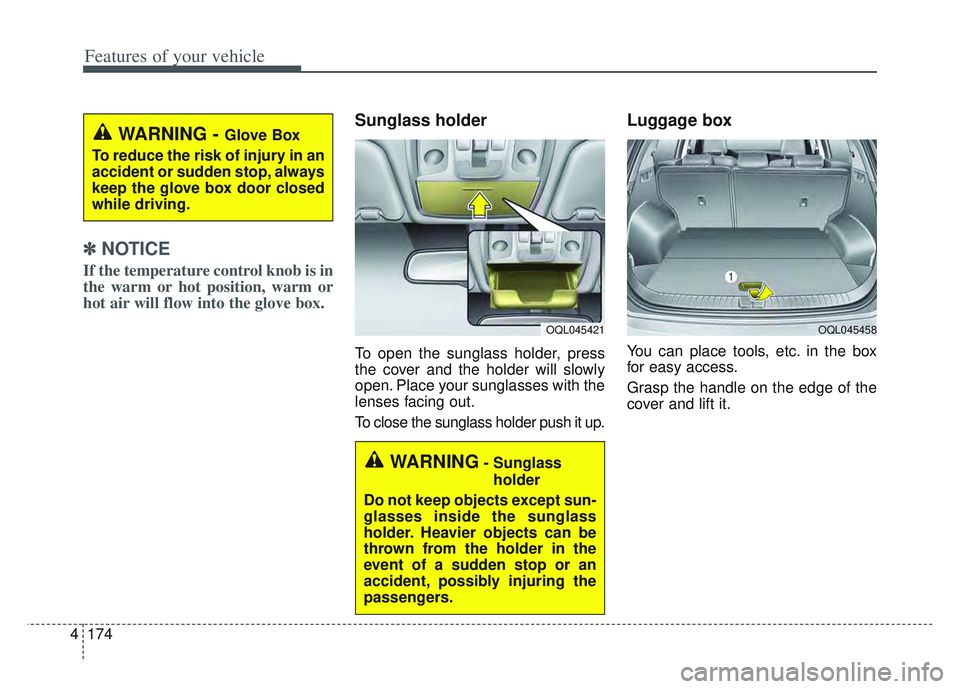
To open the sunglass holder, press
the cover and the holder will slowly
open. Place your sunglasses with the
lenses facing out.
To close the sunglass holder push it up.
Luggage box
You can place tools, etc. in the box
for easy access.
Grasp the handle on the edge of the
cover and lift it.
WARNING - Glove Box
To reduce the risk of injury in an
accident or sudden stop, always
keep the glove box door closed
while driving.
WARNING- Sunglass holder
Do not keep objects except sun-
glasses inside the sunglass
holder. Heavier objects can be
thrown from the holder in the
event of a sudden stop or an
accident, possibly injuring the
passengers.
OQL045421OQL045458
Page 264 of 630
4175
Features of your vehicle
Two types of luggage board
levels (if equipped)
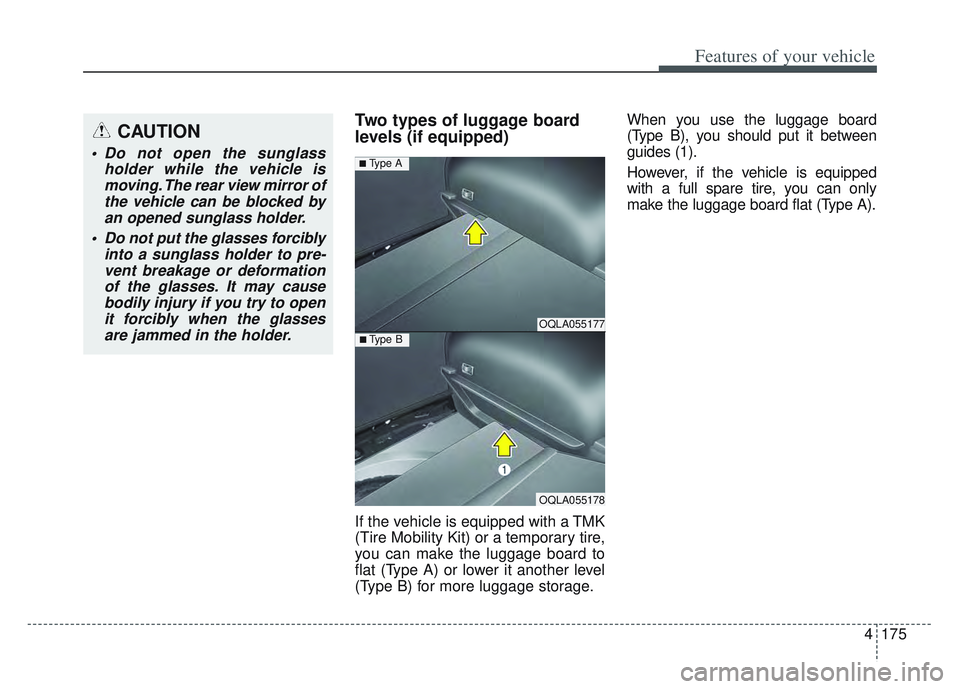
If the vehicle is equipped with a TMK
(Tire Mobility Kit) or a temporary tire,
you can make the luggage board to
flat (Type A) or lower it another level
(Type B) for more luggage storage.When you use the luggage board
(Type B), you should put it between
guides (1).
However, if the vehicle is equipped
with a full spare tire, you can only
make the luggage board flat (Type A).
OQLA055177
OQLA055178
■ Type B
■ Type A
CAUTION
Do not open the sunglass
holder while the vehicle ismoving. The rear view mirror ofthe vehicle can be blocked byan opened sunglass holder.
Do not put the glasses forcibly into a sunglass holder to pre-vent breakage or deformationof the glasses. It may causebodily injury if you try to openit forcibly when the glassesare jammed in the holder.
Page 265 of 630
Features of your vehicle
176
4
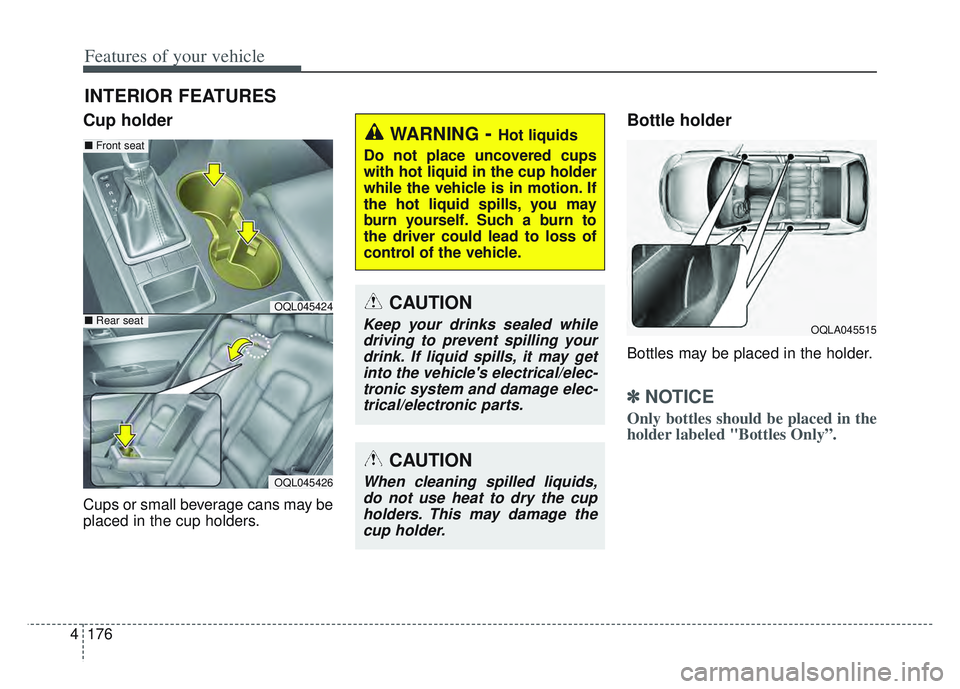
Cup holder
Cups or small beverage cans may be
placed in the cup holders.
Bottle holder
Bottles may be placed in the holder.
✽ ✽
NOTICE
Only bottles should be placed in the
holder labeled "Bottles Only”.
INTERIOR FEATURES
WARNING- Hot liquids
Do not place uncovered cups
with hot liquid in the cup holder
while the vehicle is in motion. If
the hot liquid spills, you may
burn yourself. Such a burn to
the driver could lead to loss of
control of the vehicle.
OQLA045515
CAUTION
Keep your drinks sealed while driving to prevent spilling yourdrink. If liquid spills, it may getinto the vehicle's electrical/elec-tronic system and damage elec-trical/electronic parts.
OQL045424
OQL045426
■ Front seat
■Rear seat
CAUTION
When cleaning spilled liquids,
do not use heat to dry the cupholders. This may damage thecup holder.
Page 266 of 630
4177
Features of your vehicle
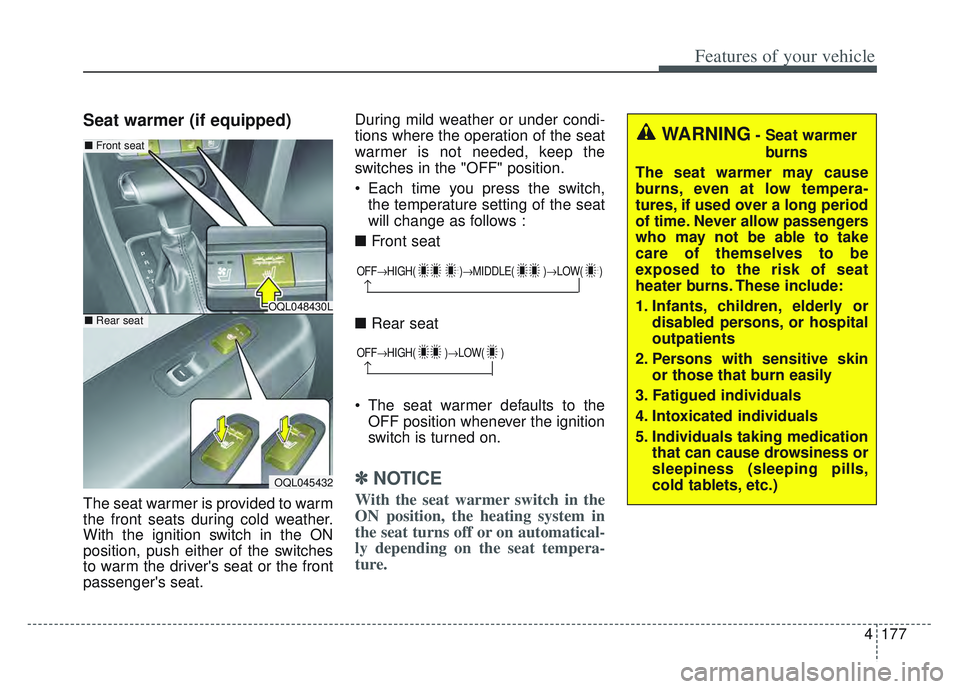
Seat warmer (if equipped)
The seat warmer is provided to warm
the front seats during cold weather.
With the ignition switch in the ON
position, push either of the switches
to warm the driver's seat or the front
passenger's seat.During mild weather or under condi-
tions where the operation of the seat
warmer is not needed, keep the
switches in the "OFF" position.
Each time you press the switch,
the temperature setting of the seat
will change as follows :
■ Front seat
■ Rear seat
The seat warmer defaults to the OFF position whenever the ignition
switch is turned on.
✽ ✽ NOTICE
With the seat warmer switch in the
ON position, the heating system in
the seat turns off or on automatical-
ly depending on the seat tempera-
ture.
OQL048430L
OQL045432
■ Front seat
■Rear seat
OFF HIGH( ) MIDDLE( )LOW( )
OFFHIGH( ) LOW( )
WARNING- Seat warmer
burns
The seat warmer may cause
burns, even at low tempera-
tures, if used over a long period
of time. Never allow passengers
who may not be able to take
care of themselves to be
exposed to the risk of seat
heater burns. These include:
1. Infants, children, elderly or disabled persons, or hospital
outpatients
2. Persons with sensitive skin or those that burn easily
3. Fatigued individuals
4. Intoxicated individuals
5. Individuals taking medication that can cause drowsiness or
sleepiness (sleeping pills,
cold tablets, etc.)
Page 267 of 630
Features of your vehicle
178
4
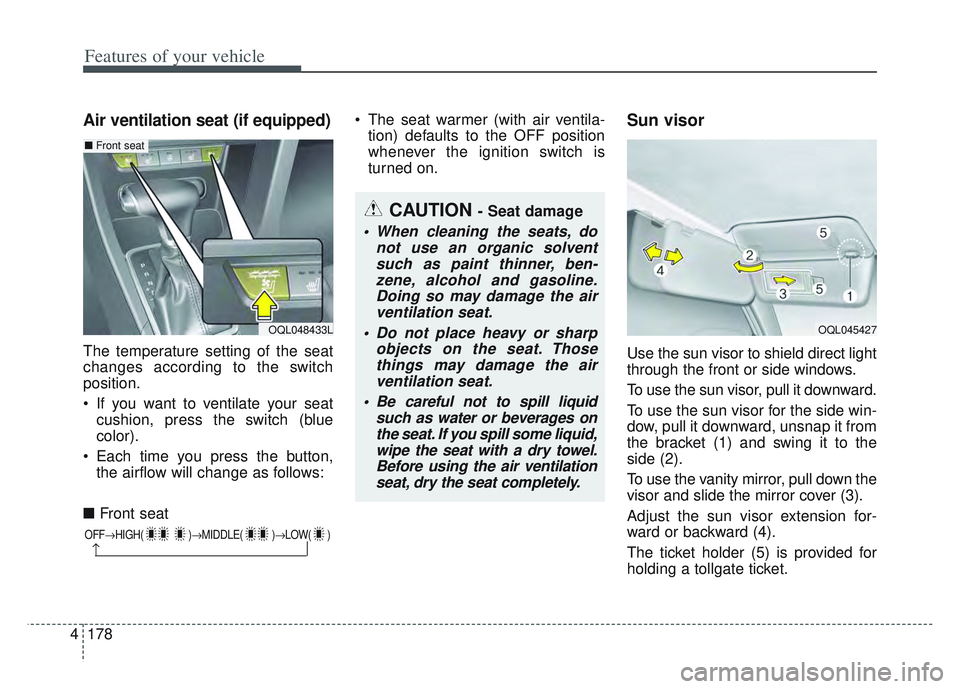
Air ventilation seat (if equipped)
The temperature setting of the seat
changes according to the switch
position.
If you want to ventilate your seat
cushion, press the switch (blue
color).
Each time you press the button, the airflow will change as follows:
■ Front seat The seat warmer (with air ventila-
tion) defaults to the OFF position
whenever the ignition switch is
turned on.
Sun visor
Use the sun visor to shield direct light
through the front or side windows.
To use the sun visor, pull it downward.
To use the sun visor for the side win-
dow, pull it downward, unsnap it from
the bracket (1) and swing it to the
side (2).
To use the vanity mirror, pull down the
visor and slide the mirror cover (3).
Adjust the sun visor extension for-
ward or backward (4).
The ticket holder (5) is provided for
holding a tollgate ticket.
OFF HIGH( ) MIDDLE( )LOW( )
CAUTION - Seat damage
When cleaning the seats, do
not use an organic solventsuch as paint thinner, ben-zene, alcohol and gasoline.Doing so may damage the airventilation seat.
Do not place heavy or sharp objects on the seat. Thosethings may damage the airventilation seat.
Be careful not to spill liquid such as water or beverages onthe seat. If you spill some liquid,wipe the seat with a dry towel.Before using the air ventilationseat, dry the seat completely.
OQL048433L OQL045427
■ Front seat
Page 268 of 630
4179
Features of your vehicle
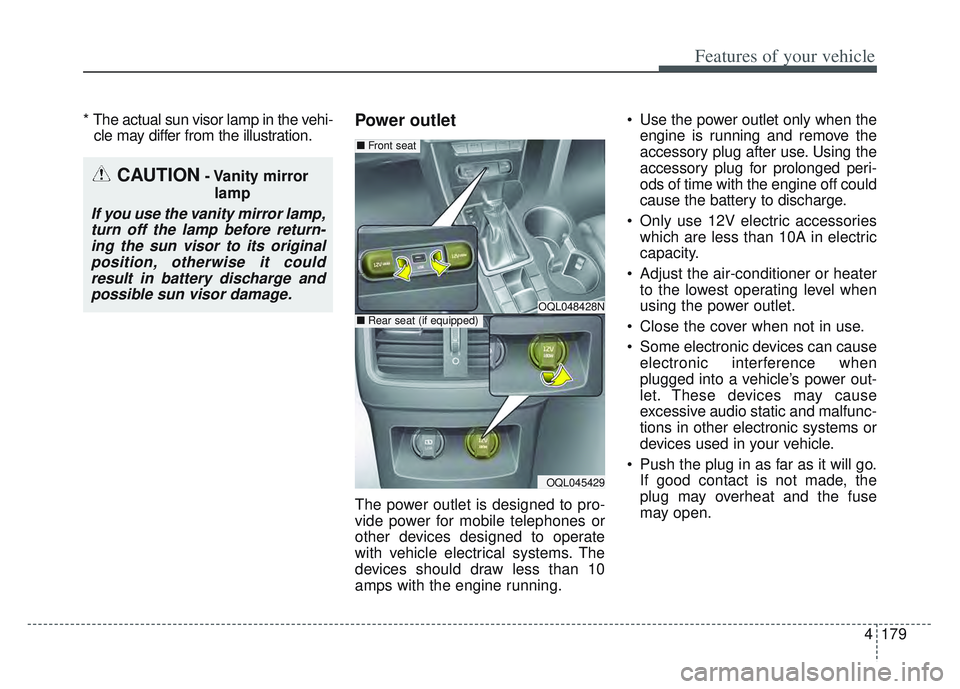
* The actual sun visor lamp in the vehi-cle may differ from the illustration.Power outlet
The power outlet is designed to pro-
vide power for mobile telephones or
other devices designed to operate
with vehicle electrical systems. The
devices should draw less than 10
amps with the engine running. Use the power outlet only when the
engine is running and remove the
accessory plug after use. Using the
accessory plug for prolonged peri-
ods of time with the engine off could
cause the battery to discharge.
Only use 12V electric accessories which are less than 10A in electric
capacity.
Adjust the air-conditioner or heater to the lowest operating level when
using the power outlet.
Close the cover when not in use.
Some electronic devices can cause electronic interference when
plugged into a vehicle’s power out-
let. These devices may cause
excessive audio static and malfunc-
tions in other electronic systems or
devices used in your vehicle.
Push the plug in as far as it will go. If good contact is not made, the
plug may overheat and the fuse
may open.
CAUTION- Vanity mirror
lamp
If you use the vanity mirror lamp,turn off the lamp before return-ing the sun visor to its originalposition, otherwise it couldresult in battery discharge andpossible sun visor damage.
OQL048428N
OQL045429
■ Front seat
■Rear seat (if equipped)
Page 269 of 630
Features of your vehicle
180
4
Plug in battery equipped electronic
devices with reverse current protec-
tion. The current from the battery
may flow into the vehicle’s electri
cal/electronic system and cause
system malfunction.
✽ ✽ NOTICE
Do not use aftermarket chargers to
charge devices. Only use device cer-
tified cables to charge.
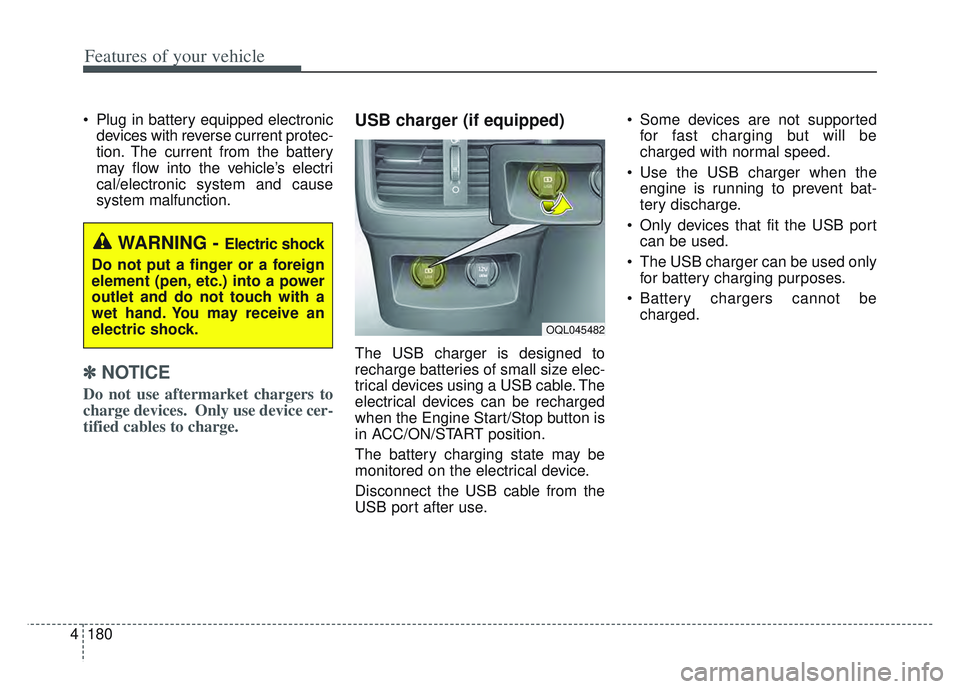
USB charger (if equipped)
The USB charger is designed to
recharge batteries of small size elec-
trical devices using a USB cable. The
electrical devices can be recharged
when the Engine Start/Stop button is
in ACC/ON/START position.
The battery charging state may be
monitored on the electrical device.
Disconnect the USB cable from the
USB port after use. Some devices are not supported
for fast charging but will be
charged with normal speed.
Use the USB charger when the engine is running to prevent bat-
tery discharge.
Only devices that fit the USB port can be used.
The USB charger can be used only for battery charging purposes.
Battery chargers cannot be charged.
WARNING - Electric shock
Do not put a finger or a foreign
element (pen, etc.) into a power
outlet and do not touch with a
wet hand. You may receive an
electric shock.
OQL045482
Page 270 of 630
4181
Features of your vehicle
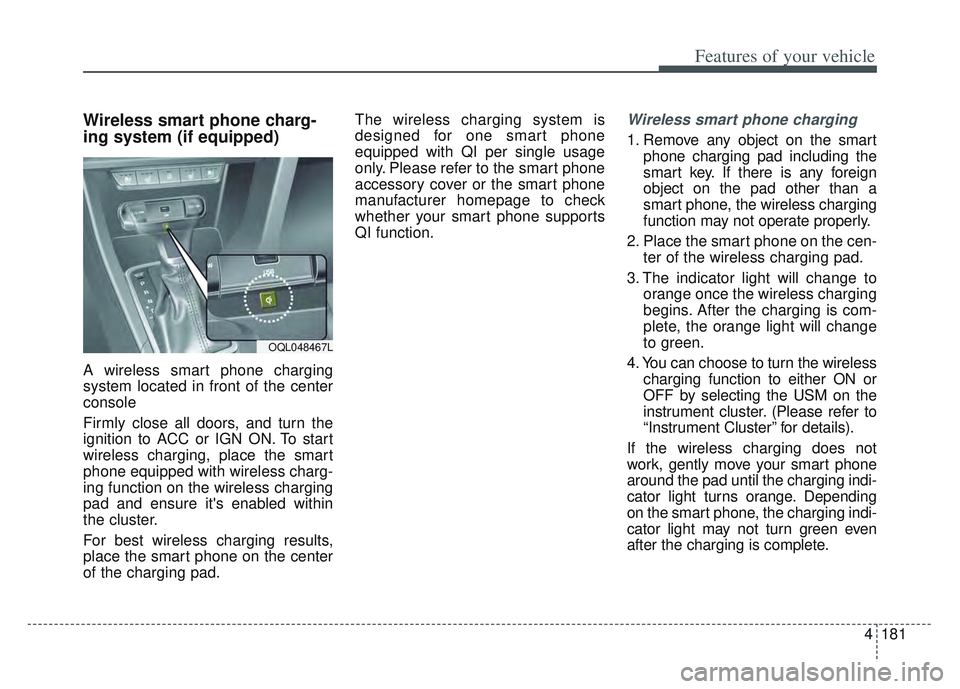
Wireless smart phone charg-
ing system (if equipped)
A wireless smart phone charging
system located in front of the center
console
Firmly close all doors, and turn the
ignition to ACC or IGN ON. To start
wireless charging, place the smart
phone equipped with wireless charg-
ing function on the wireless charging
pad and ensure it's enabled within
the cluster.
For best wireless charging results,
place the smart phone on the center
of the charging pad.The wireless charging system is
designed for one smart phone
equipped with QI per single usage
only. Please refer to the smart phone
accessory cover or the smart phone
manufacturer homepage to check
whether your smart phone supports
QI function.
Wireless smart phone charging
1. Remove any object on the smart
phone charging pad including the
smart key. If there is any foreign
object on the pad other than a
smart phone, the wireless charging
function may not operate properly.
2. Place the smart phone on the cen- ter of the wireless charging pad.
3. The indicator light will change to orange once the wireless charging
begins. After the charging is com-
plete, the orange light will change
to green.
4. You can choose to turn the wireless charging function to either ON or
OFF by selecting the USM on the
instrument cluster. (Please refer to
“Instrument Cluster” for details).
If the wireless charging does not
work, gently move your smart phone
around the pad until the charging indi-
cator light turns orange. Depending
on the smart phone, the charging indi-
cator light may not turn green even
after the charging is complete.
OQL048467L