battery replacement KIA SPORTAGE 2022 Owners Manual
[x] Cancel search | Manufacturer: KIA, Model Year: 2022, Model line: SPORTAGE, Model: KIA SPORTAGE 2022Pages: 630, PDF Size: 9.69 MB
Page 90 of 630
Features of your vehicle
Folding key . . . . . . . . . . . . . . . . . . . . . . . . . . . . . . . . 4-5
• Record your key number . . . . . . . . . . . . . . . . . . . . . . . 4-5
• Key operations . . . . . . . . . . . . . . . . . . . . . . . . . . . . . . . . 4-5
• Transmitter precautions . . . . . . . . . . . . . . . . . . . . . . . . 4-7
• Battery replacement . . . . . . . . . . . . . . . . . . . . . . . . . . . 4-8
• Immobilizer system . . . . . . . . . . . . . . . . . . . . . . . . . . . . 4-9
Smart key . . . . . . . . . . . . . . . . . . . . . . . . . . . . . . . . 4-12
• Record your key number . . . . . . . . . . . . . . . . . . . . . . 4-12
• Smart key function . . . . . . . . . . . . . . . . . . . . . . . . . . . 4-12
• Mechanical key . . . . . . . . . . . . . . . . . . . . . . . . . . . . . . 4-15
• Loss of the smart key . . . . . . . . . . . . . . . . . . . . . . . . . 4-15
• Smart key precautions . . . . . . . . . . . . . . . . . . . . . . . . 4-15
• Battery replacement . . . . . . . . . . . . . . . . . . . . . . . . . . 4-16
• Smart key immobilizer system . . . . . . . . . . . . . . . . . . 4-17
Theft-alarm system . . . . . . . . . . . . . . . . . . . . . . . . 4-20
• Armed stage . . . . . . . . . . . . . . . . . . . . . . . . . . . . . . . . . 4-20
• Theft-alarm stage . . . . . . . . . . . . . . . . . . . . . . . . . . . . 4-21
• Disarmed stage. . . . . . . . . . . . . . . . . . . . . . . . . . . . . . . 4-21
Door locks . . . . . . . . . . . . . . . . . . . . . . . . . . . . . . . . 4-23
• Operating door locks from outside the vehicle. . . . . 4-23
• Operating door locks from inside the vehicle . . . . . . 4-24
• Impact sensing door unlock system . . . . . . . . . . . . . . 4-26
• Child-protector rear door lock. . . . . . . . . . . . . . . . . . 4-27
Liftgate (for manual liftgate) . . . . . . . . . . . . . . . . 4-28
• Opening the liftgate . . . . . . . . . . . . . . . . . . . . . . . . . . . 4-28
• Closing the liftgate. . . . . . . . . . . . . . . . . . . . . . . . . . . . 4-28
• Emergency liftgate safety release. . . . . . . . . . . . . . . . 4-29
Power liftgate . . . . . . . . . . . . . . . . . . . . . . . . . . . . . 4-31
• Opening the liftgate . . . . . . . . . . . . . . . . . . . . . . . . . . . 4-32
• Closing the liftgate. . . . . . . . . . . . . . . . . . . . . . . . . . . . 4-33
• Smart Power Liftgate . . . . . . . . . . . . . . . . . . . . . . . . . 4-36
Windows . . . . . . . . . . . . . . . . . . . . . . . . . . . . . . . . . 4-41
• Power windows . . . . . . . . . . . . . . . . . . . . . . . . . . . . . . 4-42
Hood. . . . . . . . . . . . . . . . . . . . . . . . . . . . . . . . . . . . \
. 4-46
• Opening the hood . . . . . . . . . . . . . . . . . . . . . . . . . . . . 4-46
• Closing the hood . . . . . . . . . . . . . . . . . . . . . . . . . . . . . 4-47
Fuel filler door . . . . . . . . . . . . . . . . . . . . . . . . . . . . 4-48
• Opening the fuel filler door . . . . . . . . . . . . . . . . . . . . 4-48
• Closing the fuel filler door . . . . . . . . . . . . . . . . . . . . . 4-49
Panoramic sunroof . . . . . . . . . . . . . . . . . . . . . . . . . 4-52
• Sunroof open warning. . . . . . . . . . . . . . . . . . . . . . . . . 4-53
• Sunshade. . . . . . . . . . . . . . . . . . . . . . . . . . . . . . . . \
. . . . 4-53
• Sliding the sunroof . . . . . . . . . . . . . . . . . . . . . . . . . . . 4-54
• Tilting the sunroof . . . . . . . . . . . . . . . . . . . . . . . . . . . 4-56
• Closing the sunroof . . . . . . . . . . . . . . . . . . . . . . . . . . . 4-56
• Resetting the sunroof . . . . . . . . . . . . . . . . . . . . . . . . . 4-56
4
Page 97 of 630
Features of your vehicle
84
When the transmitter does not workcorrectly, open and close the door
with the ignition key. If you have a
problem with the transmitter, con-
tact an authorized Kia dealer.
If the transmitter is in close proxim- ity to your mobile phone, the signal
could be blocked by your mobile
phones normal operational signals.
This is especially important when
the phone is active such as making
and receiving calls, text messag-
ing, and/or sending/receiving
emails. Avoid placing the transmit-
ter and your mobile phone in the
same pants or jacket pocket and
always try to maintain an adequate
distance between the two devices.
✽ ✽ NOTICE
If the keyless entry system is inoper-
ative due to exposure to water or liq-
uids, it will not be covered by your
manufacturer’s vehicle warranty.
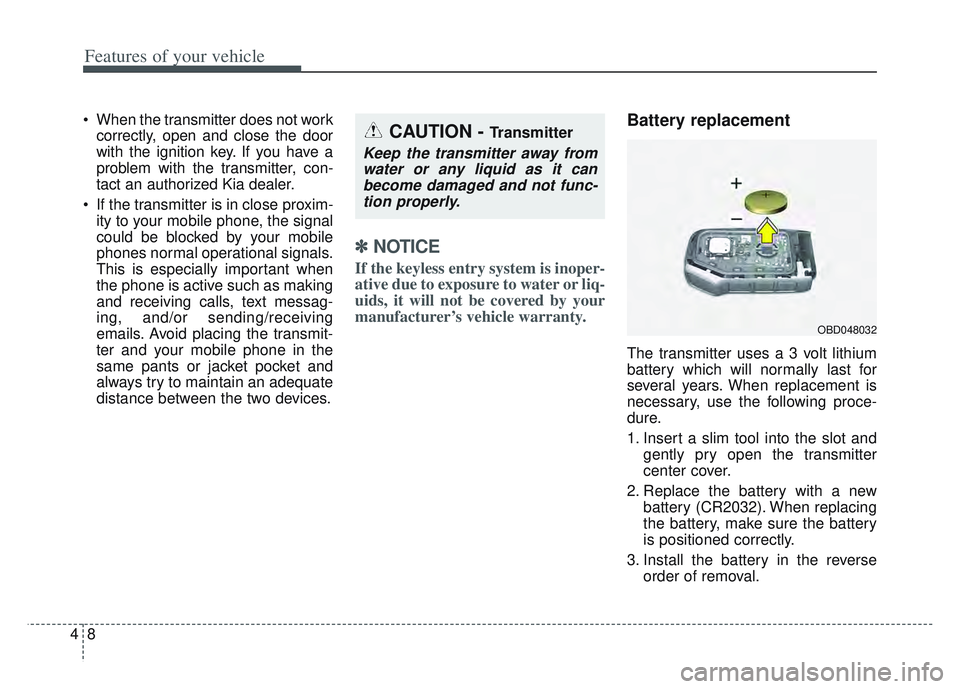
Battery replacement
The transmitter uses a 3 volt lithium
battery which will normally last for
several years. When replacement is
necessary, use the following proce-
dure.
1. Insert a slim tool into the slot and
gently pry open the transmitter
center cover.
2. Replace the battery with a new battery (CR2032). When replacing
the battery, make sure the battery
is positioned correctly.
3. Install the battery in the reverse order of removal.
OBD048032
CAUTION - Transmitter
Keep the transmitter away fromwater or any liquid as it canbecome damaged and not func-tion properly.
Page 98 of 630
49
Features of your vehicle
For replacement transmitters, see an
authorized Kia dealer for transmitter
reprogramming.
The transmitter is designed to giveyou years of trouble-free use, how-
ever it can malfunction if exposed to
moisture or static electricity. If you
are unsure how to use your trans-
mitter or replace the battery, contact
an authorized Kia dealer.
Using the wrong battery can cause the transmitter to malfunction. Be
sure to use the correct battery.
To avoid damaging the transmitter, don't drop it, get it wet, or expose it
to heat or sunlight.
An inappropriately dis- posed battery can be
harmful to the environment
and may cause harm to
human health. Dispose the
battery according to your
local law(s) or regulation.Immobilizer system
(if equipped)
Your vehicle is equipped with an
electronic engine immobilizer system
to reduce the risk of unauthorized
vehicle use.
Your immobilizer system is com-
prised of a small transponder in the
ignition key and electronic devices
inside the vehicle.
With the immobilizer system, when-
ever you insert your ignition key into
the ignition switch and turn it to ON,
verifies if the ignition key is valid.
If the key is determined to be valid,
the engine will start.
If the key is determined to be invalid,
the engine will not start.
CAUTION - Transmitter
damage
Do not drop, wet or expose the keyless entry system transmit-ter to heat or sunlight.
Page 105 of 630
Features of your vehicle
16
4
If the smart key is in close proximi-
ty to your cell phone or smart
phone, the signal from the smart
key could be blocked by normal
operation of your cell phone or
smart phone. This is especially
important when the phone is active
such as making a call, receiving
calls, text messaging, and/or send-
ing/receiving emails. Avoid placing
the smart key and your cell phone
or smart phone in the same pants
or jacket pocket and maintain ade-
quate distance between the two
devices.
✽ ✽ NOTICE
If the keyless entry system is inoper-
ative due to exposure to water or liq-
uids, it will not be covered by your
manufacturer’s vehicle warranty.
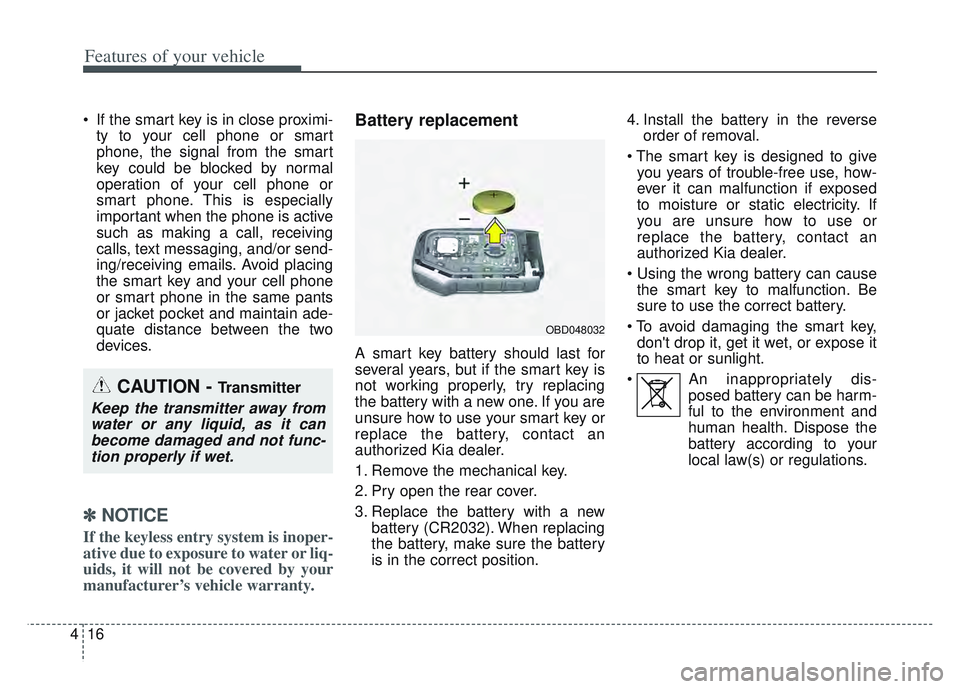
Battery replacement
A smart key battery should last for
several years, but if the smart key is
not working properly, try replacing
the battery with a new one. If you are
unsure how to use your smart key or
replace the battery, contact an
authorized Kia dealer.
1. Remove the mechanical key.
2. Pry open the rear cover.
3. Replace the battery with a new
battery (CR2032). When replacing
the battery, make sure the battery
is in the correct position. 4. Install the battery in the reverse
order of removal.
you years of trouble-free use, how-
ever it can malfunction if exposed
to moisture or static electricity. If
you are unsure how to use or
replace the battery, contact an
authorized Kia dealer.
the smart key to malfunction. Be
sure to use the correct battery.
don't drop it, get it wet, or expose it
to heat or sunlight.
An inappropriately dis- posed battery can be harm-
ful to the environment and
human health. Dispose the
battery according to your
local law(s) or regulations.
CAUTION - Transmitter
Keep the transmitter away fromwater or any liquid, as it canbecome damaged and not func-tion properly if wet.
OBD048032
Page 497 of 630
Maintenance
Engine compartment . . . . . . . . . . . . . . . . . . . . . . . . 7-3
Maintenance services . . . . . . . . . . . . . . . . . . . . . . . . 7-4
• Owner’s responsibility . . . . . . . . . . . . . . . . . . . . . . . . . 7-4
• Owner maintenance precautions . . . . . . . . . . . . . . . . . 7-5
Owner maintenance . . . . . . . . . . . . . . . . . . . . . . . . . 7-7
• Owner maintenance schedule. . . . . . . . . . . . . . . . . . . . 7-7
Scheduled maintenance service. . . . . . . . . . . . . . . . 7-9
Explanation of scheduled maintenance items . . . 7-21
Checking fluid levels . . . . . . . . . . . . . . . . . . . . . . . 7-26
Engine oil. . . . . . . . . . . . . . . . . . . . . . . . . . . . . . . . . 7-27
• Checking the engine oil level . . . . . . . . . . . . . . . . . . . 7-27
• Changing the engine oil and filter . . . . . . . . . . . . . . . 7-28
Engine coolant . . . . . . . . . . . . . . . . . . . . . . . . . . . . 7-29
• Checking the coolant level . . . . . . . . . . . . . . . . . . . . . 7-29
• Changing the coolant . . . . . . . . . . . . . . . . . . . . . . . . . 7-32
Brake fluid . . . . . . . . . . . . . . . . . . . . . . . . . . . . . . . 7-33
• Checking the brake fluid level . . . . . . . . . . . . . . . . . . 7-33
Washer fluid . . . . . . . . . . . . . . . . . . . . . . . . . . . . . . 7-34
• Checking the washer fluid level . . . . . . . . . . . . . . . . . 7-34
Parking brake . . . . . . . . . . . . . . . . . . . . . . . . . . . . . 7-35
• Checking the parking brake. . . . . . . . . . . . . . . . . . . . 7-35
Air cleaner. . . . . . . . . . . . . . . . . . . . . . . . . . . . . . . . 7-36
• Filter replacement . . . . . . . . . . . . . . . . . . . . . . . . . . . . 7-36
Climate control air filter . . . . . . . . . . . . . . . . . . . . 7-38
• Filter inspection . . . . . . . . . . . . . . . . . . . . . . . . . . . . . . 7-38
Wiper blades . . . . . . . . . . . . . . . . . . . . . . . . . . . . . . 7-40
• Blade inspection . . . . . . . . . . . . . . . . . . . . . . . . . . . . . . 7-40
• Blade replacement . . . . . . . . . . . . . . . . . . . . . . . . . . . . 7-40
Battery . . . . . . . . . . . . . . . . . . . . . . . . . . . . . . . . . . . 7-\
43
• For best battery service . . . . . . . . . . . . . . . . . . . . . . . 7-43
• Recharging the battery . . . . . . . . . . . . . . . . . . . . . . . . 7-44
• Reset items . . . . . . . . . . . . . . . . . . . . . . . . . . . . . . . . . . 7-45\
Tires and wheels . . . . . . . . . . . . . . . . . . . . . . . . . . . 7-46
• Tire care . . . . . . . . . . . . . . . . . . . . . . . . . . . . . . . . . . . . \
7-46
• Recommended cold tire inflation pressures . . . . . . . 7-46
• Tire pressure . . . . . . . . . . . . . . . . . . . . . . . . . . . . . . . . 7-47
• Checking tire inflation pressure. . . . . . . . . . . . . . . . . 7-47
• Tire rotation . . . . . . . . . . . . . . . . . . . . . . . . . . . . . . . . 7-48
• Wheel alignment and tire balance . . . . . . . . . . . . . . . 7-49
• Tire replacement . . . . . . . . . . . . . . . . . . . . . . . . . . . . . 7-50
• Wheel replacement . . . . . . . . . . . . . . . . . . . . . . . . . . . 7-51
• Tire traction . . . . . . . . . . . . . . . . . . . . . . . . . . . . . . . . . 7-51
• Tire maintenance . . . . . . . . . . . . . . . . . . . . . . . . . . . . 7-51
• Tire sidewall labeling . . . . . . . . . . . . . . . . . . . . . . . . . 7-51
• All season tires . . . . . . . . . . . . . . . . . . . . . . . . . . . . . . . 7-58
• Summer tires . . . . . . . . . . . . . . . . . . . . . . . . . . . . . . . . 7-58
• Snow tires . . . . . . . . . . . . . . . . . . . . . . . . . . . . . . . . . . . 7-\
58
• Tire chains . . . . . . . . . . . . . . . . . . . . . . . . . . . . . . . . . . 7-58\
7
Page 557 of 630
761
Maintenance
FUSES
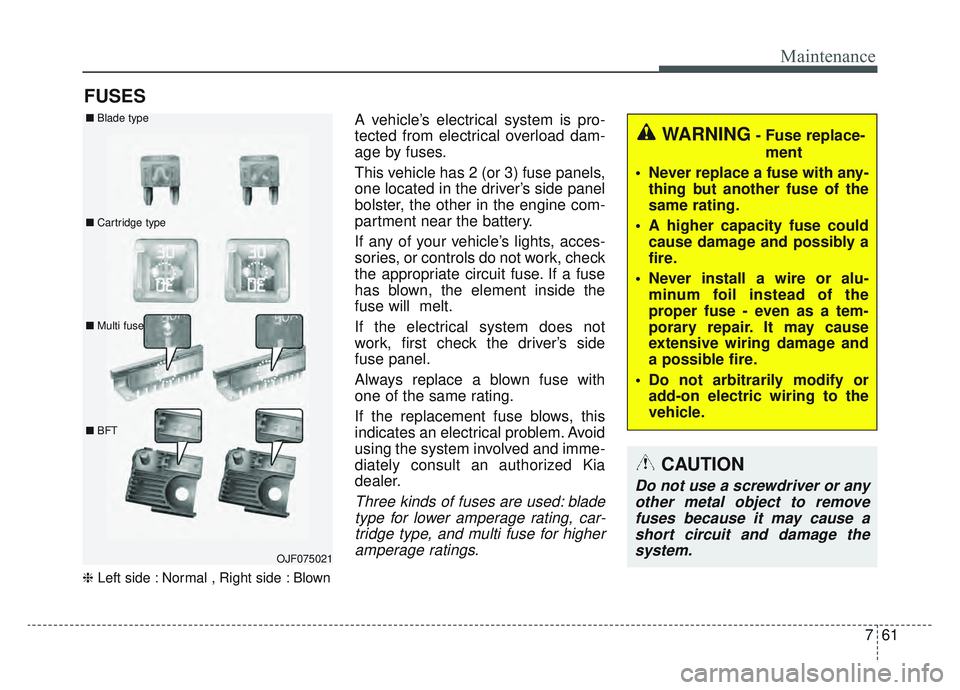
❈Left side : Normal , Right side : Blown
A vehicle’s electrical system is pro-
tected from electrical overload dam-
age by fuses.
This vehicle has 2 (or 3) fuse panels,
one located in the driver’s side panel
bolster, the other in the engine com-
partment near the battery.
If any of your vehicle’s lights, acces-
sories, or controls do not work, check
the appropriate circuit fuse. If a fuse
has blown, the element inside the
fuse will melt.
If the electrical system does not
work, first check the driver’s side
fuse panel.
Always replace a blown fuse with
one of the same rating.
If the replacement fuse blows, this
indicates an electrical problem. Avoid
using the system involved and imme-
diately consult an authorized Kia
dealer.
Three kinds of fuses are used: blade
type for lower amperage rating, car-tridge type, and multi fuse for higheramperage ratings.
WARNING- Fuse replace-
ment
Never replace a fuse with any- thing but another fuse of the
same rating.
A higher capacity fuse could cause damage and possibly a
fire.
Never install a wire or alu- minum foil instead of the
proper fuse - even as a tem-
porary repair. It may cause
extensive wiring damage and
a possible fire.
Do not arbitrarily modify or add-on electric wiring to the
vehicle.
CAUTION
Do not use a screwdriver or anyother metal object to removefuses because it may cause ashort circuit and damage thesystem.
OJF075021
■
Blade type
■ Cartridge type
■ Multi fuse
■ BFT
Page 558 of 630
Maintenance
62
7
✽ ✽
NOTICE
• When replacing fuse, turn the
ignition “OFF” and turn off
switches of all electrical devices
then remove battery (-) terminal.
• The actual fuse/relay panel label may differ from equipped items.
WARNING- Electrical Fire
Always ensure replacements
fuses and relays are securely
fastened when installed. Failure
to do so can result in a vehicle
fire.
WARNING- Electrical wiring repairs
All electrical repairs should be
performed by authorized Kia
dealerships using approved Kia
parts. Using other wiring com-
ponents, especially when retro-
fitting the audio system or theft
alarm system, or remote engine
control may cause vehicle dam-
age and increase the risk of a
vehicle fire.
CAUTION
When replacing a blown fuse or relay, make sure the newfuse or relay fits tightly intothe clips. Failure to tightlyinstall the fuse or relay maycause damage to the wiringand electric systems.
Do not remove fuses, relays and terminals fastened withbolts or nuts. The fuses, relaysand terminals may not be fas-tened correctly which maycause vehicle damage.
CAUTION
Do not input any other objects except fuses or relays intofuse/relay terminals such as adriver or wiring. It may causecontact failure and systemmalfunction.
Do not plug in screwdrivers or aftermarket wiring into the ter-minal originally designed forfuse and relays only.
(Continued)
(Continued)The electrical system andwiring of the vehicle interiormay be damaged or burneddue to contact failure.
If you directly connect the wire on the taillight or replacethe bulb which is over the reg-ulated capacity to install trail-ers etc., the inner junctionblock can get burned.
Page 561 of 630
765
Maintenance
Engine compartment fuse
replacement
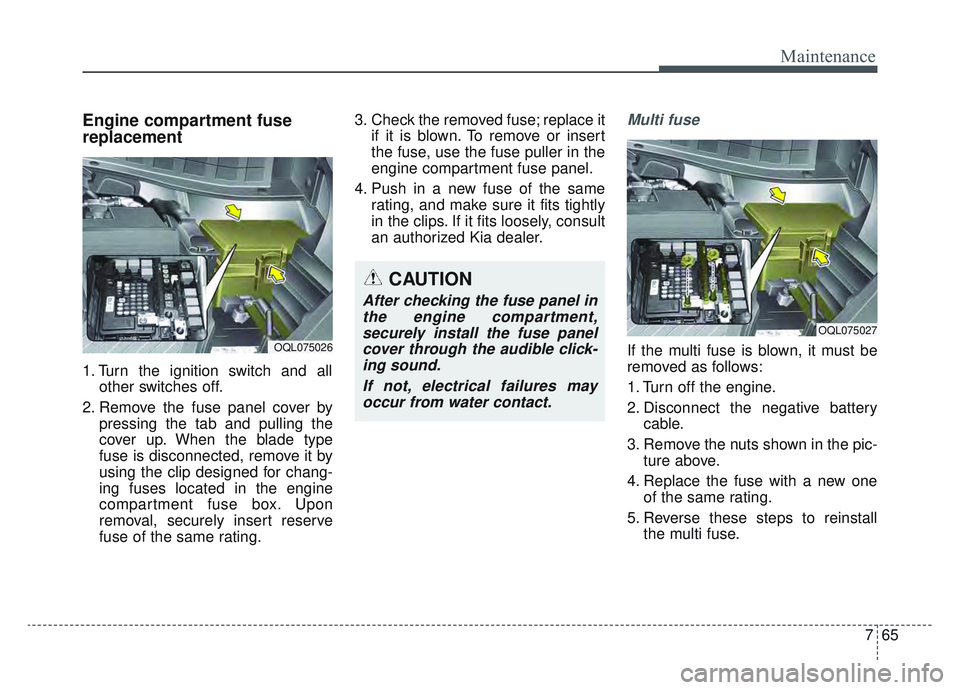
1. Turn the ignition switch and allother switches off.
2. Remove the fuse panel cover by pressing the tab and pulling the
cover up. When the blade type
fuse is disconnected, remove it by
using the clip designed for chang-
ing fuses located in the engine
compartment fuse box. Upon
removal, securely insert reserve
fuse of the same rating. 3. Check the removed fuse; replace it
if it is blown. To remove or insert
the fuse, use the fuse puller in the
engine compartment fuse panel.
4. Push in a new fuse of the same rating, and make sure it fits tightly
in the clips. If it fits loosely, consult
an authorized Kia dealer.
Multi fuse
If the multi fuse is blown, it must be
removed as follows:
1. Turn off the engine.
2. Disconnect the negative batterycable.
3. Remove the nuts shown in the pic- ture above.
4. Replace the fuse with a new one of the same rating.
5. Reverse these steps to reinstall the multi fuse.
CAUTION
After checking the fuse panel inthe engine compartment,securely install the fuse panelcover through the audible click-ing sound.
If not, electrical failures mayoccur from water contact.
OQL075026
OQL075027
Page 575 of 630
779
Maintenance
LIGHT BULBS
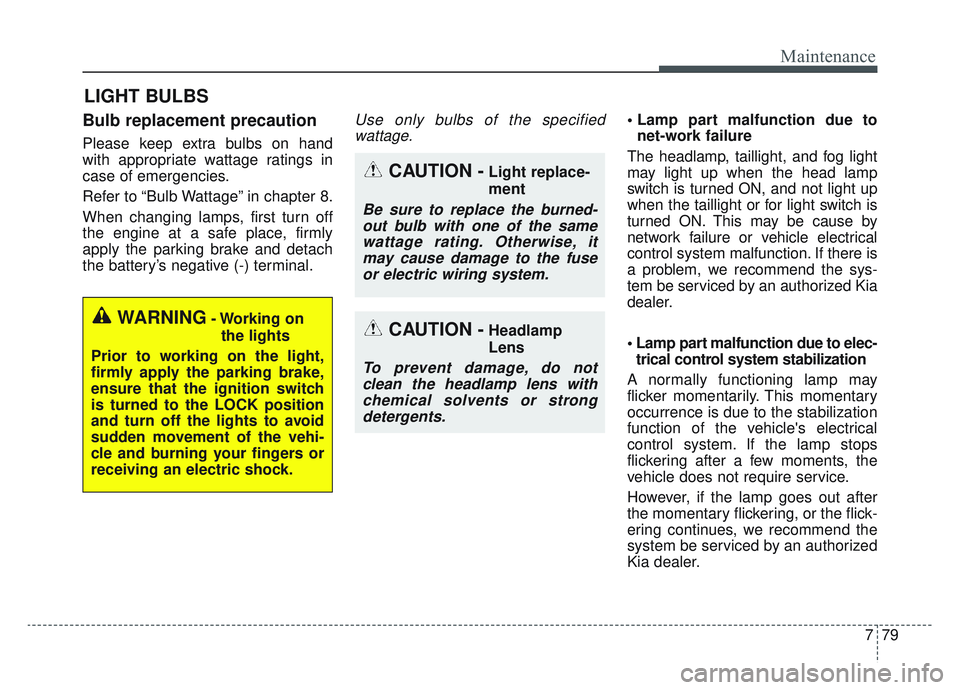
Bulb replacement precaution
Please keep extra bulbs on hand
with appropriate wattage ratings in
case of emergencies.
Refer to “Bulb Wattage” in chapter 8.
When changing lamps, first turn off
the engine at a safe place, firmly
apply the parking brake and detach
the battery’s negative (-) terminal.
Use only bulbs of the specifiedwattage. net-work failure
The headlamp, taillight, and fog light
may light up when the head lamp
switch is turned ON, and not light up
when the taillight or for light switch is
turned ON. This may be cause by
network failure or vehicle electrical
control system malfunction. If there is
a problem, we recommend the sys-
tem be serviced by an authorized Kia
dealer.
trical control system stabilization
A normally functioning lamp may
flicker momentarily. This momentary
occurrence is due to the stabilization
function of the vehicle's electrical
control system. If the lamp stops
flickering after a few moments, the
vehicle does not require service.
However, if the lamp goes out after
the momentary flickering, or the flick-
ering continues, we recommend the
system be serviced by an authorized
Kia dealer.
WARNING- Working on the lights
Prior to working on the light,
firmly apply the parking brake,
ensure that the ignition switch
is turned to the LOCK position
and turn off the lights to avoid
sudden movement of the vehi-
cle and burning your fingers or
receiving an electric shock.
CAUTION -Light replace-
ment
Be sure to replace the burned- out bulb with one of the samewattage rating. Otherwise, itmay cause damage to the fuseor electric wiring system.
CAUTION -Headlamp
Lens
To prevent damage, do notclean the headlamp lens withchemical solvents or strongdetergents.
Page 620 of 630
Index
2I
Air bag - advanced supplemental restraint system ........3-45Adding equipment to or modifying your airbag-equipped vehicle ................................................3-72
Air bag warning label ................................................3-72
Air bag warning light ..................................................3-48
Curtain air bag ............................................................3-64
Driver's and passenger's front air bag ........................3-60
How does the air bag system operate? ......................3-46
Occupant Detection System (ODS) ............................3-52
Side air bag ................................................................3-62
SRS Care ....................................................................3-71\
SRS components and functions ..................................3-49
Air cleaner ....................................................................7-36\
Filter replacement ......................................................7-36
Air conditioning system ..................................................8-7
All Wheel Drive(AWD) ................................................5-23 All Wheel Drive (AWD) transfer mode selection ......5-25
For safe all wheel drive operation ..............................5-26
Reducing the risk of a rollover ..................................5-29
Tight corner brake effect ............................................5-24
Appearance care ............................................................7-94 Exterior care ................................................................7-94
Interior care ................................................................7-99
Audio system ..............................................................4-190 Antenna ....................................................................4-19\
0
Aux, USB port ..........................................................4-192 How vehicle radio works ..........................................4-192
Steering wheel audio controls ..................................4-190
Automatic climate control system ..............................4-155 Air Conditioning refrigerant label ............................4-166
Automatic heating and air conditioning ..................4-156
Checking the amount of air conditioner refrigerant and compressor lubricant ........................................4-167
Climate control air filter ..........................................4-165
Manual heating and air conditioning ........................4-157
System operation ......................................................4-163
Automatic transmission ................................................5-15 Automatic transmission operation ..............................5-15
Good driving practices ................................................5-22
Battery........................................................................\
....7-43 For best battery service ..............................................7-43
Recharging the battery ................................................7-44
Reset items ..................................................................7-45
Before driving ..................................................................5-5 Before entering vehicle ................................................5-5
Before starting ..............................................................5-5
Necessary inspections ..................................................5-5
Blind-Spot Collision Warning (BCW) ..........................5-99 System description ......................................................5-99
System setting and activation ..................................5-100
A
B