lock KIA STINGER 2021 Owners Manual
[x] Cancel search | Manufacturer: KIA, Model Year: 2021, Model line: STINGER, Model: KIA STINGER 2021Pages: 585, PDF Size: 10.87 MB
Page 16 of 585

Your vehicle at a glance
4 2
INTERIOR OVERVIEW
1. Door lock/unlock button.........................4-17
2. Driver position memory system button .3-11
3. Power window switches ........................4-34
4. Central door lock switch ........................4-18
5. Power window lock button .....................4-37
6. Outside rearview mirror control switch..4-64
7. Outside rearview mirror folding button ..4-66
8. Fuel filler door release button ...............4-41
9. Power liftgate open/close button ...........4-23
10. Instrument panel illumination control
switch ..................................................4-68
11. BCW ON/OFF button ........................5-124
12. LKA ON/OFF button..........................5-115
13. Steering wheel ....................................4-51
14. Steering wheel tilt control....................4-52
15. Inner fuse panel ..................................7-57
16. Brake pedal .........................................5-43
17. Parking brake pedal ............................5-45
18. Hood release lever ..............................4-39
19. Seat .......................................................3-4
OCK018003N❈The actual shape may differ from the illustration.
Page 24 of 585

Safety features of your vehicle
6 3
WARNING - Rear seatbacks
Always lock the rear seatback
before driving. Failure to do so
could result in passengers or
objects being thrown forward
injuring vehicle occupants.
WARNING- Luggage and
Cargo
Do not stack pile or stack lug-
gage or cargo higher than the
seatback in the cargo area. In an
accident the cargo could strike
and injury a passenger. If
objects are large, heavy or must
be piled, they must be secured
in the cargo area.
WARNING- Cargo Area
Do not allow passengers to ride
in the cargo area under any cir-
cumstance. The cargo area is
solely for the purpose of trans-
porting luggage or cargo.WARNING- Driver’s seat
Never attempt to adjust the
seat while the vehicle is mov-
ing. This could result in loss
of control of your vehicle.
Do not allow anything to inter-
fere with the normal position
of the seatback. Storing items
against the seatback could
result in serious or fatal injury
in a sudden stop or collision.
Sit as far back as possible from
the steering wheel while still
maintaining comfortable con-
trol of the your vehicle. A dis-
tance of at least 10" from your
chest to the steering wheel is
recommended. Failure to do so
can result in air bag inflation
injuries to the driver.
Page 29 of 585

311
Safety features of your vehicle
Seat back bolster control
(For driver seat, if equipped)
1. Turn the adjustment switch clock-
wise, the right/left seatback bol-
sters will be adjusted inward. Turn
the switch counterclockwise, the
seatback bolster will be adjusted
outward.2. To adjust the bolster height to its
maximum in the default state,
operate the switch for 8 seconds.
After that, release the switch
because there is no change in
height even if you continue to
operate the switch.
3. Once adjustment is done, leave
the switch in place.
Driver position memory system
(if equipped, for power seat)
Driver Position Memory System is
the facility that enables driver’s seat,
leg extension, steering wheel, out-
side rear view mirrors, cluster and
head-up display (HUD) to be con-
trolled with a simple button opera-
tion, which allows a driver to recall
memorized driving positions to suit
your preferences.
- Driver’s seat/Leg extension/Steering
Wheel/Exterior mirrors: Position
- Cluster: Brightness of lighting
- Head Up Display (HUD): Position
and brightness.
OCK037008OCK037021
Page 34 of 585

Safety features of your vehicle
16 3
✽
✽
NOTICE
If you recline the seatback towards
the front with the headrest and seat
cushion raised, the headrest may
come in contact with the sunvisor or
other parts of the vehicle.
Removal and reinstallation
To remove the headrest:
1. Recline the seatback (2) with the
recline switch (1).
2. Raise headrest as far as it can go.
3. Press the headrest release button
(3) while pulling the headrest up (4).To reinstall the headrest :
1. Put the headrest poles (2) into the
holes while pressing the release
button (1).
2. Recline the seatback (4) with the
recline switch (3).
3. Adjust the headrest to the appro-
priate height.
OCK037012
WARNING - Headrest
Removal
NEVER allow anyone to ride in a
seat with the headrest removed.
Headrests can provide critical
neck and head support in a
crash.
OYFH034205OCK037014
WARNING- Headrest
Reinstallation
To reduce the risk of injury to
the head or neck, always make
sure the headrest is locked into
position and adjusted properly
after reinstalling.
Page 36 of 585

Safety features of your vehicle
18 3
Adjusting the height up and down
To raise the headrest, pull it up to the
desired position (1). To lower the
headrest, push and hold the release
button (2) on the headrest support
and lower the headrest to the desired
position (3).Removal and reinstallation
To remove the headrest, raise it as
far as it can go then press the
release button (1) while pulling the
headrest upward (2).
To reinstall the headrest, put the
headrest poles (3) into the holes
while pressing the release button (1).
Then adjust it to the appropriate
height and ensure that it locks in
position.
Armrest
To use the armrest, pull it forward
from the seatback.
OCK037018OCK037017N
OCK039019N
Page 37 of 585

319
Safety features of your vehicle
Folding the rear seat
The rear seatbacks may be folded to
facilitate carrying long items or to
increase the luggage capacity of the
vehicle.
To fold down the rear seatback
1. Make sure the rear seat belt web-
bing is in the guide to prevent the
seat belt from being damaged.
2. Set the front seatback to the
upright position and if necessary,
slide the front seat forward.
3. Lower the rear headrests to the
lowest position.
4. Pull on the seatback folding
lever(1), then fold the seat toward
the front of the vehicle.5. To use the rear seat, lift and push
the seatback backward. Push the
seat back firmly until it clicks into
place. Make sure the seatback is
locked in place.
6. Return the rear seat belt to the
proper position.
OCK037067
WARNING
The purpose of the fold-down
rear seatbacks is to allow you to
carry longer objects that could
not otherwise be accommodat-
ed.
Never allow passengers to sit
on top of the folded down seat-
back while the car is moving as
this is not a proper seating
position and no seat belts are
available for use. This could
result in serious injury or death
in case of an accident or sud-
den stop. Objects carried on the
folded down seatback should
not extend higher than the top
of the front seats. This could
allow cargo to slide forward and
cause injury or damage during
sudden stops.
CAUTION
Be careful when loading cargo
through the rear passenger
seats to prevent damage to the
vehicle interior.
OCK037068
Page 38 of 585

Safety features of your vehicle
20 3
WARNING
Unless the driver’s position is
properly set according to the
driver’s physical figure, do not
fold the rear seat. It may
increase body injuries in a sud-
den stop or collision.
WARNING - Uprighting
seat
When you return the seatback
to its upright position, hold the
seatback and return it slowly. If
the seatback is returned with-
out holding it, the back of the
seat could spring forward
resulting in injury caused by
being struck by the seatback.
WARNING
When you return the rear seat-
back to its upright position after
being folded down:
Be careful not to damage the
seat belt webbing or buckle. Do
not allow the seat belt webbing
or buckle to get caught or
pinched in the rear seat. Ensure
that the seatback is completely
locked into its upright position
by pushing on the top of the
seatback. Otherwise, in an acci-
dent or sudden stop, the seat
could fold down and allow
cargo enter the passenger com-
partment, which could result in
serious injury or death.
CAUTION- Rear seat
belts
When returning the rear seat-
backs to the upright position,
remember to return the rear
shoulder belts to their proper
position.
CAUTION - Damaging
rear seat belt buckles
When you fold the rear seat-
back, insert the buckle between
the rear seatback and cushion.
Doing so can prevent the buckle
from being damaged by the rear
seatback.
Page 43 of 585

325
Safety features of your vehicle
To adjust the height of the seat belt
anchor, lower or raise the height
adjuster into an appropriate position.
To raise the height adjuster, pull it up
(1). To lower it, push it down (3) while
pressing the height adjuster button (2).
Release the button to lock the
anchor into position. Try sliding the
height adjuster to make sure that it
has locked into position.
Improperly positioned seat belts can
cause serious injuries in an accident.
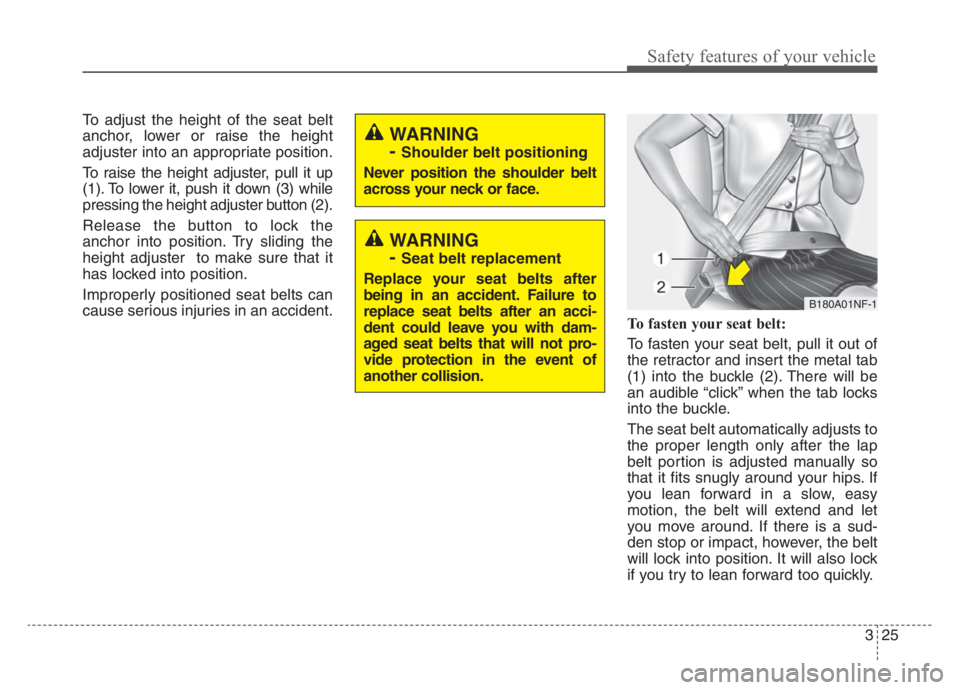
To fasten your seat belt:
To fasten your seat belt, pull it out of
the retractor and insert the metal tab
(1) into the buckle (2). There will be
an audible “click” when the tab locks
into the buckle.
The seat belt automatically adjusts to
the proper length only after the lap
belt portion is adjusted manually so
that it fits snugly around your hips. If
you lean forward in a slow, easy
motion, the belt will extend and let
you move around. If there is a sud-
den stop or impact, however, the belt
will lock into position. It will also lock
if you try to lean forward too quickly.
B180A01NF-1
WARNING
-
Shoulder belt positioning
Never position the shoulder belt
across your neck or face.
WARNING
-
Seat belt replacement
Replace your seat belts after
being in an accident. Failure to
replace seat belts after an acci-
dent could leave you with dam-
aged seat belts that will not pro-
vide protection in the event of
another collision.
Page 44 of 585

Safety features of your vehicle
26 3
✽
✽
NOTICE
If you are not able to pull out the
seat belt from the retractor, firmly
pull the belt out and release it. Then
you will be able to pull the belt out
smoothly.
To fasten seat belts in the rear seats:
Pull the metal tab (3) and insert it
into the buckle (4). There will be an
audible “click” when the tab locks into
the buckle. Make sure the belt is not
twisted.
When using the rear center seat belt
the buckle with the “CENTER” mark
must be used.
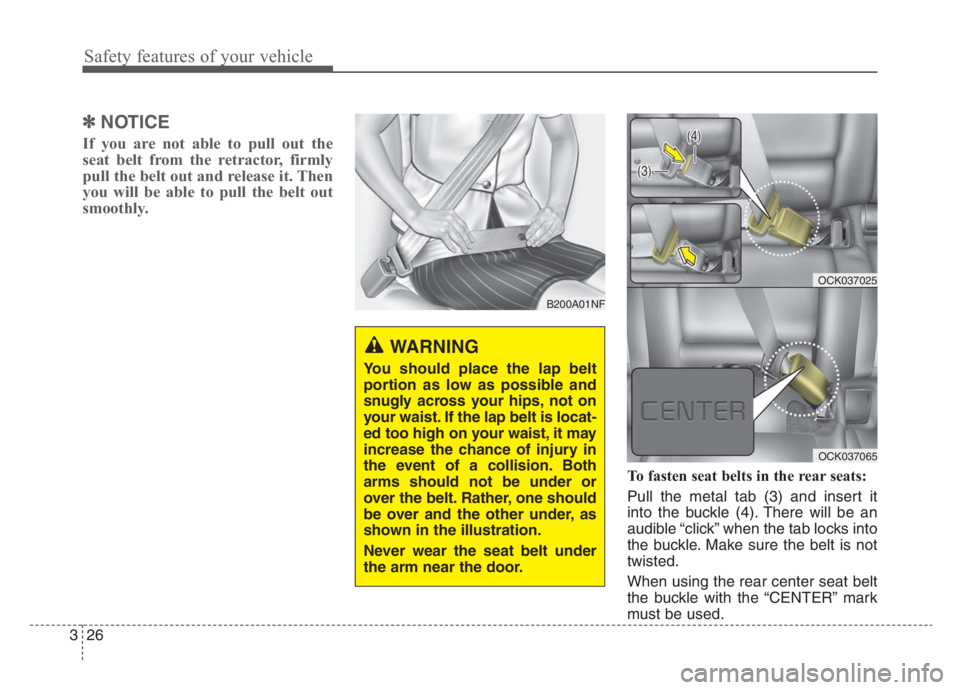
B200A01NF
WARNING
You should place the lap belt
portion as low as possible and
snugly across your hips, not on
your waist. If the lap belt is locat-
ed too high on your waist, it may
increase the chance of injury in
the event of a collision. Both
arms should not be under or
over the belt. Rather, one should
be over and the other under, as
shown in the illustration.
Never wear the seat belt under
the arm near the door.
OCK037025
OCK037065
Page 45 of 585

327
Safety features of your vehicle
✽ ✽
NOTICE
If you are not able to pull out the
safety belt from the retractor, firmly
pull the belt out and release it. After
release, you will be able to pull the
belt out smoothly.
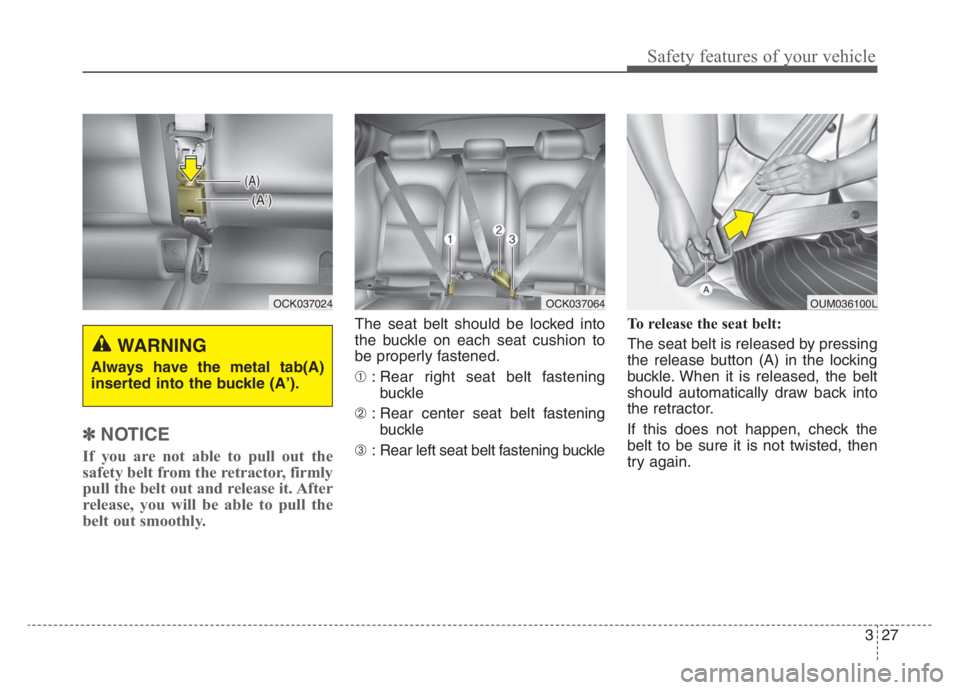
The seat belt should be locked into
the buckle on each seat cushion to
be properly fastened.
➀: Rear right seat belt fastening
buckle
➁: Rear center seat belt fastening
buckle
➂: Rear left seat belt fastening buckleTo release the seat belt:
The seat belt is released by pressing
the release button (A) in the locking
buckle. When it is released, the belt
should automatically draw back into
the retractor.
If this does not happen, check the
belt to be sure it is not twisted, then
try again.
WARNING
Always have the metal tab(A)
inserted into the buckle (A’).
OUM036100LOCK037064OCK037024