light KIA STINGER 2022 Quick Start Guide Base Audio
[x] Cancel search | Manufacturer: KIA, Model Year: 2022, Model line: STINGER, Model: KIA STINGER 2022Pages: 148, PDF Size: 4.05 MB
Page 12 of 148
10
Turning off the system
If you do not want to use the system while driving, press and hold the
Power button on the control panel.
\225The screen and the sound will turn off.
\225To use the system again, press the Power button.
After you have turned off the engine, the system will automatically turn off
after a while or as soon as you open the driver's door.
\225Depending on the vehicle model or specifications, the system may turn off as soon as you
turn off the engine.
Product specifications
Common specifications
Item Specifications
Dimensions (W x H x L) 313.5 x 114.2 x 248.7 mm
Weight 1.4 kg
Display
ItemSpecifications
Size (W x H) 8 inch (176.4 x 99.36 mm)
Pixel number 384,000 pixels (resolution: 800 x 480)
Operating method Thin Film Transistor (TFT) Active Matrix
Viewing angle Left/Right, Top/Bottom: 89°
Internal lighting LED
Page 26 of 148
1-10
\335Caution
\225Do not apply excessive pressure to the
touch screen or press it with a pointed
object. Doing so may damage the touch
screen.
\225Do not let any electrically conductive
material contact the touch screen, and
do not place any objects that generate
electromagnetic waves, such as wireless
chargers or electronic devices, near the
touch screen. The system may work
incorrectly due to electromagnetic
effects, which may cause the touch
screen to malfunction.
\333 Note
If you wear regular gloves, you will not be
able to control the touch screen. Remove
your gloves or wear gloves designed for
use with a touch screen.
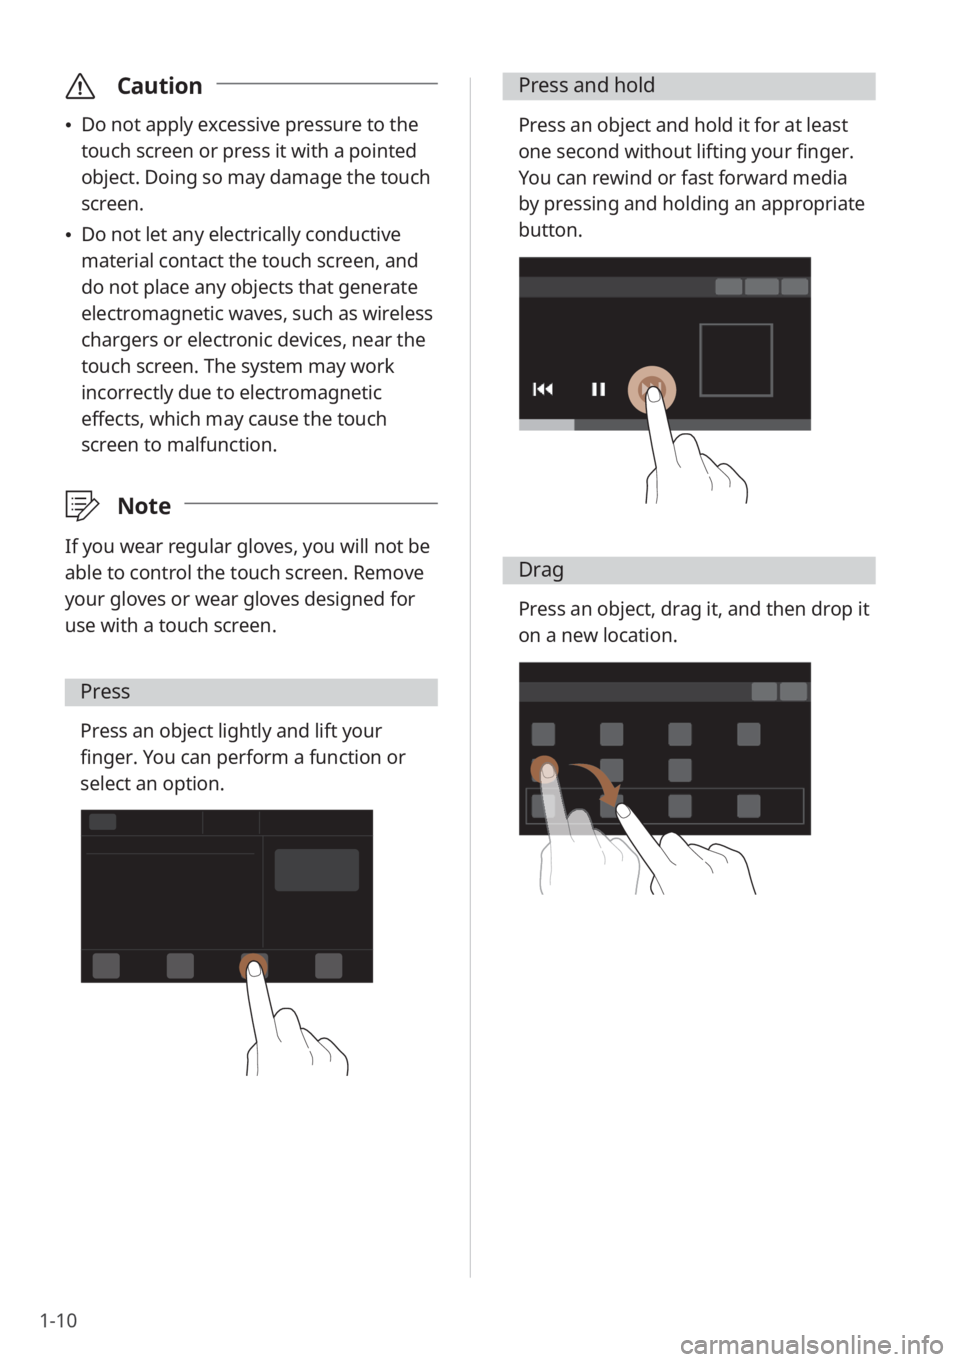
Press
Press an object lightly and lift your
finger. You can perform a function or
select an option.
Press and hold
Press an object and hold it for at least
one second without lifting your finger.
You can rewind or fast forward media
by pressing and holding an appropriate
button.
Drag
Press an object, drag it, and then drop it
on a new location.
Page 27 of 148
1-11
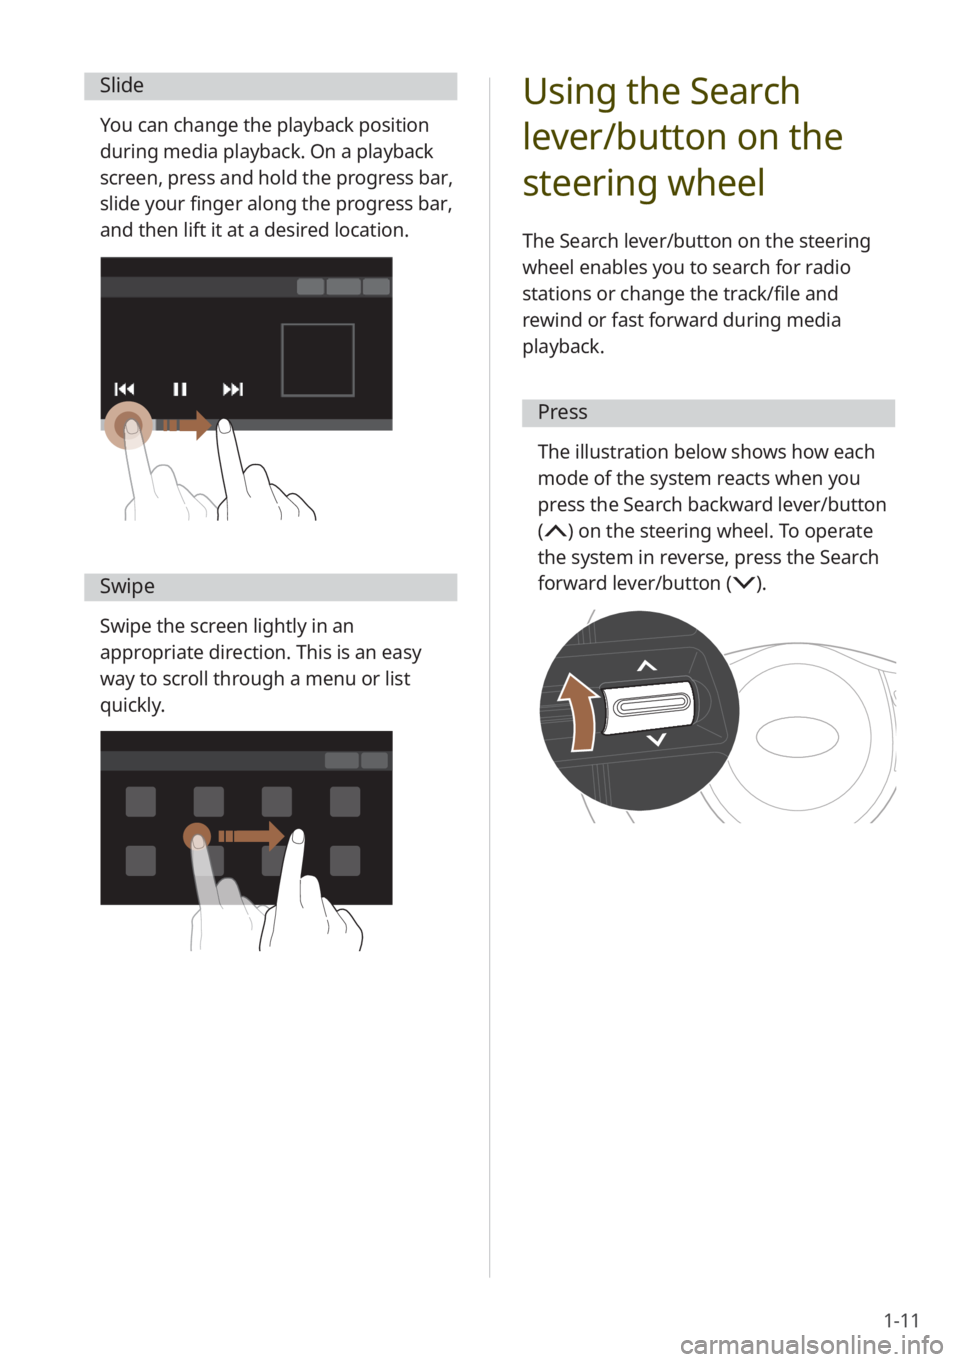
Slide
You can change the playback position
during media playback. On a playback
screen, press and hold the progress bar,
slide your finger along the progress bar,
and then lift it at a desired location.
Swipe
Swipe the screen lightly in an
appropriate direction. This is an easy
way to scroll through a menu or list
quickly.
Using the Search
lever/button on the
steering wheel
The Search lever/button on the steering
wheel enables you to search for radio
stations or change the track/file and
rewind or fast forward during media
playback.
Press
The illustration below shows how each
mode of the system reacts when you
press the Search backward lever/button
(
) on the steering wheel. To operate
the system in reverse, press the Search
forward lever/button (
) .
Page 99 of 148
7-5
Diagnosing your vehicle
You can diagnose your vehicle. With
a vehicle diagnosis, you can schedule
maintenance.
1 Park your vehicle in a safe
location.
\333Note
Depending on the vehicle model
or specifications, you may need to
ensure your vehicle is parked before
performing a diagnosis.
2 On the Home screen, press
All Menus > UVO > Vehicle
Diagnostics .
\225A remote diagnosis will begin.
Refrain from using your system until
the diagnosis is complete and the
result is displayed on the screen.
If you move to another screen
while a diagnosis is in progress, the
diagnosis will be canceled.
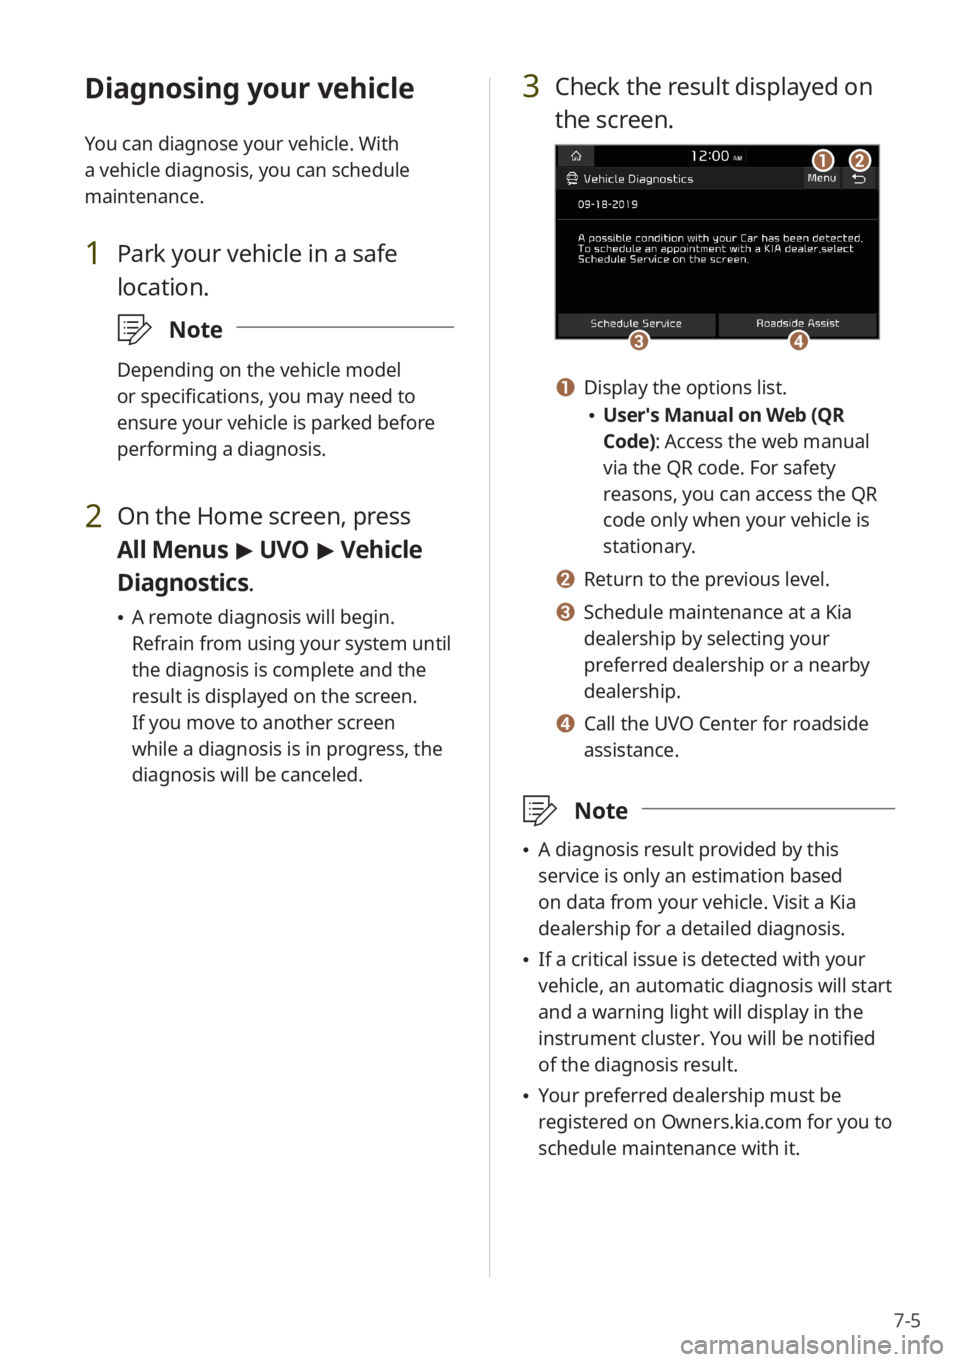
3 Check the result displayed on
the screen.
cc
aa
dd
bb
a a Display the options list.
\225User′s Manual on Web (QR
Code): Access the web manual
via the QR code. For safety
reasons, you can access the QR
code only when your vehicle is
stationary.
b b Return to the previous level.
c c Schedule maintenance at a Kia
dealership by selecting your
preferred dealership or a nearby
dealership.
d d Call the UVO Center for roadside
assistance.
\333 Note
\225A diagnosis result provided by this
service is only an estimation based
on data from your vehicle. Visit a Kia
dealership for a detailed diagnosis.
\225If a critical issue is detected with your
vehicle, an automatic diagnosis will start
and a warning light will display in the
instrument cluster. You will be notified
of the diagnosis result.
\225Your preferred dealership must be
registered on Owners.kia.com for you to
schedule maintenance with it.
Page 113 of 148
8-11
[Storage
You can view your system′s memory
storage information.
[User′s Manual on Web (QR
Code)
You can access the web manual of the
system by scanning the QR code with your
smartphone.
\334 Warning
Park your vehicle in a safe location before
scanning the QR code. For safety reasons,
you are not able to access QR codes from
the system′s screen while the vehicle is
moving.
[Reset
You can reset your system settings to
default values. All user data stored in the
system will also be deleted.
Date/Time
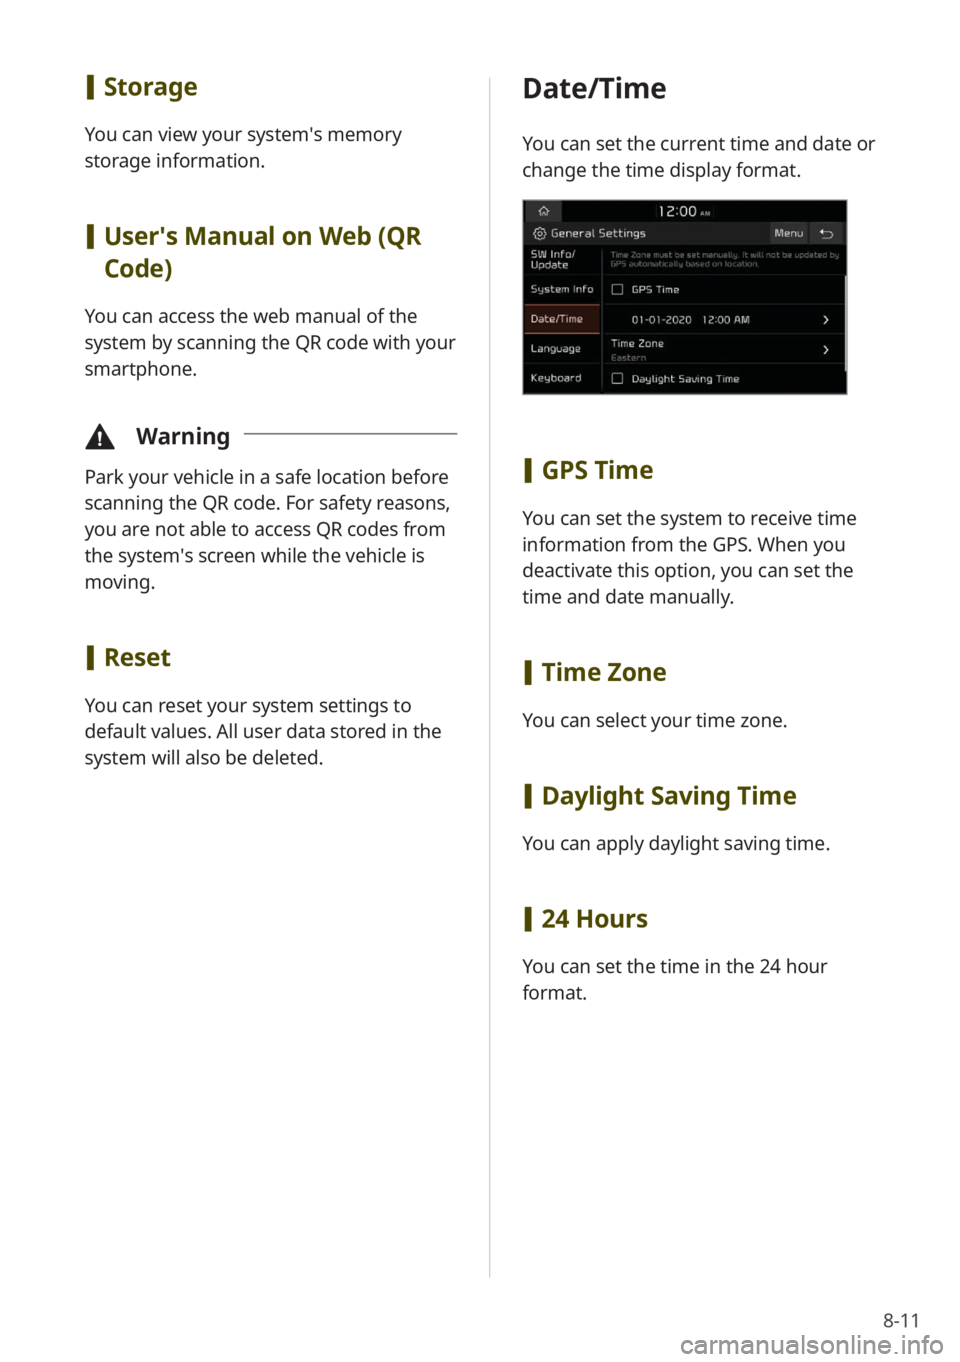
You can set the current time and date or
change the time display format.
[GPS Time
You can set the system to receive time
information from the GPS. When you
deactivate this option, you can set the
time and date manually.
[Time Zone
You can select your time zone.
[Daylight Saving Time
You can apply daylight saving time.
[24 Hours
You can set the time in the 24 hour
format.
Page 120 of 148
8-18
Illumination
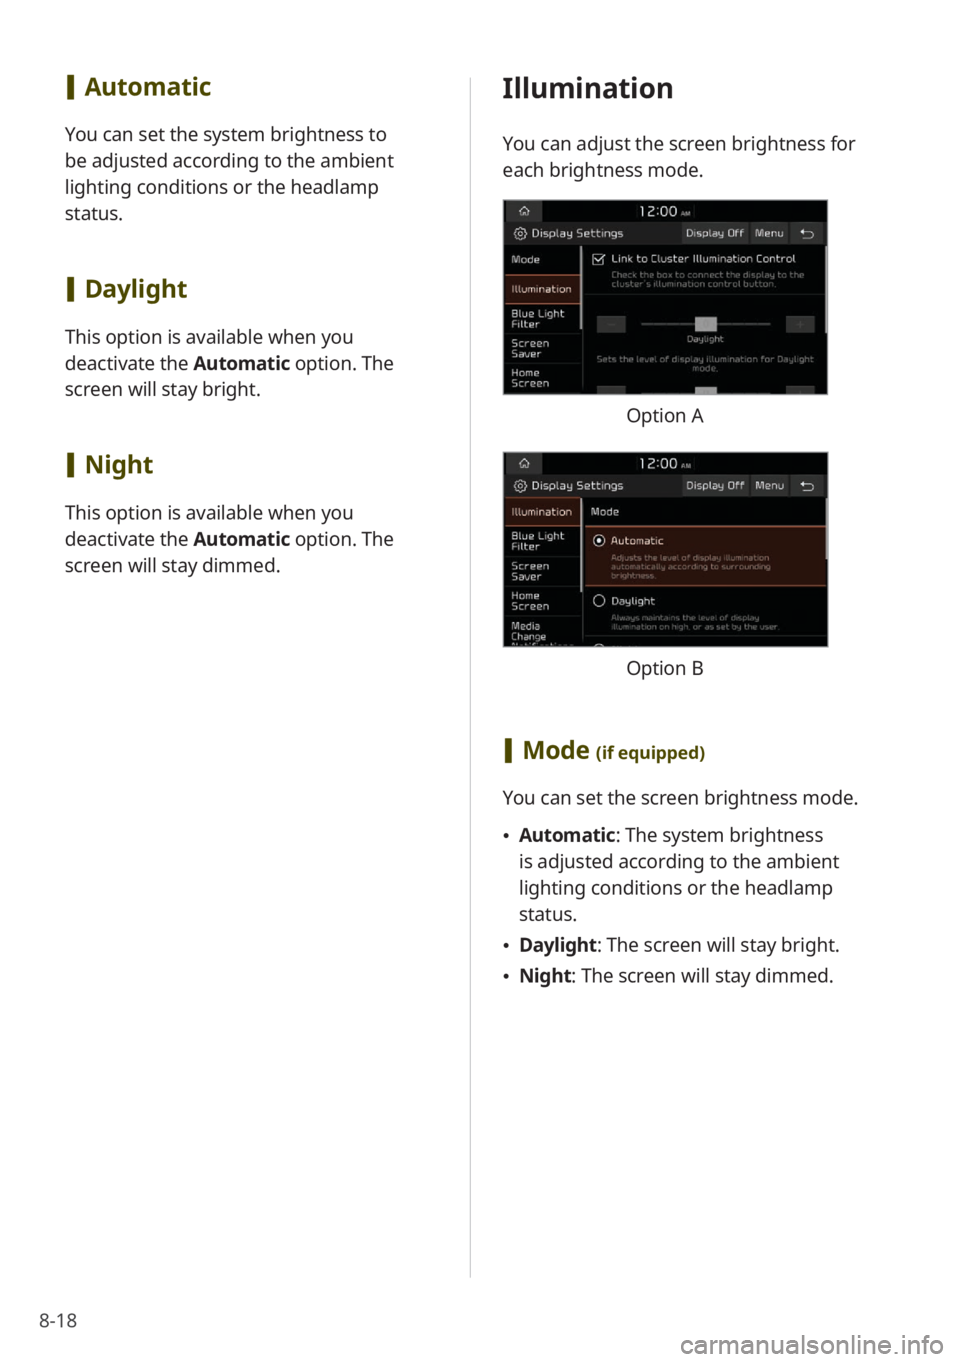
You can adjust the screen brightness for
each brightness mode.
Option A
Option B
[Mode (if equipped)
You can set the screen brightness mode.
\225 Automatic : The system brightness
is adjusted according to the ambient
lighting conditions or the headlamp
status.
\225 Daylight : The screen will stay bright.
\225Night: The screen will stay dimmed.
[Automatic
You can set the system brightness to
be adjusted according to the ambient
lighting conditions or the headlamp
status.
[Daylight
This option is available when you
deactivate the Automatic option. The
screen will stay bright.
[ Night
This option is available when you
deactivate the Automatic option. The
screen will stay dimmed.
Page 121 of 148
8-19
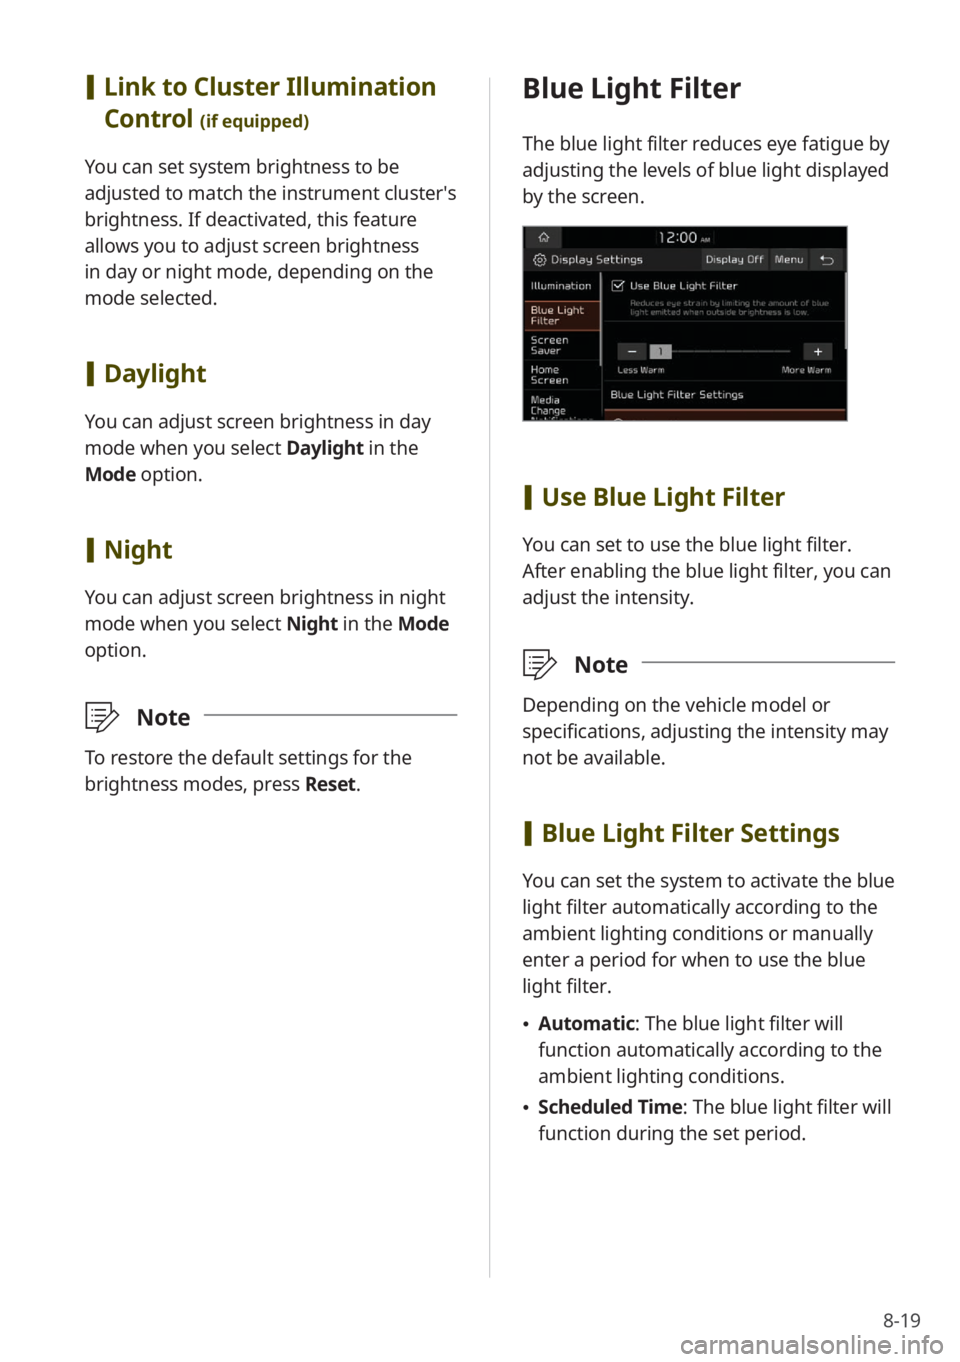
Blue Light Filter
The blue light filter reduces eye fatigue by
adjusting the levels of blue light displayed
by the screen.
[Use Blue Light Filter
You can set to use the blue light filter.
After enabling the blue light filter, you can
adjust the intensity.
\333 Note
Depending on the vehicle model or
specifications, adjusting the intensity may
not be available.
[Blue Light Filter Settings
You can set the system to activate the blue
light filter automatically according to the
ambient lighting conditions or manually
enter a period for when to use the blue
light filter.
\225 Automatic : The blue light filter will
function automatically according to the
ambient lighting conditions.
\225 Scheduled Time: The blue light filter will
function during the set period.
[Link to Cluster Illumination
Control
(if equipped)
You can set system brightness to be
adjusted to match the instrument cluster′s
brightness. If deactivated, this feature
allows you to adjust screen brightness
in day or night mode, depending on the
mode selected.
[Daylight
You can adjust screen brightness in day
mode when you select Daylight in the
Mode option.
[ Night
You can adjust screen brightness in night
mode when you select Night in the Mode
option.
\333 Note
To restore the default settings for the
brightness modes, press Reset.
Page 142 of 148
9-18
Index
A
advanced system settings 8-7
all menus 1-15
Android Auto
via USB connection 2-3
via wireless connection 2-7
Apple CarPlay
via USB connection 2-5
via wireless connection 2-12
B
battery warning 1-9
beep, set 8-17
blue light filter settings 8-19
Bluetooth audio player
pausing/resuming 4-8
playing 4-6
playing the previous/next file 4-8
restarting playback 4-8
Bluetooth information 8-6
Bluetooth mode
connecting devices 5-3
deleting devices 5-6
disconnecting devices 5-5
pairing devices 5-2
Bluetooth phone
answering a call 5-13
call history 5-7
contacts list 5-10
favorites list 5-8
functions during a call 5-14
keypad 5-11
making a call 5-6
switching calls 5-15
Bluetooth settings 8-6
Bluetooth specifications 9-15
brightness mode, set 8-17
brightness settings 8-18
button settings 8-9
C
call history 5-6
climate control system 2-20, 2-21
climate settings 8-4
coasting, set 8-3
component names and functions control panel
custom button 1-5
media button 1-5
power button/volume knob 1-5
radio button 1-5
reset button 1-5, 9-6
search backward/forward
button 1-5
search knob 1-6
setup button 1-5
steering wheel remote control
call/answer button 1-7
call end button 1-7
custom button 1-7
mode button 1-6
mute button 1-6
search lever/button 1-6
voice recognition button 1-6
volume lever/button 1-6