lock KIA STINGER 2022 Quick Start Guide Base Audio
[x] Cancel search | Manufacturer: KIA, Model Year: 2022, Model line: STINGER, Model: KIA STINGER 2022Pages: 148, PDF Size: 4.05 MB
Page 36 of 148
2-4
3 If your smartphone is locked,
unlock it and agree to use
phone projection.
\225When the smartphone is recognized
successfully, the Android Auto menu
is activated on the All Menus screen.
4 On the Home screen, press All
Menus > Android Auto.
5 Use your smartphone's
functions, such as calling and
messaging, on your system.
\225 Press an icon on the screen to run an
app or perform a function.
\225Press the Voice recognition button
on the steering wheel to start
Google voice recognition.
\333 Note
\225Even if you start phone projection
while music is playing in your
smartphone′s music player, music
playback may not automatically
switch to your system. To play music
via the system, open the music
player on the phone projection
screen and begin playback, or
press and hold the Media button
and select an appropriate phone
projection function from the media
selection window.
\225When you are using your
smartphone′s navigation via phone
projection, sounds from both the
system′s radio/media function
and the navigation will be output
through your vehicle′s speakers.
When you turn the Volume knob
while both sounds are being output,
the navigation volume is adjusted
first.
6 To end Android Auto, remove
the USB cable from your
system.
Page 38 of 148
2-6Start Apple CarPlay by following the steps
below:
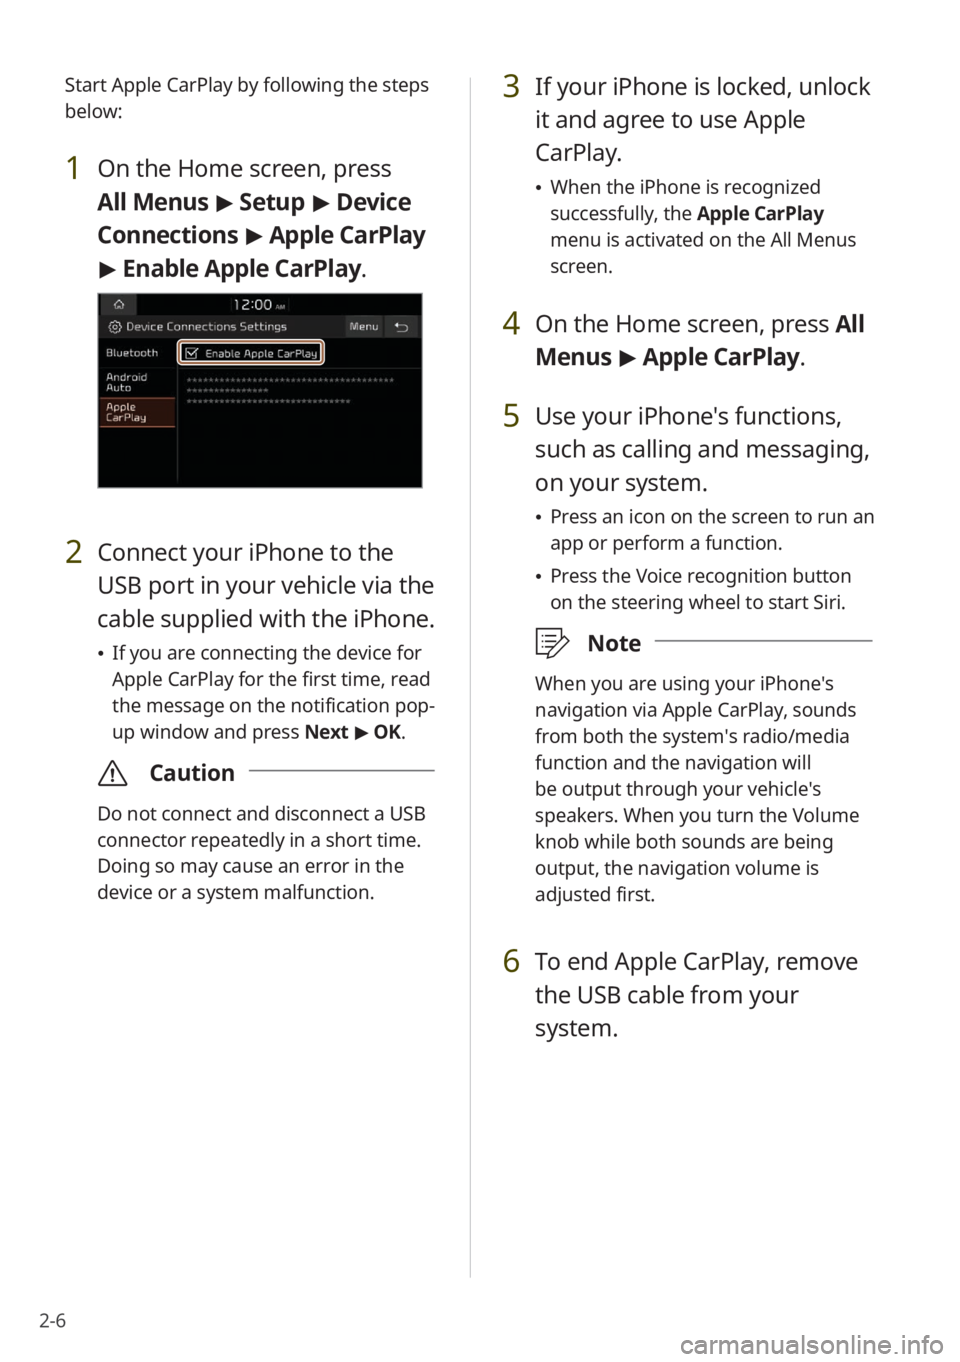
1 On the Home screen, press
All Menus
> Setup > Device
Connections > Apple CarPlay
> Enable Apple CarPlay .
2 Connect your iPhone to the
USB port in your vehicle via the
cable supplied with the iPhone.
\225If you are connecting the device for
Apple CarPlay for the first time, read
the message on the notification pop-
up window and press Next > OK.
\335 Caution
Do not connect and disconnect a USB
connector repeatedly in a short time.
Doing so may cause an error in the
device or a system malfunction.
3 If your iPhone is locked, unlock
it and agree to use Apple
CarPlay.
\225When the iPhone is recognized
successfully, the Apple CarPlay
menu is activated on the All Menus
screen.
4 On the Home screen, press All
Menus > Apple CarPlay.
5 Use your iPhone's functions,
such as calling and messaging,
on your system.
\225 Press an icon on the screen to run an
app or perform a function.
\225Press the Voice recognition button
on the steering wheel to start Siri.
\333 Note
When you are using your iPhone′s
navigation via Apple CarPlay, sounds
from both the system′s radio/media
function and the navigation will
be output through your vehicle′s
speakers. When you turn the Volume
knob while both sounds are being
output, the navigation volume is
adjusted first.
6 To end Apple CarPlay, remove
the USB cable from your
system.
Page 42 of 148
2-10
2 Connect your smartphone to
the USB port in your vehicle
via the cable supplied with the
smartphone, or access the
phone projection devices list
and select your smartphone.
\225If you are connecting the device for
phone projection for the first time,
read the message on the notification
pop-up window and press Next >
OK.
\335 Caution
Do not connect and disconnect a USB
connector repeatedly in a short time.
Doing so may cause an error in the
device or a system malfunction.
3 If your smartphone is locked,
unlock it and agree to use
phone projection.
\225When the smartphone is recognized
successfully, the Android Auto menu
is activated on the All Menus screen.
4 On the Home screen, press All
Menus > Android Auto.
5 Use your smartphone′s
functions, such as calling and
messaging, on your system.
\225 Press an icon on the screen to run an
app or perform a function.
\225Press the Voice recognition button
on the steering wheel to start
Google voice recognition.
# Starting Android Auto
Before using Android Auto, be sure to
check the following:
Android Auto support on your
smartphone
Visit the Android homepage ( https://
www.android.com/auto ) and check the
regions, device types, and models that
support Android Auto.
Android Auto installed on your
smartphone
Download and install the Android Auto
app from Google Play. If you are in
a region where Android Auto is not
supported, you cannot install the app.
Start Android Auto by following the steps
below:
1 Ensure that a connection
type is enabled.
> See ″Activating
wireless connectivity ″ or
″Activating USB
connectivity .″
Page 46 of 148
2-14
#Starting Apple CarPlay
Before using Apple CarPlay, be sure to
check the following:
Apple CarPlay support on your
iPhone
Visit the Apple homepage ( https://
www.apple.com/ios/carplay) and check
the iPhone models that support Apple
CarPlay.
Apple CarPlay and Siri activated or
updated on your iPhone
On your iPhone, ensure that Apple
CarPlay and Siri are activated. If your
iPhone does not have the functions,
update the iPhone′s operating system to
the latest version.
Start Apple CarPlay by following the steps
below:
1 Ensure that wireless
connectivity is enabled.
> See
″ Activating wireless connectivity .″
2 Access the phone projection
devices list and select your
iPhone.
3 If your iPhone is locked, unlock
it and agree to use Apple
CarPlay.
\225When the iPhone is recognized
successfully, the Apple CarPlay
menu is activated on the All Menus
screen.
4 On the Home screen, press All
Menus > Apple CarPlay.
5 Use your iPhone′s functions,
such as calling and messaging,
on your system.
\225 Press an icon on the screen to run an
app or perform a function.
\225Press the Voice recognition button
on the steering wheel to start Siri.
\333 Note
When you are using your iPhone′s
navigation via Apple CarPlay, sounds
from both the system′s radio/media
function and the navigation will
be output through your vehicle′s
speakers. When you turn the Volume
knob while both sounds are being
output, the navigation volume is
adjusted first.
Page 53 of 148
2-21
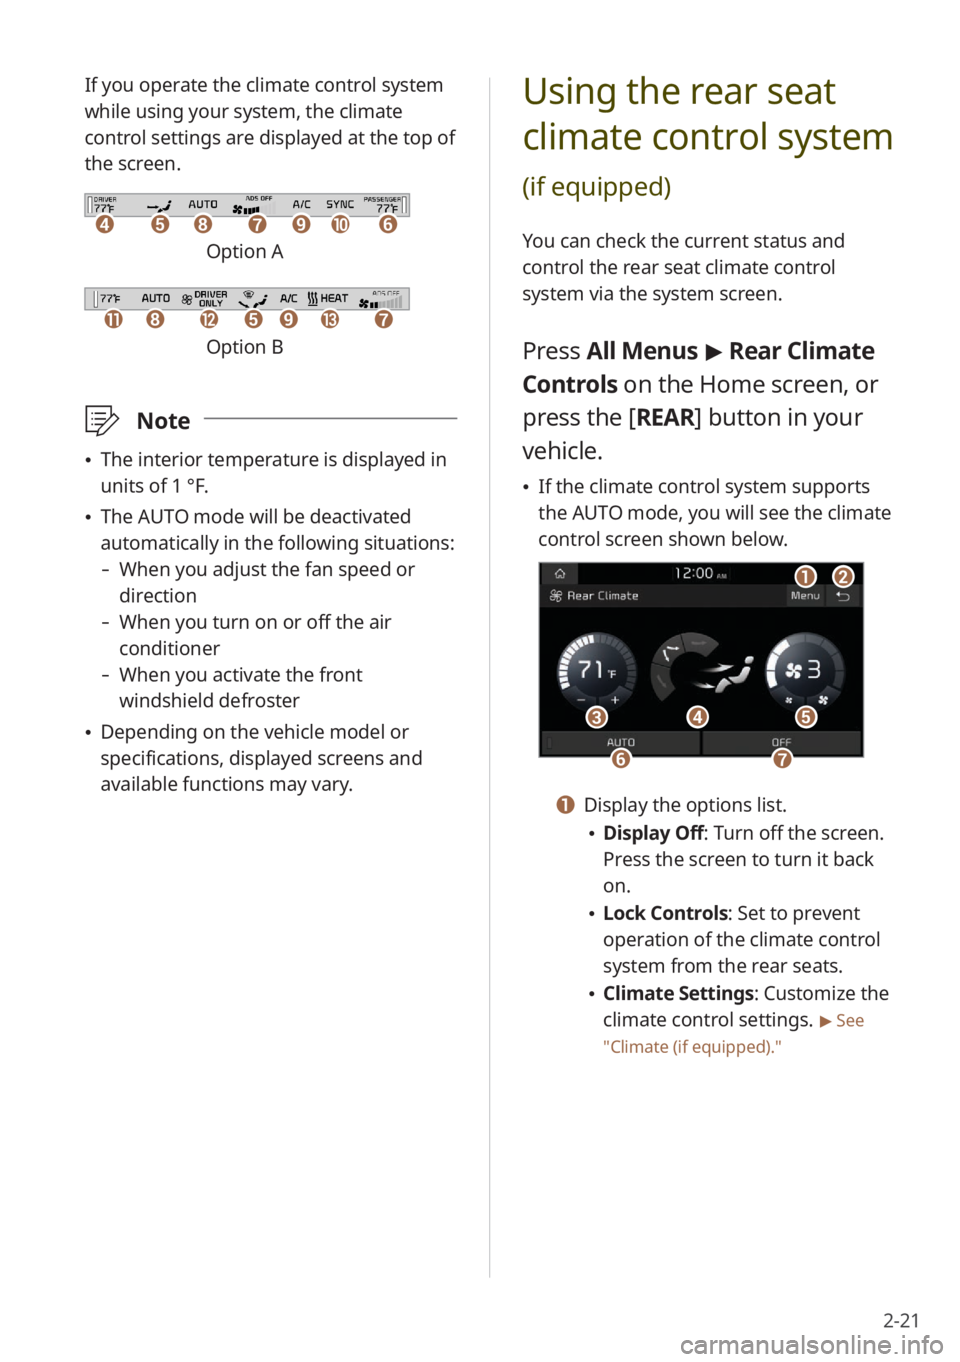
If you operate the climate control system
while using your system, the climate
control settings are displayed at the top of
the screen.
ddeehhffiijjgg
Option A
kkllhheeiimmgg
Option B
\333Note
\225The interior temperature is displayed in
units of 1 °F.
\225The AUTO mode will be deactivated
automatically in the following situations:
- When you adjust the fan speed or
direction
-When you turn on or off the air
conditioner
-When you activate the front
windshield defroster
\225Depending on the vehicle model or
specifications, displayed screens and
available functions may vary.
Using the rear seat
climate control system
(if equipped)
You can check the current status and
control the rear seat climate control
system via the system screen.
Press All Menus > Rear Climate
Controls on the Home screen, or
press the [ REAR] button in your
vehicle.
\225 If the climate control system supports
the AUTO mode, you will see the climate
control screen shown below.
aabb
dd
ffgg
ccee
a a Display the options list.
\225Display Off: Turn off the screen.
Press the screen to turn it back
on.
\225Lock Controls : Set to prevent
operation of the climate control
system from the rear seats.
\225 Climate Settings: Customize the
climate control settings.
> See
″ Climate (if equipped) .″
Page 97 of 148
7-3
Activating UVO services
You must activate UVO services to use
them. An account with Owners.kia.com
is required for activation. If you do not
already have an account, enter your
information to create one. If you already
have an account, enter the verification
code you received from Owners.kia.com.
1 Park your vehicle in a safe
location.
\225You cannot enter information for
service activation while your vehicle
is moving.
2 On the Home screen, press All
Menus > UVO > UVO Settings
> Activate UVO.
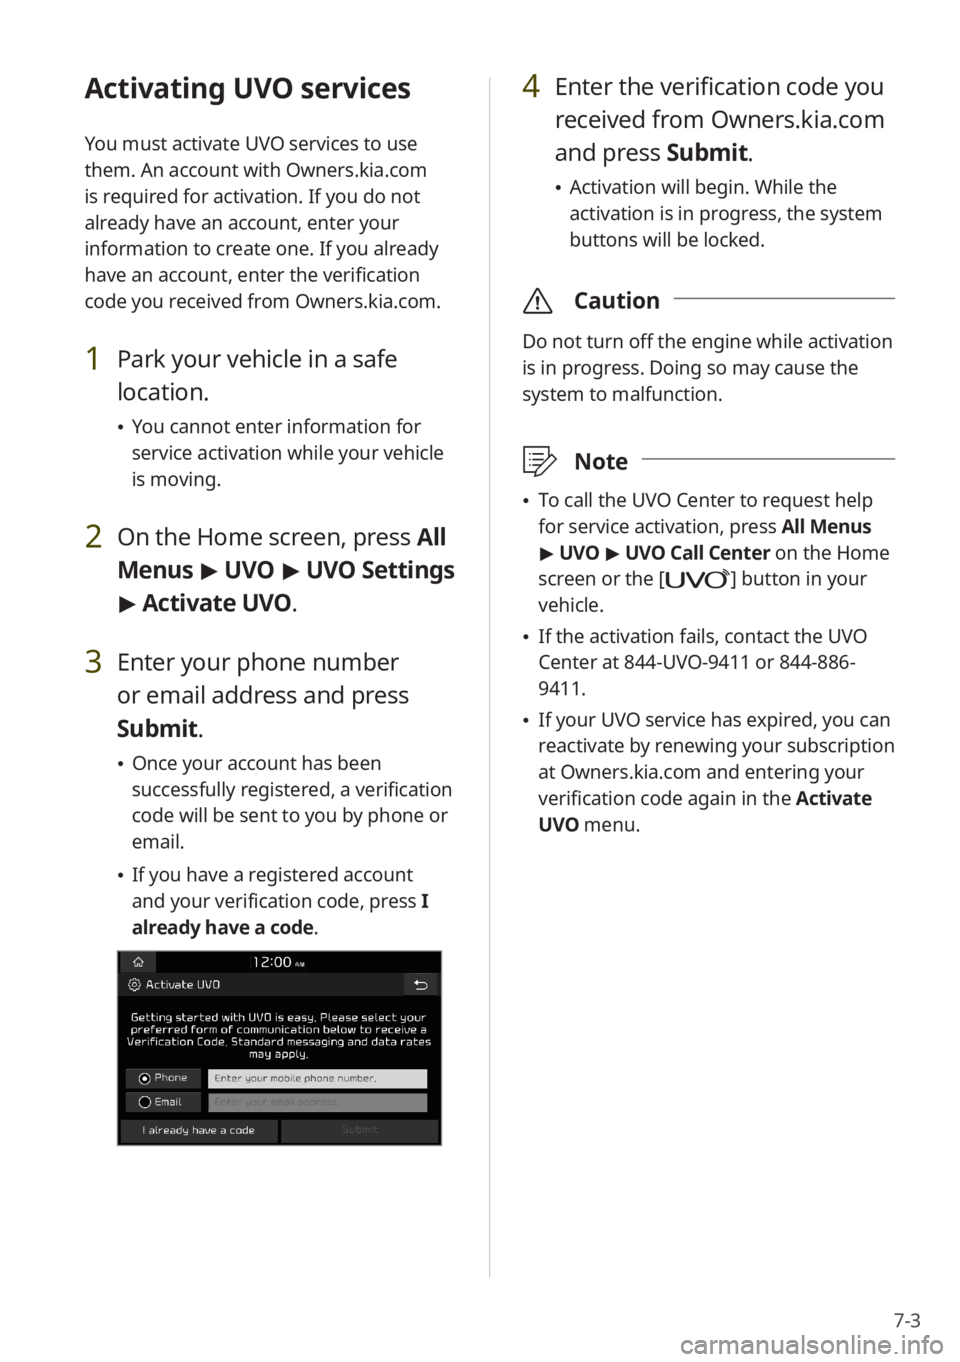
3 Enter your phone number
or email address and press
Submit.
\225 Once your account has been
successfully registered, a verification
code will be sent to you by phone or
email.
\225If you have a registered account
and your verification code, press I
already have a code .
4 Enter the verification code you
received from Owners.kia.com
and press Submit.
\225 Activation will begin. While the
activation is in progress, the system
buttons will be locked.
\335 Caution
Do not turn off the engine while activation
is in progress. Doing so may cause the
system to malfunction.
\333Note
\225To call the UVO Center to request help
for service activation, press All Menus
> UVO > UVO Call Center on the Home
screen or the [
] button in your
vehicle.
\225 If the activation fails, contact the UVO
Center at 844-UVO-9411 or 844-886-
9411.
\225If your UVO service has expired, you can
reactivate by renewing your subscription
at Owners.kia.com and entering your
verification code again in the Activate
UVO menu.
Page 107 of 148
8-5
[Defog/Defrost Options (if
equipped)
You can change the defog/defrost
settings.
\225 Defog/Defrost : Set to activate air
ventilation or operate the air conditioner
automatically to defog or defrost the
windshield.
\225 Auto Defog: Set to operate the climate
control system automatically to
prevent fog from forming on the front
windshield.
[Climate Features (if equipped)
You can change the settings for the
climate control features.
\225 Lock Rear Climate Controls (if
equipped): Set to prevent operation of
the climate control system from the rear
seats.
\225 Rear Climate Controls : Check the
current status and control the rear seat
climate control system via the system
screen.
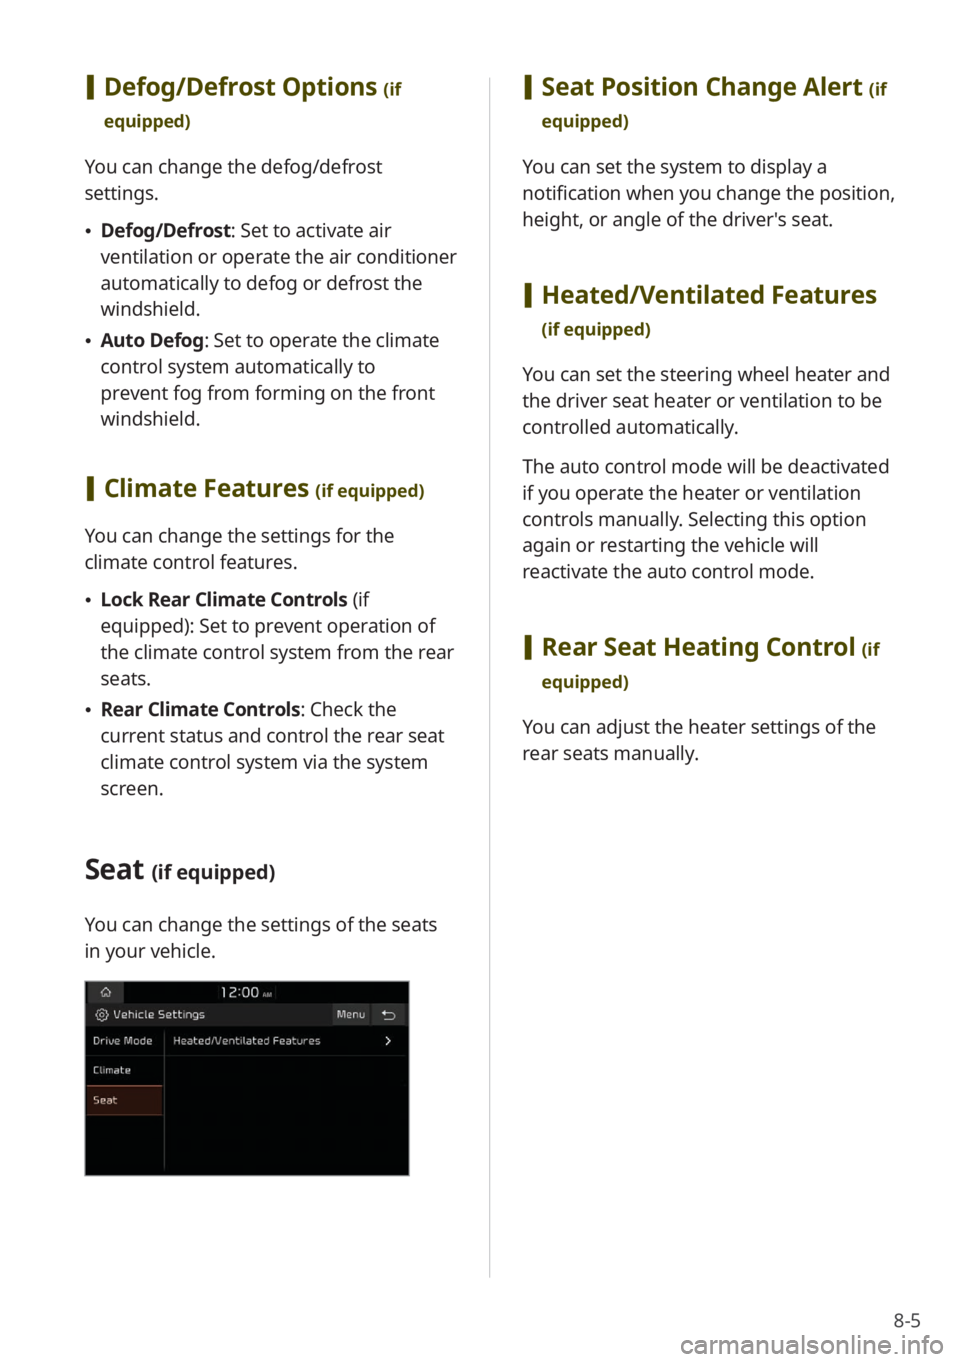
Seat (if equipped)
You can change the settings of the seats
in your vehicle.
[ Seat Position Change Alert (if
equipped)
You can set the system to display a
notification when you change the position,
height, or angle of the driver′s seat.
[ Heated/Ventilated Features
(if equipped)
You can set the steering wheel heater and
the driver seat heater or ventilation to be
controlled automatically.
The auto control mode will be deactivated
if you operate the heater or ventilation
controls manually. Selecting this option
again or restarting the vehicle will
reactivate the auto control mode.
[Rear Seat Heating Control (if
equipped)
You can adjust the heater settings of the
rear seats manually.
Page 114 of 148
8-12
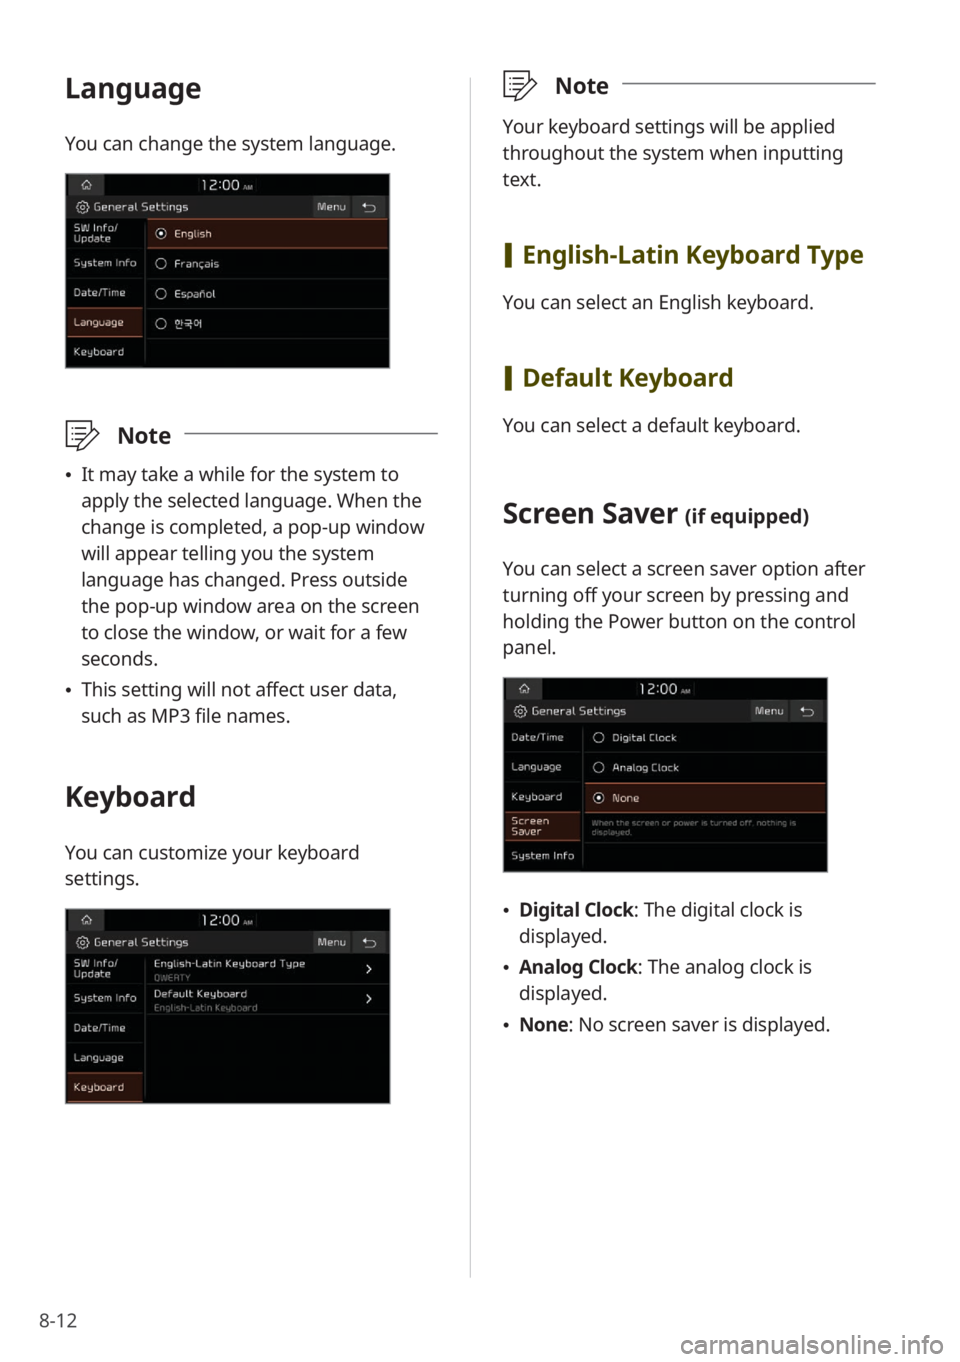
Language
You can change the system language.
\333Note
\225It may take a while for the system to
apply the selected language. When the
change is completed, a pop-up window
will appear telling you the system
language has changed. Press outside
the pop-up window area on the screen
to close the window, or wait for a few
seconds.
\225This setting will not affect user data,
such as MP3 file names.
Keyboard
You can customize your keyboard
settings.
\333 Note
Your keyboard settings will be applied
throughout the system when inputting
text.
[English-Latin Keyboard Type
You can select an English keyboard.
[Default Keyboard
You can select a default keyboard.
Screen Saver (if equipped)
You can select a screen saver option after
turning off your screen by pressing and
holding the Power button on the control
panel.
\225Digital Clock : The digital clock is
displayed.
\225 Analog Clock : The analog clock is
displayed.
\225 None: No screen saver is displayed.
Page 122 of 148
8-20
Screen Saver (if equipped)
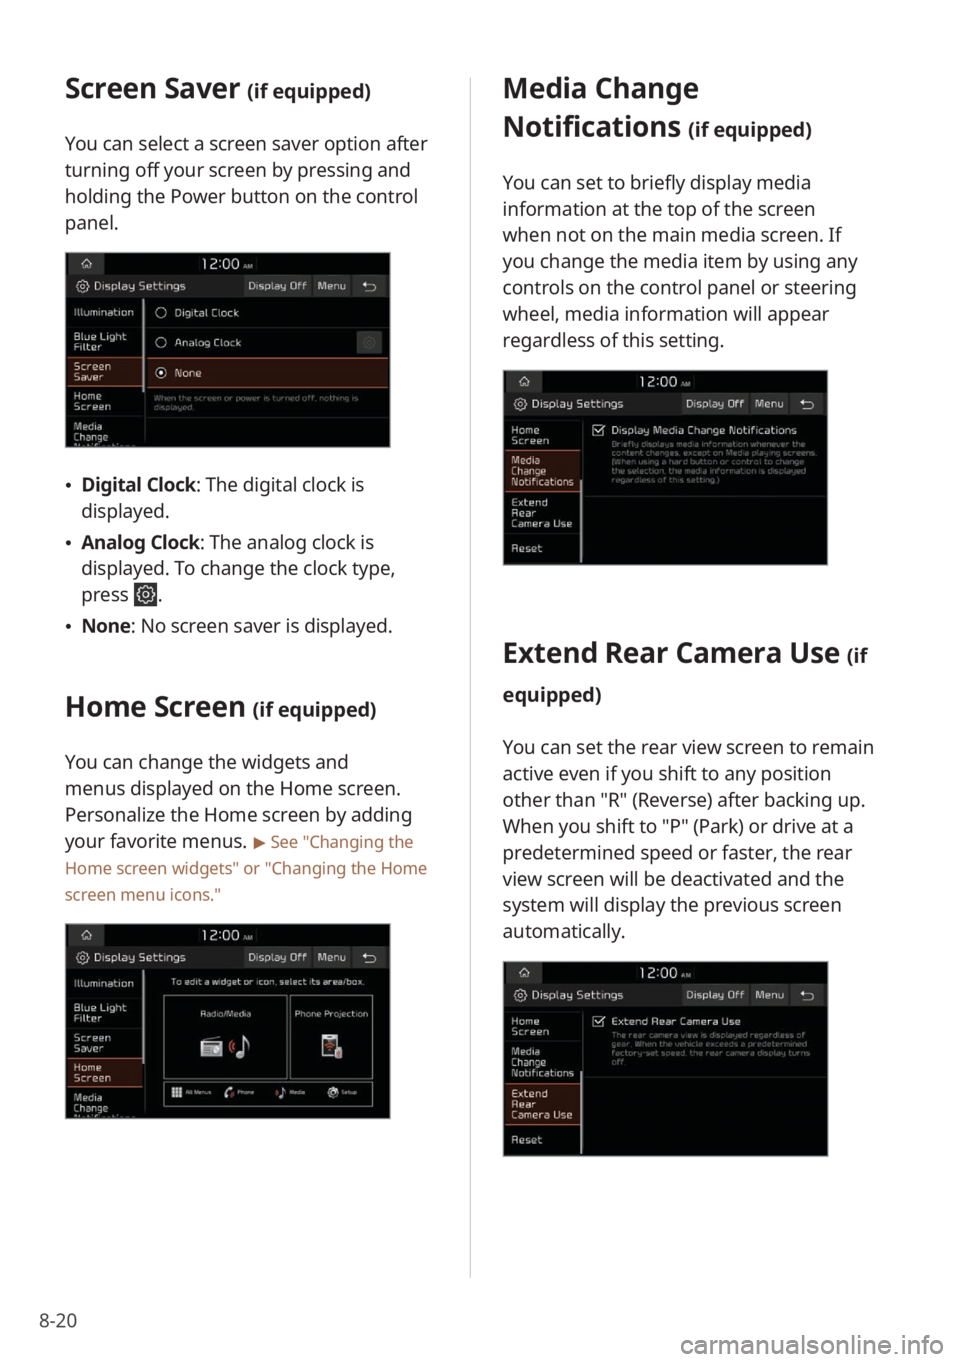
You can select a screen saver option after
turning off your screen by pressing and
holding the Power button on the control
panel.
\225Digital Clock : The digital clock is
displayed.
\225 Analog Clock : The analog clock is
displayed. To change the clock type,
press
.
\225 None: No screen saver is displayed.
Home Screen (if equipped)
You can change the widgets and
menus displayed on the Home screen.
Personalize the Home screen by adding
your favorite menus.
> See ″Changing the
Home screen widgets″ or
″ Changing the Home
screen menu icons.″
Media Change
Notifications
(if equipped)
You can set to briefly display media
information at the top of the screen
when not on the main media screen. If
you change the media item by using any
controls on the control panel or steering
wheel, media information will appear
regardless of this setting.
Extend Rear Camera Use (if
equipped)
You can set the rear view screen to remain
active even if you shift to any position
other than ″R″ (Reverse) after backing up.
When you shift to ″P″ (Park) or drive at a
predetermined speed or faster, the rear
view screen will be deactivated and the
system will display the previous screen
automatically.
Page 129 of 148
9-5
SymptomPossible causeSolution
Phone projection
disabled
\225 Depending on the availability of
wireless connectivity and usable
connection types, enable phone
projection by using one of the
following ways:
- For USB connections (if wireless
connectivity is not supported): On
the Home screen, press All Menus >
Setup > Device Connections , then
select a function you want to use.
- For USB connections (if wireless
connectivity is supported): USB
connections are available only for
Android Auto. On the Home screen,
press All Menus > Setup > Device
Connections > Phone Projection
> Menu > Connection Settings
and press Use Android Auto when
Connecting to USB to activate it.
- For wireless phone projection: On
the Home screen, press All Menus
> Setup > Wi-Fi and press Use Wi-Fi
for Phone Projection to activate it.
\225Check if phone projection is disabled
in the app settings or if there are any
restrictions set on your smartphone.
Smartphone
not ready or
malfunctioning
\225 Check if the smartphone′s battery
is low. If the battery is low, the
smartphone may not be recognized.
\225If the network signal is weak, phone
projection may not work correctly.
\225If the smartphone is locked, unlock it.
\225Reset the smartphone and reconnect it.
Authentication error
in wireless connection If you are attempting to start a wireless
connection, generate a new passkey by
pressing All Menus
> Setup > Wi-Fi >
Generate New Wi-Fi Passkey and try
again.