check engine KIA STINGER 2023 Features and Functions Guide
[x] Cancel search | Manufacturer: KIA, Model Year: 2023, Model line: STINGER, Model: KIA STINGER 2023Pages: 72, PDF Size: 5.51 MB
Page 2 of 72
Refer to the inside front cover for more information on QR codes.www.youtube.com/KiaFeatureVideos
Your New Kia Important Care Tips Video
QR CODE
Welcome to the Kia Family!
Your new Kia vehicle has been designed, engineered and manufactured to provide you with years of comfortable and dependable driving. Kia is committed to quality, innovation, safety and — above all — your satisfaction.
Using this Features & Functions Guide
The information contained in this guide is a brief overview of the operation and features of your new Kia vehicle.
This Features & Functions Guide and the specific operational and safety information it provides are not a substitute for your Owner’s Manual. In the interest of your safety and that of the vehicle’s occupants, and to help you avoid risks that may result in death or serious injury, Kia reminds you to carefully read the Owner’s Manual in order to fully familiarize yourself with the important information and safety warnings it contains.
While Kia endeavors to ensure that the information contained in this guide is accurate at the time of printing, Kia may change vehicle specifications without notice in advance of or after the fact and assumes no liability in connection with such changes.
Videos and QR Codes
Kia provides a number of video resources to assist you with becoming familiar with the features and functions found in your Kia vehicle. You can access these resources by snapping the QR Codes with your mobile device using the built-in QR Code Reader or a downloaded QR Code Reader App.
After opening the QR Code Reader App on your mobile device, the app will utilize your device’s camera. Center the code in the camera viewing area — with some apps, as soon as the app recognizes the code, it will launch the corresponding video.
With other apps, you will have to snap or “take a picture” of the code. The app will then launch the corresponding video.
For operation specifics, refer to the instructions that come with your QR Code Reader App. You can also view the videos by visiting the following website: www.youtube.com/KiaFeatureVideos
If you’re having trouble scanning codes, check the following:
•
The code should be centered and focused in your mobile device’s camera screen
•
Consider moving your device closer to or far ther away from the code
•
The code should be well lit, without significant shadow
•Avoid scanning from a significant angle
•
Confirm that the device’s app suppor ts 2D QR Code scanning
•
Tr y another QR Code Reader App; not all apps are created equal
After scanning, you may experience a “connection error ” message or a “connecting” message with no subsequent response. These messages t ypically indicate that your device is having trouble connecting to the Internet
QUICK TIPS
REMINDER: When accessing videos on your mobile device, standard cellular data rates may apply.
Page 5 of 72
INFOTAINMENT SYSTEM
Audio System Controls . . . . . . . . . . . . . . . . . . . . . . . . . . . . . . . . . . . . . . . . . . . . . . . . . . . . . . . . . . . . . . . . . . . . . . . . . . 36
Android Auto™ / Apple CarPlay® Setup . . . . . . . . . . . . . . . . . . . . . . . . . . . . . . . . . . . . . . . . . . . . . . . . . . . . . . . . . . . . 37
Bluetooth® Wireless Technology . . . . . . . . . . . . . . . . . . . . . . . . . . . . . . . . . . . . . . . . . . . . . . . . . . . . . . . . . . . . . . . . . 38
Kia Connect Activation* . . . . . . . . . . . . . . . . . . . . . . . . . . . . . . . . . . . . . . . . . . . . . . . . . . . . . . . . . . . . . . . . . . . . . . . . . . 40
Kia Connect Assistance* . . . . . . . . . . . . . . . . . . . . . . . . . . . . . . . . . . . . . . . . . . . . . . . . . . . . . . . . . . . . . . . . . . . . . . . . . 40
Kia Access App Download . . . . . . . . . . . . . . . . . . . . . . . . . . . . . . . . . . . . . . . . . . . . . . . . . . . . . . . . . . . . . . . . . . . . . . . 41
Kia Access App Features Guide . . . . . . . . . . . . . . . . . . . . . . . . . . . . . . . . . . . . . . . . . . . . . . . . . . . . . . . . . . . . . . . . . . 41
Kia Connect with Navigation . . . . . . . . . . . . . . . . . . . . . . . . . . . . . . . . . . . . . . . . . . . . . . . . . . . . . . . . . . . . . . . . . . . . . 42
CENTER PANEL
Multimedia USB Ports, Power Outlets & USB Charger Ports . . . . . . . . . . . . . . . . . . . . . . . . . . . . . . . . . . . . . . . . 43
Digital Clock - Infotainment System . . . . . . . . . . . . . . . . . . . . . . . . . . . . . . . . . . . . . . . . . . . . . . . . . . . . . . . . . . . . . . 43
Wireless Smartphone Charging System . . . . . . . . . . . . . . . . . . . . . . . . . . . . . . . . . . . . . . . . . . . . . . . . . . . . . . . . . . . 44
Idle, Stop and Go (ISG) System* . . . . . . . . . . . . . . . . . . . . . . . . . . . . . . . . . . . . . . . . . . . . . . . . . . . . . . . . . . . . . . . . . . 45
Launch Control* . . . . . . . . . . . . . . . . . . . . . . . . . . . . . . . . . . . . . . . . . . . . . . . . . . . . . . . . . . . . . . . . . . . . . . . . . . . . . . . . 45
Automatic Climate Control System . . . . . . . . . . . . . . . . . . . . . . . . . . . . . . . . . . . . . . . . . . . . . . . . . . . . . . . . . . . . . . . 46
Automatic Transmission (Shift by Cable* / Shift by Wire*)
and Manual Shift Mode (Shift by Cable only) . . . . . . . . . . . . . . . . . . . . . . . . . . . . . . . . . . . . . . . . . . . . . . . . . . . . 47
Paddle Shifters . . . . . . . . . . . . . . . . . . . . . . . . . . . . . . . . . . . . . . . . . . . . . . . . . . . . . . . . . . . . . . . . . . . . . . . . . . . . . . . . . 47
Auto Hold* . . . . . . . . . . . . . . . . . . . . . . . . . . . . . . . . . . . . . . . . . . . . . . . . . . . . . . . . . . . . . . . . . . . . . . . . . . . . . . . . . . . . . . 48
Electric Parking Brake (EPB)* . . . . . . . . . . . . . . . . . . . . . . . . . . . . . . . . . . . . . . . . . . . . . . . . . . . . . . . . . . . . . . . . . . . . 49
SEATING
Seat Warmers / Ventilated Seats* . . . . . . . . . . . . . . . . . . . . . . . . . . . . . . . . . . . . . . . . . . . . . . . . . . . . . . . . . . . . . . . . 50
Power Adjustable Driver ’s Seat . . . . . . . . . . . . . . . . . . . . . . . . . . . . . . . . . . . . . . . . . . . . . . . . . . . . . . . . . . . . . . . . . . . 51
Front Seat Headrest Adjustment . . . . . . . . . . . . . . . . . . . . . . . . . . . . . . . . . . . . . . . . . . . . . . . . . . . . . . . . . . . . . . . . . 52
Driver Position Memory System* . . . . . . . . . . . . . . . . . . . . . . . . . . . . . . . . . . . . . . . . . . . . . . . . . . . . . . . . . . . . . . . . . 52
OTHER KEY FEATURES
HomeLink® with Auto-Dimming Rearview Mirror* . . . . . . . . . . . . . . . . . . . . . . . . . . . . . . . . . . . . . . . . . . . . . . . . . 53
Sunroof Operation* . . . . . . . . . . . . . . . . . . . . . . . . . . . . . . . . . . . . . . . . . . . . . . . . . . . . . . . . . . . . . . . . . . . . . . . . . . . . . 54
Smart Key with Remote Start . . . . . . . . . . . . . . . . . . . . . . . . . . . . . . . . . . . . . . . . . . . . . . . . . . . . . . . . . . . . . . . . . . . . 55
Smart Power Liftgate* . . . . . . . . . . . . . . . . . . . . . . . . . . . . . . . . . . . . . . . . . . . . . . . . . . . . . . . . . . . . . . . . . . . . . . . . . . 56
Map/Room Lamps . . . . . . . . . . . . . . . . . . . . . . . . . . . . . . . . . . . . . . . . . . . . . . . . . . . . . . . . . . . . . . . . . . . . . . . . . . . . . . 58
Sunvisor . . . . . . . . . . . . . . . . . . . . . . . . . . . . . . . . . . . . . . . . . . . . . . . . . . . . . . . . . . . . . . . . . . . . . . . . . . . . . . . . . . . . . . . . 59
Hood Release Lever and Latch . . . . . . . . . . . . . . . . . . . . . . . . . . . . . . . . . . . . . . . . . . . . . . . . . . . . . . . . . . . . . . . . . . 59
Fuel Filler Door Release . . . . . . . . . . . . . . . . . . . . . . . . . . . . . . . . . . . . . . . . . . . . . . . . . . . . . . . . . . . . . . . . . . . . . . . . . . 59
Fuel Cap/Malfunction Indicator (Check Engine Light) . . . . . . . . . . . . . . . . . . . . . . . . . . . . . . . . . . . . . . . . . . . . . 60
SAFETY FEATURES
Seat Belts . . . . . . . . . . . . . . . . . . . . . . . . . . . . . . . . . . . . . . . . . . . . . . . . . . . . . . . . . . . . . . . . . . . . . . . . . . . . . . . . . . . . . . 61
Child-Protector Rear Door Lock . . . . . . . . . . . . . . . . . . . . . . . . . . . . . . . . . . . . . . . . . . . . . . . . . . . . . . . . . . . . . . . . . 62
Occupant Detection System (ODS) / Passenger Airbag Off Indicator . . . . . . . . . . . . . . . . . . . . . . . . . . . . . . . . 62
NORMAL MAINTENANCE SCHEDULE - TURBO . . . . . . . . . . . . . . . . . . . . . . . . . . . . . . . . . . . . . . . . . 64-67
LEGAL DISCLAIMERS . . . . . . . . . . . . . . . . . . . . . . . . . . . . . . . . . . . . . . . . . . . . . . . . . . . . . . . . . . . .Inside Back Cover
TABLE OF CONTENTS
ALWAYS CHECK THE OWNER ’S MANUAL FOR COMPLETE OPER ATING INFORMATION AND SAFET Y WARNINGS . *IF EQUIPPED3
Page 7 of 72

INSTRUMENT CLUSTER
Light ON Indicator
Cruise Control Indicator
Lane Safety Indicator
EPBElectric Parking Brake
Immobilizer Indicator
High Beam Indicator
LED Headlamp Warning Light*
Electronic Stability Control (ESC) Warning Light
Electronic Stability Control (ESC) OFF Light
Malfunction Indicator Light
Low Tire Pressure Indicator / Tire Pressure Monitoring System (TPMS) Malfunction Light
Liftgate Open Warning Light
Seat Belt Warning Light
Parking Brake & Brake Fluid Warning Light
Door Ajar Warning Light
Airbag Warning Light
Low Windshield Washer Fluid
Turn Signal Indicators
Anti-Lock Braking System (ABS) Warning Light
Auto Hold Indicator
Charging System Warning Light
Cruise Set Indicator
Engine Oil Pressure Warning Light
Engine Coolant Temperature Warning Light
Low Fuel Level Warning Light
Electric Power Steering (EPS) Warning Indicator
Electronic Brake Force Distribution (EBD) System Warning Light – (Two separate indicators on Instrument Cluster lit at same time)
Forward Safety Warning Indicator
Drive Mode Indicator
Master Warning Light
Low Beam Assist (LBA) / Dynamic Bending Light (DBL)*
High Beam Assist Indicator
Auto-Stop Indicator (ISG)*
AWD System Warning Light*
Indicators & Warning Lights
Your vehicle’s instrument cluster & indicator light locations may differ from those in the illustrations . For more information on the instrument cluster and the function of all indicator and warning lights, please refer to section 2 in the Owner’s Manual
Some indicators and warning lights may not appear in illustration . On the vehicle, they may appear in the LCD .
ALWAYS CHECK THE OWNER ’S MANUAL FOR COMPLETE OPER ATING INFORMATION AND SAFET Y WARNINGS . *IF EQUIPPED5
INSTRUMENT CLUSTER
Page 9 of 72

INSTRUMENT CLUSTER
For more information on Fuel Economy, snap the QR Code above to view a video or refer to section 4 in the Owner’s Manual .
Fuel Economy / Tips for Economical Driving
Several factors contribute to your vehicle’s fuel economy, such as maintenance of your vehicle, driving style, environmental conditions, vehicle weight and vehicle aerodynamics . Below are some tips on how to help improve fuel economy:
•Use the climate control system less often . Use the Driver Only* setting as much as possible
•Keep your vehicle in good condition with regular maintenance
•Don’t let the engine idle longer than necessary
•Drive at a moderate speed, accelerating smoothly
•Keep tires inflated to the recommended pressure
•Travel lightly, without carrying unnecessary weight in your vehicle
•Avoid placing large or heavy items on roof racks
•Avoid hilly, winding or poorly maintained roads
INSTRUMENT CLUSTER
Refer to the inside front cover for more information on QR codes .www .youtube .com/KiaFeatureVideos
Tips for Economical Driving Video
QR CODE
ALWAYS CHECK THE OWNER ’S MANUAL FOR COMPLETE OPER ATING INFORMATION AND SAFET Y WARNINGS . †LEGAL DISCL AIMERS ON BACK INSIDE COVER*IF EQUIPPED7
Tire Pressure Monitoring System (TPMS)† 20
The TPMS indicator functions as both Low Tire Pressure Light and TPMS Malfunction Indicator .
The TPMS indicator is designed to illuminate if it detects one or more tires is significantly underinflated, if a spare tire has been installed that does not have a TPMS device, or when the outside temperature drops considerably .
The LCD screen in the instrument cluster will display the Low Tire Pressure indicator A showing which tire(s) are underinflated .
•Inflate tire(s) to specifications using an accurate digital tire pressure gauge . See front driver ’s door jamb for PSI specification
•When there is a problem with the TPMS, the TPMS Malfunction Indicator will blink for approximately one minute then illuminate . See dealer for service
24
36 36
36
Image is for illustrative purposes only and may not reflect actual feature or operation . See section 6 in the Owner’s Manual for more information .
Refer to the inside front cover for more information on QR codes .www .youtube .com/KiaFeatureVideos
Tire Pressure Monitoring Video
QR CODE
A
REMINDERS:
•
Check the recommended tire pressure label located on the left side of driver ’s door jamb, visible when the door is open
•
Consult your dealer for ser vice if the Low Tire Pressure Light remains illuminated after inflating your tire(s)
•
Personal electronic devices (such as laptops, wireless chargers, remote star t systems, etc .) may inter fere with the TPMS system, which may cause the Malfunction Warning Indicator (Check Engine Light) to illuminate
•Even with TPMS, tire pressure should be checked manually at least once a month . Only adjust tire pressure on “cold tires” that have been sit ting for 3 hours or more, and tires that are not hot in temperature from direct sunlight or heat
•
For proper maintenance, safet y and optimal fuel economy, maintain recommended tire inflation pressure and stay within the load limits and weight distribution recommended for your vehicle
•A significant drop in temperature can cause tire inflation pressures to drop, which may activate the TMPS light . Manually confirm tire pressures after significant changes in temperature or altitude
QUICK TIPS
Page 11 of 72
VEHICLE SETTINGS
VEHICLE SETTINGS
ALWAYS CHECK THE OWNER ’S MANUAL FOR COMPLETE OPER ATING INFORMATION AND SAFET Y WARNINGS . *IF EQUIPPED9
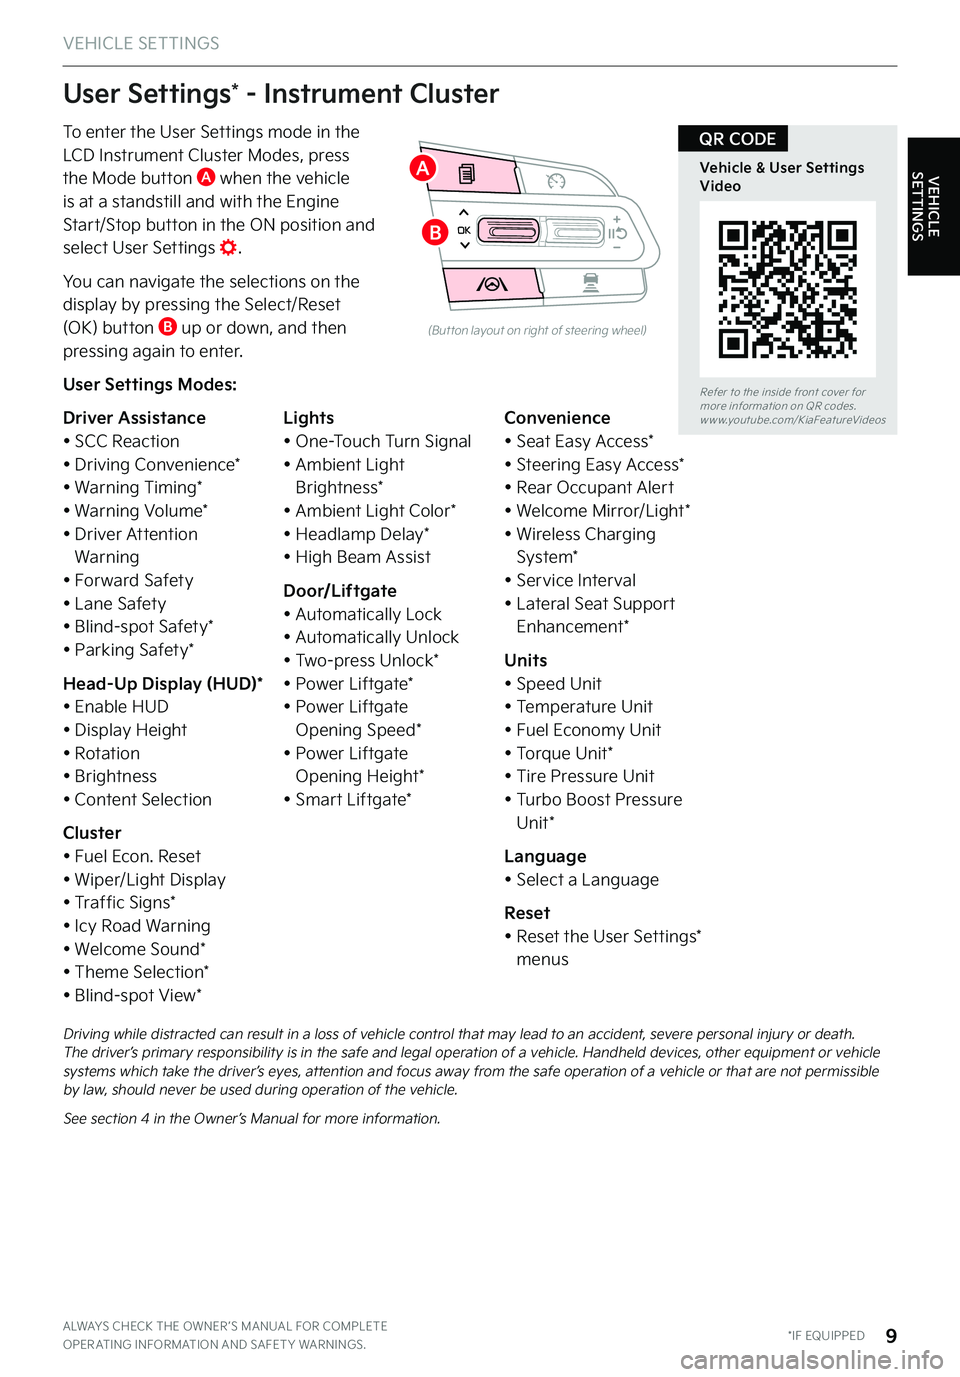
To enter the User Settings mode in the LCD Instrument Cluster Modes, press the Mode button A when the vehicle
is at a standstill and with the Engine Start/Stop button in the ON position and select User Settings .
You can navigate the selections on the display by pressing the Select/Reset (OK) button B up or down, and then pressing again to enter .
User Settings Modes:
Driver Assistance• SCC Reaction• Driving Convenience*• Warning Timing*• Warning Volume*• Driver Attention Warning• Forward Safety• Lane Safety• Blind-spot Safety*• Parking Safety*
Head-Up Display (HUD)*• Enable HUD• Display Height• Rotation• Brightness• Content Selection
Cluster• Fuel Econ . Reset• Wiper/Light Display• Traffic Signs*• Icy Road Warning• Welcome Sound*• Theme Selection*• Blind-spot View*
Lights• One-Touch Turn Signal• Ambient Light Brightness*• Ambient Light Color*• Headlamp Delay*• High Beam Assist
Door/Liftgate• Automatically Lock• Automatically Unlock• Two-press Unlock*• Power Liftgate*• Power Liftgate Opening Speed*• Power Liftgate Opening Height*• Smart Liftgate*
Convenience• Seat Easy Access*• Steering Easy Access*• Rear Occupant Alert• Welcome Mirror/Light*• Wireless Charging System*• Service Interval• Lateral Seat Support Enhancement*
Units• Speed Unit• Temperature Unit• Fuel Economy Unit• Torque Unit*• Tire Pressure Unit• Turbo Boost Pressure Unit*
Language• Select a Language
Reset• Reset the User Settings* menus
User Settings* - Instrument Cluster
OK
(But ton layout on right of steering wheel)
Driving while distracted can result in a loss of vehicle control that may lead to an accident, severe personal injury or death . The driver’s primary responsibility is in the safe and legal operation of a vehicle . Handheld devices, other equipment or vehicle systems which take the driver’s eyes, attention and focus away from the safe operation of a vehicle or that are not permissible by law, should never be used during operation of the vehicle .
See section 4 in the Owner’s Manual for more information .
Refer to the inside front cover for more information on QR codes .www .youtube .com/KiaFeatureVideos
Vehicle & User Settings Video
QR CODE
A
B
Page 13 of 72
VEHICLE SETTINGS
VEHICLE SETTINGS
ALWAYS CHECK THE OWNER ’S MANUAL FOR COMPLETE OPER ATING INFORMATION AND SAFET Y WARNINGS . *IF EQUIPPED11
OK
(But ton layout on right of steering wheel)
Driving while distracted can result in a loss of vehicle control that may lead to an accident, severe personal injury or death . The driver’s primary responsibility is in the safe and legal operation of a vehicle . Handheld devices, other equipment or vehicle systems which take the driver’s eyes, attention and focus away from the safe operation of a vehicle or that are not permissible by law, should never be used during operation of the vehicle .
See section 4 in the Owner’s Manual for more information .
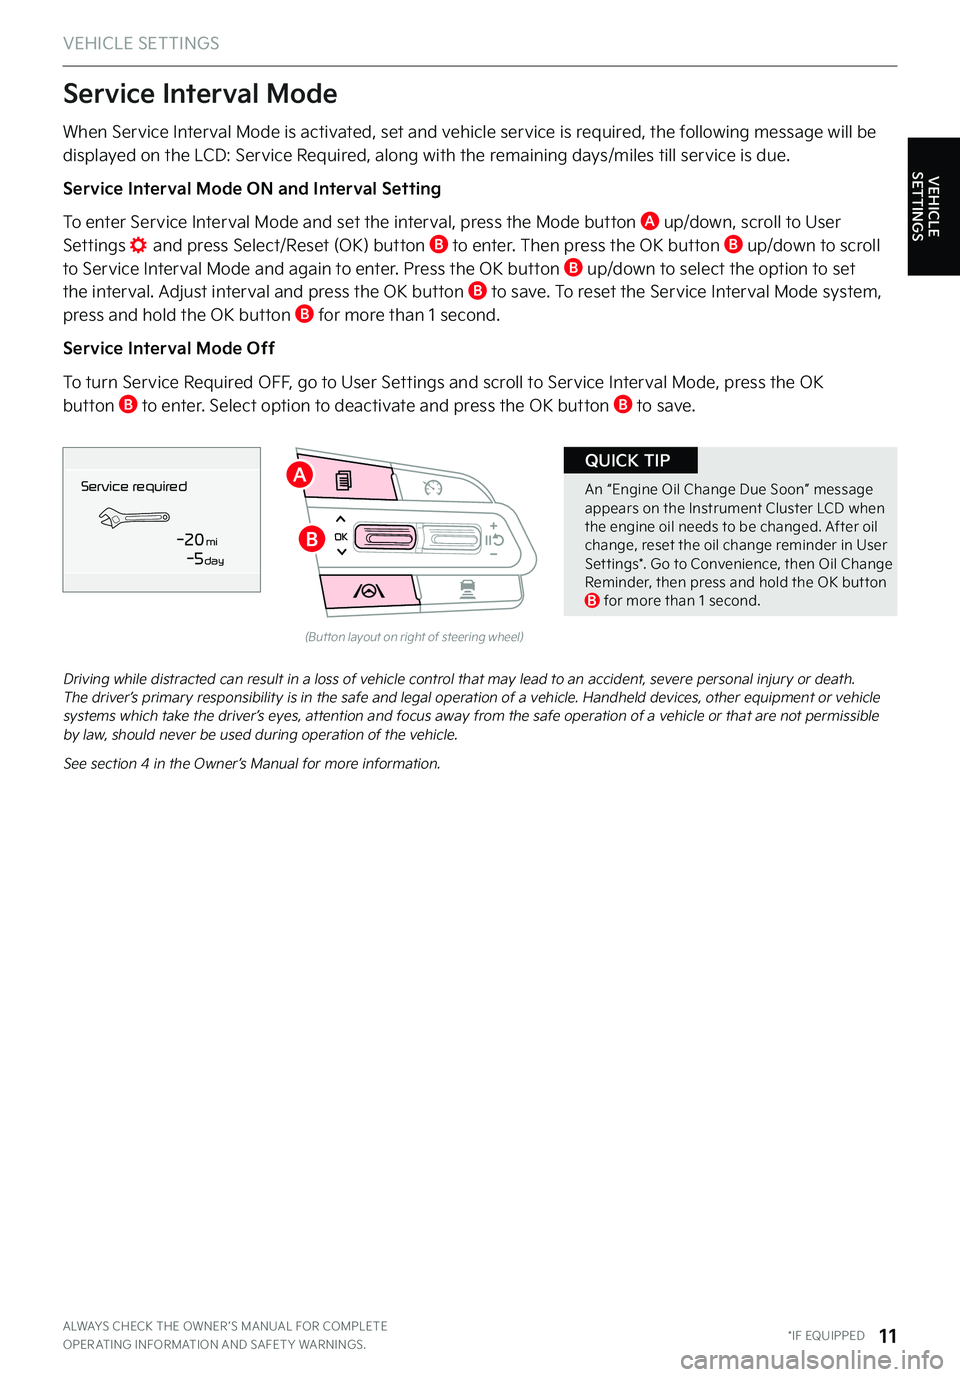
When Service Interval Mode is activated, set and vehicle service is required, the following message will be displayed on the LCD: Service Required, along with the remaining days/miles till service is due .
Service Interval Mode ON and Interval Setting
To enter Service Interval Mode and set the interval, press the Mode button A up/down, scroll to User Settings and press Select/Reset (OK) button B to enter . Then press the OK button B up/down to scroll to Service Interval Mode and again to enter . Press the OK button B up/down to select the option to set the interval . Adjust interval and press the OK button B to save . To reset the Service Interval Mode system, press and hold the OK button B for more than 1 second .
Service Interval Mode Off
To turn Service Required OFF, go to User Settings and scroll to Service Interval Mode, press the OK button B to enter . Select option to deactivate and press the OK button B to save .
Service Interval Mode
Service in
-20 mi-5 day
Service requiredA
B
An “Engine Oil Change Due Soon” message appears on the Instrument Cluster LCD when the engine oil needs to be changed . After oil change, reset the oil change reminder in User Set tings* . Go to Convenience, then Oil Change Reminder, then press and hold the OK but ton B for more than 1 second .
QUICK TIP
Page 15 of 72
ALWAYS CHECK THE OWNER ’S MANUAL FOR COMPLETE OPER ATING INFORMATION AND SAFET Y WARNINGS . †LEGAL DISCL AIMERS ON BACK INSIDE COVER*IF EQUIPPED13
ADAS
ADVANCED DRIVER ASSISTANCE SYSTEM (ADAS)
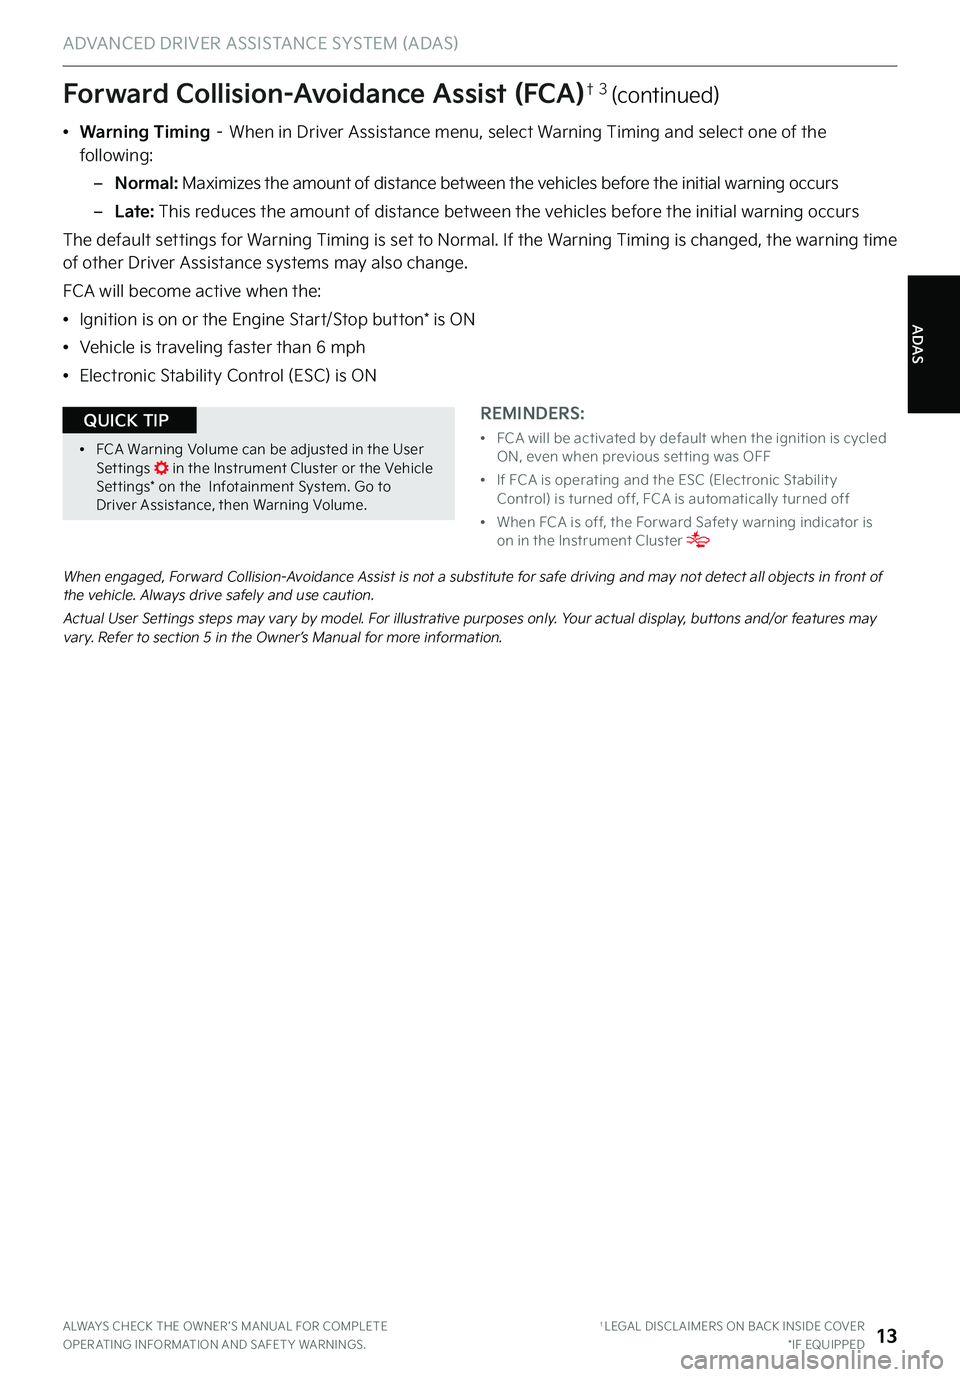
When engaged, Forward Collision-Avoidance Assist is not a substitute for safe driving and may not detect all objects in front of the vehicle . Always drive safely and use caution .
Actual User Settings steps may vary by model . For illustrative purposes only . Your actual display, buttons and/or features may vary . Refer to section 5 in the Owner’s Manual for more information .
Forward Collision-Avoidance Assist (FCA)† 3 (continued)
REMINDERS:
•
FCA will be activated by default when the ignition is cycled ON, even when previous set ting was OFF
•
If FCA is operating and the ESC (Electronic Stabilit y Control) is turned off, FCA is automatically turned off
•
When FCA is off, the For ward Safet y warning indicator is on in the Instrument Cluster
•
FCA Warning Volume can be adjusted in the User Set tings in the Instrument Cluster or the Vehicle Set tings* on the Infotainment System . Go to Driver Assistance, then Warning Volume .
QUICK TIP
•Warning Timing – When in Driver Assistance menu, select Warning Timing and select one of the following:
–Normal: Maximizes the amount of distance between the vehicles before the initial warning occurs
–Late: This reduces the amount of distance between the vehicles before the initial warning occurs
The default settings for Warning Timing is set to Normal . If the Warning Timing is changed, the warning time of other Driver Assistance systems may also change .
FCA will become active when the:
•Ignition is on or the Engine Start/Stop button* is ON
•Vehicle is traveling faster than 6 mph
•Electronic Stability Control (ESC) is ON
Page 21 of 72
ADAS
ADVANCED DRIVER ASSISTANCE SYSTEM (ADAS)
ALWAYS CHECK THE OWNER ’S MANUAL FOR COMPLETE OPER ATING INFORMATION AND SAFET Y WARNINGS . †LEGAL DISCL AIMERS ON BACK INSIDE COVER*IF EQUIPPED19
OK
Refer to the inside front cover for more information on QR codes .www .youtube .com/KiaFeatureVideos
Leading Vehicle Departure Alert (LVDA) Video
QR Code
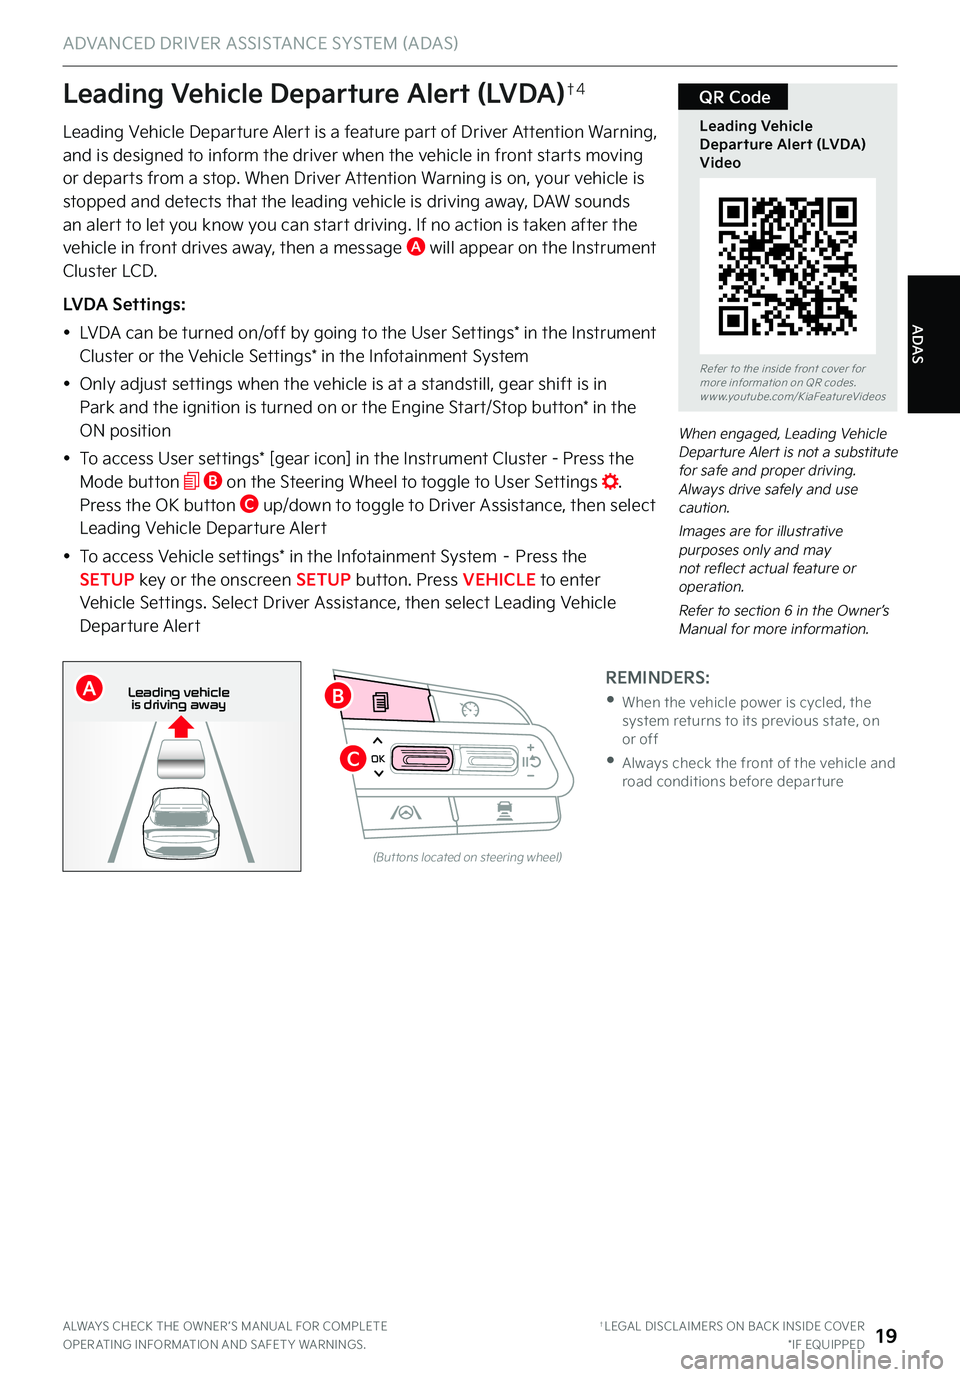
Leading Vehicle Departure Alert is a feature part of Driver Attention Warning, and is designed to inform the driver when the vehicle in front starts moving or departs from a stop . When Driver Attention Warning is on, your vehicle is
stopped and detects that the leading vehicle is driving away, DAW sounds an alert to let you know you can start driving . If no action is taken after the vehicle in front drives away, then a message A will appear on the Instrument Cluster LCD .
LVDA Settings:
•LVDA can be turned on/off by going to the User Settings* in the Instrument Cluster or the Vehicle Settings* in the Infotainment System
•Only adjust settings when the vehicle is at a standstill, gear shift is in Park and the ignition is turned on or the Engine Start/Stop button* in the
ON position
•To access User settings* [gear icon] in the Instrument Cluster - Press the Mode button B on the Steering Wheel to toggle to User Settings . Press the OK button C up/down to toggle to Driver Assistance, then select Leading Vehicle Departure Alert
•To access Vehicle settings* in the Infotainment System – Press the SETUP key or the onscreen SETUP button . Press VEHICLE to enter Vehicle Settings . Select Driver Assistance, then select Leading Vehicle Departure Alert
When engaged, Leading Vehicle Departure Alert is not a substitute for safe and proper driving . Always drive safely and use caution .
Images are for illustrative purposes only and may not reflect actual feature or operation .
Refer to section 6 in the Owner’s Manual for more information .
Leading Vehicle Departure Alert (LVDA)†4
REMINDERS:
•
When the vehicle power is cycled, the system returns to its previous state, on or off
•
Always check the front of the vehicle and road conditions before depar ture
(But tons located on steering wheel)
0 KMH
202 m
272m
CHG
PWR
Leading vehicle
is driving awayB
C
A
Page 23 of 72

ADAS
ADVANCED DRIVER ASSISTANCE SYSTEM (ADAS)
NSCC is a supplemental system and is not a substitute for safe driving . It is the responsibility of the driver to always check the speed and distance to the vehicle ahead
Images are for illustrative purposes only and may not reflect actual feature or operation .
See section 5 in the Owner’s Manual for more information . For more setting information, refer to the Car Infotainment System Quick Reference Guide .
(Distances are approximate and var y depending on vehicle speed)
(Displays on LCD screen)
172ft130ft
82ft
106ft
Navigation-based Smart Cruise Control (NSCC)†3 (Continued)
REMINDERS:
•
CRUISE indicator must be ON in order to operate SCC
•The speed set ting will need to be reset when ignition is cycled
•
The distance set tings are approximations and may var y depending on vehicle speed . See the owner ’s manual for more information
•
SCC is also canceled when the driver ’s door is opened, gear shift is changed out of D (Drive), Electronic Parking Brake (EPB) is activated and various other conditions . See owner ’s manual for other conditions
•
If SCC is left on, it can be activated inadver tently . Keep the system off when not in use to avoid set ting a speed which the driver is not aware of
•The navigation par t of NSCC does not function when a destination is not set on the infotainment navigation system .
•NSCC requires an active navigation subscription
•NSCC is only available on controlled access roads and highways
ALWAYS CHECK THE OWNER ’S MANUAL FOR COMPLETE OPER ATING INFORMATION AND SAFET Y WARNINGS . †LEGAL DISCL AIMERS ON BACK INSIDE COVER*IF EQUIPPED21
G
•If your vehicle speed is bet ween 0-20 mph when you press the Driving Assist but ton to turn NSCC on, the set speed will be set to 20 mph
•When following a vehicle, the system can automatically adjust your cruise speed based on the vehicle detected in front . It will even bring the vehicle to a complete stop if necessar y . If the vehicle remains at a standstill for more than 3 seconds, you must depress the accelerator pedal or press the +/- switch up/down to star t the vehicle
•NSCC is designed to function above approximately 20 mph only
•NSCC will not activate until the brake pedal has been depressed at least once after ignition ON or engine star t
QUICK TIPS
0 KMH
020 4060
202 m100 kWh/ 100m96%Lv 166°F
2 72m
CHG
PWR
60 MPH
0 KMH
020 4060
202 m100 kWh/ 100m96%Lv 166°F
2 72m
CHG
60 MPH
0 KMH
020 4060
202 m100 kWh/ 100m96%Lv 166°F
2 72m
CHG
PWR
60 MPHCRUISED
DAUTOA
Page 25 of 72
ADAS
ADVANCED DRIVER ASSISTANCE SYSTEM (ADAS)
ALWAYS CHECK THE OWNER ’S MANUAL FOR COMPLETE OPER ATING INFORMATION AND SAFET Y WARNINGS . †LEGAL DISCL AIMERS ON BACK INSIDE COVER*IF EQUIPPED23
Rear View Monitor (RVM)†3
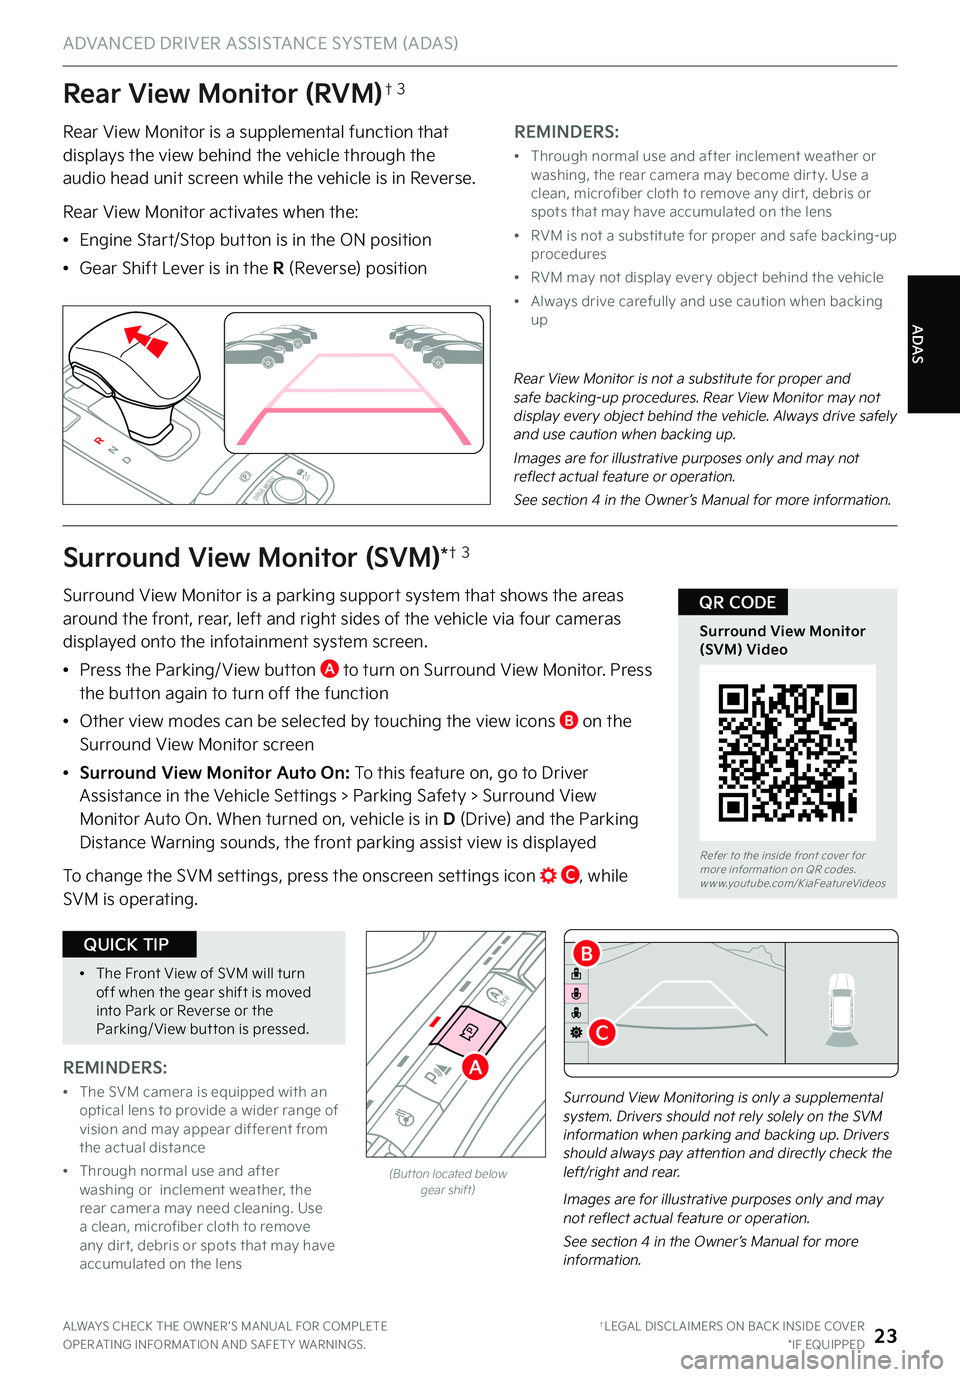
Rear View Monitor is a supplemental function that displays the view behind the vehicle through the audio head unit screen while the vehicle is in Reverse .
Rear View Monitor activates when the:
•Engine Start/Stop button is in the ON position
•Gear Shift Lever is in the R (Reverse) position
REMINDERS:
•
Through normal use and after inclement weather or washing, the rear camera may become dir t y . Use a clean, microfiber cloth to remove any dir t, debris or spots that may have accumulated on the lens
•
RVM is not a substitute for proper and safe backing-up procedures
•
RVM may not display ever y object behind the vehicle
•
Always drive carefully and use caution when backing up
P
R
N
D
AUTO
HOLD
DRIVE MODEOFF
Rear View Monitor is not a substitute for proper and safe backing-up procedures . Rear View Monitor may not display every object behind the vehicle . Always drive safely and use caution when backing up .
Images are for illustrative purposes only and may not reflect actual feature or operation .
See section 4 in the Owner’s Manual for more information .
Surround View Monitoring is only a supplemental system . Drivers should not rely solely on the SVM information when parking and backing up . Drivers should always pay attention and directly check the left/right and rear .
P
R
N
D
AUTO
HOLD
DRIVE MODE
OFF
OFF
P
P
Images are for illustrative purposes only and may not reflect actual feature or operation .
See section 4 in the Owner’s Manual for more information .
(But ton located below gear shift)
Surround View Monitor (SVM)*†3
Surround View Monitor is a parking support system that shows the areas around the front, rear, left and right sides of the vehicle via four cameras displayed onto the infotainment system screen .
•
Press the Parking/ View button A to turn on Surround View Monitor . Press the button again to turn off the function
•
Other view modes can be selected by touching the view icons B on the Surround View Monitor screen
•Surround View Monitor Auto On: To this feature on, go to Driver
Assistance in the Vehicle Settings > Parking Safety > Surround View Monitor Auto On . When turned on, vehicle is in D (Drive) and the Parking Distance Warning sounds, the front parking assist view is displayed
To change the SVM settings, press the onscreen settings icon C, while SVM is operating .
Refer to the inside front cover for more information on QR codes .www .youtube .com/KiaFeatureVideos
Surround View Monitor (SVM) Video
QR CODE
A
B
C
REMINDERS:
•
The SVM camera is equipped with an optical lens to provide a wider range of vision and may appear different from the actual distance
•
Through normal use and after washing or inclement weather, the rear camera may need cleaning . Use a clean, microfiber cloth to remove any dir t, debris or spots that may have accumulated on the lens
•The Front View of SVM will turn off when the gear shift is moved into Park or Reverse or the Parking/ View but ton is pressed .
QUICK TIP