phone KIA TELLURIDE 2021 Features and Functions Guide
[x] Cancel search | Manufacturer: KIA, Model Year: 2021, Model line: TELLURIDE, Model: KIA TELLURIDE 2021Pages: 70, PDF Size: 8.41 MB
Page 4 of 70
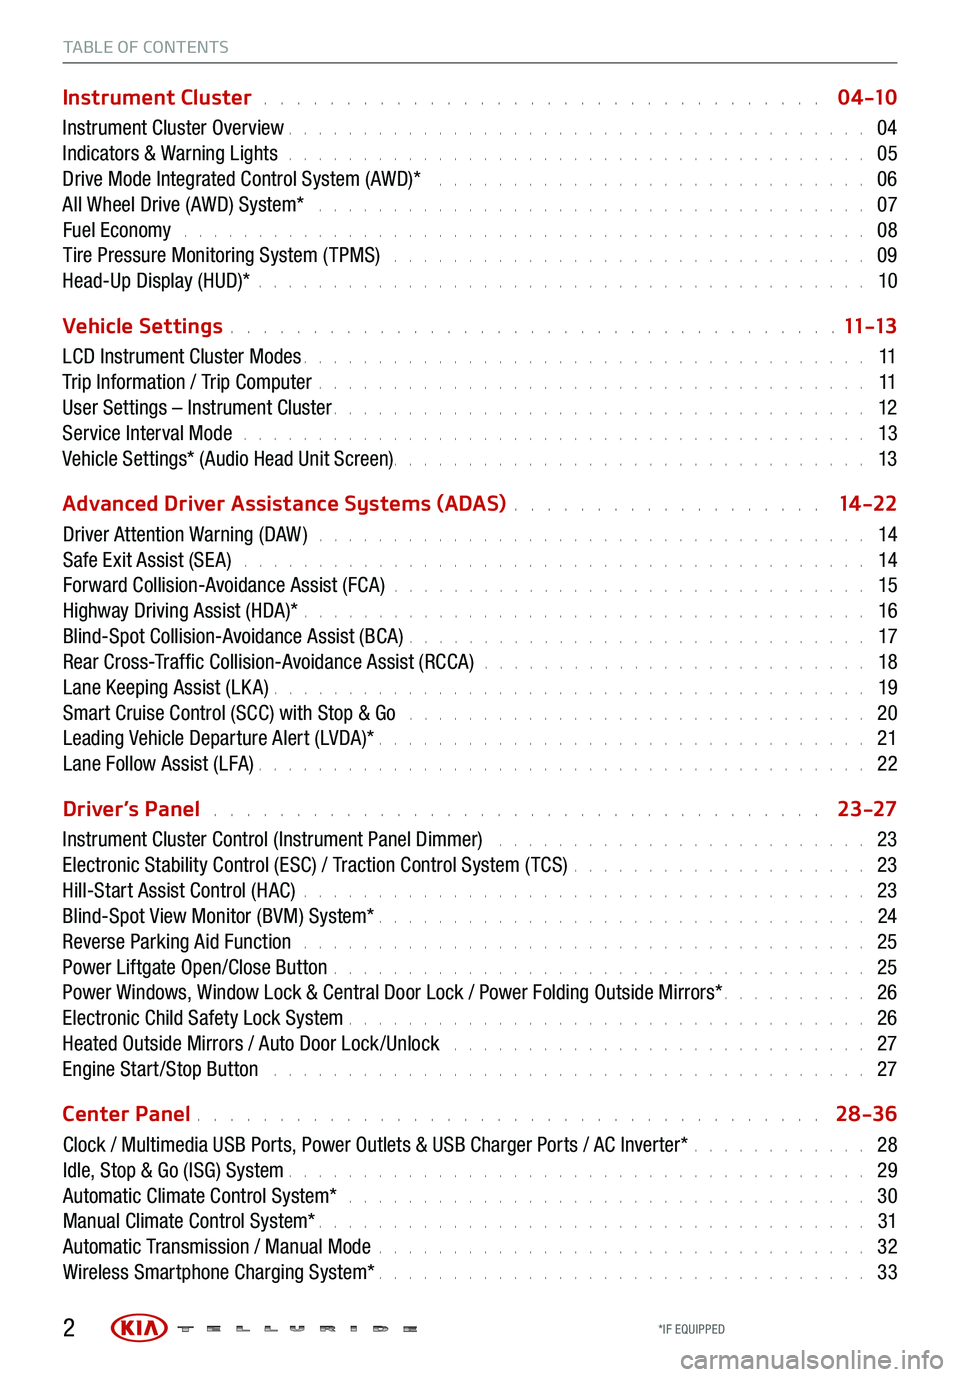
TABLE OF CONTENTS
Instrument Cluster . . . . . . . . . . . . . . . . . . . . . . . . . . . . . . . . . . 0 4 -10
Instrument Cluster Overview . . . . . . . . . . . . . . . . . . . . . . . . . . . . . . . . . . . . \
. . . 04
Indicators & Warning Lights . . . . . . . . . . . . . . . . . . . . . . . . . . . . . . . . . . . . \
. . . 05
Drive Mode Integrated Control System (AWD)* . . . . . . . . . . . . . . . . . . . . . . . . . . . . . 06
All Wheel Drive (AWD) System* . . . . . . . . . . . . . . . . . . . . . . . . . . . . . . . . . . . . . 07
Fuel Economy . . . . . . . . . . . . . . . . . . . . . . . . . . . . . . . . . . . . \
. . . . . . . . . . 08
Tire Pressure Monitoring System ( TPMS) . . . . . . . . . . . . . . . . . . . . . . . . . . . . . . . . 09
Head-Up Display (HUD)* . . . . . . . . . . . . . . . . . . . . . . . . . . . . . . . . . . . . \
. . . . . 10
Vehicle Settings
. . . . . . . . . . . . . . . . . . . . . . . . . . . . . . . . . . . . \
. 11 -13
LCD Instrument Cluster Modes . . . . . . . . . . . . . . . . . . . . . . . . . . . . . . . . . . . . \
. . 11
Trip Information / Trip Computer . . . . . . . . . . . . . . . . . . . . . . . . . . . . . . . . . . . . \
. 11
User Settings – Instrument Cluster . . . . . . . . . . . . . . . . . . . . . . . . . . . . . . . . . . . . \
12
Service Interval Mode . . . . . . . . . . . . . . . . . . . . . . . . . . . . . . . . . . . . . . . . . . 13
Vehicle Settings* (Audio Head Unit Screen) . . . . . . . . . . . . . . . . . . . . . . . . \
. . . . . . . . 13
Advanced Driver Assistance Systems (ADAS)
. . . . . . . . . . . . . . . . . . . 14 -22
Driver Attention Warning (DAW ) . . . . . . . . . . . . . . . . . . . . . . . . . . . . . . . . . . . . . 14
Safe Exit Assist (SE A) . . . . . . . . . . . . . . . . . . . . . . . . . . . . . . . . . . . . . . . . . . 14
Forward Collision-Avoidance Assist (FCA) . . . . . . . . . . . . . . . . . . . . . . . . . . . . . . . . 15
Highway Driving Assist (HDA)* . . . . . . . . . . . . . . . . . . . . . . . . . . . . . . . . . . . . \
. . 16
Blind-Spot Collision-Avoidance Assist (BCA) . . . . . . . . . . . . . . . . . . . . . . . . . . . . . . . 17
Rear Cross-Traffic Collision-Avoidance Assist (RCCA) . . . . . . . . . . . . . . . . . . . . . . . . . . 18
Lane Keeping Assist (LK A) . . . . . . . . . . . . . . . . . . . . . . . . . . . . . . . . . . . . \
. . . . 19
Smart Cruise Control (SCC) with Stop & Go . . . . . . . . . . . . . . . . . . . . . . . . . . . . . . . 20
Leading Vehicle Departure Alert (LVDA)* . . . . . . . . . . . . . . . . . . . . . . . . . . . . . . . . . 21
Lane Follow Assist (LFA) . . . . . . . . . . . . . . . . . . . . . . . . . . . . . . . . . . . . \
. . . . . 22
Driver’s Panel
. . . . . . . . . . . . . . . . . . . . . . . . . . . . . . . . . . . . . 23-27
Instrument Cluster Control (Instrument Panel Dimmer) . . . . . . . . . . . . . . . . . . . . . . . . . 23
Electronic Stability Control (ESC) / Traction Control System ( TCS) . . . . . . . . . . . . . . . . . . . . 23
Hill-Start Assist Control (HAC) . . . . . . . . . . . . . . . . . . . . . . . . . . . . . . . . . . . . \
. . 23
Blind-Spot View Monitor (BVM) System* . . . . . . . . . . . . . . . . . . . . . . . . . . . . . . . . . 24
Reverse Parking Aid Function . . . . . . . . . . . . . . . . . . . . . . . . . . . . . . . . . . . . \
. . 25
Power Liftgate Open/Close Button . . . . . . . . . . . . . . . . . . . . . . . . . . . . . . . . . . . . 25
Power Windows, Window Lock & Central Door Lock / Power Folding Outside Mirrors* . . . . . . . . . . 26
Electronic Child Safety Lock System . . . . . . . . . . . . . . . . . . . . . . . . . . . . . . . . . . . 26
Heated Outside Mirrors / Auto Door Lock /Unlock . . . . . . . . . . . . . . . . . . . . . . . . . . . . 27
Engine Start /Stop Button . . . . . . . . . . . . . . . . . . . . . . . . . . . . . . . . . . . . \
. . . . 27
Center Panel
. . . . . . . . . . . . . . . . . . . . . . . . . . . . . . . . . . . . \
. . 28-36
Clock / Multimedia USB Ports, Power Outlets & USB Charger Ports / AC Inverter* . . . . . . . . . . . . 28
Idle, Stop & Go (ISG) System . . . . . . . . . . . . . . . . . . . . . . . . . . . . . . . . . . . . \
. . . 29
Automatic Climate Control System* . . . . . . . . . . . . . . . . . . . . . . . . . . . . . . . . . . . 30
Manual Climate Control System* . . . . . . . . . . . . . . . . . . . . . . . . . . . . . . . . . . . . \
. 31
Automatic Transmission / Manual Mode . . . . . . . . . . . . . . . . . . . . . . . . . . . . . . . . . 32
Wireless Smartphone Charging System* . . . . . . . . . . . . . . . . . . . . . . . . . . . . . . . . . 33
2*IF EQUIPPED
Page 30 of 70
28
CENTER PANEL
Select the SETUP key on audio head unit. Select General, then scroll to and select DATE / TIME, and adjust.
REMINDERS:
§ Daylight Savings must be enabled or disabled o n the Clock Settings screen
§ To access manual date and time setting, turn GPS Time OFF in the Clock Settings (UVO link with Navigation*)
Refer to the Car Infotainment System Quick Reference Guide for more information.
Clock
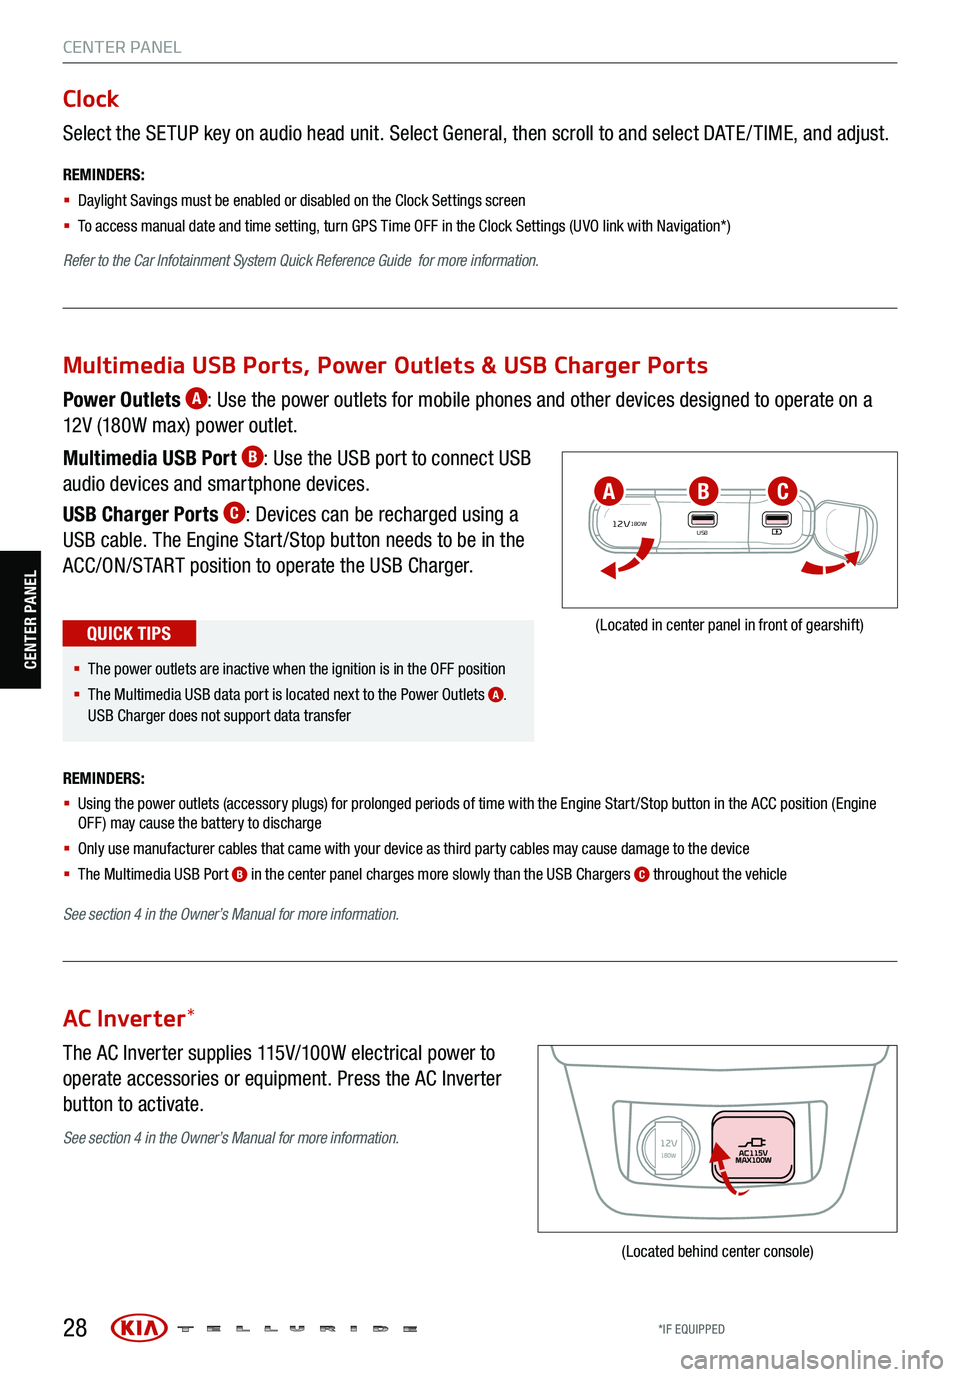
The AC Inverter supplies 115V/100W electrical power to
operate accessories or equipment. Press the AC Inverter
button to activate.
AC Inverter *
(Located behind center console)
Power Outlets A: Use the power outlets for mobile phones and other devices designed to operate on a
12V (180W max) power outlet.
Multimedia USB Port
B: Use the USB port to connect USB
audio devices and smartphone devices.
USB Charger Ports
C: Devices can be recharged using a
USB cable. The Engine Start /Stop button needs to be in the
ACC/ON/START position to operate the USB Charger.
REMINDERS:
§ Using the power outlets (accessory plugs) for prolonged periods of time with the Engine Start /Stop button in the ACC position (Engine
OFF ) may cause the battery to discharge
§ Only use manufacturer cables that came with your device as third party cables may cause damage to the device
§ The Multimedia USB Port
B in the center panel charges more slowly than the USB Chargers C throughout the vehicle
See section 4 in the Owner’s Manual for more information.
12V180WUSB
(Located in center panel in front of gearshift)
Multimedia USB Ports, Power Outlets & USB Charger Ports
§ The power outlets are inactive when the ignition is in the OFF position
§ The Multimedia USB data port is located next to the Power Outlets
A.
USB Charger does not support data transfer
QUICK TIPS
ABC
See section 4 in the Owner’s Manual for more information.
CENTER PANEL
*IF EQUIPPED
Page 35 of 70
33
CENTER PANEL
CENTER PANEL
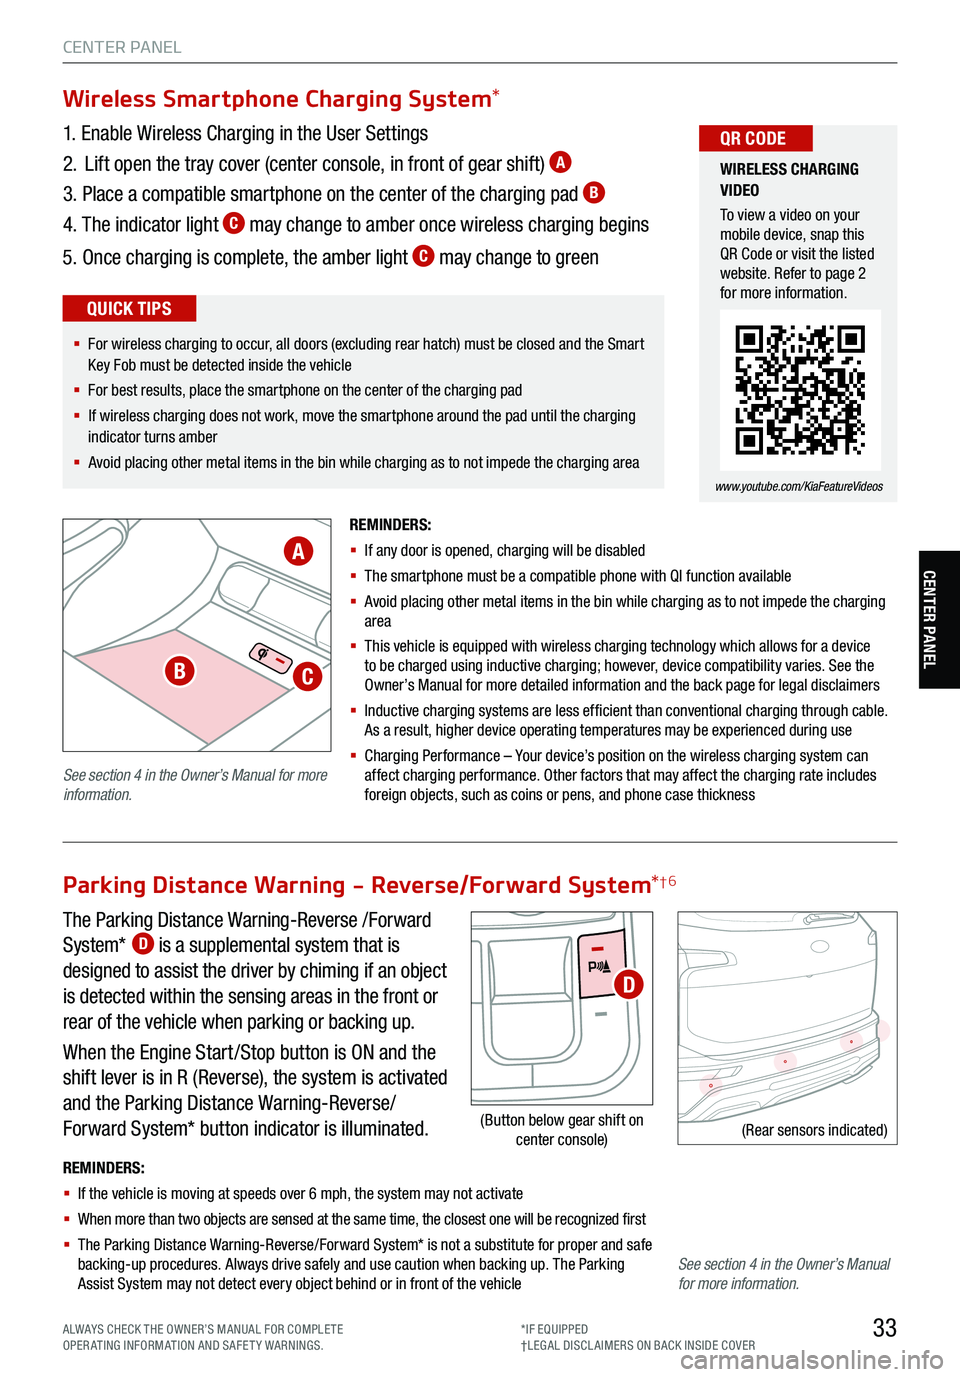
The Parking Distance Warning-Reverse /Forward
System* D is a supplemental system that is
designed to assist the driver by chiming if an object
is detected within the sensing areas in the front or
rear of the vehicle when parking or backing up.
When the Engine Start /Stop button is ON and the
shift lever is in R (Reverse), the system is activated
and the Parking Distance Warning-Reverse/
Forward System* button indicator is illuminated.
REMINDERS:
§ If the vehicle is moving at speeds over 6 mph, the system may not activate
§ When more than two objects are sensed at the same time, the closest one will be recognized first
§ The Parking Distance Warning-Reverse/Forward System* is not a substitute for proper and safe
backing-up procedures. Always drive safely and use caution when backing up. The Parking
Assist System may not detect every object behind or in front of the vehicle
(Rear sensors indicated)
Parking Distance Warning - Reverse/Forward System *†6
(Button below gear shift on
center console)
D
Wireless Smartphone Charging System *
1. Enable Wireless Charging in the User Settings
2. Lift open the tray cover (center console, in front of gear shift)
A
3. Place a compatible smartphone on the center of the charging pad B
4. The indicator light C may change to amber once wireless charging begins
5. Once charging is complete, the amber light
C may change to green
REMINDERS:
§ If any door is opened, charging will be disabled
§ The smartphone must be a compatible phone with QI function available
§ Avoid placing other metal items in the bin while charging as to not impede the charging
area
§ This vehicle is equipped with wireless charging technology which allows for a device
to be charged using inductive charging ; however , device compatibility varies. See the
O wner’s Manual for more detailed information and the back page for legal disclaimers
§ Inductive charging systems are less ef ficient than conventional charging through cable.
As a result, higher device operating temperatures may be experienced during use
§ Charging Performance – Your d evice’s position on the wireless charging system can
affect charging performance. Other factors that may affect the charging rate includes
foreign objects, such as coins or pens, and phone case thickness
WIRELESS CHARGING
VIDEO
To view a video on your
mobile device, snap this
QR Code or visit the listed
website. Refer to page 2
for more information.
www.youtube.com/KiaFeatureVideos
QR CODE
§ For wireless charging to occur, all doors (excluding rear hatch) must be closed and the Smart
Key Fob must be detected inside the vehicle
§ For best results, place the smartphone on the center of the charging pad
§ If wireless charging does not work, move the smartphone around the pad until the charging
indicator turns amber
§ Avoid placing other metal items in the bin while charging as to not impede the charging area
QUICK TIPS
A
BC
See section 4 in the Owner’s Manual for more
information.
See section 4 in the Owner’s Manual
for more information.
ALWAYS CHECK THE OWNER’S MANUAL FOR COMPLE TE
OPERATING INFORMATION AND SAFETY WARNINGS. *IF EQUIPPED
†LEG AL DISCL AIMERS ON BACK INSIDE COVER
Page 42 of 70
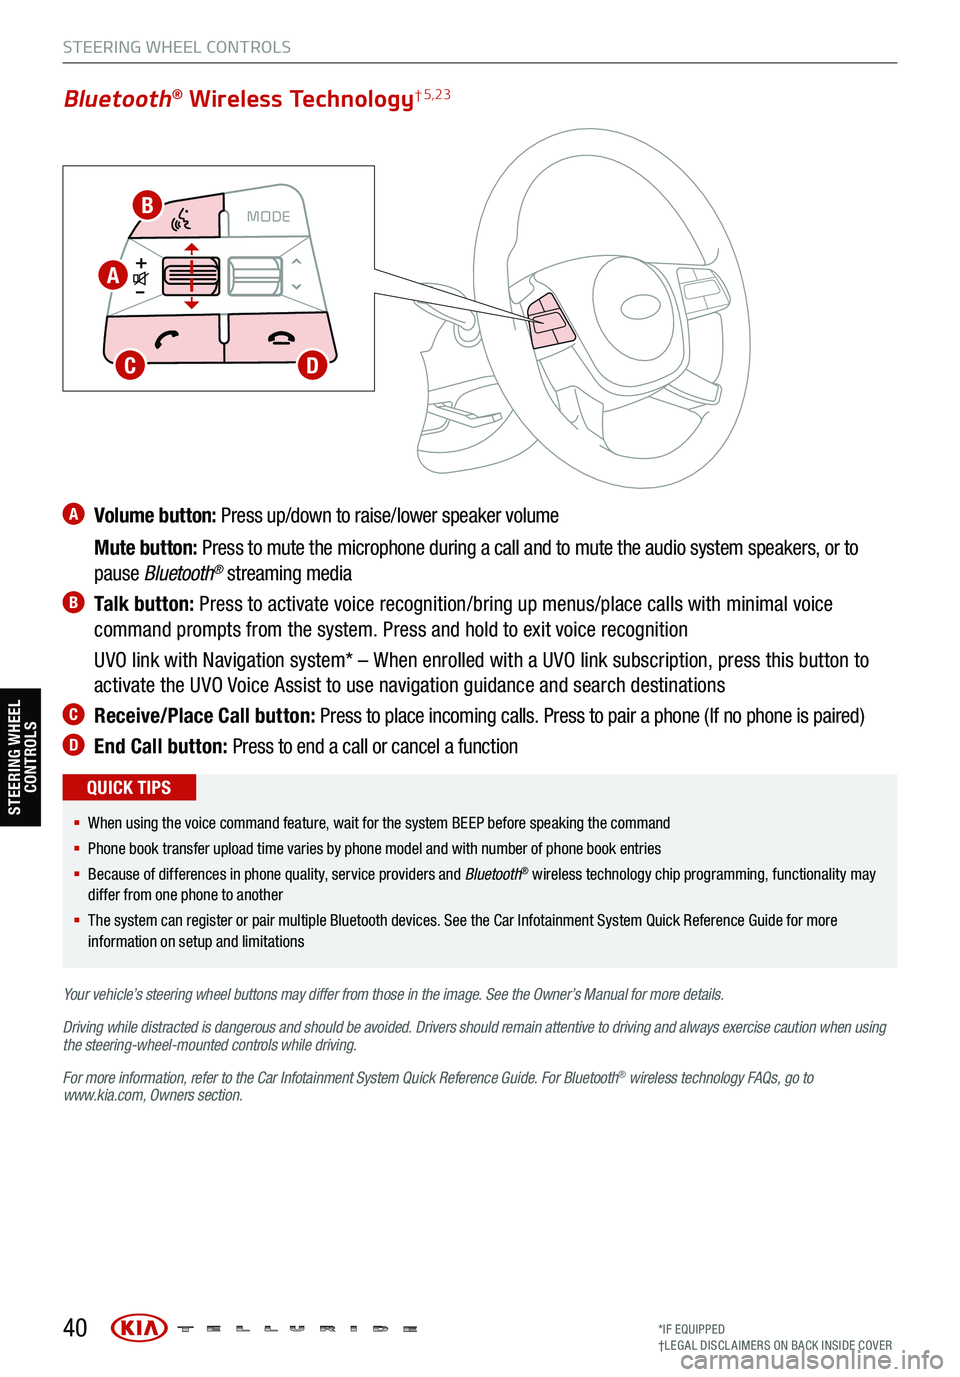
A Volume button: Press up/down to raise/lower speaker volume
Mute button: Press to mute the microphone during a call and to mute the audio system speakers, or to
pause Bluetooth
® streaming media
B Talk button: Press to activate voice recognition/bring up menus/place calls with minimal voice
command prompts from the system. Press and hold to exit voice recognition
UVO link with Navigation system* – When enrolled with a UVO link subscription, press this button to
activate the UVO Voice Assist to use navigation guidance and search destinations
C Receive/Place Call button: Press to place incoming calls. Press to pair a phone (If no phone is paired)
D End Call button: Press to end a call or cancel a function
40
CRUISE
MODECRUISE
CANCEL
RES
OK SET
CRUISE
CANCEL
RES
OK SET
MODE CRUISE
CANCEL
RES
OK SET
MODE
CANCEL
RES
OK SET
MODECRUISE
CANCEL
RES
OK SET
CRUISE
CANCEL
RES
OK SET
Bluetooth® Wireless Technology† 5,23
§ When using the voice command feature, wait for the system BEEP before speaking the command
§ Phone book transfer upload time varies by phone model and with number of phone book entries
§ Because of differences in phone quality, service providers and Bluetooth
® wireless technology chip programming, functionality may
differ from one phone to another
§ The system can register or pair multiple Bluetooth devices. See the Car Infotainment System Quick Reference Guide for more
information on setup and limitations
QUICK TIPS
Your vehicle’s steering wheel buttons may differ from those in the image. See the Owner’s Manual for more details.
Driving while distracted is dangerous and should be avoided. Drivers should remain attentive to driving and always exercise caution when using
the steering-wheel-mounted controls while driving.
For more information, refer to the Car Infotainment System Quick Reference Guide . For Bluetooth
® wireless technology FAQs, go to
www.kia.com, Owners section.
STEERING WHEEL CONTROLS
B
A
CD
STEERING WHEEL CONTROLS
*IF EQUIPPED
†LEG AL DISCL AIMERS ON BACK INSIDE COVER
Page 43 of 70
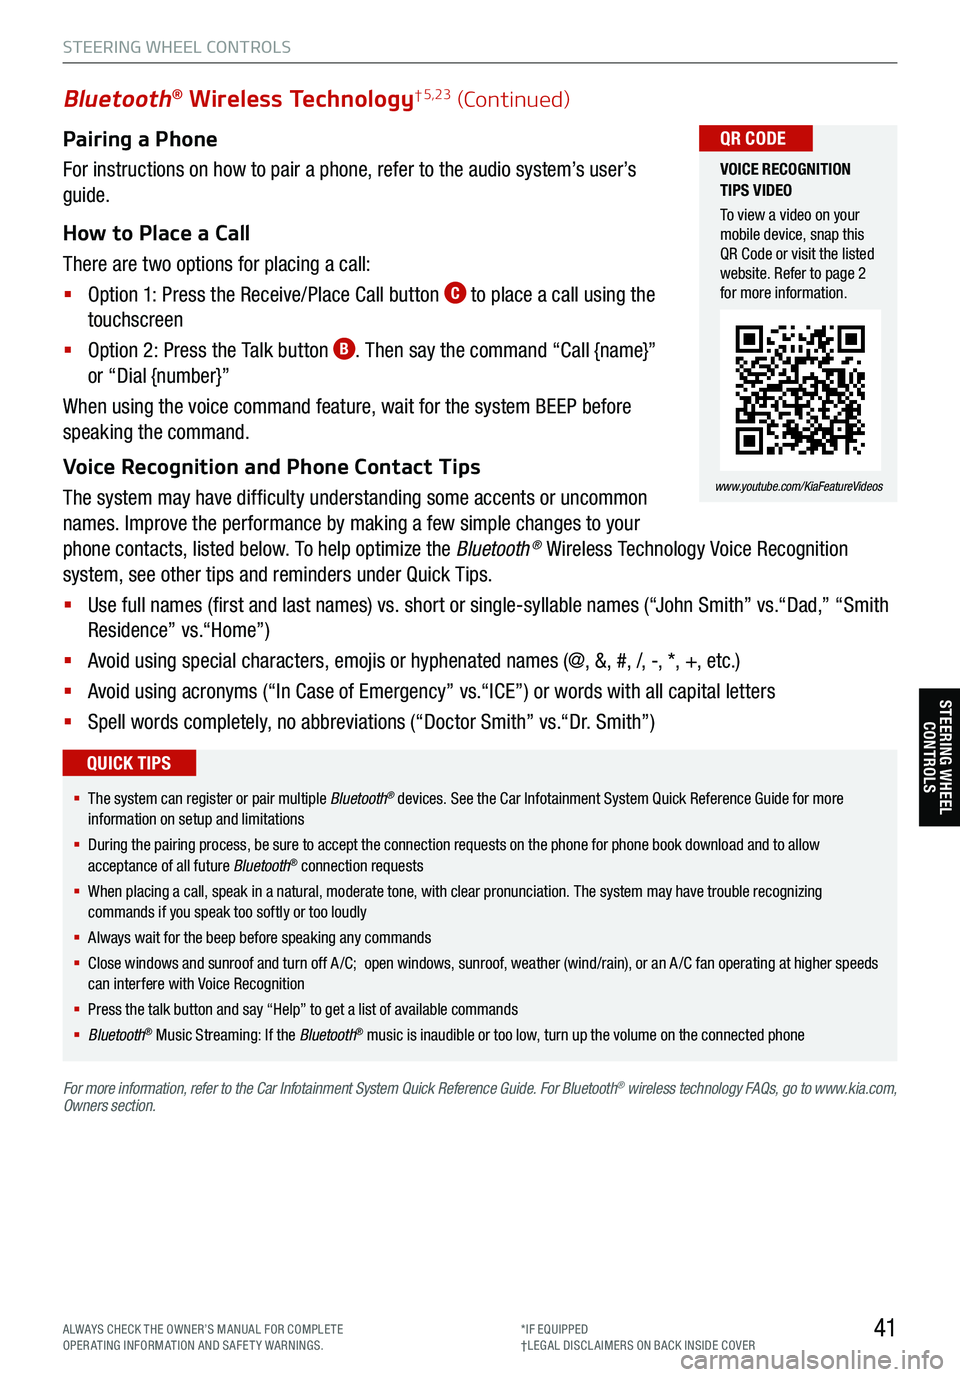
Pairing a Phone
For instructions on how to pair a phone, refer to the audio system’s user’s
guide.
How to Place a Call
There are two options for placing a call:
§ Option 1: Press the Receive/Place Call button
C to place a call using the
touchscreen
§ Option 2: Press the Talk button
B. Then say the command “Call {name}”
or “Dial {number}”
When using the voice command feature, wait for the system BEEP before
speaking the command.
Voice Recognition and Phone Contact Tips
The system may have difficulty understanding some accents or uncommon
names. Improve the performance by making a few simple changes to your
phone contacts, listed below. To help optimize the Bluetooth
® Wireless Technology Voice Recognition
system, see other tips and reminders under Quick Tips.
§ Use full names (first and last names) vs. short or single-syllable names (“John Smith” vs.“Dad,” “Smith
Residence” vs.“Home”)
§ Avoid using special characters, emojis or hyphenated names (@, &, #, /, -, *, +, etc.)
§ Avoid using acronyms (“In Case of Emergency” vs.“ICE”) or words with all capital letters
§ Spell words completely, no abbreviations (“Doctor Smith” vs.“Dr. Smith”)
41
Bluetooth® Wireless Technology† 5,23 (Continued)
§ The system can register or pair multiple Bluetooth® devices. See the Car Infotainment System Quick Reference Guide for more
information on setup and limitations
§ During the pairing process, be sure to accept the connection requests on the phone for phone book download and to allow
acceptance of all future Bluetooth
® connection requests
§ When placing a call, speak in a natural, moderate tone, with clear pronunciation. The system may have trouble recognizing
commands if you speak too softly or too loudly
§ Always wait for the beep before speaking any commands
§ Close windows and sunroof and turn off A /C; open windows, sunroof, weather (wind/rain), or an A /C fan operating at higher speeds
can interfere with Voice Recognition
§ Press the talk button and say “Help” to get a list of available commands
§ Bluetooth
® Music Streaming: If the Bluetooth® music is inaudible or too low, turn up the volume on the connected phone
QUICK TIPS
For more information, refer to the Car Infotainment System Quick Reference Guide. For Bluetooth® wireless technology FAQs, go to www.kia.com,
Owners section.
VOICE RECOGNITION
TIPS VIDEO
To view a video on your
mobile device, snap this
QR Code or visit the listed
website. Refer to page 2
for more information.
www.youtube.com/KiaFeatureVideos
QR CODE
STEERING WHEEL CONTROLS
STEERING WHEEL CONTROLS
ALWAYS CHECK THE OWNER’S MANUAL FOR COMPLE TE
OPERATING INFORMATION AND SAFETY WARNINGS. *IF EQUIPPED
†LEG AL DISCL AIMERS ON BACK INSIDE COVER
Page 46 of 70
REMINDERS:
§ Android Auto™ compatibility requirements: Micro-USB cable that came with your phone, OS Android™ 5.0 or higher, compatible
Android™ smartphone and data and wireless plan for applicable feature(s)
§ Apple CarPlay® compatibility requirements: Apple Lightning® cable, latest iOS software (above iOS 10) and data and wireless plan for
applicable feature(s)
§ It is recommended to always update your phone to the latest operating system release
§ Using an approved USB cable provided by your smartphone manufacture is recommended
§ Using unapproved USB cables may cause a phone projection error or a system malfuntion, black screen, no sound, disconnection, etc.
§ Phone projection may not work due to a defect in the phone
§ Driving while distracted can result in a loss of vehicle control that may lead to an accident, severe bodily injury, and death. The driver’s
primary responsibility is in the safe and legal operation of a vehicle, and any handheld devices, other equipment, or vehicle systems
which take the driver’s eyes, attention and focus away from the safe operation of a vehicle or which are not permissible by law should
never be used during operation of the vehicle
For further information , refer to the Car Infotainment System Quick Reference Guide.
For audio system information, refer to pages 43-47.
44
Android Auto™
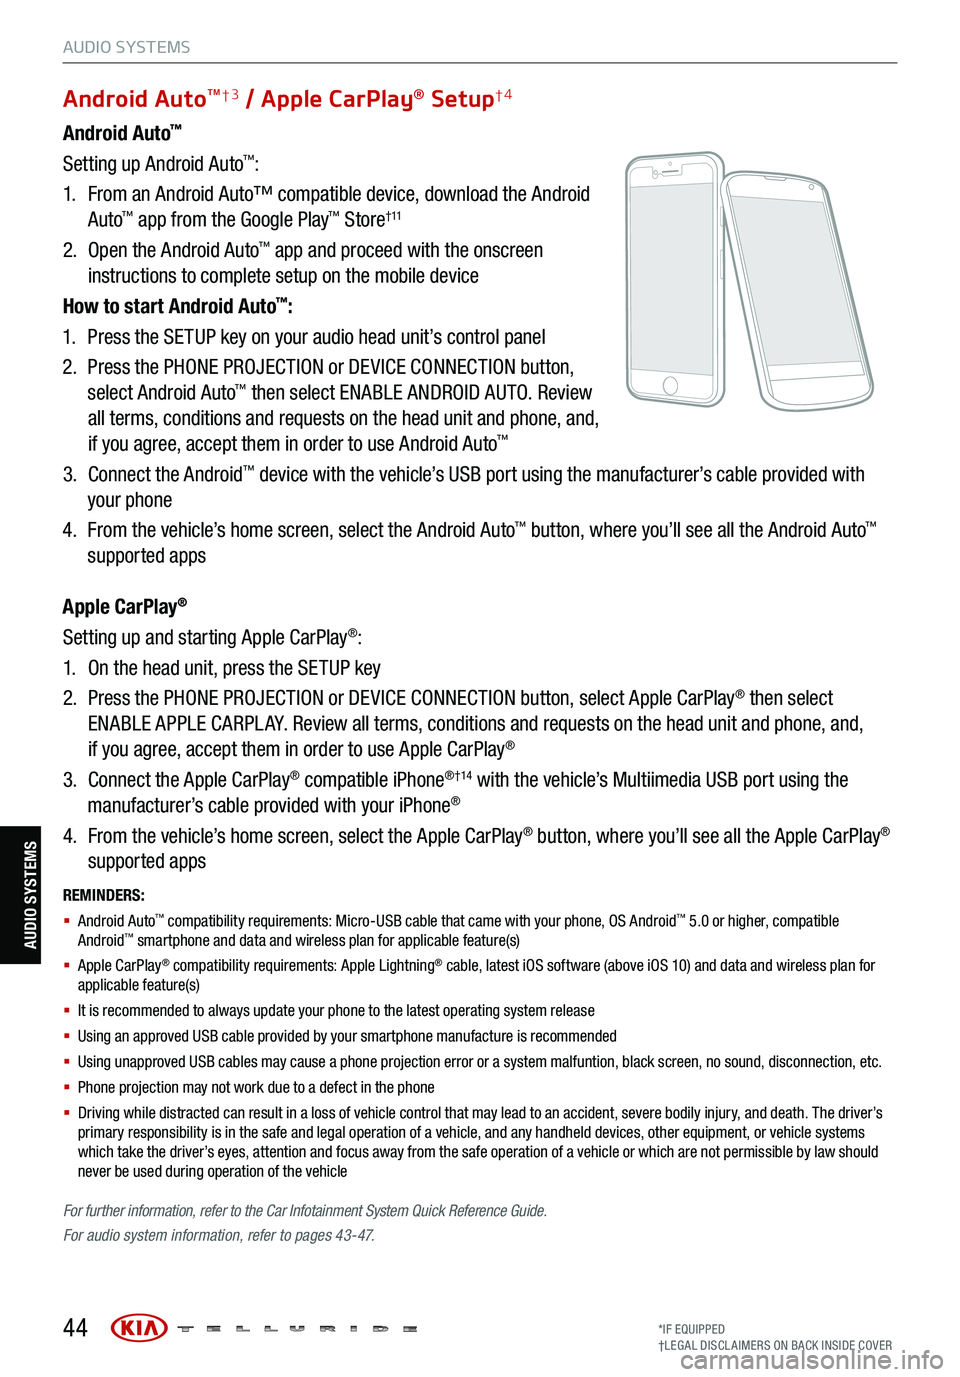
Setting up Android Auto™:
1. From an Android Auto™ compatible device, download the Android
Auto
™ app from the Google Play™ Store† 11
2. Open the Android Auto™ app and proceed with the onscreen
instructions to complete setup on the mobile device
How to start Android Auto
™:
1. Press the SETUP key on your audio head unit’s control panel
2. Press the PHONE PROJECTION or DEVICE CONNECTION button,
select Android Auto
™ then select ENABLE ANDROID AUTO. Review
all terms, conditions and requests on the head unit and phone, and,
if you agree, accept them in order to use Android Auto
™
3. Connect the Android™ device with the vehicle’s USB port using the manufacturer’s cable provided with
your phone
4. From the vehicle’s home screen, select the Android Auto
™ button, where you’ll see all the Android Auto™
supported apps
Apple CarPlay
®
Setting up and starting Apple CarPlay®:
1. On the head unit, press the SETUP key
2. Press the PHONE PROJECTION or DEVICE CONNECTION button, select Apple CarPlay
® then select
ENABLE APPLE CARPL AY. Review all terms, conditions and requests on the head unit and phone, and,
if you agree, accept them in order to use Apple CarPlay
®
3. Connect the Apple CarPlay
® compatible iPhone® †14 with the vehicle’s Multiimedia USB port using the
manufacturer’s cable provided with your iPhone®
4. From the vehicle’s home screen, select the Apple CarPlay
® button, where you’ll see all the Apple CarPlay®
supported apps
Android AutoTM†3 / Apple CarPlay® Setup†4
AUDIO SYSTEMS
AUDIO SYSTEMS
*IF EQUIPPED
†LEG AL DISCL AIMERS ON BACK INSIDE COVER
Page 47 of 70
45
AUDIO SYSTEMS
AUDIO SYSTEMS
UVO
FRONTREAR
ONOFFDOOR
(Buttons
on overhead console *)
1. Enter the activation screen on your vehicle’s head
unit:
a. Press SETUP key
b. Press UVO icon
c. Press Activate UVO
2. Read and agree to Terms of Service and Privacy
Policy and press SUBMIT
3. Enter smartphone number or email address to
receive a verification code, then press SUBMIT
4a. Follow these steps if using your phone
number to receive your verification code:
a. Check your phone for an SMS (text message)
b. Open the link in your SMS. A page will open
requesting that you create your account
Note: If you already have a Kia Owners Portal
account using the phone number as your login ID,
you will need to provide your password prior to
receiving the verification code
c. Enter your first name, last name, email, phone
number, an account password, and click CRE ATE
ACCOUNT. A page will open displaying your
verification code
d. Enter the code in the head unit and press
ACTIVATE
e. Go back to the page with your verification code
and press “I have entered my PIN.” A link will be
provided to download the Kia Access with UVO
link app from your app store. After installing the
app, log in and enjoy 4b.
Follow these steps if using your email to
receive your verification code:
a. Check your email. The email will be from reset@
notifications.myuvo.com
b. Open link inside email. A page will open
requesting that you create your account
Note: If you already have a Kia Owners Portal
account using the email as your login ID, you will
need to provide your password prior to receiving the
verification code
c. Enter your first name, last name, email, phone
number, an account password, and click CRE ATE
ACCOUNT. A page will open displaying your
verification code
d. Enter the code in the head unit and press
ACTIVATE
e. Go back to the page with your verification code
and press “I have entered my PIN.” A link will be
provided to download the Kia Access with UVO
link app from your app store. After installing the
app, log in and enjoy
Driving while distracted can result in a loss of vehicle control that
may lead to an accident, severe bodily injury, and death. The driver’s
primary responsibility is in the safe and legal operation of a vehicle,
and any handheld devices, other equipment, or vehicle systems
which take the driver’s eyes, attention and focus away from the safe
operation of a vehicle or which are not permissible by law should
never be used during operation of the vehicle.
For further UVO link operations, refer to the Car Infotainment
System Quick Reference Guide . For other audio system
information, refer to pages 43-47.
UVO link Activation†1
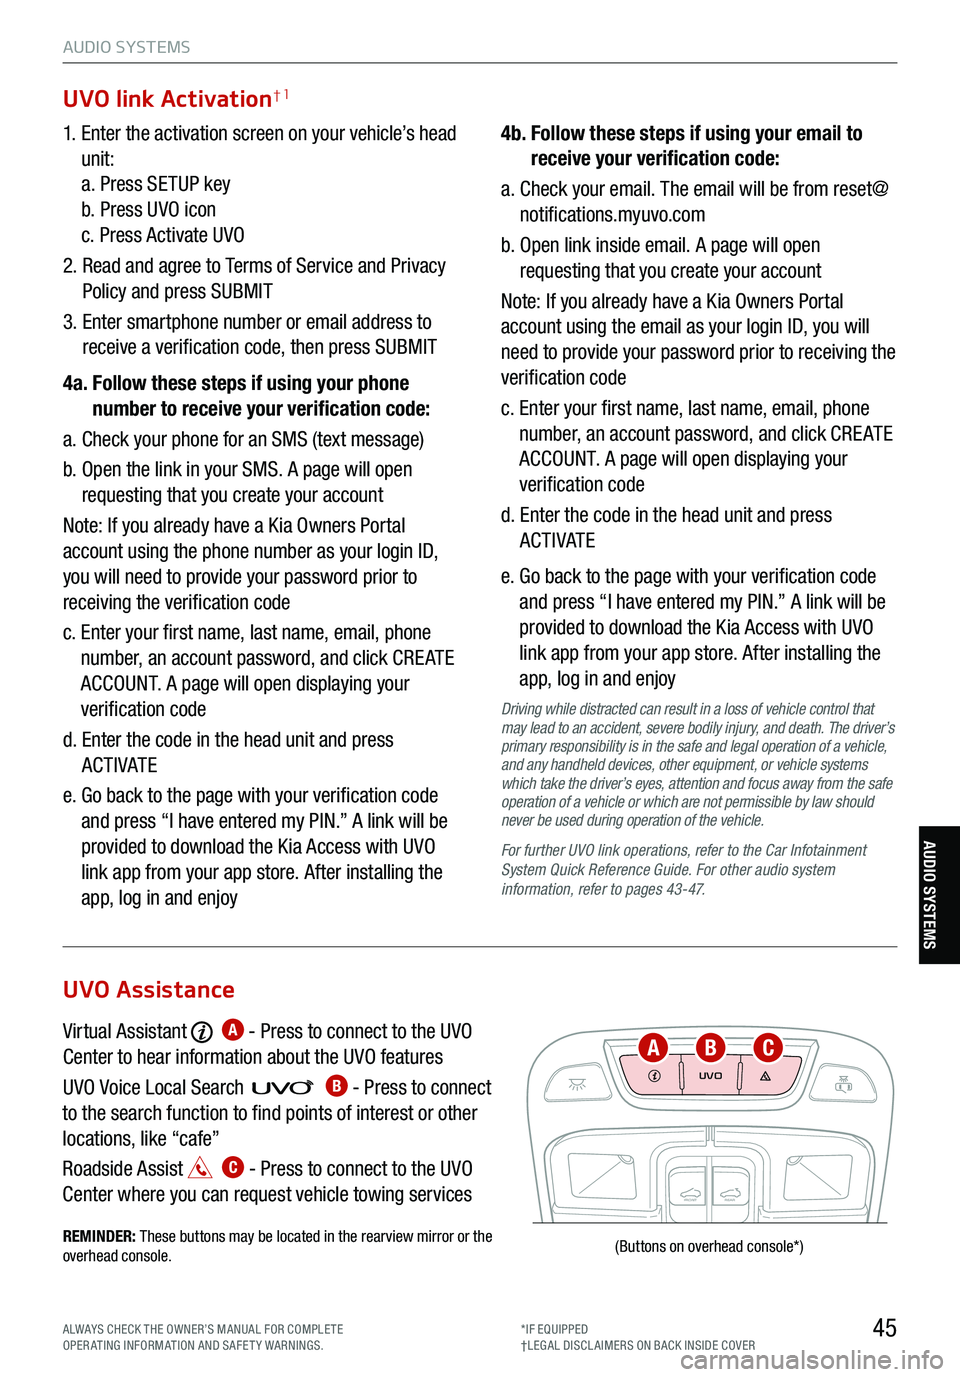
Virtual Assistant A - Press to connect to the UVO
Center to hear information about the UVO features
UVO Voice Local Searc h
B - Press to connect
to the search function to find points of interest or other
locations, like “cafe”
Roadside Assist
C - Press to connect to the UVO
Center where you can request vehicle towing services
REMINDER: These buttons may be located in the rearview mirror or the
overhead console .
UVO Assistance
ABC
ALWAYS CHECK THE OWNER’S MANUAL FOR COMPLE TE
OPERATING INFORMATION AND SAFETY WARNINGS. *IF EQUIPPED
†LEG AL DISCL AIMERS ON BACK INSIDE COVER
Page 48 of 70
UVO link*† 1 – FM/AM/SiriusXM®†21/Media (USB, Bluetoot h® Audio, My Music)
Sound Settings – To adjust the sound settings:
1. Press the SETUP key on the audio head unit or the onscreen MENU button,
when in MEDIA mode. Select the onscreen SOUND button, or SOUND
SETTINGS
2. Select the menu item (Position, Volume, Tone, Priority, Advanced, Default)
3. Use the onscreen buttons to adjust settings. Press the return button
to
save settings
Radio Presets – You can listen to FM, AM and SiriusXM
® radio and save
frequently used stations. How to Save a Preset – Press and hold the desired
slot. This saves the current station in the selected slot.
SiriusXM
® Smart Favorites – For the first ten favorite SiriusXM® channels, you
may play live or repeat from the beginning of a song or a program segment. In
Radio mode, choose SiriusXM
®, then select any of the first ten favorites. During
song or program play, tap the Skip Backward icon to start from the beginning
of the song or program. Tap the Play Live icon to return to the live broadcast.
Custom Key
H: A programmable key to provide quick access to one of several available system features.
To Program the Custom Key: Press and hold the Custom key. Select one of the available features you would
like the Custom key to open.
REMINDER: Driving while
distracted is dangerous and
should be avoided. Drivers
should remain attentive to
driving and always exercise
caution when using the audio
system controls while driving.
T o help minimize driver
distraction, some audio system
functionalities have been
modified while the vehicle is
in Drive , Reverse or moved out
of Park.
For more information, refer to the Car Multimedia System User’s Manual. For other audio system information, refer to pages 43-47.
46
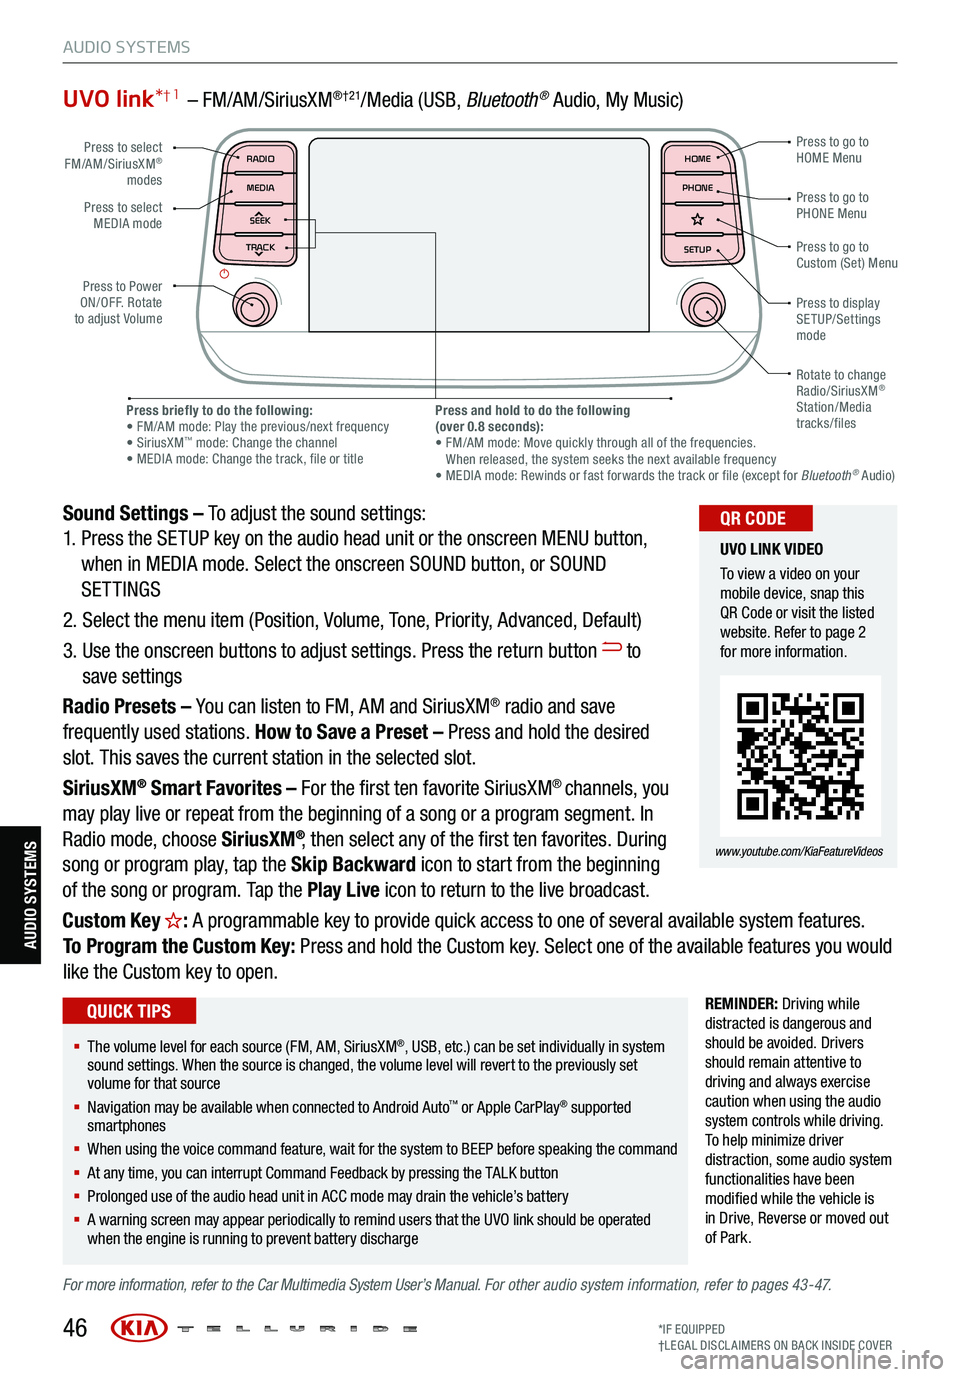
Press to select
FM/AM/SiriusXM®
modes
Press to Power
ON/OFF. Rotate
to adjust Volume Press to go to
Custom (Set) Menu
Press to go to
PHONE Menu
Press to go to
HOME Menu
Press briefly to do the following:
• FM/AM mode: Play the previous/next frequency
• SiriusXM
™ mode: Change the channel
• MEDIA mode: Change the track, file or title Press and hold to do the following
(over 0.8 seconds):
• FM/AM mode: Move quickly through all of the frequencies.
When released, the system seeks the next available frequency
• MEDIA mode: Rewinds or fast forwards the track or file (except for Bluetooth
® Audio)
Press to display
SETUP/Settings
mode
Press to select
MEDIA mode
Rotate to change
Radio/SiriusXM
®
Station/Media
tracks/files
MAP RADIO
N AV MEDIASEEK<
Page 53 of 70
51
S E AT I N G
SE ATING
CRUISE
CANCEL
RES
OK SET
This system is not a substitute
for one’s attention and may
not detect all movement within
the vehicle. Always check the
vehicle’s interior before exiting.
Images are for illustrative
purposes only and may not
reflect actual feature or
operation.
See section 4 in the Owner’s
Manual for more information.
Rear Occupant Alert (ROA) with Ultrasonic Sensors *†6
The Rear Occupant Alert (ROA) with Ultrasonic Sensors can help alert the
driver when rear passenger(s) are left in the rear seats using the ultrasonic
sensors and door monitoring. The system is designed to provide three
separate alerts:
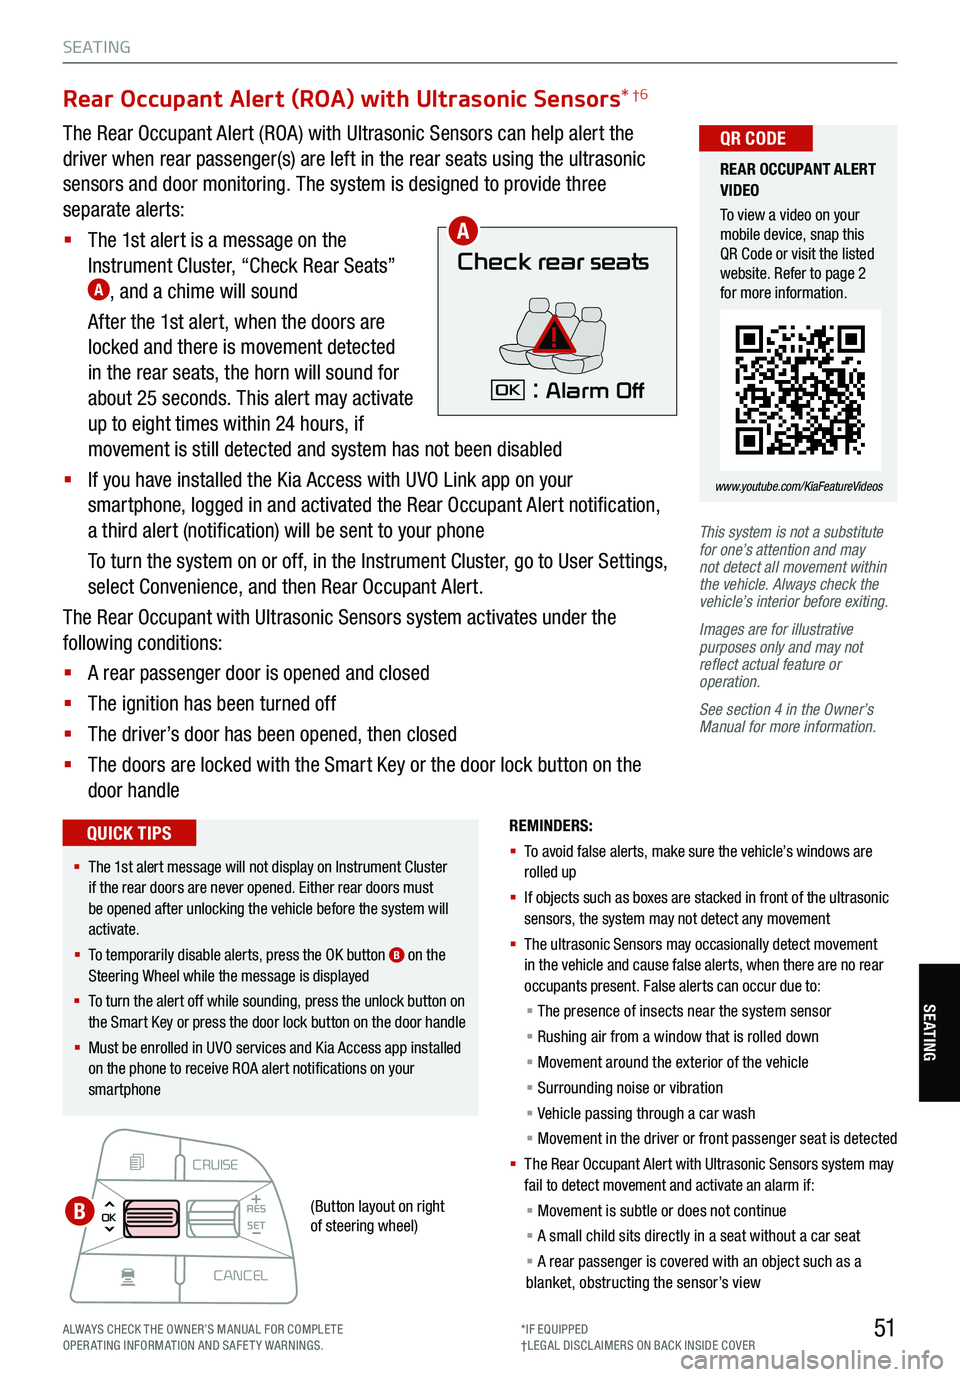
§ The 1st alert is a message on the
Instrument Cluster, “Check Rear Seats”
A, and a chime will sound
After the 1st alert, when the doors are
locked and there is movement detected
in the rear seats, the horn will sound for
about 25 seconds. This alert may activate
up to eight times within 24 hours, if
movement is still detected and system has not been disabled
§ If you have installed the Kia Access with UVO Link app on your
smartphone, logged in and activated the Rear Occupant Alert notification,
a third alert (notification) will be sent to your phone
To turn the system on or off, in the Instrument Cluster, go to User Settings,
select Convenience, and then Rear Occupant Alert.
The Rear Occupant with Ultrasonic Sensors system activates under the
following conditions:
§ A rear passenger door is opened and closed
§ The ignition has been turned off
§ The driver’s door has been opened, then closed
§ The doors are locked with the Smart Key or the door lock button on the
door handle
Check rear seats
: Alarm OffOK
A
B
REMINDERS:
§ To avoid false alerts, make sure the vehicle’s windows are
rolled up
§ If objects such as boxes are stacked in front of the ultrasonic
sensors, the system may not detect any movement
§ The ultrasonic Sensors may occasionally detect movement
in the vehicle and cause false alerts, when there are no rear
occupants present. False alerts can occur due to:
§ The presence of insects near the system sensor
§ Rushing air from a window that is rolled down
§ Movement around the exterior of the vehicle
§ Surrounding noise or vibration
§ Vehicle passing through a car wash
§ Movement in the driver or front passenger seat is detected
§ Th e Rear Occupant Alert with Ultrasonic Sensors system may
fail to detect movement and activate an alarm if:
§ Movement is subtle or does not continue
§ A small child sits directly in a seat without a car seat
§ A rear passenger is covered with an object such as a
blanket, obstructing the sensor’s view
REAR OCCUPANT ALERT
VIDEO
To view a video on your
mobile device, snap this
QR Code or visit the listed
website. Refer to page 2
for more information.
www.youtube.com/KiaFeatureVideos
QR CODE
§ The 1st alert message will not display on Instrument Cluster
if the rear doors are never opened. Either rear doors must
be opened after unlocking the vehicle before the system will
activate.
§ To temporarily disable alerts, press the OK button
B on the
Steering Wheel while the message is displayed
§ To turn the alert off while sounding, press the unlock button on
the Smart Key or press the door lock button on the door handle
§ Must be enrolled in UVO services and Kia Access app installed
on the phone to receive ROA alert notifications on your
smartphone
QUICK TIPS
(Button layout on right
of steering wheel)
ALWAYS CHECK THE OWNER’S MANUAL FOR COMPLE TE
OPERATING INFORMATION AND SAFETY WARNINGS. *IF EQUIPPED
†LEG AL DISCL AIMERS ON BACK INSIDE COVER
Page 58 of 70
56
REMINDERS:
§ The liftgate unlocks when the Smart Key is
within close proximity of the vehicle
§ Remote button configuration may vary
depending on vehicle options
See section 4 in the Owner’s Manual for more
information.
These illustrations are for demonstration
purposes only.
Unock
Lock
Smart Key
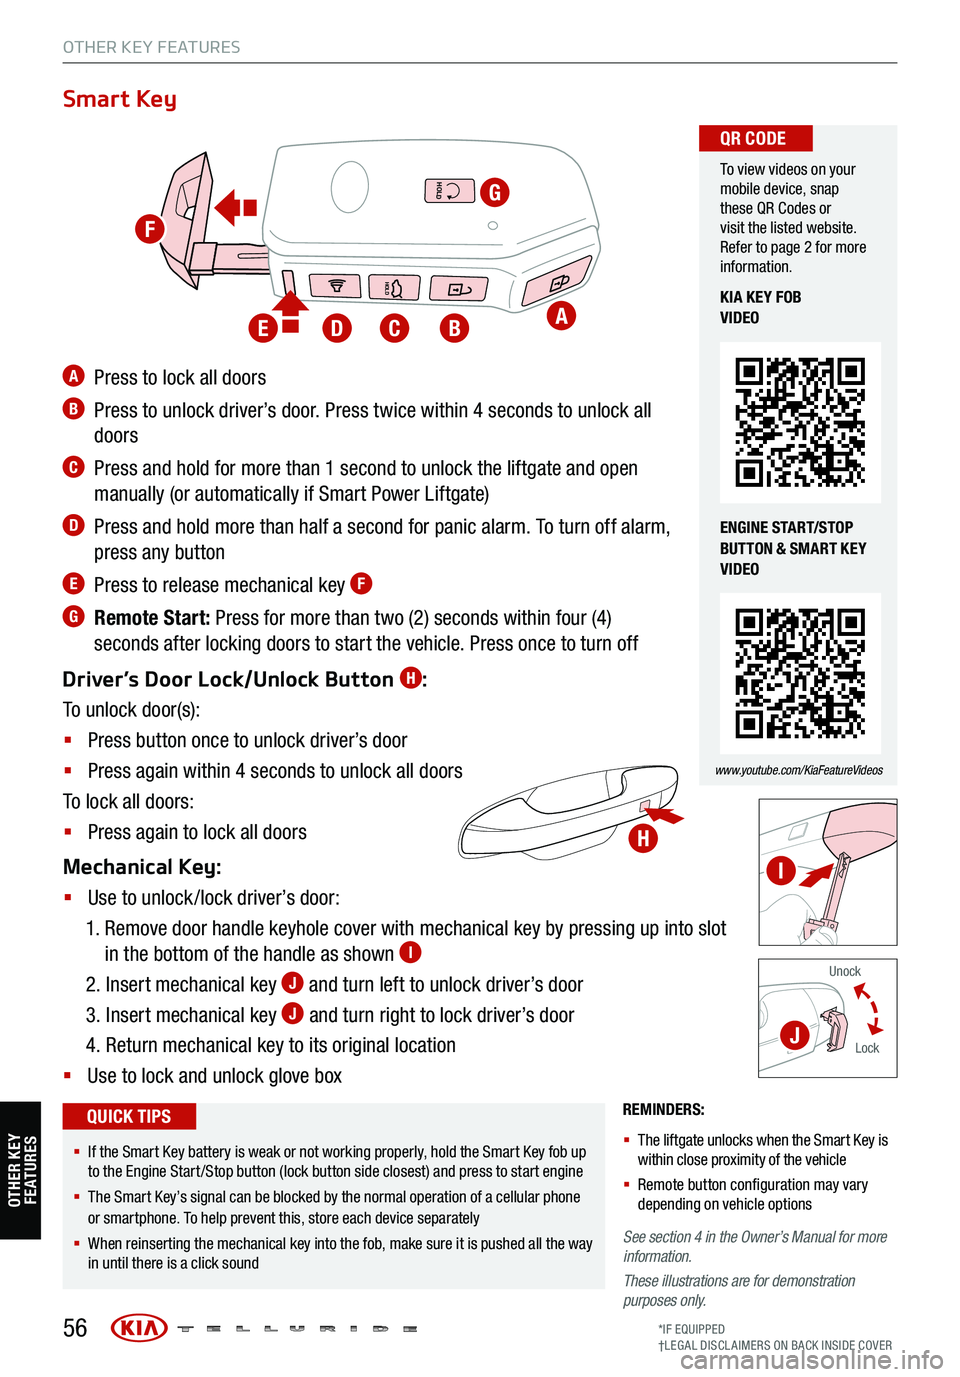
A Press to lock all doors
B Press to unlock driver’s door. Press twice within 4 seconds to unlock all
doors
C Press and hold for more than 1 second to unlock the liftgate and open
manually (or automatically if Smart Power Liftgate)
D Press and hold more than half a second for panic alarm. To turn off alarm,
press any button
E Press to release mechanical key F
G Remote Start: Press for more than two (2) seconds within four (4)
seconds after locking doors to start the vehicle. Press once to turn off
Driver’s Door Lock/Unlock Button
H:
To unlock door(s):
§ Press button once to unlock driver’s door
§ Press again within 4 seconds to unlock all doors
To lock all doors:
§ Press again to lock all doors
Mechanical Key:
§ Use to unlock /lock driver’s door:
1. Remove door handle keyhole cover with mechanical key by pressing up into slot
in the bottom of the handle as shown
I
2. Insert mechanical key J and turn left to unlock driver’s door
3. Insert mechanical key
J and turn right to lock driver’s door
4. Return mechanical key to its original location
§ Use to lock and unlock glove box
To view videos on your
mobile device, snap
these QR Codes or
visit the listed website.
Refer to page 2 for more
information.
www.youtube.com/KiaFeatureVideos
QR CODE
KIA KEY FOB
VIDEO
ENGINE START/STOP
BUTTON & SMART KEY
VIDEO
§ If the Smart Key battery is weak or not working properly, hold the Smart Key fob up
to the Engine Start /Stop button (lock button side closest) and press to start engine
§ The Smart Key’s signal can be blocked by the normal operation of a cellular phone
or smartphone. To help prevent this, store each device separately
§ When reinserting the mechanical key into the fob, make sure it is pushed all the way
in until there is a click sound
QUICK TIPS
HOLD
HOLD
HOLD
OTHER KEY FEATURES
A
G
BCDE
H
I
J
F
OTHER KEY FE AT URE S
*IF EQUIPPED
†LEG AL DISCL AIMERS ON BACK INSIDE COVER