ad blue KIA TELLURIDE 2021 Navigation System Quick Reference Guide
[x] Cancel search | Manufacturer: KIA, Model Year: 2021, Model line: TELLURIDE, Model: KIA TELLURIDE 2021Pages: 300, PDF Size: 10.06 MB
Page 213 of 300
9-33
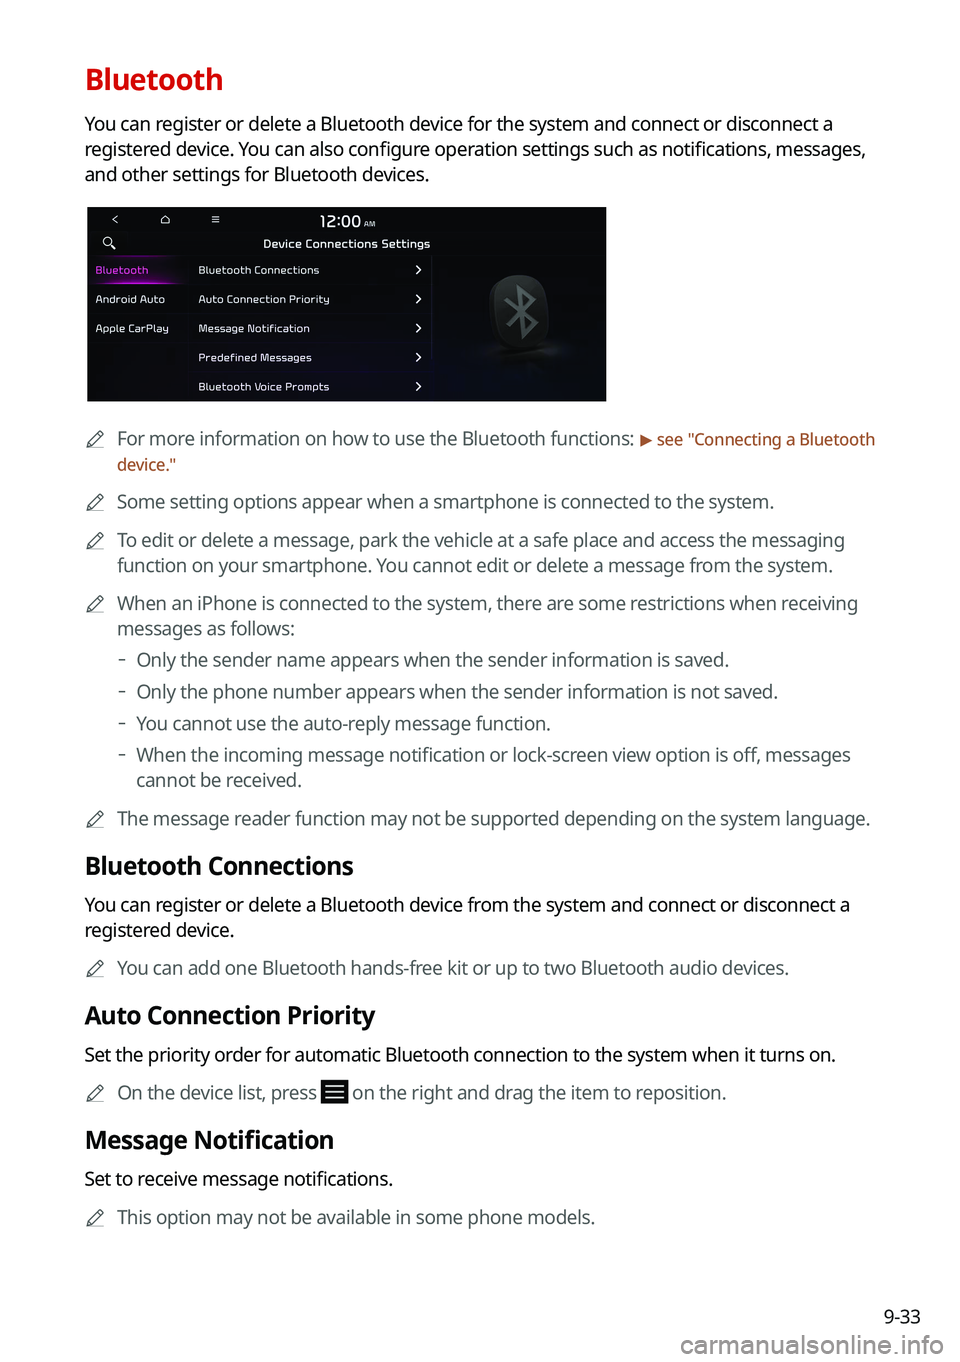
Bluetooth
You can register or delete a Bluetooth device for the system and connect or disconnect a
registered device. You can also configure operation settings such as notifications, messages,
and other settings for Bluetooth devices.
0000
A
For more information on how to use the Bluetooth functions: > see "Connecting a Bluetooth
device."
0000
A
Some setting options appear when a smartphone is connected to the system\
.
0000
A
To edit or delete a message, park the vehicle at a safe place and access \
the messaging
function on your smartphone. You cannot edit or delete a message from the system.
0000
A
When an iPhone is connected to the system, there are some restrictions when receiving
messages as follows:
000DOnly the sender name appears when the sender information is saved.
000DOnly the phone number appears when the sender information is not saved.
000DYou cannot use the auto-reply message function.
000DWhen the incoming message notification or lock-screen view option is off, messages
cannot be received.
0000
A
The message reader function may not be supported depending on the system language.
Bluetooth Connections
You can register or delete a Bluetooth device from the system and connect or disconnect a
registered device.
0000
A
You can add one Bluetooth hands-free kit or up to two Bluetooth audio devices.
Auto Connection Priority
Set the priority order for automatic Bluetooth connection to the system when it turns on.
0000
A
On the device list, press
on the right and drag the item to reposition.
Message Notification
Set to receive message notifications.
0000
A
This option may not be available in some phone models.
Page 214 of 300
9-34
Predefined Messages
Edit message templates for quick replies.0000
A
This option may not be available in some phone models.
Bluetooth Voice Prompts
Set whether to hear voice prompts for events related to Bluetooth connections.
Privacy Mode
Enable or disable Privacy Mode. Hide data including contacts and call hi\
story from showing
up on the system screen to protect privacy.
Bluetooth System Info
You can see and edit the Bluetooth information of the system.
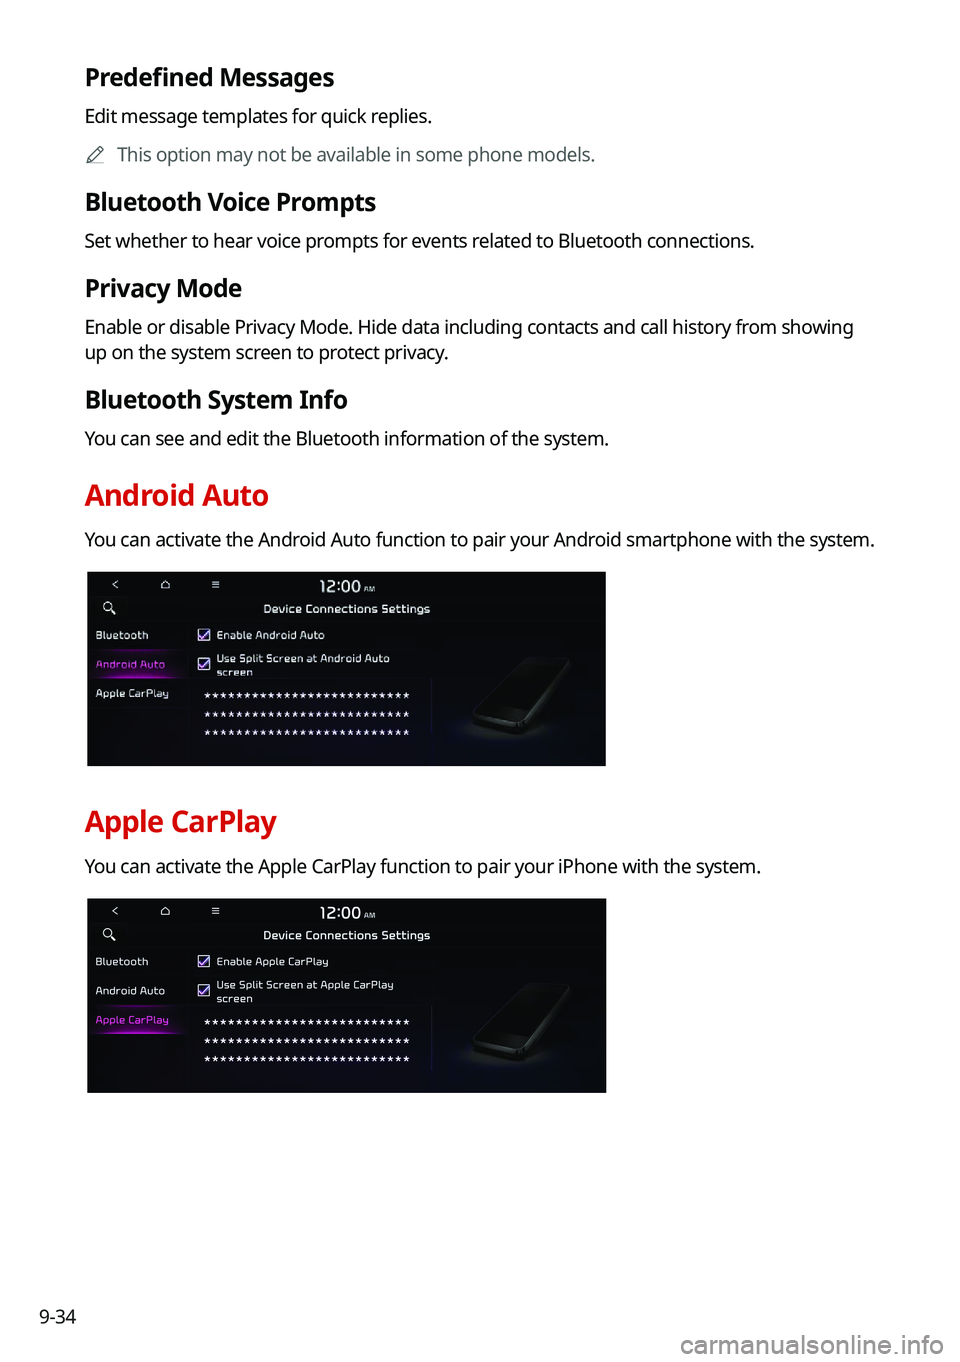
Android Auto
You can activate the Android Auto function to pair your Android smartphone with the system.
Apple CarPlay
You can activate the Apple CarPlay function to pair your iPhone with the \
system.
Page 249 of 300
9-69
Link Bluetooth Devices
You can connect any registered Bluetooth device. > See "Connecting a Bluetooth device."
Reset User Account
You can initialize all account settings.
Configuring the user profile settings (Type2)
You can additionally set profiles for each driver after First Run Setup.
1 On the All Menus screen, press Setup >
User Profile.
2 Press the user to change its profile.
The User Profile Settings screen appears.
0000
A
Press
>
Search for Settings or press and enter a keyword to search for a
setting item. You can also search for a setting item by voice.
0000
A
Press Change User to switch to another user's profile.
0000
A
When you log in as guest, you cannot set the profile items additionally. To set a different
profile, select another user.
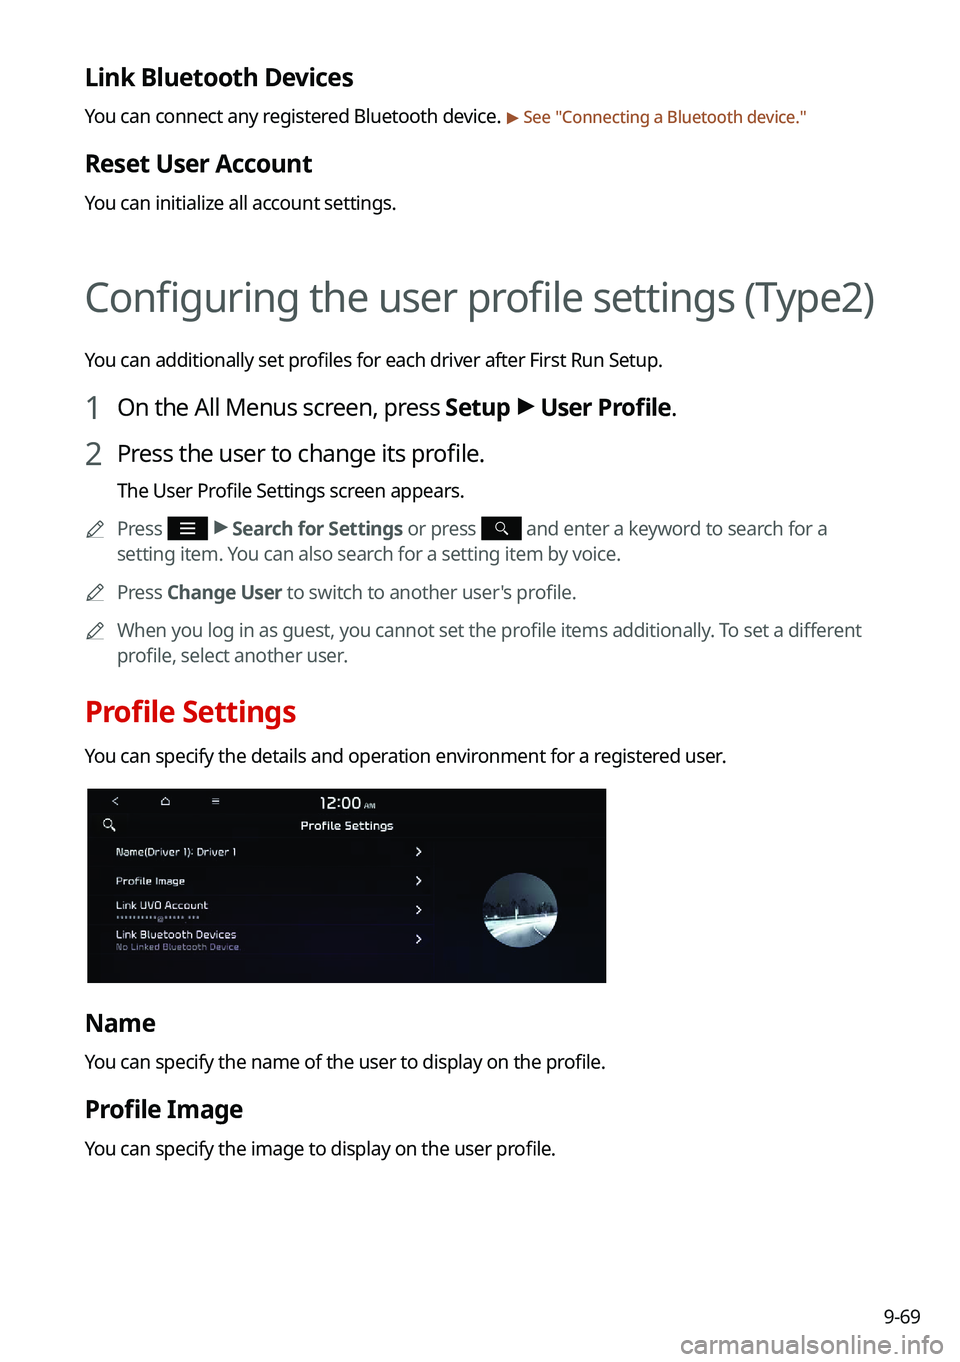
Profile Settings
You can specify the details and operation environment for a registered user.
Name
You can specify the name of the user to display on the profile.
Profile Image
You can specify the image to display on the user profile.
Page 250 of 300
9-70
Link UVO Account
You can use various services and convenient management features when linked to the
registered UVO service.0000
A
Subscribe to UVO to check the function.
> See "Subscribing to the service."
Link Bluetooth Devices
You can connect any registered Bluetooth device. > See "Connecting a Bluetooth device."
Configuring the general system settings
(Type1)
You can configure general settings for date, time, language, and the like. You can also check
information of the system.
1 On the All Menus screen, press Setup >
General.
The general settings screen appears.
2 Configure the settings required:
0000
A
Press Menu >
Search for Settings or press and enter a keyword to search for a
setting item. You can also search for a setting item by voice.
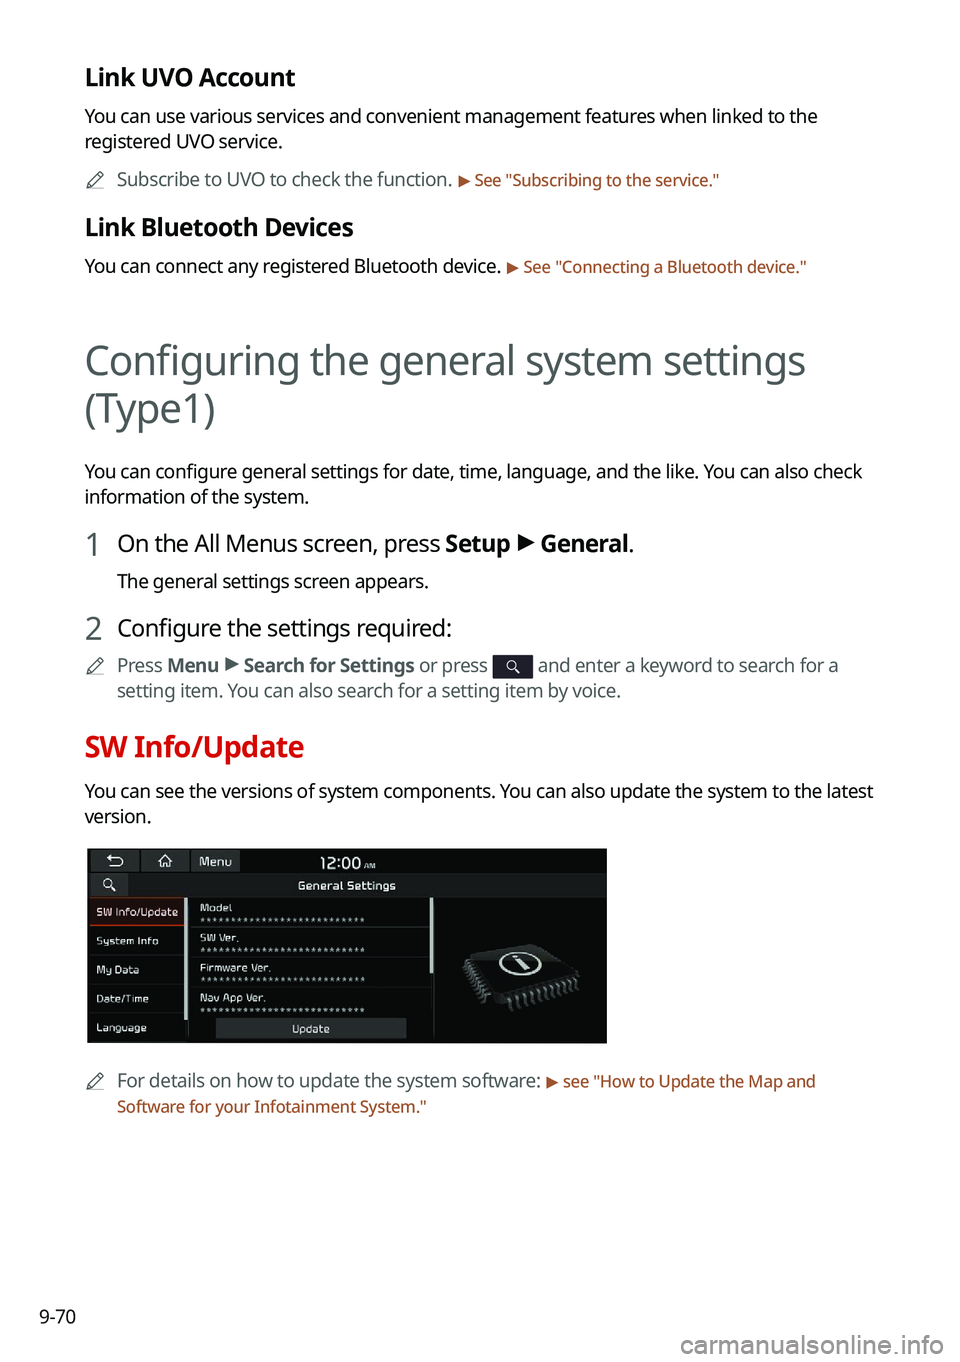
SW Info/Update
You can see the versions of system components. You can also update the system to the latest
version.
0000A
For details on how to update the system software: > see "How to Update the Map and
Software for your Infotainment System."
Page 253 of 300
9-73
GPS Time
After receiving the time from GPS, it sets the system date and time automatically.0000
A
To manually set the date and time, uncheck GPS Time, press the current date and time
below GPS Time, and then set the date and time.
24 Hours
The system time is displayed in the 24-hour format.
0000
A
For example, when 24 Hours is checked and the current time is 01:08 pm, the system
screen displays the time as "13:08." When the checkbox is deselected, the time display
changes to "01:08 PM."
Daylight Saving Time
Displays the system time in the format of Daylight Saving Time.
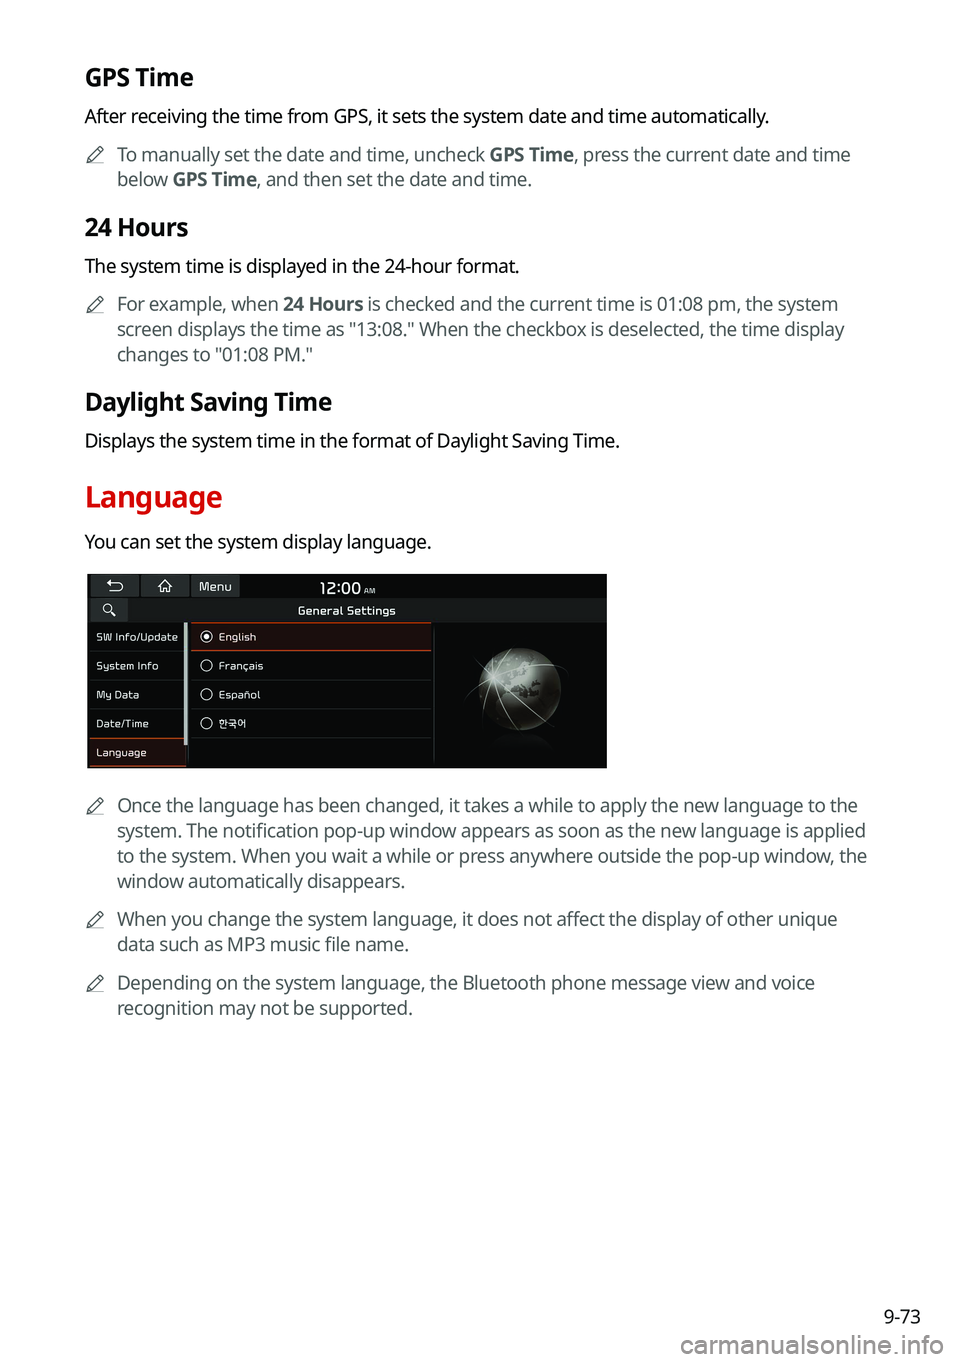
Language
You can set the system display language.
0000
A
Once the language has been changed, it takes a while to apply the new language to the
system. The notification pop-up window appears as soon as the new language is applied
to the system. When you wait a while or press anywhere outside the pop-up window, the
window automatically disappears.
0000
A
When you change the system language, it does not affect the display of other unique
data such as MP3 music file name.
0000
A
Depending on the system language, the Bluetooth phone message view and voice
recognition may not be supported.
Page 258 of 300
9-78
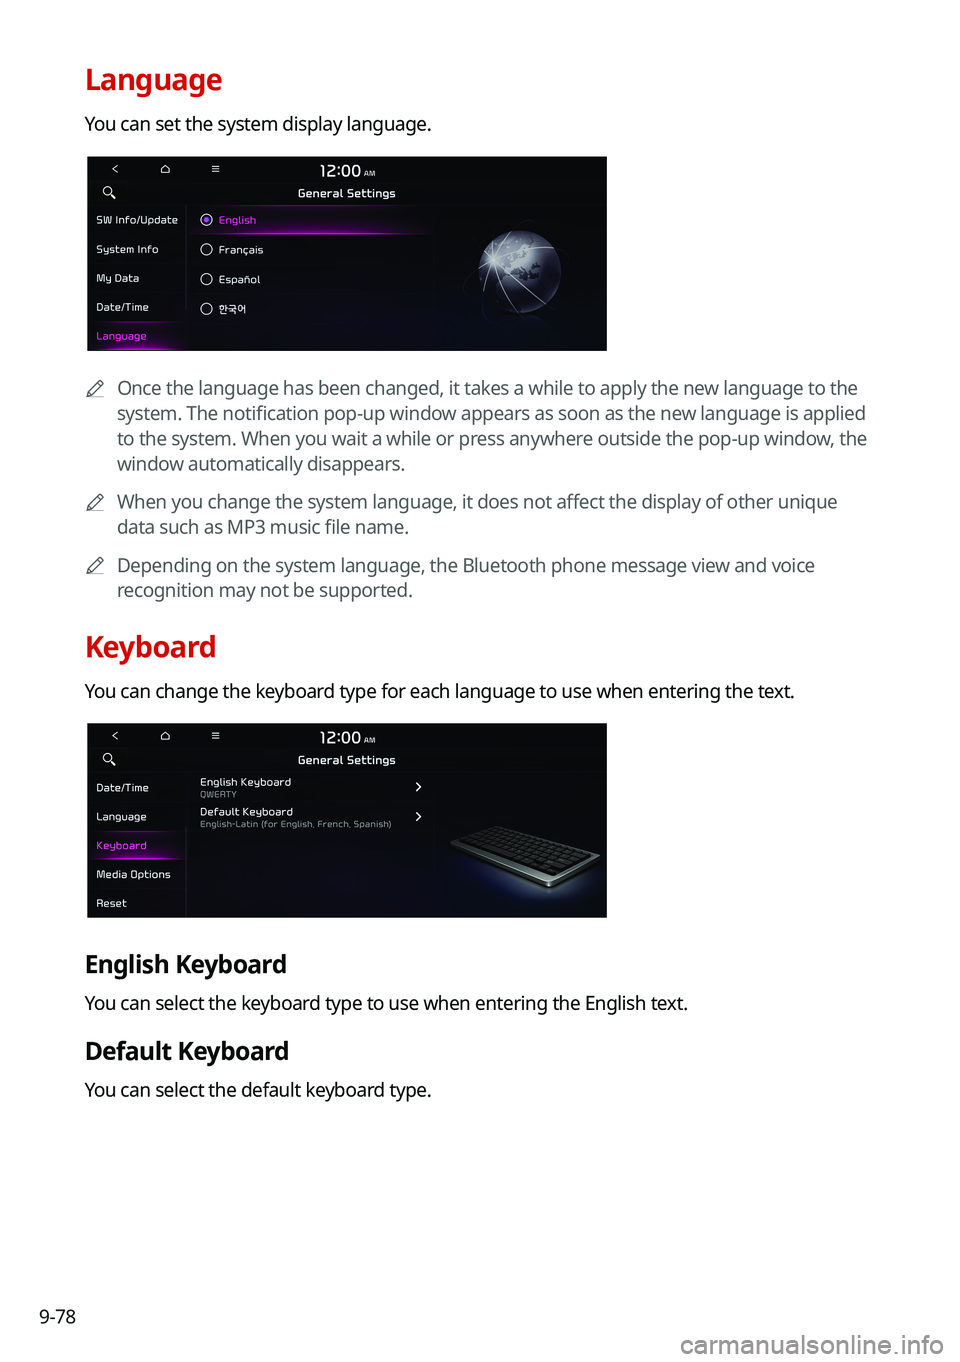
Language
You can set the system display language.
0000
A
Once the language has been changed, it takes a while to apply the new language to the
system. The notification pop-up window appears as soon as the new language is applied
to the system. When you wait a while or press anywhere outside the pop-up window, the
window automatically disappears.
0000
A
When you change the system language, it does not affect the display of other unique
data such as MP3 music file name.
0000
A
Depending on the system language, the Bluetooth phone message view and voice
recognition may not be supported.
Keyboard
You can change the keyboard type for each language to use when entering the text.
English Keyboard
You can select the keyboard type to use when entering the English text.
Default Keyboard
You can select the default keyboard type.
Page 262 of 300
9-82
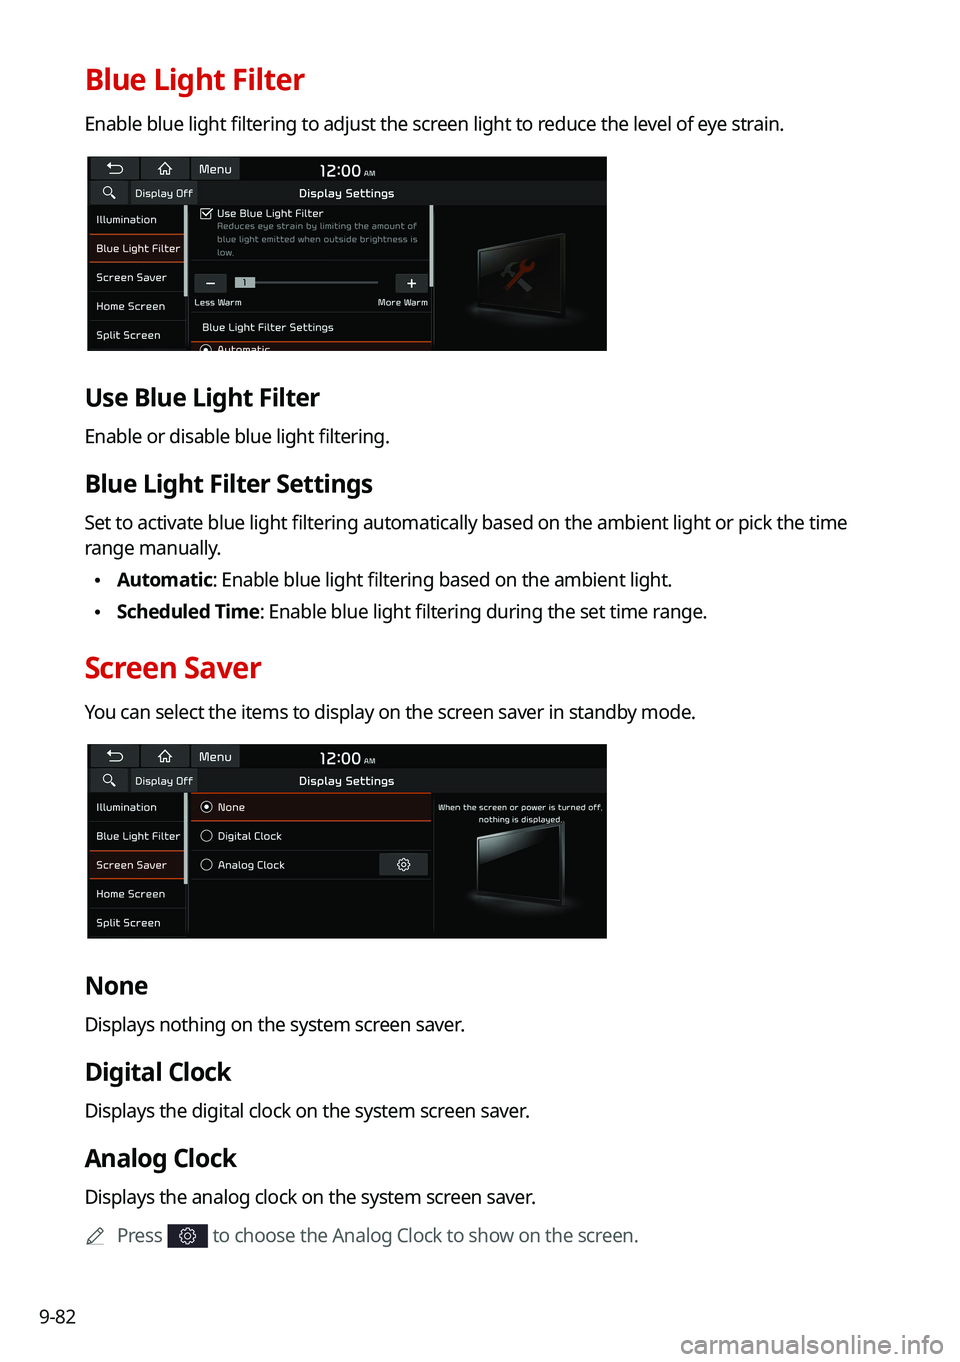
Blue Light Filter
Enable blue light filtering to adjust the screen light to reduce the level of eye strain.
Use Blue Light Filter
Enable or disable blue light filtering.
Blue Light Filter Settings
Set to activate blue light filtering automatically based on the ambient light or pick the time
range manually.
\225Automatic: Enable blue light filtering based on the ambient light.
\225Scheduled Time: Enable blue light filtering during the set time range.
Screen Saver
You can select the items to display on the screen saver in standby mode.
None
Displays nothing on the system screen saver.
Digital Clock
Displays the digital clock on the system screen saver.
Analog Clock
Displays the analog clock on the system screen saver.
0000
A
Press
to choose the Analog Clock to show on the screen.
Page 266 of 300
9-86
Illumination
\225Link to Cluster Illumination Control: The display brightness is automatically adjusted
based on the cluster illumination.
\225Daylight: You can set the display brightness when Daylight is selected under Mode.
Uncheck
Link to Cluster Illumination Control and then set to the desired brightness.
\225Night: You can set the display brightness when Night is selected under Mode. Uncheck
Link to Cluster Illumination Control and then set to the desired brightness.
0000
A
To reset all screen brightness settings to the default values, press Reset.
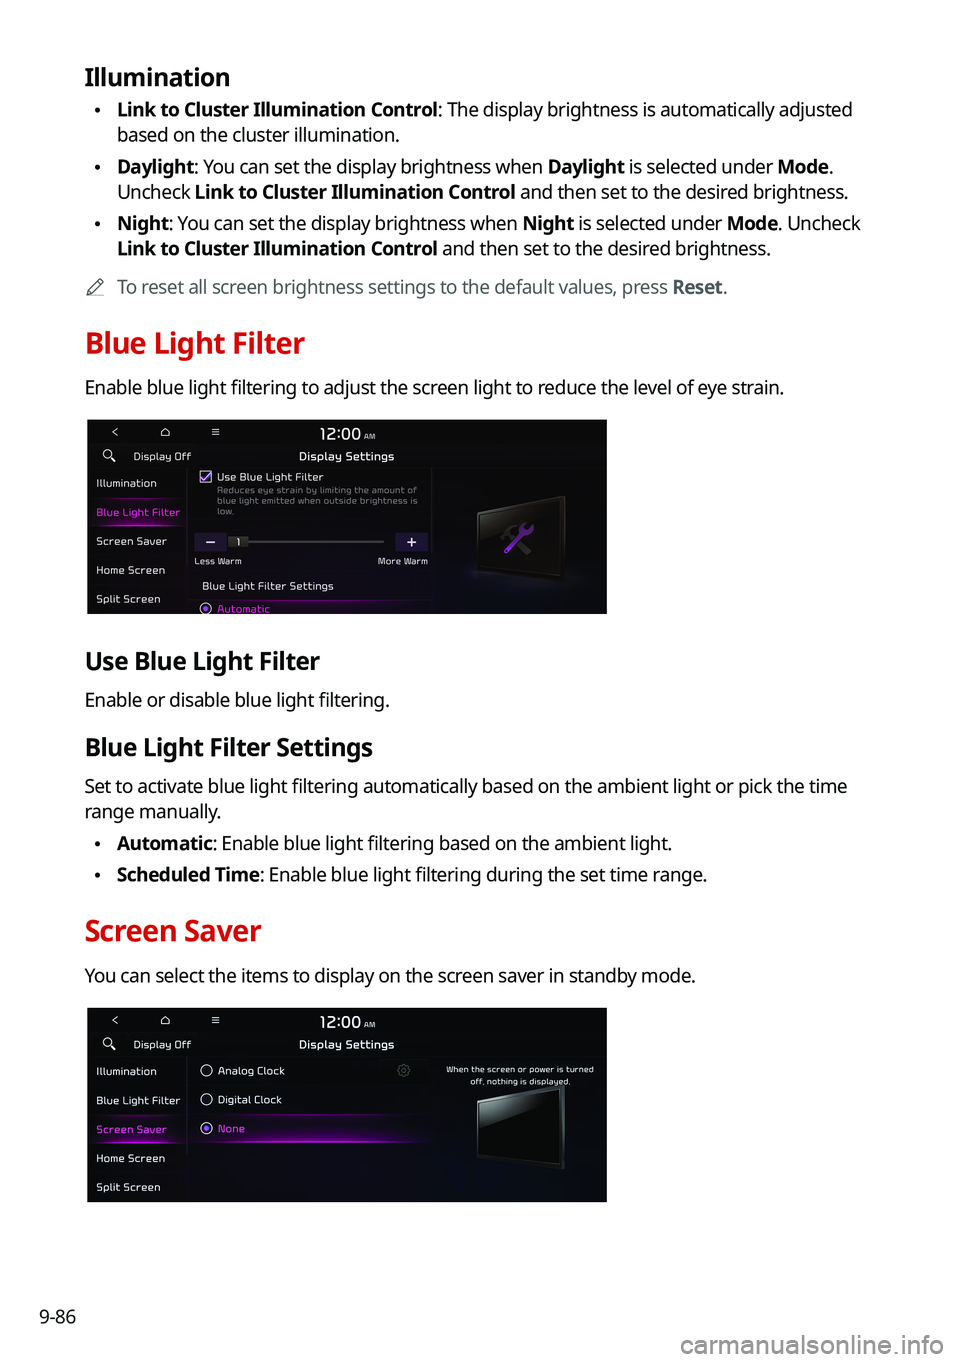
Blue Light Filter
Enable blue light filtering to adjust the screen light to reduce the level of eye strain.
Use Blue Light Filter
Enable or disable blue light filtering.
Blue Light Filter Settings
Set to activate blue light filtering automatically based on the ambient light or pick the time
range manually.
\225Automatic: Enable blue light filtering based on the ambient light.
\225Scheduled Time: Enable blue light filtering during the set time range.
Screen Saver
You can select the items to display on the screen saver in standby mode.
Page 277 of 300
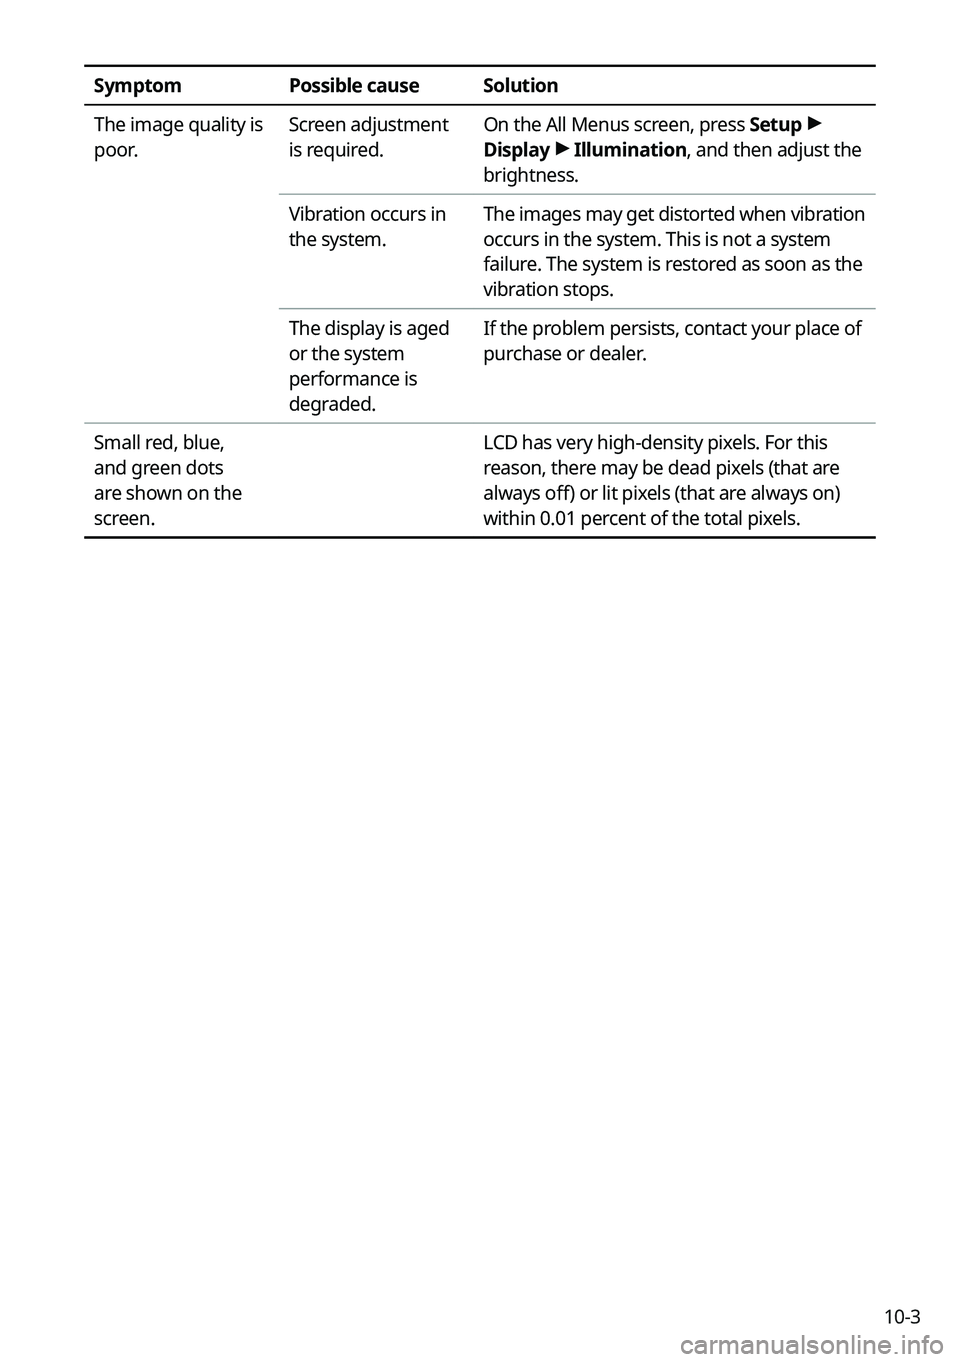
10-3
SymptomPossible causeSolution
The image quality is
poor. Screen adjustment
is required.On the All Menus screen, press Setup
>
Display >
Illumination, and then adjust the
brightness.
Vibration occurs in
the system. The images may get distorted when vibration
occurs in the system. This is not a system
failure. The system is restored as soon as the
vibration stops.
The display is aged
or the system
performance is
degraded. If the problem persists, contact your place of
purchase or dealer.
Small red, blue,
and green dots
are shown on the
screen. LCD has very high-density pixels. For this
reason, there may be dead pixels (that are
always off) or lit pixels (that are always on)
within 0.01 percent of the total pixels.
Page 279 of 300
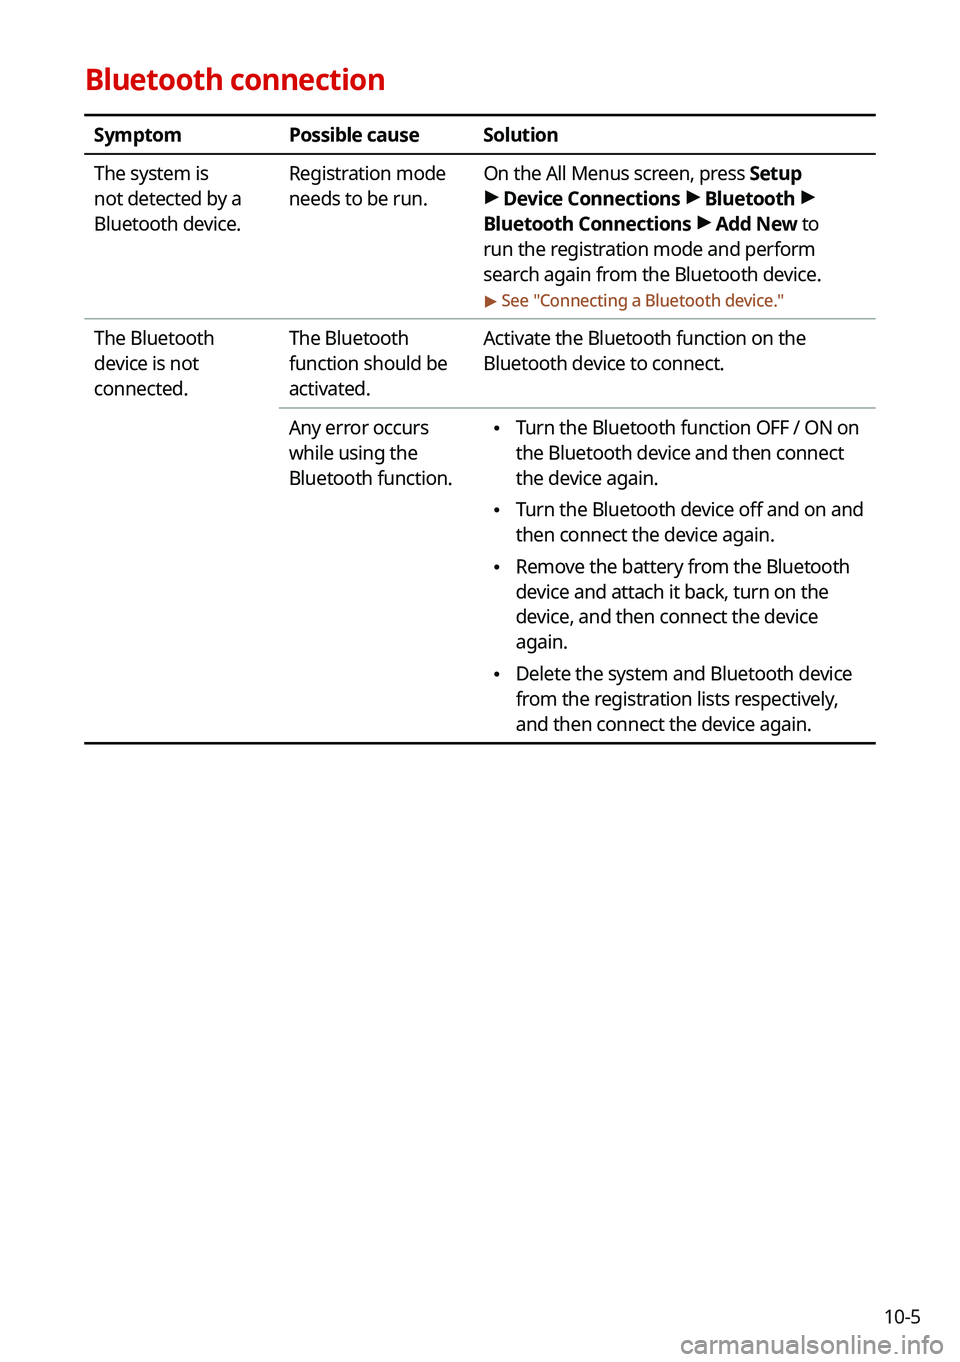
10-5
Bluetooth connection
SymptomPossible causeSolution
The system is
not detected by a
Bluetooth device. Registration mode
needs to be run.
On the All Menus screen, press Setup
>
Device Connections >
Bluetooth >
Bluetooth Connections >
Add New to
run the registration mode and perform
search again from the Bluetooth device.
> See " Connecting a Bluetooth device."
The Bluetooth
device is not
connected. The Bluetooth
function should be
activated.Activate the Bluetooth function on the
Bluetooth device to connect.
Any error occurs
while using the
Bluetooth function.
\225 Turn the Bluetooth function OFF / ON on
the Bluetooth device and then connect
the device again.
\225Turn the Bluetooth device off and on and
then connect the device again.
\225Remove the battery from the Bluetooth
device and attach it back, turn on the
device, and then connect the device
again.
\225Delete the system and Bluetooth device
from the registration lists respectively,
and then connect the device again.