interior light KIA VENGA 2011 Owners Manual
[x] Cancel search | Manufacturer: KIA, Model Year: 2011, Model line: VENGA, Model: KIA VENGA 2011Pages: 761, PDF Size: 34.65 MB
Page 6 of 761
I3
Index
If the engine will not start . . . . . . . . . . . . . . . . . . . . . . 6-3
If you have a flat tire (with spare tire) . . . . . . . . . . . . 6-7
If you have a flat tire (with TireMobilityKit) . . . . . 6-15
In case of an emergency while driving . . . . . . . . . . . . 6-2
Indicator symbols on the instrument cluster . . . . . . . 1-6
Instrument cluster . . . . . . . . . . . . . . . . . . . . . . . . . . . 4-40
Instrument panel overview . . . . . . . . . . . . . . . . . . . . . 2-3
Interior features . . . . . . . . . . . . . . . . . . . . . . . . . . . . . 4-93
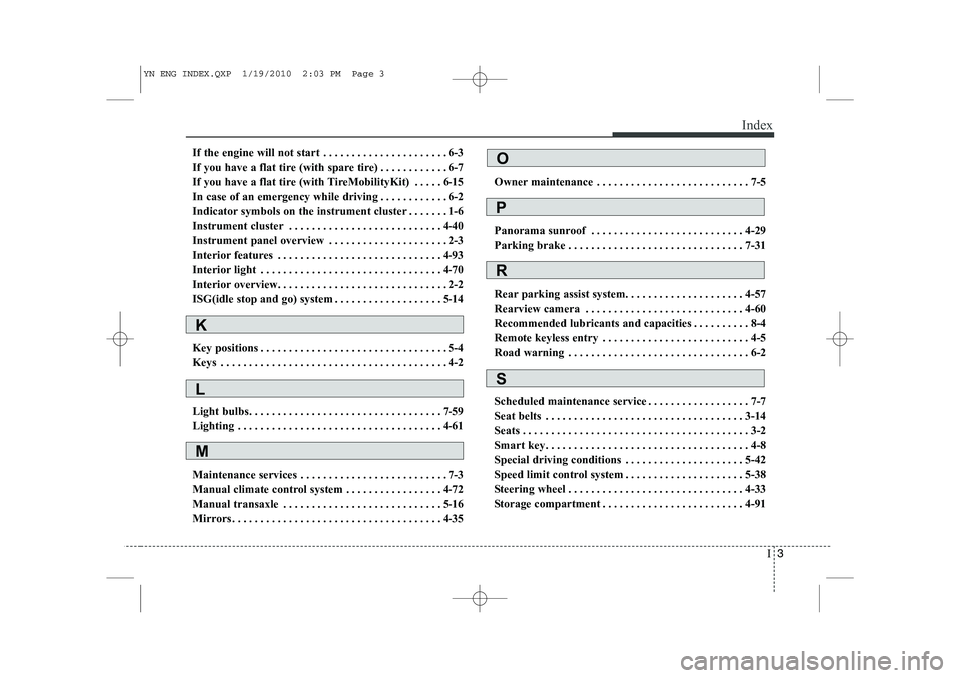
Interior light . . . . . . . . . . . . . . . . . . . . . . . . . . . . . . . . 4-70
Interior overview. . . . . . . . . . . . . . . . . . . . . . . . . . . . . . 2-2
ISG(idle stop and go) system . . . . . . . . . . . . . . . . . . . 5-14
Key positions . . . . . . . . . . . . . . . . . . . . . . . . . . . . . . . . . 5-4
Keys . . . . . . . . . . . . . . . . . . . . . . . . . . . . . . . . . . . . . . . . 4-2
Light bulbs. . . . . . . . . . . . . . . . . . . . . . . . . . . . . . . . . . 7-59
Lighting . . . . . . . . . . . . . . . . . . . . . . . . . . . . . . . . . . . . 4-61
Maintenance services . . . . . . . . . . . . . . . . . . . . . . . . . . 7-3
Manual climate control system . . . . . . . . . . . . . . . . . 4-72
Manual transaxle . . . . . . . . . . . . . . . . . . . . . . . . . . . . 5-16
Mirrors . . . . . . . . . . . . . . . . . . . . . . . . . . . . . . . . . . . . . 4-35 Owner maintenance . . . . . . . . . . . . . . . . . . . . . . . . . . . 7-5
Panorama sunroof . . . . . . . . . . . . . . . . . . . . . . . . . . . 4-29
Parking brake . . . . . . . . . . . . . . . . . . . . . . . . . . . . . . . 7-31
Rear parking assist system. . . . . . . . . . . . . . . . . . . . . 4-57
Rearview camera . . . . . . . . . . . . . . . . . . . . . . . . . . . . 4-60
Recommended lubricants and capacities . . . . . . . . . . 8-4
Remote keyless entry . . . . . . . . . . . . . . . . . . . . . . . . . . 4-5
Road warning . . . . . . . . . . . . . . . . . . . . . . . . . . . . . . . . 6-2
Scheduled maintenance service . . . . . . . . . . . . . . . . . . 7-7
Seat belts . . . . . . . . . . . . . . . . . . . . . . . . . . . . . . . . . . . 3-14
Seats . . . . . . . . . . . . . . . . . . . . . . . . . . . . . . . . . . . . . . . . 3-2
Smart key. . . . . . . . . . . . . . . . . . . . . . . . . . . . . . . . . . . . 4-8
Special driving conditions . . . . . . . . . . . . . . . . . . . . . 5-42
Speed limit control system . . . . . . . . . . . . . . . . . . . . . 5-38
Steering wheel . . . . . . . . . . . . . . . . . . . . . . . . . . . . . . . 4-33
Storage compartment . . . . . . . . . . . . . . . . . . . . . . . . . 4-91
K
L
M
O
P
R
S
YN ENG INDEX.QXP 1/19/2010 2:03 PM Page 3
Page 44 of 761

327
Safety features of your vehicle
WARNING
To reduce the chance of serious or fatal injuries:
Children of all ages are safer when restrained in the rear seat.
A child riding in the front passen-
ger seat can be forcefully struck
by an inflating air bag resulting inserious or fatal injuries.
Always follow the instructions for installation and use of the child
restraint maker.
Always make sure the child seat is secured properly in the car and
your child is securely restrained
in the child seat.
Never hold a child in your arms or lap when riding in a vehicle. The
violent forces created during a
crash will tear the child from your
arms and throw the child against
the car’s interior.
Never put a seat belt over your- self and a child. During a crash,the belt could press deep into the
child causing serious internalinjuries.
(Continued)(Continued)
Never leave children unattendedin a vehicle – not even for a short
time. The car can heat up very
quickly, resulting in serious
injuries to children inside. Even
very young children may inadver-
tently cause the vehicle to move,entangle themselves in the win-
dows, or lock themselves or oth-
ers inside the vehicle.
Never allow two children, or any two persons, to use the sameseat belt.
Children often squirm and repo- sition themselves improperly.
Never let a child ride with theshoulder belt under their arm or
behind their back. Always proper-
ly position and secure children inrear seat.
Never allow a child to stand-up or kneel on the seat or floorboard of
a moving vehicle. During a colli-
sion or sudden stop, the child
can be violently thrown against
the vehicles interior, resulting in
serious injury.
(Continued)(Continued)
Never use an infant carrier or achild safety seat that "hooks"
over a seatback, it may not pro-vide adequate security in an acci-dent.
Seat belts can become very hot, especially when the car is parked
in direct sunlight. Always check
seat belt buckles before fasten-
ing them over a child.
After an accident, have an author- ized KIA dealer check the child
restraint system, seat belt, tether
anchor and lower anchor.
If there is not enough space to place the child restraint systembecause of the driver's seat,
install the child restraint systemin the rear right seat.
Page 77 of 761
4
Keys / 4-2
Remote keyless entry / 4-5
Smart key / 4-8
Theft-alarm system / 4-11
Door locks / 4-13
Tailgate / 4-17
Windows / 4-19
Hood / 4-24
Fuel filler lid / 4-26
Panorama sunroof / 4-29
Steering wheel / 4-33
Mirrors / 4-35
Instrument cluster / 4-40
Rear parking assist system / 4-57
Rearview camera / 4-60
Hazard warning flasher / 4-60
Lighting / 4-61
Wipers and washers / 4-67
Interior light / 4-70
Defroster / 4-71
Manual climate control system / 4-72
Automatic climate control system / 4-81
Windshield defrosting and defogging / 4-89
Storage compartment / 4-91
Interior features / 4-93
Audio system / 4-100
Features of your vehicle
Page 112 of 761

Features of your vehicle
36
4
To operate the electric rearview mirror:
The mirror defaults to the ON position
whenever the ignition switch is turned on. Press the ON/OFF button (1) to turn
the automatic dimming function off.
The mirror indicator light will turn off.
Press the ON/OFF button (1) to turn the automatic dimming function on.
The mirror indicator light will illuminate. Outside rearview mirror Be sure to adjust the mirror angles
before driving.
Your vehicle is equipped with both left-
hand and right-hand outside rearview
mirrors. The mirrors can be adjusted
remotely with the remote switch (if
equipped). The mirror heads can be fold-
ed back to prevent damage during an
automatic car wash or when passing
through a narrow street.
WARNING -
Rearview mir-
rors
The right outside rearview mirror is convex. In some countries, the
left outside rearview mirror is
also convex. Objects seen in the
mirror are closer than they
appear.
Use your interior rearview mirror or direct observation to deter-
mine the actual distance of fol-
lowing vehicles when changinglanes.
OYN049030
OYN049031
■Type A
■ Type B
IndicatorSensor
Indicator
SensorRearview display
Page 146 of 761
Features of your vehicle
70
4
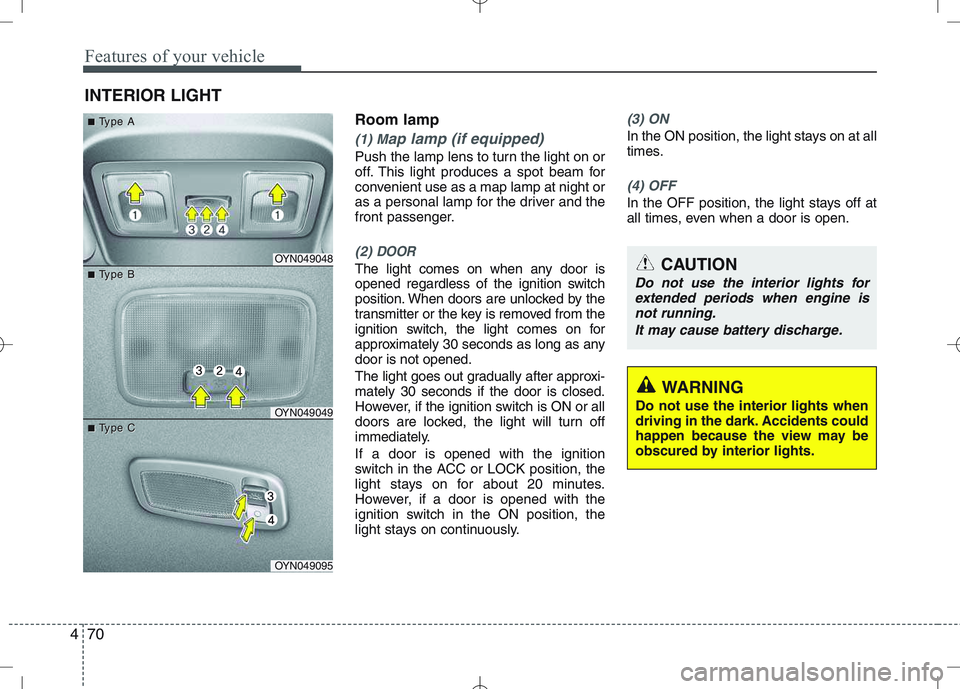
Room lamp
(1) Map lamp (if equipped)
Push the lamp lens to turn the light on or
off. This light produces a spot beam for
convenient use as a map lamp at night or
as a personal lamp for the driver and the
front passenger.
(2) DOOR
The light comes on when any door is
opened regardless of the ignition switch
position. When doors are unlocked by the
transmitter or the key is removed from the
ignition switch, the light comes on for
approximately 30 seconds as long as anydoor is not opened.
The light goes out gradually after approxi- mately 30 seconds if the door is closed.
However, if the ignition switch is ON or all
doors are locked, the light will turn off
immediately. If a door is opened with the ignition
switch in the ACC or LOCK position, the
light stays on for about 20 minutes.
However, if a door is opened with the
ignition switch in the ON position, the
light stays on continuously.
(3) ON
In the ON position, the light stays on at all
times.
(4) OFF
In the OFF position, the light stays off at
all times, even when a door is open.
INTERIOR LIGHT
CAUTION
Do not use the interior lights for
extended periods when engine isnot running.
It may cause battery discharge.
OYN049048
OYN049049
OYN049095
■■TType Aype A
■■TType Bype B
■■TType Cype C
WARNING
Do not use the interior lights when
driving in the dark. Accidents could
happen because the view may be
obscured by interior lights.
Page 154 of 761
Features of your vehicle
78
4
Operation Tips
To keep dust or unpleasant fumes from
entering the car through the ventilation
system, temporarily set the air intakecontrol to the recirculated air position.
Be sure to return the control to the
fresh air position when the irritation
has passed to keep fresh air in the
vehicle. This will help keep the driver
alert and comfortable.
Air for the heating/cooling system is drawn in through the grilles just ahead
of the windshield. Care should be
taken that these are not blocked by
leaves, snow, ice or other obstructions.
To prevent interior fog on the wind- shield, set the air intake control to the
fresh air position and fan speed to the
desired position, turn on the air condi-tioning system, and adjust the temper-
ature control to desired temperature.Air conditioning (if equipped)
All KIA Air Conditioning Systems are
filled with environmentally friendly
R-134a refrigerant which does not dam-
age the ozone layer.
1. Start the engine. Push the air condi- tioning button.
2. Set the mode to the position.
3. Set the air intake control to the outside air or recirculated air position.
4. Adjust the fan speed control and tem- perature control to maintain maximum
comfort.✽✽ NOTICE
When using the air conditioning sys- tem, monitor the temperature gauge
closely while driving up hills or in
heavy traffic when outside tempera-
tures are high. Air conditioning sys-
tem operation may cause engine over-
heating. Continue to use the blower
fan but turn the air conditioning sys-
tem off if the temperature gauge indi-
cates engine overheating.
When opening the windows in humid weather air conditioning may create
water droplets inside the vehicle.
Since excessive water droplets may
cause damage to electrical equipment,
air conditioning should only be run
with the windows closed.
Air conditioning system operation tips
If the vehicle has been parked in directsunlight during hot weather, open the
windows for a short time to let the hot
air inside the vehicle escape.
To help reduce moisture inside of the windows on rainy or humid days,
decrease the humidity inside the vehi-
cle by operating the air conditioningsystem.
Page 169 of 761
493
Features of your vehicle
INTERIOR FEATURES
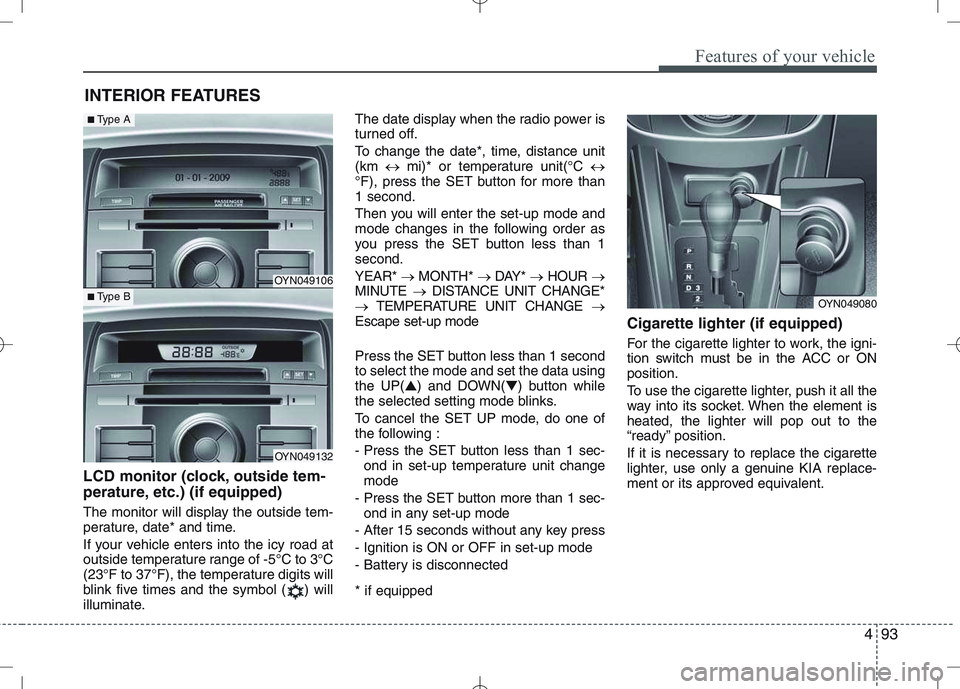
LCD monitor (clock, outside tem-
perature, etc.) (if equipped)
The monitor will display the outside tem-
perature, date* and time.
If your vehicle enters into the icy road at
outside temperature range of -5°C to 3°C
(23°F to 37°F), the temperature digits will
blink five times and the symbol ( ) will
illuminate. The date display when the radio power is
turned off.
To change the date*, time, distance unit (km
mi)* or temperature unit(°C
°F), press the SET button for more than1 second.
Then you will enter the set-up mode and
mode changes in the following order as
you press the SET button less than 1second. YEAR* MONTH* DAY* HOUR
MINUTE DISTANCE UNIT CHANGE*
TEMPERATURE UNIT CHANGE
Escape set-up mode
Press the SET button less than 1 second to select the mode and set the data usingthe UP( ▲) and DOWN( ▼) button while
the selected setting mode blinks.
To cancel the SET UP mode, do one of
the following :
- Press the SET button less than 1 sec-
ond in set-up temperature unit change mode
- Press the SET button more than 1 sec- ond in any set-up mode
- After 15 seconds without any key press
- Ignition is ON or OFF in set-up mode
- Battery is disconnected * if equipped Cigarette lighter (if equipped)
For the cigarette lighter to work, the igni-
tion switch must be in the ACC or ONposition.
To use the cigarette lighter, push it all the
way into its socket. When the element isheated, the lighter will pop out to the
“ready” position.
If it is necessary to replace the cigarette
lighter, use only a genuine KIA replace-
ment or its approved equivalent.
OYN049080
OYN049106
OYN049132
■
Type A
■Type B
Page 237 of 761
63
What to do in an emergency
2. When the vehicle is stopped, turn onyour emergency hazard flashers, set
the parking brake and put the transaxle
in P (automatic transaxle) or reverse
(manual transaxle).
3. Have all passengers get out of the vehicle. Be sure they all get out on the
side of the vehicle that is away from
traffic.
4. When changing a flat tire, follow the instruction provided later in this sec-tion.
If engine stalls while driving
1. Reduce your speed gradually, keeping a straight line. Move cautiously off the
road to a safe place.
2. Turn on your emergency flashers.
3. Try to start the engine again. If your vehicle will not start, contact an
authorized KIA dealer or seek other
qualified assistance. If engine doesn't turn over or
turns over slowly
1. If your vehicle has an automatic
transaxle, be sure the shift lever is in N
(Neutral) or P (Park) and the emer-
gency brake is set.
2. Check the battery connections to be sure they are clean and tight.
3. Turn on the interior light. If the light dims or goes out when you operate the
starter, the battery is discharged.
4. Check the starter connections to be sure they are securely tightened.
5. Do not push or pull the vehicle to start it. See instructions for "Jump starting". If engine turns over normally but
does not start
1. Check the fuel level.
2. With the ignition switch in the LOCK
position, check all connectors at the
ignition coils and spark plugs.
Reconnect any that may be discon-
nected or loose.
3. Check the fuel line in the engine com- partment.
4. If the engine still does not start, call an authorized KIA dealer or seek other
qualified assistance.
IF THE ENGINE WILL NOT START
WARNING
If the engine will not start, do not
push or pull the vehicle to start it.This could result in a collision or
cause other damage. In addition,
push or pull starting may cause the
catalytic converter to be over-
loaded and create a fire hazard.
Page 303 of 761
Maintenance
40
7
Battery recharging
Your vehicle has a maintenance-free,
calcium-based battery.
If the battery becomes discharged in a
short time (because, for example, the
headlights or interior lights were left on
while the vehicle was not in use),
recharge it by slow charging (trickle)
for 10 hours.
If the battery gradually discharges because of high electric load while the
vehicle is being used, recharge it at 20-
30A for two hours.(Continued)
The battery contains lead.
Do not dispose of it after
use. Please return the bat-
tery to an authorized KIA
dealer to be recycled.
When lifting a plastic-cased bat- tery, excessive pressure on the
case may cause battery acid to
leak, resulting in personal injury.
Lift with a battery carrier or with
your hands on opposite corners.
Never attempt to recharge the battery when the battery cablesare connected.
The electrical ignition system works with high voltage. Never
touch these components with theengine running or the ignition
switched on.
Failure to follow the above warn-
ings can result in serious bodily
injury or death.CAUTION
When you don’t use the vehicle for a long time in the low temper-
ature area, separate the batteryand keep it indoors.
Always charge the battery fully to prevent battery case damage in
low temperature area.
If you connect unauthorized elec- tric devices to the battery, the bat-tery may be discharged. Never use unauthorized devices.
WARNING
Separating the battery from the
vehicle should be done in an
authorized KIA dealer.
Page 317 of 761
Maintenance
54
7
Memory fuse
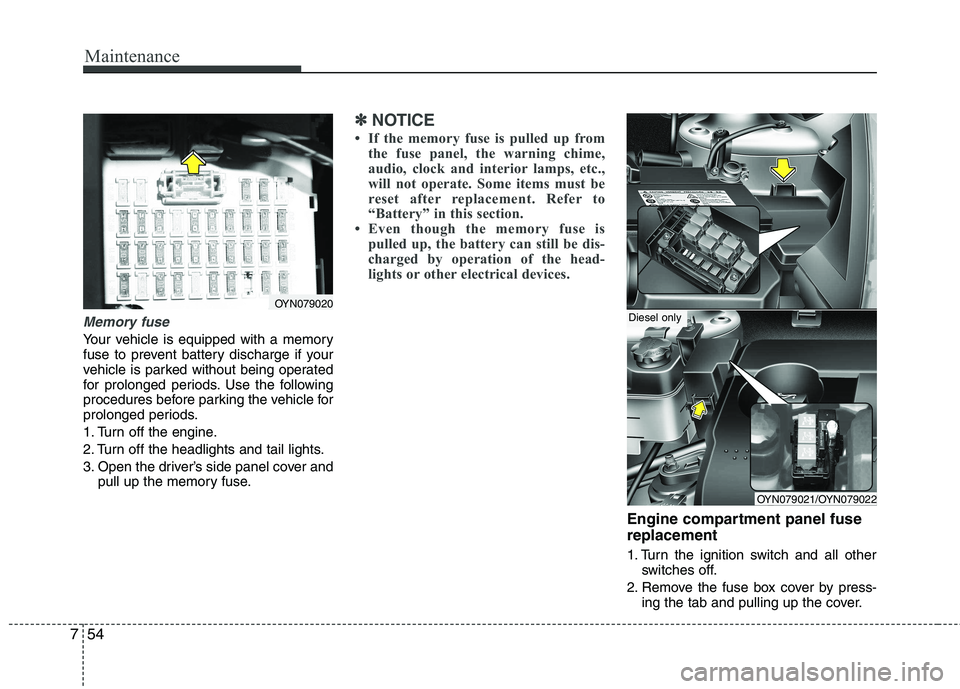
Your vehicle is equipped with a memory
fuse to prevent battery discharge if your
vehicle is parked without being operated
for prolonged periods. Use the following
procedures before parking the vehicle for
prolonged periods.
1. Turn off the engine.
2. Turn off the headlights and tail lights.
3. Open the driver’s side panel cover and
pull up the memory fuse.
✽✽ NOTICE
If the memory fuse is pulled up from the fuse panel, the warning chime,
audio, clock and interior lamps, etc.,
will not operate. Some items must be
reset after replacement. Refer to
“Battery” in this section.
Even though the memory fuse is
pulled up, the battery can still be dis-
charged by operation of the head-
lights or other electrical devices.
Engine compartment panel fuse replacement
1. Turn the ignition switch and all other switches off.
2. Remove the fuse box cover by press- ing the tab and pulling up the cover.
OYN079020
OYN079021/OYN079022
Diesel only