tow Lancia Flavia 2012 Owner handbook (in English)
[x] Cancel search | Manufacturer: LANCIA, Model Year: 2012, Model line: Flavia, Model: Lancia Flavia 2012Pages: 233, PDF Size: 2.61 MB
Page 144 of 233
SIX-SPEED AUTOMATIC
TRANSMISSION
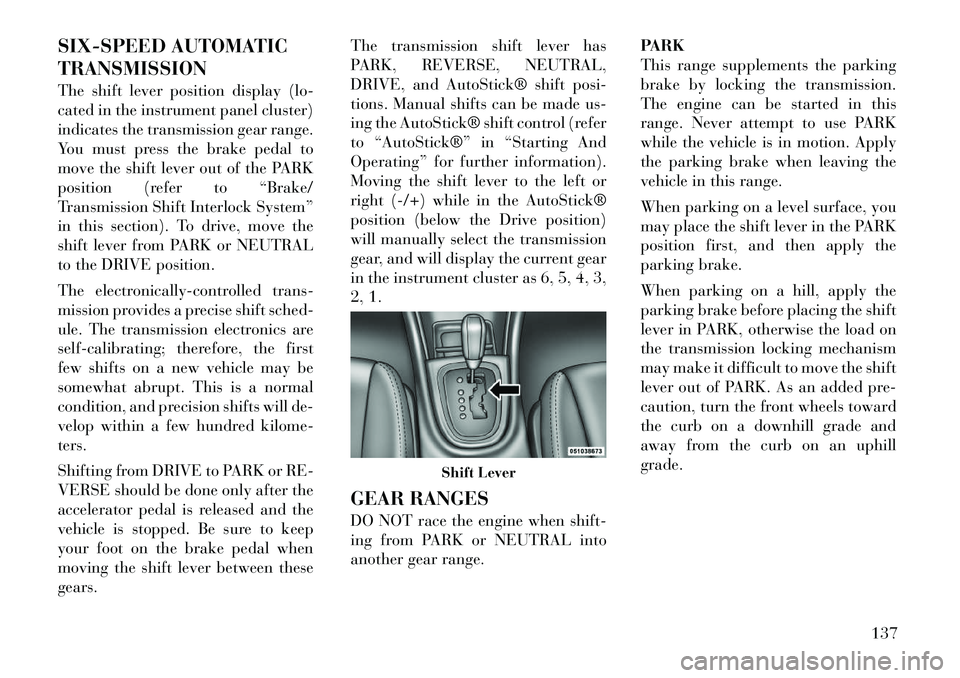
The shift lever position display (lo-
cated in the instrument panel cluster)
indicates the transmission gear range.
You must press the brake pedal to
move the shift lever out of the PARK
position (refer to “Brake/
Transmission Shift Interlock System”
in this section). To drive, move the
shift lever from PARK or NEUTRAL
to the DRIVE position.
The electronically-controlled trans-
mission provides a precise shift sched-
ule. The transmission electronics are
self-calibrating; therefore, the first
few shifts on a new vehicle may be
somewhat abrupt. This is a normal
condition, and precision shifts will de-
velop within a few hundred kilome-
ters.
Shifting from DRIVE to PARK or RE-
VERSE should be done only after the
accelerator pedal is released and the
vehicle is stopped. Be sure to keep
your foot on the brake pedal when
moving the shift lever between these
gears.The transmission shift lever has
PARK, REVERSE, NEUTRAL,
DRIVE, and AutoStick® shift posi-
tions. Manual shifts can be made us-
ing the AutoStick® shift control (refer
to “AutoStick®” in “Starting And
Operating” for further information).
Moving the shift lever to the left or
right (-/+) while in the AutoStick®
position (below the Drive position)
will manually select the transmission
gear, and will display the current gear
in the instrument cluster as 6, 5, 4, 3,
2, 1.
GEAR RANGES
DO NOT race the engine when shift-
ing from PARK or NEUTRAL into
another gear range.
PARK
This range supplements the parking
brake by locking the transmission.
The engine can be started in this
range. Never attempt to use PARK
while the vehicle is in motion. Apply
the parking brake when leaving the
vehicle in this range.
When parking on a level surface, you
may place the shift lever in the PARK
position first, and then apply the
parking brake.
When parking on a hill, apply the
parking brake before placing the shift
lever in PARK, otherwise the load on
the transmission locking mechanism
may make it difficult to move the shift
lever out of PARK. As an added pre-
caution, turn the front wheels toward
the curb on a downhill grade and
away from the curb on an uphill
grade.
Shift Lever
137
Page 146 of 233

CAUTION!
Before moving the shift lever outof PARK, you must turn the igni-
tion switch from the LOCK/OFF
position to the ON/RUN position,
and also press the brake pedal.
Otherwise, damage to the shift le-
ver could result.
DO NOT race the engine when
shifting from PARK or NEUTRAL
into another gear range, as this
can damage the drivetrain.
The following indicators should be
used to ensure that you have engaged
the shift lever into the PARK position:
When shifting into PARK, move the shift lever all the way forward and
to the left until it stops and is fully
seated.
Look at the shift lever position dis- play and verify that it indicates the
PARK position.
With brake pedal released, verify that the shift lever will not move out
of PARK. REVERSE
This range is for moving the vehicle
backward. Shift into REVERSE only
after the vehicle has come to a com-
plete stop.
NEUTRAL
Use this range when vehicle is stand-
ing for prolonged periods with engine
running. The engine may be started in
this range. Set the parking brake and
shift the transmission into PARK if
you must leave the vehicle.
WARNING!
Do not coast in NEUTRAL and
never turn off the ignition to coast
down a hill. These are unsafe prac-
tices that limit your response to
changing traffic or road conditions.
You might lose control of the vehicle
and have a collision.
CAUTION!
Towing the vehicle, coasting, or
driving for any other reason with the
transmission in NEUTRAL can re-
sult in severe transmission damage.
Refer to “Recreational Towing” in
“Starting And Operating” and
“Towing A Disabled Vehicle” in
What To Do In Emergencies” for
further information.
DRIVE
This range should be used for most
city and highway driving. It provides
the smoothest upshifts and down-
shifts, and the best fuel economy. The
transmission automatically upshifts
through underdrive first, second,
third, and fourth gears, direct fifth
gear and overdrive sixth gear. The
DRIVE position provides optimum
driving characteristics under all nor-
mal operating conditions.
When frequent transmission shifting
occurs (such as when operating the
vehicle under heavy loading condi-
tions, in hilly terrain, traveling into
strong head winds, or while towing
heavy trailers), use the AutoStick®
139
Page 152 of 233

PARKING BRAKE
Before leaving the vehicle, make sure
that the parking brake is fully ap-
plied. Also, be certain to leave the
transmission in PARK.
The parking brake lever is located in
the center console. To apply the park-
ing brake, pull the lever up as firmly
as possible. To release the parking
brake, pull the lever up slightly, press
the center button, then lower the lever
completely.
When the parking brake is applied
with the ignition switch ON, the
“Brake Warning Light” in the instru-
ment cluster will illuminate.NOTE:
When the parking brake is ap-
plied and the transmission is
placed in gear, the “Brake Warn-
ing Light” will flash. If vehicle
speed is detected, a chime will
sound to alert the driver. Fully
release the parking brake before
attempting to move the vehicle.
This light only shows that the parking brake is applied. It does
not show the degree of brake ap-
plication.
When parking on a hill, it is important
to turn the front wheels toward the
curb on a downhill grade and away
from the curb on an uphill grade.
Apply the parking brake before plac-
ing the shift lever in PARK, otherwise
the load on the transmission locking
mechanism may make it difficult to
move the shift lever out of PARK. The
parking brake should always be ap-
plied whenever the driver is not in the
vehicle.
WARNING!
Never use the PARK position as a substitute for the parking brake.
Always apply the parking brake
fully when parked to guard
against vehicle movement and
possible injury or damage.
When leaving the vehicle, always
remove the key fob from the igni-
tion and lock your vehicle.
Never leave children alone in a
vehicle, or with access to an un-
locked vehicle. Allowing children
to be in a vehicle unattended is
dangerous for a number of rea-
sons. A child or others could be
seriously or fatally injured. Chil-
dren should be warned not to
touch the parking brake, brake
pedal or the shift lever.
Do not leave the key fob in or near
the vehicle. A child could operate
power windows, other controls, or
move the vehicle.
Be sure the parking brake is fully
disengaged before driving; failure
to do so can lead to brake failure
and a collision.
(Continued)
Parking Brake
145
Page 166 of 233

METHANOL
(Methyl or Wood Alcohol) is used in a
variety of concentrations when
blended with unleaded gasoline. You
may find fuels containing 3% or more
methanol along with other alcohols
called cosolvents. Problems that re-
sult from using methanol/gasoline or
E-85 Ethanol blends are not the re-
sponsibility of the manufacturer.
While MTBE is an oxygenate made
from Methanol, it does not have the
negative effects of Methanol.CAUTION!
Do not use gasolines containing
Methanol or E-85 Ethanol. Use of
these blends may result in starting
and driveability problems and may
damage critical fuel system compo-
nents.
ETHANOL
The manufacturer recommends that
your vehicle be operated on fuel con-
taining no more than 10% ethanol.
Purchasing your fuel from a reputable
supplier may reduce the risk of ex-
ceeding this 10% limit and/or of re-
ceiving fuel with abnormal properties. It should also be noted that an in-
crease in fuel consumption should be
expected when using ethanol-blended
fuels, due to the lower energy content
of ethanol. Problems that result from
using methanol/gasoline or E-85
ethanol blends are not the responsibil-
ity of the manufacturer. While MTBE
is an oxygenate made from Methanol,
it does not have the negative effects of
Methanol.
CAUTION!
Use of fuel with Ethanol content
higher than 10% may result in en-
gine malfunction, starting and oper-
ating difficulties, and materials deg-
radation. These adverse effects
could result in permanent damage to
your vehicle.
CLEAN AIR GASOLINE
Many gasolines are now being
blended to contribute to cleaner air,
especially in those areas where air
pollution levels are high. These new
blends provide a cleaner burning fuel
and some are referred to as “reformu-
lated gasoline.” The manufacturer supports these ef-
forts toward cleaner air. You can help
by using these blends as they become
available.
MMT IN GASOLINE
MMT is a manganese containing me-
tallic additive that is blended into
some gasoline to increase octane.
Gasoline blended with MMT provides
no performance advantage beyond
gasoline of the same octane number
without MMT. Gasoline blended with
MMT reduces spark plug life and re-
duces emission system performance in
some vehicles. The manufacturer rec-
ommends that gasoline without MMT
be used in your vehicle. The MMT
content of gasoline may not be indi-
cated on the gasoline pump; therefore,
you should ask your gasoline retailer
whether or not his/her gasoline con-
tains MMT.
159
Page 169 of 233
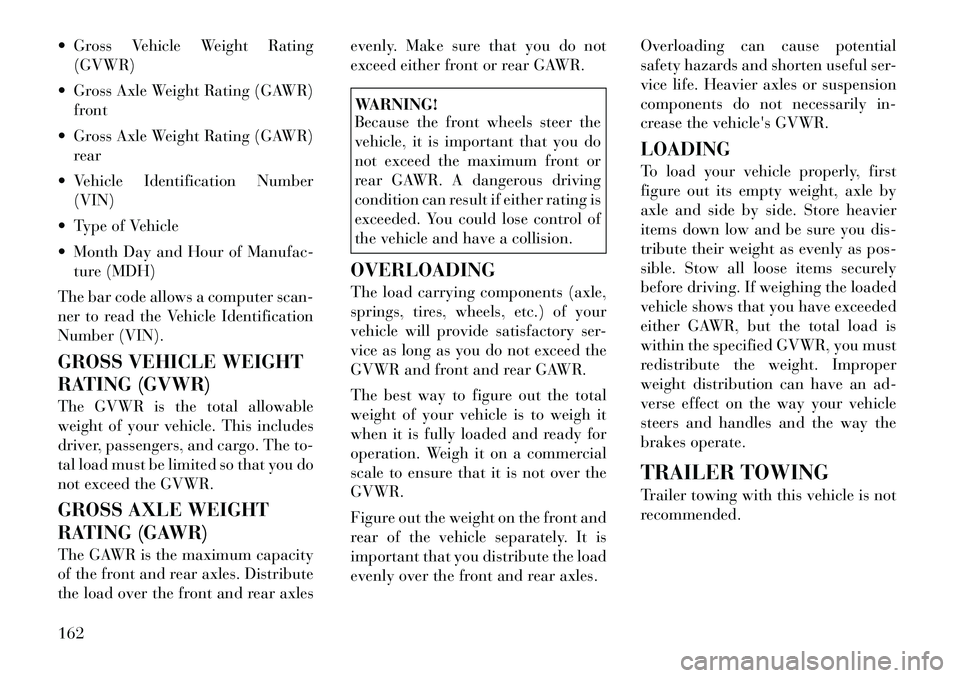
Gross Vehicle Weight Rating(GVWR)
Gross Axle Weight Rating (GAWR) front
Gross Axle Weight Rating (GAWR) rear
Vehicle Identification Number (VIN)
Type of Vehicle
Month Day and Hour of Manufac- ture (MDH)
The bar code allows a computer scan-
ner to read the Vehicle Identification
Number (VIN).
GROSS VEHICLE WEIGHT
RATING (GVWR)
The GVWR is the total allowable
weight of your vehicle. This includes
driver, passengers, and cargo. The to-
tal load must be limited so that you do
not exceed the GVWR.
GROSS AXLE WEIGHT
RATING (GAWR)
The GAWR is the maximum capacity
of the front and rear axles. Distribute
the load over the front and rear axles evenly. Make sure that you do not
exceed either front or rear GAWR.
WARNING!
Because the front wheels steer the
vehicle, it is important that you do
not exceed the maximum front or
rear GAWR. A dangerous driving
condition can result if either rating is
exceeded. You could lose control of
the vehicle and have a collision.
OVERLOADING
The load carrying components (axle,
springs, tires, wheels, etc.) of your
vehicle will provide satisfactory ser-
vice as long as you do not exceed the
GVWR and front and rear GAWR.
The best way to figure out the total
weight of your vehicle is to weigh it
when it is fully loaded and ready for
operation. Weigh it on a commercial
scale to ensure that it is not over the
GVWR.
Figure out the weight on the front and
rear of the vehicle separately. It is
important that you distribute the load
evenly over the front and rear axles. Overloading can cause potential
safety hazards and shorten useful ser-
vice life. Heavier axles or suspension
components do not necessarily in-
crease the
vehicle's GVWR.
LOADING
To load your vehicle properly, first
figure out its empty weight, axle by
axle and side by side. Store heavier
items down low and be sure you dis-
tribute their weight as evenly as pos-
sible. Stow all loose items securely
before driving. If weighing the loaded
vehicle shows that you have exceeded
either GAWR, but the total load is
within the specified GVWR, you must
redistribute the weight. Improper
weight distribution can have an ad-
verse effect on the way your vehicle
steers and handles and the way the
brakes operate.
TRAILER TOWING
Trailer towing with this vehicle is not
recommended.
162
Page 170 of 233

RECREATIONAL TOWING (BEHIND MOTORHOME, ETC.)
TOWING THIS VEHICLE BEHIND ANOTHER VEHICLE
Towing ConditionWheels OFF the
Ground All Models
Flat Tow NONE NOT ALLOWED
Dolly Tow Front
OK
Rear NOT ALLOWED
On Trailer ALL OK
RECREATIONAL TOWING –
ALL MODELS
Recreational towing is allowed ONLY
if the front wheels are OFF the
ground. This may be accomplished
using a tow dolly or vehicle trailer. If
using a tow dolly, follow this proce-
dure:
1. Properly secure the dolly to the
tow vehicle, following the dolly
manufactur er's instructions. 2. Drive the front wheels onto the tow
dolly.
3. Firmly apply the parking brake.
Place the transmission in PARK.
4. Properly secure the front wheels to
the dolly, following the dolly
manu-
factur er's instructions.
CAUTION!
DO NOT flat tow this vehicle.
Damage to the drivetrain will r e-
sult.
Towing this vehicle in violation of
the above requirements can cause
severe transmission damage.
Damage from improper towing is
not covered under the New Ve-
hicle Limited Warranty.
163
Page 172 of 233

6
WHAT TO DO IN EMERGENCIES
HAZARD WARNING FLASHERS . . . . . . . . . . . . 166
IF YOUR ENGINE OVERHEATS . . . . . . . . . . . . . 166 ENGINE OIL OVERHEATING . . . . . . . . . . . . . 167
TIREFIT KIT . . . . . . . . . . . . . . . . . . . . . . . . . . . 167 TIREFIT STORAGE . . . . . . . . . . . . . . . . . . . . 167
TIREFIT KIT COMPONENTS ANDOPERATION . . . . . . . . . . . . . . . . . . . . . . . . . 167
TIREFIT USAGE PRECAUTIONS . . . . . . . . . . 168
SEALING A TIRE WITH TIREFIT . . . . . . . . . 169
JUMP-STARTING . . . . . . . . . . . . . . . . . . . . . . . . 172 PREPARATIONS FOR JUMP-START . . . . . . . 173
JUMP-STARTING PROCEDURE . . . . . . . . . . . 173
FREEING A STUCK VEHICLE . . . . . . . . . . . . . . 174
SHIFT LEVER OVERRIDE . . . . . . . . . . . . . . . . . 175
TOWING A DISABLED VEHICLE . . . . . . . . . . . 176 AUTOMATIC TRANSMISSION . . . . . . . . . . . . 176
WITHOUT THE IGNITION KEY . . . . . . . . . . . 177
165
Page 174 of 233
ENGINE OIL
OVERHEATING
During sustained high-speed driving
or trailer tow up long grades on a hot
day, the engine oil temperature may
become too hot. If this happens, the
“HOTOIL” message flashes in the
odometer and the vehicle speed will
be reduced to 85 km/h until the en-
gine oil temperature is reduced.
NOTE:
The vehicle speed is reduced to a
maximum of 85 km/h. You may of
course, reduce your vehicle speed
further if needed.
TIREFIT KIT
Small punctures up to 6 mm in the tire
tread can be sealed with TIREFIT.
Foreign objects (e.g., screws or nails)
should not be removed from the tire.
TIREFIT can be used in outside tem-
peratures down to approximately
20°C.
This kit will provide a temporary tire
seal, allowing you to drive your ve-
hicle up to 160 km with a maximum
speed of 88 km/h.TIREFIT STORAGE
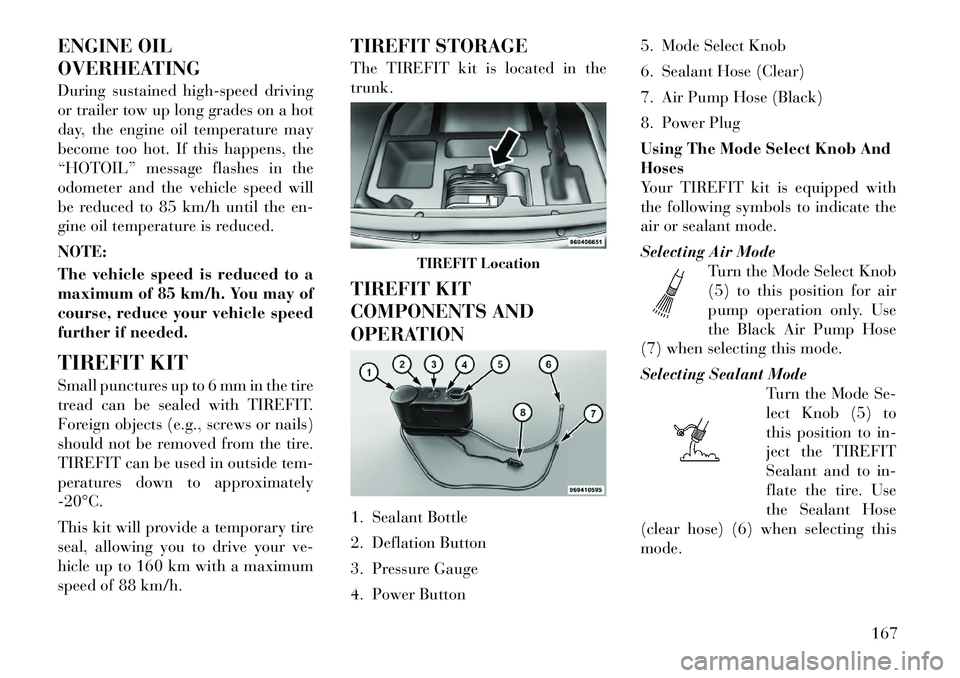
The TIREFIT kit is located in the
trunk.
TIREFIT KIT
COMPONENTS AND
OPERATION
1. Sealant Bottle
2. Deflation Button
3. Pressure Gauge
4. Power Button5. Mode Select Knob
6. Sealant Hose (Clear)
7. Air Pump Hose (Black)
8. Power Plug
Using The Mode Select Knob And
Hoses
Your TIREFIT kit is equipped with
the following symbols to indicate the
air or sealant mode.
Selecting Air Mode
Turn the Mode Select Knob
(5) to this position for air
pump operation only. Use
the Black Air Pump Hose
(7) when selecting this mode.
Selecting Sealant Mode Turn the Mode Se-
lect Knob (5) to
this position to in-
ject the TIREFIT
Sealant and to in-
flate the tire. Use
the Sealant Hose
(clear hose) (6) when selecting this
mode.
TIREFIT Location
167
Page 176 of 233
WARNING!(Continued)
A loose TIREFIT kit thrown for-
ward in a collision or hard stop
could endanger the occupants of
the vehicle. Always stow the
TIREFIT kit in the place pro-
vided. Failure to follow these
warnings can result in injuries
that are serious or fatal to you,
your passengers, and others
around you.
Take care not to allow the con-
tents of TIREFIT to come in con-
tact with hair, eyes, or clothing.
TIREFIT is harmful if inhaled,
swallowed, or absorbed through
the skin. It causes skin, eye, and
respiratory irritation. Flush im-
mediately with plenty of water if
there is any contact with eyes or
skin. Change clothing as soon as
possible, if there is any contact
with clothing.
(Continued)
WARNING!(Continued)
TIREFIT Sealant solution con-
tains latex. In case of an allergic
reaction or rash, consult a physi-
cian immediately. Keep TIREFIT
out of reach of children. If swal-
lowed, rinse mouth immediately
with plenty of water and drink
plenty of water. Do not induce
vomiting! Consult a physician im-
mediately.
SEALING A TIRE WITH
TIREFIT
(A) Whenever You Stop To Use
TIREFIT:
1. Pull over to a safe location and
turn on the vehicle’s Hazard Warning
flashers.
2. Verify that the valve stem (on the
wheel with the deflated tire) is in a
position that is near to the ground.
This will allow the TIREFIT Hoses
(6) and (7) to reach the valve stem
and keep the TIREFIT kit flat on the
ground. This will provide the best po-
sitioning of the kit when injecting the
sealant into the deflated tire and run- ning the air pump. Move the vehicle as
necessary to place the valve stem in
this position before proceeding.
3. Place the transmission in PARK
(auto transmission) or in Gear
(manual transmission) and turn Off
the ignition.
4. Set the parking brake.
(B) Setting Up To Use TIREFIT:
1. Turn the Mode Select Knob (5) to
the Sealant Mode position.
2. Uncoil the Sealant Hose (6) and
then remove the cap from the fitting
at the end of the hose.
3. Place the TIREFIT kit flat on the
ground next to the deflated tire.
4. Remove the cap from the valve
stem and then screw the fitting at the
end of the Sealant Hose (6) onto the
valve stem.
5. Uncoil the Power Plug (8) and in-
sert the plug into the vehicle’s 12 Volt
power outlet.
NOTE:
Do not remove foreign objects (e.g.,
screws or nails) from the tire.
169
Page 183 of 233
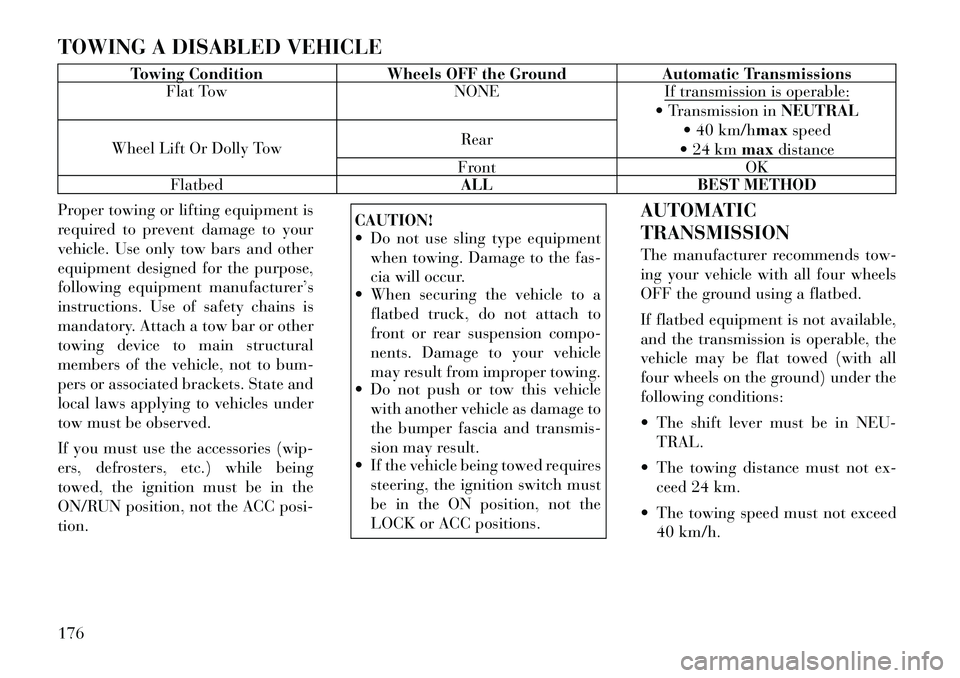
TOWING A DISABLED VEHICLE
Towing ConditionWheels OFF the Ground Automatic Transmissions
Flat Tow NONEIf transmission is operable:
Transmission inNEUTRAL
40 km/hmax speed
24 km maxdistance
Wheel Lift Or Dolly Tow Rear
Front OK
Flatbed ALLBEST METHOD
Proper towing or lifting equipment is
required to prevent damage to your
vehicle. Use only tow bars and other
equipment designed for the purpose,
following equipment manufacturer’s
instructions. Use of safety chains is
mandatory. Attach a tow bar or other
towing device to main structural
members of the vehicle, not to bum-
pers or associated brackets. State and
local laws applying to vehicles under
tow must be observed.
If you must use the accessories (wip-
ers, defrosters, etc.) while being
towed, the ignition must be in the
ON/RUN position, not the ACC posi-
tion.
CAUTION!
Do not use sling type equipment when towing. Damage to the fas-
cia will occur.
When securing the vehicle to a
flatbed truck, do not attach to
front or rear suspension compo-
nents. Damage to your vehicle
may result from improper towing.
Do not push or tow this vehicle
with another vehicle as damage to
the bumper fascia and transmis-
sion may result.
If the vehicle being towed requires
steering, the ignition switch must
be in the ON position, not the
LOCK or ACC positions. AUTOMATIC
TRANSMISSION
The manufacturer recommends tow-
ing your vehicle with all four wheels
OFF the ground using a flatbed.
If flatbed equipment is not available,
and the transmission is operable, the
vehicle may be flat towed (with all
four wheels on the ground) under the
following conditions:
The shift lever must be in NEU-
TRAL.
The towing distance must not ex- ceed 24 km.
The towing speed must not exceed 40 km/h.
176