window Lancia Thema 2012 Owner handbook (in English)
[x] Cancel search | Manufacturer: LANCIA, Model Year: 2012, Model line: Thema, Model: Lancia Thema 2012Pages: 316, PDF Size: 3.85 MB
Page 16 of 316
TRANSMITTER BATTERY REPLACEMENT . . . 17
GENERAL INFORMATION . . . . . . . . . . . . . . . . 18
DOOR LOCKS . . . . . . . . . . . . . . . . . . . . . . . . . . . 18 MANUAL DOOR LOCKS . . . . . . . . . . . . . . . . . 18
POWER DOOR LOCKS . . . . . . . . . . . . . . . . . . 19
CHILD-PROTECTION DOOR LOCKSYSTEM — REAR DOORS . . . . . . . . . . . . . . . . 20
KEYLESS ENTER-N-GO . . . . . . . . . . . . . . . . . . . 20
WINDOWS . . . . . . . . . . . . . . . . . . . . . . . . . . . . . . 22 POWER WINDOWS . . . . . . . . . . . . . . . . . . . . . 22
WIND BUFFETING . . . . . . . . . . . . . . . . . . . . . 24
TRUNK LOCK AND RELEASE . . . . . . . . . . . . . . . 24
TRUNK SAFETY WARNING . . . . . . . . . . . . . . . . . 25 TRUNK EMERGENCY RELEASE . . . . . . . . . . . 25
OCCUPANT RESTRAINTS . . . . . . . . . . . . . . . . . . 25 LAP/SHOULDER BELTS . . . . . . . . . . . . . . . . . 26
LAP/SHOULDER BELT UNTWISTINGPROCEDURE . . . . . . . . . . . . . . . . . . . . . . . . . . 29
SEAT BELTS IN PASSENGER SEATING POSITIONS . . . . . . . . . . . . . . . . . . . . . . . . . . . 29
AUTOMATIC LOCKING RETRACTOR MODE (ALR) . . . . . . . . . . . . . . . . . . . . . . . . . . . . . . . . 30
SEAT BELT PRETENSIONERS . . . . . . . . . . . . . 30
ACTIVE HOOD SYSTEM (for versions/ markets, where provided) . . . . . . . . . . . . . . . . 30
10
Page 19 of 316
IGNITION OR ACCESSORY
ON MESSAGE
Opening the driver's door when the
ignition is in ACC or ON (engine not
running), a chime will sound to re-
mind you to cycle the ignition to OFF.
In addition to the chime, the ignition
or accessory on message will display
in the cluster.
NOTE:
With the Uconnect Touch™ sys-
tem, the power window switches,
radio, power sunroof (for versions/
markets, where provided), and
power outlets will remain active
for up to 10 minutes after the igni-
tion is cycled to the OFF position.
Opening either front door will can-
cel this feature. The time for this
feature is programmable. Refer to
“Uconnect Touch™ Settings” in
“Understanding Your Instrument
Panel” for further information.
WARNING!
When leaving the vehicle, alwaysremove the key fob and lock your
vehicle.
Never leave children alone in a
vehicle, or with access to an un-
locked vehicle.
Allowing children to be in a ve-
hicle unattended is dangerous for
a number of reasons. A child or
others could be seriously or fatally
injured. Children should be
warned not to touch the parking
brake, brake pedal or the shift
lever.
Do not leave the key fob in or near
the vehicle, and do not leave Key-
less Enter-N-Go in the ACC or
ON/RUN mode. A child could op-
erate power windows, other con-
trols, or move the vehicle.
Do not leave children or animals
inside parked vehicles in hot
weather. Interior heat build-up
may cause serious injury or death.
CAUTION!
An unlocked car is an invitation to
thieves. Always remove the Key Fob
from vehicle, cycle the ignition OFF
and lock all doors when leaving the
vehicle unattended.
SENTRY KEY®
The Sentry Key® Immobilizer System
prevents unauthorized vehicle opera-
tion by disabling the engine. The sys-
tem does not need to be armed or
activated. Operation is automatic, re-
gardless of whether the vehicle is
locked or unlocked.
The system uses a Key Fob with Re-
mote Keyless Entry (RKE) transmit-
ter, a Keyless Ignition Node (KIN) and
a RF receiver to prevent unauthorized
vehicle operation. Therefore, only
Key Fobs that are programmed to the
vehicle can be used to start and oper-
ate the vehicle.
After placing the ignition in the ON/
RUN position, the Vehicle Security
Light will turn on for three seconds
for a bulb check. If the light remains
on after the bulb check, it indicates
13
Page 25 of 316
Therefore, make sure the Key Fob is
not inside the vehicle before closing
the door.WARNING!
For personal security and safetyin the event of an accident, lock
the vehicle doors before you drive
as well as when you park and
leave the vehicle.
When leaving the vehicle, always
remove the key fob and lock your
vehicle.
Never leave children alone in a
vehicle, or with access to an un-
locked vehicle.
Allowing children to be in a vehicle
unattended is dangerous for a
number of reasons. A child or oth-
ers could be seriously or fatally in-
jured. Children should be warned
not to touch the parking brake,
brake pedal or the shift lever. Do not leave the key fob in or near
the vehicle, and do not leave Key-
less Enter-N-Go in the ACC or
ON/RUN mode. A child could op-
erate power windows, other con-
trols, or move the vehicle. POWER DOOR LOCKS
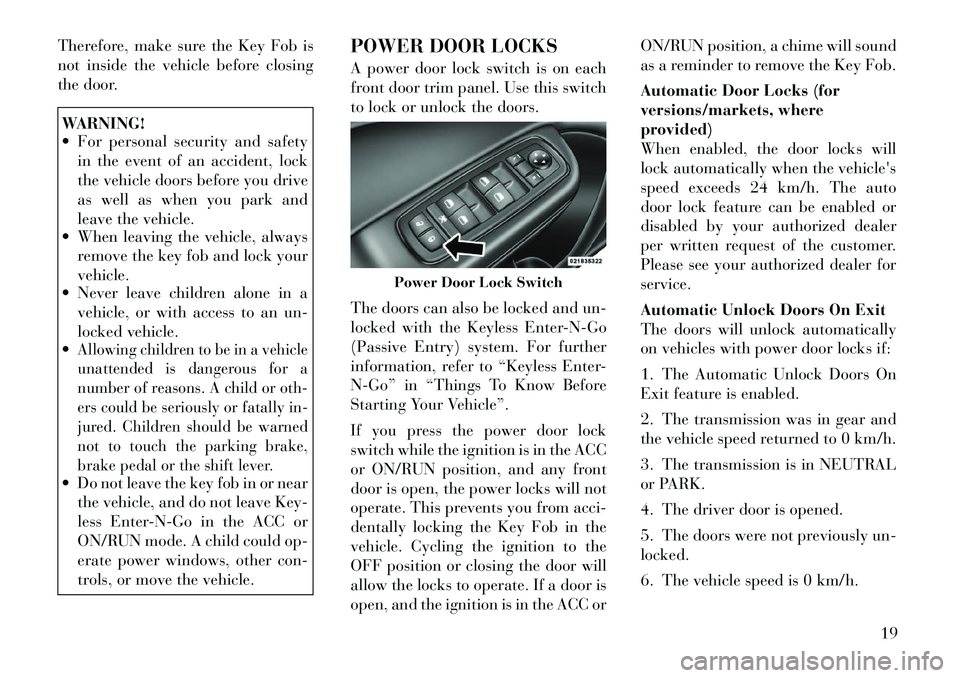
A power door lock switch is on each
front door trim panel. Use this switch
to lock or unlock the doors.
The doors can also be locked and un-
locked with the Keyless Enter-N-Go
(Passive Entry) system. For further
information, refer to “Keyless Enter-
N-Go” in “Things To Know Before
Starting Your Vehicle”.
If you press the power door lock
switch while the ignition is in the ACC
or ON/RUN position, and any front
door is open, the power locks will not
operate. This prevents you from acci-
dentally locking the Key Fob in the
vehicle. Cycling the ignition to the
OFF position or closing the door will
allow the locks to operate. If a door is
open, and the ignition is in the ACC or ON/RUN position, a chime will sound
as a reminder to remove the Key Fob.
Automatic Door Locks (for
versions/markets, where
provided)
When enabled, the door locks will
lock automatically when the vehicle's
speed exceeds 24 km/h. The auto
door lock feature can be enabled or
disabled by your authorized dealer
per written request of the customer.
Please see your authorized dealer for
service.
Automatic Unlock Doors On Exit
The doors will unlock automatically
on vehicles with power door locks if:
1. The Automatic Unlock Doors On
Exit feature is enabled.
2. The transmission was in gear and
the vehicle speed returned to 0 km/h.
3. The transmission is in NEUTRAL
or PARK.
4. The driver door is opened.
5. The doors were not previously un-
locked.
6. The vehicle speed is 0 km/h.
Power Door Lock Switch
19
Page 26 of 316
Automatic Unlock Doors On Exit
Programming
To change the current setting, refer to
“Uconnect Touch™ Settings” in “Un-
derstanding Your Instrument Panel”
for further information.
NOTE:
Use the Automatic Unlock Doors
On Exit feature in accordance with
local laws.
CHILD-PROTECTION
DOOR LOCK SYSTEM —
REAR DOORS
To provide a safer environment for
small children riding in the rear seats,
the rear doors are equipped with
Child-Protection Door Lock system.
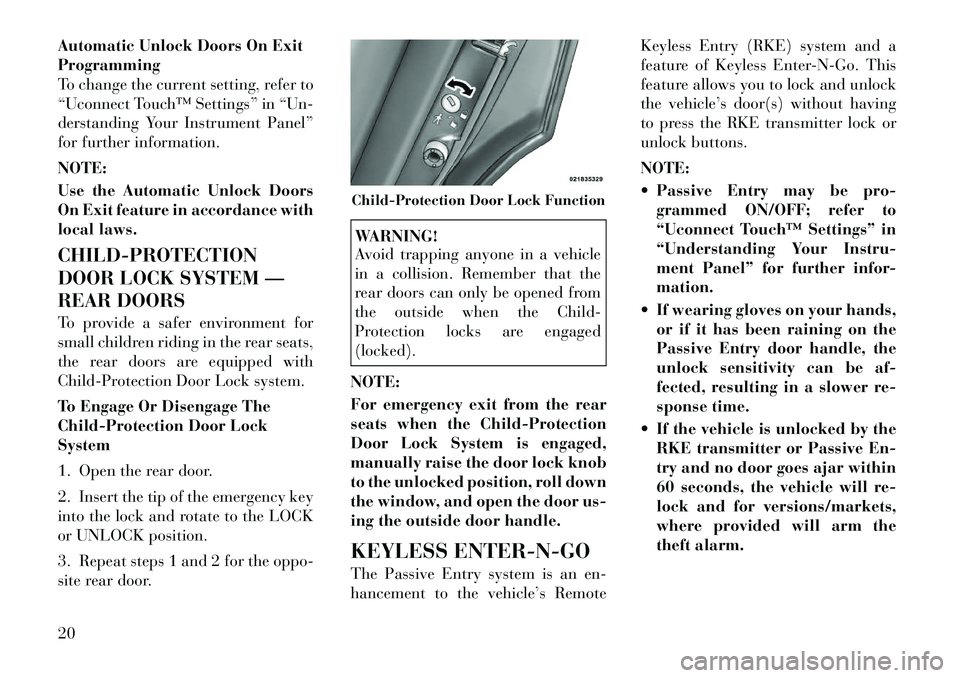
To Engage Or Disengage The
Child-Protection Door Lock
System
1. Open the rear door.
2. Insert the tip of the emergency key
into the lock and rotate to the LOCK
or UNLOCK position.
3. Repeat steps 1 and 2 for the oppo-
site rear door.
WARNING!
Avoid trapping anyone in a vehicle
in a collision. Remember that the
rear doors can only be opened from
the outside when the Child-
Protection locks are engaged
(locked).
NOTE:
For emergency exit from the rear
seats when the Child-Protection
Door Lock System is engaged,
manually raise the door lock knob
to the unlocked position, roll down
the window, and open the door us-
ing the outside door handle.
KEYLESS ENTER-N-GO
The Passive Entry system is an en-
hancement to the vehicle’s Remote Keyless Entry (RKE) system and a
feature of Keyless Enter-N-Go. This
feature allows you to lock and unlock
the vehicle’s door(s) without having
to press the RKE transmitter lock or
unlock buttons.
NOTE:
Passive Entry may be pro-
grammed ON/OFF; refer to
“Uconnect Touch™ Settings” in
“Understanding Your Instru-
ment Panel” for further infor-
mation.
If wearing gloves on your hands, or if it has been raining on the
Passive Entry door handle, the
unlock sensitivity can be af-
fected, resulting in a slower re-
sponse time.
If the vehicle is unlocked by the RKE transmitter or Passive En-
try and no door goes ajar within
60 seconds, the vehicle will re-
lock and for versions/markets,
where provided will arm the
theft alarm.Child-Protection Door Lock Function
20
Page 28 of 316
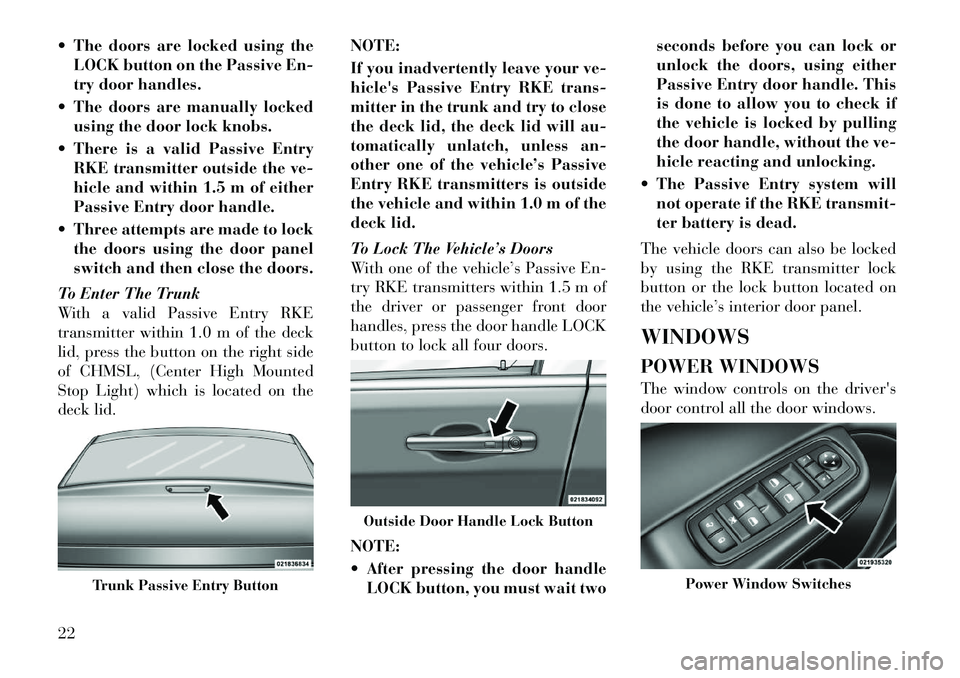
The doors are locked using theLOCK button on the Passive En-
try door handles.
The doors are manually locked using the door lock knobs.
There is a valid Passive Entry RKE transmitter outside the ve-
hicle and within 1.5 m of either
Passive Entry door handle.
Three attempts are made to lock the doors using the door panel
switch and then close the doors.
To Enter The Trunk
With a valid Passive Entry RKE
transmitter within 1.0 m of the deck
lid, press the button on the right side
of CHMSL, (Center High Mounted
Stop Light) which is located on the
deck lid. NOTE:
If you inadvertently leave your ve-
hicle's Passive Entry RKE trans-
mitter in the trunk and try to close
the deck lid, the deck lid will au-
tomatically unlatch, unless an-
other one of the vehicle’s Passive
Entry RKE transmitters is outside
the vehicle and within 1.0 m of the
deck lid.
To Lock The Vehicle’s Doors
With one of the vehicle’s Passive En-
try RKE transmitters within 1.5 m of
the driver or passenger front door
handles, press the door handle LOCK
button to lock all four doors.
NOTE:
After pressing the door handle
LOCK button, you must wait two seconds before you can lock or
unlock the doors, using either
Passive Entry door handle. This
is done to allow you to check if
the vehicle is locked by pulling
the door handle, without the ve-
hicle reacting and unlocking.
The Passive Entry system will not operate if the RKE transmit-
ter battery is dead.
The vehicle doors can also be locked
by using the RKE transmitter lock
button or the lock button located on
the vehicle’s interior door panel.
WINDOWS
POWER WINDOWS
The window controls on the driver's
door control all the door windows.
Trunk Passive Entry Button
Outside Door Handle Lock Button
Power Window Switches
22
Page 29 of 316

There are single window controls on
each passenger door trim panel,
which operate the passenger door
windows. The window controls will
operate only when the ignition is in
the ACC or ON/RUN position.
NOTE:
For vehicles equipped with the
Uconnect Touch™, the power win-
dow switches will remain active
for up to 10 minutes after the igni-
tion is cycled to the OFF position.
Opening either front door will can-
cel this feature. The time is pro-
grammable. Refer to “Uconnect
Touch™ Settings” in “Under-
standing Your Instrument Panel”
for further information.WARNING!
Never leave children in a vehicle
with the Key Fob. Occupants, par-
ticularly unattended children, can
become entrapped by the windows
while operating the power window
switches. Such entrapment may re-
sult in serious injury or death.AUTO-Down Feature
The driver door power window switch
and some model passenger door
power window switches have an
AUTO-down feature. Press the win-
dow switch to the second detent, re-
lease, and the window will go down
automatically.
To open the window part way, press
the window switch to the first detent
and release it when you want the win-
dow to stop.
To stop the window from going all the
way down during the AUTO-down
operation, pull up on the switch
briefly.
AUTO-Up Feature With
Anti-Pinch Protection (for
versions/markets, where
provided)
Lift the window switch to the second
detent, release, and the window will
go up automatically.
To stop the window from going all the
way up during the AUTO-up opera-
tion, push down on the switch briefly.
To close the window part way, lift the
window switch to the first detent and
release it when you want the window
to stop.
NOTE:
If the window runs into any ob-
stacle during auto-closure, it
will reverse direction and then
go back down. Remove the ob-
stacle and use the window
switch again to close the win-
dow.
Any impact due to rough road conditions may trigger the auto-
reverse function unexpectedly
during auto-closure. If this hap-
pens, pull the switch lightly to
the first detent and hold to close
the window manually.
WARNING!
There is no anti-pinch protection
when the window is almost closed.
Be sure to clear all objects from the
window before closing.
23
Page 30 of 316

Reset Auto Up
Should the Auto Up feature stop
working, the window probably needs
to be reset. To reset Auto Up:
1. Pull the window switch up to close
the window completely and continue
to hold the switch up for an additional
two seconds after the window is
closed.
2. Push the window switch down
firmly to the second detent to open the
window completely and continue to
hold the switch down for an addi-
tional two seconds after the window is
fully open.
Window Lockout Switch
The window lockout switch on the
driver's door trim panel allows you to
disable the window controls on the
rear passenger doors and the rear sun-
screen (for versions/markets, where
provided). To disable the window
controls and the rear sunscreen, press
and release the window lockout but-
ton (setting it in the DOWN position).
To enable the window controls and
the rear sunscreen, press and releasethe window lockout button again (set-
ting it in the UP position).
WIND BUFFETING
Wind buffeting can be described as
the perception of pressure on the ears
or a helicopter-type sound in the ears.
Your vehicle may exhibit wind buffet-
ing with the windows down, or the
sunroof (for versions/markets, where
provided) in certain open or partially
open positions. This is a normal oc-
currence and can be minimized. If the
buffeting occurs with the rear win-
dows open, then open the front and
rear windows together to minimize
the buffeting. If the buffeting occurs
with the sunroof open, then adjust the
sunroof opening to minimize the buf-
feting.TRUNK LOCK AND
RELEASE
The trunk lid can be released from
inside the vehicle by pressing the
TRUNK RELEASE button located on
the instrument panel to the left of the
steering wheel.
NOTE:
The transmission must be in PARK
before the button will operate.
The trunk lid
can be re-
leased from
outside the ve-
hicle by press-
ing the
TRUNK but-
ton on the Re-
mote Keyless
Entry (RKE)
transmitter
twice within five seconds or by using
the external release switch located on
the underside of the decklid over-
hang. The release feature will func-
tion only when the vehicle is in the
unlock condition.
Window Lockout Switch
Trunk Release Button
24
Page 31 of 316
With the ignition in the ON/RUN po-
sition, the Trunk Open symbol will
display in the instrument cluster indi-
cating that the trunk is open. The
odometer display will reappear once
the trunk is closed.
With the ignition in the OFF position,
the Trunk Open symbol will display
until the trunk is closed.
Refer to “Keyless Enter-N-Go” in
“Things To Know Before Starting
Your Vehicle” for more information
on trunk operation with the Passive
Entry feature.
TRUNK SAFETY
WARNINGWARNING!Do not allow children to have access to
the trunk, either by climbing into the
trunk from outside, or through the
inside of the vehicle. Always close the
trunk lid when your vehicle is unat-
tended. Once in the trunk, young chil-
dren may not be able to escape, even if
they entered through the rear seat. If
trapped in the trunk, children can die
from suffocation or heat stroke.
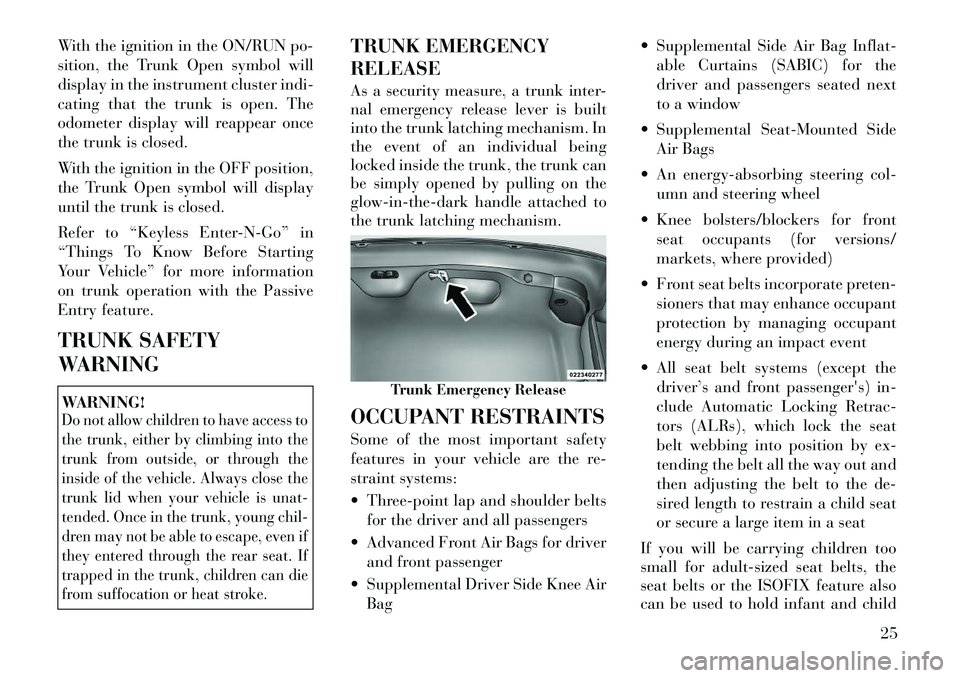
TRUNK EMERGENCY
RELEASE
As a security measure, a trunk inter-
nal emergency release lever is built
into the trunk latching mechanism. In
the event of an individual being
locked inside the trunk, the trunk can
be simply opened by pulling on the
glow-in-the-dark handle attached to
the trunk latching mechanism.
OCCUPANT RESTRAINTS
Some of the most important safety
features in your vehicle are the re-
straint systems:
Three-point lap and shoulder beltsfor the driver and all passengers
Advanced Front Air Bags for driver and front passenger
Supplemental Driver Side Knee Air Bag Supplemental Side Air Bag Inflat-
able Curtains (SABIC) for the
driver and passengers seated next
to a window
Supplemental Seat-Mounted Side Air Bags
An energy-absorbing steering col- umn and steering wheel
Knee bolsters/blockers for front seat occupants (for versions/
markets, where provided)
Front seat belts incorporate preten- sioners that may enhance occupant
protection by managing occupant
energy during an impact event
All seat belt systems (except the driver’s and front passenger's) in-
clude Automatic Locking Retrac-
tors (ALRs), which lock the seat
belt webbing into position by ex-
tending the belt all the way out and
then adjusting the belt to the de-
sired length to restrain a child seat
or secure a large item in a seat
If you will be carrying children too
small for adult-sized seat belts, the
seat belts or the ISOFIX feature also
can be used to hold infant and child
Trunk Emergency Release
25
Page 40 of 316

This vehicle may be equipped with a
driver and/or front passenger seat
belt buckle switch that detects
whether the driver or front passenger
seat belt is fastened. The seat belt
buckle switch may adjust the inflation
rate of the Advanced Front Air Bags.
This vehicle is equipped with Supple-
mental Side Air Bag Inflatable Cur-
tains (SABIC) to protect the driver,
front, and rear passengers sitting next
to a window. The SABIC air bags are
located above the side windows and
their covers are also labeled: SRS
AIRBAG.
This vehicle is equipped with Supple-
mental Seat-Mounted Side Air Bags
(SAB) to provide enhanced protection
for an occupant during a side impact.
The Supplemental Seat-Mounted
Side Air Bags are located in the out-
board side of the front seats.
NOTE:
Air Bag covers may not be obvi-ous in the interior trim, but they
will open during air bag deploy-
ment. After any accident, the vehicle
should be taken to an autho-
rized dealer immediately.
Air Bag System Components
Your vehicle may be equipped with
the following air bag system compo-
nents:
Occupant Restraint Controller (ORC)
Air Bag Warning Light
Steering Wheel and Column
Instrument Panel
Supplemental Driver Side Knee Air Bag (for versions/markets, where
provided)
Knee Impact Bolster (for versions/ markets, where provided)
Driver Advanced Front Air Bag
Passenger Advanced Front Air Bag
Supplemental Seat-Mounted Side Air Bags (SAB)
Supplemental Side Air Bag Inflat- able Curtains (SABIC)
Front and Side Impact Sensors Front Seat Belt Pretensioners, Seat
Belt Buckle Switch
Active Hood System
Advanced Front Air Bag Features
The Advanced Front Air Bag system
has multistage driver and front pas-
senger air bags. This system provides
output appropriate to the severity and
type of collision as determined by the
Occupant Restraint Controller
(ORC), which may receive informa-
tion from the front impact sensors.
The first stage inflator is triggered
immediately during an impact that
requires air bag deployment. This low
output is used in less severe collisions.
A higher energy output is used for
more severe collisions.
WARNING!
No objects should be placed over or near the air bag on the instru-
ment panel, because any such ob-
jects could cause harm if the ve-
hicle is in a collision severe
enough to cause the air bag to
inflate.
(Continued)
34
Page 41 of 316
WARNING!(Continued)
Do not put anything on or around
the air bag covers or attempt to
open them manually. You may
damage the air bags and you
could be injured because the air
bags may no longer be functional.
The protective covers for the air
bag cushions are designed to open
only when the air bags are inflat-
ing.
Do not drill, cut or tamper with
the knee bolster (for versions/
markets, where provided) in any
way.
Do not mount any accessories to
the knee bolster (for versions/
markets, where provided) such as
alarm lights, stereos, citizen band
radios, etc.
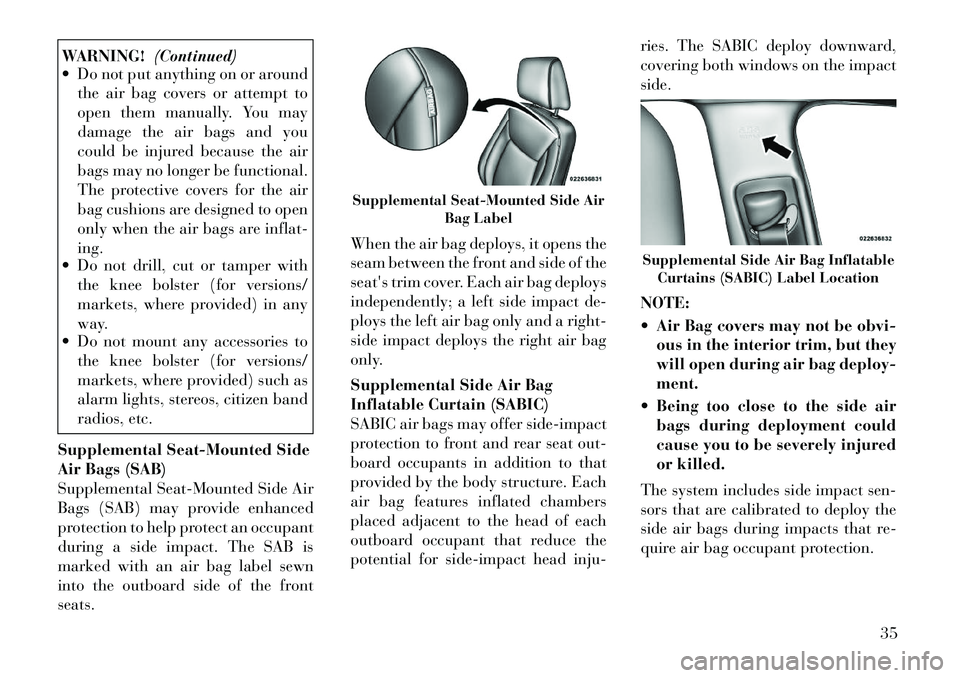
Supplemental Seat-Mounted Side
Air Bags (SAB)
Supplemental Seat-Mounted Side Air
Bags (SAB) may provide enhanced
protection to help protect an occupant
during a side impact. The SAB is
marked with an air bag label sewn
into the outboard side of the front
seats. When the air bag deploys, it opens the
seam between the front and side of the
seat's trim cover. Each air bag deploys
independently; a left side impact de-
ploys the left air bag only and a right-
side impact deploys the right air bag
only.
Supplemental Side Air Bag
Inflatable Curtain (SABIC)
SABIC air bags may offer side-impact
protection to front and rear seat out-
board occupants in addition to that
provided by the body structure. Each
air bag features inflated chambers
placed adjacent to the head of each
outboard occupant that reduce the
potential for side-impact head inju-ries. The SABIC deploy downward,
covering both windows on the impact
side.
NOTE:
Air Bag covers may not be obvi-
ous in the interior trim, but they
will open during air bag deploy-
ment.
Being too close to the side air bags during deployment could
cause you to be severely injured
or killed.
The system includes side impact sen-
sors that are calibrated to deploy the
side air bags during impacts that re-
quire air bag occupant protection.
Supplemental Seat-Mounted Side Air Bag Label
Supplemental Side Air Bag InflatableCurtains (SABIC) Label Location
35