steering Lancia Thema 2013 Owner handbook (in English)
[x] Cancel search | Manufacturer: LANCIA, Model Year: 2013, Model line: Thema, Model: Lancia Thema 2013Pages: 336, PDF Size: 3.87 MB
Page 81 of 336
Uconnect™ Phone ButtonThe Uconnect™ Phone
Button is used to get
into the phone mode and
make calls, show recent, in-
coming, outgoing calls, view phone-
book etc., When you press the button
you will hear a BEEP. The beep is
your signal to give a command.
Uconnect™ Voice Command Button
The Uconnect™ Voice
Command
Button is
only used for “barge in”
and when you are already
in a call and you want to send Tones
or make another call.
The
button is also used to ac-
cess the Voice Commands for the
Uconnect™ Voice Command fea-
tures if your vehicle is equipped.
Please see the Uconnect™ Voice
Command section for direction on
how to use the
button.
The Uconnect™ Phone is fully inte-
grated with the vehicle's audio sys-
tem. The volume of the Uconnect™ Phone can be adjusted either from the
radio volume control knob or from the
steering wheel radio control (right
switch), if so equipped.
Voice Activated Features:
Hands Free dialing via Voice (“Call
John Smiths Mobile” or, “Dial
248- 555-1212”).
Hands Free text to speech listening of your incoming SMS messages.
Hands Free text messaging (“Send a message to John Smiths Mobile”).
Redialing last dialed numbers (“Redial”).
Calling Back the last incoming call number (“Call Back”).
View Call logs on screen (“Show incoming calls”, “Show Outgoing
calls”, “Show missed Calls”, “Show
Recent Calls”).
Searching Contacts phone number (“Search for John Smith Mobile”). Screen Activated Features:
Dialing via Keypad using touch-
screen.
Viewing and Calling contacts from Phonebooks displayed on the
touch-screen.
Setting Favorite Contact Phone numbers so the are easily accessible
on the Main Phone screen.
Viewing and Calling contacts from Recent Call logs.
Reviewing your recent Incoming SMS.
Sending a text message via the touch-screen.
Listen to Music on your Bluetooth® Device via the touch-screen.
Pairing up to 10 phones/audio devices for easy access to connect to
them quickly.
75
Page 112 of 336
desired position settings for the driver
seat, side mirrors, adjustable pedals
(for versions/markets, where pro-
vided), and power tilt and telescopic
steering column (for versions/
markets, where provided) and a set of
desired radio station presets. Your Re-
mote Keyless Entry (RKE) transmit-
ter can also be programmed to recall
the same positions when the UN-
LOCK button is pressed.
NOTE:
Only one RKE transmitter canbe linked to each of the memory
positions.
Passive Entry door handles can- not be linked to the memory
function. Use either the memory
recall switch or the RKE trans-
mitter (if linked to the memory
feature) to recall memory posi-
tions 1 or 2.
The memory seat switch is located
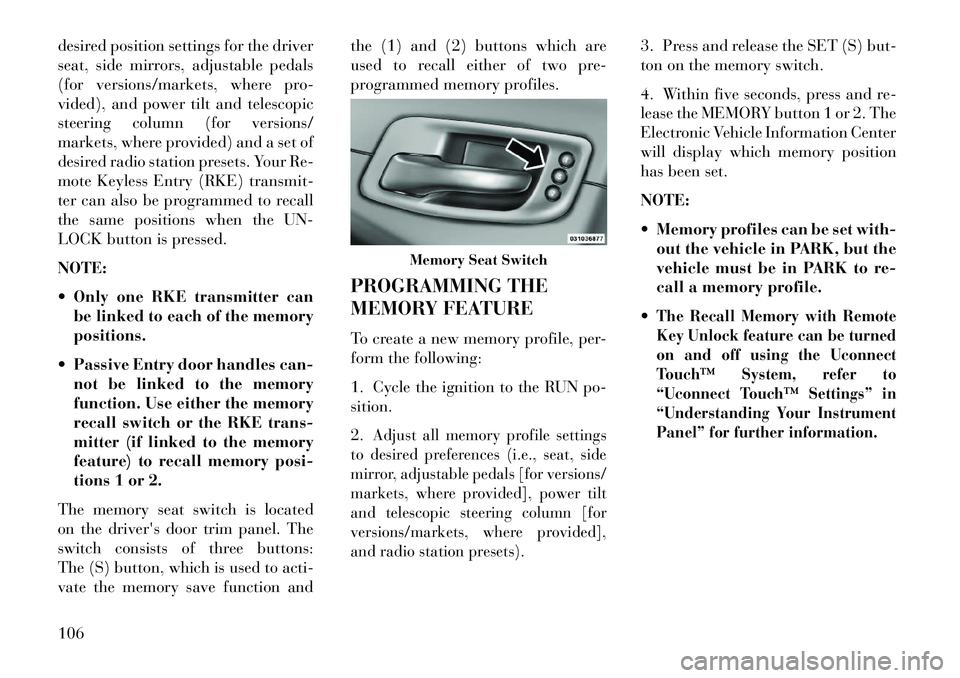
on the driver's door trim panel. The
switch consists of three buttons:
The (S) button, which is used to acti-
vate the memory save function and the (1) and (2) buttons which are
used to recall either of two pre-
programmed memory profiles.
PROGRAMMING THE
MEMORY FEATURE
To create a new memory profile, per-
form the following:
1. Cycle the ignition to the RUN po-
sition.
2.
Adjust all memory profile settings
to desired preferences (i.e., seat, side
mirror, adjustable pedals [for versions/
markets, where provided], power tilt
and telescopic steering column [for
versions/markets, where provided],
and radio station presets).
3. Press and release the SET (S) but-
ton on the memory switch.
4. Within five seconds, press and re-
lease the MEMORY button 1 or 2. The
Electronic Vehicle Information Center
will display which memory position
has been set.
NOTE:
Memory profiles can be set with- out the vehicle in PARK, but the
vehicle must be in PARK to re-
call a memory profile.
The Recall Memory with Remote
Key Unlock feature can be turned
on and off using the Uconnect
Touch™ System, refer to
“Uconnect Touch™ Settings” in
“Understanding Your Instrument
Panel” for further information.
Memory Seat Switch
106
Page 113 of 336
LINKING AND UNLINKING
THE REMOTE KEYLESS
ENTRY TRANSMITTER TO
MEMORY
Your RKE transmitters can be pro-
grammed to recall one of two pre-
programmed memory profiles by
pressing the UNLOCK button on the
RKE transmitter.
To program your RKE transmitters,
perform the following:
1. Cycle the ignition to the OFF posi-
tion.
2. Select desired memory profile (1)
or (2).
3. Once the profile has been recalled,
press and release the SET (S) button
on the memory switch, then press and
release button (1) or (2) accordingly.
“Memory Profile Set” (1 or 2) will
display in the instrument cluster on
vehicles equipped with the EVIC.
4. Press and release the LOCK but-
ton on the RKE transmitter within
10 seconds.NOTE: Your RKE transmitters
can be unlinked to your memory
settings by pressing the SET (S)
button followed by the UNLOCK
button on the RKE transmitter in
Step 4 above.
MEMORY POSITION
RECALL
NOTE: The vehicle must be in
PARK to recall memory positions.
If a recall is attempted when the
vehicle is not in PARK, a message
will display in the EVIC.
To recall the memory settings for
driver, press MEMORY button num-
ber (1) on the driver's door or the
UNLOCK button on the RKE trans-
mitter linked to memory position 1.
To recall the memory setting for
driver, press MEMORY button num-
ber (2) on the driver's door or the
UNLOCK button on the RKE trans-
mitter linked to memory position 2.
A recall can be cancelled by pressing
any of the MEMORY buttons (S, 1,
or 2) on the driver's door during a
recall. When a recall is cancelled, thedriver seat, side mirror, adjustable
pedals (for versions/markets, where
provided), and power tilt and tele-
scopic steering column (for versions/
markets, where provided) stop mov-
ing. A delay of one second will occur
before another recall can be selected.
EASY ENTRY/EXIT SEAT
(Available With Memory
Seat Only)
This feature provides automatic
driver seat positioning to enhance
driver mobility when entering and
exiting the vehicle.
The distance the driver seat moves
depends on where you have the driver
seat positioned when you place the
ignition to the OFF position.
When you cycle the ignition to the
OFF position, the driver seat will
move about 60 mm rearward if the
driver seat position is greater than
or equal to 68 mm forward of the
rear stop. The seat will return to its
previously set position when you
place the ignition into the ACC or
RUN position.
107
Page 117 of 336

To Deactivate
1.
Pull the multifunction lever toward
you (or rearward in car) to manually
deactivate the system (normal opera-
tion of low beams).
2. Push back on the multifunction
lever once again to reactivate the sys-
tem.
DAYTIME RUNNING
LIGHTS (for versions/
markets, where provided)
DRLs come ON when the vehicle is
running and shifted out of park, the
headlights are OFF and the parking
brake is OFF. The headlight switch
must be used for normal nighttime
driving. If a turn signal is activated,
the DRL lamp on the same side of the
vehicle will turn off for the duration of
the turn signal activation. Once the
turn signal is no longer active, the
DRL lamp will illuminate.
NOTE: Depending on your area's
regulations, DRLs may be able to
be turned on and off. The DRLs
can be turned on and off using the Uconnect Touch™ System, refer to
“Uconnect Touch™ Settings” in
“Understanding Your Instrument
Panel” for further information.
ADAPTIVE BI-XENON
HIGH INTENSITY
DISCHARGE HEADLIGHTS
This system automatically swivels the
headlight beam pattern horizontally
to provide increased illumination in
the direction the vehicle is steering.
NOTE:
Each time the Adaptive Headlight
System is turned on, the head-
lights will initialize by perform-
ing a brief sequence of rotations. The Adaptive Headlight System
is active only when the vehicle is
moving forward.
The Adaptive Headlight System
can be turned On or Off using the
Uconnect Touch™ System, refer to
“Uconnect Touch™ Settings” in
“Understanding Your Instrument
Panel” for further information. LIGHTS-ON REMINDER
If the headlights or parking lights are
on after the ignition is placed in the
OFF position, a chime will sound to
alert the driver when the driver's door
is opened.
FOG LIGHTS
The fog light switch is built
into the headlight switch. To
activate the fog lights, turn
the headlamp switch to the
park lamp or headlamp position. Press
the headlight switch once for front fog
lights, press the switch a second time
for front and rear fog lights. Pressing
the switch a third time will deactivate
the rear fog lights, and a fourth time
will deactivate the front fog lights.
Turning the headlight switch off will
also deactivate the fog lights.
An indicator light in the instrument
cluster illuminates when the fog lights
are turned on.
NOTE: The front fog lights will
activate automatically when turn-
ing on the position lights or the low
111
Page 118 of 336

beam headlights if previously de-
activated by turning the headlight
switch off. The rear fog lights will
only turn on by operating the
switch as previously described.
MULTIFUNCTION LEVERThe multifunction lever controls the
operation of the turn signals, headlight
beam selection and passing lights. The
multifunction lever is located on the
left side of the steering column.TURN SIGNALS
Move the multifunction lever up or
down and the arrows on each side of
the instrument cluster flash to show
proper operation of the front and rear
turn signal lights.NOTE:
If either light remains on and
does not flash, or there is a very
fast flash rate, check for a defec-
tive outside light bulb. If an indi-
cator fails to light when the lever
is moved, it would suggest that
the indicator bulb is defective.A “Turn Signal On” message will
appear in the EVIC (for versions/
markets, where provided) and a
continuous chime will sound if the
vehicle is driven more than 1.6 km
with either turn signal on.LANE CHANGE ASSISTTap the lever up or down once, without
moving beyond the detent, and the
turn signal (right or left) will flash
three times then automatically turn off.HIGH/LOW BEAM SWITCH
Push the multifunction lever away
from you to switch the headlights to
high beam. Pull the multifunction le-
ver toward you to switch the head-
lights back to low beam.
FLASH-TO-PASS
You can signal another vehicle with
your headlights by lightly pulling the
multifunction lever toward you. This
will turn on the high beams headlights
until the lever is released.
COURTESY LIGHTS
The courtesy lights can be turned on
by pressing the top corner of the lens.
To turn the lights off, press the lens a
second time.
FRONT MAP/READING
LIGHTS
The front map/reading lights are
mounted in the overhead console.
Multifunction Lever
Courtesy Lights
112
Page 120 of 336
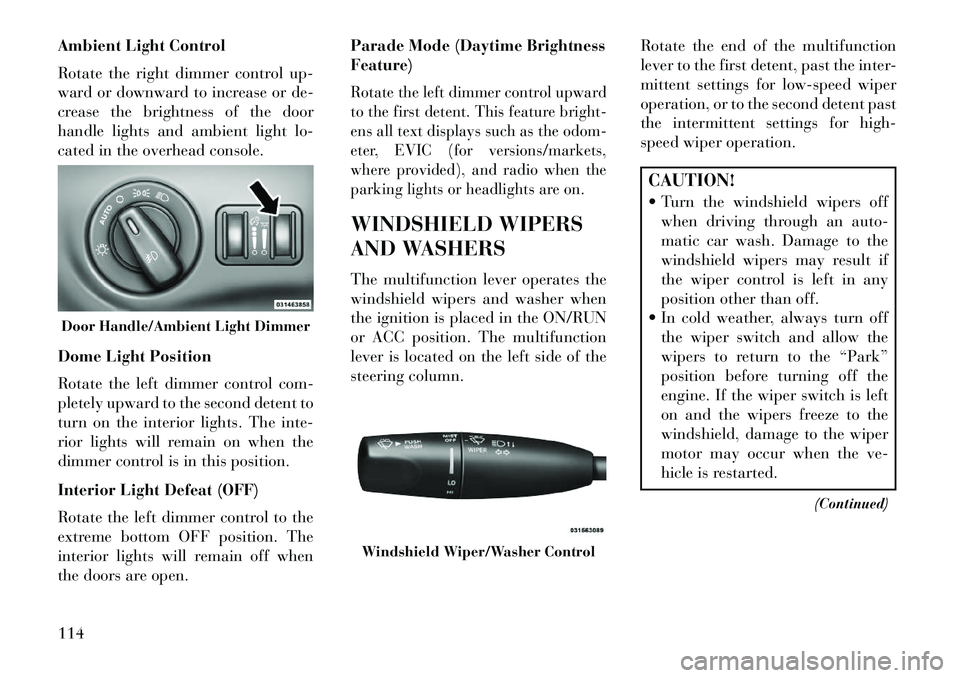
Ambient Light Control
Rotate the right dimmer control up-
ward or downward to increase or de-
crease the brightness of the door
handle lights and ambient light lo-
cated in the overhead console.
Dome Light Position
Rotate the left dimmer control com-
pletely upward to the second detent to
turn on the interior lights. The inte-
rior lights will remain on when the
dimmer control is in this position.
Interior Light Defeat (OFF)
Rotate the left dimmer control to the
extreme bottom OFF position. The
interior lights will remain off when
the doors are open.Parade Mode (Daytime Brightness
Feature)
Rotate the left dimmer control upward
to the first detent. This feature bright-
ens all text displays such as the odom-
eter, EVIC (for versions/markets,
where provided), and radio when the
parking lights or headlights are on.WINDSHIELD WIPERS
AND WASHERS
The multifunction lever operates the
windshield wipers and washer when
the ignition is placed in the ON/RUN
or ACC position. The multifunction
lever is located on the left side of the
steering column.
Rotate the end of the multifunction
lever to the first detent, past the inter-
mittent settings for low-speed wiper
operation, or to the second detent past
the intermittent settings for high-
speed wiper operation.
CAUTION!
Turn the windshield wipers off
when driving through an auto-
matic car wash. Damage to the
windshield wipers may result if
the wiper control is left in any
position other than off.
In cold weather, always turn off the wiper switch and allow the
wipers to return to the “Park”
position before turning off the
engine. If the wiper switch is left
on and the wipers freeze to the
windshield, damage to the wiper
motor may occur when the ve-
hicle is restarted.
(Continued)
Door Handle/Ambient Light Dimmer
Windshield Wiper/Washer Control
114
Page 121 of 336
CAUTION!(Continued)
Always remove any buildup of snow that prevents the wind-
shield wiper blades from return-
ing to the off position. If the wind-
shield wiper control is turned off
and the blades cannot return to
the off position, damage to the
wiper motor may occur.
INTERMITTENT WIPER
SYSTEM
Use the intermittent wiper when
weather conditions make a single
wiping cycle with a variable pause
between cycles desirable. Rotate the
end of the multifunction lever to the
first detent position, and then turn the
end of the lever to select the desired
delay interval. There are four delay
settings, which allow you to regulate
the wipe interval from a minimum of
one cycle every second to a maximum
of approximately 18 seconds between
cycles. The delay intervals will double
in duration when the vehicle speed is
16 km/h or less. MIST FEATURE
Rotate the end of the lever downward
to the Mist position to activate a single
wipe cycle to clear off road mist or
spray from a passing vehicle. The
wipers will continue to operate until
you release the multifunction lever.
NOTE: The mist feature does not
activate the washer pump; there-
fore, no washer fluid will be
sprayed on the windshield. The
wash function must be used in
order to spray the windshield with
washer fluid.
WINDSHIELD WASHERS
To use the washer, push the multi-
function lever inward (toward the
steering column) and hold it for as
long as washer spray is desired.
If you activate the washer while the
windshield wiper control is in the
delay range, the wipers will operate
for two wipe cycles after releasing the
lever and then resume the intermit-
tent interval previously selected.
If you activate the washer while the
windshield wiper is turned off, the
wipers will operate for three wipe
cycles and then turn off.
WARNING!Sudden loss of visibility through the
windshield could lead to a collision.
You might not see other vehicles or
other obstacles. To avoid sudden ic-
ing of the windshield during freez-
ing weather, warm the windshield
with the defroster before and during
windshield washer use.RAIN SENSING WIPERS
(for versions/markets,
where provided)
This feature senses moisture on the
windshield and automatically acti-
vates the wipers for the driver. The
feature is especially useful for road
splash or over spray from the wind-
shield washers of the vehicle ahead.
Rotate the end of the multifunction
lever to one of four settings to activate
this feature.
115
Page 122 of 336

The sensitivity of the system can be
adjusted with the multifunction lever.
Wiper delay position 1 is the least sen-
sitive, and wiper delay position 4 is the
most sensitive. Setting 3 should be used
for normal rain conditions. Settings 1
and 2 can be used if the driver desires
less wiper sensitivity. Settings 4 can be
used if the driver desires more sensitiv-
ity. The rain sense wipers will auto-
matically change between an intermit-
tent wipe, slow wipe and a fast wipe
depending on the amount of moisture
that is sensed on the windshield. Place
the wiper switch in the OFF position
when not using the system.The Rain Sensing feature can be
turned on and off using the Uconnect
Touch™ System, refer to “Uconnect
Touch™ Settings” in “Understanding
Your Instrument Panel” for further
information.
NOTE:
The Rain Sensing feature will not
operate when the wiper speed is
in the low or high position.
The Rain Sensing feature maynot function properly when ice
or dried salt water is present on
the windshield.
The use of products containing wax or silicone may reduce rain
sensor performance.
The Rain Sensing system has protec-
tive features for the wiper blades and
arms. It will not operate under the
following conditions:
Low Temperature Wipe Inhibit
— The Rain Sensing feature will
not operate when the ignition is
placed in the RUN position, the ve-
hicle is stationary and the outside
temperature is below 0°C, unless
the wiper control on the multifunc-
tion lever is moved, the vehicle
speed becomes greater than 0 km/h
or the outside temperature rises
above freezing.
Neutral Wipe Inhibit — The Rain
Sensing feature will not operate
when the ignition is placed in the
RUN position, the transmission
shift lever is in the NEUTRAL po-
sition and the vehicle speed is less than 8 km/h, unless the wiper con-
trol on the multifunction lever is
moved or the shift lever is moved
out of the NEUTRAL position.
HEADLIGHT WASHERS
The multifunction lever operates the
headlight washers when the ignition
switch is in the ON position and the
headlights are turned on. The multi-
function lever is located on the left
side of the steering column.
To use the headlight washers, push
the multifunction lever inward (to-
ward the steering column) to the sec-
ond detent and release it. The head-
light washers will spray a timed high-
pressure spray of washer fluid onto
each headlight lens. In addition, the
windshield washers will spray the
windshield and the windshield wipers
will cycle.
NOTE: After turning the ignition
switch and headlights ON, the
headlight washers will operate on
the first spray of the windshield
washer and then every eleventh
spray after that.
116
Page 123 of 336
TILT/TELESCOPING
STEERING COLUMN
This feature allows you to tilt the
steering column upward or down-
ward. It also allows you to lengthen or
shorten the steering column. The tilt/
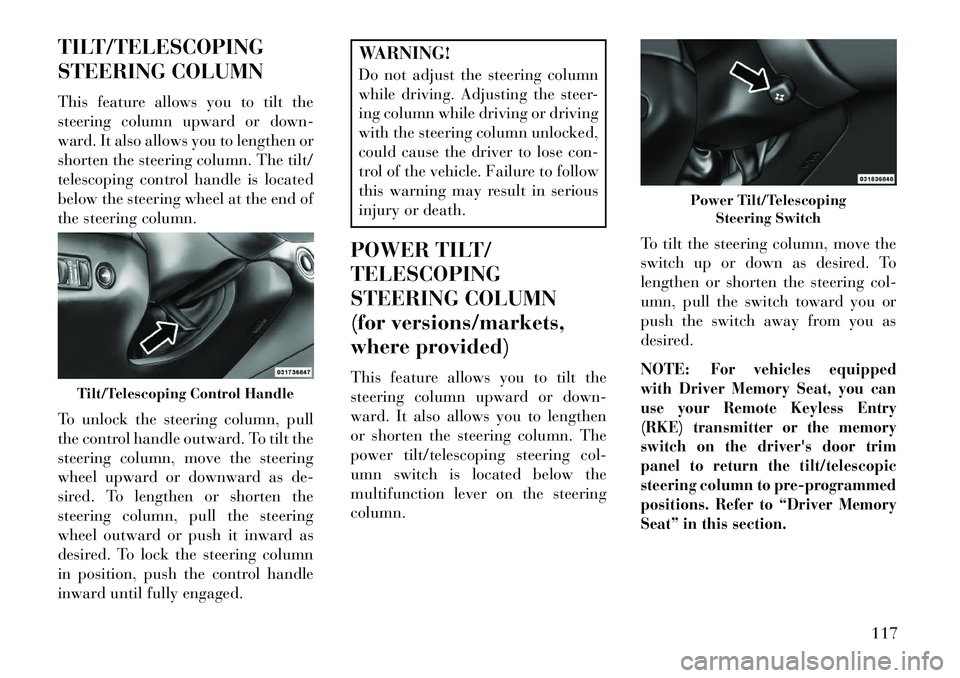
telescoping control handle is located
below the steering wheel at the end of
the steering column.
To unlock the steering column, pull
the control handle outward. To tilt the
steering column, move the steering
wheel upward or downward as de-
sired. To lengthen or shorten the
steering column, pull the steering
wheel outward or push it inward as
desired. To lock the steering column
in position, push the control handle
inward until fully engaged.
WARNING!
Do not adjust the steering column
while driving. Adjusting the steer-
ing column while driving or driving
with the steering column unlocked,
could cause the driver to lose con-
trol of the vehicle. Failure to follow
this warning may result in serious
injury or death.
POWER TILT/
TELESCOPING
STEERING COLUMN
(for versions/markets,
where provided)
This feature allows you to tilt the
steering column upward or down-
ward. It also allows you to lengthen
or shorten the steering column. The
power tilt/telescoping steering col-
umn switch is located below the
multifunction lever on the steering
column. To tilt the steering column, move the
switch up or down as desired. To
lengthen or shorten the steering col-
umn, pull the switch toward you or
push the switch away from you as
desired.
NOTE:
For vehicles equipped
with Driver Memory Seat, you can
use your Remote Keyless Entry
(RKE) transmitter or the memory
switch on the driver's door trim
panel to return the tilt/telescopic
steering column to pre-programmed
positions. Refer to “Driver Memory
Seat” in this section.
Tilt/Telescoping Control Handle
Power Tilt/Telescoping Steering Switch
117
Page 124 of 336
WARNING!
Do not adjust the steering column
while driving. Adjusting the steer-
ing column while driving or driving
with the steering column unlocked,
could cause the driver to lose con-
trol of the vehicle. Failure to follow
this warning may result in serious
injury or death.
HEATED STEERING
WHEEL (for versions/
markets, where provided)
The steering wheel contains a heating
element that helps warm your hands
in cold weather. The heated steering
wheel has only one temperature set-
ting. Once the heated steering wheel
has been turned on it will operate for
approximately 58 to 70 minutes be-
fore automatically shutting off. The
heated steering wheel can shut off
early or may not turn on when the
steering wheel is already warm. The heated steering wheel can be
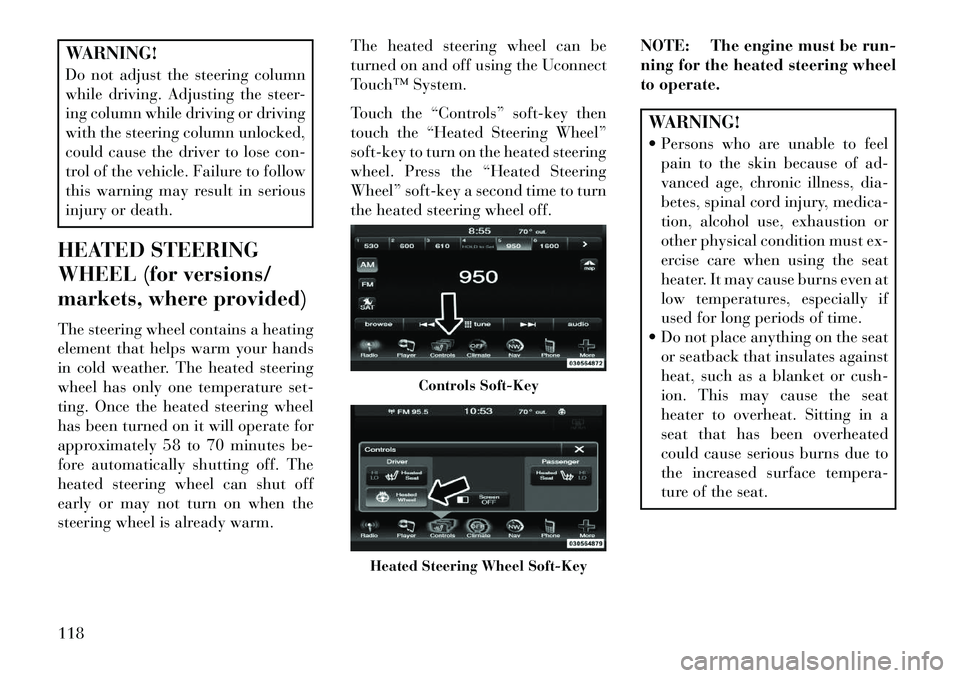
turned on and off using the Uconnect
Touch™ System.
Touch the “Controls” soft-key then
touch the “Heated Steering Wheel”
soft-key to turn on the heated steering
wheel. Press the “Heated Steering
Wheel” soft-key a second time to turn
the heated steering wheel off.
NOTE: The engine must be run-
ning for the heated steering wheel
to operate.
WARNING!
Persons who are unable to feel
pain to the skin because of ad-
vanced age, chronic illness, dia-
betes, spinal cord injury, medica-
tion, alcohol use, exhaustion or
other physical condition must ex-
ercise care when using the seat
heater. It may cause burns even at
low temperatures, especially if
used for long periods of time.
Do not place anything on the seat or seatback that insulates against
heat, such as a blanket or cush-
ion. This may cause the seat
heater to overheat. Sitting in a
seat that has been overheated
could cause serious burns due to
the increased surface tempera-
ture of the seat.
Controls Soft-Key
Heated Steering Wheel Soft-Key
118