ECU Lancia Thema 2013 Owner handbook (in English)
[x] Cancel search | Manufacturer: LANCIA, Model Year: 2013, Model line: Thema, Model: Lancia Thema 2013Pages: 336, PDF Size: 3.87 MB
Page 111 of 336
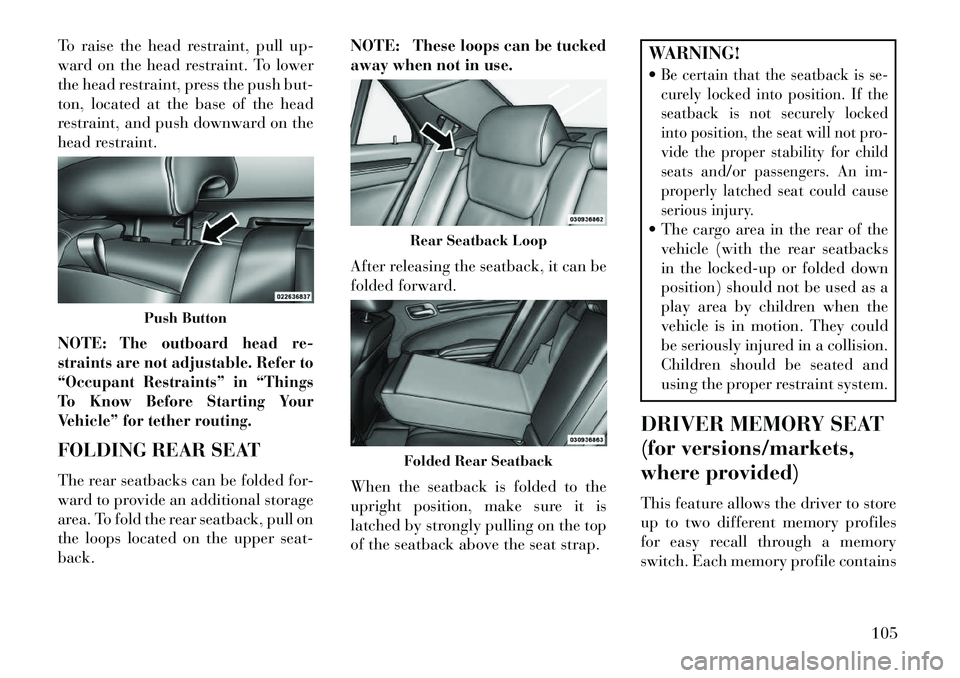
To raise the head restraint, pull up-
ward on the head restraint. To lower
the head restraint, press the push but-
ton, located at the base of the head
restraint, and push downward on the
head restraint.
NOTE:
The outboard head re-
straints are not adjustable. Refer to
“Occupant Restraints” in “Things
To Know Before Starting Your
Vehicle” for tether routing.
FOLDING REAR SEAT
The rear seatbacks can be folded for-
ward to provide an additional storage
area. To fold the rear seatback, pull on
the loops located on the upper seat-
back. NOTE:
These loops can be tucked
away when not in use.
After releasing the seatback, it can be
folded forward.
When the seatback is folded to the
upright position, make sure it is
latched by strongly pulling on the top
of the seatback above the seat strap.
WARNING!
Be certain that the seatback is se-
curely locked into position. If the
seatback is not securely locked
into position, the seat will not pro-
vide the proper stability for child
seats and/or passengers. An im-
properly latched seat could cause
serious injury. The cargo area in the rear of the vehicle (with the rear seatbacks
in the locked-up or folded down
position) should not be used as a
play area by children when the
vehicle is in motion. They could
be seriously injured in a collision.
Children should be seated and
using the proper restraint system.
DRIVER MEMORY SEAT
(for versions/markets,
where provided)
This feature allows the driver to store
up to two different memory profiles
for easy recall through a memory
switch. Each memory profile contains
Push Button
Rear Seatback LoopFolded Rear Seatback
105
Page 114 of 336
When you cycle the ignition to theOFF position, the driver seat will
move to a position 8 mm forward of
the rear stop if the driver seat posi-
tion is between 23 mm and 68 mm
forward of the rear stop. The seat
will return to its previously set po-
sition when you place the ignition
to the ACC or RUN position.
The Easy Entry/Easy Exit feature is
disabled when the driver seat posi-
tion is less than 23 mm forward of
the rear stop. At this position, there
is no benefit to the driver by moving
the seat for Easy Exit or Easy Entry.Each stored memory setting will have
an associated Easy Entry and Easy
Exit position.
NOTE: The Easy Entry/Easy Exit
feature can be enabled or disabled
using the Uconnect Touch™ Sys-
tem, refer to “Uconnect Touch™
Settings” in “Understanding Your
Instrument Panel” for further in-
formation. TO OPEN AND CLOSE
THE HOOD
Two latches must be released to open
the hood.
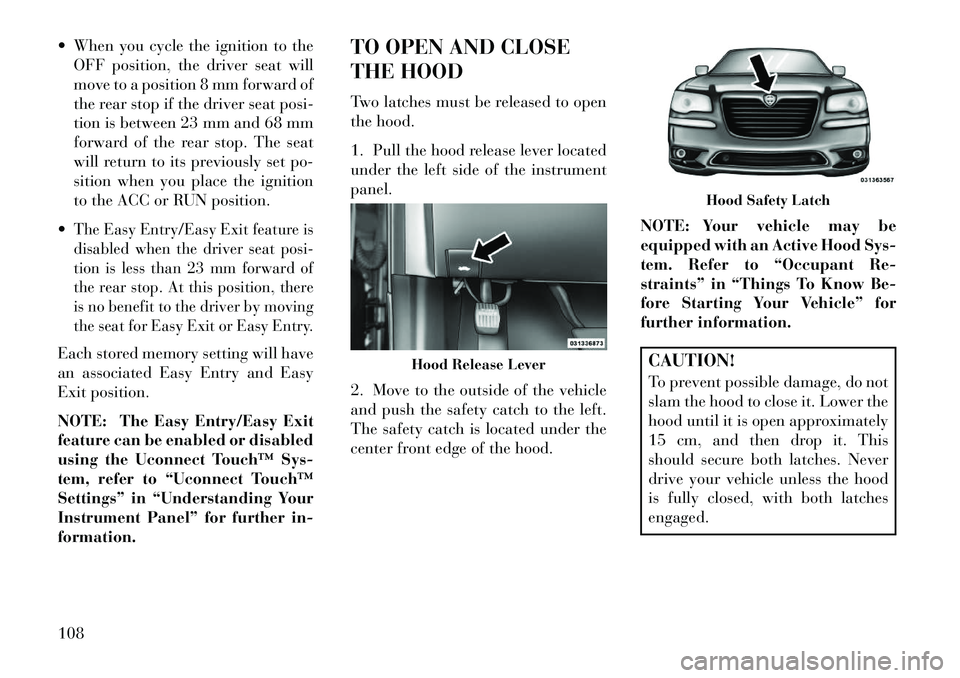
1. Pull the hood release lever located
under the left side of the instrument
panel.
2. Move to the outside of the vehicle
and push the safety catch to the left.
The safety catch is located under the
center front edge of the hood.
NOTE: Your vehicle may be
equipped with an Active Hood Sys-
tem. Refer to “Occupant Re-
straints” in “Things To Know Be-
fore Starting Your Vehicle” for
further information.
CAUTION!
To prevent possible damage, do not
slam the hood to close it. Lower the
hood until it is open approximately
15 cm, and then drop it. This
should secure both latches. Never
drive your vehicle unless the hood
is fully closed, with both latches
engaged.
Hood Release Lever
Hood Safety Latch
108
Page 147 of 336
WARNING!(Continued)
In a collision, there is a greater risk
of being thrown from a vehicle
with an open sunroof. You could
also be seriously injured or killed.
Always fasten your seat belt prop-
erly and make sure all passengers
are properly secured too.Do not allow small children to
operate the sunroof. Never allow
your fingers, other body parts, or
any object to project through the
sunroof opening. Injury may result.
OPENING SUNROOF —
EXPRESS
Press the switch rearward and release
it within one-half second and the sun-
roof will open automatically from any
position. The sunroof will open fully
and stop automatically. This is called
“Express Open”. During Express
Open operation, any movement of the
sunroof switch will stop the sunroof. OPENING SUNROOF —
MANUAL MODE
To open the sunroof, press and hold
the switch rearward to full open. Any
release of the switch will stop the
movement and the sunroof will re-
main in a partially opened condition
until the switch is pushed and held
rearward again.
CLOSING SUNROOF —
EXPRESS
Press the switch forward and release it
within one-half second and the sun-
roof will close automatically from any
position. The sunroof will close fully
and stop automatically. This is called
“Express Close”. During Express
Close operation, any movement of the
switch will stop the sunroof.
CLOSING SUNROOF —
MANUAL MODE
To close the sunroof, press and hold
the switch in the forward position.
Any release of the switch will stop
the movement and the sunroof will
remain in a partially closed condition
until the switch is pushed and held
forward again.PINCH PROTECT FEATURE
This feature will detect an obstruction
in the opening of the sunroof during
Express Close operation. If an ob-
struction in the path of the sunroof is
detected, the sunroof will automati-
cally retract. Remove the obstruction
if this occurs. Next, press the switch
forward and release to Express Close.
NOTE:
If three consecutive sunroof
close attempts result in Pinch Pro-
tect reversals, the fourth close at-
tempt will be a Manual Close move-
ment with Pinch Protect disabled.
VENTING SUNROOF —
EXPRESS
Press and release the “Vent” button,
and the sunroof will open to the vent
position. This is called “Express
Vent”, and will occur regardless of
sunroof position. During Express Vent
operation, any movement of the
switch will stop the sunroof.
141
Page 149 of 336

WARNING!
Never leave children in a vehiclewith the Remote Keyless Entry
(RKE) transmitter in the passen-
ger compartment. Occupants,
particularly unattended children,
can become entrapped by the
power sunroof while operating
the power sunroof switch. Such
entrapment may result in serious
injury or death.
In a collision, there is a greater risk
of being thrown from a vehicle
with an open sunroof. You could
also be seriously injured or killed.
Always fasten your seat belt prop-
erly and make sure all passengers
are properly secured too.Do not allow small children to op-
erate the sunroof. Never allow your
fingers, other body parts, or any
object to project through the sun-
roof opening. Injury may result.
OPENING SUNROOF —
EXPRESS
Press the switch rearward and release
it within one-half second and the sun-
roof will open automatically from any
position. The sunroof will open fully
and stop automatically. This is called
“Express Open”. During Express
Open operation, any movement of the
sunroof switch will stop the sunroof.
OPENING SUNROOF —
MANUAL MODE
To open the sunroof, press and hold
the switch rearward to full open. Any
release of the switch will stop the
movement and the sunroof will re-
main in a partially opened condition
until the switch is pushed and held
rearward again.
CLOSING SUNROOF —
EXPRESS
Press the switch forward and release it
within one-half second and the sun-
roof will close automatically from any
position. The sunroof will close fully and stop automatically. This is called
“Express Close”. During Express
Close operation, any movement of the
switch will stop the sunroof.
CLOSING SUNROOF —
MANUAL MODE
To close the sunroof, press and hold
the switch in the forward position.
Any release of the switch will stop the
movement and the sunroof will re-
main in a partially closed condition
until the switch is pushed and held
forward again.
OPENING POWER SHADE
— EXPRESS
Press the shade switch rearward and
release it within one-half second and
the shade will open automatically
from any position. The shade will
open fully and stop automatically.
This is called “Express Open”. During
Express Open operation, any move-
ment of the shade switch will stop the
shade.
143
Page 150 of 336

OPENING POWER
SHADE — MANUAL MODE
To open the shade, press and hold the
switch rearward to full open. Any re-
lease of the switch will stop the move-
ment and the shade will remain in a
partially opened condition until the
switch is pushed and held rearward
again.
CLOSING POWER
SHADE — EXPRESS
Press the switch forward and release it
within one-half second and the shade
will close automatically from any po-
sition. The shade will close fully and
stop automatically. This is called “Ex-
press Close”. During Express Close
operation, any movement of the
switch will stop the shade.
CLOSING POWER
SHADE — MANUAL MODE
To close the shade, press and hold the
switch in the forward position. Any
release of the switch will stop the
movement and the shade will remainin a partially closed condition until
the switch is pushed and held forward
again.
PINCH PROTECT FEATURE
This feature will detect an obstruction
in the opening of the sunroof during
Express Close operation. If an ob-
struction in the path of the sunroof is
detected, the sunroof will automati-
cally retract. Remove the obstruction
if this occurs. Next, press the switch
forward and release to Express Close.
NOTE: If three consecutive sun-
roof close attempts result in Pinch
Protect reversals, the fourth close
attempt will be a Manual Close
movement with Pinch Protect dis-
abled.
WIND BUFFETING
Wind buffeting can be described as
the perception of pressure on the ears
or a helicopter-type sound in the ears.
Your vehicle may exhibit wind buffet-
ing with the windows down, or the
sunroof (for versions/markets, where
provided) in certain open or partially
open positions. This is a normal oc-
currence and can be minimized. If the
buffeting occurs with the rear win-
dows open, open the front and rear
windows together to minimize the
buffeting. If the buffeting occurs with
the sunroof open, adjust the sunroof
opening to minimize the buffeting or
open any window.
SUNROOF MAINTENANCE
Use only a non-abrasive cleaner and a
soft cloth to clean the glass panel.
IGNITION OFF OPERATION
For vehicles not equipped with the
Electronic Vehicle Information Center
(EVIC), the power sunroof switch will
remain active for 45 seconds after the
ignition switch is turned to the LOCK
position. Opening either front door
will cancel this feature.
144
Page 156 of 336
WARNING!
Be certain that the seatback issecurely locked into position. If
the seatback is not securely
locked into position, the seat will
not provide the proper stability
for child seats and/or passengers.
An improperly latched seat could
cause serious injury.
The cargo area in the rear of the vehicle (with the rear seatbacks
in the locked-up or folded down
position) should not be used as a
play area by children when the
vehicle is in motion. They could
be seriously injured in a collision.
Children should be seated and us-
ing the proper restraint system.
To help protect against personal injury, passengers should not be
seated in the rear cargo area. The
rear cargo space is intended for
load carrying purposes only, not
for passengers, who should sit in
seats and use seat belts.
WARNING!
The weight and position of cargo
and passengers can change the ve-
hicle center of gravity and vehicle
handling. To avoid loss of control
resulting in personal injury, follow
these guidelines for loading your
vehicle:
Always place cargo evenly on the
cargo floor. Put heavier objects as
low and as far forward as possible. Place as much cargo as possible infront of the rear axle. Too much
weight or improperly placed
weight over or behind the rear
axle can cause the rear of the ve-
hicle to sway.
Do not pile luggage or cargo
higher than the top of the seat-
back. This could impair visibility
or become a dangerous projectile
in a sudden stop or collision. CARGO AREA FEATURES
TRUNK MAT (for versions/
markets, where provided)
A trunk mat covers the bottom of the
cargo area. The trunk mat is used to
protect the interior of the trunk from
mud, snow, and debris.
GROCERY BAG HOOKS
(for versions/markets
where provided)
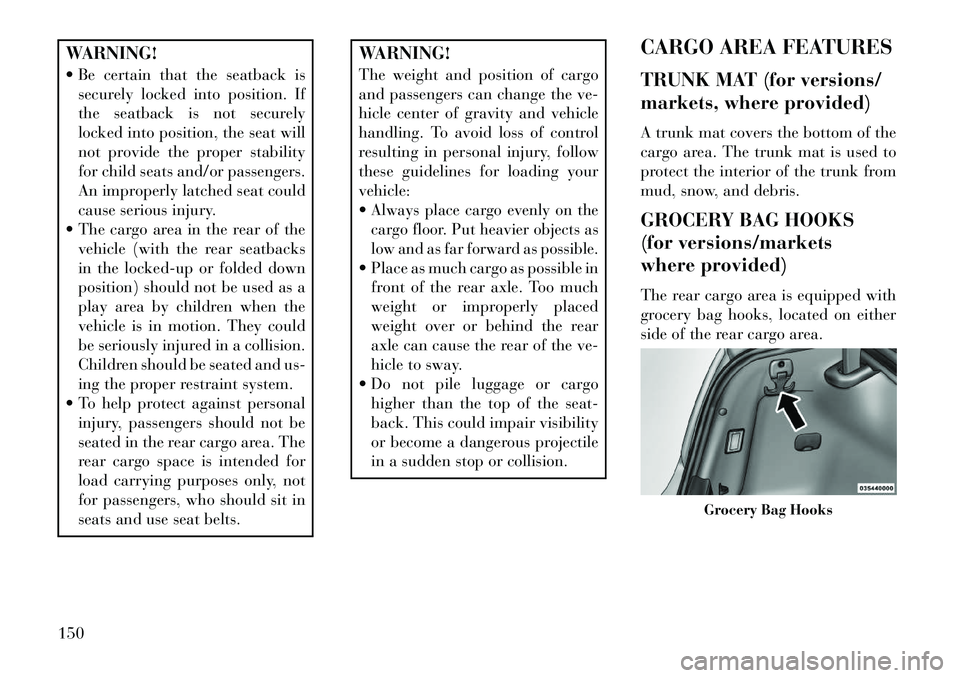
The rear cargo area is equipped with
grocery bag hooks, located on either
side of the rear cargo area.
Grocery Bag Hooks
150
Page 168 of 336
16. Vehicle Security LightThis light will flash at a fast
rate for approximately
15 seconds, when the ve-
hicle security alarm is arm-
ing, and then will flash slowly until
the vehicle is disarmed.
17. Electronic Stability Control
(ESC) OFF Indicator Light (for
versions/markets, where provided)
This light indicates the
Electronic Stability Control
(ESC) is off.
18. Electronic Stability Control
(ESC) Activation/Malfunction
Indicator Light (for versions/
markets, where provided) The “ESC Activation/Mal-
function Indicator Light” in
the instrument cluster will
come on when the ignition
switch is turned to the ON/RUN posi-
tion. It should go out with the engine
running. If the “ESC Activation/
Malfunction Indicator Light” comes on continuously with the engine run-
ning, a malfunction has been detected
in the ESC system. If this light re-
mains on after several ignition cycles,
and the vehicle has been driven sev-
eral kilometers at speeds greater than
48 km/h, see your authorized dealer
as soon as possible to have the prob-
lem diagnosed and corrected.
NOTE:
The “ESC Off Indicator Light” and
the “ESC Activation/Malfunction
Indicator Light” come on momen-
tarily each time the ignition
switch is turned to ON/RUN.Each time the ignition is turned to
ON/RUN, the ESC system will be
ON, even if it was turned off
previously.The ESC system will make buzz-
ing or clicking sounds when it is
active. This is normal; the sounds
will stop when ESC becomes in-
active following the maneuver
that caused the ESC activation.
19. Seat Belt Reminder Light
When the ignition switch is
first turned to ON/RUN, this
light will turn on for four to
eight seconds as a bulb check. During
the bulb check, if the driver's seat belt
is unbuckled, a chime will sound.
After the bulb check or when driving,
if the driver or passenger's (for
versions/markets, where provided)
seat belt remains unbuckled, the Seat
Belt Reminder Light will illuminate
and the chime will sound. Refer to
“Occupant Restraints” in “Things To
Know Before Starting Your Vehicle”
for further information.
20. Temperature Gauge
The temperature gauge shows engine
coolant temperature. Any reading
within the normal range indicates
that the engine cooling system is op-
erating satisfactorily.
The gauge pointer will likely indicate
a higher temperature when driving in
hot weather, up mountain grades, or
when towing a trailer. It should not be
allowed to exceed the upper limits of
the normal operating range.
162
Page 208 of 336

WARNING!(Continued)
Unintended movement of a vehicle
could injure those in or near the
vehicle. As with all vehicles, you
should never exit a vehicle while
the engine is running. Before exit-
ing a vehicle, always apply the
parking brake, shift the transmis-
sion into PARK, and turn the en-
gine off. When the ignition is in the
OFF position, the shift lever is
locked in PARK, securing the ve-
hicle against unwanted movement. When leaving the vehicle, always remove the key fob and lock your
vehicle.
Never leave children alone in a
vehicle, or with access to an un-
locked vehicle. Allowing children
to be in a vehicle unattended is
dangerous for a number of rea-
sons. A child or others could be
seriously or fatally injured. Chil-
dren should be warned not to
touch the parking brake, brake
pedal or the shift lever.
(Continued)
WARNING!(Continued)
Do not leave the key fob in or near the vehicle, and do not leave Key-
less Enter-N-Go in the ACC or
ON/RUN mode. A child could
operate power windows, other
controls, or move the vehicle.CAUTION!
Before moving the shift lever out
of PARK, you must turn the igni-
tion switch from the LOCK/OFF
position to the ON/RUN position,
and also press the brake pedal.
Otherwise, damage to the shift
lever could result.
DO NOT race the engine when shifting from PARK or NEU-
TRAL into another gear range, as
this can damage the drivetrain.
The following indicators should be
used to ensure that you have engaged
the shift lever into the PARK position:
When shifting into PARK, press the
lock button on the shift lever and
push the lever all the way forward
until it stops. When released, the
lever will return to its home position.
With brake pedal released, look at the
shift lever position display and verify
that it indicates the PARK position.REVERSE
This range is for moving the vehicle
backward. Shift into REVERSE only
after the vehicle has come to a com-
plete stop.
NEUTRAL
Use this range when the vehicle is
standing for prolonged periods with
the engine running. The engine may
be started in this range. Apply the
parking brake and shift the transmis-
sion into PARK if you must leave the
vehicle.WARNING!
Do not coast in NEUTRAL and
never turn off the ignition to coast
down a hill. These are unsafe prac-
tices that limit your response to
changing traffic or road conditions.
You might lose control of the ve-
hicle and have a collision.
202
Page 210 of 336

In the event of a momentary problem,
the transmission can be reset to regain
all forward gears by performing the
following steps.
NOTE:
In cases where the instru-
ment cluster message indicates the
transmission may not re-engage af-
ter engine shutdown, perform this
procedure only in a desired loca-
tion (preferably, at your authorized
dealer).
1. Stop the vehicle.
2. Shift the transmission into PARK,
if possible.
3. Turn the engine OFF.
4. Wait approximately 30 seconds.
5. Restart the engine.
6. Shift into the desired gear range.
If the problem is no longer detected,
the transmission will return to normal
operation.
NOTE: Even if the transmission
can be reset, we recommend that
you visit your authorized dealer at your earliest possible conve-
nience. Your authorized dealer has
diagnostic equipment to deter-
mine if the problem could recur.
If the transmission cannot be reset,
authorized dealer service is required.
FIVE-SPEED AUTOMATIC
TRANSMISSION –
3.0L DIESEL ENGINE
The shift lever position display (lo-
cated in the instrument cluster) indi-
cates the transmission gear range. You
must press the brake pedal to move
the shift lever out of PARK (refer to
“Brake/Transmission Shift Interlock
System” in this section). To drive,
move the shift lever from PARK or
NEUTRAL to the DRIVE position.
The electronically-controlled trans-
mission provides a precise shift sched-
ule. The transmission electronics are
self-calibrating; therefore, the first few
shifts on a new vehicle may be some-
what abrupt. This is a normal condi-
tion, and precision shifts will develop
within a few hundred kilometers.
Only shifting from DRIVE to PARK or
REVERSE when the accelerator
pedal is released and the vehicle is
stopped. Be sure to keep your foot on
the brake pedal when shifting be-
tween these gears.
The transmission shift lever has only
PARK, REVERSE, NEUTRAL, and
DRIVE shift positions. Manual shifts
can be made using the “AutoStick®”
shift control (for versions/markets,
where provided; refer to
“AutoStick®” in this section). Mov-
ing the shift lever to the left or right
(-/+) while in the DRIVE position, or
tapping one of the steering wheel-
mounted shift paddles (-/+) (for
versions/markets, where provided),
will manually select the transmission
gear, and will display that gear in the
instrument cluster as 5, 4, 3, 2, 1.
Shift Lever
204
Page 211 of 336

GEAR RANGES
DO NOT race the engine when shift-
ing from PARK or NEUTRAL into
another gear range.
NOTE: After selecting any gear
range, wait a moment to allow the
selected gear to engage before ac-
celerating. This is especially im-
portant when the engine is cold.
If there is a need to restart the engine,
be sure to cycle the ignition to the OFF
position before restarting. Transmis-
sion gear engagement may be delayed
after restarting the engine if the igni-
tion is not cycled to the OFF position
first.
PARKThis range supplements the parking
brake by locking the transmission. The
engine can be started in this range.
Never attempt to use PARK while the
vehicle is in motion. Apply the parking
brake when leaving the vehicle in this
range.When parking on a level surface, you
may place the shift lever in PARK first,
and then apply the parking brake.
When parking on a hill, apply the
parking brake before placing the shift
lever in PARK, otherwise the load on
the transmission locking mechanism
may make it difficult to move the shift
lever out of PARK. As an added pre-
caution, turn the front wheels toward
the curb on a downhill grade and away
from the curb on an uphill grade.
WARNING!
Never use the PARK position as a
substitute for the parking brake.
Always apply the parking brake
fully when parked to guard
against vehicle movement and
possible injury or damage.
Your vehicle could move and in-
jure you and others if it is not in
PARK. Check by trying to move
the shift lever out of PARK with
the brake pedal released. Make
sure the transmission is in PARK
before leaving the vehicle.
(Continued)
WARNING!(Continued)
It is dangerous to move the shift
lever out of PARK or NEUTRAL if
the engine speed is higher than idle
speed. If your foot is not firmly
pressing the brake pedal, the ve-
hicle could accelerate quickly for-
ward or in reverse. You could lose
control of the vehicle and hit some-
one or something. Only shift into
gear when the engine is idling nor-
mally and when your foot is firmly
pressing the brake pedal.Unintended movement of a vehicle
could injure those in or near the
vehicle. As with all vehicles, you
should never exit a vehicle while
the engine is running. Before exit-
ing a vehicle, always apply the
parking brake, shift the transmis-
sion into PARK, and turn the en-
gine off. When the ignition is in the
OFF position, the shift lever is
locked in PARK, securing the ve-
hicle against unwanted movement. When leaving the vehicle, always remove the key fob and lock your
vehicle.
(Continued)
205