park assist Lancia Thema 2014 Owner handbook (in English)
[x] Cancel search | Manufacturer: LANCIA, Model Year: 2014, Model line: Thema, Model: Lancia Thema 2014Pages: 332, PDF Size: 3.46 MB
Page 73 of 332
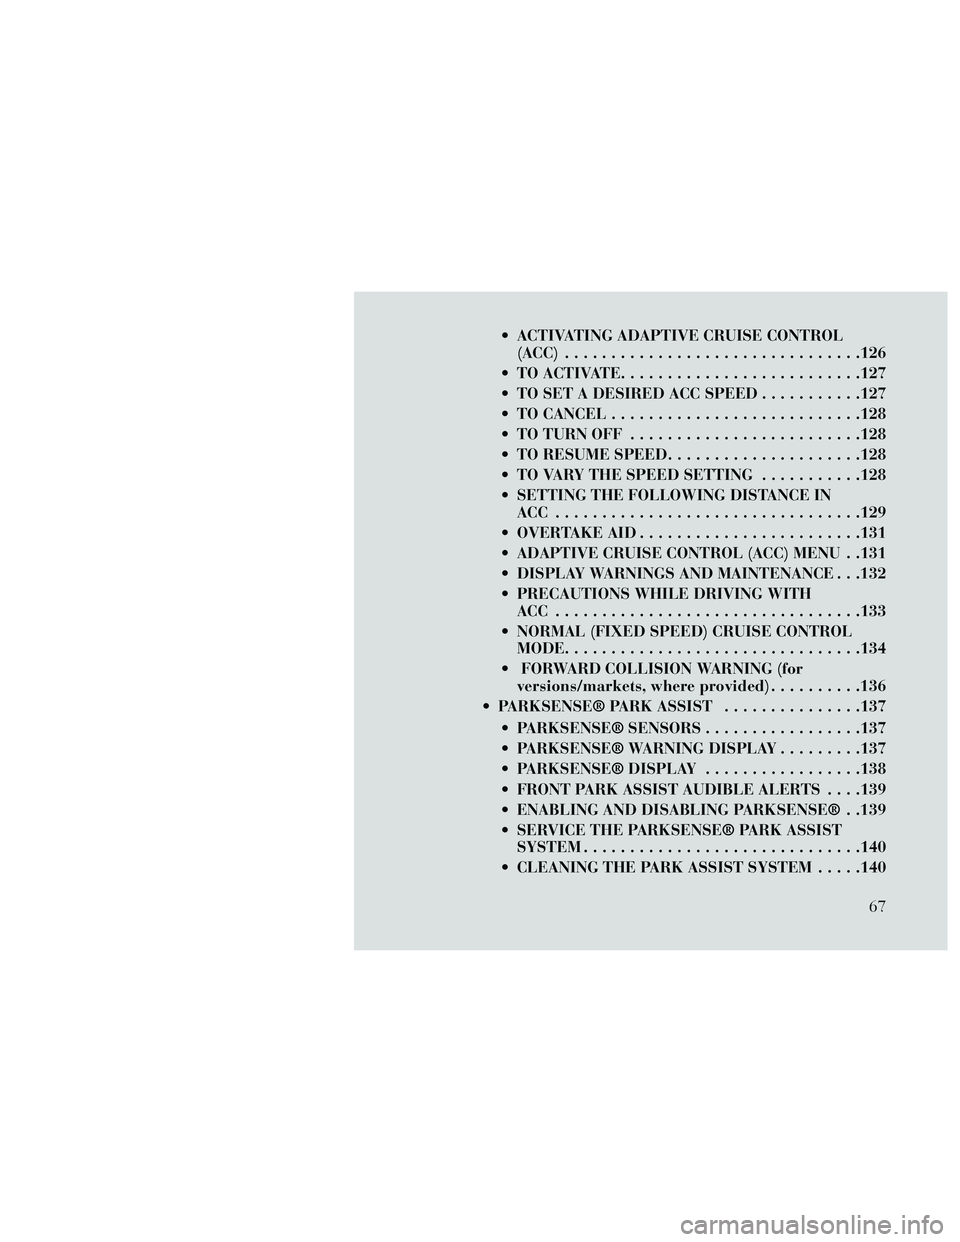
ACTIVATING ADAPTIVE CRUISE CONTROL(ACC) ................................126
TO ACTIVATE ..........................127
TO SET A DESIRED ACC SPEED ...........127
TO CANCEL ...........................128
TO TURN OFF .........................128
TO RESUME SPEED .....................128
TO VARY THE SPEED SETTING ...........128
SETTING THE FOLLOWING DISTANCE IN ACC .................................129
OVERTAKE AID ........................131
ADAPTIVE CRUISE CONTROL (ACC) MENU . .131
DISPLAY WARNINGS AND MAINTENANCE . . .132
PRECAUTIONS WHILE DRIVING WITH ACC .................................133
NORMAL (FIXED SPEED) CRUISE CONTROL MODE................................134
FORWARD COLLISION WARNING (for versions/markets, where provided) ..........136
PARKSENSE® PARK ASSIST ...............137
PARKSENSE® SENSORS .................137
PARKSENSE® WARNING DISPLAY .........137
PARKSENSE® DISPLAY .................138
FRONT PARK ASSIST AUDIBLE ALERTS . . . .139
ENABLING AND DISABLING PARKSENSE® . .139
SERVICE THE PARKSENSE® PARK ASSIST SYSTEM..............................140
CLEANING THE PARK ASSIST SYSTEM .....140
67
Page 86 of 332
Help Command
If you need assistance at any prompt,
or if you want to know your options at
any prompt, say “Help” following the
beep.
To activate the Uconnect® Phone
from idle, simply press the
button
on your steering wheel and say a com-
mand or say “help.” All Uconnect®
Phone sessions begin with a press of
the
button on the radio control
head.
Cancel Command
At any prompt, after the beep, you
can say “Cancel” and you will be re-
turned to the main menu.
You can also press the
orbut-
ton on your steering wheel when the
system is listening for a command and
be returned to the main or previous
menu. Pair (Link) Uconnect® Phone To
A Mobile Phone
To begin using your Uconnect®
Phone, you must pair your compat-
ible Bluetooth® enabled mobile
phone.
To complete the pairing process, you
will need to reference your mobile
phone Owner's Manual. The
Uconnect® website may also provide
detailed instructions for pairing.
NOTE:
You must have Bluetooth® en-
abled on your phone to complete
this procedure.
The vehicle must be in PARK.
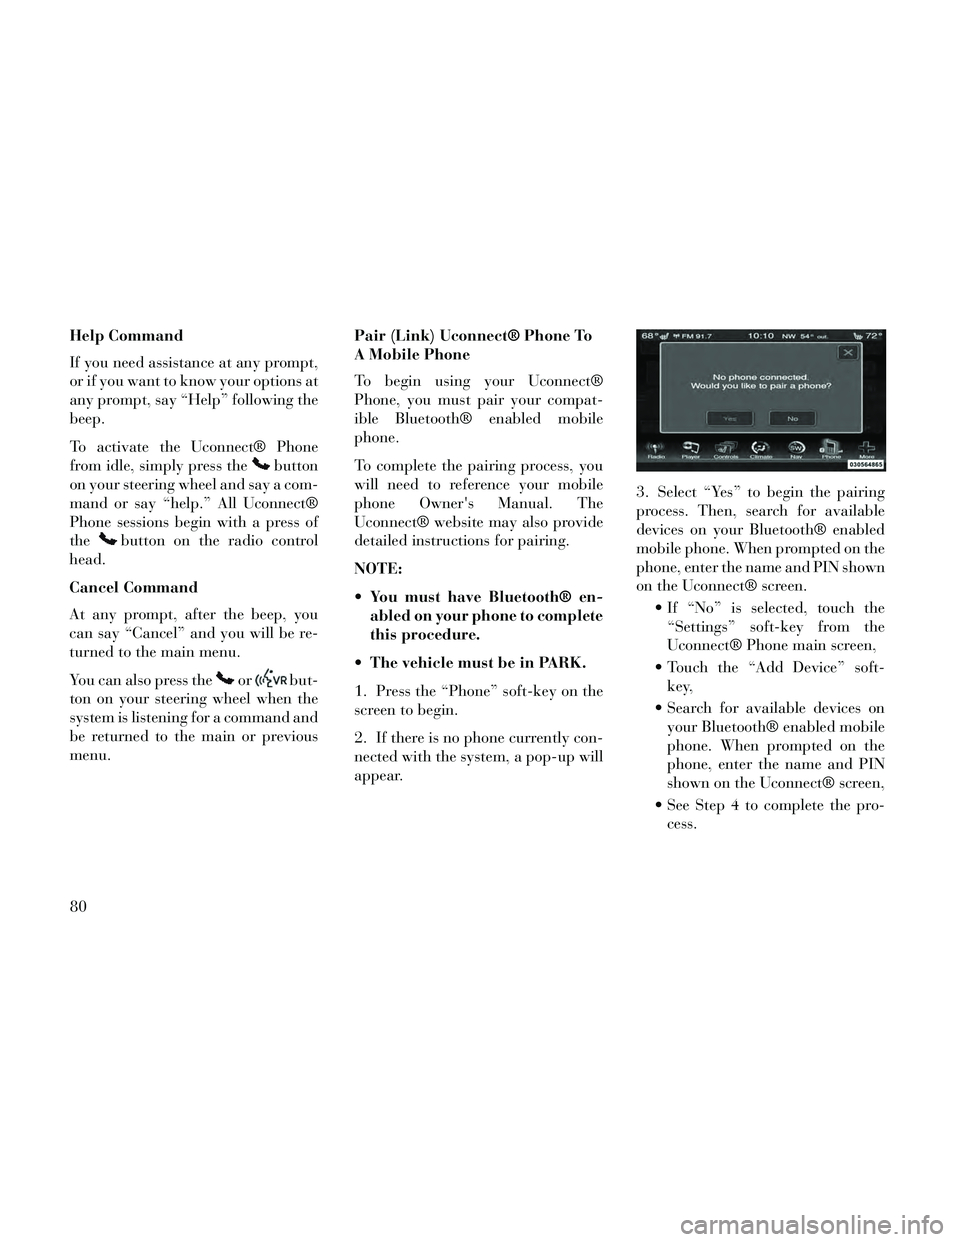
1. Press the “Phone” soft-key on the
screen to begin.
2. If there is no phone currently con-
nected with the system, a pop-up will
appear. 3. Select “Yes” to begin the pairing
process. Then, search for available
devices on your Bluetooth® enabled
mobile phone. When prompted on the
phone, enter the name and PIN shown
on the Uconnect® screen.
If “No” is selected, touch the“Settings” soft-key from the
Uconnect® Phone main screen,
Touch the “Add Device” soft- key,
Search for available devices on your Bluetooth® enabled mobile
phone. When prompted on the
phone, enter the name and PIN
shown on the Uconnect® screen,
See Step 4 to complete the pro- cess.
80
Page 121 of 332
FOG LIGHTS
The fog light switch is built
into the headlight switch.
To activate the fog lights,
turn the headlamp switch to
the park lamp or headlamp position.
Press the headlight switch once for
front fog lights, press the switch a
second time for front and rear fog
lights. Pressing the switch a third time
will deactivate the rear fog lights, and
a fourth time will deactivate the front
fog lights. Turning the headlight
switch off will also deactivate the fog
lights.
An indicator light in the instrument
cluster illuminates when the fog lights
are turned on.
NOTE: The front fog lights will
activate automatically when turn-
ing on the position lights or the low
beam headlights if previously de-
activated by turning the headlight
switch off. The rear fog lights will
only turn on by operating the
switch as previously described.
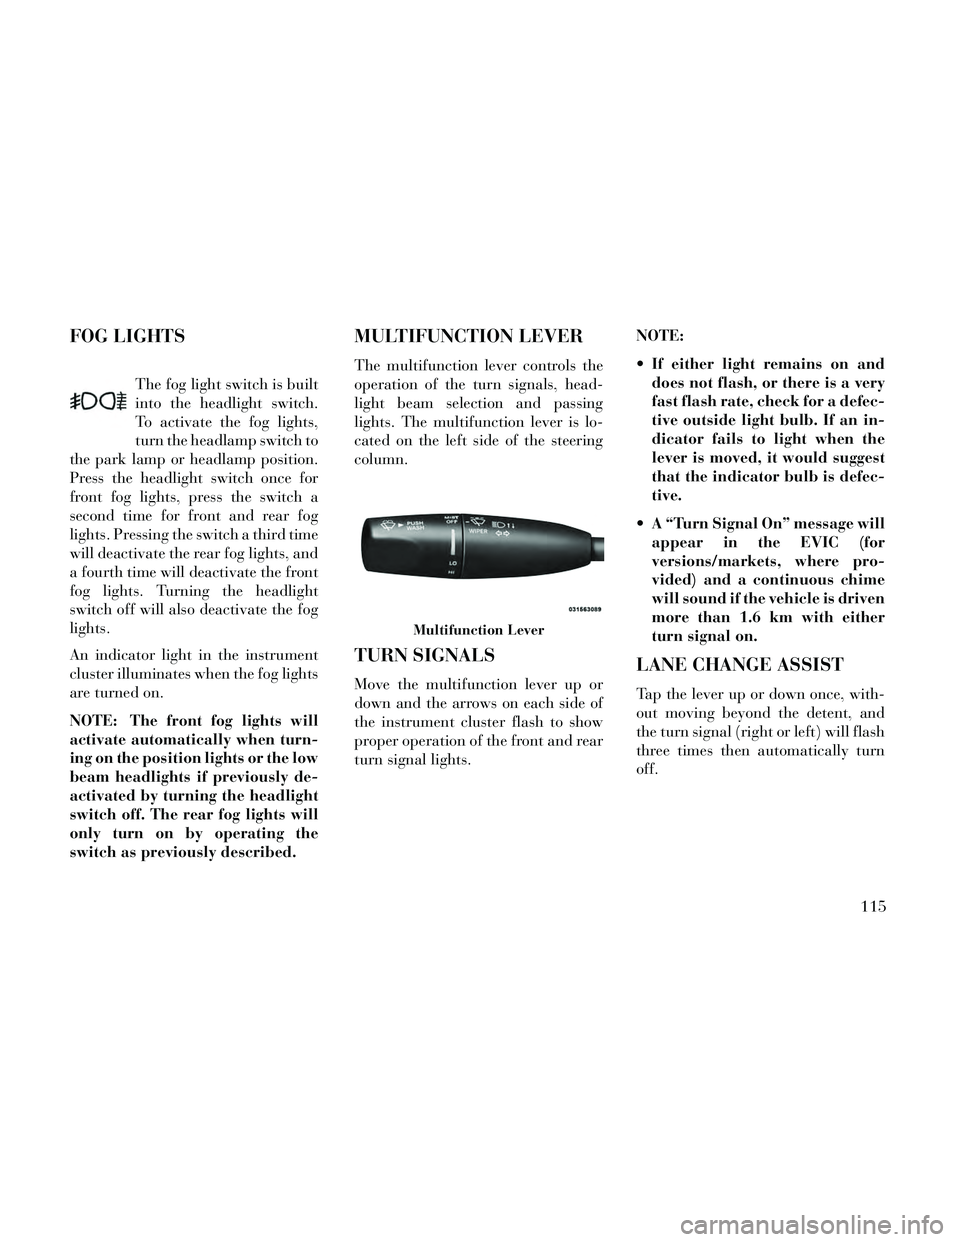
MULTIFUNCTION LEVER
The multifunction lever controls the
operation of the turn signals, head-
light beam selection and passing
lights. The multifunction lever is lo-
cated on the left side of the steering
column.
TURN SIGNALS
Move the multifunction lever up or
down and the arrows on each side of
the instrument cluster flash to show
proper operation of the front and rear
turn signal lights. NOTE:
If either light remains on and
does not flash, or there is a very
fast flash rate, check for a defec-
tive outside light bulb. If an in-
dicator fails to light when the
lever is moved, it would suggest
that the indicator bulb is defec-
tive.
A “Turn Signal On” message will appear in the EVIC (for
versions/markets, where pro-
vided) and a continuous chime
will sound if the vehicle is driven
more than 1.6 km with either
turn signal on.
LANE CHANGE ASSIST
Tap the lever up or down once, with-
out moving beyond the detent, and
the turn signal (right or left) will flash
three times then automatically turn
off.
Multifunction Lever
115
Page 143 of 332

If the FCW becomes disabledthen a warning will display on
the EVIC screen.
FCW Unavailable Warning
If the system turns off, and the EVIC
displays “ACC/FCW Unavailable,
Service Required”, there may be a
temporary malfunction that limits
FCW functionality. Although the ve-
hicle is still drivable under normal
conditions, FCW will be temporarily
unavailable. If this occurs, try activat-
ing FCW again later, following a key
cycle. If the problem persists, see your
authorized dealer.PARKSENSE® PARK
ASSIST
The ParkSense® Park Assist system
provides visual and audible indica-
tions of the distance between the rear
and/or front fascia and a detected ob-
stacle when backing up or moving
forward, e.g. during a parking ma-
neuver. Refer to ParkSense® System
Usage Precautions for limitations of
this system and recommendations.
ParkSense® will retain the last sys-
tem state (enabled or disabled) from
the last ignition cycle when the igni-
tion is changed to the ON/RUN posi-
tion.
ParkSense® can be active only when
the shift lever is in REVERSE or
DRIVE. If ParkSense® is enabled at
one of these shift lever positions, the
system will remain active until the
vehicle speed is increased to approxi-
mately 11 km/h or above. The system
will become active again if the vehicle
speed is decreased to speeds less than
approximately 9 km/h.
PARKSENSE® SENSORS
The four ParkSense® sensors, located
in the rear fascia/bumper, monitor the
area behind the vehicle that is within
the sensors’ field of view. The sensors
can detect obstacles up to approxi-
mately 150 cm from the rear fascia/
bumper in the horizontal direction,
depending on the location, type and
orientation of the obstacle.
The six ParkSense® sensors, located
in the front fascia/bumper, monitor
the area in front of the vehicle that is
within the sensors’ field of view. The
sensors can detect obstacles up to ap-
proximately 120 cm from the front
fascia/bumper in the horizontal direc-
tion, depending on the location, type
and orientation of the obstacle.
PARKSENSE® WARNING
DISPLAY
The ParkSense® Warning screen will
only be displayed if Sound and Dis-
play is selected from the Uconnect®ACC/FCW Unavailable, Service Required Warning
137
Page 144 of 332

System. Refer to “Uconnect® Set-
tings” in “Understanding Your In-
strument Panel” for further informa-
tion.
The ParkSense® Warning screen is
located within the Electronic Vehicle
Information Center (EVIC). It pro-
vides visual warnings to indicate the
distance between the rear fascia/
bumper and/or front fascia/bumper
and the detected obstacle.
PARKSENSE® DISPLAY
The warning display will turn ON in-
dicating the system status when the
vehicle is in REVERSE or when the
vehicle is in DRIVE and an obstacle
has been detected.The system will indicate a detected
obstacle by showing three solid arcs
and will produce a one-half second
tone. As the vehicle moves closer to
the object the EVIC display will show
fewer, flashing arcs and the sound
tone will change from slow, to fast, to
continuous.
Park Assist Display
Park Assist System ON
Park Assist System Off
Slow Tone
Fast Tone
Continuous Tone
138
Page 145 of 332

The vehicle is close to the obstacle
when the EVIC display shows one
flashing arc and sounds a continuous
tone. The following chart shows the
warning alert operation when the sys-
tem is detecting an obstacle:
WARNING ALERTS
Rear Distance (cm) Greater than
150 cm 150-100 cm 100-65 cm 65-30 cm Less than 30 cm
Front Distance (cm) Greater than
120 cm 120-100 cm 100-65 cm 65-30 cm Less than 30 cm
Audible Alert (Chime) NoneSingle 1/2 sec-
ond tone (for rear only) Slow (for rear
only) Fast
Continuous
Arc None3 Solid
(Continuous) 3 Slow Flashing 2 Slow Flashing 1 Slow Flashing
FRONT PARK ASSIST
AUDIBLE ALERTS
ParkSense® will turn off the Front
Park Assist audible alert (chime) after
approximately 3 seconds when an ob-
stacle has been detected, the vehicle is
stationary, and brake pedal is applied.
ENABLING AND
DISABLING PARKSENSE®
ParkSense® can be enabled and dis-
abled using the Uconnect® System.
The available choices are: Off, Sound
Only, or Sound and Display. Refer to
“Uconnect® Settings” in “Under-
standing Your Instrument Panel” for
further information.
When the ParkSense® soft-key is
pressed to disable the system, the EVIC will display the “PARK ASSIST SYS-
TEM OFF” message for approximately
five seconds. Refer to “Electronic Ve-
hicle Information Center (EVIC)” in
“Understanding Your Instrument
Panel” for further information. When
the shift lever is moved to REVERSE
position and ParkSense® is turned off,
the instrument cluster will display
“PARK ASSIST SYSTEM OFF” mes-
sage for as long as the vehicle is in
REVERSE at or below 11 km/h.
139
Page 146 of 332

SERVICE THE
PARKSENSE® PARK
ASSIST SYSTEM
During vehicle start up, when the
ParkSense® Park Assist system has
detected a fault condition, the Elec-
tronic Vehicle Information Center
(EVIC) will actuate a single chime,
once per ignition cycle, and it will
display the “CLEAN PARK ASSIST”,
“SERVICE PARK ASSIST” or the
“SERVICE PARK ASSIST SYSTEM”
message. Refer to “Electronic Vehicle
Information Center (EVIC)” in “Un-
derstanding Your Instrument Panel”
for further information. When the
shift lever is moved to REVERSE and
the system has detected a fault condi-
tion, the EVIC will display the
"CLEAN PARK ASSIST", "SERVICE
PARK ASSIST", or "SERVICE PARK
ASSIST SYSTEM" message for as
long as the vehicle is in REVERSE.
Under this condition, ParkSense®
will not operate.
CLEANING THE PARK
ASSIST SYSTEM
Clean the sensors with water, car
wash soap and a soft cloth. Do not use
rough or hard cloths. Do not scratch
or poke the sensors. Otherwise, you
could damage the sensors.
PARKSENSE® SYSTEM
USAGE PRECAUTIONS
NOTE:
Ensure that the front and rearbumper are free of snow, ice,
mud, dirt and debris to keep the
ParkSense® system operating
properly.
Jackhammers, large trucks, and other vibrations could affect the
performance of ParkSense®.
When you turn ParkSense® off, the EVIC will display “PARK
ASSIST SYSTEM OFF.” Further-
more, once you turn
ParkSense® off, it remains off
until you turn it on again, even if
you cycle the ignition key. When you move the shift lever to
the REVERSE position and
ParkSense® is turned off, the
EVIC will display “PARK AS-
SIST SYSTEM OFF” message for
as long as the vehicle is in RE-
VERSE at or below 11 km/h.
ParkSense®, when on, will MUTE the radio when it is
sounding a tone.
Clean the ParkSense® sensors regularly, taking care not to
scratch or damage them. The
sensors must not be covered
with ice, snow, slush, mud, dirt
or debris. Failure to do so can
result in the system not working
properly. The ParkSense® sys-
tem might not detect an obstacle
behind or in front of the fascia/
bumper, or it could provide a
false indication that an obstacle
is behind or in front of the
fascia/bumper.
Objects such as bicycle carriers, trailer hitches, etc., must not be
placed within 30 cm from the
140
Page 147 of 332

rear fascia/bumper while driv-
ing the vehicle. Failure to do so
can result in the system misin-
terpreting a close object as a
sensor problem, causing the
“SERVICE PARK ASSIST” mes-
sage to be displayed in the EVIC.
CAUTION!
ParkSense® is only a parking aidand it is unable to recognize every
obstacle, including small ob-
stacles. Parking curbs might be
temporarily detected or not de-
tected at all. Obstacles located
above or below the sensors will
not be detected when they are in
close proximity.
The vehicle must be driven slowly when using ParkSense® in order
to be able to stop in time when an
obstacle is detected. When back-
ing up, it is recommended that
the driver looks over his/her
shoulder when using
ParkSense®.
WARNING!
Drivers must be careful whenbacking up even when using the
ParkSense® Park Assist system.
Always check carefully behind
your vehicle, look behind you,
and be sure to check for pedestri-
ans, animals, other vehicles, ob-
structions, and blind spots before
backing up. You are responsible
for safety and must continue to
pay attention to your surround-
ings. Failure to do so can result in
serious injury or death.
(Continued)
WARNING!(Continued)
Before using the ParkSense®Park Assist system, it is strongly
recommended that the ball
mount and hitch ball assembly is
disconnected from the vehicle
when the vehicle is not used for
towing. Failure to do so can result
in injury or damage to vehicles or
obstacles because the hitch ball
will be much closer to the obstacle
than the rear fascia when the
warning display turns on the
single flashing arc and sounds the
continuous tone. Also, the sensors
could detect the ball mount and
hitch ball assembly, depending on
its size and shape, giving a false
indication that an obstacle is be-
hind the vehicle.
141
Page 183 of 332
touch the Sync with GPS Time soft-
key until a check-mark appears next
to the setting, showing that setting has
been selected. Touch the back arrow
soft-key to return to the previous
menu.
Set Time Hours
When in this display, you may adjust
the hours. The Sync with GPS Time
soft-key must be unchecked. To make
your selection touch the + or - soft-
keys to adjust the hours up or down.
Touch the back arrow soft-key to re-
turn to the previous menu or touch the
X soft-key to close out of the settings
screen.
Set Time Minutes
When in this display, you may adjust
the minutes. The Sync with GPS Time
soft-key must be unchecked. To make
your selection touch the + or - soft-
keys to adjust the minutes up or
down. Touch the back arrow soft-key
to return to the previous menu or
touch the X soft-key to close out of the
settings screen. Time Format
When in this display, you may select
the time format display setting. Touch
the Time Format soft-key until a
check-mark appears next to the 12hrs
or 24hrs setting, showing that setting
has been selected. Touch the back ar-
row soft-key to return to the previous
menu.
Show Time In Status Bar
When in this display, you may turn on
or shut off the digital clock in the
status bar. To change the Show Time
Status setting touch the Show Time in
Status Bar soft-key until a check-
mark appears next to setting, showing
that setting has been selected. Touch
the back arrow soft-key to return to
the previous menu.
Safety / Assistance
After pressing the Safety / Assistance
soft-key the following settings will be
available.
Front Collision Sensitivity (for
versions/markets, where provided)
The Front Collision Warning (FCW)
feature can be can be set to Far, set to
Near or turned Off. The default status
of FCW is the Far setting. This means
the system will warn you of a possible
collision with the vehicle in front of
you when you are farther away. This
gives you the most reaction time. To
change the setting for more dynamic
driving, select the Near setting. This
warns you of a possible collision when
you are much closer to the vehicle in
front of you. This allows for a more
dynamic driving experience. To
change the FCW status, touch and
release the OFF, Near or Far button.
Then touch the arrow back soft-key.
For further information, refer to
“Adaptive Cruise Control (ACC)” in
“Understanding The Features Of
Your Vehicle”.
Park Assist
The Rear Park Assist system will scan
for objects behind the vehicle when
the transmission shift lever is in RE-
VERSE and the vehicle speed is less
177
Page 184 of 332
than 18 km/h. The system can be
enabled with Sound Only, Sound and
Display, or turned OFF. To change the
Park Assist status, touch and release
the OFF, Sound Only or Sounds and
Display button. Then touch the arrow
back soft-key. Refer to “ParkSense®
Rear Park Assist” in “Understanding
The Features Of Your Vehicle” for
system function and operating
information.
Tilt Mirrors In Reverse (for
versions/markets, where provided)
When this feature is selected, the out-
side sideview mirrors will tilt down-
ward when the ignition is in the RUN
position and the transmission shift le-
ver is in the REVERSE position. The
mirrors will move back to their previ-
ous position when the transmission is
shifted out of REVERSE. To make
your selection, touch the Tilt Mirrors
In Reverse soft-key, until a check-
mark appears next to setting, showing
that setting has been selected. Touch
the back arrow soft-key to return to
the previous menu. Blind Spot Alert (for versions/
markets, where provided)
When this feature is selected, the
Blind Spot Alert feature can be set to
Off, Lights or Lights and Chime. The
Blind Spot Alert feature can be acti-
vated in “Lights” mode. When this
mode is selected, the Blind Spot Moni-
tor (BSM) system is activated and will
only show a visual alert in the outside
mirrors. When “Lights & Chime”
mode is activated, the Blind Spot
Monitor (BSM) will show a visual
alert in the outside mirrors as well as
an audible alert when the turn signal
is on. When “Off” is selected, the
Blind Spot Monitor (BSM) system is
deactivated. To change the Blind Spot
Alert status, touch the Off, Lights or
Lights & Chime soft-key. Then touch
the arrow back soft-key.
NOTE: If your vehicle has expe-
rienced any damage in the area
where the sensor is located, even if
the fascia is not damaged, the sen-
sor may have become misaligned.
Take your vehicle to an authorized
dealer to verify sensor alignment.Having a sensor that is misaligned
will result in the BSM not operat-
ing to specification.
ParkView® Backup Camera (for
versions/markets, where provided)
Your vehicle may be equipped with
the ParkView® Rear Back Up Cam-
era that allows you to see an on-screen
image of the rear surroundings of
your vehicle whenever the shift lever
is put into REVERSE. The image will
be displayed on the radio touchscreen
display along with a caution note to
“check entire surroundings” across
the top of the screen. After five sec-
onds, this note will disappear. The
ParkView® camera is located on the
rear of the vehicle above the rear Li-
cense plate. To make your selection,
touch the ParkView® Backup Cam-
era soft-key, until a check-mark ap-
pears next to setting, showing that
setting has been selected. Touch the
back arrow soft-key to return to the
previous menu.
178