light Lancia Thesis 2009 Owner handbook (in English)
[x] Cancel search | Manufacturer: LANCIA, Model Year: 2009, Model line: Thesis, Model: Lancia Thesis 2009Pages: 386, PDF Size: 4.96 MB
Page 38 of 386

37
OPENING THE TAILGATE
The tailgate can be opened from
the outside by pressing the remote
control button E(fig. 9), even when
the electronic alarm is on.
One single short pressure of the
button will switch the boot alarm
system off and release the lock: the
tailgate can therefore be opened
from the outside by pressing the
boot button. A prolonged pressure
(more than 1 second) of the button
will switch the boot alarm system off
and open the tailgate, which will
partially lift.
The opening of the tailgate is
accompanied by two direction indi-
cator flashes.When tailgate opening is actuated,
the alarm system disconnects the
boot sensor and the direction indica-
tors flash twice (except for the ver-
sions of certain markets).
When the tailgate is closed again,
press button D(fig. 9) to restore
locking and control functions; the
direction indicators will flash twice
(except for the versions of certain
markets).
If the tailgate is not open within 30
seconds after actuating the boot
unlock control, the tailgate lock will
be re-locked and the alarm system
will be reactivated.AUTOMATICALLY ACTUATED
FUNCTIONS
The system automatically controls
the following functions (settings that
cannot be modified):
– boot locking if, within 30 seconds
after boot unlocking, it will not be
opened;
– possible unlocking of all the door
locks, in case of impact with actua-
tion of the inertia switch;
– lock release and tailgate opening
(actuated by the button inside the
car);
– door opening/closing by the but-
tons inside the car;
– disconnection of all services when
the key is turned to STOP, exclud-
ing sound system, window regula-
tors, sunroof and internal lighting
until doors are opened;
– progressive switching on/off of
internal lights;
– light indication of boot open/
closed.
Page 41 of 386

40
SWITCHING THE ALARM ON
With the doors and boot closed and
the key removed from the ignition
switch, point the key with the
remote control in the direction of the
car, then press and release the but-
tonB(fig. 14).
With the exception of certain mar-
kets, a beep will be heard, the direc-
tion indicators will light up for about
1 second and the doors will be
locked.
The alarm activation is preceded
by a self-test: if a fault is found, the
system sounds another warning beep
and when the key is turned to MAR,
the symbol Ywill appear on the
instrument panel display, together
with the message “ALARM
FAULT”.
IMPORTANTWhen operating the
central door locking with the metal
insert of the key, the alarm is not
activated.Surveillance
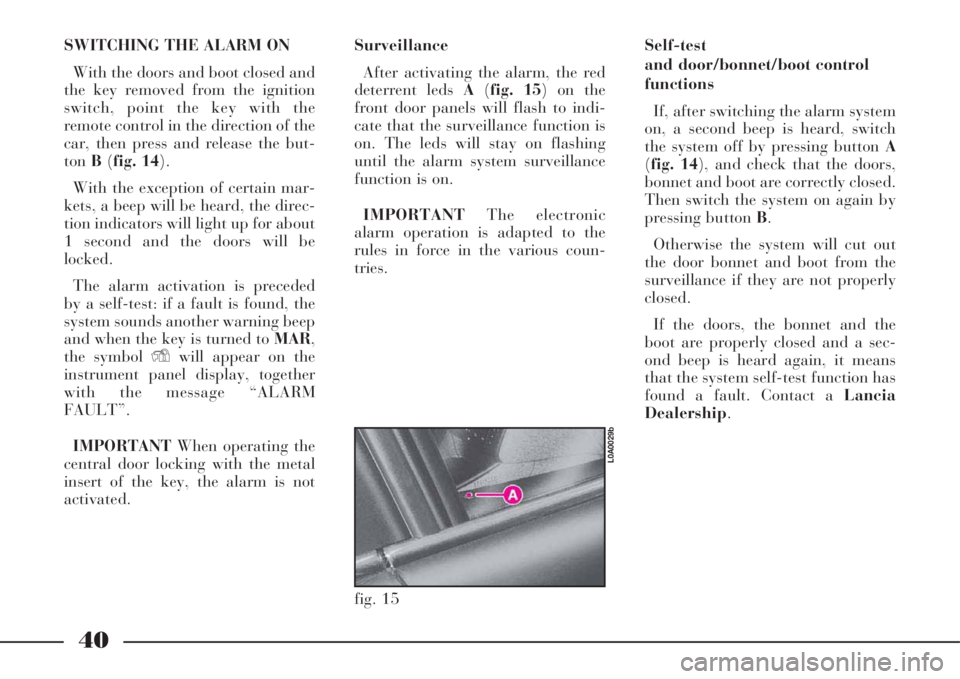
After activating the alarm, the red
deterrent leds A(fig. 15) on the
front door panels will flash to indi-
cate that the surveillance function is
on. The leds will stay on flashing
until the alarm system surveillance
function is on.
IMPORTANTThe electronic
alarm operation is adapted to the
rules in force in the various coun-
tries.Self-test
and door/bonnet/boot control
functions
If, after switching the alarm system
on, a second beep is heard, switch
the system off by pressing button A
(fig. 14), and check that the doors,
bonnet and boot are correctly closed.
Then switch the system on again by
pressing button B.
Otherwise the system will cut out
the door bonnet and boot from the
surveillance if they are not properly
closed.
If the doors, the bonnet and the
boot are properly closed and a sec-
ond beep is heard again, it means
that the system self-test function has
found a fault. Contact a Lancia
Dealership.
fig. 15
L0A0029b
Page 42 of 386

41
SWITCHING THE ALARM OFF
To switch the alarm off, press the
key button A(fig. 14).
The following actions will be car-
ried out by the system (with the
exception of certain markets):
– the direction indicators will flash
twice;
– two beeps will be heard;
– driver’s door or doors unlocking,
depending on the setting selected on
the CONNECT menu.
IMPORTANTWhen operating the
central door unlocking with the
metal insert of the key, the alarm is
not deactivated.VOLUMETRIC PROTECTION
Do not leave passengers or pets in
the parked car and completely close
the windows and the sunroof to
ensure the correct operation of the
volumetric sensors. Furthermore,
make sure that the doors, bonnet
and boot/tailgate are properly
closed.
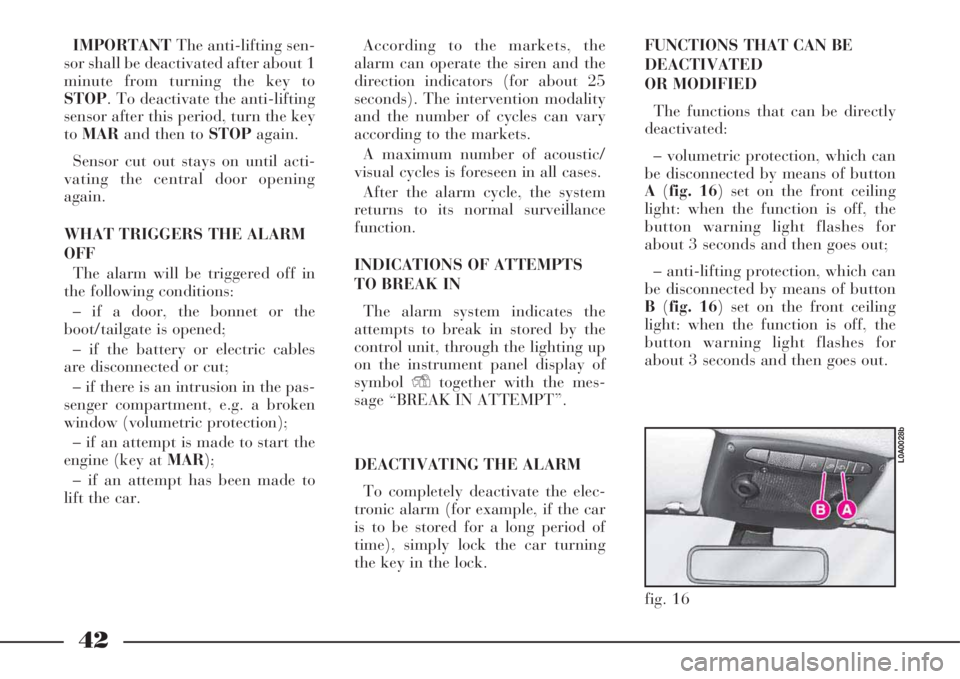
To deactivate the volumetric
protection, press button A(fig. 16)
on the front ceiling light: when the
function is off, the button warning
light will flash for about 3 seconds
and then goes out.
Protection cut out stays on until
activating the central door opening
again.
IMPORTANTVolumetric protec-
tion shall be deactivated after about
1 minute from turning the key to
STOP. To deactivate the volumetric
protection after this period, turn the
key to MARand then to STOP
again.ANTI-LIFTING SENSOR
The anti-lifting sensor detects vari-
ations in slant to signal lifting or
partial lifting (e.g. to remove a
wheel) of the car.
The sensor can detect minimal
variations in cat trim along both the
longitudinal axis and the transversal
axis. Variations in trim lower than
0.5°/min. (such as, for example, a
slow deflating tyre) are not take into
account.
To switch the anti-lifting protec-
tion off, press button B(fig. 16) on
the front ceiling light: when the
function is off, the button warning
light will flash for about 3 seconds
and then goes out.To ensure correct opera-
tion of the volumetric pro-
tection system, before acti-
vating the alarm, check that win-
dows and sunroof (where pro-
vided) are perfectly closed.
Page 43 of 386

42
IMPORTANTThe anti-lifting sen-
sor shall be deactivated after about 1
minute from turning the key to
STOP. To deactivate the anti-lifting
sensor after this period, turn the key
toMARand then to STOPagain.
Sensor cut out stays on until acti-
vating the central door opening
again.
WHAT TRIGGERS THE ALARM
OFF
The alarm will be triggered off in
the following conditions:
– if a door, the bonnet or the
boot/tailgate is opened;
– if the battery or electric cables
are disconnected or cut;
– if there is an intrusion in the pas-
senger compartment, e.g. a broken
window (volumetric protection);
– if an attempt is made to start the
engine (key at MAR);
– if an attempt has been made to
lift the car.According to the markets, the
alarm can operate the siren and the
direction indicators (for about 25
seconds). The intervention modality
and the number of cycles can vary
according to the markets.
A maximum number of acoustic/
visual cycles is foreseen in all cases.
After the alarm cycle, the system
returns to its normal surveillance
function.
INDICATIONS OF ATTEMPTS
TO BREAK IN
The alarm system indicates the
attempts to break in stored by the
control unit, through the lighting up
on the instrument panel display of
symbolYtogether with the mes-
sage “BREAK IN ATTEMPT”.
DEACTIVATING THE ALARM
To completely deactivate the elec-
tronic alarm (for example, if the car
is to be stored for a long period of
time), simply lock the car turning
the key in the lock.FUNCTIONS THAT CAN BE
DEACTIVATED
OR MODIFIED
The functions that can be directly
deactivated:
– volumetric protection, which can
be disconnected by means of button
A(fig. 16) set on the front ceiling
light: when the function is off, the
button warning light flashes for
about 3 seconds and then goes out;
– anti-lifting protection, which can
be disconnected by means of button
B(fig. 16) set on the front ceiling
light: when the function is off, the
button warning light flashes for
about 3 seconds and then goes out.
fig. 16
L0A0028b
Page 47 of 386

46
IMPORTANTDo not remove the
battery from the CID device until
when its replacement is possible.
Where system is unable to identify
the CID device (e.g. the CID battery
is flat) the car can be accessed by
using the emergency key existing
inside the CID itself.
When switched on, the alarm sys-
tem will be actuated when the door
is opened and the siren will start
sounding but will be switched off by
turning the starting knob to MAR.
Car start-up will moreover be possi-
ble by positioning the CID into the
special seat A(fig. 21), located in
front of the gear lever. Under these
conditions, such compartment is the
only position capable of acknowledg-
ing the presence of a CID device
inside the passenger compartment.
fig. 21
L0A0182b
It is advised to always
carry about with you the
CID device, avoiding to
leave it unguarded inside the
passenger compartment, because
in this case any children remain-
ing unguarded inside the car or
unauthorised people could start
the engine.
Do not expose the CID
device to electromagnetic
fields or high-intensity
radio frequency sources, to avoid
operation anomalies. Heavy
shocks or exposure to direct sun-
light could damage the electronic
components of the device.
IMPORTANTDo not lay the CID
device outside the car on the sunroof,
to avoid a fake identification of the
CID itself as if inside the car. It is rec-
ommend to carry about with you the
CID device (e.g. into a pocket). “GARAGE” POSITION
(EMERGENCY ACTUATION)
During emergency or servicing
operations, the CID device shall be
housed in the dashboard central
oddment compartment A(fig. 21) in
front of the gear lever.
The electronic component in the
CID device is of the “passive” type
and does not require dedicated
power supply; it can therefore oper-
ate in “garage” position even if the
CID device battery is run down.
Page 51 of 386

50
AUTOCLOSE FUNCTION
(AUTOMATIC LOCKING
OF DOORS, BOOT,
AND FUEL FILLER FLAP)
The Keyless System automatically
locks the boot and door locks when
the owner goes away with the CID
device at least 4 metres far from the
car. Boot and door locking is con-
firmed by the flashing of direction
indicators.
This function can be switched off
by acting on the CONNECT settings.
The Autoclose function is not actu-
ated in the following cases:
– If, when the driver moves away
from the car, one or several doors are
not closed correctly, automatic lock-
ing will not be actuated and the car
doors and boot will remain open: the
owner is warned of this by the failed
blinking of direction indicators.
– If at the time of moving away,
other CID devices are identified as
existing in the car passenger com-
partment or in the luggage compart-
ment, or if the knob is not set to the
STOPposition (instrument panel
turned on or engine started). LOCKING THE DOOR AND
LEAVING THE CAR (with the
identification system disabled)
To lock doors when system func-
tions are disabled, proceed as fol-
lows:
– Close all the doors and the lug-
gage compartment bonnet
– Push on button C(fig. 18) on
CID device to engage central locking
of doors, of luggage compartment
and of electronic alarm.
Leds on door panels will lit for
approx. 3 seconds in red colour and
then they will start flashing with
deterring function.
If one or more doors are not cor-
rectly closed, leds will start flashing
for 3 seconds instead of being lit
with a fixed light. After flashing for
3 seconds, leds will anyhow be
turned out, except for that on the
driver’s door, which will start flash-
ing with a deterring function. TAILGATE OPENING
If the boot shall be opened from
outside, with the doors locked, it is
enough to get near the boot with the
CID device and press the boot but-
ton: the boot lock will release and
the boot will be opened while the
doors remain locked. If the alarm
system is on, the boot protection,
volumetric protection and anti-lift-
ing protection will be temporarily
excluded.
When the boot is reclosed, it will
have to be locked by pressing the
door locking button on the CID
device, which will resume the alarm
protection, too.
IMPORTANTBefore closing the
luggage compartment bonnet, make
sure you always have with yourself
the CID device.
Page 53 of 386

52
The other recognition system set-
tings that can be enabled/disabled
are:
– automatic locking of doors and
boot.
As regards the setting of the recog-
nition system customizations, refer
to the CONNECT supplement.
FAILURE INDICATION
The presence of anomalies in the
Keyless System is indicated by the
lighting of symbol Yon the instru-
ment display, together with the mes-
sage “VEHICLE PROTECTION
SYSTEM FAULT”.
IMPORTANTIn case of fault, con-
tact your Lancia Dealership.
Before and during auto-
matic actuation of the
window regulators and
sunroof, always make sure that
the passengers and the persons
standing near the car are not
exposed to the risk of injures that
may be caused either by the mov-
ing windows and sunroof or by
objects dragged or hit by the
same.To actuate central opening of the
windows and sunroof, keep the
remote control button B(fig. 25)
depressed for more than 2 seconds
after opening the doors: both the win-
dow regulators and the sunroof will be
actuated until they are fully opened or
until the button is released.
This function can be used to aerate
the passenger’s compartment before
getting into the car parked in the sun.
IMPORTANTDo not lay the CID
device outside the car on the sunroof,
to avoid a fake identification of the
CID itself as if inside the car. It is rec-
ommend to carry about with you the
CID device (e.g. into a pocket). SYSTEM SETTINGS
The CONNECT enables to cus-
tomize certain functions of the
Keyless System recognition system,
through the settings that can be
selected on the CONNECT display.
The “central unlock” and “driver’s
door unlock” functions of the central
locking can be set also for the
Keyless System and operate as fol-
lows:
– central unlock: all the car doors
are unlocked simultaneously and
access is possible through every door
– driver’s door unlock: access is
possible through the driver’s door
whereas the other doors remain
locked, thus preventing un-autho-
rized persons from getting into the
car. In this case, the led on the dri-
ver’s door panel lights up (green
colour) whereas the leds on the other
doors remain off.
When “unlocking driver’s door” is
set, it is anyhow possible to unlock all
the doors, to enable access to passen-
gers, by pushing button B(fig. 18) on
CID device or, after opening the dri-
ver’s door, by pushing the central
unlock button existing on the door
panel.
Page 56 of 386

55
To unlock, turn the key clockwise
1; to lock, turn the key counter-
clockwise2.
When the doors are released by
means of the remote control, the
alarm system and the deadlock
device (described below) are also
switched off.
IMPORTANTThe electronic
alarm will not be switched off if the
door is unlocked by the key in the
lock.
Inside each handle there is a button
A(fig. 31 front doors -fig. 32 rear
doors) which actuates, when the
handle is caught, the servo control
used to open the door.The car is fitted with power locks
that control the mechanical parts at
door opening.
fig. 30
L0A0176b
fig. 32
L0A0173b
fig. 31
L0A0177b
In an emergency (flat battery or
electric system failure), doors can be
opened, with the locks released, by
pressing button B(fig. 31 front
doors -fig. 32 rear doors).
All door panels incorporate a
red/green led A(fig. 33 front doors -
fig. 34 rear doors) , indicating the
locking/unlocking condition. The
leds come on with red light for about
3 seconds after door locking and
with green light after unlocking.
IMPORTANTDoor leds stay on
for about 3 seconds only; therefore,
leds are off under normal conditions.
fig. 33
L0A6013b
Page 57 of 386

56
Deadlock device
The deadlock device enables to dis-
connect mechanically the internal
door handles; in this case, doors can-
not be opened from the inside by
acting on the handles after breaking
the glass (improving protection
against theft).
The device can be switched on by
pressing the remote control button B
(fig. 29) again within 1 second after
closing the doors: active function
will be indicated by a beep and 2
further blinks of the direction indi-
cators.
The device activates only if all the
doors are properly closed.
When the deadlock device is
switched on, the door panel leds will
flash twice with red light.
After activating the dead
lock device it will be
impossible to get out of
the passenger compartment: for
this reason this device must be
activated only after making sure
that the passenger compartment
is empty.The front door leds are also used as
deterrent leds for the alarm system;
as a consequence, they will flash
when the alarm system is on or the
doors are locked.
The CONNECT enables to set the
central locking of all the doors or
only the driver’s door.
In the former case, all the car doors
are unlocked simultaneously and
access is possible through any door.
In the second case, access is possible
only through the driver’s door,
whereas the other doors are locked,
thus preventing un-authorized per-
sons from getting into the car.In this case, the driver’s door led
comes on with green light, whereas
the leds on the other doors will
remain off.
When only the driver’s door is
unlocked, after opening the driver’s
door, also the other doors can be
unlocked by pressing the central
unlocking button B(fig. 35) so as to
enable passengers getting into the
car.
IMPORTANTButtonsBandC
(fig. 35) are disabled when the doors
are locked from the outside.
If, when the doors are closed from
the outside, one or more doors
and/or the boot are not closed cor-
rectly, the direction indicators will
flash rapidly for a few seconds.
fig. 34
L0A6014b
fig. 35
L0A0051b
Page 58 of 386

57
OPENING/CLOSING FROM
THE INSIDE
To open the door even when the
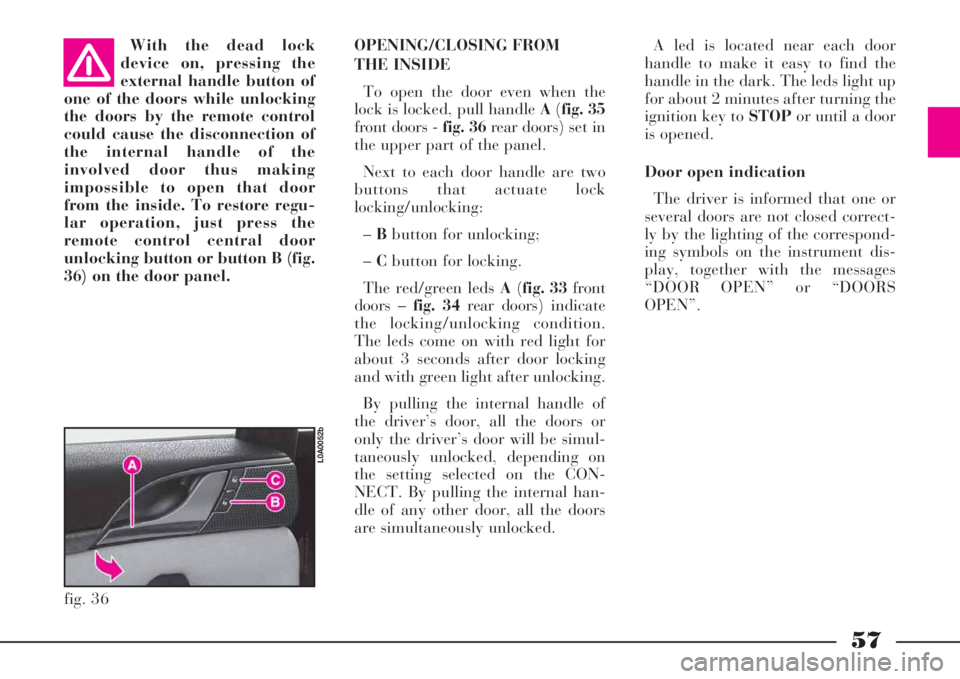
lock is locked, pull handle A(fig. 35
front doors -fig. 36 rear doors) set in
the upper part of the panel.
Next to each door handle are two
buttons that actuate lock
locking/unlocking:
–Bbutton for unlocking;
–Cbutton for locking.
The red/green leds A(fig. 33 front
doors –fig. 34 rear doors) indicate
the locking/unlocking condition.
The leds come on with red light for
about 3 seconds after door locking
and with green light after unlocking.
By pulling the internal handle of
the driver’s door, all the doors or
only the driver’s door will be simul-
taneously unlocked, depending on
the setting selected on the CON-
NECT. By pulling the internal han-
dle of any other door, all the doors
are simultaneously unlocked.
fig. 36
L0A0052b
With the dead lock
device on, pressing the
external handle button of
one of the doors while unlocking
the doors by the remote control
could cause the disconnection of
the internal handle of the
involved door thus making
impossible to open that door
from the inside. To restore regu-
lar operation, just press the
remote control central door
unlocking button or button B (fig.
36) on the door panel.A led is located near each door
handle to make it easy to find the
handle in the dark. The leds light up
for about 2 minutes after turning the
ignition key to STOPor until a door
is opened.
Door open indication
The driver is informed that one or
several doors are not closed correct-
ly by the lighting of the correspond-
ing symbols on the instrument dis-
play, together with the messages
“DOOR OPEN” or “DOORS
OPEN”.