door lock Lancia Thesis 2009 Owner handbook (in English)
[x] Cancel search | Manufacturer: LANCIA, Model Year: 2009, Model line: Thesis, Model: Lancia Thesis 2009Pages: 386, PDF Size: 4.96 MB
Page 79 of 386
78
The pretensioner does not require
any maintenance or greasing.
Anything that modifies its original
conditions invalidates its efficiency.
If due to unusual natural events
(floods, sea storm, etc.) the device
has been affected by water and mud,
it must necessarily be replaced.
The pretensioner can
only be used once. After a
collision that has trig-
gered it, have it replaced at a
Lancia Dealership Pretensioner
validity is written on the plate
located on the front left door post
near door hinges. The preten-
sioners should be replaced at a
Lancia Dealership as this date
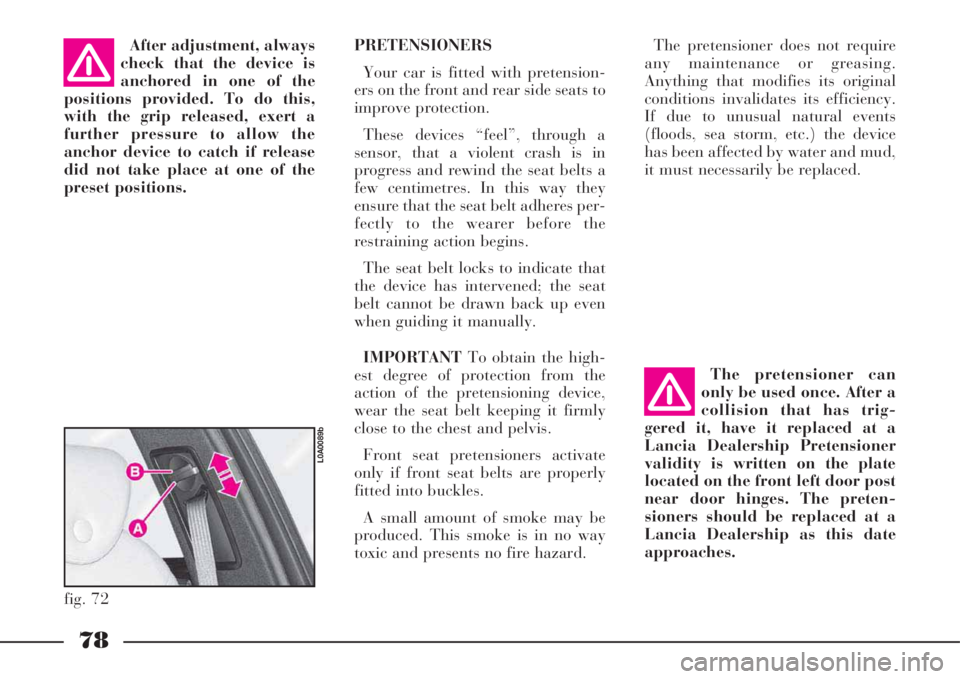
approaches.After adjustment, always
check that the device is
anchored in one of the
positions provided. To do this,
with the grip released, exert a
further pressure to allow the
anchor device to catch if release
did not take place at one of the
preset positions. PRETENSIONERS
Your car is fitted with pretension-
ers on the front and rear side seats to
improve protection.
These devices “feel”, through a
sensor, that a violent crash is in
progress and rewind the seat belts a
few centimetres. In this way they
ensure that the seat belt adheres per-
fectly to the wearer before the
restraining action begins.
The seat belt locks to indicate that
the device has intervened; the seat
belt cannot be drawn back up even
when guiding it manually.
IMPORTANTTo obtain the high-
est degree of protection from the
action of the pretensioning device,
wear the seat belt keeping it firmly
close to the chest and pelvis.
Front seat pretensioners activate
only if front seat belts are properly
fitted into buckles.
A small amount of smoke may be
produced. This smoke is in no way
toxic and presents no fire hazard.
fig. 72
L0A0089b
Page 111 of 386

110
KILOMETRE COUNTER (AND
TRIP METER) AND AUTOMATIC
GEARBOX
The following information is shown
on the display (fig. 108):
– the total number of kilometres
driven (six digits on the first line A;
– the trip meter reading (four dig-
its) on the second line B;
– engaged or demanded gear (ver-
sions with electronic automatic gear-
box) on the top of the display C.Press button A(fig. 109) for at
least two seconds to reset the trip
meter.
When pressing the button for less
than two seconds, failure message
deleting function is activated.
With ignition key at STOPor
removed, the display is off. When
opening or closing a front door, the
display comes on displaying trip
meter info for about 20 seconds.
IMPORTANTThe trip meter read-
ing will be deleted if the battery is
disconnected.
fig. 108
L0A0237b
fig. 109
L0A0092b
MULTIFUNCTION DISPLAY
(fig. 110)
The multifunction display shows
all the useful information necessary
when driving, more particularly:
Information on standard screen
– Clock A
– External temperature B.
fig. 110
L0A0258b
Page 123 of 386

122
Follow me home device
Warning light/symbol
-
Instrument dimmer
Warning light/symbol
x
Meaning of the message
Indicates the set lighting
level (for instrument panel,
display and buttons)
Meaning of the message
Indicates that the “Follow me
home” device is on, external
lights will therefore stay on
for the set time Remarks
–
Remarks
Minimum: 30 seconds,
maximum: 210 seconds, 30
seconds intervals
Steering wheel lock
Warning light/symbol
-
Message
FOLLOW ME
XXs Message
STEERING LOCKED WHEN
DOORS CLOSEDMeaning of the message
Steering will be locked when
locking the doors
with the remote controlRemarks
– Message
DIMMER
INSTRUMENT
Page 149 of 386

148
FRONT CONTROL PANEL (fig. 121)
fig. 121L0A0054b
INITIALISING THE AIR
CONDITIONING CONTROL UNIT
Whenever the battery is electrically
connected again or it is reloaded
after being completely flat or after
replacing one of the protection fuses,
to restore the correct operation of
the air conditioning, of the door
locking and of the ESP system. It is
necessary to perform the initialisa-
tion operations contained in the
paragraph “If battery is to be dis-
connected” in the chapter “In an
emergency”.
Page 174 of 386

173
If, after an accident, you
can smell petrol or see
that the fuel feed system is
leaking, do not reset the switches
to avoid the risk of fire.Mechanical connections
of outside handles are
active only if the doors
are locked. In case the driver has
activated the central door locking
from the inside and, after an
accident, the inertial switch was
not able to activate the automatic
door unlocking as a result of bat-
tery loss or damage, it will not be
possible to reach the passenger
compartment from the outside.Anyway, door opening
from the outside depends
on their conditions after
the accident: if a door is distorted
it might be impossible to open it
even if it is unlocked. In this case
try to open the other car doors.
Before resetting the fuel
cut-off switch, carefully
check for any fuel leaks or
damages to the car electric devices
(e.g.: headlights).
fig. 129
L0A0273b
If, after an accident, you cannot see
any fuel leaks or damages to the car
electric devices (e.g.: headlights) and
the car is in a fit state to continue its
journey, reset the fuel cut-off switch
and the circuit breaker according to
the following instructions.
Door unlocking in case of
accident
In case of accident with activation of
the inertial switch as a consequence,
door locks are automatically unlocked
to let rescuers reach the passenger
compartment from the outside.Resetting the fuel cut-off switch
(fig. 129)
fig. 130
L0A0030b
Page 175 of 386

174
Lift cover Aset at the driver's left
and press button Bto reset the fuel
cut-off switch.
Resetting the circuit breaker
Before resetting the cir-
cuit breaker, carefully
check for any fuel leaks or
damages to the car electric devices
(e.g.: headlights).Circuit breaker is located on the left
side of the boot, inside a box directly
set and connected to the battery pos-
itive terminal.
To reach the circuit breaker:
1) Open the tailgate.
2) Loosen knob A(fig. 130) and re-
move the battery cover B.
3) Press tabs A(fig. 131) and re-
move cover B.
4) Press button A(fig. 132) to reset
the circuit breaker.Initialising the control units of
the door locks, air conditioner
and ESP system
After resetting the circuit breaker, to
restore correct door locking, air con-
ditioning and ESP system, perform
the following operations:
1) Close the doors and the tailgate,
fit the key into the lock of one of the
front doors and perform a door cen-
tralised opening/closing cycle.
2) Start the engine and turn on the
compressor of the conditioner, setting
a lower temperature value than that
of the environment and check
whether the led on the disconnection
push button of the conditioner com-
pressoròis lit.
3) Turn the steering wheel one
fourth turn at least (the car can be at
standstill but the engine shall be run-
ning) and start running the car for a
few metres in a straight line until the
ESP warning light
áis off.
fig. 131
L0A0031b
fig. 132
L0A0347b
Page 176 of 386

ELECTRIC PARKING BRAKE
(EPB) (fig. 133)
The car is fitted with the EPB
(Electric Parking Brake) that cuts in
when switching the engine off and
will cut out when starting the engine
and pressing the accelerator pedal
(for manual gearbox versions when
releasing the clutch pedal at the
same time). The EPB can also be
disengaged manually by pressing
buttonAset on the central console
with engine running or ignition key
toMAR.
After disengaging the EPB manual-
ly, when opening the driver’s door
the EPB will re-engage automatical-
ly, press button Aagain to disengage
it.The button shape is rather large so
the brake can be engaged rapidly,
even by the passenger, in case of
emergency.
The advantages of this system, com-
pared to the usual lever, are several:
– no effort should be made to
engage and disengage the parking
brake
– the parking brake efficiency is
always at top level in any using con-
dition, contrary to the lever which
guarantees the car complete stop only
when fully lifted
– the EPB is controlled by electric
wires, therefore all problems regard-
ing transmission cables, such as
adjustments, freezing or tears, no
longer exist
– improved safety as a result of the
sophisticated electronic control sys-
tem, similar to the ABS one, prevent-
ing wheels from blocking if the park-
ing brake is engaged during driving
– improved safety when the car is
stationary and children are left
inside the car; in this case the brake
cannot be disengaged if the ignition
key is at STOPor removed– it has automatic functions that
other systems lack.
When the parking brake is engaged
and the ignition key is at MAR, the
instrument panel warning light x
turns on.
This warning light turns on when
the parking brake reaches its highest
working level, and it turns off when
the brake is disengaged and com-
pletely released. Unlike usual park-
ing brakes, whose warning light
turns on even when the lever is lift-
ed a little bit, the EPB system warn-
ing light turns on only when the car
has come to a complete stop.
When the brake is engaged, a typi-
cal noise can be heard by the driver;
the parking brake is completely
engaged or disengaged when the
operating noise stops.
fig. 133
L0A0197b
When engaging the park-
ing brake keep the brake
pedal always depressed.
175
Page 189 of 386

188
If the failure is signalled when the
engine is started, it means that the
electronic control unit had stored it
previously, before stopping the
engine. Even in this case, go to a
Lancia Dealershipto have the
automatic gearbox checked.
When driving with auto-
matic gearbox faulty,
drive carefully consider-
ing the limited car efficiency in
terms of acceleration and speed.
In addition, when driving with
automatic gearbox faulty, the
reverse block might not be oper-
ating: for this reason it is
absolutely necessary to move the
lever to position R while the car
is moving.SOUND SIGNAL
A buzzer will sound in the follow-
ing conditions:
– for about 15 seconds when the
driver’s door is opened while the
engine is running or not and the gear
lever has a position different from P
– for about 15 seconds when the
engine is turned off and the gear
lever has a position different from P
– for about 4 seconds when the
gear lever is shifted to R(reverse)
– with the manual sequential oper-
ation on, when the selected gear is
not accepted by the electronic con-
trol unit (e.g. since it might generate
a runaway speed rate). BUMP STARTING
Never bump starting the engine (by
pushing, towing, etc.). In an emer-
gency, when the battery is flat, start
the engine with the appropriate
emergency battery according to the
instructions contained in chapter “In
an emergency”.
Page 194 of 386

193
The following table summarizes warning light indications according to the different operating conditions.
Operating or failure conditions
Engine start up (key turned to MAR)
Driving in
normal
conditions
Driving inconditions which
might lead to
slipping
ASR fault
ESP fault
System condition
Warning light check
ASR on
ESP on
ASR off
ESP on
ASR active
ESP active
ASR off
ESP active
ASR and ESP off
ASR on
ESP off ASR on
ASR off
manually
ASR on
ASR off
manuallyASR button warning light
On for about 3 seconds
Off
On
Off
On
On
OffESP warning light on
instrument panel
On for about 4 seconds
Off
Off
Flashing
Flashing
On
On
INITIALISING THE ESP SYSTEM CONTROL UNIT
Whenever the battery is electrically connected again or it is reloaded after being completely flat or after replacing one of
the protection fuses, to restore the correct operation of the ESP system, of the door locking, and of the air conditioning, it
is necessary to perform the initialisation operations contained in the paragraph “If battery is to be disconnected” in the chap-
ter “In an emergency”.
Page 214 of 386

213
To switch the courtesy lights on
and off, press the respective buttons
B. The courtesy lights will automat-
ically go out after about 15 minutes
after shutting the engine off (by
turning the key to STOP).
The central ceiling light will switch
on automatically, together with the
rear ceiling light, when a door is
opened. The ceiling lights will go out
after about 3 minutes if one or sever-
al doors remain open or if the doors
are closed beforehand, after about 10
seconds after the last door has been
closed or at doors locking.
If a door is left open, the ceiling
lights will automatically go out
after about 3 minutes. To switch
them on again, it is enough to open
and close a door.
Ceiling lights come on (for about 10
seconds) when removing the ignition
key (knob to STOPon cars fitted
with Keyless System) and operating
the central door opening with the
remote control.
In case of collision with actuation
of the inertial switch, the ceiling
lights will automatically light up for
about 15 minutes.REAR CEILING LIGHT
(fig. 160)
This ceiling light includes a central
light and two courtesy lights.
The central light will switch on and
off gradually, together with the front
ceiling light.
To switch the central light on man-
ually, press button A; to switch it
off, press the same button again.
To switch the courtesy lights on
and off, press the respective buttons
B. The courtesy lights will automat-
ically go out after about 15 minutes
after the engine has been shut off
(by turning the key to STOP).DOOR PUDDLE LIGHTS
(fig. 161)
A light is provided in the lower part
of the door panel, to illuminate the
area through which passengers get
into and out of the car.
This light will automatically light
up when the door is opened, regard-
less of the ignition key position.
With the door open, the light stays
on for about 3 minutes, then it goes
off automatically.
fig. 160
L0A0279b
fig. 161
L0A0214b