key Lancia Ypsilon 2001 Owner handbook (in English)
[x] Cancel search | Manufacturer: LANCIA, Model Year: 2001, Model line: Ypsilon, Model: Lancia Ypsilon 2001Pages: 191, PDF Size: 2.45 MB
Page 44 of 191

41
G
IMPORTANTThe climate control
is very useful for speeding up demist-
ing because it dries the air. Simply
adjust the controls for the demisting
function and turn on the climate con-
trol by pressing button
√.
IMPORTANTThe versions with cli-
mate control have a factory-fitted
pollen filter.
IMPORTANTThe climate control
compressor will be temporarily ex-
cluded when accelerating sharply, and
reengaged after an established period
of time.STEERING
COLUMN STALKS
LEFT-HAND STALK
This stalk controls the following out-
side lights:
– side/taillights;
– dipped beam headlights;
– main beam headlights;
– direction indicators.
The outside lights can only be lit up
with the control stalk when the igni-
tion key is at MAR.
When the outside lights are turned
on, the instrument panel and the var-
ious controls located in the dashboard
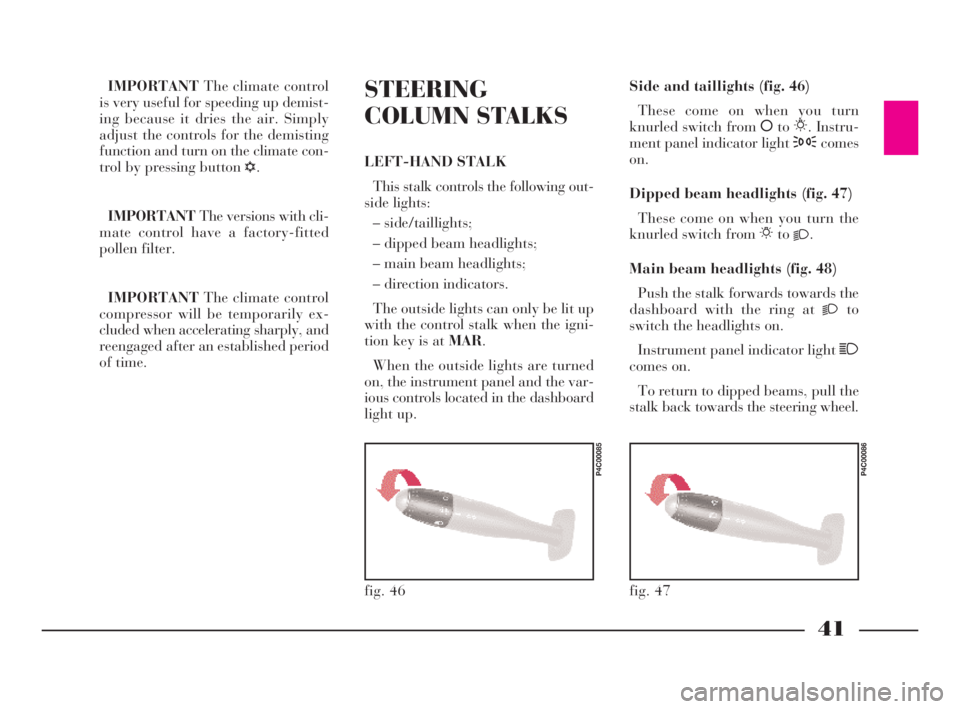
light up.Side and taillights (fig. 46)
These come on when you turn
knurled switch from åto6. Instru-
ment panel indicator light 3comes
on.
Dipped beam headlights (fig. 47)
These come on when you turn the
knurled switch from 6to
2.
Main beam headlights (fig. 48)
Push the stalk forwards towards the
dashboard with the ring at
2to
switch the headlights on.
Instrument panel indicator light 1
comes on.
To return to dipped beams, pull the
stalk back towards the steering wheel.
fig. 46
P4C00085
fig. 47
P4C00086
4C001-067 ING 11-03-2008 11:57 Pagina 41
Page 45 of 191

42
G
RIGHT-HAND STALK
Windscreen wash/wipe (fig. 51)
This feature can only work when the
ignition key is at MAR.
Controls:
0- windscreen wiper off;
1- flick wipe;
2- slow continuous wipe;
3- fast continuous wipe;
4- temporary function: when you
release the stalk it returns to position
0and automatically turns off the
windscreen wiper.
fig. 51
P4C00090
To flash the lights (fig. 49)
Pull the stalk towards the steering
wheel (temporary position).Direction indicators (fig. 50)
Move the stalk as follows to turn on
the direction indicators:
up - for the right indicator;
down - for the left indicator.
Instrument panel indicator light y
flashes.
The direction indicators automati-
cally return to the neutral position
when the car straightens up.
If you want the indicator to flash
briefly, move the stalk up or down
without it clicking into position. When
you let it go it will return to its origi-
nal position.
fig. 48
P4C00087
fig. 49
P4C00088
fig. 50
P4C00089
4C001-067 ING 11-03-2008 11:57 Pagina 42
Page 46 of 191

43
G
When you pull the lever towards the
steering wheel (fig. 52), a jet of liquid
shoots out from the windscreen
washer.Rear window wash/wipe (fig. 53)
This function is only possible when
the ignition key is at MAR.
Controls:
1)turn the control from åto'for
continous wiper operation;
2)when you push the control stalk
forward (temporary position), a jet of
liquid shoots out from the rear win-
dow washer and the rear window
wiper comes into operation. When you
let the lever go again the rear window
washer/ wiper ceases to function.
fig. 52
P4C00091
fig. 53
P4C00092
CONTROLS
HAZARD LIGHTS
These come on when switch A
(fig. 54)is pressed, regardless of the
position of the ignition key.
When these lights are on, the panel
warning light
rflashes.
Press the switch again to turn the
lights off.
fig. 54
P4C00343
4C001-067 ING 11-03-2008 11:57 Pagina 43
Page 47 of 191

44
G
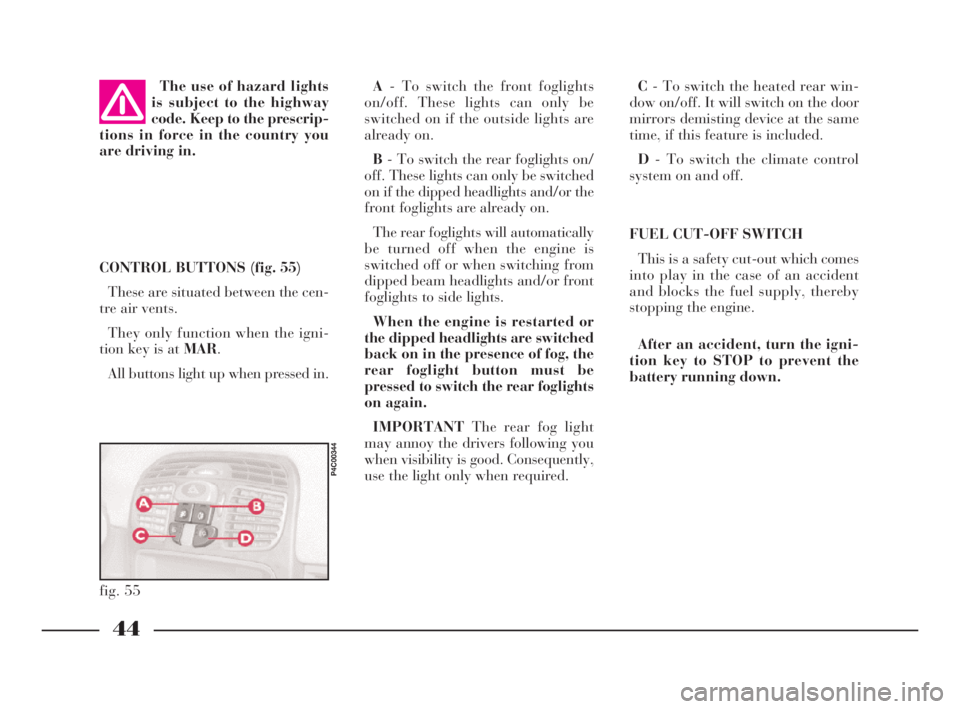
C- To switch the heated rear win-
dow on/off. It will switch on the door
mirrors demisting device at the same
time, if this feature is included.
D- To switch the climate control
system on and off.
FUEL CUT-OFF SWITCH
This is a safety cut-out which comes
into play in the case of an accident
and blocks the fuel supply, thereby
stopping the engine.
After an accident, turn the igni-
tion key to STOP to prevent the
battery running down. CONTROL BUTTONS (fig. 55)
These are situated between the cen-
tre air vents.
They only function when the igni-
tion key is at MAR.
All buttons light up when pressed in. The use of hazard lights
is subject to the highway
code. Keep to the prescrip-
tions in force in the country you
are driving in.
fig. 55
P4C00344
A- To switch the front foglights
on/off. These lights can only be
switched on if the outside lights are
already on.
B- To switch the rear foglights on/
off. These lights can only be switched
on if the dipped headlights and/or the
front foglights are already on.
The rear foglights will automatically
be turned off when the engine is
switched off or when switching from
dipped beam headlights and/or front
foglights to side lights.
When the engine is restarted or
the dipped headlights are switched
back on in the presence of fog, the
rear foglight button must be
pressed to switch the rear foglights
on again.
IMPORTANTThe rear fog light
may annoy the drivers following you
when visibility is good. Consequently,
use the light only when required.
4C001-067 ING 11-03-2008 11:57 Pagina 44
Page 51 of 191

48
G
A key C (fig. 67)is attached to the
back of the cover B (fig. 67); insert
this key into D (fig. 68) and turn it to
manually perform the operations de-
scribed previously (opening/closing).
To reach D, remove the press-fitted
cover.
fig. 68
P4C00187
Do not open the roof if
there is snow or ice on it as
you risk damaging it.
SUNROOF
The sunroof is electrically operated.
It will only work if the ignition key
is at MAR.
ButtonA (fig. 65)on the ceiling light
unit controls the opening, closing,
raising and lowering of the roof.
When you release the button, the
roof locks in the position it is in at
that moment.
£Press once to open in the spoiler
position.
Press again to open completely.
¢Press to close.
fig. 65
P4C00101
A sliding sunshade, fitted under the
sunroof, will lessen the effect of the
sun’s rays or the amount of air enter-
ing the car (fig. 66).
If there is an electrical fault in the
sunroof, open the glove compartment.
fig. 66
P4C00102
fig. 67
P4C00103
4C001-067 ING 11-03-2008 11:57 Pagina 48
Page 52 of 191

49
G
DOORS
SIDE DOORS CENTRAL
LOCKING/UNLOCKING
Unlocking from the outside
Insert the key into one of the two
doors and turn it to position 2
(fig. 69), then lift the door handle. Only open or close the
sunroof when the car is
stationary.
Incorrect use of the sun-
roof could be dangerous.
Before and when pressing
the switch, always make sure that
passengers are not liable to injury
either directly by the movement of
the sunroof or by personal effects
being dragged along or knocked
by the roof.
Always remove the igni-
tion key when getting out
of the car to make sure
that the sunroof cannot be acci-
dentally operated and constitute a
hazard for passengers remaining
in the car.
fig. 69
P4C00020
Before opening a door,
make sure that the condi-
tions are safe to carry out
the manoeuvre.
Locking from the outside
Turn the key to position 1 (fig. 69).
Opening/locking the doors
from the inside
With the doors closed, press (to
lock) or lift (to unlock) the door open-
ing lever A (fig. 70)on either the dri-
ver’s or the passenger’s side.
A green sector B(covered when the
lock is off) will appear when the door
is locked (lever Adown). The instru-
ment panel warning light
´may light
up if the doors are not closed perfectly
in some versions.
fig. 70
P4C00019
4C001-067 ING 11-03-2008 11:57 Pagina 49
Page 53 of 191

50
G
Incorrect use of the elec-
tric windows could be
dangerous. Before and
when pressing the switches, always
make sure that passengers are not
liable to injury either directly by
the movement of the windows or
by personal effects being dragged
along or knocked by the windows.
Always remove the ignition key
when getting out of the car to make
sure that the electric windows can-
not be accidentally operated and
constitute a hazard for passengers
remaining in the car.
The door handle on the passenger
side has a button to control that par-
ticular window. IMPORTANTFor versions with
door locking/unlocking remote con-
trol, see the “Lancia CODE system -
Door lock/unlock remote control”
paragraph at the beginning of this
chapter.
IMPORTANTIf one of the doors is
not shut properly or there is a failure
in the system, the central locking fea-
ture will not work and, after some at-
tempts, the device stops working for
around two minutes. In these two min-
utes the doors can be locked or un-
locked manually without the electrical
system coming into play. After the two
minutes, the control unit is ready to
receive commands once more.
If the reason for the malfunction has
been removed, the device will start to
work properly again. If not, it will cut
out once more.ELECTRIC WINDOWS
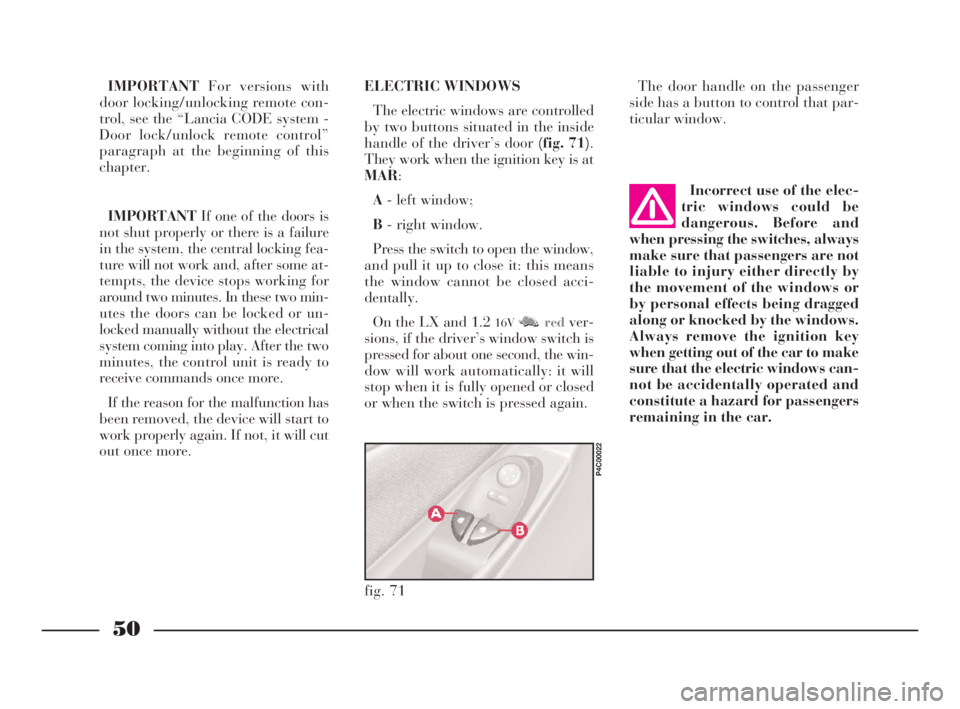
The electric windows are controlled
by two buttons situated in the inside
handle of the driver’s door (fig. 71).
They work when the ignition key is at
MAR:
A- left window;
B- right window.
Press the switch to open the window,
and pull it up to close it: this means
the window cannot be closed acci-
dentally.
On the LX and 1.2
16VM M Nredver-
sions, if the driver’s window switch is
pressed for about one second, the win-
dow will work automatically: it will
stop when it is fully opened or closed
or when the switch is pressed again.
fig. 71
P4C00022
4C001-067 ING 11-03-2008 11:57 Pagina 50
Page 54 of 191

51
G
BOOT
OPENING/CLOSING
THE TAILGATE
To open the boot from the outside,
unlock it with the ignition key A
(fig. 72).
To open it from inside the car, pull
leverA (fig. 73)at the side of the dri-
ver’s seat.
To lift the tailgate, use the grip lo-
cated between the two number plate
lights.When the tailgate is closed, it will
lock automatically, and can only be
reopened by using the key or pulling
leverA (fig. 73)inside the car.
IMPORTANTNever leave the keys
in the boot.
Use the handle situated in the inte-
rior trim of the tailgate A (fig. 74)to
lower it without getting your hands
dirty.
To close the tailgate, lower it and
press in the centre until you hear it
lock.
fig. 72
P4C00021
fig. 73
P4C00015
Do not work boot release
lever when the car is in
motion.
The addition of objects to
the rear parcel shelf or
tailgate (loudspeakers,
spoiler, etc.) may prevent the gas-
filled struts at the sides of the tail-
gate working properly. Items
arranged on the rear window shelf
could be thrown forwards and in-
jure passengers should you brake
sharply.
fig. 74
P4C00037
When using the boot,
make sure the load you are
carrying does not exceed
the permitted weight (see the
“Technical specifications” sec-
tion). Also ensure the items in the
boot are arranged properly to pre-
vent them being thrown forward
and injurying passengers should
you brake sharply.
4C001-067 ING 11-03-2008 11:57 Pagina 51
Page 57 of 191

54
G
To close the bonnet:
1)Hold the bonnet up with one
hand and, with the other, remove rod
A (fig. 82)from recess Cand replace
it in its clip B.
2)Lower the bonnet until it is about
20 cm (8 ins) above the engine com-
partment.
3)Let it fall: the bonnet closes auto-
matically.
Always make sure the
bonnet is closed properly
so it will not open while
travelling.
2)Lift lever B (fig. 81).
3)Lift the bonnet, and release the
support rod A (fig. 82)from its clip B.
4)Place the tip of the support rod in
recessCof the bonnet.
fig. 81
P4C00005
Important. The bonnet
might fall violently if the
support rod is not posi-
tioned properly.
Scarves, ties and loose
garmets can get caught in
moving parts. This can be
extremely dangerous.
fig. 82
P4C00006
If repairs need to be car-
ried out inside the engine
compartment when this is
still hot, be careful not to burn
yourself and keep away from the
electric fan as this may cut in at
any time, even if the key is re-
moved from the ignition switch.
Wait until the engine has cooled.
4C001-067 ING 11-03-2008 11:57 Pagina 54
Page 62 of 191

59
G
Europe and most other countries
world-wide.
In the event of front collisions at low
speed, the restraining action of the
seat belts is sufficient and the airbag
is not inflated.
For impacts against very deformable
or mobile objects (traffic sign poles,
heaps of gravel or snow, parked vehi-
cles), side impacts, wedging under
other vehicles or barriers (e.g. under
a truck or guard rail), the airbag is
not necessary and may even be unde-
sirable.
The fact that the airbag is not trig-
gered in these situations, this does not
signify a malfunction.
fig. 85
P4C00348
PASSENGER’S FRONT AIRBAG
The passenger side airbag was de-
signed and calibrated to protect a per-
son wearing seat belts.
When fully inflated, the bag will fill
most of the space between the dash-
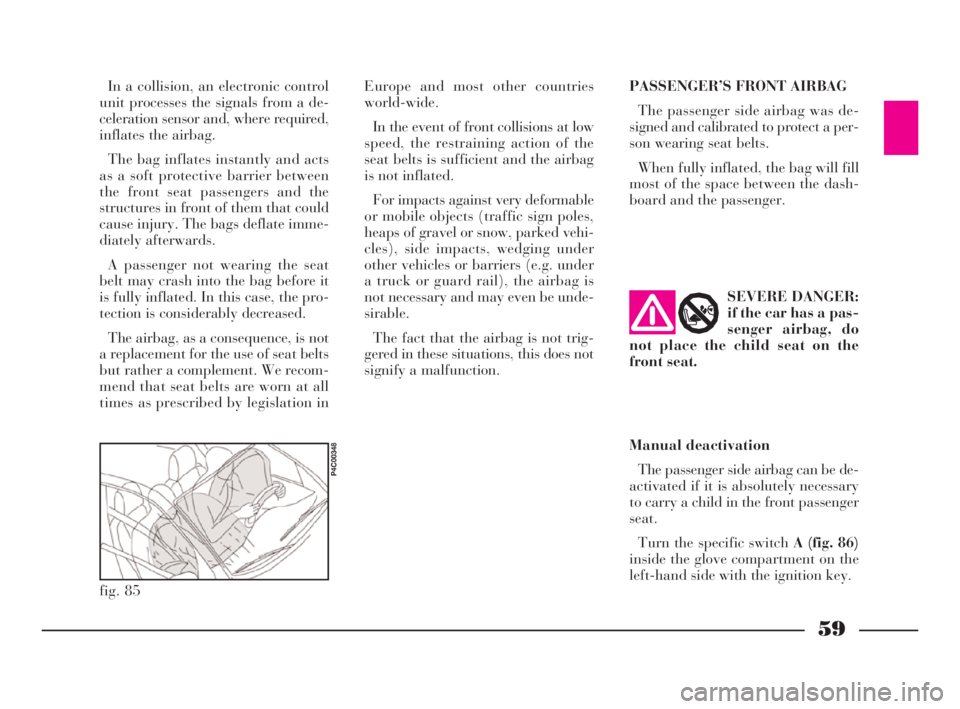
board and the passenger. In a collision, an electronic control
unit processes the signals from a de-
celeration sensor and, where required,
inflates the airbag.
The bag inflates instantly and acts
as a soft protective barrier between
the front seat passengers and the
structures in front of them that could
cause injury. The bags deflate imme-
diately afterwards.
A passenger not wearing the seat
belt may crash into the bag before it
is fully inflated. In this case, the pro-
tection is considerably decreased.
The airbag, as a consequence, is not
a replacement for the use of seat belts
but rather a complement. We recom-
mend that seat belts are worn at all
times as prescribed by legislation inSEVERE DANGER:
if the car has a pas-
senger airbag, do
not place the child seat on the
front seat.
Manual deactivation
The passenger side airbag can be de-
activated if it is absolutely necessary
to carry a child in the front passenger
seat.
Turn the specific switch A (fig. 86)
inside the glove compartment on the
left-hand side with the ignition key.
4C001-067 ING 11-03-2008 11:57 Pagina 59