warning Lancia Ypsilon 2002 Owner handbook (in English)
[x] Cancel search | Manufacturer: LANCIA, Model Year: 2002, Model line: Ypsilon, Model: Lancia Ypsilon 2002Pages: 191, PDF Size: 2.45 MB
Page 89 of 191

86
G
Standard tyre Snow tyre
165/65 R14 78T
185/60 R14 82H165/65 R14 78Q (M+S) (*)
185/60 R14 82T185/60 R14 82Q (M+S) (*)
195/50 R15 82H195/50 R15 82H
(*) See the warnings concerning maxi-
mum speed on the next page.
SNOW TYRES
These are tyres that have been
specifically designed for driving on
snow and ice, to be fitted in place of
the car’s standard tyres.
Only replace with the type of tyre in-
dicated in the table below:LANCIA Dealershipis pleased to
offer advice concerning the choice of
the most suitable tyre according to the
use required by the Customer.
Refer to the pressure of standard
tyres of the same size to find the cor-
rect inflation pressure: see “Tyre pres-
sure” in the “Technical Specifica-
tions” section.
The winter characteristics for snow
tyres are considerably less when the
tread is less than 4 mm. In such cases
it is safer to replace them.
The snow tyre characteristics are
such that, with normal environmen-
tal conditions or on long journeys on
the motorway their performance is
lower than that of standard tyres. Keep you speed
down when snow
chains are fitted.
Avoid potholes, steps and kerbs.
Do not drive for long distances on
roads free from snow as not to
damage the car and the road sur-
face.
The 1.2 16VM Nredcar is
fitted with 195/50 R15 82H
tyres; snow chains cannot
be fitted on these tyres. Alterna-
tively, have 185/60 R14 82H tyres
fitted on which snow chains can be
mounted. If it is desired to use
snow tyres see the section “Snow
tyres”.
#
4C068-089 ING 11-03-2008 11:59 Pagina 86
Page 90 of 191

87
G
The maximum speed of
snow tyres with a “Q” in-
dication must never ex-
ceed 160 km/h and in any case
must always observe the regula-
tions of the Highway Code.Therefore they should only be used
for the purpose for which they have
been homologated (“Q” indicates that
the tyre is designed for a speed of less
than 160 km/h).
IMPORTANTWhen using snow
tyres with a maximum speed index
that is less than the capacity of the car
(increased by 5%), place in the pas-
senger compartment, well in sight, a
warning that indicates the maximum
speed permitted by the snow tyres (in
accordance with the EC Directive).
Fit four identical tyres (same make
and tread) on the wheels to ensure
safety when driving and when brak-
ing as well as easy handling.
Do not reverse the direction of rota-
tion of the tyres.STORING THE CAR
Do the following if the car is not to
be used for more than a month:
– Park the car in covered, dry and if
possible well-ventilated premises.
– Engage a gear.
– Remove the cables from the bat-
tery terminals (first remove the cable
to the negative terminal) and check
the battery charge. This check should
be carried out once every three
months while the car is in storage.
Recharge the battery if the no-load
voltage is less than 12.5V.
– Make sure the handbrake is not
engaged.
– Clean and protect the painted
parts using protective wax.
4C068-089 ING 11-03-2008 11:59 Pagina 87
Page 94 of 191

91
G
EMERGENCY
STARTUP
If the ignition key fails to deactivate
the engine immobiliser, the warning
light¢will remain lit and the engine
will not start. In this case, you should
contact your LANCIA Dealership
and get them to carry out the emer-
gency startup using the code given on
the CODE card. Alternatively, you
can perform the emergency startup
procedure yourself by following the
procedure given below.
Read the whole procedure care-
fully before trying to carry it out.If
you make a mistake in the emergency
procedure you must turn the ignition
key back to STOPand repeat the
whole operation from the beginning
step1.
1)Read the 5-figure electronic code
given on the CODE card.
2)Turn the ignition key to MAR.
3)Press the accelerator pedal to the
floor and keep it there. The warning
lamp will light up for about 8
seconds, and then go out. At this point
release the accelerator pedal and pre-
pare to count the number of flashes of
the warning lamp .
4)The warning lamp starts
flashing: when it has
flashed the number of times that cor-
responds to the first figure of the code
on the CODE card, press the acceler-
ator pedal and keep it there until the
warning lamp lights up for four
seconds and then
goes out again. Release the accelera-
tor pedal.
5)The warning lamp will start
flashing again: when
the lamp has flashed the number of
times that corresponds to the second
figure on the CODE card, press the
accelerator pedal to the floor and keep
it there.
6)Do the same for the remaining
figures on the CODE card.
7)Once the final figure has been en-
tered, keep the accelerator pedal
pressed. The warning lamp will
light up for 4 seconds andthen go out. Release the accelerator
pedal.
4C090-119 ING 11-03-2008 12:00 Pagina 91
Page 95 of 191
92
G
8)The warning lamp will flash
rapidly for about 4 seconds to indicate
that the operation has been completed
correctly.
9)Start the engine by turning the ig-
nition key from MARtoAVV(with-
out turning it to STOP).
If, however, the warning lamp
remains lit, turn the ignition key
toSTOPand repeat the procedure
from step 1.
IMPORTANTAfter an emergency
start, you should contact a LANCIA
Dealershipimmediately, otherwise
you will have to repeat the procedure
described each time you want to start
the engine.JUMP STARTING
If the battery is flat, you can use an-
other battery to start the engine. Its
capacity must be the same or slightly
greater than the flat battery (see the
section “Technical Specifications”).
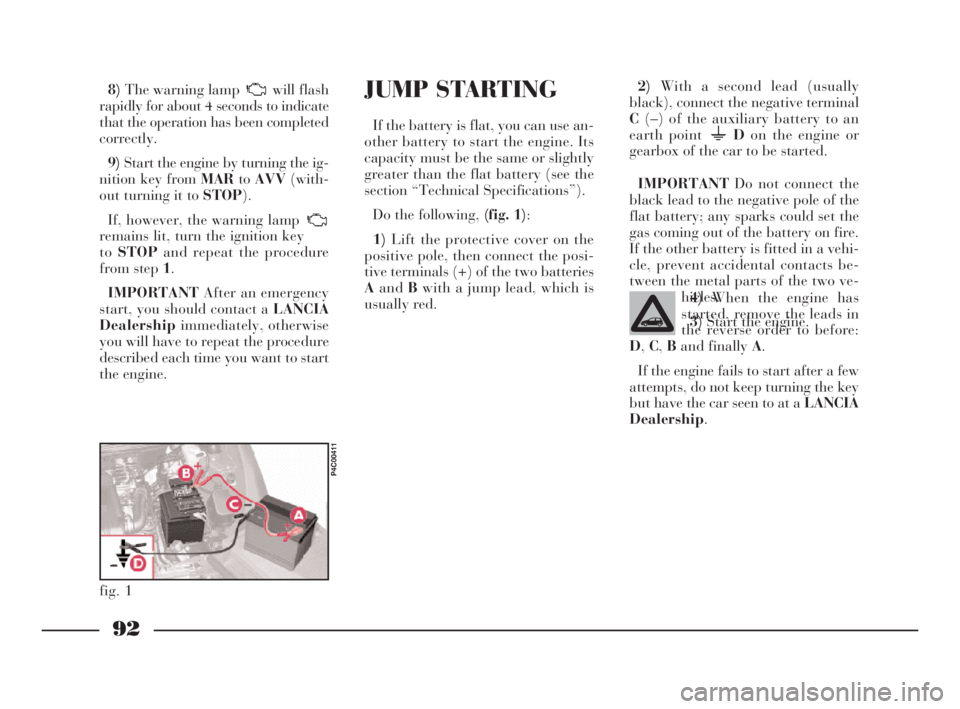
Do the following, (fig. 1):
1)Lift the protective cover on the
positive pole, then connect the posi-
tive terminals (+) of the two batteries
AandBwith a jump lead, which is
usually red.2)With a second lead (usually
black), connect the negative terminal
C(–) of the auxiliary battery to an
earth point Don the engine or
gearbox of the car to be started.
IMPORTANTDo not connect the
black lead to the negative pole of the
flat battery; any sparks could set the
gas coming out of the battery on fire.
If the other battery is fitted in a vehi-
cle, prevent accidental contacts be-
tween the metal parts of the two ve-
hicles.
3)Start the engine.
4)When the engine has
started, remove the leads in
the reverse order to before:
D,C,Band finally A.
If the engine fails to start after a few
attempts, do not keep turning the key
but have the car seen to at a LANCIA
Dealership.
fig. 1
P4C00411
4C090-119 ING 11-03-2008 12:00 Pagina 92
Page 100 of 191

97
G
1. STOP THE CAR
– Stop the car so it is not a danger
for on-coming traffic and in such a
position that the tyre can be changed
in safety. The ground must be flat and
adequately firm. During the night,
chose a lit area, if possible.
– Turn engine off and engage the
handbrake.
– Engage first or reverse gear.
– Signal that the car is stopped ac-
cording to traffic regulations: hazard
lights, warning triangle, etc.
Any passengers must leave the car
and watch out for traffic while the
tyre is being changed.
If the ground is sloping or bumpy,
place wedges or other suitable mate-
rial for stopping the car under the
wheels.2. TAKE OUT THE TOOLS,
JACK AND SPARE WHEEL
(space-saver wheel)
They are in the boot.
– Lift the carpeting.
– Unscrew the fastener A (fig. 2)
and take out the tool holder.
The tool holder contains:
B- vehicle tow ring;
C- jack handle;
D- wheel bolt wrench;
E- screwdriver;F- extension for screwing wheel
bolts and inflation valve cap;
G- jack.
fig. 4
P4C00402
fig. 5
P4C00045
4C090-119 ING 11-03-2008 12:00 Pagina 97
Page 114 of 191
111
fG
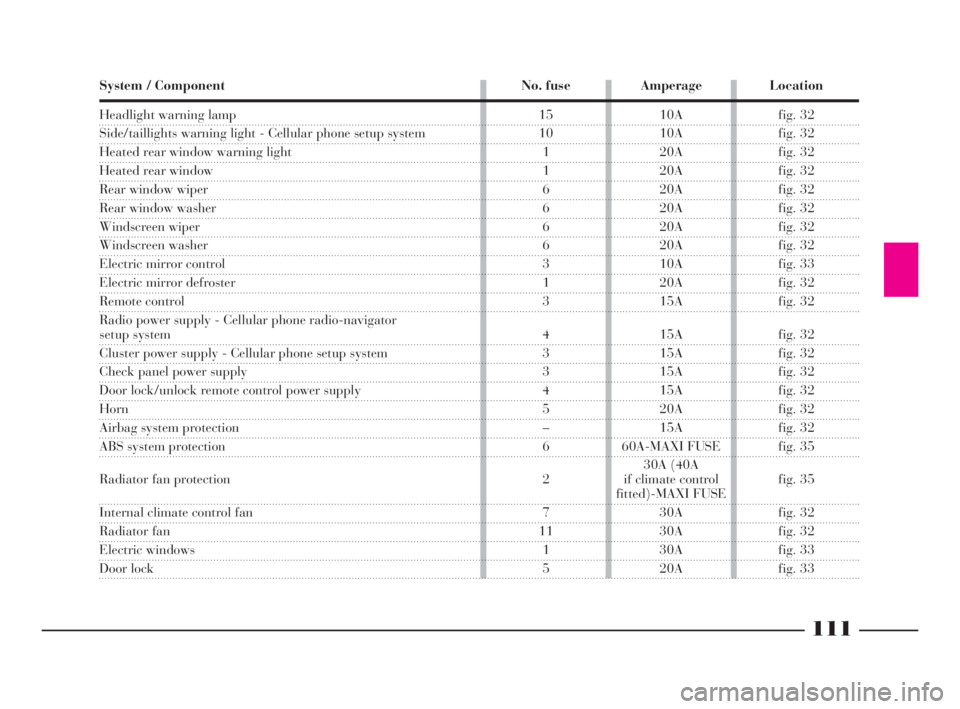
Headlight warning lamp
Side/taillights warning light - Cellular phone setup system
Heated rear window warning light
Heated rear window
Rear window wiper
Rear window washer
Windscreen wiper
Windscreen washer
Electric mirror control
Electric mirror defroster
Remote control
Radio power supply - Cellular phone radio-navigator
setup system
Cluster power supply - Cellular phone setup system
Check panel power supply
Door lock/unlock remote control power supply
Horn
Airbag system protection
ABS system protection
Radiator fan protection
Internal climate control fan
Radiator fan
Electric windows
Door lock System / Component No. fuse Amperage Location
15 10A fig. 32
10 10A fig. 32
1 20A fig. 32
1 20A fig. 32
6 20A fig. 32
6 20A fig. 32
6 20A fig. 32
6 20A fig. 32
3 10A fig. 33
1 20A fig. 32
3 15A fig. 32
4 15A fig. 32
3 15A fig. 32
3 15A fig. 32
4 15A fig. 32
5 20A fig. 32
– 15A fig. 32
6 60A-MAXI FUSE fig. 35
30A (40A
2 if climate control fig. 35
fitted)-MAXI FUSE
7 30A fig. 32
11 30A fig. 32
1 30A fig. 33
5 20A fig. 33
4C090-119 ING 13-03-2008 12:51 Pagina 111
Page 125 of 191
122
G
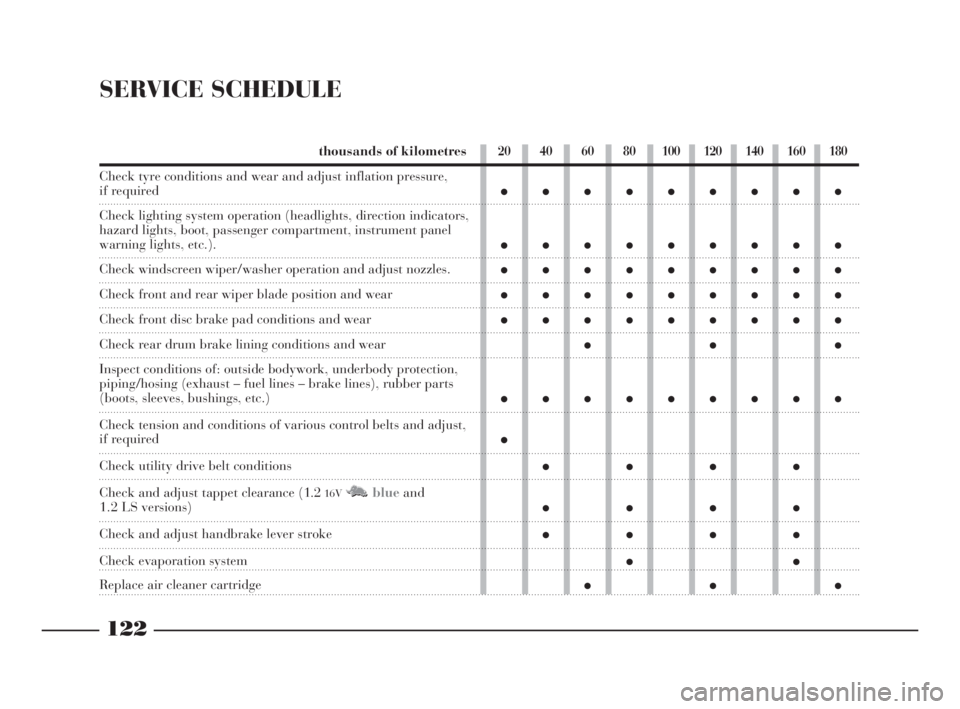
SERVICE SCHEDULE
thousands of kilometres
Check tyre conditions and wear and adjust inflation pressure,
if required
Check lighting system operation (headlights, direction indicators,
hazard lights, boot, passenger compartment, instrument panel
warning lights, etc.).
Check windscreen wiper/washer operation and adjust nozzles.
Check front and rear wiper blade position and wear
Check front disc brake pad conditions and wear
Check rear drum brake lining conditions and wear
Inspect conditions of: outside bodywork, underbody protection,
piping/hosing (exhaust – fuel lines – brake lines), rubber parts
(boots, sleeves, bushings, etc.)
Check tension and conditions of various control belts and adjust,
if required
Check utility drive belt conditions
Check and adjust tappet clearance (1.2
16VM Nblueand1.2 LS versions)
Check and adjust handbrake lever stroke
Check evaporation system
Replace air cleaner cartridge
20 40 60 80 100 120 140 160 180
●●●●●●●●●
●●●●●●●●●
●●●●●●●●●
●●●●●●●●●
●●●●●●●●●
●●●
●●●●●●●●●
●
●●●●
●●●●
●●●●
●●
●●●
4C120-143 ING 11-03-2008 12:01 Pagina 122
Page 133 of 191
130
G
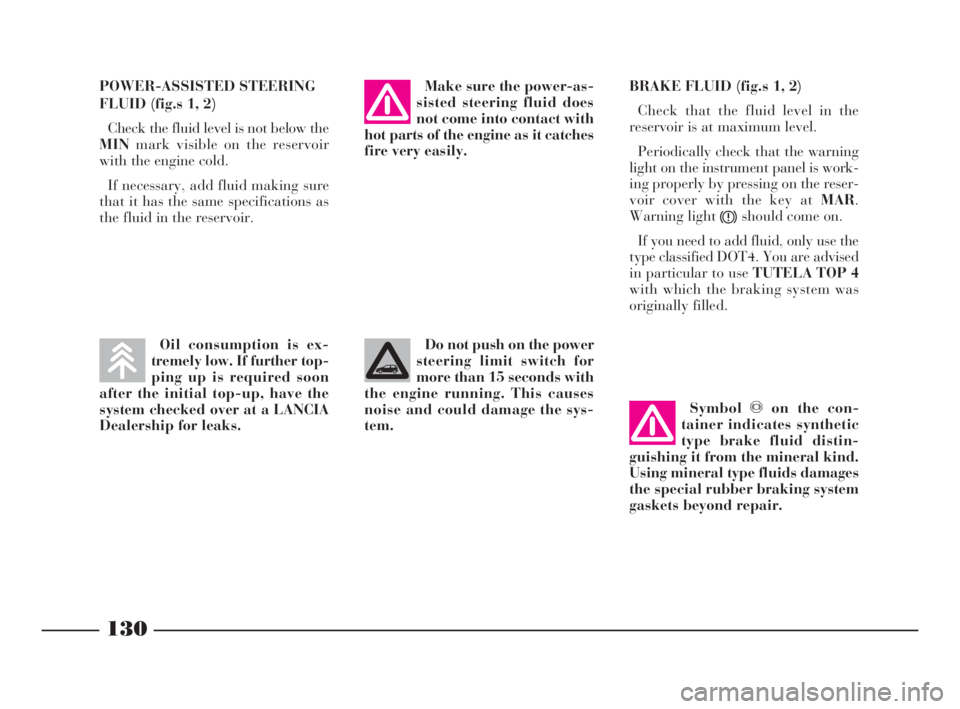
POWER-ASSISTED STEERING
FLUID (fig.s 1, 2)
Check the fluid level is not below the
MINmark visible on the reservoir
with the engine cold.
If necessary, add fluid making sure
that it has the same specifications as
the fluid in the reservoir.BRAKE FLUID (fig.s 1, 2)
Check that the fluid level in the
reservoir is at maximum level.
Periodically check that the warning
light on the instrument panel is work-
ing properly by pressing on the reser-
voir cover with the key at MAR.
Warning light
xshould come on.
If you need to add fluid, only use the
type classified DOT4. You are advised
in particular to use TUTELA TOP 4
with which the braking system was
originally filled.
Symbolπon the con-
tainer indicates synthetic
type brake fluid distin-
guishing it from the mineral kind.
Using mineral type fluids damages
the special rubber braking system
gaskets beyond repair.
Make sure the power-as-
sisted steering fluid does
not come into contact with
hot parts of the engine as it catches
fire very easily.
Do not push on the power
steering limit switch for
more than 15 seconds with
the engine running. This causes
noise and could damage the sys-
tem.Oil consumption is ex-
tremely low. If further top-
ping up is required soon
after the initial top-up, have the
system checked over at a LANCIA
Dealership for leaks.
4C120-143 ING 11-03-2008 12:01 Pagina 130
Page 180 of 191
177
fdG
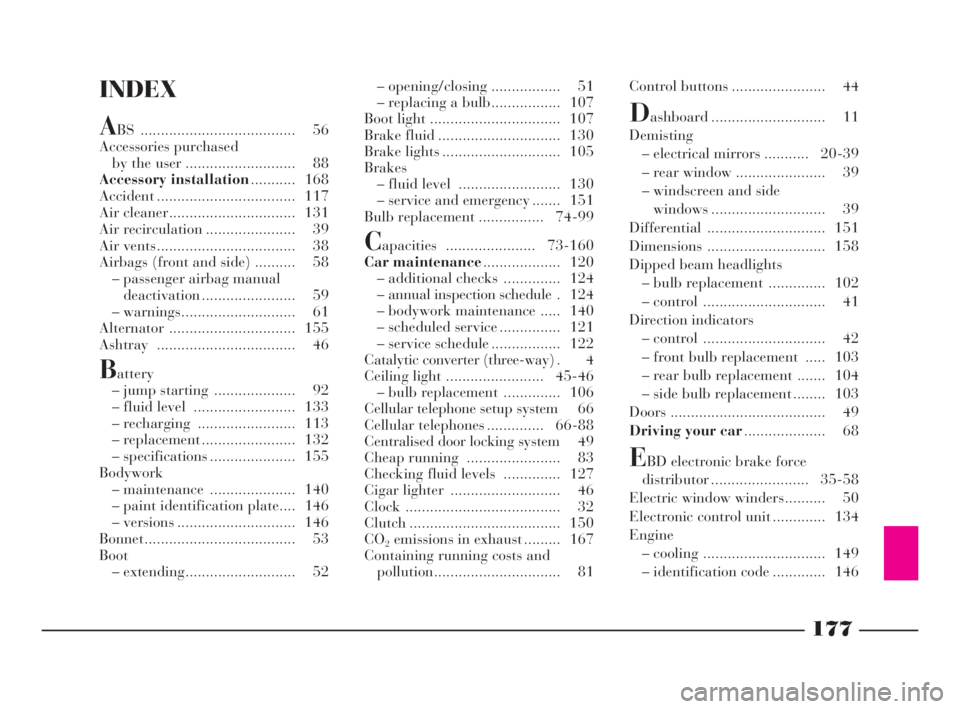
INDEX
ABS ...................................... 56
Accessories purchased
by the user ........................... 88
Accessory installation........... 168
Accident .................................. 117
Air cleaner............................... 131
Air recirculation ...................... 39
Air vents.................................. 38
Airbags (front and side) .......... 58
– passenger airbag manual
deactivation ....................... 59
– warnings............................ 61
Alternator ............................... 155
Ashtray .................................. 46
Battery
– jump starting .................... 92
– fluid level ......................... 133
– recharging ........................ 113
– replacement ....................... 132
– specifications ..................... 155
Bodywork
– maintenance ..................... 140
– paint identification plate.... 146
– versions ............................. 146
Bonnet..................................... 53
Boot
– extending........................... 52– opening/closing ................. 51
– replacing a bulb................. 107
Boot light ................................ 107
Brake fluid .............................. 130
Brake lights ............................. 105
Brakes
– fluid level ......................... 130
– service and emergency ....... 151
Bulb replacement ................ 74-99
Capacities ...................... 73-160
Car maintenance................... 120
– additional checks .............. 124
– annual inspection schedule . 124
– bodywork maintenance ..... 140
– scheduled service ............... 121
– service schedule ................. 122
Catalytic converter (three-way) . 4
Ceiling light ........................ 45-46
– bulb replacement .............. 106
Cellular telephone setup system 66
Cellular telephones .............. 66-88
Centralised door locking system 49
Cheap running ....................... 83
Checking fluid levels .............. 127
Cigar lighter ........................... 46
Clock ...................................... 32
Clutch ..................................... 150
CO
2emissions in exhaust ......... 167
Containing running costs and
pollution............................... 81Control buttons ....................... 44
Dashboard ............................ 11
Demisting
– electrical mirrors ........... 20-39
– rear window ...................... 39
– windscreen and side
windows ............................ 39
Differential ............................. 151
Dimensions ............................. 158
Dipped beam headlights
– bulb replacement .............. 102
– control .............................. 41
Direction indicators
– control .............................. 42
– front bulb replacement ..... 103
– rear bulb replacement ....... 104
– side bulb replacement ........ 103
Doors ...................................... 49
Driving your car.................... 68
EBD electronic brake force
distributor ........................ 35-58
Electric window winders.......... 50
Electronic control unit ............. 134
Engine
– cooling .............................. 149
– identification code ............. 146
4C177-184 Indice ING 13-03-2008 13:31 Pagina 177
Page 182 of 191
179
fdG
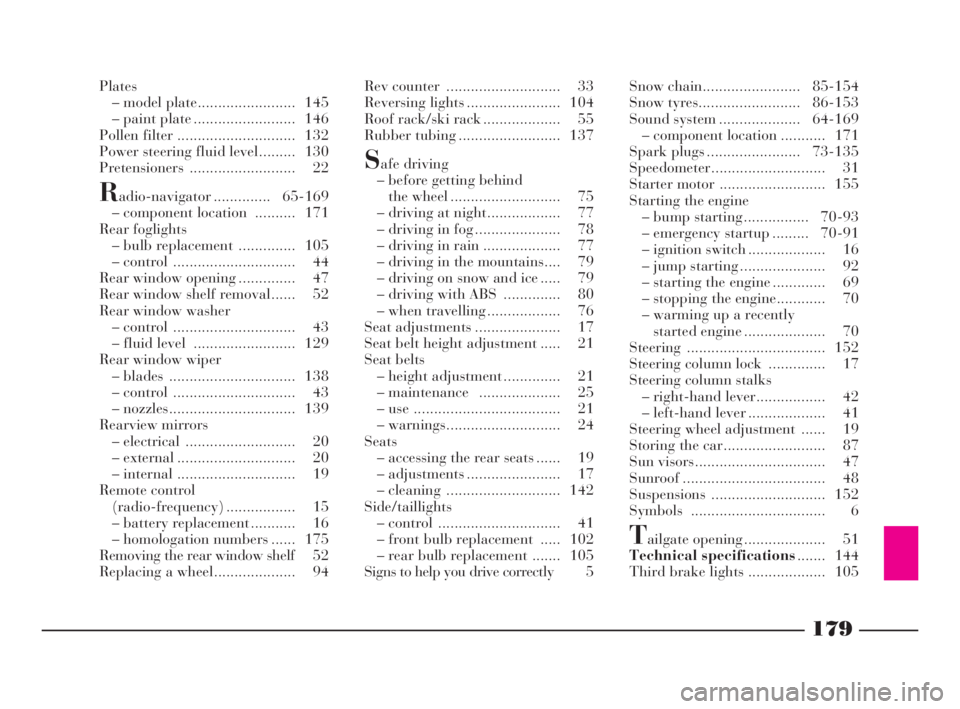
Plates
– model plate........................ 145
– paint plate ......................... 146
Pollen filter ............................. 132
Power steering fluid level......... 130
Pretensioners .......................... 22
Radio-navigator .............. 65-169
– component location .......... 171
Rear foglights
– bulb replacement .............. 105
– control .............................. 44
Rear window opening .............. 47
Rear window shelf removal...... 52
Rear window washer
– control .............................. 43
– fluid level ......................... 129
Rear window wiper
– blades ............................... 138
– control .............................. 43
– nozzles............................... 139
Rearview mirrors
– electrical ........................... 20
– external ............................. 20
– internal ............................. 19
Remote control
(radio-frequency) ................. 15
– battery replacement ........... 16
– homologation numbers ...... 175
Removing the rear window shelf 52
Replacing a wheel.................... 94Rev counter ............................ 33
Reversing lights ....................... 104
Roof rack/ski rack ................... 55
Rubber tubing ......................... 137
Safe driving
– before getting behind
the wheel ........................... 75
– driving at night.................. 77
– driving in fog ..................... 78
– driving in rain ................... 77
– driving in the mountains.... 79
– driving on snow and ice ..... 79
– driving with ABS .............. 80
– when travelling .................. 76
Seat adjustments ..................... 17
Seat belt height adjustment ..... 21
Seat belts
– height adjustment .............. 21
– maintenance .................... 25
– use .................................... 21
– warnings............................ 24
Seats
– accessing the rear seats ...... 19
– adjustments ....................... 17
– cleaning ............................ 142
Side/taillights
– control .............................. 41
– front bulb replacement ..... 102
– rear bulb replacement ....... 105
Signs to help you drive correctly 5Snow chain........................ 85-154
Snow tyres......................... 86-153
Sound system .................... 64-169
– component location ........... 171
Spark plugs ....................... 73-135
Speedometer............................ 31
Starter motor .......................... 155
Starting the engine
– bump starting ................ 70-93
– emergency startup ......... 70-91
– ignition switch ................... 16
– jump starting ..................... 92
– starting the engine ............. 69
– stopping the engine............ 70
– warming up a recently
started engine .................... 70
Steering .................................. 152
Steering column lock .............. 17
Steering column stalks
– right-hand lever................. 42
– left-hand lever ................... 41
Steering wheel adjustment ...... 19
Storing the car......................... 87
Sun visors................................ 47
Sunroof ................................... 48
Suspensions ............................ 152
Symbols ................................. 6
Tailgate opening .................... 51
Technical specifications....... 144
Third brake lights ................... 105
4C177-184 Indice ING 13-03-2008 13:31 Pagina 179