height adjustment Lancia Ypsilon 2002 Owner handbook (in English)
[x] Cancel search | Manufacturer: LANCIA, Model Year: 2002, Model line: Ypsilon, Model: Lancia Ypsilon 2002Pages: 191, PDF Size: 2.45 MB
Page 20 of 191

17
G
STEERING COLUMN LOCK
To set: remove the ignition key from
theSTOPorPARKposition, and
turn the steering wheel until it locks.
To release: move the steering wheel
slightly as you turn the ignition key to
MAR.
Never remove the ignition
key while the car is mov-
ing. The steering wheel
would automatically lock as soon
as you tried to turn it. This also
applies when the car is being
towed.INDIVIDUAL
SETTINGS
Adjustments must be
made only when the car is
stationary.
FRONT SEATS
Moving the seat backwards
or forwards
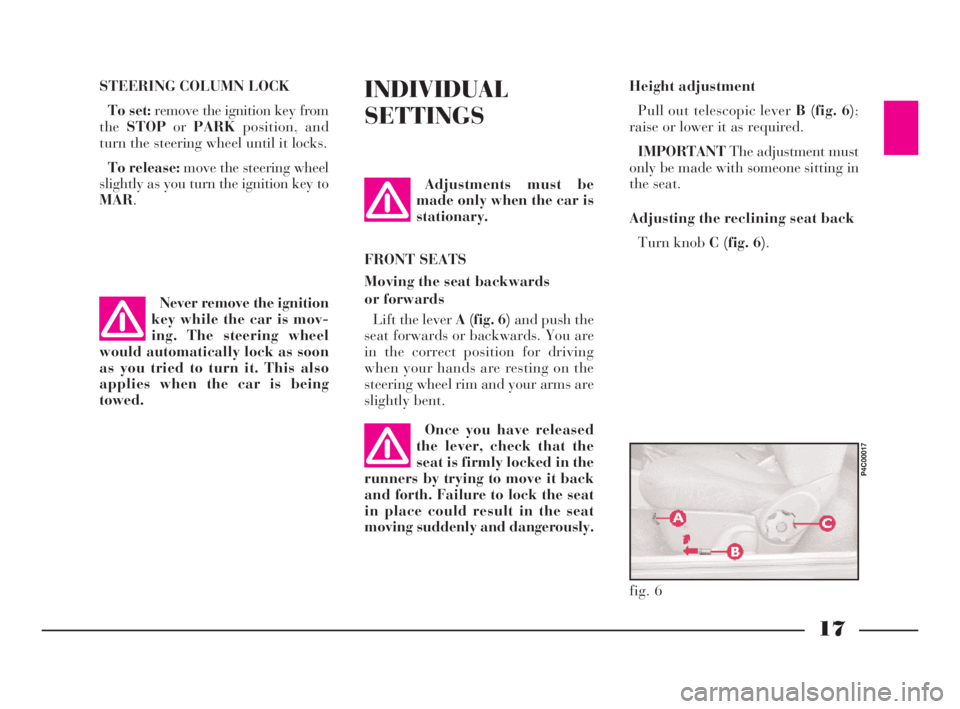
Lift the lever A (fig. 6)and push the
seat forwards or backwards. You are
in the correct position for driving
when your hands are resting on the
steering wheel rim and your arms are
slightly bent.Height adjustment
Pull out telescopic lever B (fig. 6);
raise or lower it as required.
IMPORTANTThe adjustment must
only be made with someone sitting in
the seat.
Adjusting the reclining seat back
Turn knob C (fig. 6).
fig. 6
P4C00017
Once you have released
the lever, check that the
seat is firmly locked in the
runners by trying to move it back
and forth. Failure to lock the seat
in place could result in the seat
moving suddenly and dangerously.
4C001-067 ING 11-03-2008 11:57 Pagina 17
Page 21 of 191

18
G
HEAD RESTRAINTS (fig. 8)The rear head restraints (fig. 9)can
be removed to fold the seat back:
– press tabs Aand remove the head
restraint.
To refit, fit it in the holes until you
hear a click.
fig. 9
P4C00391
Remember: head re-
straints should be adjusted
to support the back of your
head and not your neck. Only if
they are in this position will they
be able to provide effective protec-
tion in the event of a rear-end
shunt.
The height of the front head re-
straints can be adjusted to ensure that
the person’s head rests on it correctly. Lumbar support adjustment
This adjustment gives better back
support.
To adjust, turn knob D (fig. 7).
fig. 7
P4C00159
fig. 8
P4C00390
k),
the
D
be
the
4C001-067 ING 11-03-2008 11:57 Pagina 18
Page 25 of 191

22
G
For maximum pretensioner protec-
tion, make sure your seat belt fits
snugly to your chest and hips.
Never dismantle or tam-
per with pretensioner
components. Any interven-
tion must be performed by skilled
and qualified personnel. Always
have interventions performed at a
LANCIA Dealership.PRETENSIONERS
The Lancia Y is fitted with preten-
sioners to enable the seat belts to of-
fer even more effective protection.
These devices “feel” that a violent col-
lision is in progress, via a sensor, and
call in a few inches of webbing. The
pretensioner, therefore, ensures the
belt is adhering perfectly to the body
before it begins to stop the wearer
moving forward.
When the seat belt locks, it indicates
the pretensioner has been activated.
The belt will not wind back even if
accompanied manually.
A small amount of smoke may be
noticed: this is not harmful and does
not indicate the beginning of a fire.
The pretensioner needs no mainte-
nance or lubrication. Any modifica-
tion to its original features will nullify
the pretensioner’s effectiveness. If wa-
ter or mud accidentally get into the
pretensioner as a result of floods or
storms, the device must be replaced. The belt is adjusted properly when
the webbing passes approximately
halfway between the edge of the
shoulder and the neck.
The seat belt can be adjusted to one
of four different heights.
To lift the belt
Lift loop B (fig. 17)to the required
position.
To lower the belt
Press knob A (fig. 17)and move
loopBdown to the position required.
After you have made the
adjustment, always make
sure the slider the loop is
attached to catches firmly in one of
the fixed positions and cannot
move. To check this, release the
knob and push again so that it can
catch into place if it is not properly
latched in position.
4C001-067 ING 11-03-2008 11:57 Pagina 22
Page 56 of 191

53
G
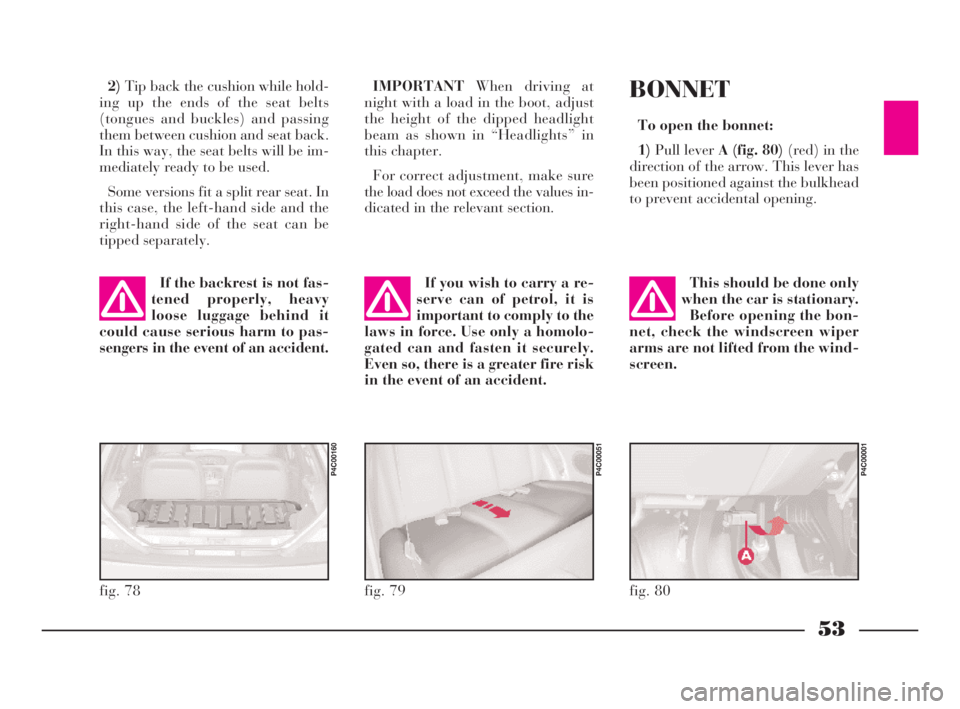
2)Tip back the cushion while hold-
ing up the ends of the seat belts
(tongues and buckles) and passing
them between cushion and seat back.
In this way, the seat belts will be im-
mediately ready to be used.
Some versions fit a split rear seat. In
this case, the left-hand side and the
right-hand side of the seat can be
tipped separately.IMPORTANTWhen driving at
night with a load in the boot, adjust
the height of the dipped headlight
beam as shown in “Headlights” in
this chapter.
For correct adjustment, make sure
the load does not exceed the values in-
dicated in the relevant section.
fig. 78
P4C00160
fig. 79
P4C00051
If the backrest is not fas-
tened properly, heavy
loose luggage behind it
could cause serious harm to pas-
sengers in the event of an accident.If you wish to carry a re-
serve can of petrol, it is
important to comply to the
laws in force. Use only a homolo-
gated can and fasten it securely.
Even so, there is a greater fire risk
in the event of an accident.
BONNET
To open the bonnet:
1)Pull lever A (fig. 80)(red) in the
direction of the arrow. This lever has
been positioned against the bulkhead
to prevent accidental opening.
fig. 80
P4C00001
This should be done only
when the car is stationary.
Before opening the bon-
net, check the windscreen wiper
arms are not lifted from the wind-
screen.
4C001-067 ING 11-03-2008 11:57 Pagina 53
Page 182 of 191

179
fdG
Plates
– model plate........................ 145
– paint plate ......................... 146
Pollen filter ............................. 132
Power steering fluid level......... 130
Pretensioners .......................... 22
Radio-navigator .............. 65-169
– component location .......... 171
Rear foglights
– bulb replacement .............. 105
– control .............................. 44
Rear window opening .............. 47
Rear window shelf removal...... 52
Rear window washer
– control .............................. 43
– fluid level ......................... 129
Rear window wiper
– blades ............................... 138
– control .............................. 43
– nozzles............................... 139
Rearview mirrors
– electrical ........................... 20
– external ............................. 20
– internal ............................. 19
Remote control
(radio-frequency) ................. 15
– battery replacement ........... 16
– homologation numbers ...... 175
Removing the rear window shelf 52
Replacing a wheel.................... 94Rev counter ............................ 33
Reversing lights ....................... 104
Roof rack/ski rack ................... 55
Rubber tubing ......................... 137
Safe driving
– before getting behind
the wheel ........................... 75
– driving at night.................. 77
– driving in fog ..................... 78
– driving in rain ................... 77
– driving in the mountains.... 79
– driving on snow and ice ..... 79
– driving with ABS .............. 80
– when travelling .................. 76
Seat adjustments ..................... 17
Seat belt height adjustment ..... 21
Seat belts
– height adjustment .............. 21
– maintenance .................... 25
– use .................................... 21
– warnings............................ 24
Seats
– accessing the rear seats ...... 19
– adjustments ....................... 17
– cleaning ............................ 142
Side/taillights
– control .............................. 41
– front bulb replacement ..... 102
– rear bulb replacement ....... 105
Signs to help you drive correctly 5Snow chain........................ 85-154
Snow tyres......................... 86-153
Sound system .................... 64-169
– component location ........... 171
Spark plugs ....................... 73-135
Speedometer............................ 31
Starter motor .......................... 155
Starting the engine
– bump starting ................ 70-93
– emergency startup ......... 70-91
– ignition switch ................... 16
– jump starting ..................... 92
– starting the engine ............. 69
– stopping the engine............ 70
– warming up a recently
started engine .................... 70
Steering .................................. 152
Steering column lock .............. 17
Steering column stalks
– right-hand lever................. 42
– left-hand lever ................... 41
Steering wheel adjustment ...... 19
Storing the car......................... 87
Sun visors................................ 47
Sunroof ................................... 48
Suspensions ............................ 152
Symbols ................................. 6
Tailgate opening .................... 51
Technical specifications....... 144
Third brake lights ................... 105
4C177-184 Indice ING 13-03-2008 13:31 Pagina 179