tow Lancia Ypsilon 2014 Owner handbook (in English)
[x] Cancel search | Manufacturer: LANCIA, Model Year: 2014, Model line: Ypsilon, Model: Lancia Ypsilon 2014Pages: 315, PDF Size: 13.18 MB
Page 26 of 315
Values displayed
Range
This indicates the approximate distance which can
be travelled with the amount of fuel present in
the tank. “----”will appear on the display in the
following cases:
❒range value lower than 50 km (or 30 mi)
❒car parked with engine running for a long
period.
IMPORTANT The range value variation can be
affected by several factors: driving style, type
of route (motorway, towns and cities, mountain
roads, etc.), conditions of use (load, tyre pressures,
etc.). Trip planning must therefore take the above
into account.
Distance travelled
Shows the distance covered since the start of the
new journey.Average consumption
Shows the approximate average fuel consumption
since the start of the new journey.
Instantaneous consumption
This value shows the fuel consumption. The value
is constantly updated. The display will show “- -
- -” if the car is parked with the engine running.
Average speed
This shows the car average speed as a function of
the overall time elapsed since the start of the
new mission.
Trip time
Shows the time elapsed since the start of a new
journey.
22GETTING TO
KNOW YOUR CAR
SAFETY
STARTING AND
DRIVING
WARNING LIGHTS
AND MESSAGES
IN AN EMERGENCY
SERVICING AND
MAINTENANCE
TECHNICAL
SPECIFICATIONS
INDEX
Page 36 of 315
WARNING
It is absolutely forbidden to carry out
any after-market operation involving
steering system or steering column
modifications (e.g.: installation of anti-theft
device) that could badly affect performance
and safety, invalidate the warranty and
also result in non-compliance of the car
with type-approval requirements.
WARNING
Never remove the key while the car is
moving. The steering wheel will lock
as soon as it is turned. This holds true for
cars being towed as well.
SEATS
WARNING
All adjustments must be made with
the car stationary.
FRONT SEATS
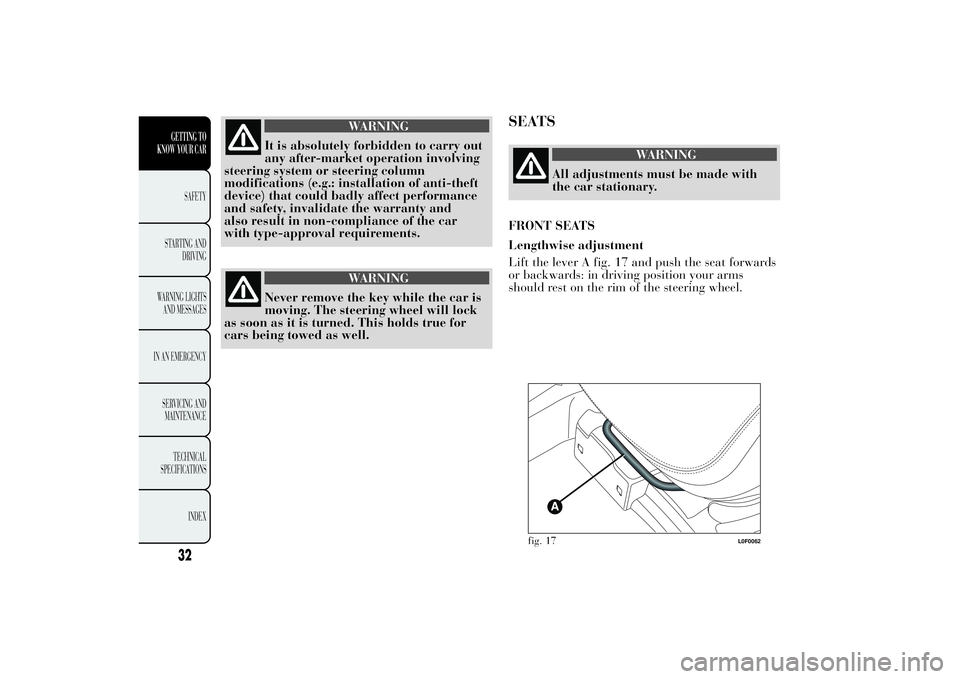
Lengthwise adjustment
Lift the lever A fig. 17 and push the seat forwards
or backwards: in driving position your arms
should rest on the rim of the steering wheel.
fig. 17
L0F0062
32GETTING TO
KNOW YOUR CAR
SAFETY
STARTING AND
DRIVING
WARNING LIGHTS
AND MESSAGES
IN AN EMERGENCY
SERVICING AND
MAINTENANCE
TECHNICAL
SPECIFICATIONS
INDEX
Page 47 of 315
C Air distribution knob
toward the body and the side windowstoward the body, the side windows and the
feettoward the feet onlytoward the feet and the windscreentoward the windscreen only
D Heated rear window activation/deactivation
button.
When the function is active, the LED on the
button is lit up.
In order to maintain battery efficiency, the
function is automatically deactivated after about
20 minutes.
E Fan speed adjustment knob.NoteTo stop the air flow from the vents turn the
knob to 0.
F climate control compressor on/off button. Press
the button to activate the climate control
system; the LED on the button switches on
contemporarily (this enables rapid cooling of
the passenger compartment).
43GETTING TO
KNOW YOUR CARSAFETY
STARTING AND
DRIVING
WARNING LIGHTS
AND MESSAGES
IN AN EMERGENCY
SERVICING AND
MAINTENANCE
TECHNICAL
SPECIFICATIONS
INDEX
Page 50 of 315

towards the front seat feet area diffusers. Due
to the natural tendency of heat to rise, this
type of distribution warms the passenger
compartment up as quickly as possible,
providing an immediate feeling of warmth.+
distribution between feet area diffusers
(warmest air) and dashboard vents
(coolest air).
+
distribution between feet area diffusers
and windscreen/front side window
diffusers. This type of distribution
achieves effective heating of the
passenger compartment and prevents
the windows from misting up.
Button B MAX
- MAX-DEF function
activation
When theMAXbutton
is pressed, the system
activates all the functions required for fast
demisting/defrosting, that is:
❒compressor on (if the weather conditions are
suitable)
❒air recirculation off
❒maximum air temperature setting (HI)
❒fan speed determined according to the coolant
temperature
❒air flow conveyed to the windscreen and front
side windows❒Button C
- Climate control compressor
activation/deactivation
When the
symbol is lit on the display, press
button C to switch off the compressor.
When the compressor is deactivated:
❒the system will deactivate air recirculation to
prevent the windows from misting up;
❒it is not possible to convey air to the passenger
compartment with a temperature below the
outside temperature (the temperature indicated
on the display will flash when the system cannot
guarantee the required comfort conditions);
❒the fan speed can be manually reset (with
compressor enabled, ventilation cannot go
below a bar shown on the display).
46GETTING TO
KNOW YOUR CAR
SAFETY
STARTING AND
DRIVING
WARNING LIGHTS
AND MESSAGES
IN AN EMERGENCY
SERVICING AND
MAINTENANCE
TECHNICAL
SPECIFICATIONS
INDEX
Page 60 of 315
When the lights have been activated automatically
and are then switched off by the sensor, the
dipped beam headlights are switched off first,
followed by the side lights a few seconds later. If
the sensor is activated but is malfunctioning,
the side lights and dipped beam headlights are
switched on irrespective of the outside light level
and the sensor failure is indicated on the
instrument panel display. It is also possible to
deactivate the sensor and switch on the side lights
and dipped beam headlights.
IMPORTANT The sensor is unable to detect the
presence of fog. Under these circumstances, these
lights are therefore turned on manually.
MAIN BEAM HEADLIGHTS
To activate the main beam headlights, with ring
nut at
, pull the stalk towards the steering
wheel. The warning light
switches on in the
instrument panel.
When the stalk is pulled towards the steering
wheel again, the lights deactivate, the dipped
headlights reactivate and the
warning light
switches off.
It is not possible to switch on the main beam
headlights in fixed mode if the automatic lighting
control system is active.FLASHING
You can flash the headlights by pulling the stalk
towards the wheel (unstable position). The
warning light will come on in the instrument
panel.
DIRECTION INDICATORS
Bring the stalk to the (stable) position:
upwards:right-hand direction indicator
activation;
downwards:left-hand direction indicator
activation.
Warning light
or
should flash in the
instrument panel. The indicators switch off
automatically when the steering wheel is
straightened.
Lane change function
If you wish to signal a lane change, put the left
stalk in the unstable position for less than half a
second.
The direction indicator on the side selected will be
activated for 5 flashes and then go out
automatically.
56GETTING TO
KNOW YOUR CAR
SAFETY
STARTING AND
DRIVING
WARNING LIGHTS
AND MESSAGES
IN AN EMERGENCY
SERVICING AND
MAINTENANCE
TECHNICAL
SPECIFICATIONS
INDEX
Page 61 of 315
“FOLLOW ME HOME” DEVICE
This allows the space in front of the car to be lit
up for a certain period of time.
Activation:with the ignition key on STOP or
removed, pull the stalk towards the steering wheel
within 2 minutes from when the engine is turned
off.
At each single movement of the stalk, the lights
will remain on for an extra 30 seconds up to a
maximum of 210 seconds; then the lights are
switched off automatically.
Each time the stalk is operated, the
warning
light on the instrument panel switches on and the
display also shows a message and how long the
function will remain active.The
warning light switches on when the stalk
is first moved and stays on until the function is
automatically deactivated. Each movement of the
stalk only increases the amount of time the lights
stay on.
Deactivation:keep the stalk pulled towards the
steering wheel for more than two seconds.
57GETTING TO
KNOW YOUR CARSAFETY
STARTING AND
DRIVING
WARNING LIGHTS
AND MESSAGES
IN AN EMERGENCY
SERVICING AND
MAINTENANCE
TECHNICAL
SPECIFICATIONS
INDEX
Page 63 of 315
"Smart washing" function
Pull the lever towards the steering wheel (unstable
position) to activate the windscreen washer.
Keeping the stalk pulled for more than half a
second, with just one movement it is possible to
operate the washer jet and the wiper at the same
time.
The wiper stops working three strokes after the
stalk is released.
A further stroke after approximately six seconds
completes the wiping cycle.
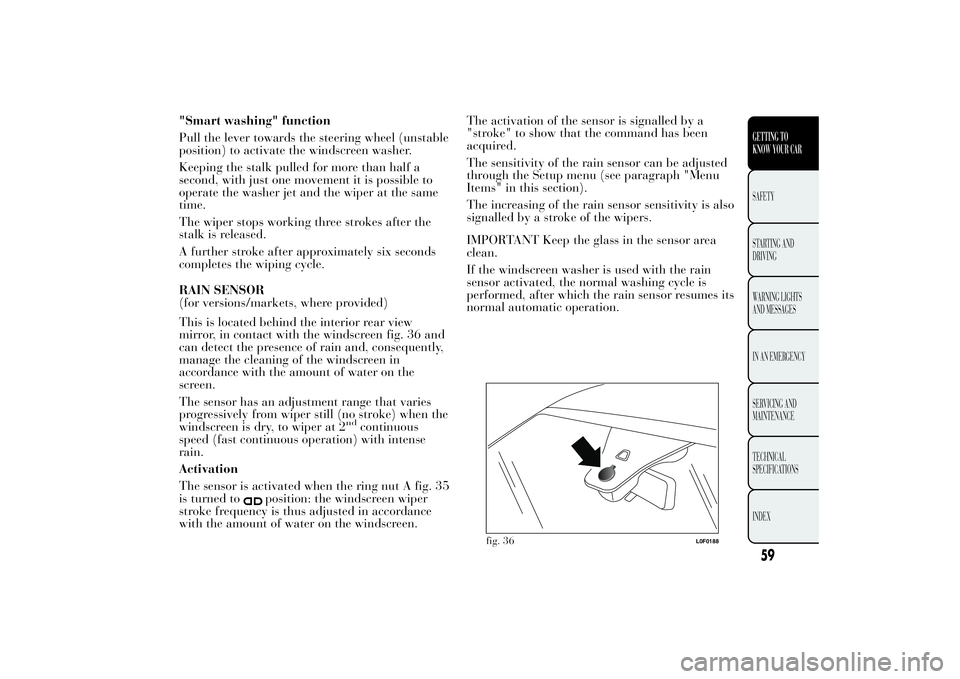
RAIN SENSOR
(for versions/markets, where provided)
This is located behind the interior rear view
mirror, in contact with the windscreen fig. 36 and
can detect the presence of rain and, consequently,
manage the cleaning of the windscreen in
accordance with the amount of water on the
screen.
The sensor has an adjustment range that varies
progressively from wiper still (no stroke) when the
windscreen is dry, to wiper at 2
nd
continuous
speed (fast continuous operation) with intense
rain.
Activation
The sensor is activated when the ring nut A fig. 35
is turned to
position: the windscreen wiper
stroke frequency is thus adjusted in accordance
with the amount of water on the windscreen.The activation of the sensor is signalled by a
"stroke" to show that the command has been
acquired.
The sensitivity of the rain sensor can be adjusted
through the Setup menu (see paragraph "Menu
Items" in this section).
The increasing of the rain sensor sensitivity is also
signalled by a stroke of the wipers.
IMPORTANT Keep the glass in the sensor area
clean.
If the windscreen washer is used with the rain
sensor activated, the normal washing cycle is
performed, after which the rain sensor resumes its
normal automatic operation.
fig. 36
L0F0188
59GETTING TO
KNOW YOUR CARSAFETY
STARTING AND
DRIVING
WARNING LIGHTS
AND MESSAGES
IN AN EMERGENCY
SERVICING AND
MAINTENANCE
TECHNICAL
SPECIFICATIONS
INDEX
Page 65 of 315

The rain sensor is able to recognise, and
automatically adjust itself in the presence of the
following conditions:
❒presence of dirt on the controlled surface (salt,
dirt, etc.);
❒presence of streaks of water caused by the worn
window wiper blades;
❒difference between day and night.
Do not activate the rain sensor when
washing the car in an automatic car
wash.Make sure the device is switched off if
there is ice on the windscreen.
WARNING
Make sure the device is switched off
whenever the windscreen must be
cleaned.REAR WINDOW WASHER/ WIPER
It can be operated only with the ignition key
turned to MAR.
Activation
Turn the ring nut B fig. 35 from
to
to operate
the rear window wiper as follows:
❒in intermittent mode when the windscreen wiper
is not operating;
❒in synchronous mode (at half the speed of the
windscreen wiper) when the windscreen wiper
is operating;
❒in continuous mode with reverse gear engaged
and the control active.
With the windscreen wiper on and reverse gear
engaged, rear window wiping will be continuous.
Pushing the stalk towards the dashboard
(unstable position) the rear window washer jet
will activate. Keep the stalk pushed for more than
half a second to activate the rear window wiper
as well. Releasing the stalk will activate the smart
washing function, as described for the windscreen
wiper.
61GETTING TO
KNOW YOUR CARSAFETY
STARTING AND
DRIVING
WARNING LIGHTS
AND MESSAGES
IN AN EMERGENCY
SERVICING AND
MAINTENANCE
TECHNICAL
SPECIFICATIONS
INDEX
Page 66 of 315

Deactivation
The function stops when the stalk is released.
Do not use the rear window wiper to
remove layers of snow or ice. In these
conditions, the windscreen wipers may
be submitted to excessive effort resulting in
the motor protection cutting in and wiper
operation being inhibited for a few seconds. If
operation is not restored, contact a Lancia
Dealership.
CRUISE CONTROL(for versions/markets, where provided)
This is an electronically controlled driving
assistance device which allows the car to be driven
at a chosen speed above 30 km/h on long
stretches of dry, straight roads with few variations
(e.g. motorways), without having to depress the
accelerator pedal.
The use of this device on extra-urban roads with
traffic is not therefore recommended. Do not
use the device in town.
Activating the device
Turn ring nut A fig. 37 to ON. Activation is
indicated by the
warning light switching on
and, on some versions, by a message on the
display.
fig. 37
L0F0202
62GETTING TO
KNOW YOUR CAR
SAFETY
STARTING AND
DRIVING
WARNING LIGHTS
AND MESSAGES
IN AN EMERGENCY
SERVICING AND
MAINTENANCE
TECHNICAL
SPECIFICATIONS
INDEX
Page 113 of 315

The frequency of the acoustic signal:
❒increases as the distance between the car and
the obstacle decreases;
❒becomes continuous when the distance between
the car and the obstacle is less than 30 cm and
stops immediately if the distance increases;
❒is constant if the distance is unchanged.
If several obstacles are detected by the sensors,
only the nearest one is considered.
FAULT INDICATION
Any parking sensor faults will be indicated when
reverse is engaged by the
warning light on
the instrument panel together with the message in
the multifunction display (for versions/markets,
where provided) (see “Warning lights and
messages” section).OPERATION WITH TRAILER
Sensor operation is deactivated automatically
when the trailer's electric cable plug is fitted into
the car's tow hook socket.
The sensors are automatically reactivated when
the trailer's cable plug is removed.
For correct operation, sensors must
always be clean from mud, dirt, snow
or ice. Be careful not to scratch or
damage the sensors while cleaning them.
Avoid using dry, rough or hard cloths. The
sensors must be washed using clean water,
with the addition of car shampoo if necessary.
When using special washing equipment such
as high pressure jets or steam cleaning, clean
the sensors very quickly keeping the jet more
than 10 cm away.
109GETTING TO
KNOW YOUR CARSAFETY
STARTING AND
DRIVING
WARNING LIGHTS
AND MESSAGES
IN AN EMERGENCY
SERVICING AND
MAINTENANCE
TECHNICAL
SPECIFICATIONS
INDEX