handbrake Lancia Ypsilon 2016 Owner handbook (in English)
[x] Cancel search | Manufacturer: LANCIA, Model Year: 2016, Model line: Ypsilon, Model: Lancia Ypsilon 2016Pages: 200, PDF Size: 4.53 MB
Page 4 of 200
VERY IMPORTANT
REFUELLING
Petrol engines: only refuel with unleaded petrol with octane rating (RON) not less than 95 in compliance with the European specification
EN228. Using these mixtures may cause misfiring and driving issues, as well as damage fundamental components of the supply system.
Diesel engines: refuel only with Diesel fuel motor vehicles conforming to the European specification EN590. The use of other products or
mixtures may damage the engine beyond repair and consequently invalidate the warranty, due to the damage caused.
LPG engines: refuel only with LPG for motor vehicles conforming to the European specification EN589. The use of other products or
mixtures may damage the engine beyond repair and consequently invalidate the warranty, due to the damage caused.
For further details on the use of the correct fuel see the "Refuelling the car" paragraph in the "Starting and driving" chapter.
STARTING THE ENGINE
Make sure that the handbrake is engaged and place the gear lever in neutral. Fully depress the clutch pedal, without pressing the accelerator,
then turn the ignition key to MAR and wait for thewarning light to switch off (and thewarning light for Diesel versions); turn the
ignition key to AVV and release it as soon as the engine starts.
Versions with Dual FuNction System gearbox: make sure that the handbrake is engaged and that the gear lever is in P (Parking) or N
(Neutral), fully depress the brake pedal, then turn the ignition key to AVV and release it as soon as the engine is started.
PARKING ON FLAMMABLE MATERIAL
The catalytic converter develops high temperatures during operation. Do not park the car on grass, dry leaves, pine needles or other
flammable material: fire hazard.
RESPECTING THE ENVIRONMENT
The vehicle is fitted with a system that carries out a continuous diagnosis of the emission-related components in order to help protect the
environment.
ELECTRICAL ACCESSORIES
If, after buying the vehicle, you decide to add electrical accessories (with the risk of gradually draining the battery), contact a Lancia
Dealership. They can calculate the overall electrical requirement and check that the vehicle's electric system can support the required load.
SCHEDULED SERVICING
Correct maintenance of the car is essential for ensuring that it maintains its performance and its safety features, its environmental friendliness
and low running costs for a long time to come.
Page 12 of 200
IGNITION DEVICE
3) 4)
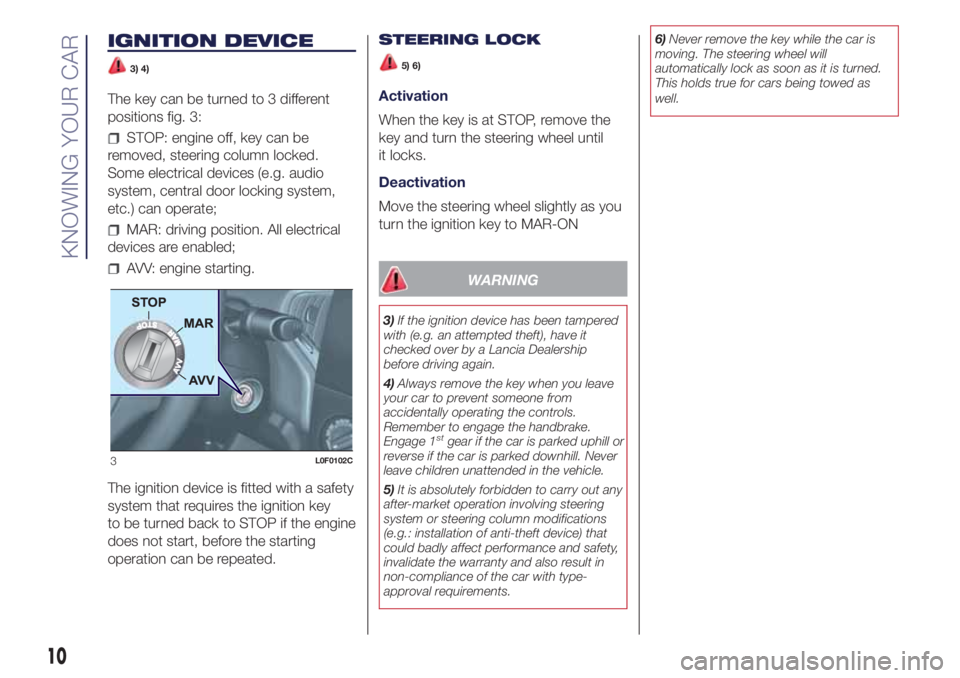
The key can be turned to 3 different
positions fig. 3:
STOP: engine off, key can be
removed, steering column locked.
Some electrical devices (e.g. audio
system, central door locking system,
etc.) can operate;
MAR: driving position. All electrical
devices are enabled;
AVV: engine starting.
The ignition device is fitted with a safety
system that requires the ignition key
to be turned back to STOP if the engine
does not start, before the starting
operation can be repeated.STEERING LOCK
5) 6)
Activation
When the key is at STOP, remove the
key and turn the steering wheel until
it locks.
Deactivation
Move the steering wheel slightly as you
turn the ignition key to MAR-ON
WARNING
3)If the ignition device has been tampered
with (e.g. an attempted theft), have it
checked over by a Lancia Dealership
before driving again.
4)Always remove the key when you leave
your car to prevent someone from
accidentally operating the controls.
Remember to engage the handbrake.
Engage 1
stgear if the car is parked uphill or
reverse if the car is parked downhill. Never
leave children unattended in the vehicle.
5)It is absolutely forbidden to carry out any
after-market operation involving steering
system or steering column modifications
(e.g.: installation of anti-theft device) that
could badly affect performance and safety,
invalidate the warranty and also result in
non-compliance of the car with type-
approval requirements.6)Never remove the key while the car is
moving. The steering wheel will
automatically lock as soon as it is turned.
This holds true for cars being towed as
well.
3L0F0102C
10
KNOWING YOUR CAR
Page 33 of 200
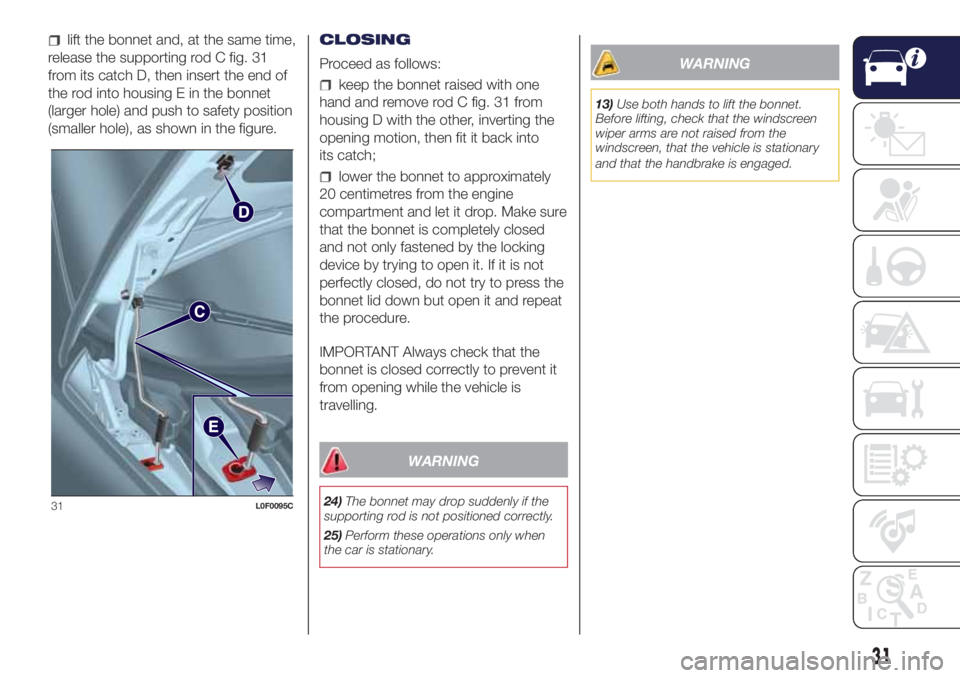
lift the bonnet and, at the same time,
release the supporting rod C fig. 31
from its catch D, then insert the end of
the rod into housing E in the bonnet
(larger hole) and push to safety position
(smaller hole), as shown in the figure.CLOSING
Proceed as follows:
keep the bonnet raised with one
hand and remove rod C fig. 31 from
housing D with the other, inverting the
opening motion, then fit it back into
its catch;
lower the bonnet to approximately
20 centimetres from the engine
compartment and let it drop. Make sure
that the bonnet is completely closed
and not only fastened by the locking
device by trying to open it. If it is not
perfectly closed, do not try to press the
bonnet lid down but open it and repeat
the procedure.
IMPORTANT Always check that the
bonnet is closed correctly to prevent it
from opening while the vehicle is
travelling.
WARNING
24)The bonnet may drop suddenly if the
supporting rod is not positioned correctly.
25)Perform these operations only when
the car is stationary.
WARNING
13)Use both hands to lift the bonnet.
Before lifting, check that the windscreen
wiper arms are not raised from the
windscreen, that the vehicle is stationary
and that the handbrake is engaged.
31L0F0095C
31
Page 49 of 200
Warning light What it means
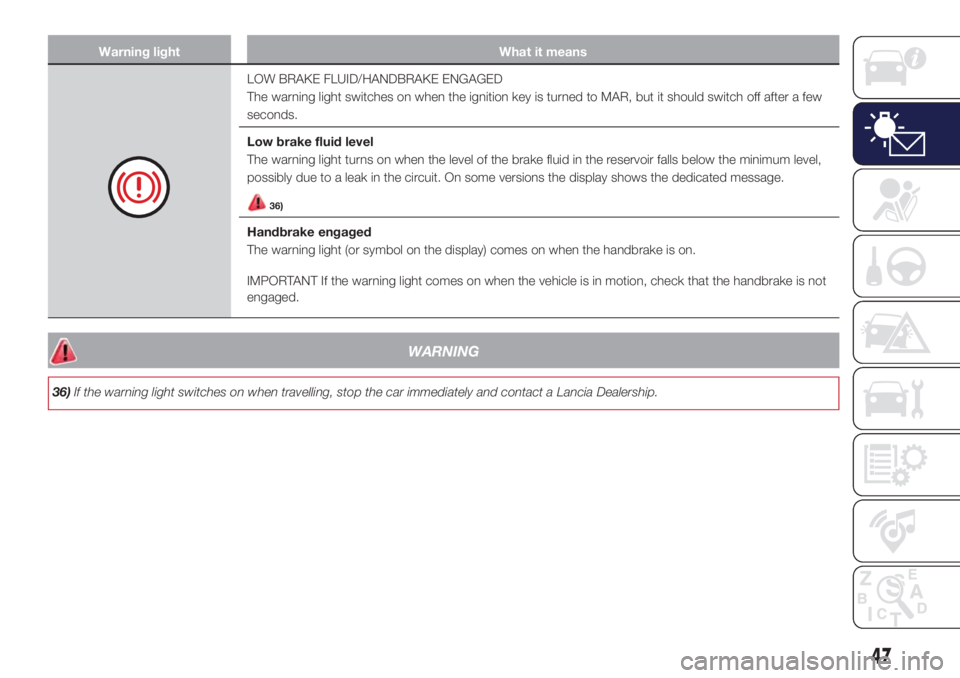
LOW BRAKE FLUID/HANDBRAKE ENGAGED
The warning light switches on when the ignition key is turned to MAR, but it should switch off after a few
seconds.
Low brake fluid level
The warning light turns on when the level of the brake fluid in the reservoir falls below the minimum level,
possibly due to a leak in the circuit. On some versions the display shows the dedicated message.
36)
Handbrake engaged
The warning light (or symbol on the display) comes on when the handbrake is on.
IMPORTANT If the warning light comes on when the vehicle is in motion, check that the handbrake is not
engaged.
WARNING
36)If the warning light switches on when travelling, stop the car immediately and contact a Lancia Dealership.
47
Page 69 of 200
uphill:car stationary on a road with
a gradient higher than 5%, engine
running, brake pressed and gearbox in
neutral or gear (other than reverse)
engaged;
downhill:car stationary on a road
with a gradient higher than 5%, engine
running, brake pressed and reverse
gear engaged.
When setting off, the ESC system
control unit maintains the braking
pressure on the wheels until the torque
necessary for starting is reached, or
in any case for a maximum of 2
seconds, allowing your right foot to be
moved easily from the brake pedal to
the accelerator.
When the 2 seconds have elapsed,
without starting, the system is
automatically deactivated, gradually
releasing the braking pressure. During
this release stage, the typical
mechanical brake release noise can be
heard, indicating that the car is about
to move.
IMPORTANT The Hill Holder system is
not active with engaged parking brake.IMPORTANT The Hill Holder system is
not a parking brake, therefore do not
leave the car without activating the
handbrake, switching off the engine,
and engaging first gear, with the car
parked in safe conditions.
IMPORTANT The Hill Holder system is
not active with engaged parking brake.
If the parking brake is engaged and
at the same time you press the brake
pedal, the Hill Holder system is
activated only if the parking brake is
disengaged before releasing the brake
pedal.
56)
ASR (AntiSlip
Regulation) SYSTEM
This is an integral part of the ESC
system and automatically operates in
the event of one or both drive wheels
slipping, loss of grip on wet roads
(aquaplaning) and acceleration
on slippery, snowy or icy roads, etc.
Depending on the slipping conditions,
two different control systems are
activated:
if the slipping involves both drive
wheels, the ASR intervenes reducing
the power transmitted by the engine;
if the slipping only involves one of
the drive wheels, it intervenes
automatically braking the wheel that is
slipping.
Turning the ASR system on/off
The ASR is switched on automatically
each time the engine is started.
While driving, the ASR can be switched
off and subsequently switched on
again by pressing the ASR OFF button
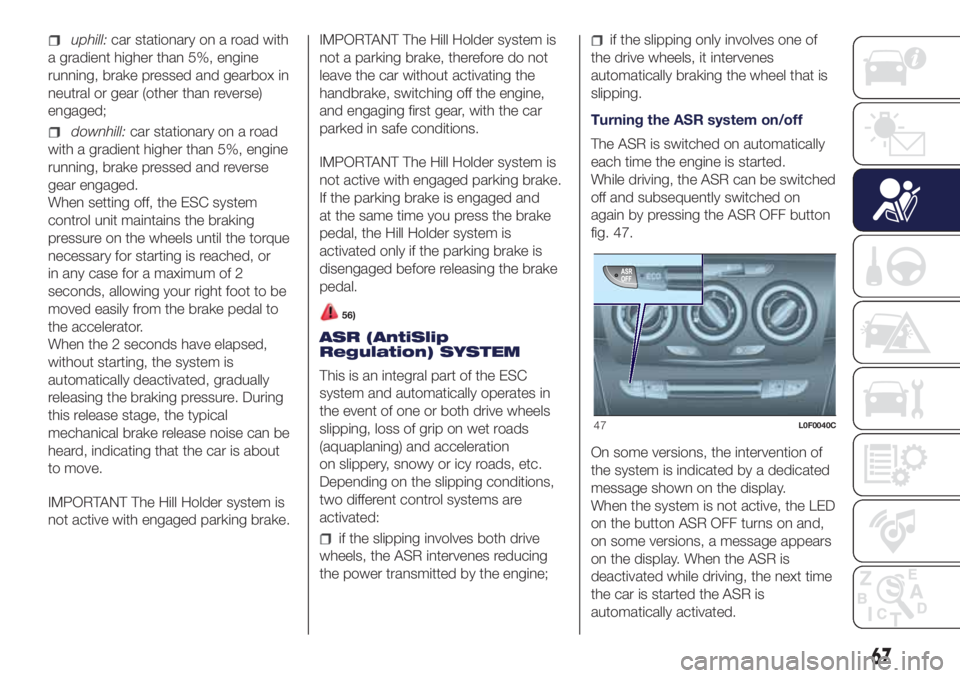
fig. 47.
On some versions, the intervention of
the system is indicated by a dedicated
message shown on the display.
When the system is not active, the LED
on the button ASR OFF turns on and,
on some versions, a message appears
on the display. When the ASR is
deactivated while driving, the next time
the car is started the ASR is
automatically activated.
47L0F0040C
67
Page 95 of 200
STARTING AND DRIVING
Let’s get to the core of the vehicle:
seeing how you can exploit all of its
potential to the full.
We’ll look at how to drive it safely in any
situation, so that it can be a welcome
companion, with our comfort and
our wallets in mind.STARTING THE ENGINE ................. 94
HANDBRAKE .................................. 95
MANUAL GEARBOX ....................... 96
DUAL FUNCTION SYSTEM
GEARBOX....................................... 97
STOP/START SYSTEM ................... 98
CRUISE CONTROL ......................... 99
PARKING SENSORS.......................101
TOWING TRAILERS ........................102
REFUELLING THE VEHICLE ..........103
93
Page 96 of 200
STARTING THE
ENGINE
107) 108)34) 35) 36) 37)
Before starting the engine, adjust the
seat, the interior rear view mirrors,
the door mirrors and fasten the seat
belt correctly.
Never press the accelerator pedal for
starting the engine.
PETROL VERSIONS
Proceed as follows:
engage the handbrake and put the
gear lever in neutral.On 0.9 TwinAir
versionsengage the handbrake and
place the gear lever in neutral or fully
press the clutch pedal if a gear other
than neutral is engaged;
for all versions (except 0.9
TwinAir)fully depress the clutch pedal
without touching the accelerator;
turn the ignition key to AVV and
release it as soon as the engine starts.
DIESEL VERSIONS
Proceed as follows:
engage the handbrake and put the
gear lever in neutral;
turn the ignition key to MAR: the
warning lights
andon the
instrument panel will turn on;
wait for the warning lightsand
to switch off;
fully depress the clutch pedal
without touching the accelerator;
turn the ignition key to the AVV
position as soon as the warning light
turns off. Waiting too long will waste
the heating work carried out by the
plugs. Release the key as soon as the
engine starts.
IMPORTANT With cold engine, the
accelerator must be entirely released
when turning the ignition key to position
AVV. If the engine does not start at the
first attempt, return the ignition key
to STOP before repeating the starting
procedure. If, when the ignition key is at
MAR, the instrument panel warning
light
remains lit, turn the key to
STOP and then back to MAR. If the
warning light remains on, try with the
other keys provided with the car.
Contact a Lancia Dealership if you still
cannot start the engine.VERSIONS WITH DUAL
FUNCTION SYSTEM
TRANSMISSION
109)
The system allows the engine to be
started both with a gear engaged and
with the transmission in neutral (N).
However, the brake pedal must always
be pressed first if neutral is not
engaged. It is therefore advisable to
position the gear lever at N before
starting the engine.
LPG AND NATURAL
POWER VERSIONS
38)
The engine always starts up on petrol
independently of the previously
selected mode.
SWITCHING OFF THE
ENGINE
39)
Turn the ignition key to STOP while the
engine is idling.
IMPORTANT After a demanding drive,
before turning the engine off you should
allow it to idle to allow the temperature
in the engine compartment to
decrease.
94
STARTING AND DRIVING
Page 97 of 200
WARNING
107)It is dangerous to run the engine in
enclosed areas. The engine consumes
oxygen and engine exhaust contains
carbon dioxide, carbon monoxide and
other toxic gasses.
108)Remember that the brake servo and
power steering are not operational until the
engine has been started, therefore much
effort than usual is required on the brake
pedal and steering wheel.
109)If the engine fails to start with a gear
engaged, the potentially dangerous
situation due to the fact that the gearbox is
automatically placed in neutral will be
signalled by a buzzer.
WARNING
34)The flashing of the warning lightfor
60 seconds after starting or during
prolonged cranking of the engine indicates
a fault with the glow plug heating system.
You can use the car as usual if the engine
starts but you should contact a Lancia
Dealership as soon as possible.
35)It is advisable not to demand maximum
performance from your car (e.g. excessive
acceleration, long distances at maximum
rpm, excessively intense braking, etc.)
when it is first used.
36)When the engine is switched off never
leave the key turned to MAR-ON to prevent
useless current absorption from draining
the battery.37)Never, under any circumstances, jump
start the engine by pushing, towing or
coasting downhill. This could cause fuel to
flow into the catalytic converter and
damage it beyond repair.
38)There must therefore always be
enough petrol in the tank to protect the
petrol pump and to guarantee temporary
switching from methane to petrol
operation, if high performance is required.
39)A quick burst on the accelerator before
turning off the engine serves absolutely
no practical purpose, it wastes fuel and is
especially damaging to turbocharged
engines.
HANDBRAKE
110) 111) 112)
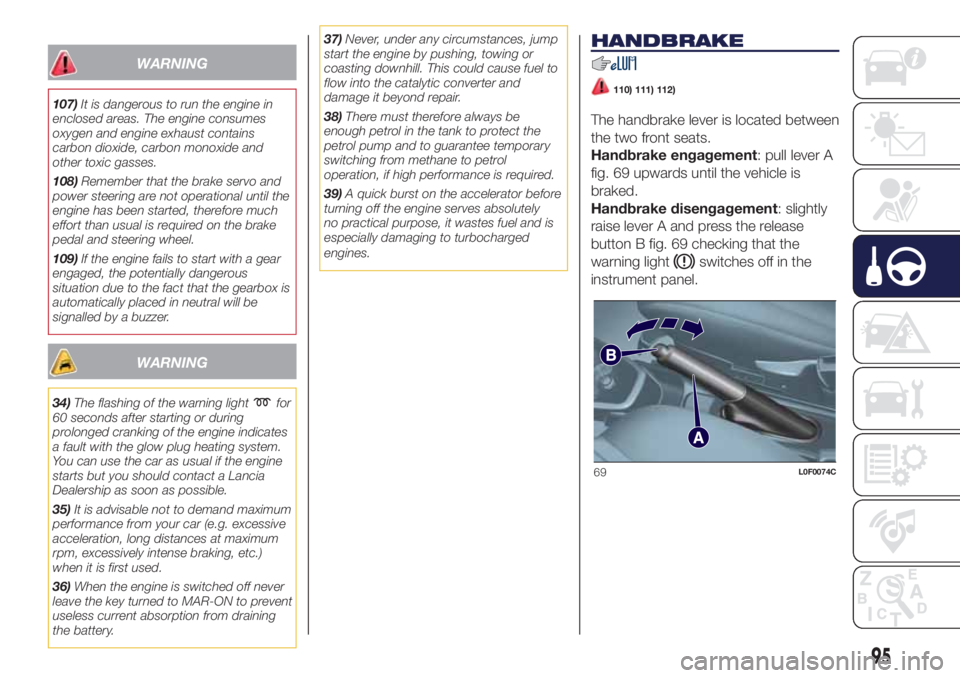
The handbrake lever is located between
the two front seats.
Handbrake engagement: pull lever A
fig. 69 upwards until the vehicle is
braked.
Handbrake disengagement: slightly
raise lever A and press the release
button B fig. 69 checking that the
warning light
switches off in the
instrument panel.
69L0F0074C
95
Page 106 of 200
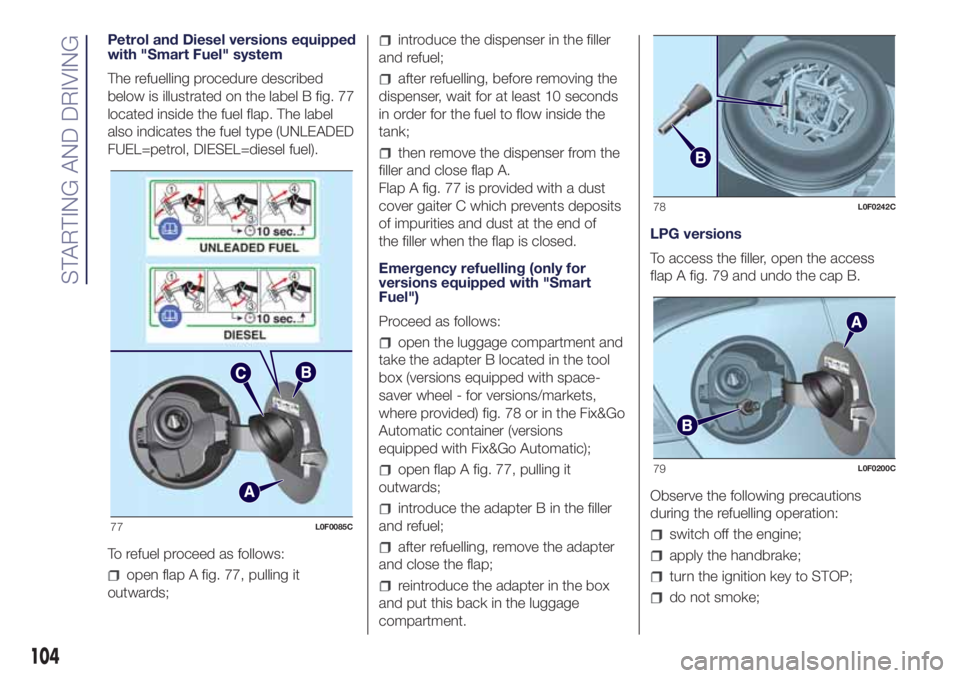
Petrol and Diesel versions equipped
with "Smart Fuel" system
The refuelling procedure described
below is illustrated on the label B fig. 77
located inside the fuel flap. The label
also indicates the fuel type (UNLEADED
FUEL=petrol, DIESEL=diesel fuel).
To refuel proceed as follows:
open flap A fig. 77, pulling it
outwards;
introduce the dispenser in the filler
and refuel;
after refuelling, before removing the
dispenser, wait for at least 10 seconds
in order for the fuel to flow inside the
tank;
then remove the dispenser from the
filler and close flap A.
Flap A fig. 77 is provided with a dust
cover gaiter C which prevents deposits
of impurities and dust at the end of
the filler when the flap is closed.
Emergency refuelling (only for
versions equipped with "Smart
Fuel")
Proceed as follows:
open the luggage compartment and
take the adapter B located in the tool
box (versions equipped with space-
saver wheel - for versions/markets,
where provided) fig. 78 or in the Fix&Go
Automatic container (versions
equipped with Fix&Go Automatic);
open flap A fig. 77, pulling it
outwards;
introduce the adapter B in the filler
and refuel;
after refuelling, remove the adapter
and close the flap;
reintroduce the adapter in the box
and put this back in the luggage
compartment.LPG versions
To access the filler, open the access
flap A fig. 79 and undo the cap B.
Observe the following precautions
during the refuelling operation:
switch off the engine;
apply the handbrake;
turn the ignition key to STOP;
do not smoke;
77L0F0085C
78L0F0242C
79L0F0200C
104
STARTING AND DRIVING
Page 119 of 200
REPLACING A
WHEEL
129) 130) 131) 132) 133) 134) 135)
54) 55)
JACK
Please note that:
the jack weight is 1,76 kg;
the jack requires no adjustment;
the jack cannot be repaired and in
the event of a fault it must be replaced
by another genuine one;
no tool other than its cranking
device may be fitted on the jack.
CHANGING PROCEDURE
To change a wheel, proceed as follows:
stop the car in a position that is
not dangerous for oncoming traffic
where you can change the wheel safely.
The ground must be flat and sufficiently
compact;
switch off the engine, pull up the
handbrake and engage the 1stgear or
reverse. Wear the reflective safety
jacket (compulsory by law) before
getting out of the car;
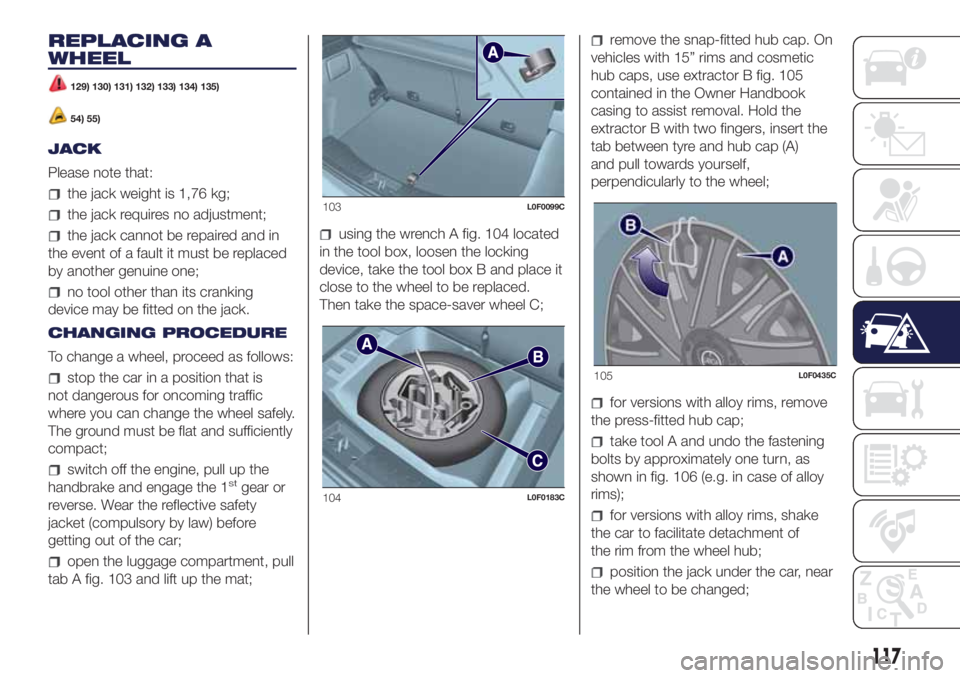
open the luggage compartment, pull
tab A fig. 103 and lift up the mat;
using the wrench A fig. 104 located
in the tool box, loosen the locking
device, take the tool box B and place it
close to the wheel to be replaced.
Then take the space-saver wheel C;
remove the snap-fitted hub cap. On
vehicles with 15” rims and cosmetic
hub caps, use extractor B fig. 105
contained in the Owner Handbook
casing to assist removal. Hold the
extractor B with two fingers, insert the
tab between tyre and hub cap (A)
and pull towards yourself,
perpendicularly to the wheel;
for versions with alloy rims, remove
the press-fitted hub cap;
take tool A and undo the fastening
bolts by approximately one turn, as
shown in fig. 106 (e.g. in case of alloy
rims);
for versions with alloy rims, shake
the car to facilitate detachment of
the rim from the wheel hub;
position the jack under the car, near
the wheel to be changed;
103L0F0099C
104L0F0183C
105L0F0435C
117