screen Lexus CT200h 2013 (in English) Manual PDF
[x] Cancel search | Manufacturer: LEXUS, Model Year: 2013, Model line: CT200h, Model: Lexus CT200h 2013Pages: 688
Page 419 of 688
415
5 5-19. Bluetooth® Phone (Lexus Display Audio System)
Audio system
CT200h_OM_OM76102E_(EE)
Using a Bluetooth® phone messages
Go to “Message inbox”: “MENU” button “Telephone” “Message
inbox”
Select a message.
Moving the controller to the left while on the “Message inbox” screen dis-
plays the setting screen. (P. 424)
Move the controller to the right while on the “Message inbox” screen and then
select an account to display a message list for the selected account.
Selecting “Next” or “Previous” displays the next or previous message.
If a message is too long, select “Read more” to display the full text.
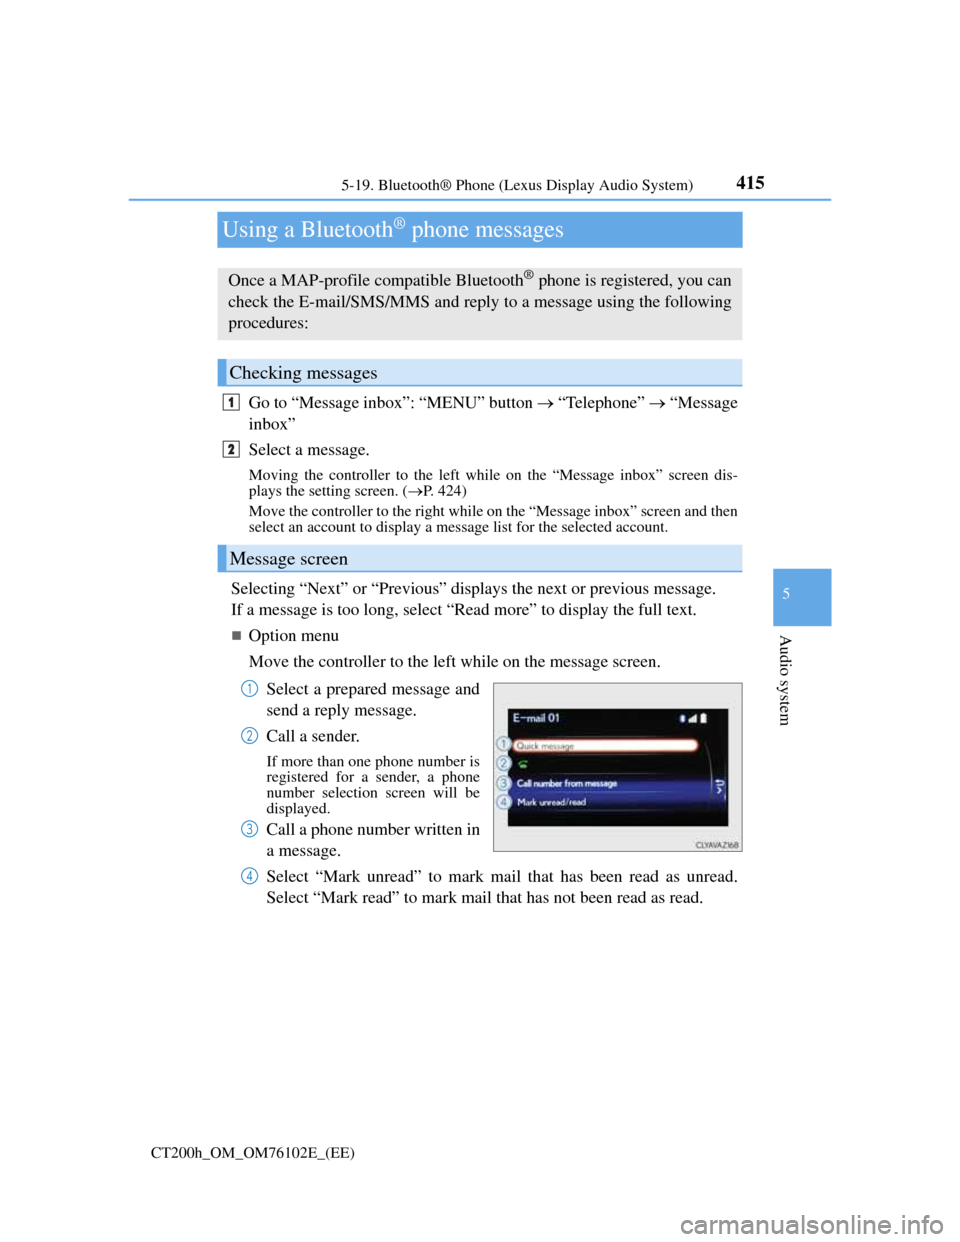
Option menu
Move the controller to the left while on the message screen.
Select a prepared message and
send a reply message.
Call a sender.
If more than one phone number is
registered for a sender, a phone
number selection screen will be
displayed.
Call a phone number written in
a message.
Select “Mark unread” to mark mail that has been read as unread.
Select “Mark read” to mark mail that has not been read as read.
Once a MAP-profile compatible Bluetooth® phone is registered, you can
check the E-mail/SMS/MMS and reply to a message using the following
procedures:
Checking messages
Message screen
1
2
1
2
3
4
Page 420 of 688
4165-19. Bluetooth® Phone (Lexus Display Audio System)
CT200h_OM_OM76102E_(EE)
Move the controller to the left while on the message screen.
Select “Quick message” to display the “Quick message” screen.
Select the desired message and then select “Send”.
Editing a quick message
Move the controller to the left while on the message screen.
Select “Quick message” and then the desired message. Move the
controller to the left while the desired message is displayed.
Select “Edit”.
To return to the default message after editing, select “Default”.
Replying to a message
1
2
3
1
2
3
Page 421 of 688
4175-19. Bluetooth® Phone (Lexus Display Audio System)
5
Audio system
CT200h_OM_OM76102E_(EE)
This function is available when the “E-mail notification popup” or “SMS/
MMS notification popup” are set to on. (P. 424)
“Incoming E-mail display” or “Incoming SMS/MMS display” are set
to “Drop-down”
When E-mail/SMS/MMS are received, the incoming message is dis-
played on the upper side of the screen with a sound.
“Incoming E-mail display” or “Incoming SMS/MMS display” are set
to “Full screen”
When E-mail/SMS/MMS are received, the incoming message screen is
displayed with a sound and it can be operated on the screen.
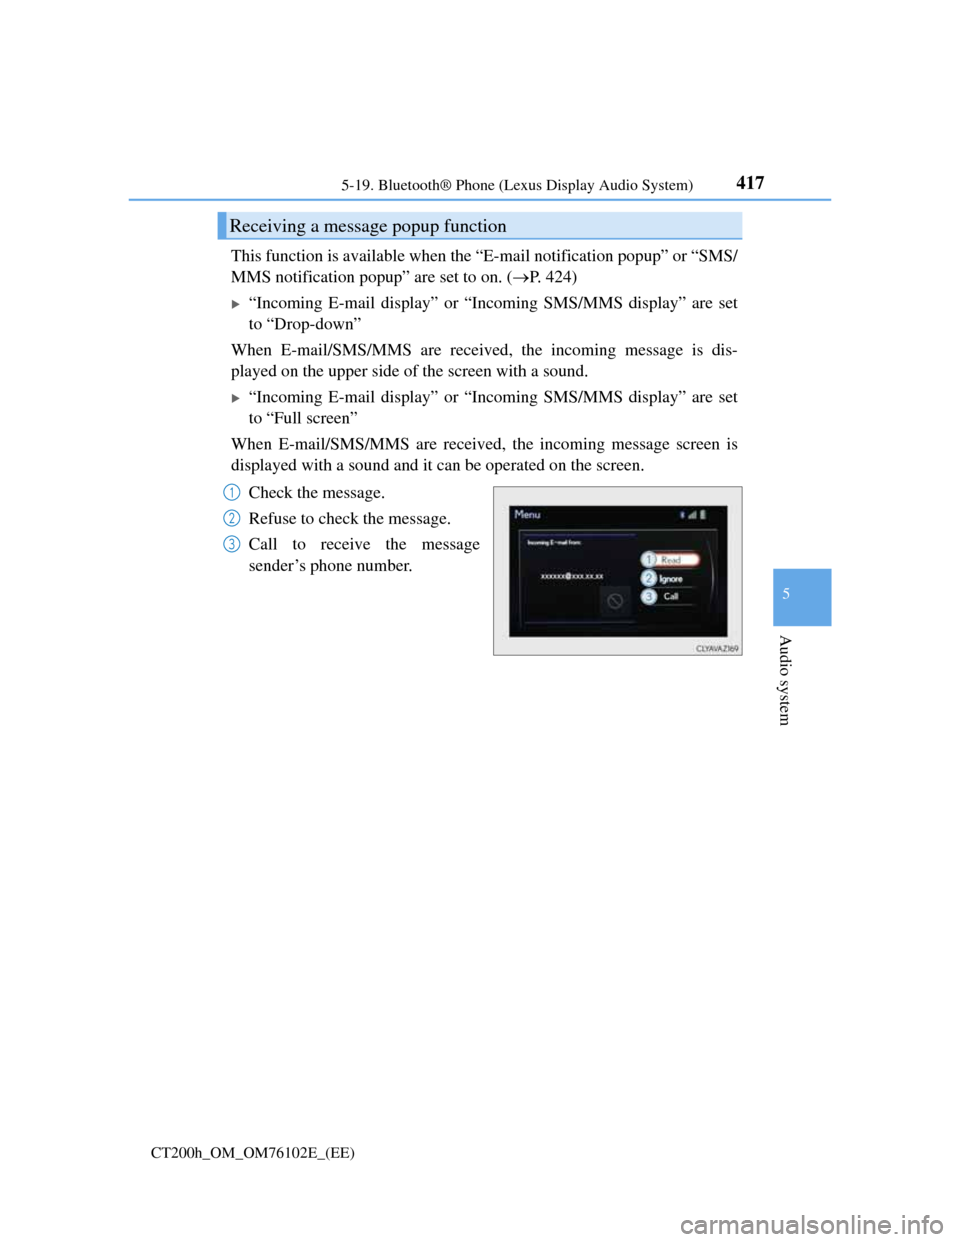
Check the message.
Refuse to check the message.
Call to receive the message
sender’s phone number.
Receiving a message popup function
1
2
3
Page 422 of 688
4185-19. Bluetooth® Phone (Lexus Display Audio System)
CT200h_OM_OM76102E_(EE)
Using the steering wheel switches
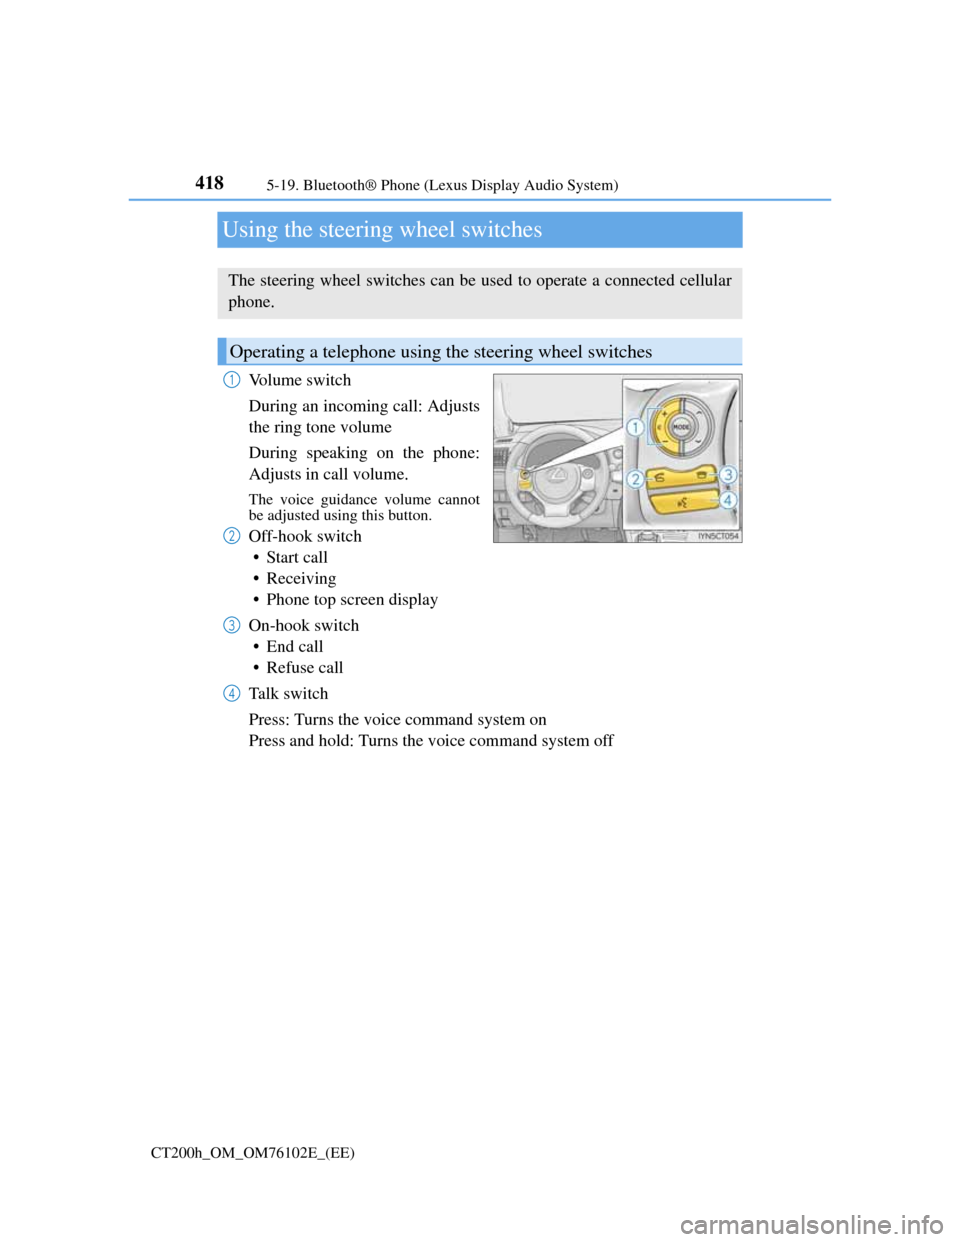
Volume switch
During an incoming call: Adjusts
the ring tone volume
During speaking on the phone:
Adjusts in call volume.
The voice guidance volume cannot
be adjusted using this button.
Off-hook switch
• Start call
• Receiving
• Phone top screen display
On-hook switch
•End call
• Refuse call
Talk switch
Press: Turns the voice command system on
Press and hold: Turns the voice command system off
The steering wheel switches can be used to operate a connected cellular
phone.
Operating a telephone using the steering wheel switches
1
2
3
4
Page 423 of 688
419
5 5-19. Bluetooth® Phone (Lexus Display Audio System)
Audio system
CT200h_OM_OM76102E_(EE)
Bluetooth® phone settings
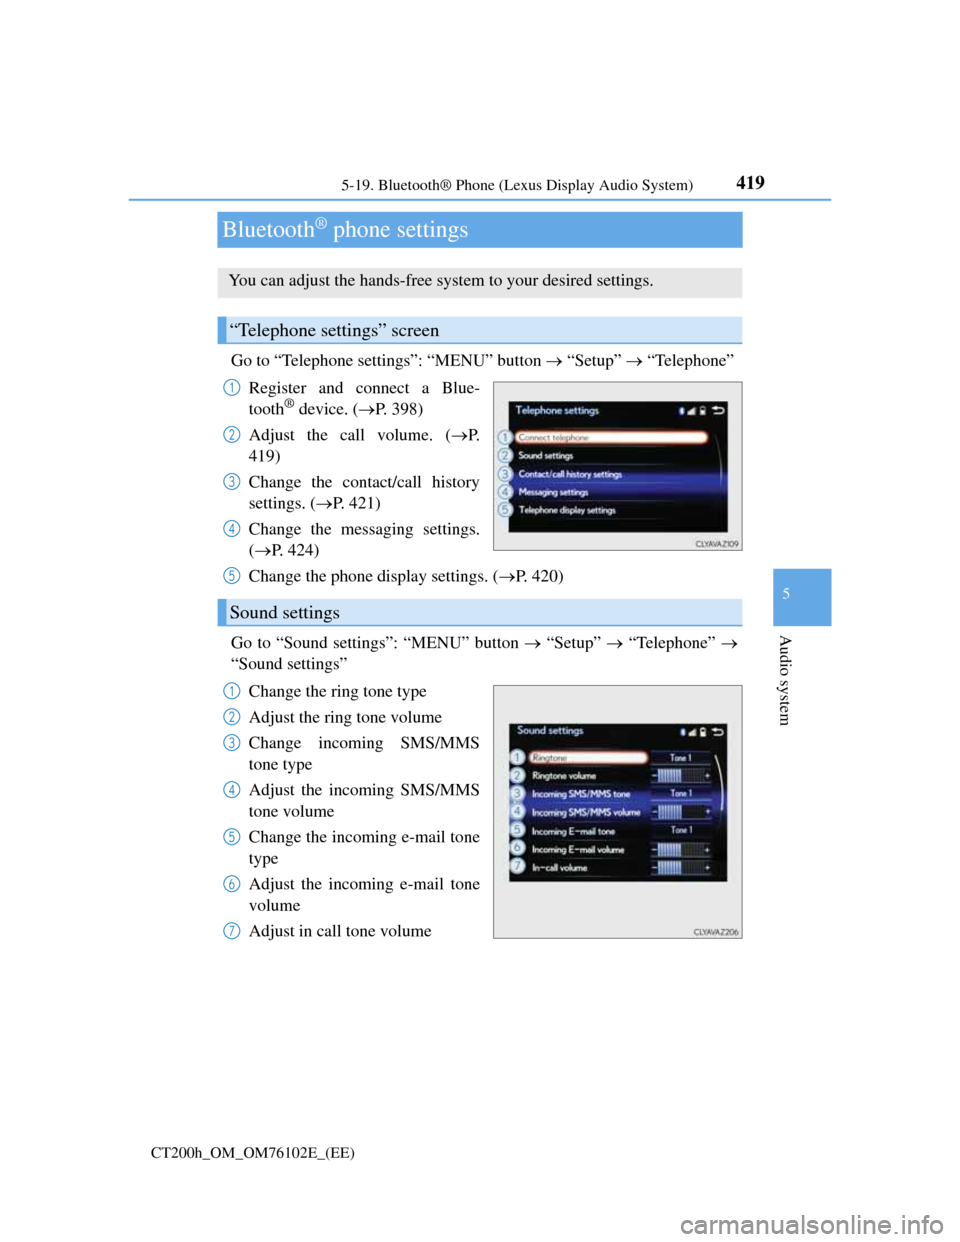
Go to “Telephone settings”: “MENU” button “Setup” “Telephone”
Register and connect a Blue-
tooth
® device. (P. 398)
Adjust the call volume. (P.
419)
Change the contact/call history
settings. (P. 421)
Change the messaging settings.
(P. 424)
Change the phone display settings. (P. 420)
Go to “Sound settings”: “MENU” button “Setup” “Telephone”
“Sound settings”
Change the ring tone type
Adjust the ring tone volume
Change incoming SMS/MMS
tone type
Adjust the incoming SMS/MMS
tone volume
Change the incoming e-mail tone
type
Adjust the incoming e-mail tone
volume
Adjust in call tone volume
You can adjust the hands-free system to your desired settings.
“Telephone settings” screen
1
2
3
4
Sound settings
5
1
2
3
4
5
6
7
Page 425 of 688
421
5 5-20. Phonebook (Lexus Display Audio System)
Audio system
CT200h_OM_OM76102E_(EE)
Contact settings
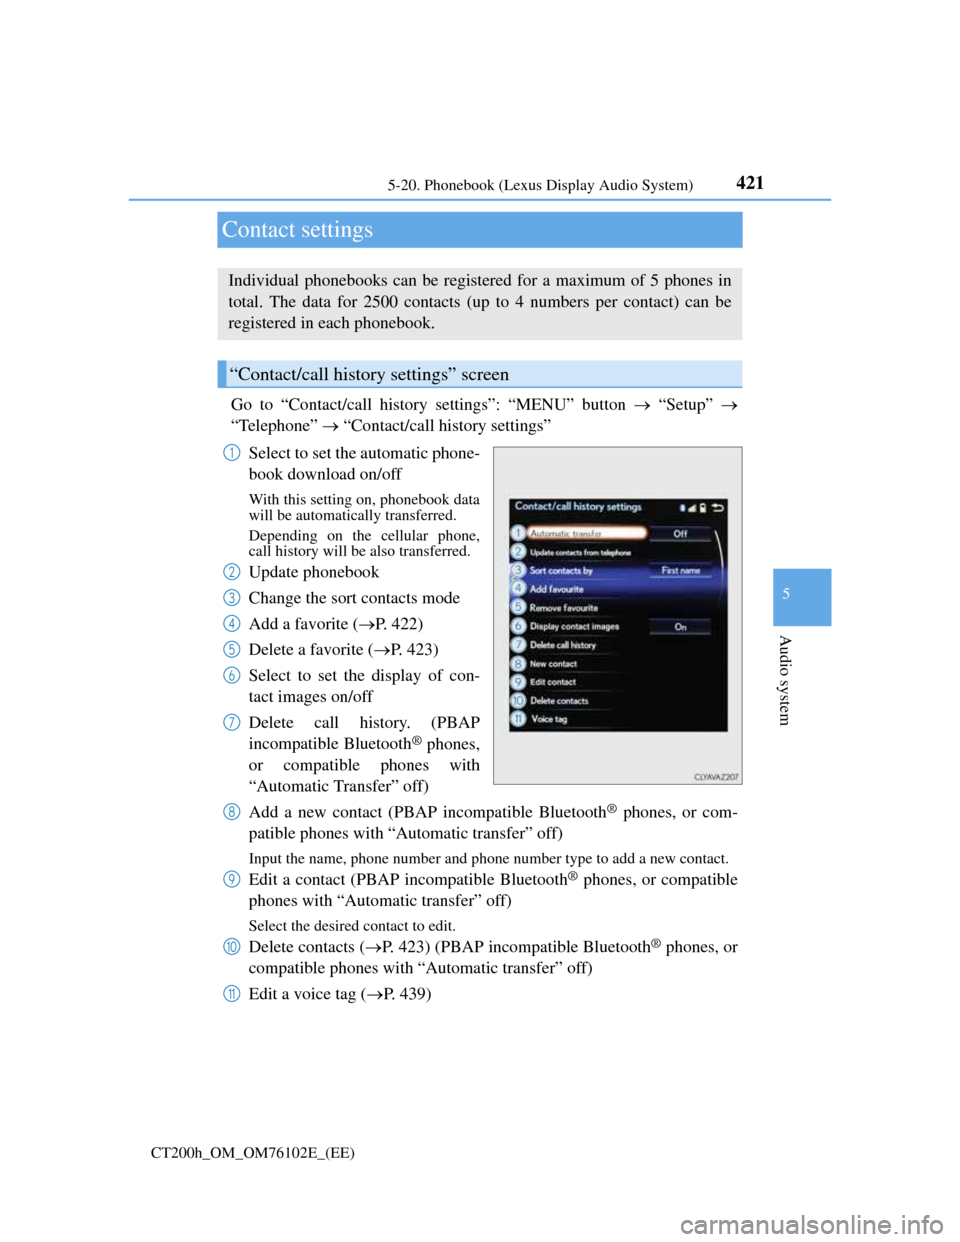
Go to “Contact/call history settings”: “MENU” button “Setup”
“Telephone” “Contact/call history settings”
Select to set the automatic phone-
book download on/off
With this setting on, phonebook data
will be automatically transferred.
Depending on the cellular phone,
call history will be also transferred.
Update phonebook
Change the sort contacts mode
Add a favorite (P. 422)
Delete a favorite (P. 423)
Select to set the display of con-
tact images on/off
Delete call history. (PBAP
incompatible Bluetooth
® phones,
or compatible phones with
“Automatic Transfer” off)
Add a new contact (PBAP incompatible Bluetooth
® phones, or com-
patible phones with “Automatic transfer” off)
Input the name, phone number and phone number type to add a new contact.
Edit a contact (PBAP incompatible Bluetooth® phones, or compatible
phones with “Automatic transfer” off)
Select the desired contact to edit.
Delete contacts (P. 423) (PBAP incompatible Bluetooth® phones, or
compatible phones with “Automatic transfer” off)
Edit a voice tag (P. 439)
Individual phonebooks can be registered for a maximum of 5 phones in
total. The data for 2500 contacts (up to 4 numbers per contact) can be
registered in each phonebook.
“Contact/call history settings” screen
1
2
3
4
5
6
7
8
9
10
11
Page 428 of 688
4245-20. Phonebook (Lexus Display Audio System)
CT200h_OM_OM76102E_(EE)
Messaging setting
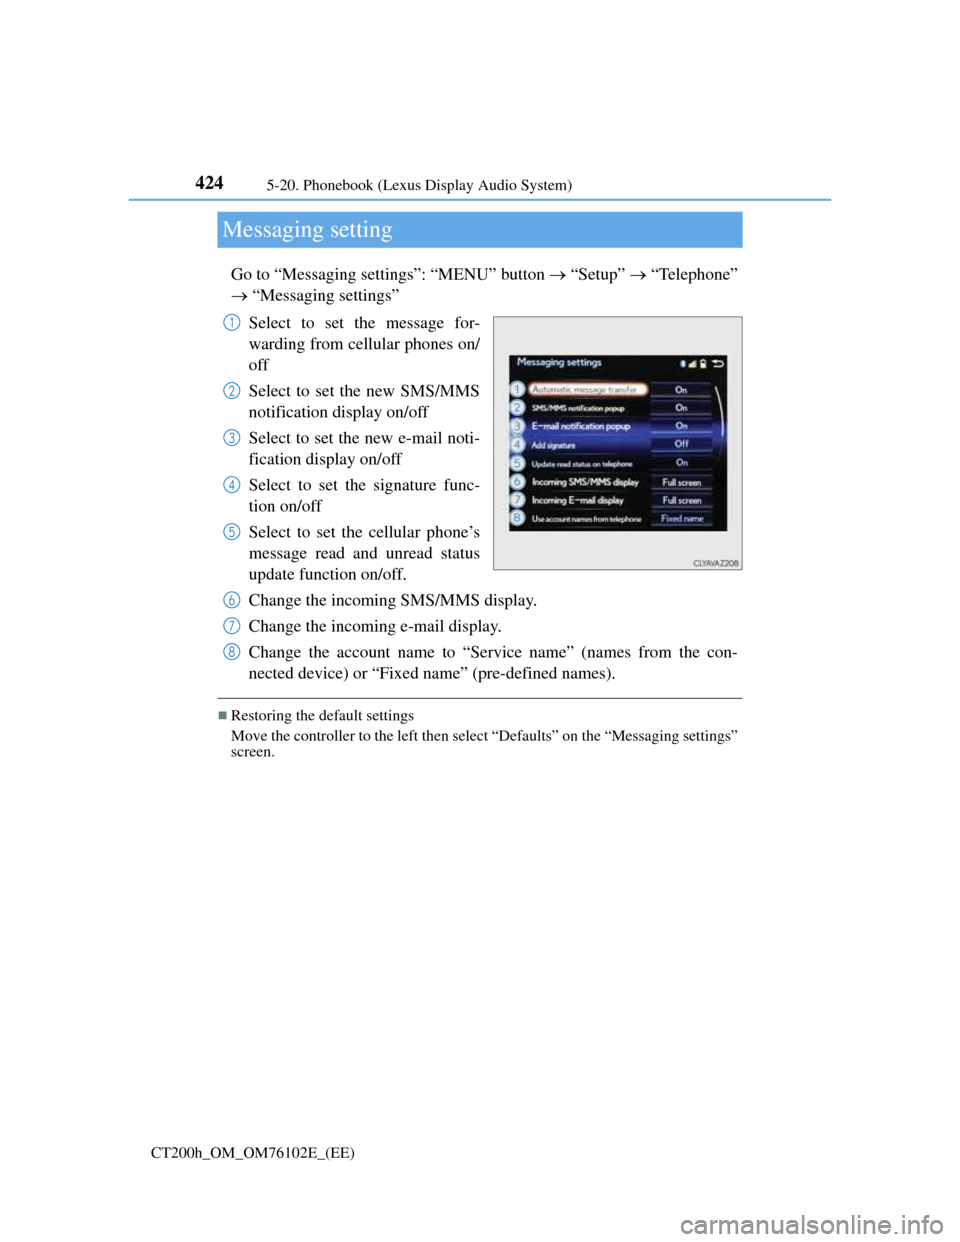
Go to “Messaging settings”: “MENU” button “Setup” “Telephone”
“Messaging settings”
Select to set the message for-
warding from cellular phones on/
off
Select to set the new SMS/MMS
notification display on/off
Select to set the new e-mail noti-
fication display on/off
Select to set the signature func-
tion on/off
Select to set the cellular phone’s
message read and unread status
update function on/off.
Change the incoming SMS/MMS display.
Change the incoming e-mail display.
Change the account name to “Service name” (names from the con-
nected device) or “Fixed name” (pre-defined names).
Restoring the default settings
Move the controller to the left then select “Defaults” on the “Messaging settings”
screen.
1
2
3
4
5
6
7
8
Page 437 of 688
433
5 5-22. Other function (Lexus Display Audio System)
Audio system
CT200h_OM_OM76102E_(EE)
“Information” screen
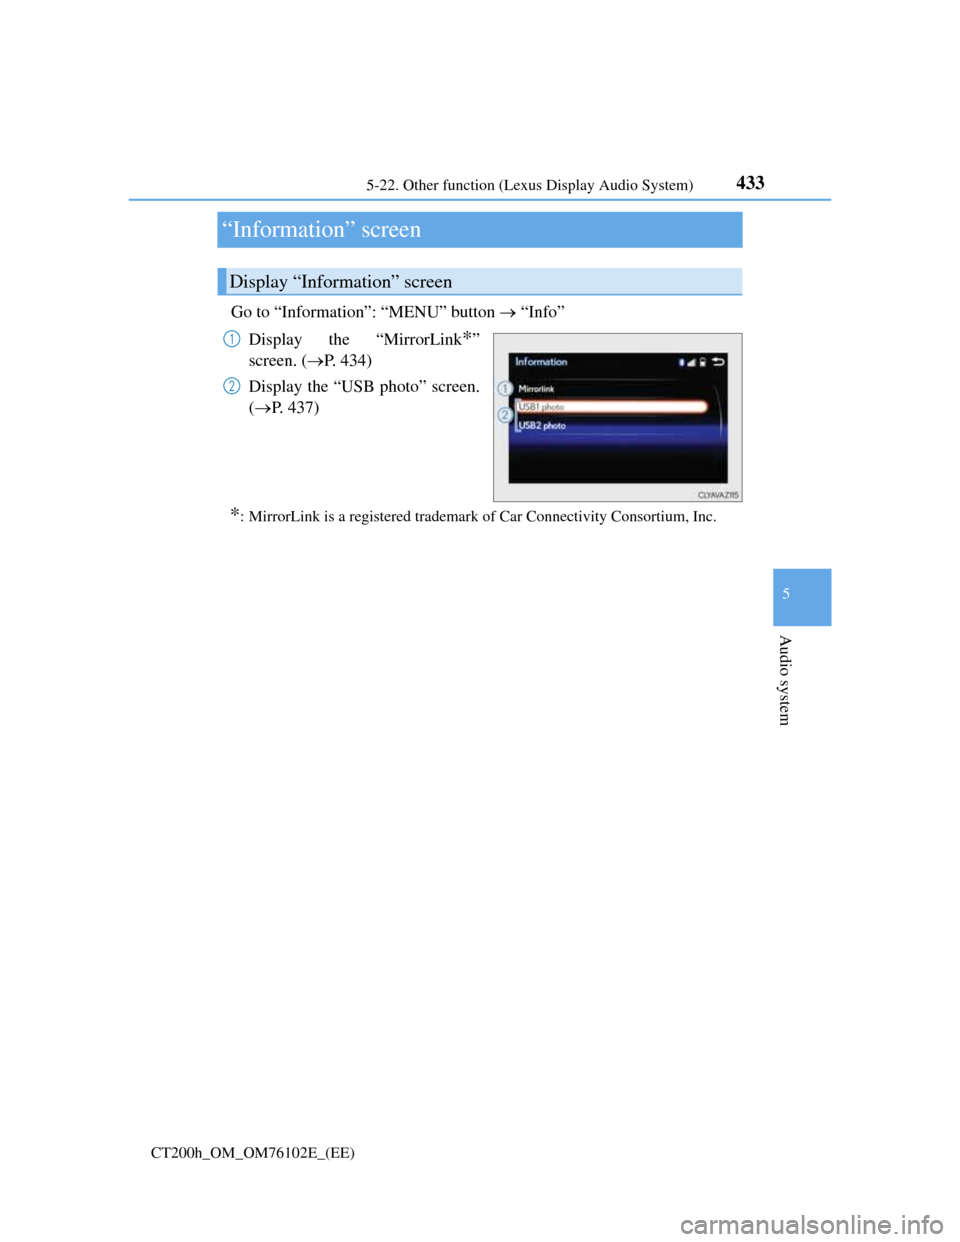
Go to “Information”: “MENU” button “Info”
Display the “MirrorLink
*”
screen. (P. 434)
Display the “USB photo” screen.
(P. 437)
*: MirrorLink is a registered trademark of Car Connectivity Consortium, Inc.
Display “Information” screen
1
2
Page 438 of 688
4345-22. Other function (Lexus Display Audio System)
CT200h_OM_OM76102E_(EE)
MirrorLink™
P. 3 6 2
The MirrorLink™ function enables to operate a smartphone contents via
Lexus Display Audio system.
Depending on differences between models or software version etc., some
models might be incompatible with this system.
Connect a smartphone to USB port using a USB cable.
For safety reasons, the safe driving screen is displayed while driving
depending on the application.
Connecting a smartphone
Page 439 of 688
4355-22. Other function (Lexus Display Audio System)
5
Audio system
CT200h_OM_OM76102E_(EE)
Go to “MirrorLink*”: “MENU” button “Info” “MirrorLink*”
Select the desired application on the application list screen.
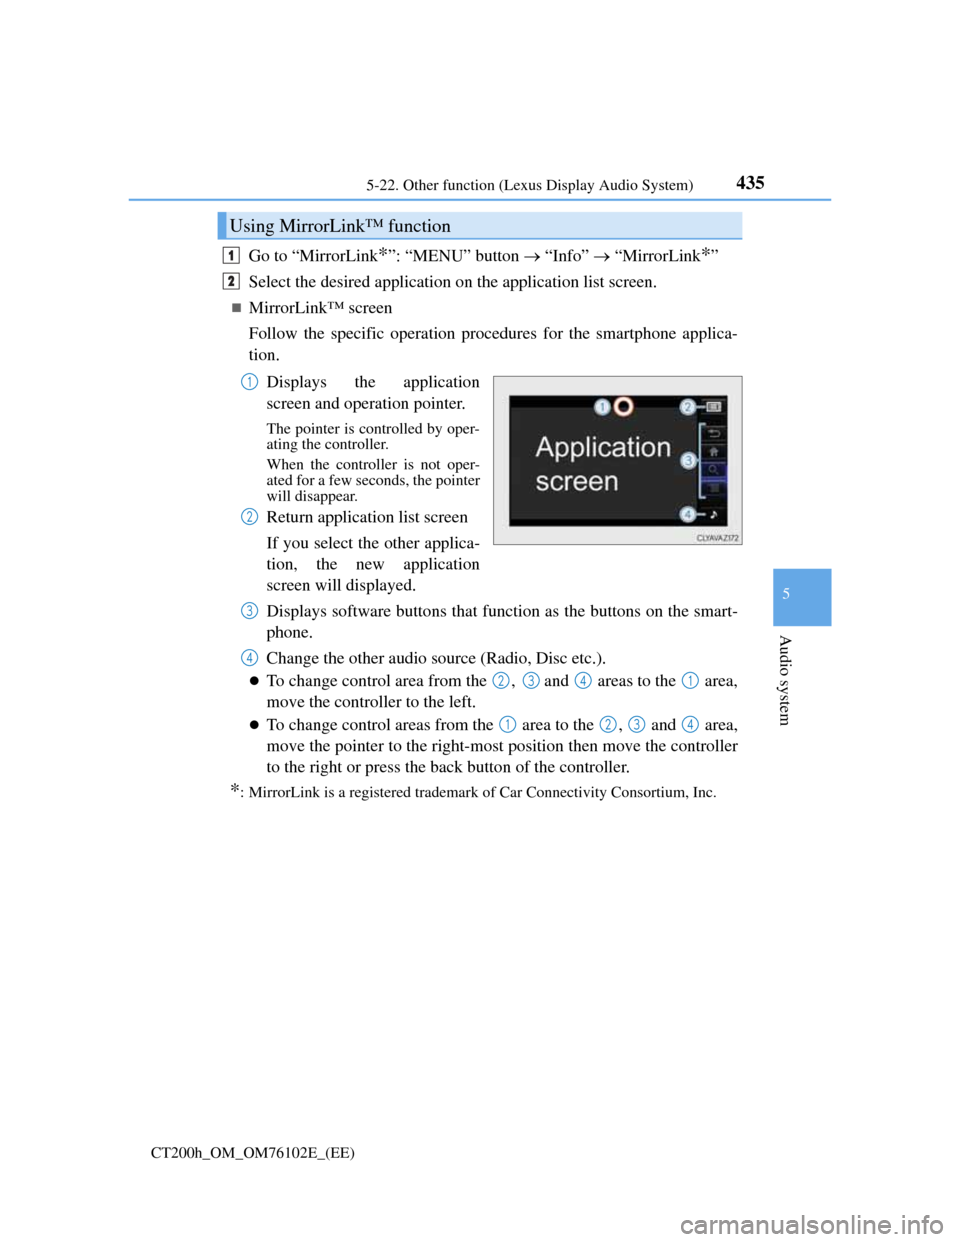
MirrorLink™ screen
Follow the specific operation procedures for the smartphone applica-
tion.
Displays the application
screen and operation pointer.
The pointer is controlled by oper-
ating the controller.
When the controller is not oper-
ated for a few seconds, the pointer
will disappear.
Return application list screen
If you select the other applica-
tion, the new application
screen will displayed.
Displays software buttons that function as the buttons on the smart-
phone.
Change the other audio source (Radio, Disc etc.).
To change control area from the , and areas to the area,
move the controller to the left.
To change control areas from the area to the , and area,
move the pointer to the right-most position then move the controller
to the right or press the back button of the controller.
*: MirrorLink is a registered trademark of Car Connectivity Consortium, Inc.
Using MirrorLink™ function
1
2
1
2
3
4
2341
1234