CD player Lexus ES300h 2014 Navigation Manual
[x] Cancel search | Manufacturer: LEXUS, Model Year: 2014, Model line: ES300h, Model: Lexus ES300h 2014Pages: 424, PDF Size: 16.46 MB
Page 241 of 424
240
1. AUDIO/VIDEO SYSTEM OPERATION
ES350/300h_Navi_OM33A66U_(U)13.07.11 10:10
OPERATING A DVD DISC
The playback condition of some DVD
discs may be determined by the DVD
software producer. This DVD player
plays a disc as the software producer in-
tended. As such some functions may not
work properly. Be sure to read the in-
struction manual that comes with the in-
dividual DVD disc. For detailed
information about DVD video discs, see
“DVD PLAYER AND DVD VIDEO
DISC INFORMATION” on page 252.
PRECAUTIONS ON DVD
VIDEO DISC
When recording with a DVD video, au-
dio tracks may not record in some cases
while the menu is displayed. As audio
will not play in this case, verify that the
video tracks are playing and then acti-
vate playback.
When playback of a disc is completed:
If an audio CD or MP3/WMA disc is
playing, the first track or file starts.
If a DVD video is playing, playback will
stop or the menu screen will be dis-
played.
The title/chapter number and playback
time display may not appear while play-
ing back certain DVD video discs.
CAUTION
●Conversational speech on some DVDs is
recorded at a low volume to emphasize
the impact of sound effects. If you adjust
the volume assuming that the conversa-
tions represent the maximum volume
level that the DVD will play, you may be
startled by louder sound effects or when
you change to a different audio source.
The louder sounds may have a significant
impact on the human body or pose a driv-
ing hazard. Keep this in mind when you
adjust the volume.
Page 243 of 424
242
1. AUDIO/VIDEO SYSTEM OPERATION
ES350/300h_Navi_OM33A66U_(U)13.07.11 10:10
■CHANGING A CHAPTER
1Press the “” or “” button of
“PRST·TRACK” or turn the
“TUNE·SCROLL” knob to change the
chapter.
1Select the menu item using , ,
or and select “Enter”. The
player starts playing the disc from the
start of the selected item.
�z When is selected, the previous
screen is displayed.
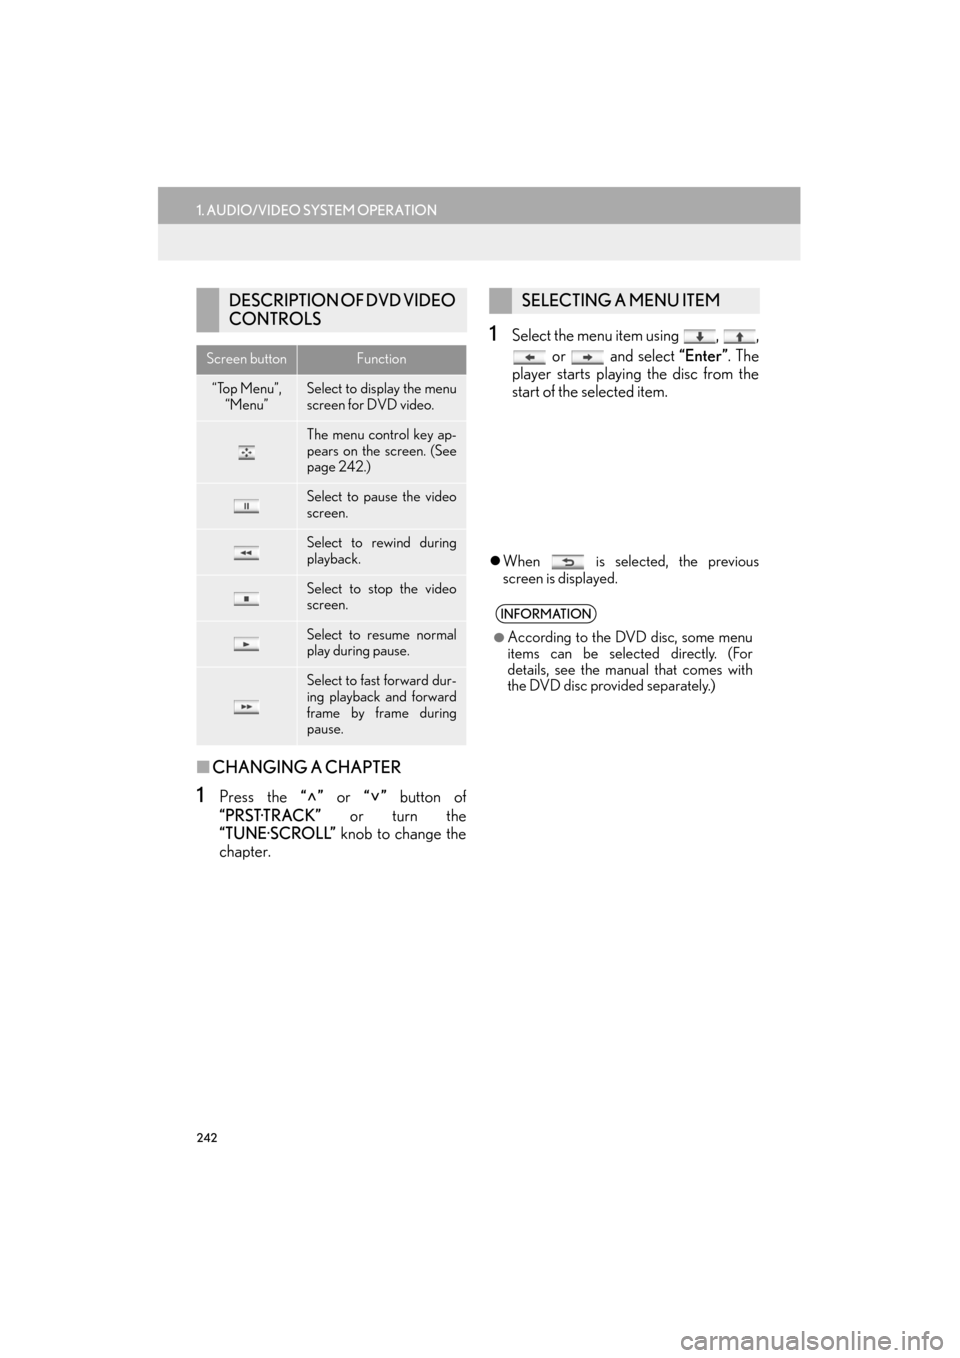
DESCRIPTION OF DVD VIDEO
CONTROLS
Screen buttonFunction
“Top Menu”,
“Menu”Select to display the menu
screen for DVD video.
The menu control key ap-
pears on the screen. (See
page 242.)
Select to pause the video
screen.
Select to rewind during
playback.
Select to stop the video
screen.
Select to resume normal
play during pause.
Select to fast forward dur-
ing playback and forward
frame by frame during
pause.
SELECTING A MENU ITEM
INFORMATION
●
According to the DVD disc, some menu
items can be selected directly. (For
details, see the manual that comes with
the DVD disc provided separately.)
Page 244 of 424
243
1. AUDIO/VIDEO SYSTEM OPERATION
5
AUDIO/VIDEO SYSTEM
ES350/300h_Navi_OM33A66U_(U)13.07.11 10:10
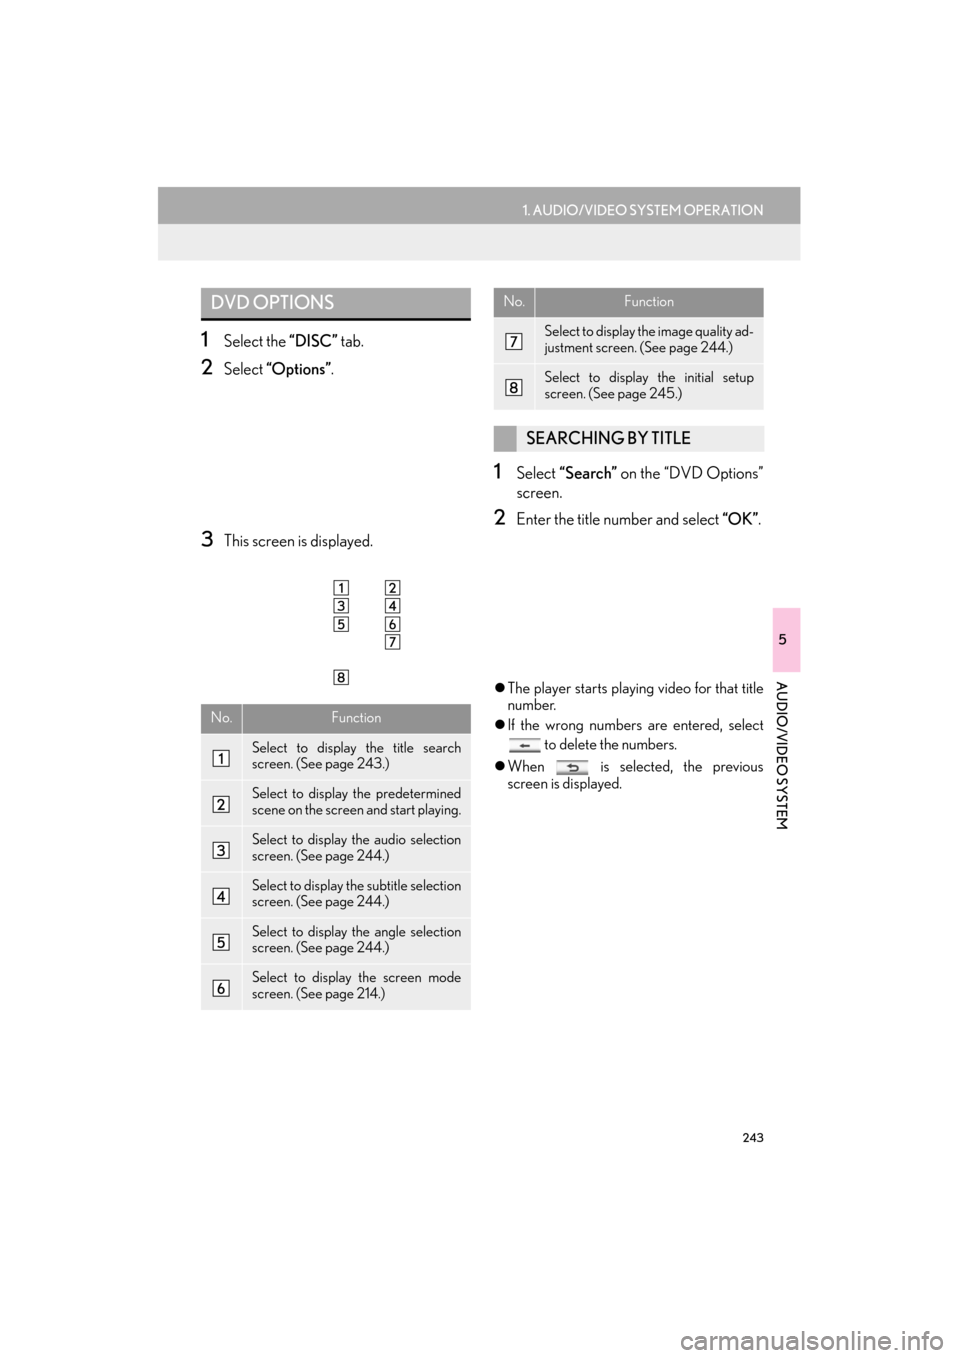
1Select the “DISC” tab.
2Select “Options” .
3This screen is displayed.
1Select “Search” on the “DVD Options”
screen.
2Enter the title number and select “OK” .
�zThe player starts playing video for that title
number.
�z If the wrong numbers are entered, select
to delete the numbers.
�z When is selected, the previous
screen is displayed.
DVD OPTIONS
No.Function
Select to display the title search
screen. (See page 243.)
Select to display the predetermined
scene on the screen and start playing.
Select to display the audio selection
screen. (See page 244.)
Select to display the subtitle selection
screen. (See page 244.)
Select to display the angle selection
screen. (See page 244.)
Select to display the screen mode
screen. (See page 214.)
Select to display the image quality ad-
justment screen. (See page 244.)
Select to display the initial setup
screen. (See page 245.)
SEARCHING BY TITLE
No.Function
Page 252 of 424
251
1. AUDIO/VIDEO SYSTEM OPERATION
5
AUDIO/VIDEO SYSTEM
ES350/300h_Navi_OM33A66U_(U)13.07.11 10:10
If “Check DISC” appears on the screen: It
indicates that the disc is dirty, damaged, or it
was inserted upside down. Clean the disc or
insert it correctly. If a disc which is not play-
able is inserted, “Check DISC” will also ap-
pear on the screen. For appropriate discs
for the player, see “AUDIO/VIDEO SYS-
TEM OPERATING HINTS” on page 277.
If “Region code error” appears on the
screen : It indicates th at the DVD region
code is not set properly.
If the malfunction is not rectified : Take
your vehicle to yo ur Lexus dealer.
2209Vietnamese
2215Volapük
2315Wolof
2408Xhosa
2515Yoruba
2621Zulu
CodeLanguageIF THE PLAYER
MALFUNCTIONS
If the player or another unit equipped
with the player malfunctions, the audio/
video system will display a message.
These are described below.
INFORMATION
●
If an MP3/WMA disc contains CD-DA
files only, the CD-DA files can be played.
If an MP3/WMA disc contains CD-DA
files and files othe r than CD-DA files,
only MP3/WMA files can be played.
Page 253 of 424
252
1. AUDIO/VIDEO SYSTEM OPERATION
ES350/300h_Navi_OM33A66U_(U)13.07.11 10:10
Region codes: Some DVD video discs have
a region code indicating which countries
the DVD video disc can be played in on this
DVD player. If the DVD video disc is not la-
beled as “ALL” or “1”, you cannot use it on
this DVD player. If you attempt to play an in-
appropriate DVD video disc on this player,
“Region code error” appears on the screen.
Even if the DVD video disc does not have a
region code, there are cases when it cannot
be used.
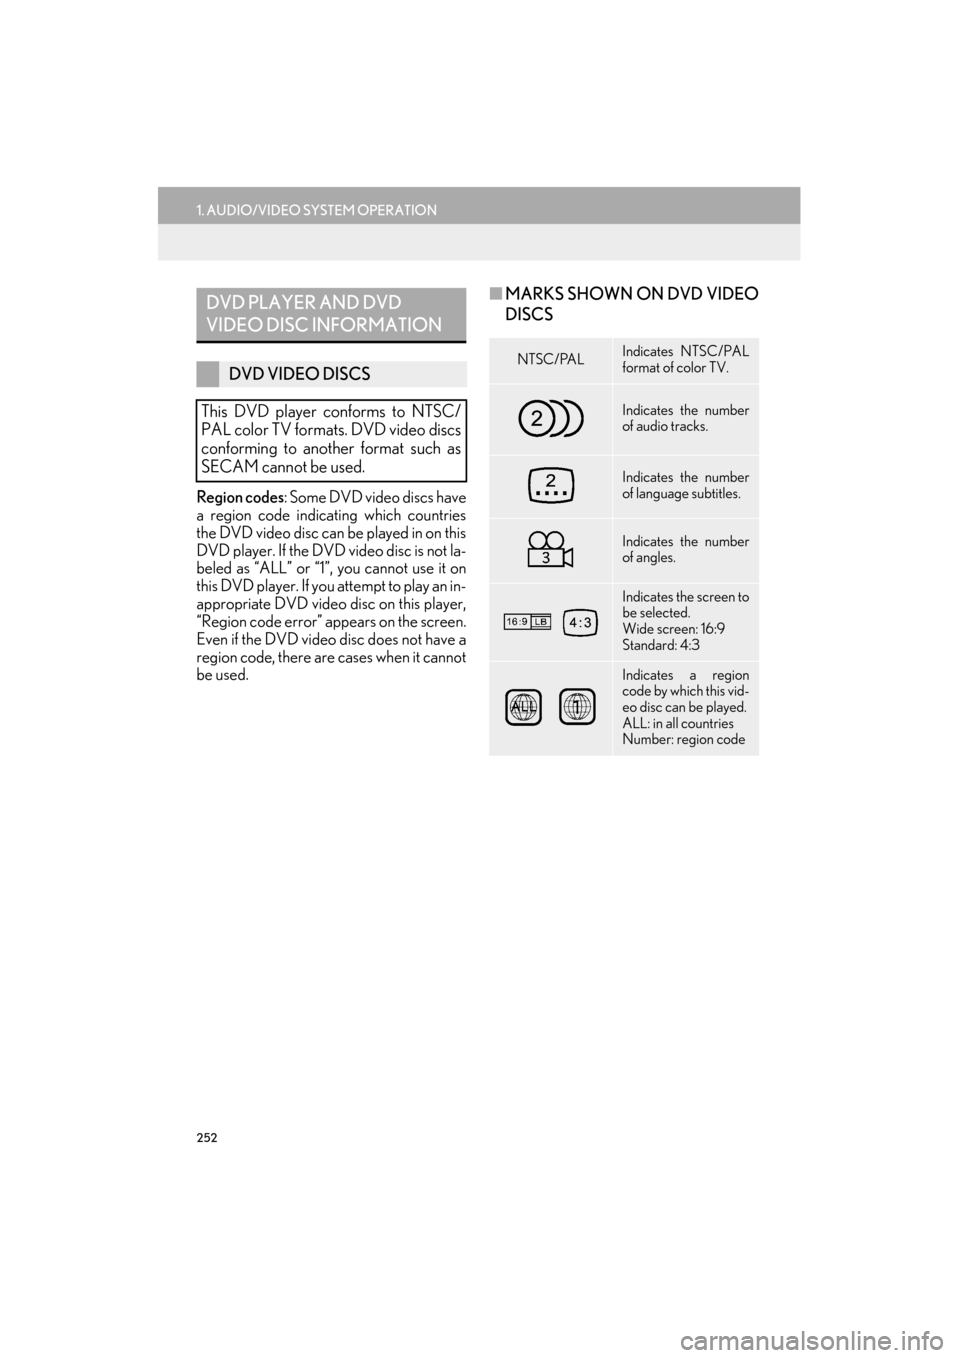
■ MARKS SHOWN ON DVD VIDEO
DISCSDVD PLAYER AND DVD
VIDEO DISC INFORMATION
DVD VIDEO DISCS
This DVD player conforms to NTSC/
PAL color TV formats. DVD video discs
conforming to another format such as
SECAM cannot be used.NTSC/PALIndicates NTSC/PAL
format of color TV.
Indicates the number
of audio tracks.
Indicates the number
of language subtitles.
Indicates the number
of angles.
Indicates the screen to
be selected.
Wide screen: 16:9
Standard: 4:3
Indicates a region
code by which this vid-
eo disc can be played.
ALL: in all countries
Number: region code
Page 254 of 424
253
1. AUDIO/VIDEO SYSTEM OPERATION
5
AUDIO/VIDEO SYSTEM
ES350/300h_Navi_OM33A66U_(U)13.07.11 10:10
DVD video discs: Digital Versatile Disc that
holds video. DVD video discs have adopted
“MPEG2”, one of the world standards of
digital compression technologies. The pic-
ture data is compressed by 1/40 on aver-
age and stored. Variable rate encoded
technology in which the volume of data as-
signed to the picture is changed depending
on the picture format has also been adopt-
ed. Audio data is stored using PCM and
Dolby Digital, which enables higher quality
of sound. Furthermore, multi-angle and
multi-language features will also help users
enjoy the more advanced technology of
DVD video.
Viewer restrictions : This feature limits what
can be viewed in conformity with a level of
restrictions of the coun try. The level of re-
strictions varies depending on the DVD vid-
eo disc. Some DVD video discs cannot be
played at all, or violent scenes are skipped
or replaced with other scenes.
• Level 1: DVD video discs for children can be played.
• Level 2 - 7: DVD video discs for children and G-rated movie can be played.
• Level 8: All types of the DVD video discs can be played.
Multi-angle feature : The same scene can
be enjoyed from different angles.
Multi-language feature : The subtitle and
audio language can be selected.
Region codes : The region codes are pro-
vided on DVD players and DVD discs. If the
DVD video disc does no t have the same re-
gion code as the DVD player, you cannot
play the disc on the DVD player. For region
codes, see page 252.
Audio : This DVD player can play liner
PCM, Dolby Digital and MPEG audio for-
mat DVDs. Other decoded types cannot be
played.
Title and chapter : Video and audio pro-
grams stored in DVD video discs are divid-
ed into parts by title and chapter.
Title : The largest unit of the video and audio
programs stored on DVD video discs. Usu-
ally, one movie, one album, or one audio
program is assigned as a title.
Chapter : A unit smaller than that of title. A
title comprises of several chapters.DVD VIDEO DISC GLOSSARY
�z Manufactured under license from Dolby
Laboratories. Dolby and the double-D
symbol are trademarks of Dolby
Laboratories.
�z This item incorporates copy protection
technology that is protected by U.S.
patents and other intellectual property
rights of Rovi Corporation. Reverse
engineering and disassembly are
prohibited.
Page 255 of 424
254
1. AUDIO/VIDEO SYSTEM OPERATION
ES350/300h_Navi_OM33A66U_(U)13.07.11 10:10
8. USB MEMORY OPERATION
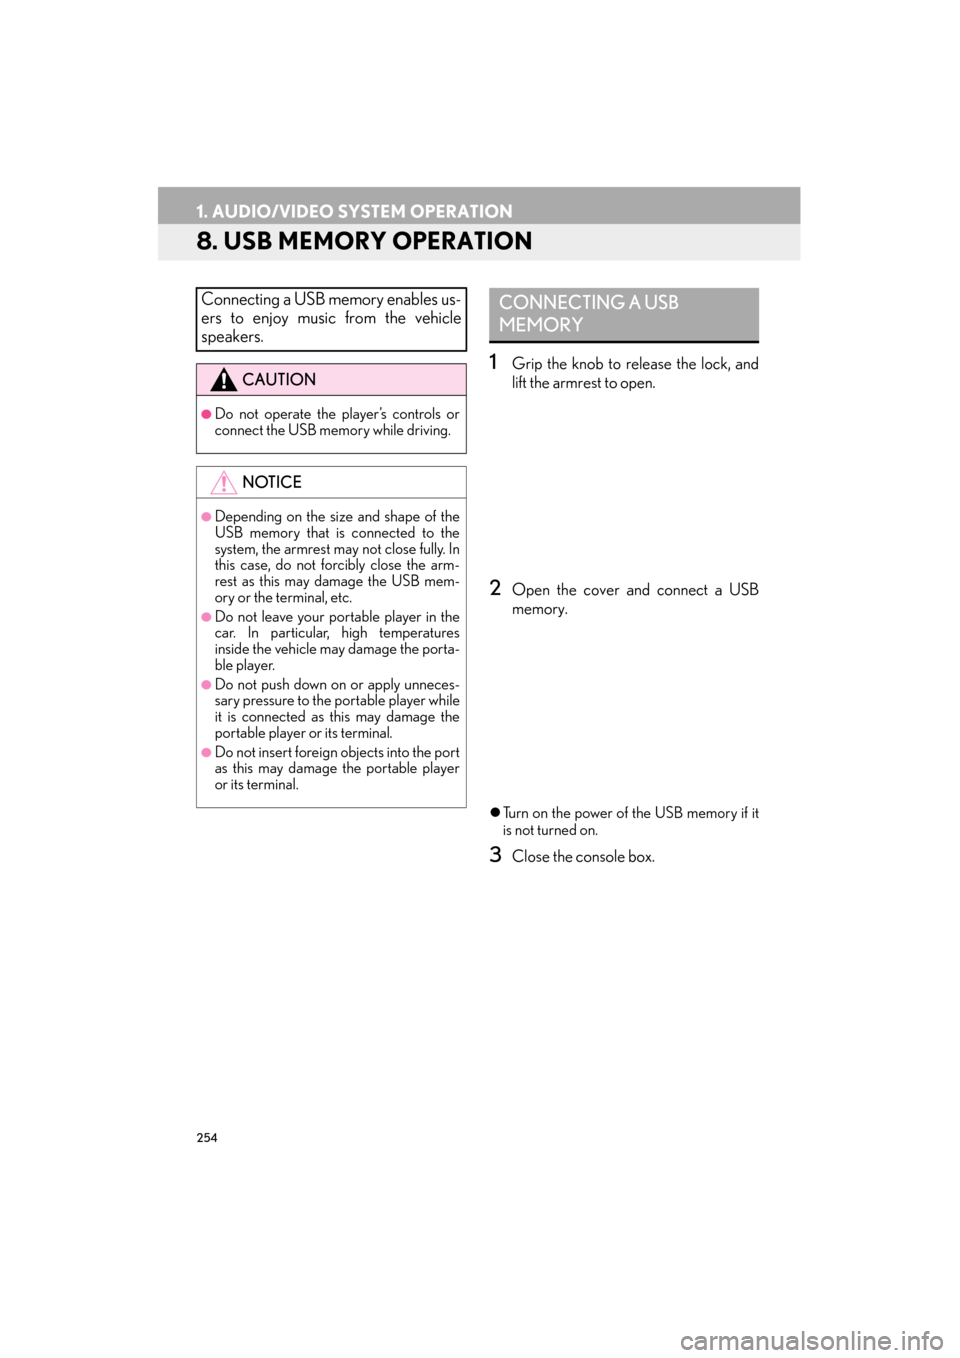
1Grip the knob to release the lock, and
lift the armrest to open.
2Open the cover and connect a USB
memory.
�zTurn on the power of the USB memory if it
is not turned on.
3Close the console box.
Connecting a USB memory enables us-
ers to enjoy music from the vehicle
speakers.
CAUTION
●Do not operate the player’s controls or
connect the USB memory while driving.
NOTICE
●Depending on the size and shape of the
USB memory that is connected to the
system, the armrest may not close fully. In
this case, do not forcibly close the arm-
rest as this may damage the USB mem-
ory or the terminal, etc.
●Do not leave your portable player in the
car. In particular, high temperatures
inside the vehicle may damage the porta-
ble player.
●Do not push down on or apply unneces-
sary pressure to the portable player while
it is connected as this may damage the
portable player or its terminal.
●Do not insert foreign objects into the port
as this may damage the portable player
or its terminal.
CONNECTING A USB
MEMORY
Page 258 of 424
257
1. AUDIO/VIDEO SYSTEM OPERATION
5
AUDIO/VIDEO SYSTEM
ES350/300h_Navi_OM33A66U_(U)13.07.11 10:10
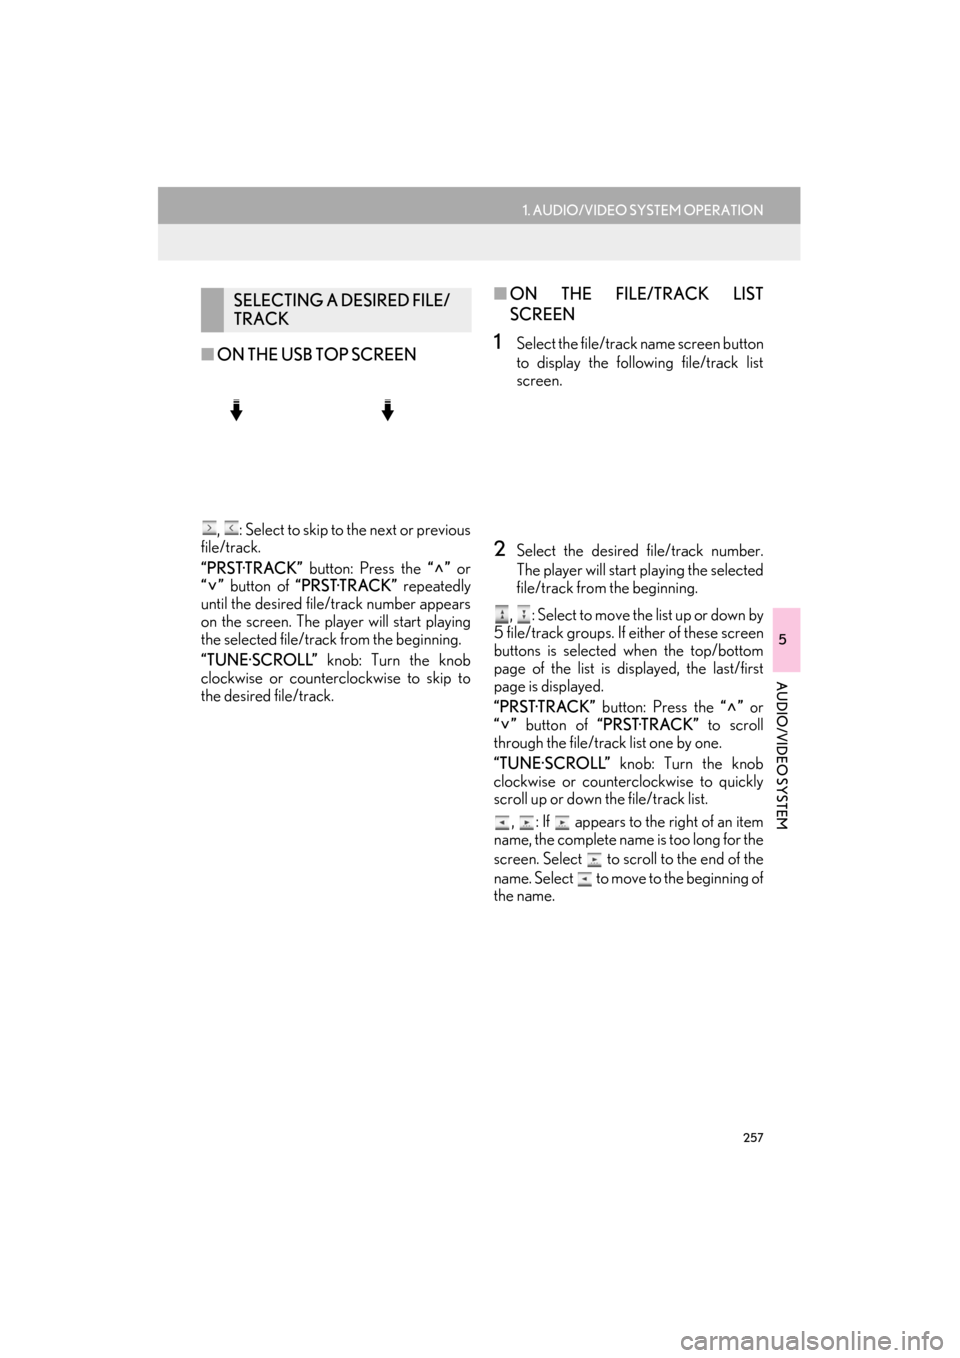
■ON THE USB TOP SCREEN
, : Select to skip to the next or previous
file/track.
“PRST·TRACK” button: Press the “” or
“” button of “PRST·TRACK” repeatedly
until the desired file/track number appears
on the screen. The player will start playing
the selected file/track from the beginning.
“TUNE·SCROLL” knob: Turn the knob
clockwise or counterclockwise to skip to
the desired file/track.
■ ON THE FILE/TRACK LIST
SCREEN
1Select the file/track name screen button
to display the following file/track list
screen.
2Select the desired file/track number.
The player will start playing the selected
file/track from the beginning.
, : Select to move the list up or down by
5 file/track groups. If either of these screen
buttons is selected when the top/bottom
page of the list is displayed, the last/first
page is displayed.
“PRST·TRACK” button: Press the “” or
“” button of “PRST·TRACK” to scroll
through the file/track list one by one.
“TUNE·SCROLL” knob: Turn the knob
clockwise or counterclockwise to quickly
scroll up or down the file/track list.
, : If appears to the right of an item
name, the complete name is too long for the
screen. Select to scroll to the end of the
name. Select to move to the beginning of
the name.
SELECTING A DESIRED FILE/
TRACK
Page 259 of 424
258
1. AUDIO/VIDEO SYSTEM OPERATION
ES350/300h_Navi_OM33A66U_(U)13.07.11 10:10
■FA S T F O RWA R D I N G O R R E -
WINDING
1Press and hold the “” or “” button of
“PRST·TRACK” to fast forward or re-
wind the file/track.
�z When the button is released, the player
resumes playing from that position.
■ REPEATING A FILE/TRACK
1Select “RPT” while the file or track is
playing.
�z Each time “RPT” is selected, the mode
changes as follows:
�X When “RAND” is off
• File/Track Repeat → Folder/Album
Repeat
→ Off
�X When “RAND” is on
• File/Track Repeat → Off
�z “RPT” appears on the screen. When the
file/track is finished, the player will auto-
matically play it again. To cancel this func-
tion, select “RPT” repeatedly until the
repeat mode turns off.
■ REPEATING A FOLDER/ALBUM
1Select “RPT” repeatedly until
“FLD.RPT” appears on the screen.
�z When the folder/album is finished, the
player will automatically go back to the
beginning of the folder/album and play it
again. To cancel this function, select “RPT”
again.
REPEATING
The file or folder currently being listened
to can be repeated.
Page 261 of 424
260
1. AUDIO/VIDEO SYSTEM OPERATION
ES350/300h_Navi_OM33A66U_(U)13.07.11 10:10
9. iPod OPERATION
1Grip the knob to release the lock, and
lift the armrest to open.
2Open the cover and connect iPod using
an iPod cable.
�zTurn on the power of the iPod if it is not
turned on.
3Close the console box.
Connecting an iPod enables users to
enjoy music from the vehicle speakers.
CAUTION
●Do not operate the player’s controls or
connect the iPod while driving.
NOTICE
●Depending on the size and shape of the
iPod that is connected to the system, the
armrest may not close fully. In this case,
do not forcibly close the armrest as this
may damage the iPod or the terminal, etc.
●Do not leave your portable player in the
car. In particular, high temperatures
inside the vehicle may damage the porta-
ble player.
●Do not push down on or apply unneces-
sary pressure to the portable player while
it is connected as this may damage the
portable player or its terminal.
●Do not insert foreign objects into the port
as this may damage the portable player
or its terminal.
INFORMATION
●
When an iPod is connected using a genu-
ine iPod cable, the iPod starts charging its
battery.
CONNECTING iPod