recommended Lexus ES300h 2014 Warranty and Services Guide / (OM33A60U) User Guide
[x] Cancel search | Manufacturer: LEXUS, Model Year: 2014, Model line: ES300h, Model: Lexus ES300h 2014Pages: 917, PDF Size: 11.11 MB
Page 666 of 917
665
ES350_300h_OM_OM33A60U_(U)
6-2. Maintenance
6
Maintenance and care
Maintenance requirements
General maintenance should be performed on a daily basis. This can be
done by yourself or by a Lexus dealer.
Scheduled maintenance should be performed at specified intervals
according to the maintenance schedule.
For details about maintenance items and schedules, refer to the “Warranty and
Service Guide”, “Owner’s Manual Supplement” or “Scheduled Maintenance”.
You can perform some maintenance procedures by yourself.
Please be aware that do-it-yourself maintenance may affect warranty cov-
erage.
The use of Lexus repair manuals is recommended.
For details about warranty coverage, refer to the separate “Owner’s Guide”,
“Warranty and Service Guide”, “Owner’s Manual Supplement” or “Warranty
Booklet”.
To ensure safe and economical driving, day-to-day care and regular
maintenance are essential. It is the owner’s responsibility to perform
regular checks. Lexus recommends the following maintenance:
General maintenance
Scheduled maintenance
Do-it-yourself maintenance
Page 667 of 917

666
ES350_300h_OM_OM33A60U_(U)
6-2. Maintenance
■Repair and replacement
It is recommended that genuine Lexus parts be used for repairs to ensure perfor-
mance of each system. If non-Lexus parts are used in replacement or if a repair shop
other than a Lexus dealer performs repairs, confirm the warranty coverage.
■Resetting the message indicating maintenance is required (U.S.A. only)
After the required maintenance is perfor med according to the maintenance sched-
ule, please reset the maintenance data.
To reset the data, follow th e procedure described below:
Switch the display to the trip meter “A” ( P. 96) when the engine
is running
Turn the “START STOP ENGINE” <“POWER”> switch off.
While pressing the “ODO TRIP” button ( P. 96), turn the “START STOP
ENGINE” <“POWER”> switch to the IGNITION ON
the engine
■Allow inspection and repairs to be performed by a Lexus dealer
●Lexus technicians are well-trained specialist s and are kept up to date with the latest
service information. They are well informed about the operations of all systems on
your vehicle.
●Keep a copy of the repair order. It proves that the maintenance that has been per-
formed is under warranty coverage. If any problem should arise while your vehicle
is under warranty, your Lexus dealer will promptly take care of it. The message shown in the illustration will
appear on the display.
Continue to press and hold the button until
the trip meter displays “000000”.
1
2
3
Page 669 of 917
668
ES350_300h_OM_OM33A60U_(U)
6-2. Maintenance
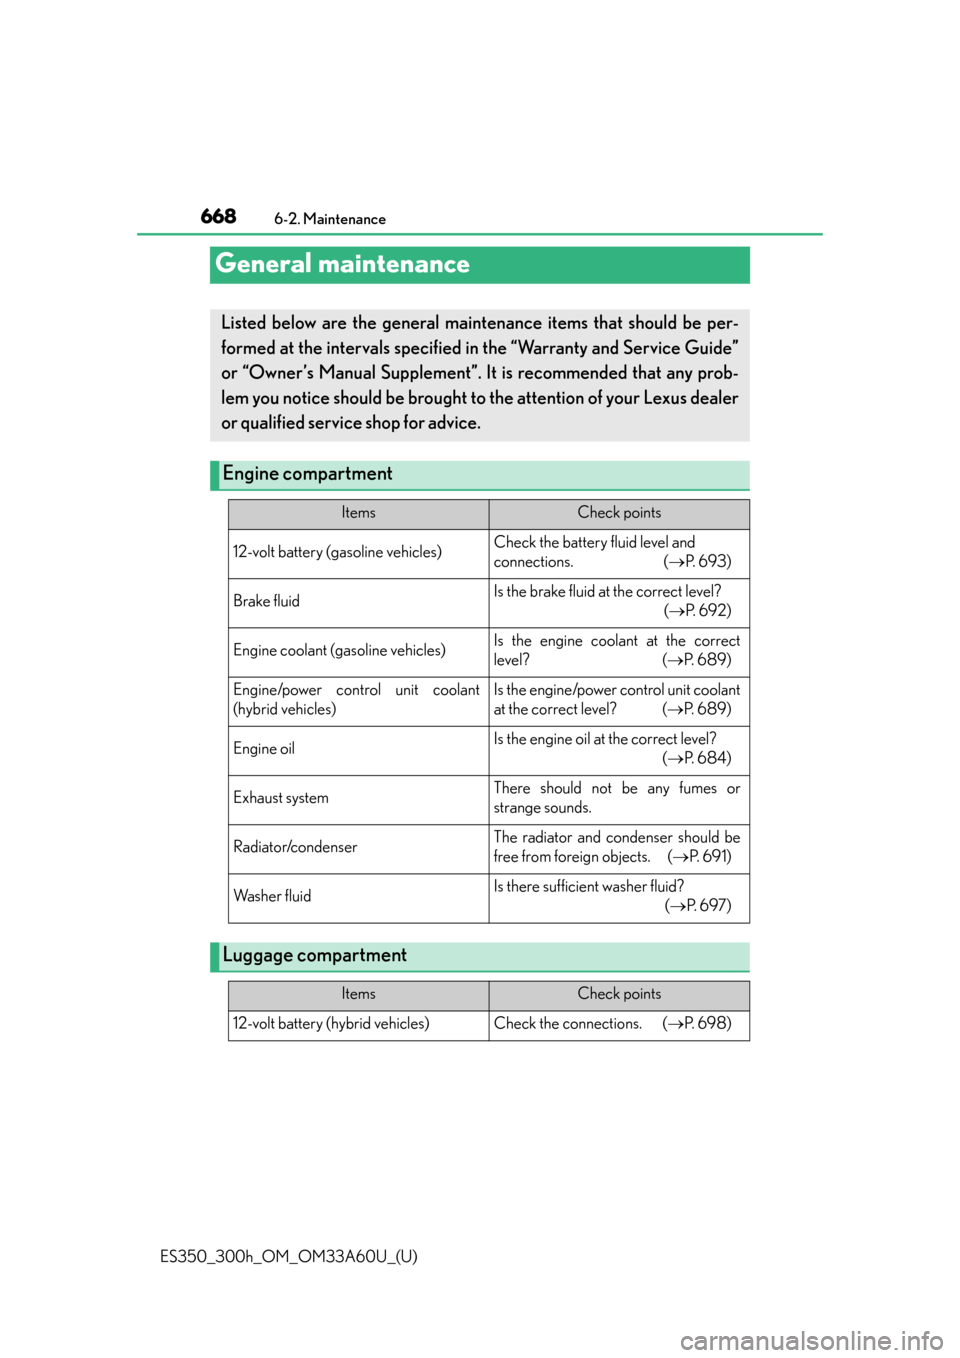
General maintenance
Listed below are the general maintenance items that should be per-
formed at the intervals specified in the “Warranty and Service Guide”
or “Owner’s Manual Supplement”. It is recommended that any prob-
lem you notice should be brought to the attention of your Lexus dealer
or qualified service shop for advice.
Engine compartment
ItemsCheck points
12-volt battery (gasoline vehicles)Check the battery fluid level and
connections. ( P. 6 9 3 )
Brake fluidIs the brake fluid at the correct level?
( P. 6 9 2 )
Engine coolant (gasoline vehicles)Is the engine coolant at the correct
level? ( P. 6 8 9 )
Engine/power control unit coolant
(hybrid vehicles)Is the engine/power control unit coolant
at the correct level? ( P. 6 8 9 )
Engine oilIs the engine oil at the correct level?
( P. 6 8 4 )
Exhaust systemThere should not be any fumes or
strange sounds.
Radiator/condenserThe radiator and condenser should be
free from foreign objects. ( P. 6 9 1 )
Wa s h e r f l u i dIs there sufficient washer fluid?
( P. 6 9 7 )
Luggage compartment
ItemsCheck points
12-volt battery (hybrid vehicles)Check the connections. ( P. 6 9 8 )
Page 707 of 917

706
ES350_300h_OM_OM33A60U_(U)
6-3. Do-it-yourself maintenance
■Low profile tires (P225/45R18 tires)
Generally, low profile tires will wear more rapidly and tire grip performance will be
reduced on snowy and/or icy roads when compared to standard tires. Be sure to use
snow tires or tire chains on snowy and/or icy roads and drive carefully at a speed
appropriate for road and weather conditions.
■Maximum load of tire
Check that the maximum load of the replacement tire is greater than 1 /2 of the
Gross Axle Weight Ratings (GAWR) of either the front axle or the rear axle, which-
ever is greater.
■Tire types
●Summer tires
Summer tires are high-speed performance tires best suited to highway driving
under dry conditions. Since summer tires do not have the same traction perfor-
mance as snow tires, summer tires are in adequate for driving on snow-covered or
icy roads. For driving on snow-covered road s or icy roads, the use of snow tires is
recommended. When installing snow tires, be sure to replace all four tires.
●All season tires
All season tires are designed to provide better traction in snow and to be ade-
quate for driving in most winter conditions as well as for use year-round. All season
tires, however, do not have adequate traction performance compared with snow
tires in heavy or loose snow. Also, all seas on tires fall short in acceleration and han-
dling performance compared with summer tires in highway driving.
●Snow tires
For driving on snow-covered roads or icy roads, we recommend using snow tires.
If you need snow tires, select tires of th e same size, construction and load capacity
as the originally installed tires. Since your vehicle has radial tires as original equip-
ment, make sure your snow tires also have radial construction. Do not install stud-
ded tires without first checking local regulations for possible restrictions. Snow
tires should be installed on all wheels. ( P. 3 3 0 )
For the GAWR, see the Certification Label.
For the maximum load of the tire, see the load
limit at maximum cold tire inflation pressure
mentioned on the sidewall of the tire.
(
P. 8 5 0 )
Page 711 of 917
710
ES350_300h_OM_OM33A60U_(U)
6-3. Do-it-yourself maintenance
CAUTION
■When inspecting or replacing tires
Observe the following precautions to prevent accidents.
Failure to do so may cause damage to parts of the drive train as well as dangerous
handling characteristics, which may lead to an accident resulting in death or seri-
ous injury.
●Do not mix tires of different makes, models or tread patterns.
Also, do not mix tires of remarkably different treadwear.
●Do not use tire sizes other than those recommended by Lexus.
●Do not mix differently constructed tires (r adial, bias-belted or bias-ply tires).
●Do not mix summer, all season and snow tires.
●Do not use tires that have been used on another vehicle.
Do not use tires if you do not know how they were used previously.
●Do not tow if your vehicle has a compact spare tire (if equipped) installed.
■When initializing the tire pressure warning system
Do not operate the tire pressure warning re set switch without first adjusting the tire
inflation pressure to the specified level. Otherwise, the tire pressure warning light
may not come on even if the tire inflation pressure is low, or it may come on when
the tire inflation pressure is actually normal.
■Caution regarding interference with electronic devices
●Users of any electrical medical device other than implantable cardiac pacemak-
ers, cardiac resynchronization therapy-pacemakers or implantable cardioverter
defibrillators should consult the manufacturer of the device for information about
its operation under the influence of radio waves.
Radio waves could have unexpected effects on the operation of such medical
devices.
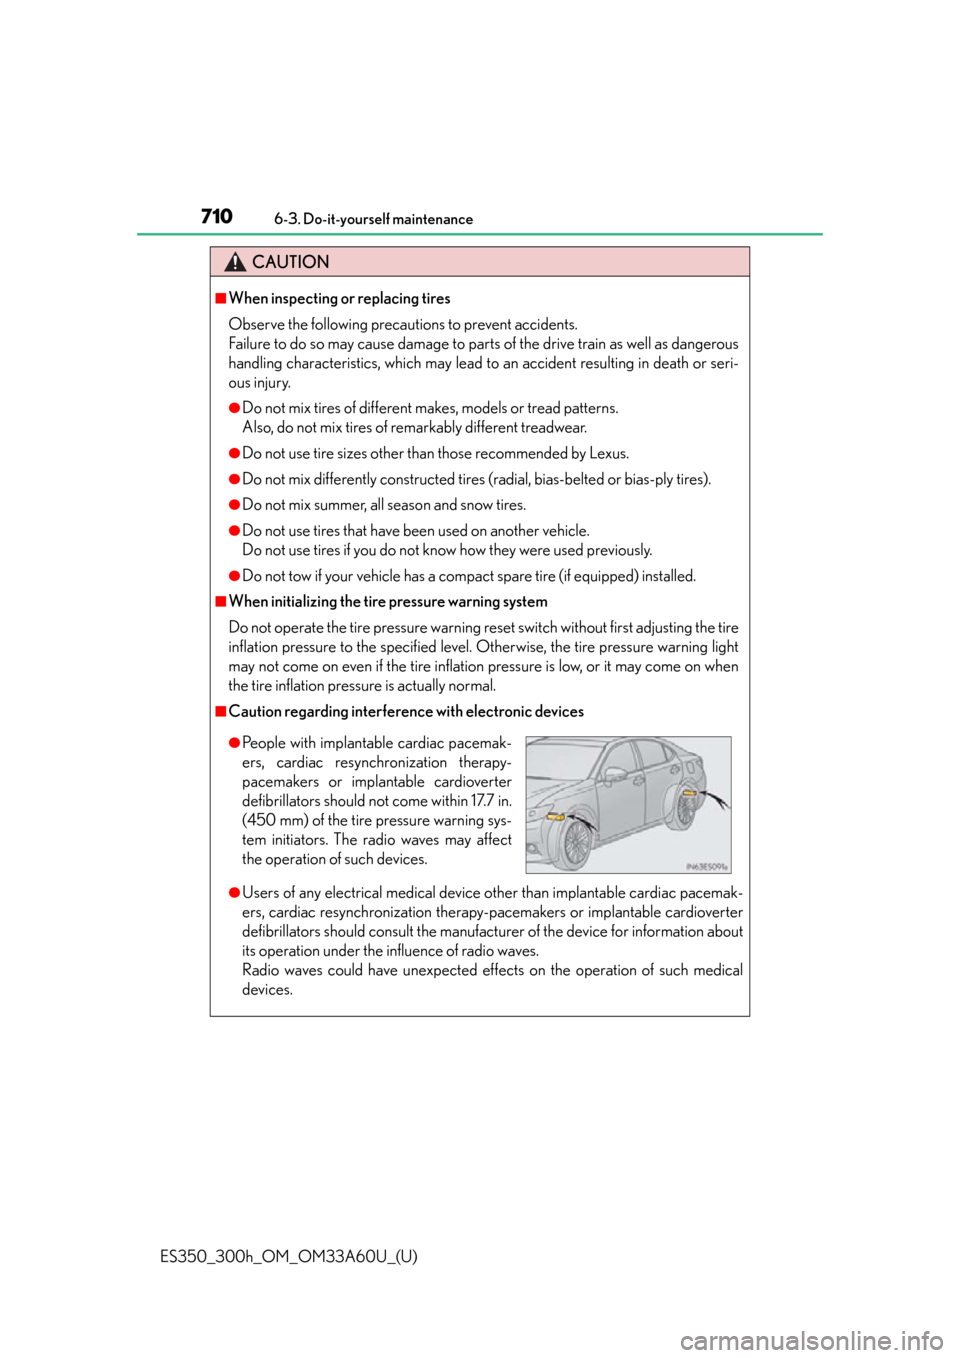
●People with implantable cardiac pacemak-
ers, cardiac resynchronization therapy-
pacemakers or implantable cardioverter
defibrillators should not come within 17.7 in.
(450 mm) of the tire pressure warning sys-
tem initiators. The radio waves may affect
the operation of such devices.
Page 713 of 917
712
ES350_300h_OM_OM33A60U_(U)
6-3. Do-it-yourself maintenance
Tire inflation pressure
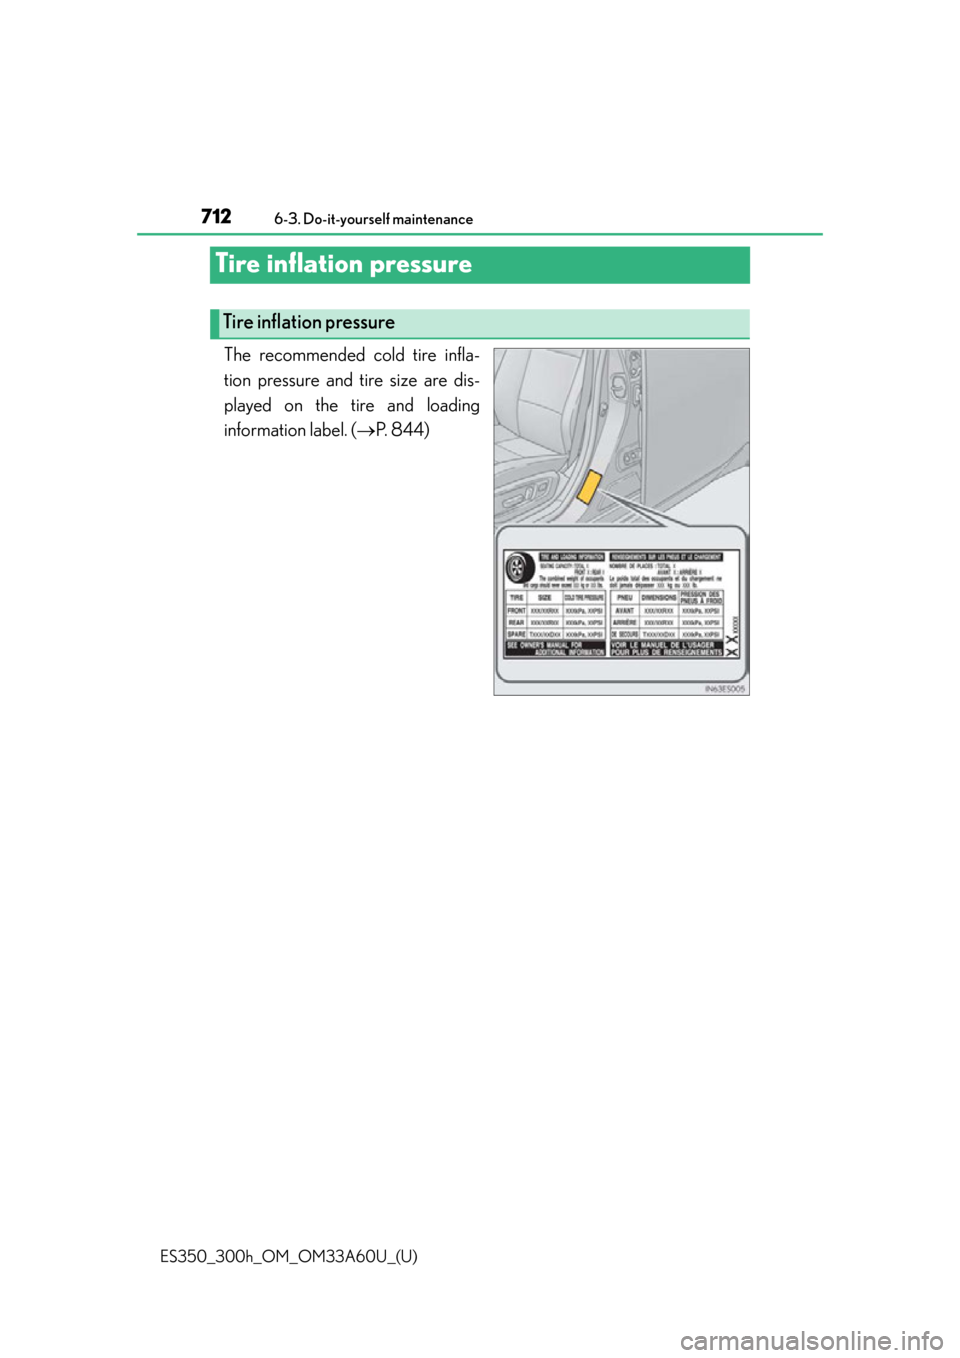
The recommended cold tire infla-
tion pressure and tire size are dis-
played on the tire and loading
information label. (P. 8 4 4 )
Tire inflation pressure
Page 714 of 917
ES350_300h_OM_OM33A60U_(U)
7136-3. Do-it-yourself maintenance
6
Maintenance and care
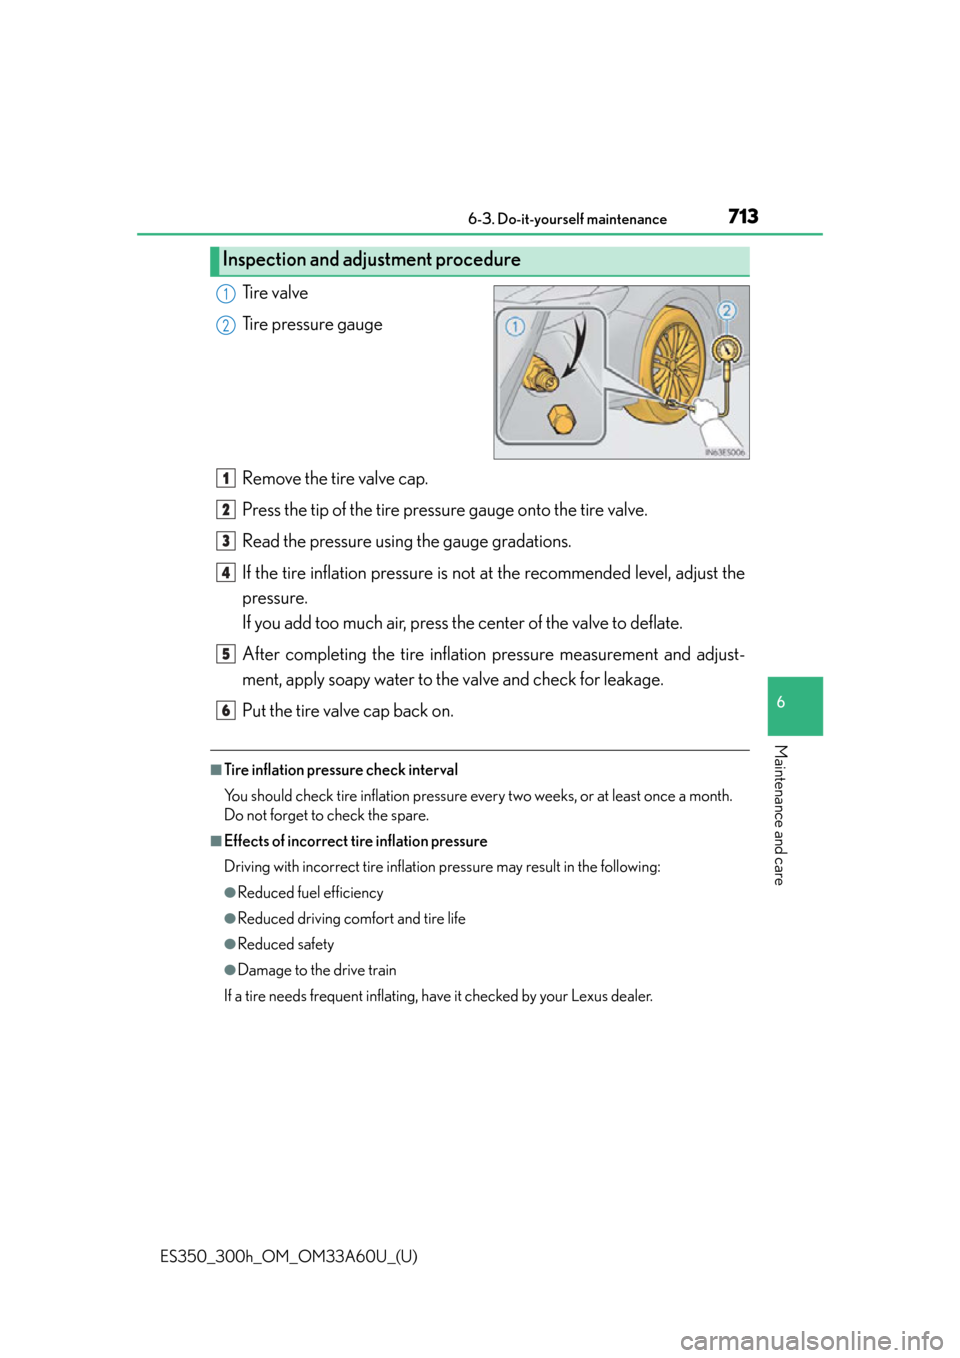
Ti r e v a l v e
Tire pressure gauge
Remove the tire valve cap.
Press the tip of the tire pressure gauge onto the tire valve.
Read the pressure using the gauge gradations.
If the tire inflation pressure is not at the recommended level, adjust the
pressure.
If you add too much air, press the center of the valve to deflate.
After completing the tire inflation pressure measurement and adjust-
ment, apply soapy water to the valve and check for leakage.
Put the tire valve cap back on.
■Tire inflation pressure check interval
You should check tire inflation pressure every two weeks, or at least once a month.
Do not forget to check the spare.
■Effects of incorrect tire inflation pressure
Driving with incorrect tire inflation pressure may result in the following:
●Reduced fuel efficiency
●Reduced driving comfort and tire life
●Reduced safety
●Damage to the drive train
If a tire needs frequent inflating, have it checked by your Lexus dealer.
Inspection and adjustment procedure
1
2
1
2
3
4
5
6
Page 717 of 917

716
ES350_300h_OM_OM33A60U_(U)
6-3. Do-it-yourself maintenance
■When replacing wheels
The wheels of your vehicle are equipped with tire pressure warning valves and trans-
mitters that allow the tire pressure warnin g system to provide advance warning in the
event of a loss in tire inflation pressure. Whenever wheels are replaced, tire pressure
warning valves and transmitters must be installed. ( P. 7 0 3 )
CAUTION
■When replacing wheels
●Do not use wheels that are a different size from those recommended in the
Owner’s Manual, as this may result in a loss of handling control.
●Never use an inner tube in a leaking wheel which is designed for a tubeless tire.
Doing so may result in an accident, causing death or serious injury.
■Use of defective wheels prohibited
Do not use cracked or deformed wheels.
Doing so could cause the tire to leak air during driving, possibly causing an acci-
dent.
NOTICE
■Replacing tire pressure warning valves and transmitters
●Because tire repair or replacement may affect the tire pressure warning valves
and transmitters, make sure to have tires serviced by your Lexus dealer or other
qualified service shop. In addition, make sure to purchase your tire pressure
warning valves and transmitters at your Lexus dealer.
●Ensure that only genuine Lexus wh eels are used on your vehicle.
Tire pressure warning valves and transmitters may not work properly with non-
genuine wheels.
Page 721 of 917

720
ES350_300h_OM_OM33A60U_(U)
6-3. Do-it-yourself maintenance
■Use a CR2032 lithium battery
●Batteries can be purchased at your Lexus dealer, local electrical appliance shops
or camera stores.
●Replace only with the same or equivalent type recommended by the manufacturer.
●Dispose of used batteries according to local laws.
■If the electronic key battery is depleted
The following symptoms may occur:
●The smart access system with push-button start and wireless remote control will
not function properly.
●The operational range will be reduced.
CAUTION
■Removed battery and other parts
These parts are small and if swallowed by a child, they can cause choking. Keep
away from children. Failure to do so could result in death or serious injury.
NOTICE
■For normal operation after replacing the battery
Observe the following precautions to prevent accidents:
●Always work with dry hands.
Moisture may cause the battery to rust.
●Do not touch or move any other component inside the remote control.
●Do not bend either of the battery terminals.
Page 813 of 917

8127-2. Steps to take in an emergency
ES350_300h_OM_OM33A60U_(U)
■Stopping the engine
Shift the shift lever to P and press the “START STOP ENGINE” <“POWER”> switch
as you normally do when stopping the engine
■Replacing the key battery
As the above procedure is a temporary measure, it is recommended that the elec-
tronic key battery be replaced immediately when the battery is depleted. ( P. 7 1 9 )
■Changing “START STOP ENGINE” <“POWER”> switch modes
Release the brake pedal and press the “START STOP ENGINE” <“POWER”> switch
in step above.
The engine
switch is pressed. ( P. 202, 209)
■When the electronic key does not work properly
●Make sure that the smart access system with push-button start has not been deac-
tivated in the customization setting. If it is off, turn the function on.
(Customizable features P. 8 6 2 )
●Check if battery-saving mode is set. If it is set, cancel the function. ( P. 1 3 1 )
3