warning light Lexus ES300h 2019 (OM33D00U) Repair Manual
[x] Cancel search | Manufacturer: LEXUS, Model Year: 2019, Model line: ES300h, Model: Lexus ES300h 2019Pages: 456, PDF Size: 8.65 MB
Page 280 of 456
2805-6. Using the other interior features
WARNING
■Caution regarding interference with
electronic devices
People with implantable cardiac pace-
makers, cardiac resy nchronization ther-
apy-pacemakers or implantable
cardioverter defibrillators, as well as any
other electrical medical device, should
consult their physician about the usage of
the wireless charger.
The operations of the wireless charger
may have an affect on medical devices.
■To prevent damage or burns
Observe the following precautions.
Failure to do so may result in a possibility
of equipment failure and damage, catch
fire, burns due to overheat.
●Do not insert any metallic objects
between the charging area and the
portable device while charging
●Do not attach stickers, metallic
objects, etc., to the charger area or
portable device
●Do not cover with cloth, etc., and
charge
●Do not charge portable devices other
than designated
●Do not attempt to dismantle for disas-
sembly or modifications
●Do not hit or apply a strong force
NOTICE
■Conditions in which the function may
not operate correctly
In the following conditions, it may not
operate correctly
●The portable device is fully charged
●There is foreign matter between the
charge area and portable device
●The temperature of the portable
device gets higher from charging
●The charging surface of the portable
device is facing up
●The placement of the portable device
is out of alignmen t with the charge
area
●Near a TV tower, electric power plant,
gas station, radio stat ion, large display,
airport or other fac ility that generates
strong radio waves or electrical noise
●When the electronic key is in contact
with, or is covered by the following
metallic objects
• Cards to which aluminum foil is attached
• Cigarette boxes that have aluminum foil inside
• Metallic wallets or bags
•Coins
• Hand warmers made of metal
• Media such as CDs and DVDs
●When other wireless keys (that emit
radio waves) are being used nearby
In addition, excluding the above-men-
tioned, when the charger does not per-
form normally or the operation indicator
light is flashing continuously, it is consid-
ered that the wirele ss charger is malfunc-
tioning. Contact your Lexus dealer.
■To prevent failure or damage to data
●Do not bring magnetic cards, such as
credit cards, or magnetic recording
media, etc., close to the charger while
charging, otherwise, data may disap-
pear under the in fluence of magne-
tism. Also, do not bring precision
instruments such as wrist watches, etc.,
close to the charger, as such objects
may break.
●Do not leave portable devices in the
cabin. The temperature inside the
cabin may become high, when under
the sun, and cause damage to the
device.
Page 285 of 456
2855-6. Using the other interior features
5
Interior features
■When support is necessary
Visit on the web at www.home-
link.com/lexus or call 1-800-355-3515.
■Before programming HomeLink®
During programming, it is possible
that garage doors, gates, or other devices may operate. For this rea-
son, make sure that people and
objects are clear of the garage door
or other devices to prevent injury or
other potential harm.
It is recommended that a new bat-
tery be placed in the remote control
transmitter for more accurate pro-
gramming.
Garage door opener motors manu-
factured after 1995 may be
equipped with rolling code protec-
tion. If this is the case, you may need
a stepladder or other sturdy, safe
device to reach the “Learn” or
“Smart” button on the garage door
opener motor.
■Programming HomeLink®
Steps 1 through 3 must be performed
within 60 seconds, otherwise the indi-
cator light will stop flashing and pro-
gramming will not be able to be
completed.
1 Press and release the HomeLink
®
button you want to program and
check that the HomeLink
® indica-
tor light flashes (orange).
WARNING
■When programming a garage door or
other remote control device
The garage door or other device may
operate, so ensure people and objects
are out of danger to prevent potential
harm.
■Conforming to federal safety stan-
dards
Do not use the HomeLink
® compatible
transceiver with any garage door opener
or device that lacks safety stop and
reverse features as required by federal
safety standards.
This includes any garage door that can-
not detect an interfering object. A door
or device without these features
increases the risk of death or serious
injury.
■When operating or programming
HomeLink®
Never allow a child to operate or play
with the HomeLink® buttons.
Programming the HomeLink®
Page 302 of 456
3026-1. Maintenance and care
WARNING
■Precaution regarding the rear
bumper with Blind Spot Monitor (if
equipped)
If the paint of the rear bumper is chipped
or scratched, the system may malfunc-
tion. If this occurs, consult your Lexus
dealer.
NOTICE
■To prevent paint deterioration and
corrosion on the body and compo-
nents (aluminum wheels etc.)
●Wash the vehicle immediately in the
following cases:
• After driving near the sea coast
• After driving on salted roads
• If coal tar, pollen or tree sap is present on the paint surface
• If dead insects, in sect droppings or
bird droppings are present on the
paint surface
• After driving in an area contaminated with soot, oily smoke, mine dust, iron
powder or chemical substances
• If the vehicle becomes heavily soiled with dust or mud
• If liquids such as benzene and gasoline are spilled on the paint surface
●If the paint is chip ped or scratched,
have it repaired immediately.
●To prevent the wheels from corroding,
remove any dirt and store in a place
with low humidity when storing the
wheels.
■Cleaning the exterior lights
●Wash carefully. Do not use organic
substances or scrub with a hard brush.
This may damage the surfaces of the
lights.
●Do not apply wax to the surfaces of the
lights.
Wax may cause damage to the lenses.
■When using an automatic car wash
(vehicles with rain-sensing windshield
wipers)
Set the wiper switch to the off position.
If the wiper switch is in “AUTO”, the wip-
ers may operate and the wiper blades
may be damaged.
■When using a high-pressure car wash
●When washing the vehicle, do not let
water of the high-p ressure washer hit
directly or the vicinity of the camera.
Due to the shock from the high-pres-
sure water, it is possible the device may
not operate as normal.
●Do not bring the nozzle tip close to
boots (rubber or resin manufactured
cover), connectors or the following
parts. The parts may be damaged if
they come into contact with high-pres-
sure water.
• Traction related parts
•Steering parts
• Suspension parts
• Brake parts
●Keep the cleaning nozzle at least 11.9
in. (30 cm) away from the vehicle
body. Otherwise resin section, such as
molding and bumpers, may be
deformed and damaged.
Also, do not continuously hold the
nozzle in the same place.
●Do not wash the underside of the vehi-
cle using a high pressure car washer.
Page 316 of 456
3166-3. Do-it-yourself maintenance
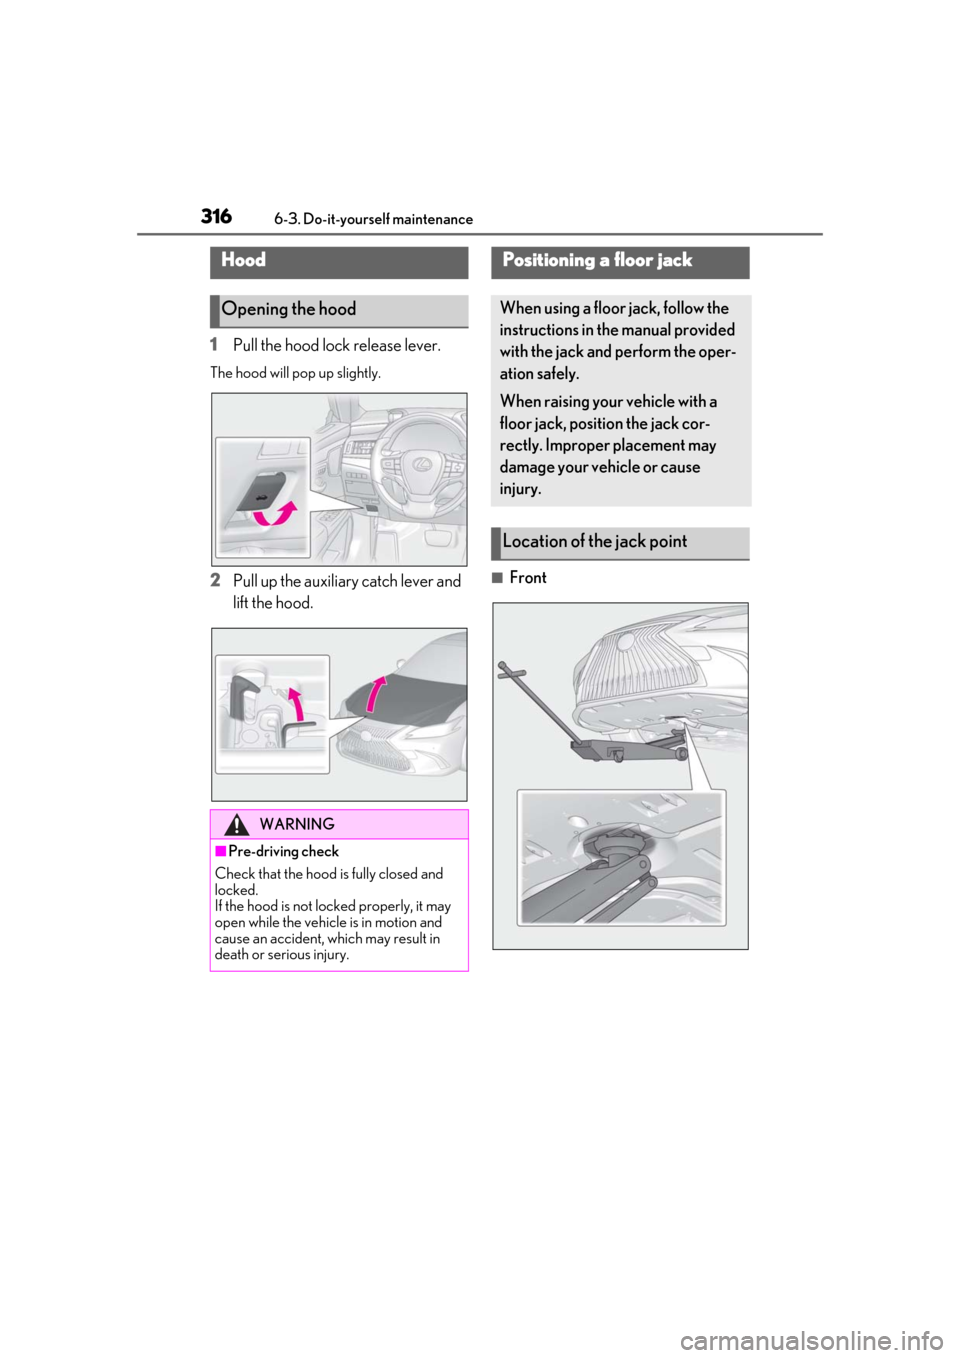
1Pull the hood lock release lever.
The hood will pop up slightly.
2Pull up the auxiliary catch lever and
lift the hood.■Front
Hood
Opening the hood
WARNING
■Pre-driving check
Check that the hood is fully closed and
locked.
If the hood is not locked properly, it may
open while the vehicle is in motion and
cause an accident, which may result in
death or serious injury.
Positioning a floor jack
When using a floor jack, follow the
instructions in the manual provided
with the jack and perform the oper-
ation safely.
When raising your vehicle with a
floor jack, position the jack cor-
rectly. Improper placement may
damage your vehicle or cause
injury.
Location of the jack point
Page 322 of 456
3226-3. Do-it-yourself maintenance
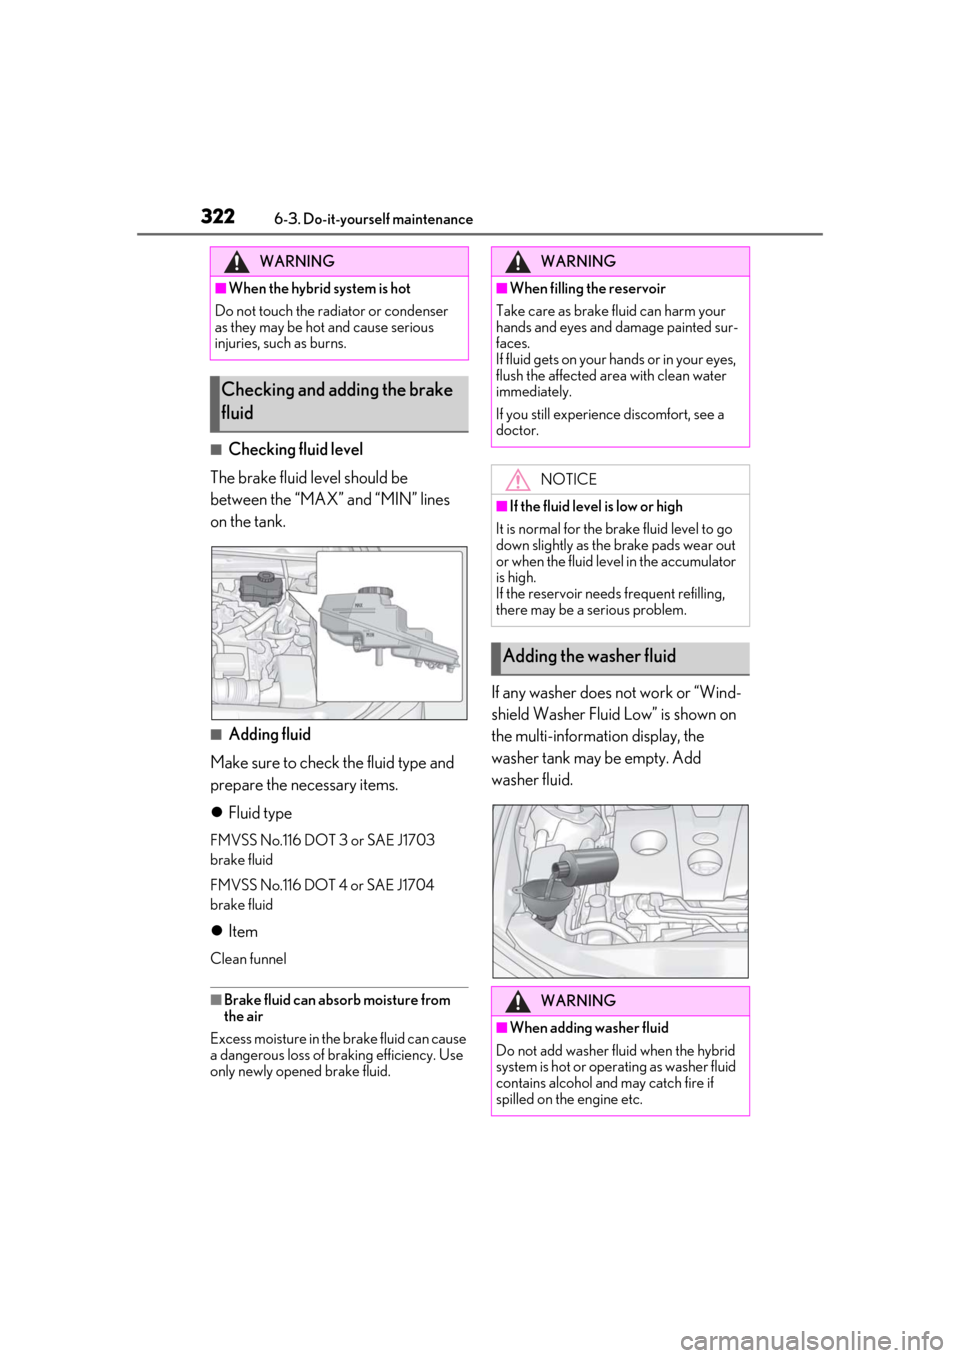
■Checking fluid level
The brake fluid level should be
between the “MAX” and “MIN” lines
on the tank.
■Adding fluid
Make sure to check the fluid type and
prepare the necessary items.
Fluid type
FMVSS No.116 DOT 3 or SAE J1703
brake fluid
FMVSS No.116 DOT 4 or SAE J1704
brake fluid
Item
Clean funnel
■Brake fluid can absorb moisture from
the air
Excess moisture in the brake fluid can cause
a dangerous loss of braking efficiency. Use
only newly opened brake fluid.
If any washer does not work or “Wind-
shield Washer Fluid Low” is shown on
the multi-information display, the
washer tank may be empty. Add
washer fluid.
WARNING
■When the hybrid system is hot
Do not touch the radiator or condenser
as they may be hot and cause serious
injuries, such as burns.
Checking and adding the brake
fluid
WARNING
■When filling the reservoir
Take care as brake fluid can harm your
hands and eyes and damage painted sur-
faces.
If fluid gets on your hands or in your eyes,
flush the affected area with clean water
immediately.
If you still experience discomfort, see a
doctor.
NOTICE
■If the fluid level is low or high
It is normal for the brake fluid level to go
down slightly as the brake pads wear out
or when the fluid leve l in the accumulator
is high.
If the reservoir need s frequent refilling,
there may be a serious problem.
Adding the washer fluid
WARNING
■When adding washer fluid
Do not add washer fluid when the hybrid
system is hot or operating as washer fluid
contains alcohol and may catch fire if
spilled on the engine etc.
Page 324 of 456
3246-3. Do-it-yourself maintenance
switch mode to the status it was in before
the 12-volt battery was disconnected.
Make sure to turn off the power switch
before disconnect the 12-volt battery.
Take extra care when connecting the 12-
volt battery if the power switch mode
prior to discharge is unknown.
If the hybrid system will not start even after
multiple attempts at all methods above,
contact your Lexus dealer.
Lift the luggage mat up.
WARNING
■Chemicals in the 12-volt battery
The 12-volt battery contains poisonous
and corrosive sulfuric acid and may pro-
duce hydrogen gas which is flammable
and explosive. To reduce the risk of death
or serious injury, take the following pre-
cautions while working on or near the 12-
volt battery:
●Do not cause sparks by touching the
12-volt battery terminals with tools.
●Do not smoke or light a match near the
12-volt battery.
●Avoid contact with eyes, skin and
clothes.
●Never inhale or swallow electrolyte.
●Wear protective safety glasses when
working near the 12-volt battery.
●Keep children away from the 12-volt
battery.
■Where to safely charge the 12-volt
battery
Always charge the 12-volt battery in an
open area. Do not charge the 12-volt bat-
tery in a garage or closed room where
there is insufficient ventilation.
■How to recharge the 12-volt battery
Recharge at a current of 5 A or less and
make sure that the recharging period
does not exceed a total of 12 hours.
■Emergency measures regarding
electrolyte
●If electrolyte gets in your eyes
Flush your eyes with clean water for at
least 15 minutes and get immediate
medical attention. If possible, continue
to apply water with a sponge or cloth
while traveling to the nearest medical
facility.
●If electrolyte gets on your skin
Wash the affected area thoroughly. If
you feel pain or burning, get medical
attention immediately.
●If electrolyte gets on your clothes
It can soak through clothing on to your
skin. Immediately take off the clothing
and follow the procedure above if nec-
essary.
●If you accidentally swallow electrolyte
Drink a large quantity of water or milk.
Get emergency medical attention
immediately.
■When replacing the 12-volt battery
Use a 12-volt battery designed for this
vehicle. Failure to do so may cause gas
(hydrogen) to enter the passenger com-
partment, causing a fire or explosion.
For replacement of the 12-volt battery,
contact your Lexus dealer.
NOTICE
■When recharging the 12-volt battery
Never recharge the 12-volt battery while
the hybrid system is operating. Also, be
sure all accessories are turned off.
Removing the 12-volt battery
cover
Page 328 of 456
3286-3. Do-it-yourself maintenance
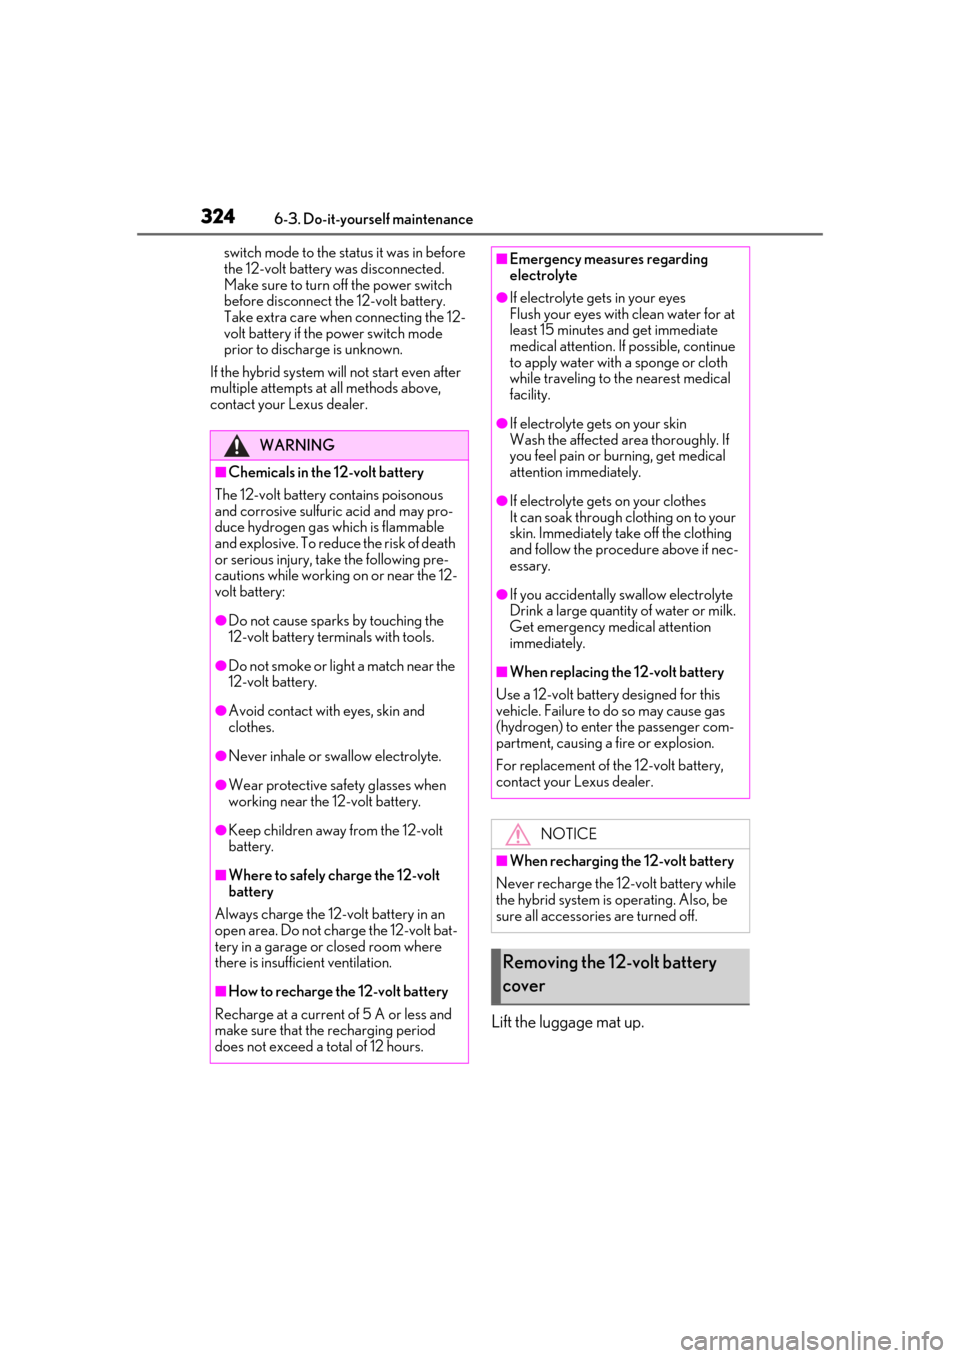
Rotate the tires in the order shown.
To equalize tire wear and extend tire life,
Lexus recommends that tire rotation is car-
ried out at the same interval as tire inspec-
tion.
Do not fail to initialize the tire pressure
warning system after tire rotation.
■When rotating the tires
Make sure that the power switch is off. If the
tires are rotated while the power switch is in
ON mode, the tire position information will
not be updated.
If this accidentally oc curs, either turn the
power switch to off and then to ON mode,
or initialize the system after checking that
the tire pressure is properly adjusted.
Your vehicle is equipped with a tire
pressure warning system that uses tire
pressure warning valves and transmit-
ters to detect low ti re inflation pressure
before serious problems arise.
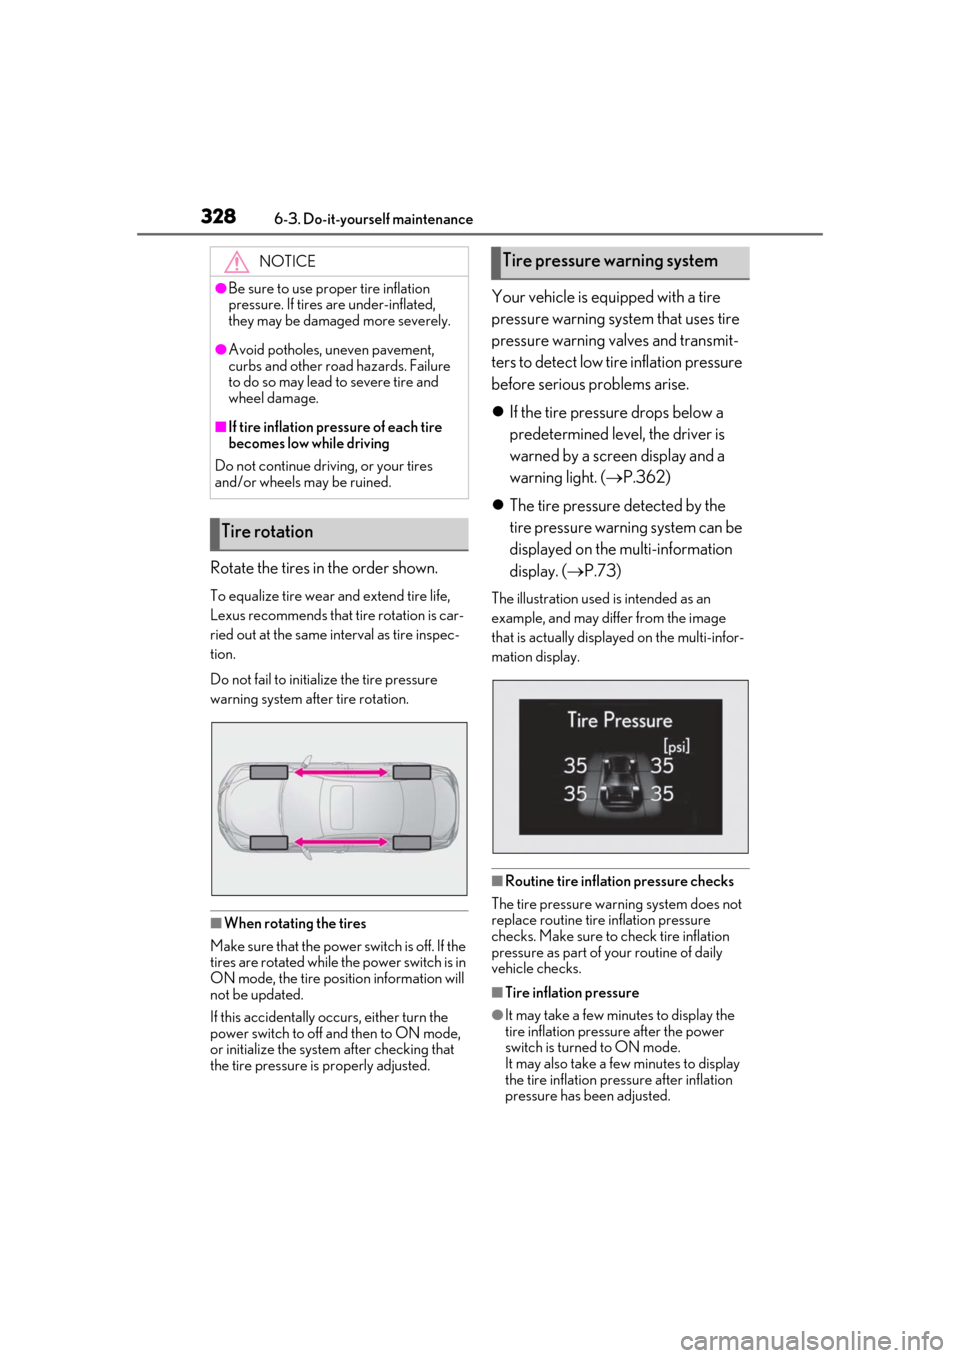
If the tire pressure drops below a
predetermined level, the driver is
warned by a screen display and a
warning light. ( P.362)
The tire pressure detected by the
tire pressure warning system can be
displayed on the multi-information
display. ( P.73)
The illustration used is intended as an
example, and may differ from the image
that is actually displayed on the multi-infor-
mation display.
■Routine tire inflation pressure checks
The tire pressure warning system does not
replace routine tire inflation pressure
checks. Make sure to check tire inflation
pressure as part of your routine of daily
vehicle checks.
■Tire inflation pressure
●It may take a few minutes to display the
tire inflation pressu re after the power
switch is turned to ON mode.
It may also take a few minutes to display
the tire inflation pressure after inflation
pressure has b een adjusted.
NOTICE
●Be sure to use proper tire inflation
pressure. If tires are under-inflated,
they may be damaged more severely.
●Avoid potholes, uneven pavement,
curbs and other road hazards. Failure
to do so may lead to severe tire and
wheel damage.
■If tire inflation pres sure of each tire
becomes low while driving
Do not continue driving, or your tires
and/or wheels may be ruined.
Tire rotation
Tire pressure warning system
Page 330 of 456
3306-3. Do-it-yourself maintenance
For vehicles sold in Canada
When replacing tires or wheels, tire
pressure warning valves and transmit-
ters must also be installed.
When new tire pressure warning
valves and transmitters are installed,
new ID codes must be registered in the
tire pressure warning computer and
the tire pressure warning system must
be initialized. ( P.332)
■When replacing the tires and wheels
If the ID code of the tire pressure warning
valve and transmitter is not registered, the
tire pressure warning system will not work
properly. After driving for about 20 min-
utes, the tire pressure warning light blinks
for 1 minute and stays on to indicate a sys-
tem malfunction.
Installing tire pressure warning
valves and transmittersNOTICE
■Repairing or replac ing tires, wheels,
tire pressure warning valves, trans-
mitters and tire valve caps
●When removing or fitting the wheels,
tires or the tire pressure warning
valves and transmitters, contact your
Lexus dealer as the tire pressure warn-
ing valves and transmitters may be
damaged if not handled correctly.
●Make sure to install the tire valve caps.
If the tire valve caps are not installed,
water could enter the tire pressure
warning valves and the tire pressure
warning valves could be bound.
●When replacing tire valve caps, do not
use tire valve caps other than those
specified. The cap may become stuck.
Page 331 of 456
3316-3. Do-it-yourself maintenance
6
Maintenance and care
■The tire pressure warning system
must be initialized in the following
circumstances:
When rotating the tires.
When the tire inflation pressure is
changed when changing traveling
speed.
When the tire inflation pressure is
changed such as when changing tire
size. (When there are multiple spec-
ified pressures)
After registering the ID codes.
( P.332)
When the tire pressure warning system
is initialized, the cu rrent tire inflation
pressure is set as the benchmark pres-
sure.
■How to initialize the tire pressure
warning system
1 Park the vehicle in a safe place and
stop the hybrid system for 20 min-
utes or more.
Initialization cannot be performed while
the vehicle is moving.
2 Adjust the tire inflation pressure to
the specified cold tire inflation pres-
sure level.
Make sure to adjust th e tire pressure to the
specified cold tire infl ation pressure level.
The tire pressure warning system will oper-
ate based on this pressure level.
3 Start the hybrid system ( P.135)
4 Press or of the meter con-
trol switches and select . 5
Press or of the meter con-
trol switches and select “Vehicle
Settings”, then press “OK”.
6 Press or of the meter con-
trol switches and select “TPWS”,
then press “OK”.
7 Press or of the meter con-
trol switches and select “Set Pres-
sure”. Then press and hold “OK”
until the tire pressure warning light
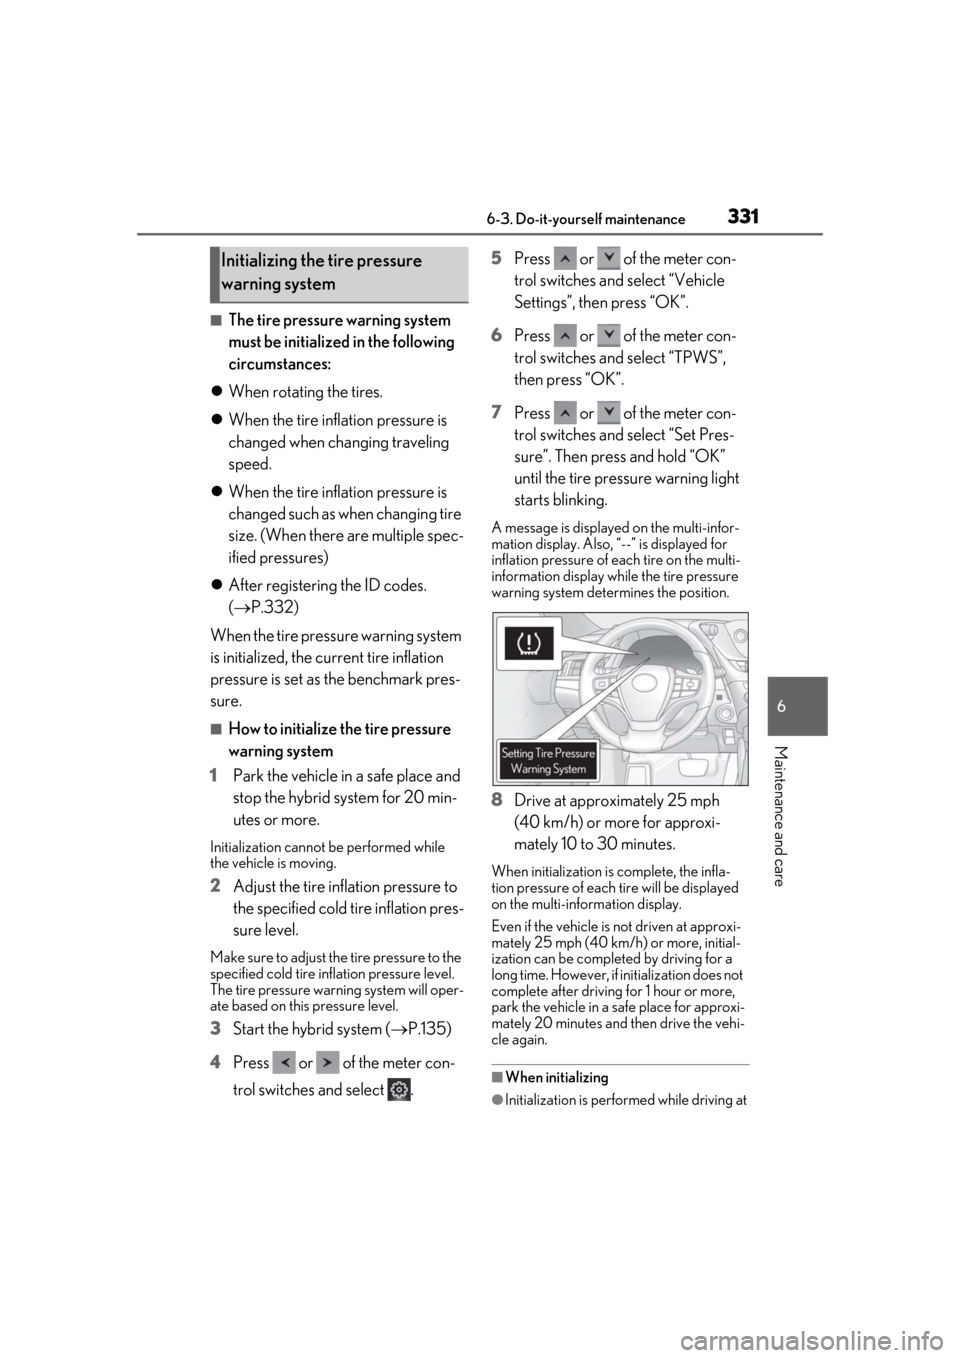
starts blinking.
A message is displayed on the multi-infor-
mation display. Also, “--” is displayed for
inflation pressure of each tire on the multi-
information display while the tire pressure
warning system determines the position.
8Drive at approximately 25 mph
(40 km/h) or more for approxi-
mately 10 to 30 minutes.
When initialization is complete, the infla-
tion pressure of each tire will be displayed
on the multi-information display.
Even if the vehicle is not driven at approxi-
mately 25 mph (40 km/h) or more, initial-
ization can be completed by driving for a
long time. However, if initialization does not
complete after driving for 1 hour or more,
park the vehicle in a safe place for approxi-
mately 20 minutes and then drive the vehi-
cle again.
■When initializing
●Initialization is performed while driving at
Initializing the tire pressure
warning system
Page 332 of 456
3326-3. Do-it-yourself maintenance
a vehicle speed of approximately 25 mph
(40 km/h) or more.
●Make sure to carry out initialization after
adjusting the tire inflation pressure.
Also, make sure the tires are cold before
carrying out initializat ion or tire inflation
pressure adjustment.
●The tire pressure warning system can be
initialized by yourse lf, but depending on
the driving conditions and driving envi-
ronment, initialization may take some
time to complete.
■The initialization operation
●If you have accidenta lly turned the power
switch off during initialization, it is not
necessary to manually restart the initial-
ization again, as initialization will restart
automatically the next time the power
switch is turned to ON mode.
●If you accidentally perform initialization
when initialization is not necessary, adjust
the tire inflation pres sure to the specified
level when the tires are cold, and conduct
initialization again.
●While the position of each tire is being
determined and the inflation pressures
are not being displayed on the multi-
information display, if the inflation pres-
sure of a tire drops, the tire pressure
warning light will come on.
■If the tire pressure warning system is not
initialized properly
●In the following situations, initialization
may take longer than usual to be com-
pleted or may not be possible. Normally,
initialization completes within approxi-
mately 30 minutes.
• Vehicle is not driven at approximately 25
mph (40 km/h) or more
• Vehicle is driven on unpaved roads
• Vehicle is driven near other vehicles and
system cannot recognize tire pressure
warning valve and tran smitters of your
vehicle over those of other vehicles
If initialization does not complete after driv-
ing for 1 hour or more, park the vehicle in a
safe place for approximately 20 minutes
and then drive the vehicle again.
●If the vehicle is reversed during initializa-
tion, the data up to that point is reset, so perform the initiali
zation procedure
again from the beginning.
●In the following situations, initialization
will not be started or was not completed
properly and the system will not operate
properly. Perform the initialization proce-
dure again.
• If, when attempting to start initialization,
the tire pressure warning light does not
blink 3 times.
• If, when the vehicle has been driven for
about 20 minutes after performing ini-
tialization, the tire pressure warning light
blinks for approximately 1 minute and
then illuminates.
If initialization canno t be completed after
performing the above procedure, contact
your Lexus dealer.
Every tire pressure warning valve and
transmitter has a unique ID code.
When replacing a tire pressure warn-
ing valve and transmitter, it is necessary
to register the ID code.
When registering the ID codes, per-
form the following procedure.
1 Park the vehicle in a safe place, wait
for approximately 20 minutes, and
then start the hybrid system.
(P.135)
WARNING
■When initializing the tire pressure
warning system
Do not initialize tire inflation pressure
without first adjusting the tire inflation
pressure to the spec ified level. Other-
wise, the tire pressu re warning light may
not come on even if the tire inflation pres-
sure is low, or it may come on when the
tire inflation pressure is actually normal.
Registering ID codes