battery Lexus ES300h 2019 (OM33E25U) User Guide
[x] Cancel search | Manufacturer: LEXUS, Model Year: 2019, Model line: ES300h, Model: Lexus ES300h 2019Pages: 456, PDF Size: 9.62 MB
Page 69 of 456
692-1. Instrument cluster
2
Vehicle status information and indicators
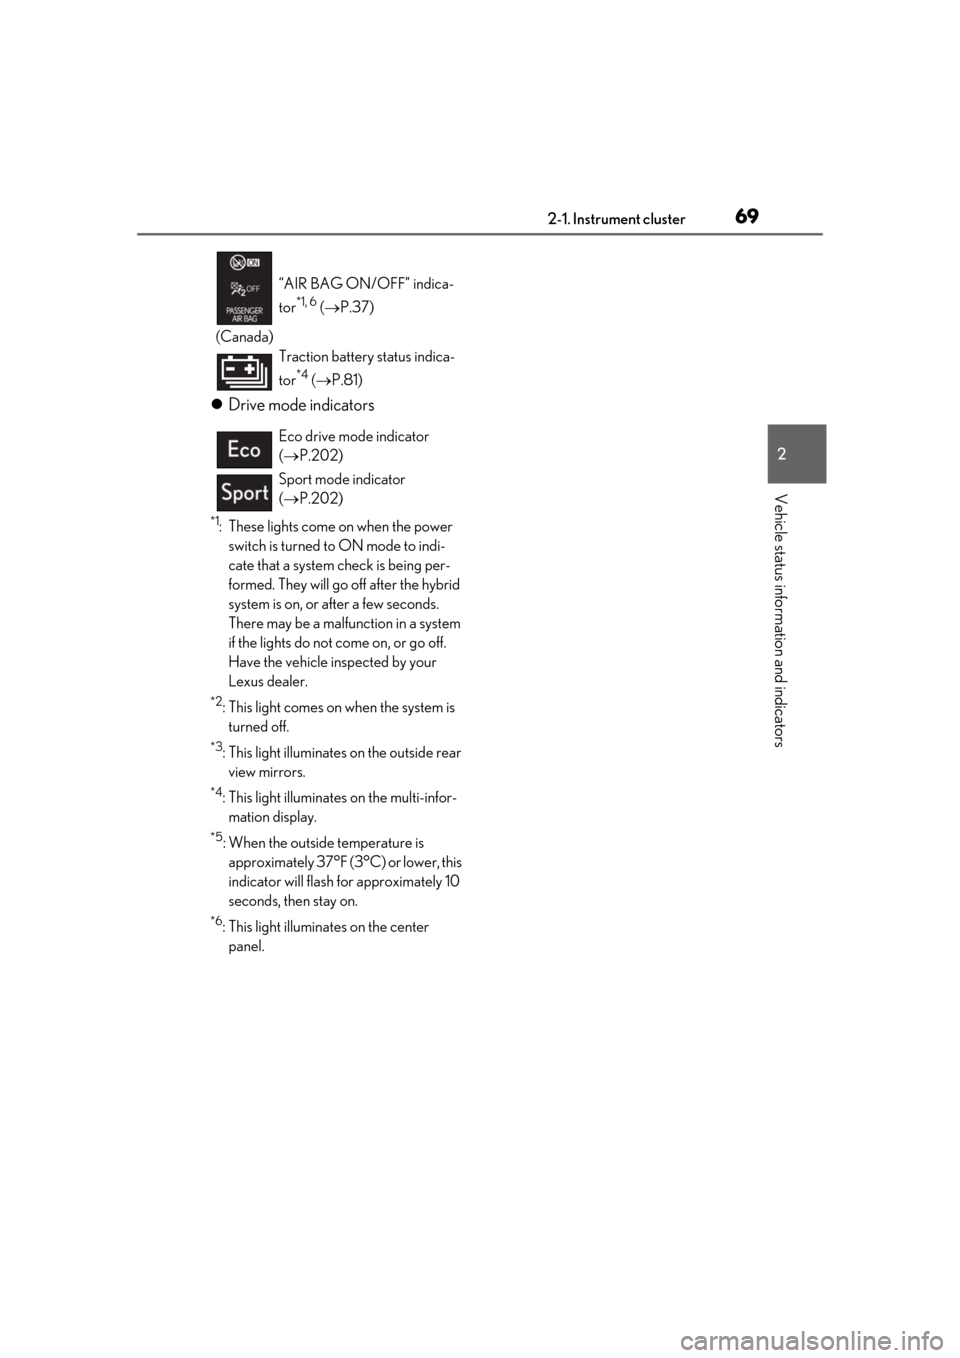
Drive mode indicators
*1: These lights come on when the power
switch is turned to ON mode to indi-
cate that a system check is being per-
formed. They will go off after the hybrid
system is on, or after a few seconds.
There may be a malfunction in a system
if the lights do not come on, or go off.
Have the vehicle inspected by your
Lexus dealer.
*2: This light comes on when the system is turned off.
*3: This light illuminates on the outside rear view mirrors.
*4: This light illuminates on the multi-infor- mation display.
*5: When the outside temperature is approximately 37°F (3°C) or lower, this
indicator will flash for approximately 10
seconds, then stay on.
*6: This light illuminates on the center panel.
(Canada)
“AIR BAG ON/OFF” indica-
tor
*1, 6 (
P.37)
Traction battery status indica-
tor
*4 ( P.81)
Eco drive mode indicator
( P.202)
Sport mode indicator
( P.202)
Page 71 of 456
712-1. Instrument cluster
2
Vehicle status information and indicators
Shift position and shift range (P.141)
Odometer and trip meter display ( P.72)
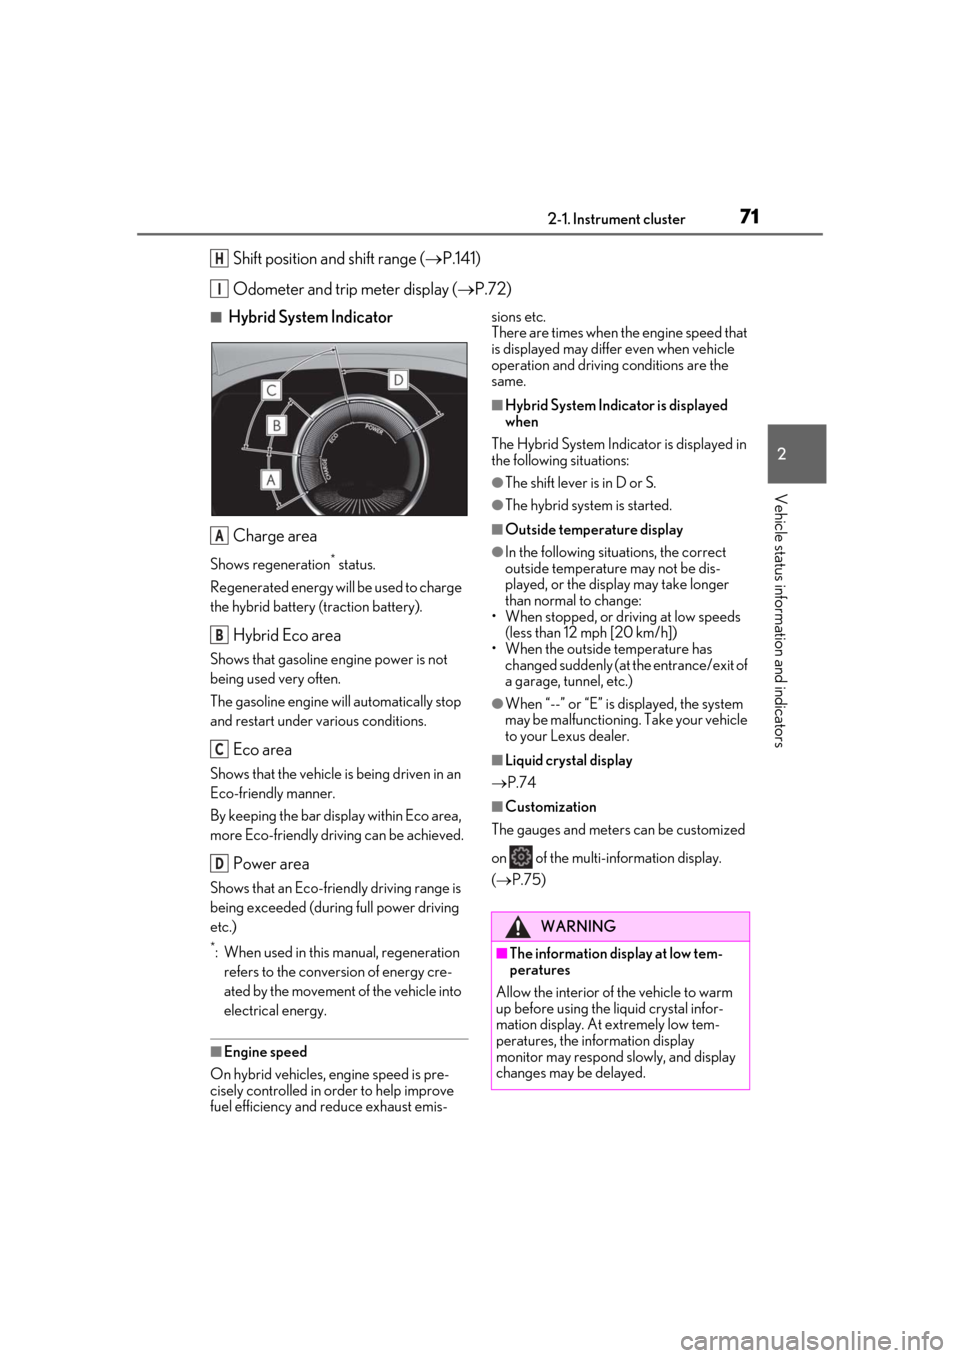
■Hybrid System Indicator
Charge area
Shows regeneration* status.
Regenerated energy will be used to charge
the hybrid battery (traction battery).
Hybrid Eco area
Shows that gasoline engine power is not
being used very often.
The gasoline engine will automatically stop
and restart under various conditions.
Eco area
Shows that the vehicle is being driven in an
Eco-friendly manner.
By keeping the bar display within Eco area,
more Eco-friendly driv ing can be achieved.
Power area
Shows that an Eco-friendly driving range is
being exceeded (durin g full power driving
etc.)
*: When used in this manual, regeneration refers to the conversion of energy cre-
ated by the movement of the vehicle into
electrical energy.
■Engine speed
On hybrid vehicles, engine speed is pre-
cisely controlled in order to help improve
fuel efficiency and reduce exhaust emis- sions etc.
There are times when the engine speed that
is displayed may differ even when vehicle
operation and driving conditions are the
same.
■Hybrid System Indicator is displayed
when
The Hybrid System Indicator is displayed in
the following situations:
●The shift lever is in D or S.
●The hybrid system is started.
■Outside temperature display
●In the following situations, the correct
outside temperature may not be dis-
played, or the display may take longer
than normal to change:
• When stopped, or driving at low speeds
(less than 12 mph [20 km/h])
• When the outside temperature has changed suddenly (at the entrance/exit of
a garage, tunnel, etc.)
●When “--” or “E” is displayed, the system
may be malfunctioning. Take your vehicle
to your Lexus dealer.
■Liquid crystal display
P.74
■Customization
The gauges and meters can be customized
on of the multi-information display.
( P.75)
H
I
A
B
C
D
WARNING
■The information display at low tem-
peratures
Allow the interior of the vehicle to warm
up before using the liquid crystal infor-
mation display. At extremely low tem-
peratures, the information display
monitor may respond slowly, and display
changes may be delayed.
Page 76 of 456
762-1. Instrument cluster
log.
Drive information 1/Drive informa-
tion 2
Select to select up to 2 items ( P.74) that
will be displayed on ea ch Drive information
screen (Drive information 1 screen and
Drive information 2 screen) respectively.
Clock
Select to switch be tween 12-hour display
and 24-hour display.
Pop-up display
Select to enable/disable pop-up displays
for each relevant system.
Accent color
Select to change the accent color on the
screen, such as the cursor color.
Tachometer setting
Select to set the display of the Hybrid Sys-
tem Indicator or tachometer for each driv-
ing mode.
EV indicator
Select to enable/disab le the EV indicator.
Default setting
Select to reset the meter display settings to
the default setting.
■Vehicle functions and settings that
can be changed
P.412
■Suspension of the settings display
●Some settings cannot be changed while
driving. When changing settings, park
the vehicle in a safe place.
●If a warning message is displayed, opera-
tion of the settings display will be sus-
pended.
Displays suggestions to the driver in
the following situations. To select a
response to a displayed suggestion,
use the meter control switches.
■Suggestion to turn off the head-
lights
If the headlights are left on for a certain
amount of time with the headlight
switch in after the power switch
has been turned off, a suggestion mes-
sage will be displayed asking if you
wish to turn the headlights off.
To turn the headlight s off, select “Yes”.
If a front door is opened after the power
switch is turned off, this suggestion mes-
sage will not be displayed.
■Customization
Some functions can be customized.
( P.412)
WARNING
■Cautions during setting up the dis-
play
As the hybrid system needs to be operat-
ing during setting up the display, ensure
that the vehicle is parked in a place with
adequate ventilation. In a closed area
such as a garage, ex haust gases includ-
ing harmful carbon monoxide (CO) may
collect and enter the vehicle. This may
lead to death or a serious health hazard.
NOTICE
■During setting up the display
To prevent 12-volt battery discharge,
ensure that the hybrid system is operat-
ing while setting up the display features.
Suggestion function
Page 79 of 456
792-1. Instrument cluster
2
Vehicle status information and indicators
Select to enable/disable the following
items:
• Route guidance to destination/street
name
• Driving support system display
*
• Compass (heading-up display)
• Audio system operation status
*: Make sure to enable this display when using the driving support systems
Display angle
Select to adjust the angle of the head-up
display.
■Enabling/disabling of the head-up dis-
play
If the head-up display is disabled, it will
remain disabled when the power switch is
turned off then back to ON mode.
■Display brightness
The brightness of the head-up display can
be adjusted on of the multi-information
display. Also, it is automatically adjusted
according to the ambient brightness.
■Head-up display automatic position
adjustment
If the display position is recorded into mem-
ory, the head-up display will be automati-
cally adjusted to the desired position.
( P.110)
■When the 12-volt battery is discon-
nected
The customize settings of the head-up dis-
play will be reset.
Displays the operational status of the
following systems:
LTA (Lane Tracing Assist) ( P.176)
Dynamic radar cruise control with
full-speed range ( P.187)
Details of content displayed on the head-
up display may differ from that displayed
on the multi-inform ation display. For
details, refer to the explanation of each sys-
tem.
Pop-up displays for the following sys-
tems will be displayed when necessary.
■Driving support systems
Displays a warning/suggestion/advice
WARNING
■Caution for changing settings of the
head-up display
As the hybrid system needs to be operat-
ing while changing th e settings of the
head-up display, ensure that the vehicle
is parked in a place with adequate venti-
lation. In a closed area such as a garage,
exhaust gases including harmful carbon
monoxide (CO) may collect and enter
the vehicle. This may lead to death or a
serious health hazard.
NOTICE
■When changing the settings of the
head-up display
To prevent 12-volt battery discharge,
ensure that the hybrid system is operat-
ing while the changing the settings of the
head-up display.
Driving support system display
area
Pop-up display
Page 83 of 456
832-1. Instrument cluster
2
Vehicle status information and indicators
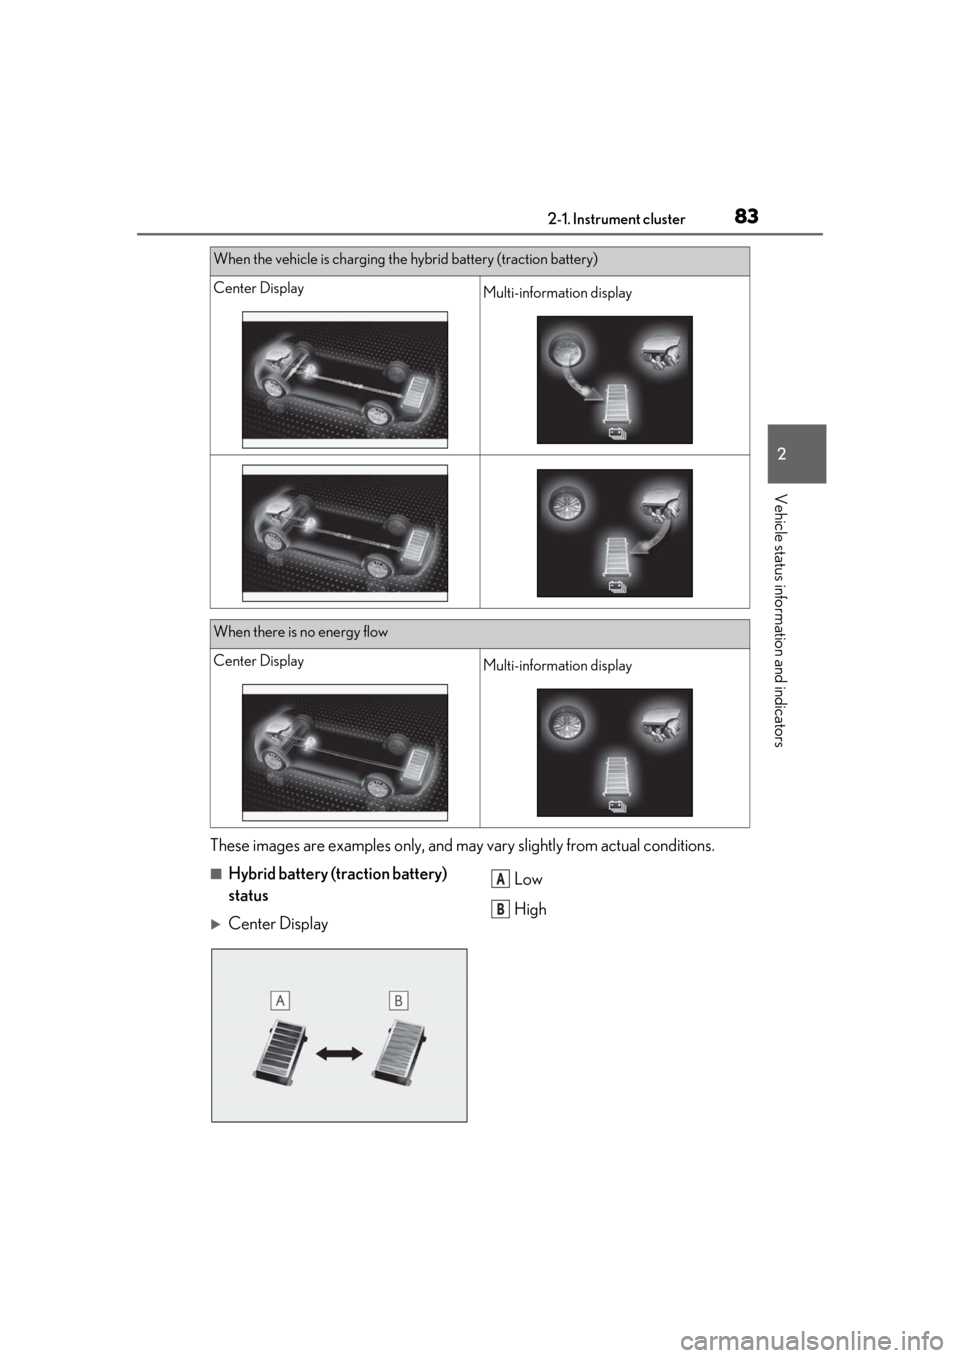
These images are examples only, and may vary slightly from actual conditions.
■Hybrid battery (traction battery)
status
Center Display Low
High
When the vehicle is charging the hybrid battery (traction battery)
Center DisplayMulti-information display
When there is no energy flow
Center DisplayMulti-information display
A
B
Page 88 of 456
883-1. Key information
3-1.Key information
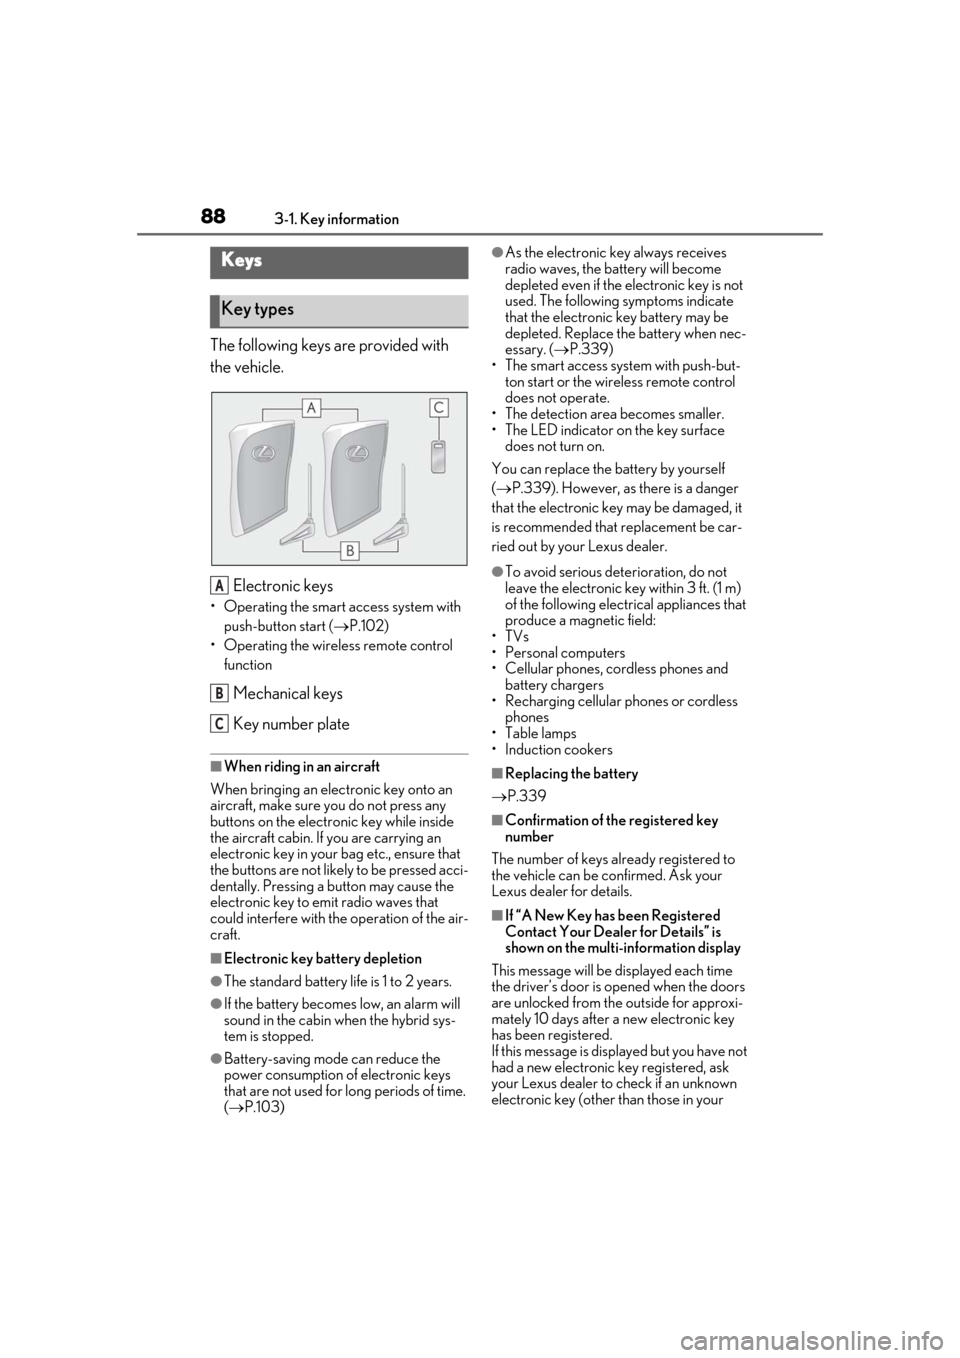
The following keys are provided with
the vehicle.
Electronic keys
• Operating the smart access system with push-button start ( P.102)
• Operating the wireless remote control function
Mechanical keys
Key number plate
■When riding in an aircraft
When bringing an elec tronic key onto an
aircraft, make sure you do not press any
buttons on the electronic key while inside
the aircraft cabin. If you are carrying an
electronic key in your bag etc., ensure that
the buttons are not likely to be pressed acci-
dentally. Pressing a button may cause the
electronic key to em it radio waves that
could interfere with the operation of the air-
craft.
■Electronic key battery depletion
●The standard battery life is 1 to 2 years.
●If the battery becomes low, an alarm will
sound in the cabin when the hybrid sys-
tem is stopped.
●Battery-saving mode can reduce the
power consumption of electronic keys
that are not used for long periods of time.
( P.103)
●As the electronic key always receives
radio waves, the battery will become
depleted even if the electronic key is not
used. The following symptoms indicate
that the electronic key battery may be
depleted. Replace the battery when nec-
essary. ( P.339)
• The smart access system with push-but- ton start or the wireless remote control
does not operate.
• The detection area becomes smaller.
• The LED indicator on the key surface does not turn on.
You can replace the battery by yourself
( P.339). However, as there is a danger
that the electronic key may be damaged, it
is recommended that replacement be car-
ried out by your Lexus dealer.
●To avoid serious dete rioration, do not
leave the electronic key within 3 ft. (1 m)
of the following electrical appliances that
produce a magnetic field:
•TVs
• Personal computers
• Cellular phones, cordless phones and battery chargers
• Recharging cellular phones or cordless
phones
•Table lamps
• Induction cookers
■Replacing the battery
P.339
■Confirmation of the registered key
number
The number of keys already registered to
the vehicle can be confirmed. Ask your
Lexus dealer for details.
■If “A New Key has been Registered
Contact Your Dealer for Details” is
shown on the multi-information display
This message will be displayed each time
the driver’s door is opened when the doors
are unlocked from the outside for approxi-
mately 10 days after a new electronic key
has been registered.
If this message is disp layed but you have not
had a new electronic key registered, ask
your Lexus dealer to check if an unknown
electronic key (other than those in your
Keys
Key types
A
B
C
Page 90 of 456
903-1. Key information
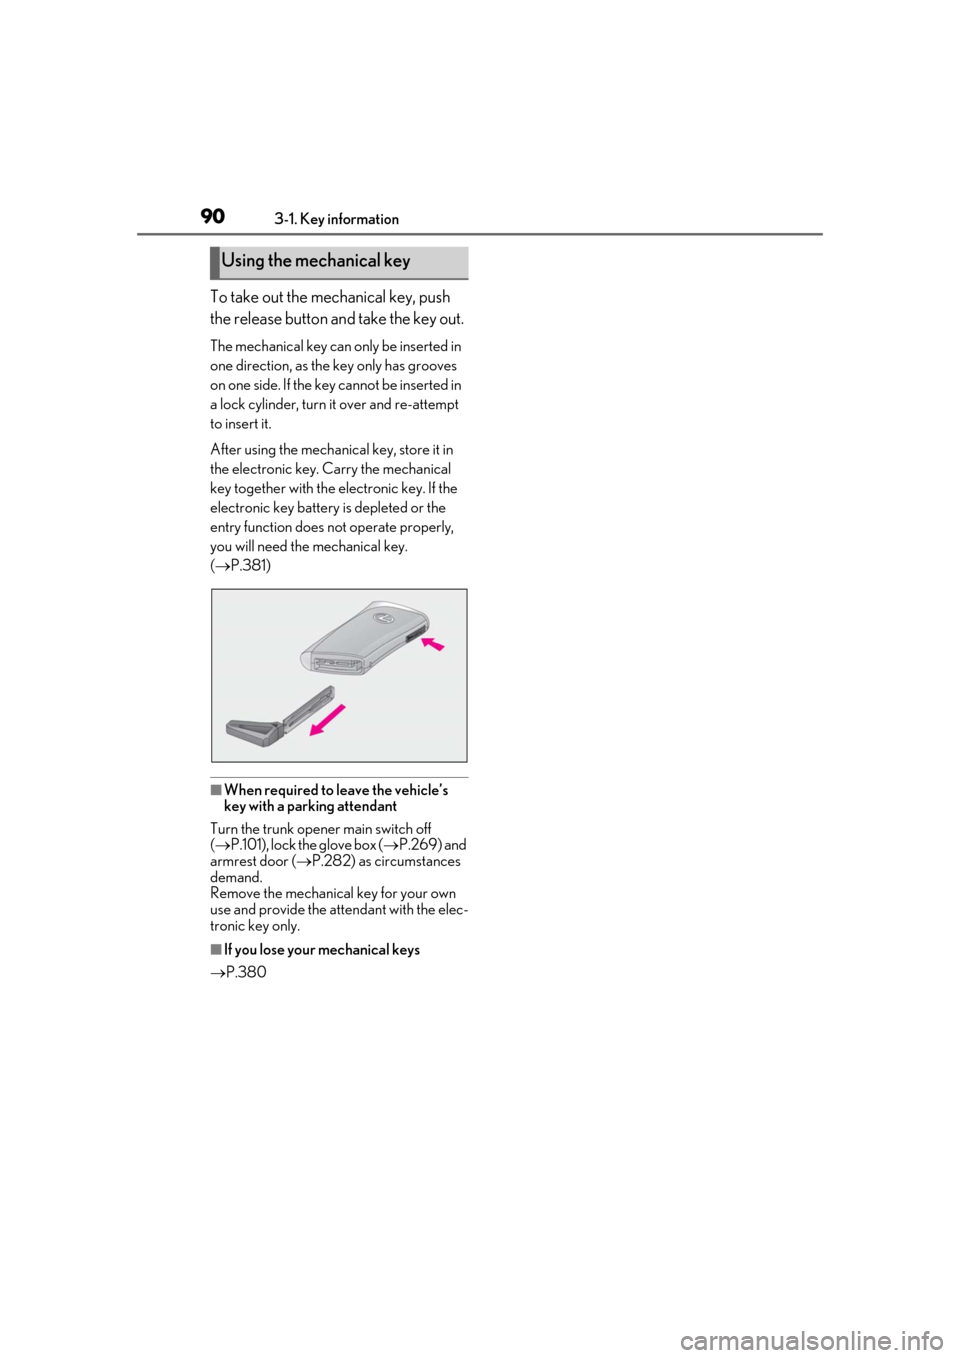
To take out the mechanical key, push
the release button and take the key out.
The mechanical key can only be inserted in
one direction, as the key only has grooves
on one side. If the key cannot be inserted in
a lock cylinder, turn it over and re-attempt
to insert it.
After using the mechanical key, store it in
the electronic key. Carry the mechanical
key together with the electronic key. If the
electronic key battery is depleted or the
entry function does not operate properly,
you will need the mechanical key.
( P.381)
■When required to leave the vehicle’s
key with a parking attendant
Turn the trunk opener main switch off
( P.101), lock the glove box ( P.269) and
armrest door ( P.282) as circumstances
demand.
Remove the mechanical key for your own
use and provide the attendant with the elec-
tronic key only.
■If you lose your mechanical keys
P.380
Using the mechanical key
Page 92 of 456
923-2. Opening, closing and locking the doors and trunk
To prevent unintended triggering of the
alarm, unlock the doors using the wireless
remote control and open and close a door
once after the settings have been changed.
(If a door is not opened within 60 seconds
after is pressed, the doors will be
locked again and the alarm will automati-
cally be set.)
In a case that the alarm is triggered, imme-
diately stop the alarm. (P.62)
■Impact detection door lock release sys-
tem
In the event that the vehicle is subject to a
strong impact, all the doors are unlocked.
Depending on the force of the impact or the
type of accident, however, the system may
not operate.
■Operation signals
A buzzer sounds and the emergency flash-
ers flash to indicate that the doors have
been locked/unlocked. (Locked: once;
Unlocked: twice)
Windows and moon roof: A buzzer sounds
to indicate that the windows and moon roof
are opening.
■Security feature
If a door is not opened within approximately
60 seconds after the vehicle is unlocked,
the security feature automatically locks the
vehicle again. (However, depending on the
location of the electronic key, the key may
be detected as being in the vehicle. In this
case, vehicle may be unlocked.)
■When the doors cannot be locked by the
lock sensor on the upper part of the
door handle
When the doors cannot be locked even if
the lock sensor on the surface of the door
handle is touched by a finger, touch the lock
sensor with the palm.
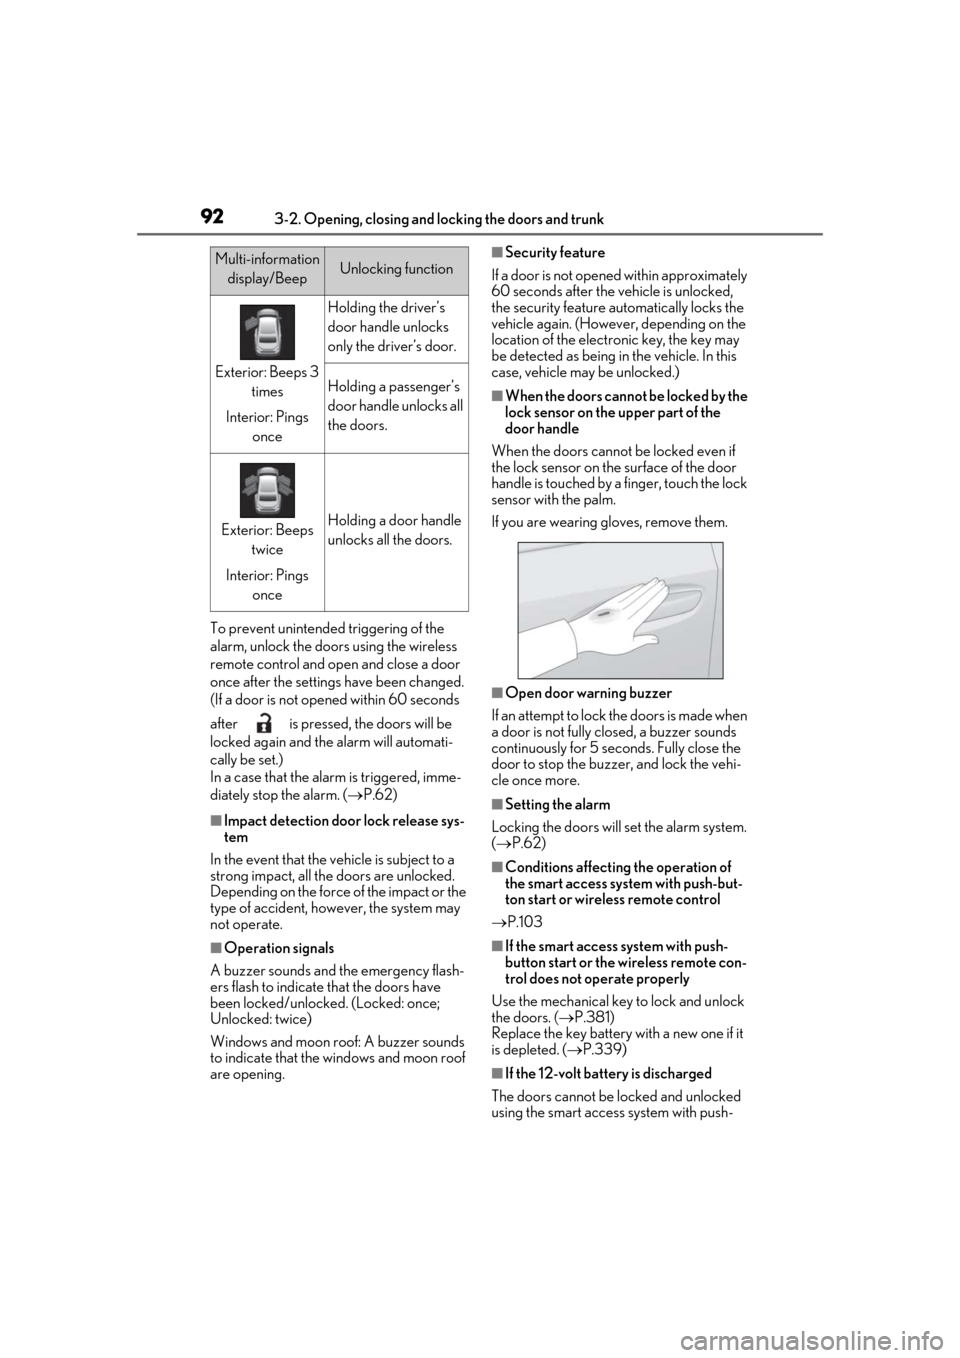
If you are wearing gloves, remove them.
■Open door warning buzzer
If an attempt to lock the doors is made when
a door is not fully closed, a buzzer sounds
continuously for 5 seconds. Fully close the
door to stop the buzzer, and lock the vehi-
cle once more.
■Setting the alarm
Locking the doors will set the alarm system.
( P.62)
■Conditions affecting the operation of
the smart access system with push-but-
ton start or wireless remote control
P.103
■If the smart access system with push-
button start or the wireless remote con-
trol does not operate properly
Use the mechanical key to lock and unlock
the doors. ( P.381)
Replace the key battery with a new one if it
is depleted. ( P.339)
■If the 12-volt batte ry is discharged
The doors cannot be locked and unlocked
using the smart access system with push-
Multi-information display/BeepUnlocking function
Exterior: Beeps 3 times
Interior: Pings once
Holding the driver’s
door handle unlocks
only the driver’s door.
Holding a passenger’s
door handle unlocks all
the doors.
Exterior: Beeps twice
Interior: Pings onceHolding a door handle
unlocks all the doors.
Page 96 of 456
963-2. Opening, closing and locking the doors and trunk
WARNING
●Vehicles without power trunk lid:
When closing the trunk lid, make sure
to press it lightly on its outer surface. If
the trunk grip is used to fully close the
trunk lid, it may result in hands or arms
being caught.
●Do not attach any accessories other
than genuine Lexus parts to the trunk
lid. Such additional weight on the trunk
lid may cause the lid to suddenly shut
again after it is opened.
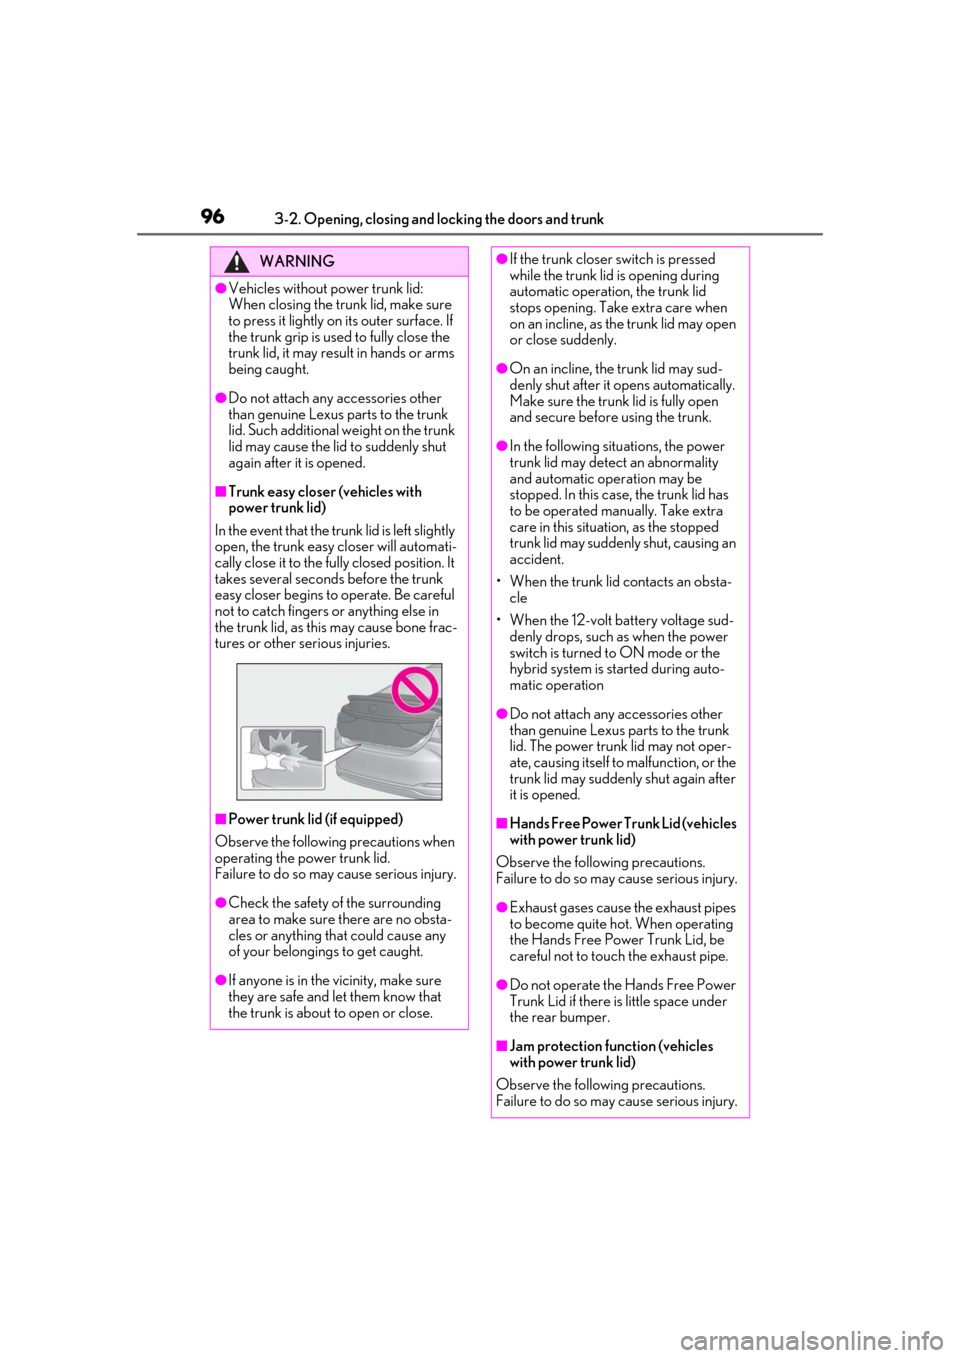
■Trunk easy closer (vehicles with
power trunk lid)
In the event that the trunk lid is left slightly
open, the trunk easy closer will automati-
cally close it to the fully closed position. It
takes several seconds before the trunk
easy closer begins to operate. Be careful
not to catch fingers or anything else in
the trunk lid, as this may cause bone frac-
tures or other serious injuries.
■Power trunk lid (if equipped)
Observe the following precautions when
operating the power trunk lid.
Failure to do so may cause serious injury.
●Check the safety of the surrounding
area to make sure there are no obsta-
cles or anything that could cause any
of your belongings to get caught.
●If anyone is in the vicinity, make sure
they are safe and let them know that
the trunk is about to open or close.
●If the trunk closer switch is pressed
while the trunk lid is opening during
automatic operation, the trunk lid
stops opening. Take extra care when
on an incline, as the trunk lid may open
or close suddenly.
●On an incline, the trunk lid may sud-
denly shut after it opens automatically.
Make sure the trunk lid is fully open
and secure before using the trunk.
●In the following situations, the power
trunk lid may detect an abnormality
and automatic operation may be
stopped. In this case, the trunk lid has
to be operated manually. Take extra
care in this situat ion, as the stopped
trunk lid may suddenly shut, causing an
accident.
• When the trunk lid contacts an obsta- cle
• When the 12-volt battery voltage sud- denly drops, such as when the power
switch is turned to ON mode or the
hybrid system is started during auto-
matic operation
●Do not attach any accessories other
than genuine Lexus parts to the trunk
lid. The power trunk lid may not oper-
ate, causing itself to malfunction, or the
trunk lid may suddenly shut again after
it is opened.
■Hands Free Power Trunk Lid (vehicles
with power trunk lid)
Observe the following precautions.
Failure to do so may cause serious injury.
●Exhaust gases cause the exhaust pipes
to become quite hot. When operating
the Hands Free Power Trunk Lid, be
careful not to touch the exhaust pipe.
●Do not operate the Hands Free Power
Trunk Lid if there is little space under
the rear bumper.
■Jam protection function (vehicles
with power trunk lid)
Observe the following precautions.
Failure to do so may cause serious injury.
Page 100 of 456
1003-2. Opening, closing and locking the doors and trunk
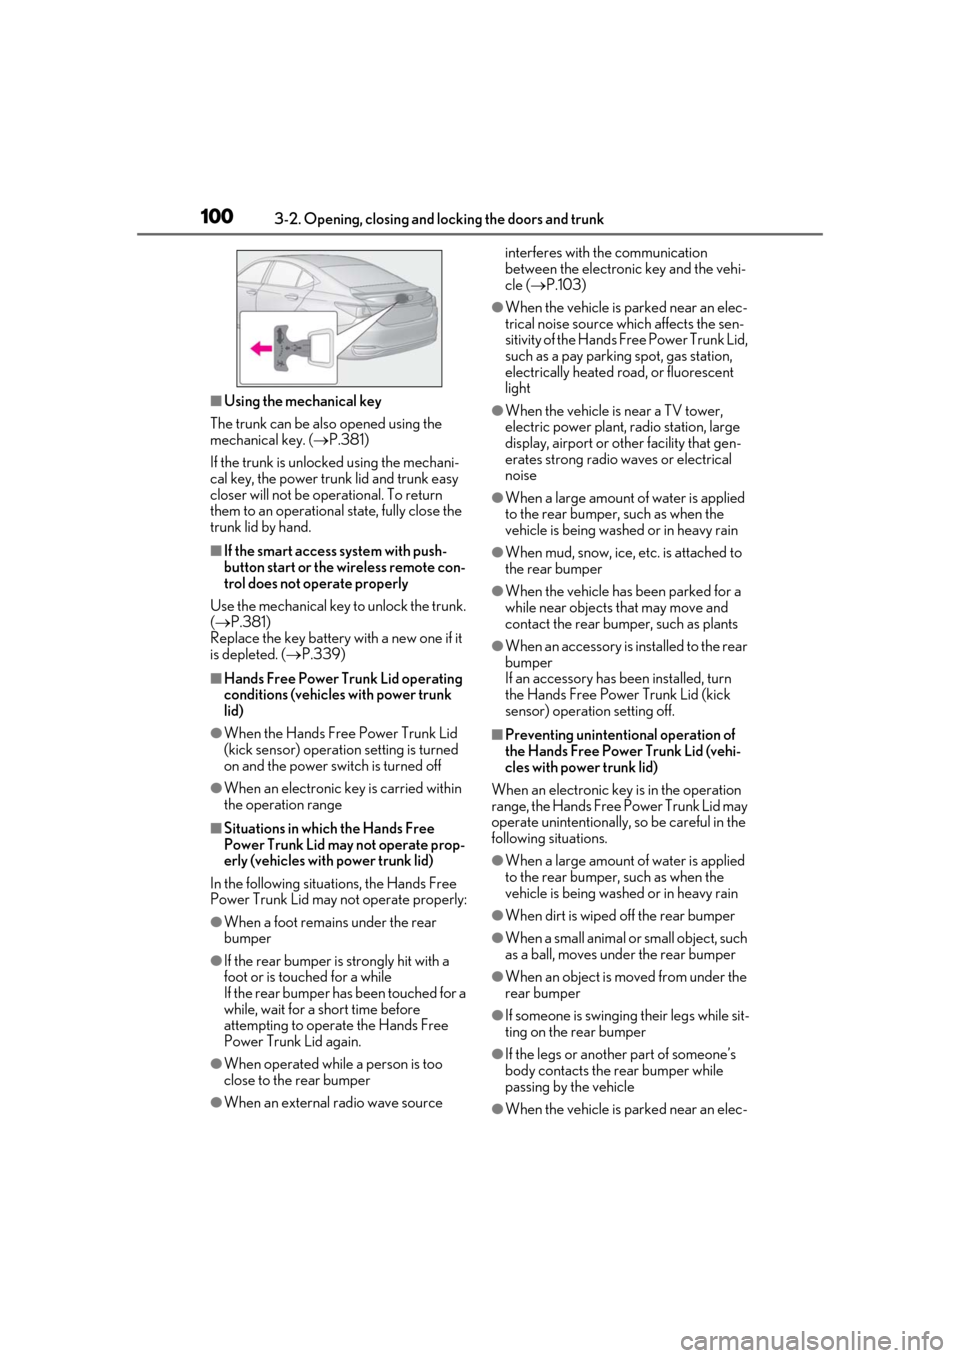
■Using the mechanical key
The trunk can be also opened using the
mechanical key. ( P.381)
If the trunk is unlocked using the mechani-
cal key, the power trunk lid and trunk easy
closer will not be operational. To return
them to an operational state, fully close the
trunk lid by hand.
■If the smart access system with push-
button start or the wireless remote con-
trol does not operate properly
Use the mechanical key to unlock the trunk.
( P.381)
Replace the key battery with a new one if it
is depleted. ( P.339)
■Hands Free Power Trunk Lid operating
conditions (vehicle s with power trunk
lid)
●When the Hands Free Power Trunk Lid
(kick sensor) operation setting is turned
on and the power switch is turned off
●When an electronic key is carried within
the operation range
■Situations in which the Hands Free
Power Trunk Lid may not operate prop-
erly (vehicles with power trunk lid)
In the following situations, the Hands Free
Power Trunk Lid may not operate properly:
●When a foot remain s under the rear
bumper
●If the rear bumper is strongly hit with a
foot or is touched for a while
If the rear bumper has been touched for a
while, wait for a short time before
attempting to operate the Hands Free
Power Trunk Lid again.
●When operated while a person is too
close to the rear bumper
●When an external radio wave source interferes with the communication
between the electronic key and the vehi-
cle (
P.103)
●When the vehicle is parked near an elec-
trical noise source which affects the sen-
sitivity of the Hands Free Power Trunk Lid,
such as a pay parking spot, gas station,
electrically heated road, or fluorescent
light
●When the vehicle is near a TV tower,
electric power plant, radio station, large
display, airport or ot her facility that gen-
erates strong radio waves or electrical
noise
●When a large amount of water is applied
to the rear bumper, such as when the
vehicle is being washed or in heavy rain
●When mud, snow, ice, etc. is attached to
the rear bumper
●When the vehicle has been parked for a
while near objects that may move and
contact the rear bumper, such as plants
●When an accessory is installed to the rear
bumper
If an accessory has been installed, turn
the Hands Free Power Trunk Lid (kick
sensor) operation setting off.
■Preventing unintentional operation of
the Hands Free Power Trunk Lid (vehi-
cles with power trunk lid)
When an electronic key is in the operation
range, the Hands Free Power Trunk Lid may
operate unintentionally, so be careful in the
following situations.
●When a large amount of water is applied
to the rear bumper, such as when the
vehicle is being washed or in heavy rain
●When dirt is wiped off the rear bumper
●When a small animal or small object, such
as a ball, moves under the rear bumper
●When an object is moved from under the
rear bumper
●If someone is swinging their legs while sit-
ting on the rear bumper
●If the legs or another part of someone’s
body contacts the rear bumper while
passing by the vehicle
●When the vehicle is parked near an elec-