start Lexus ES350 2009 Repair Manual
[x] Cancel search | Manufacturer: LEXUS, Model Year: 2009, Model line: ES350, Model: Lexus ES350 2009Pages: 475, PDF Size: 6.2 MB
Page 273 of 475
271
3-6. Other interior features
3
Interior features
ES350_U_(L/O_0808)
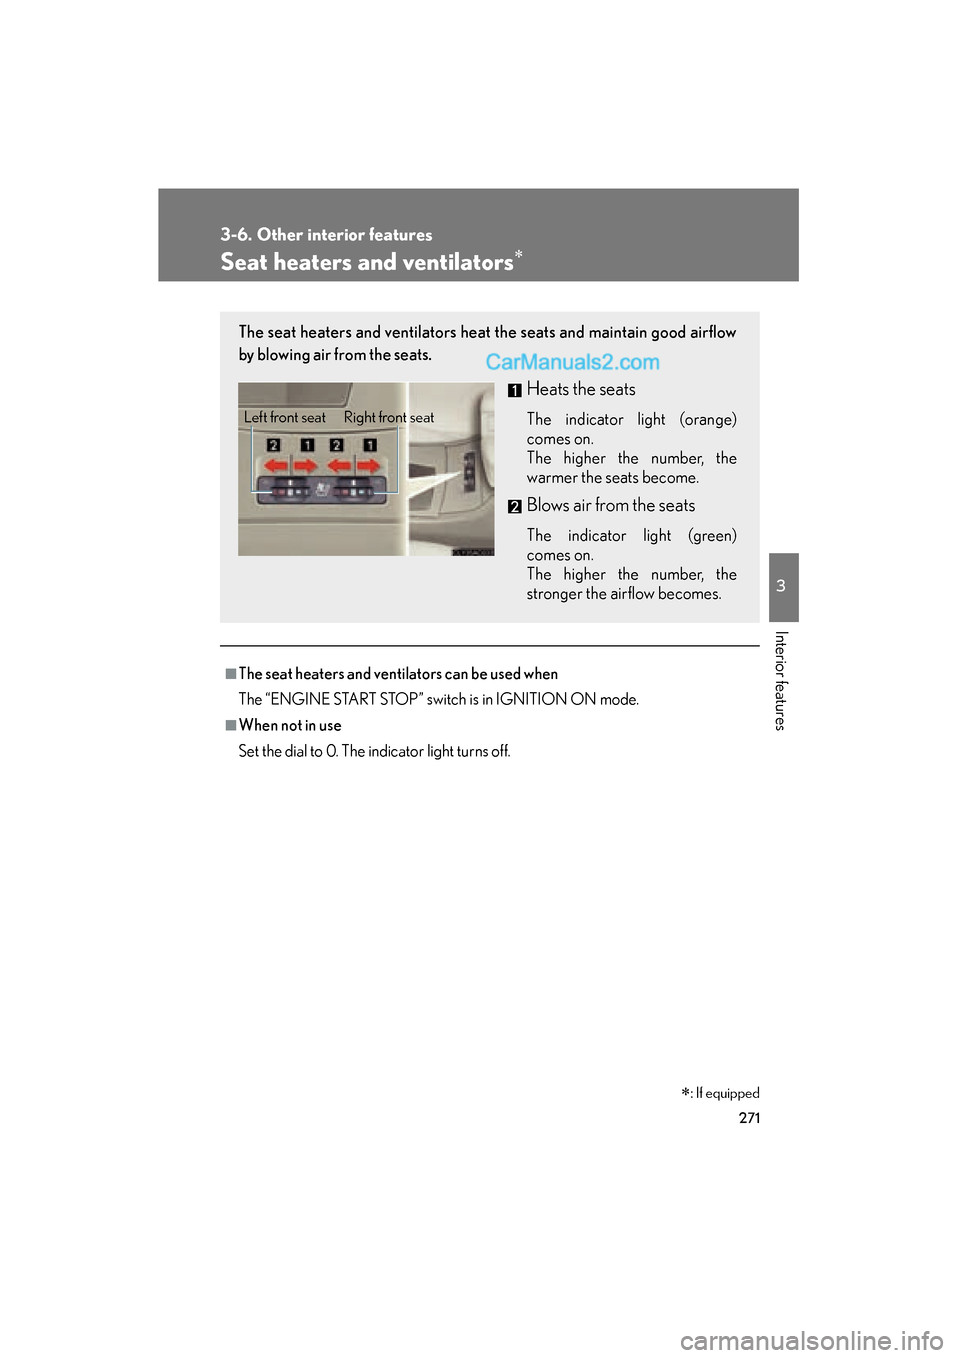
Seat heaters and ventilators∗
■The seat heaters and ventilators can be used when
The “ENGINE START STOP” switch is in IGNITION ON mode.
■When not in use
Set the dial to 0. The indicator light turns off.
The seat heaters and ventilators heat the seats and maintain good airflow
by blowing air from the seats.
Heats the seats
The indicator light (orange)
comes on.
The higher the number, the
warmer the seats become.
Blows air from the seats
The indicator light (green)
comes on.
The higher the number, the
stronger the airflow becomes.
Left front seat Right front seat
∗: If equipped
Page 277 of 475
275
3-6. Other interior features
3
Interior features
ES350_U_(L/O_0808)
■The rear sunshade can be used when
The “ENGINE START STOP” switch is in IGNITION ON mode.
■Reverse operation feature
The rear sunshade automatically lowers when the shift lever is shifted into R. The
rear sunshade rises when the shift lever is shifted out of R and vehicle speed
reaches 9 mph (15 km/h).
■When the reverse operation feature does not operate
The rear sunshade may not lower or rise automatically. In this case, press the switch
to lower or raise the rear sunshade.
CAUTION
■When the rear sunshade is being raised or lowered
Do not place fingers or other objects in the fastener section or in the opening.
They may get caught, causing injury.
NOTICE
■To prevent the battery from being discharged
Do not operate the rear sunshade when the engine is not running.
■To ensure normal operation of the sunshade
Observe the following precautions.
●Do not place excessive load on the motor or other components.
●Do not place objects where they may hinder opening and closing operations.
●Do not attach items to the rear sunshade.
●Keep the opening clean and clear of obstructions.
●Do not operate the rear sunshade continuously over long periods of time.
Page 284 of 475
282
3-6. Other interior features
ES350_U_(L/O_0808)■
Programming a Rolling Code system (for U.S.A. owners)
If your device is Rolling Code equipped, follow the steps under the
heading “Programming the HomeLink
” before proceeding with the
steps listed below.
Locate the training button on the ceiling mounted garage door
opener motor. The exact location and color of the button may
vary by brand of garage door opener motor.
Refer to the operation manual supplied with the garage door opener
motor for the location of the training button.
Press the training button.
Following this step, you have 30 seconds in which to initiate step 3
below.
Press and hold the vehicle's programmed HomeLink button for
2 seconds and release it. Repeat this step once again. The garage
door may open.
If the garage door opens, the programming process is complete. If the
door does not open, press and release the button a third time. This third
press and release will complete the programming process by opening
the garage door.
The ceiling mounted garage door op ener motor should now recognize
the HomeLink
transceiver and operate the garage door.
Repeat the steps above to program another rolling code system
for any of the remaining HomeLink buttons.
■ Programming an entry gate (for U.S.A. owners)/Programming all
devices in the Canadian market
Place your transmitter 1 to 3 in. (25 to 75 mm) away from the sur-
face of the HomeLink
.
Keep the HomeLink indicator light in view while programming.
Press and hold the selected HomeLink button.
Repeatedly press and release (cycle) the device’s remote control
button for two seconds each until step 4 is complete.
When the indicator light on the HomeLink
compatible trans-
ceiver start to flashing rapidly, release the buttons.
STEP1
STEP2
STEP3
STEP4
STEP1
STEP2
STEP3
STEP4
Page 285 of 475
283
3-6. Other interior features
3
Interior features
ES350_U_(L/O_0808)Test the operation of the HomeLink
by pressing the newly pro-
grammed button. Check to see if the gate/device operates cor-
re c t l y.
Repeat the steps above to program another device for each of
the remaining HomeLink
buttons.
■ Programming other devices
To program other devices such as home security systems, home door
locks or lighting, contact your authorized Lexus dealer for assistance.
■ Reprogramming a button
The individual HomeLink
buttons cannot be erased but can be
reprogrammed. To reprogram a button, follow the “Reprogramming a
HomeLink
button” instructions.
Operating the HomeLink
Press the appropriate HomeLink button. The HomeLink indicator
light should come on.
The HomeLink compatible transceiver in your vehicle continues to send a
signal for up to 20 seconds as long as the button is pressed.
Reprogramming a HomeLink button
Press and hold the desired HomeLink
button. After 20 seconds, the
HomeLink indicator light will start flashing slowly. Next, while still press-
ing and holding the HomeLink button, press and hold the button on the
transmitter until the HomeLink indicator light changes from a slow to a
rapid flash.
STEP5
STEP6
Page 308 of 475
306
4-3. Do-it-yourself maintenance
ES350_U_(L/O_0808)
CAUTION
The engine compartment contains many mechanisms and fluids that may move sud-
denly, become hot, or become electrically energized. To avoid death or serious injury.
■When working on the engine compartment:
●Keep hands, clothing, and tools away from the moving fan and engine drive belt.
●Be careful not to touch the engine, radiator, exhaust manifold, etc. right after driv-
ing as they may be hot. Oil and other fluids may also be hot.
●Do not leave anything that may burn easily, such as paper or rags, in the engine
compartment.
●Do not smoke, cause sparks or expose an open flame to fuel or the battery. Fuel
and battery fumes are flammable.
●Be extremely cautious when working on the battery. It contains poisonous and
corrosive sulfuric acid.
●Take care because brake fluid can harm your hands or eyes and damage painted
surfaces.
If fluid gets on your hands or in your eyes, flush the affected area with clean water
immediately.
If you still experience discomfort, see a doctor.
■When working near the electric cooling fan or radiator grille:
Be sure the “ENGINE START STOP” switch is OFF.
With the “ENGINE START STOP” switch in IGNITION ON mode, the electric
cooling fan may automatically start to run if the air conditioning is on and/or the
coolant temperature is high.
(→ P. 3 1 9 )
■Safety glasses
Wear safety glasses to prevent flying or falling material, fluid spray, etc. from getting
in the eyes.
Page 312 of 475
310
4-3. Do-it-yourself maintenance
ES350_U_(L/O_0808)
CAUTION
■When raising your vehicle:
Make sure to observe the following to reduce the possibility of death or serious
injury.
●Do not use the jack that was supplied with your vehicle.
●Do not put any part of your body or get underneath the vehicle supported only by
the floor jack.
Always use automotive jack stands on a solid, level surface.
●Do not start the engine while the vehicle is supported by the floor jack.
●Stop the vehicle on level firm ground, firmly set the parking brake and put the shift
lever in P.
●Make sure to set the floor jack properly at the jack point.
Raising the vehicle with an improperly positioned floor jack will damage the vehi-
cle and may cause the vehicle to fall off the floor jack.
●Do not raise the vehicle while someone is in the vehicle.
●When raising the vehicle, do not place any objects on top of or underneath the
floor jack.
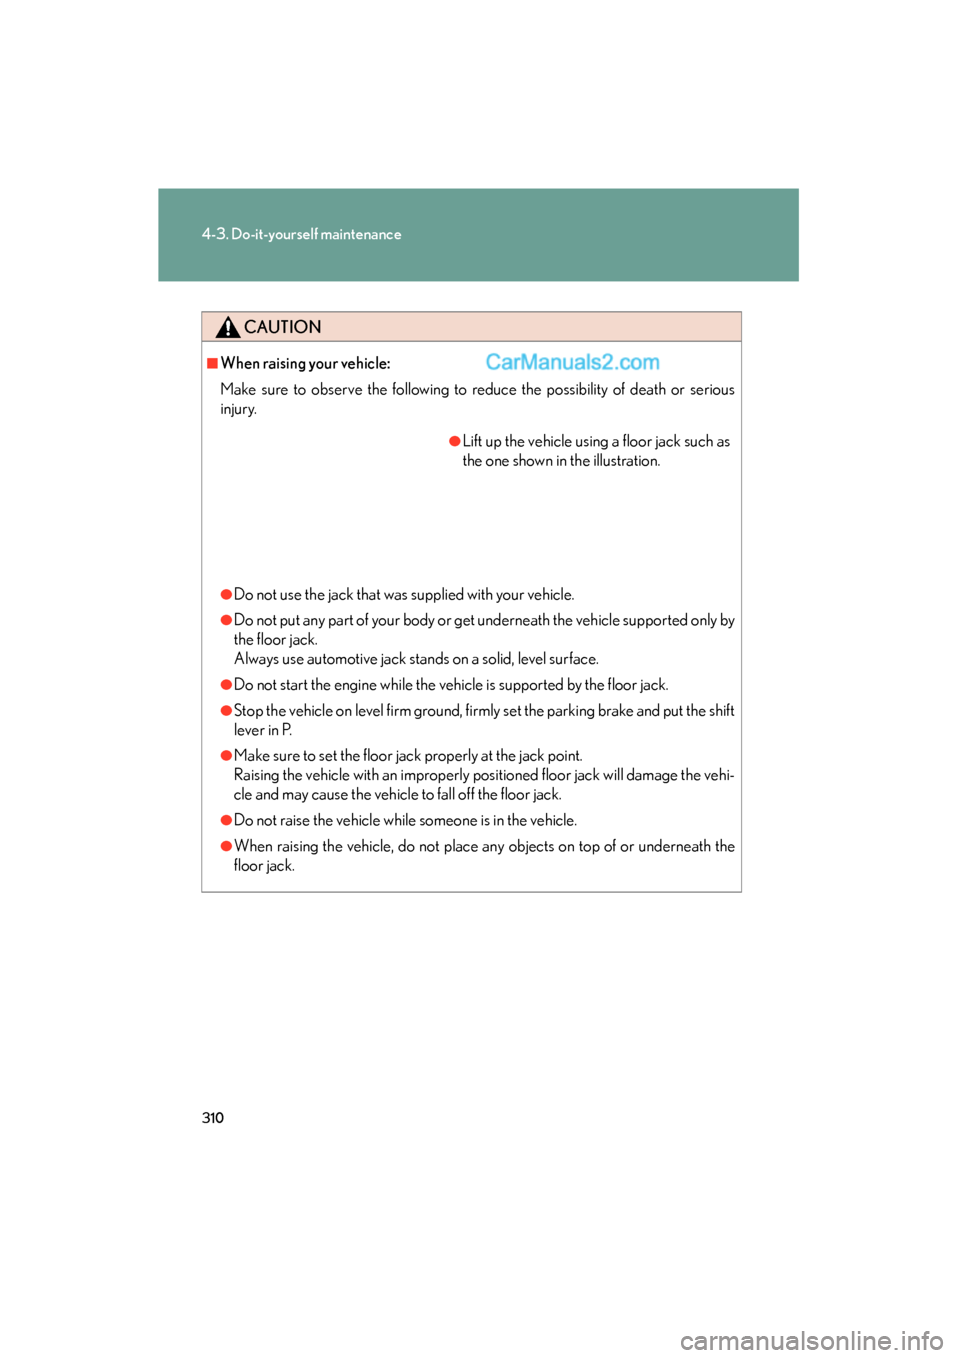
●Lift up the vehicle using a floor jack such as
the one shown in the illustration.
Page 317 of 475
315
4-3. Do-it-yourself maintenance
4
Maintenance and care
ES350_U_(L/O_0808)■
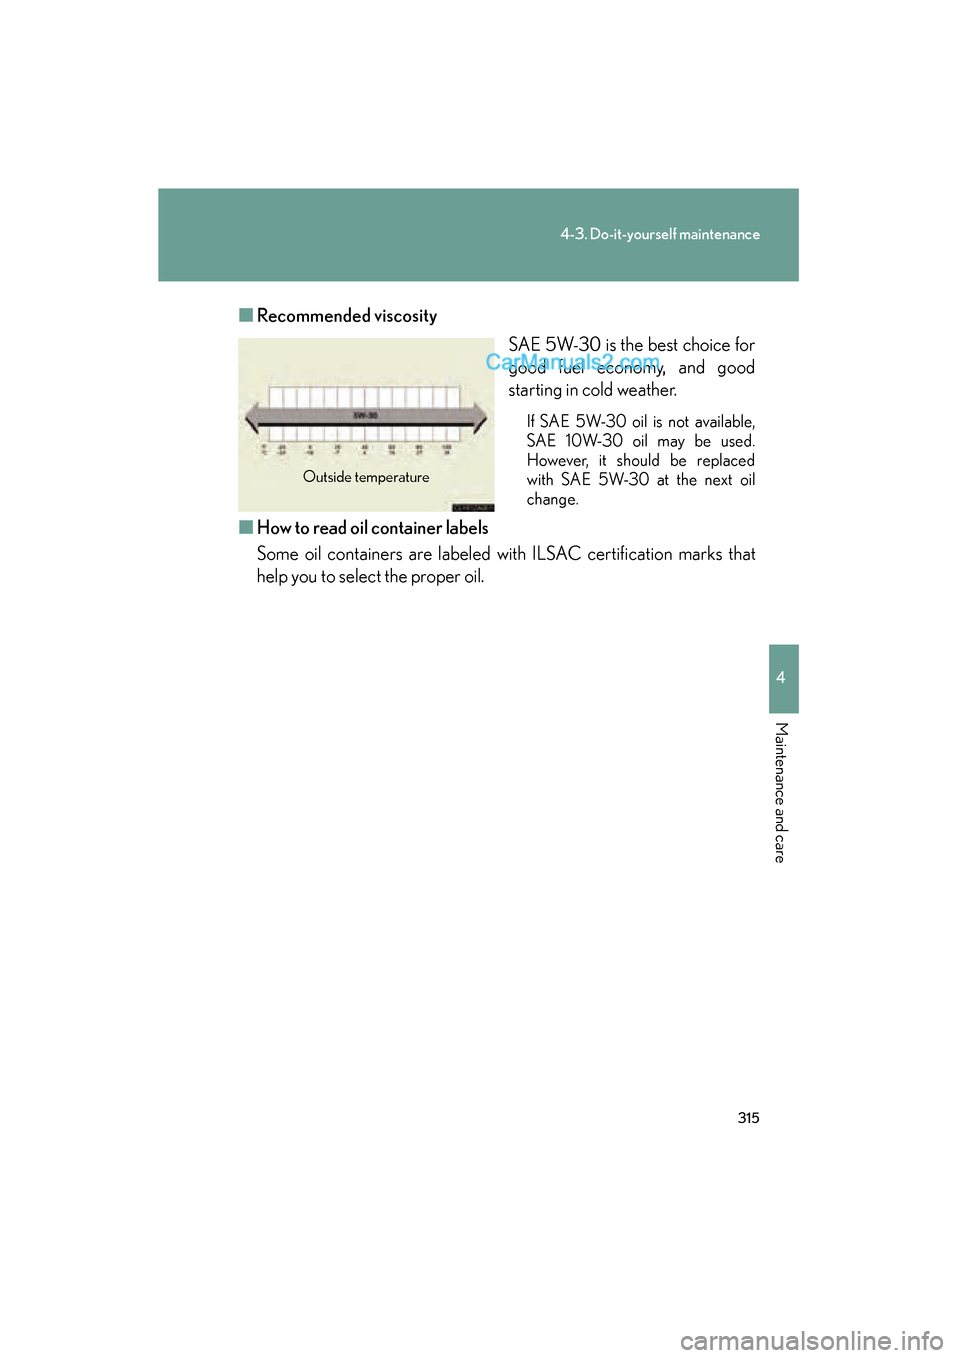
Recommended viscosity
SAE 5W-30 is the best choice for
good fuel economy, and good
starting in cold weather.
If SAE 5W-30 oil is not available,
SAE 10W-30 oil may be used.
However, it should be replaced
with SAE 5W-30 at the next oil
change.
■How to read oil container labels
Some oil containers are labeled with ILSAC certification marks that
help you to select the proper oil.
Outside temperature
Page 318 of 475
316
4-3. Do-it-yourself maintenance
ES350_U_(L/O_0808)
■Engine oil consumption
●The amount of engine oil consumed depends on the oil viscosity, the quality of
the oil and the way the vehicle is driven.
●More oil is consumed under driving conditions such as high speeds and fre-
quent acceleration and deceleration.
●A new engine consumes more oil.
●When judging the amount of oil consumption, keep in mind that the oil may
have become diluted, making it difficult to judge the true level accurately.
●Oil consumption: Max. 1.1 qt./600 miles, 0.9 lmp.qt./600 miles (1.0 L per 1000
km)
●If you consume more than 1.1 qt. (1.0 L, 0.9 lmp.qt.) every 600 miles (1000 km),
contact your Lexus dealer.
■Changing the engine oil (USA only)
To reset the oil change system, follow the procedure below:
1. Turn the “ENGINE START STOP” switch OFF with the trip meter A readingshown. ( →P. 125)
2. While pressing the trip meter reset button, set the “ENGINE START STOP” switch to the IGNITION ON mode. Contin ue to press and hold the button until
the trip meter displays 000000.
CAUTION
■Used engine oil
●Used engine oil contains potentially harmful contaminants which may cause skin
disorders such as inflammation or skin cancer, so care should be taken to avoid
prolonged and repeated contact. To remove used engine oil from your skin, wash
thoroughly with soap and water.
●Dispose of used oil and filters only in a safe and acceptable manner. Do not dis-
pose of used oil and filters in household trash, in sewers or onto the ground.
Call your Lexus dealer, service station or auto parts store for information con-
cerning recycling or disposal.
●Do not leave used engine oil within the reach of children.
Page 325 of 475
323
4-3. Do-it-yourself maintenance
4
Maintenance and care
ES350_U_(L/O_0808)
■Before recharging
When recharging, the battery produces hydrogen gas which is flammable and
explosive. Therefore, before recharging:
●If recharging with the battery installed on the vehicle, be sure to disconnect the
ground cable.
●Make sure the power switch on the charger is off when connecting and discon-
necting the charger cables to the battery.
■After recharging the battery
The engine may not start. Follow the procedure below to initialize the system.
1. Shift the shift lever to P.
2. Open and close any of the doors.
3. Restart the engine.
Page 330 of 475
328
4-3. Do-it-yourself maintenance
ES350_U_(L/O_0808)
Initializing the tire pressure warning system■ The tire pressure warning system must be initialized in the following
circumstances:
● When changing the tire inflation pressure by changing traveling
speed or load weight, etc.
When the tire pressure warning system is initialized, the current tire
inflation pressure is set as the pressure benchmark.
■ How to initialize the tire pressure warning system
Park the vehicle in safe place and turn the “ENGINE START
STOP” switch OFF.
While the vehicle is moving, initialization is not performed.
Adjust the tire inflation pressure to the specified cold tire inflation
pressure level. ( →P. 4 2 9 )
Make sure to adjust the tire pressure to the specified cold tire inflation
pressure level. The tire pressure warning system will operate based on
this pressure level.
Turn the “ENGINE START STOP” switch to IGNITION ON
mode.
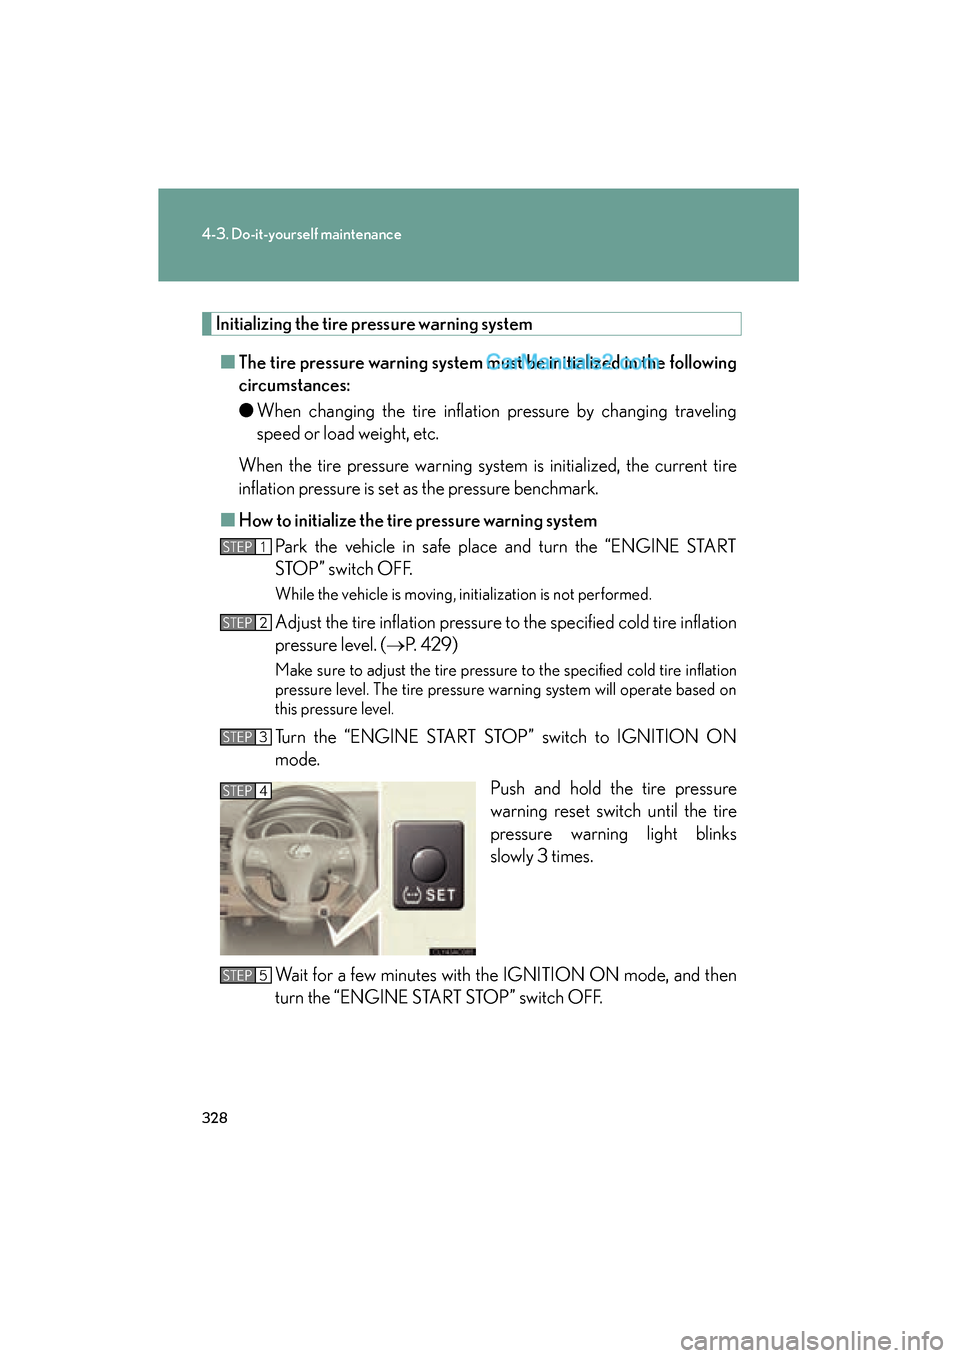
Push and hold the tire pressure
warning reset switch until the tire
pressure warning light blinks
slowly 3 times.
Wait for a few minutes with the IGNITION ON mode, and then
turn the “ENGINE START STOP” switch OFF.
STEP1
STEP2
STEP3
STEP4
STEP5