check engine light Lexus ES350 2019 Owner's Manual / LEXUS 2019 ES350 OWNER'S MANUAL (OM06130U)
[x] Cancel search | Manufacturer: LEXUS, Model Year: 2019, Model line: ES350, Model: Lexus ES350 2019Pages: 444, PDF Size: 14.22 MB
Page 4 of 444
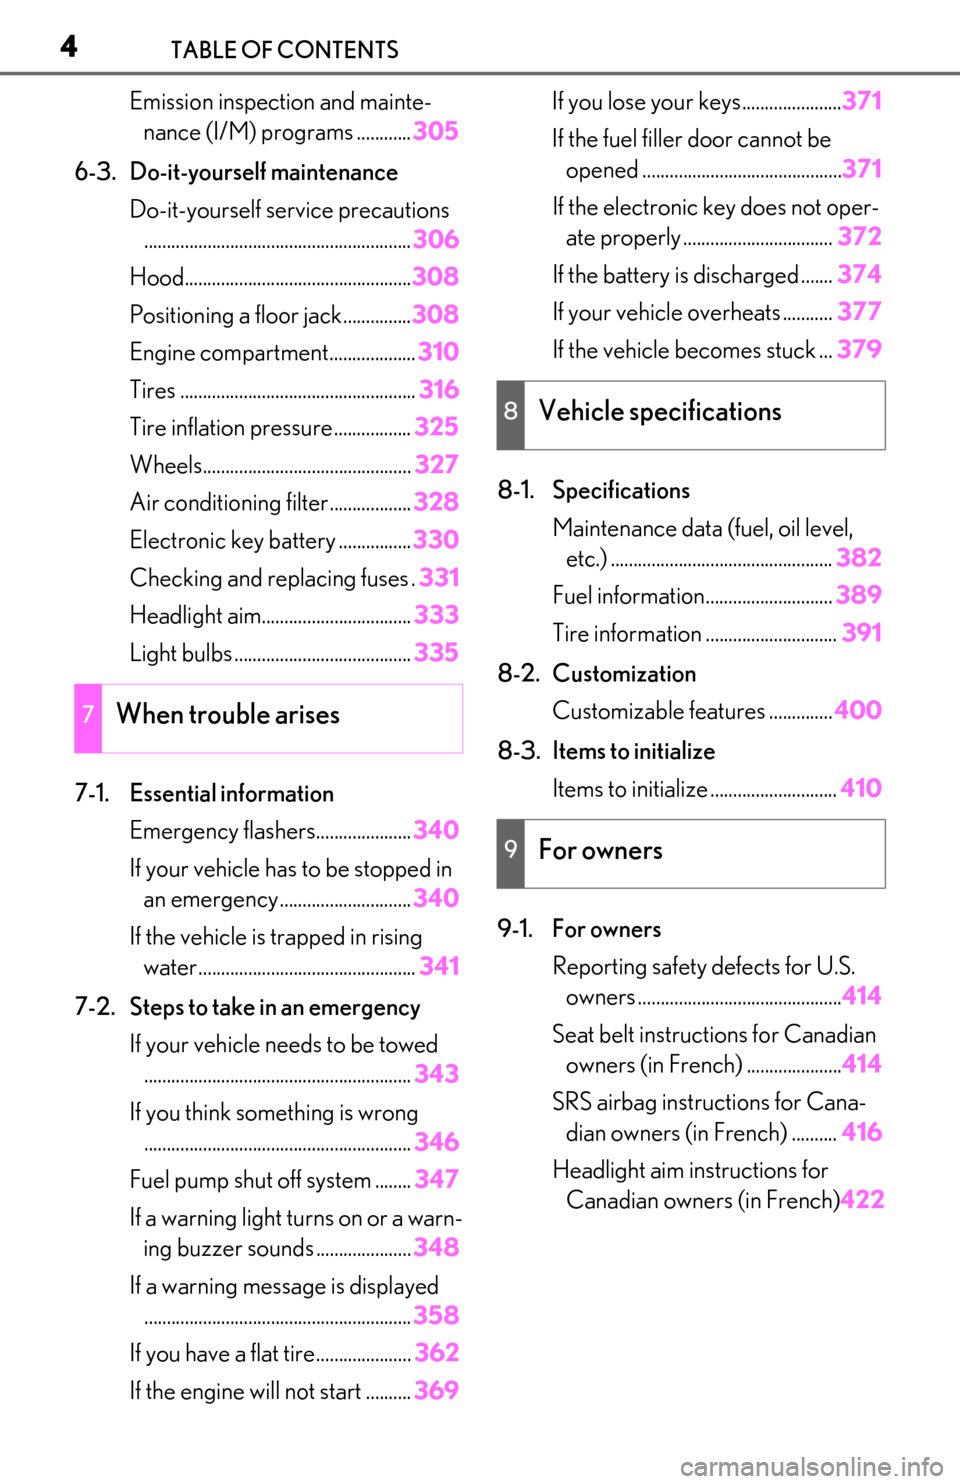
4TABLE OF CONTENTS
Emission inspection and mainte-nance (I/M) programs ............ 305
6-3. Do-it-yourself maintenance Do-it-yourself service precautions........................................................... 306
Hood.................................................. 308
Positioning a floor jack............... 308
Engine compartment................... 310
Tires .................................................... 316
Tire inflation pressure ................. 325
Wheels.............................................. 327
Air conditioning filter..................328
Electronic key battery ................ 330
Checking and replacing fuses . 331
Headlight aim................................. 333
Light bulbs ....................................... 335
7-1. Essential information Emergency flashers..................... 340
If your vehicle has to be stopped in an emergency ............................. 340
If the vehicle is trapped in rising water................................................ 341
7-2. Steps to take in an emergency If your vehicle needs to be towed........................................................... 343
If you think something is wrong ........................................................... 346
Fuel pump shut off system ........ 347
If a warning light turns on or a warn- ing buzzer sounds ..................... 348
If a warning message is displayed ........................................................... 358
If you have a flat tire..................... 362
If the engine wi ll not start .......... 369If you lose your keys......................
371
If the fuel filler door cannot be opened ............................................ 371
If the electronic key does not oper- ate properly ................................. 372
If the battery is discharged ....... 374
If your vehicle overheats ........... 377
If the vehicle becomes stuck ... 379
8-1. Specifications Maintenance data (fuel, oil level, etc.) ................................................. 382
Fuel information............................ 389
Tire information ............................. 391
8-2. Customization Customizable features .............. 400
8-3. Items to initialize Items to initialize ............................ 410
9-1. For owners Reporting safety defects for U.S. owners ............................................. 414
Seat belt instructions for Canadian owners (in French) ..................... 414
SRS airbag instructions for Cana- dian owners (in French) .......... 416
Headlight aim instructions for Canadian owners (in French) 422
7When trouble arises
8Vehicle specifications
9For owners
Page 13 of 444
13Pictorial index
Precautions against winter season ............................................................................ P.242
To prevent freezing (windshield wiper de-icer)
*................................................. P.255
Precautions against car wash ...................................................................................... P.297
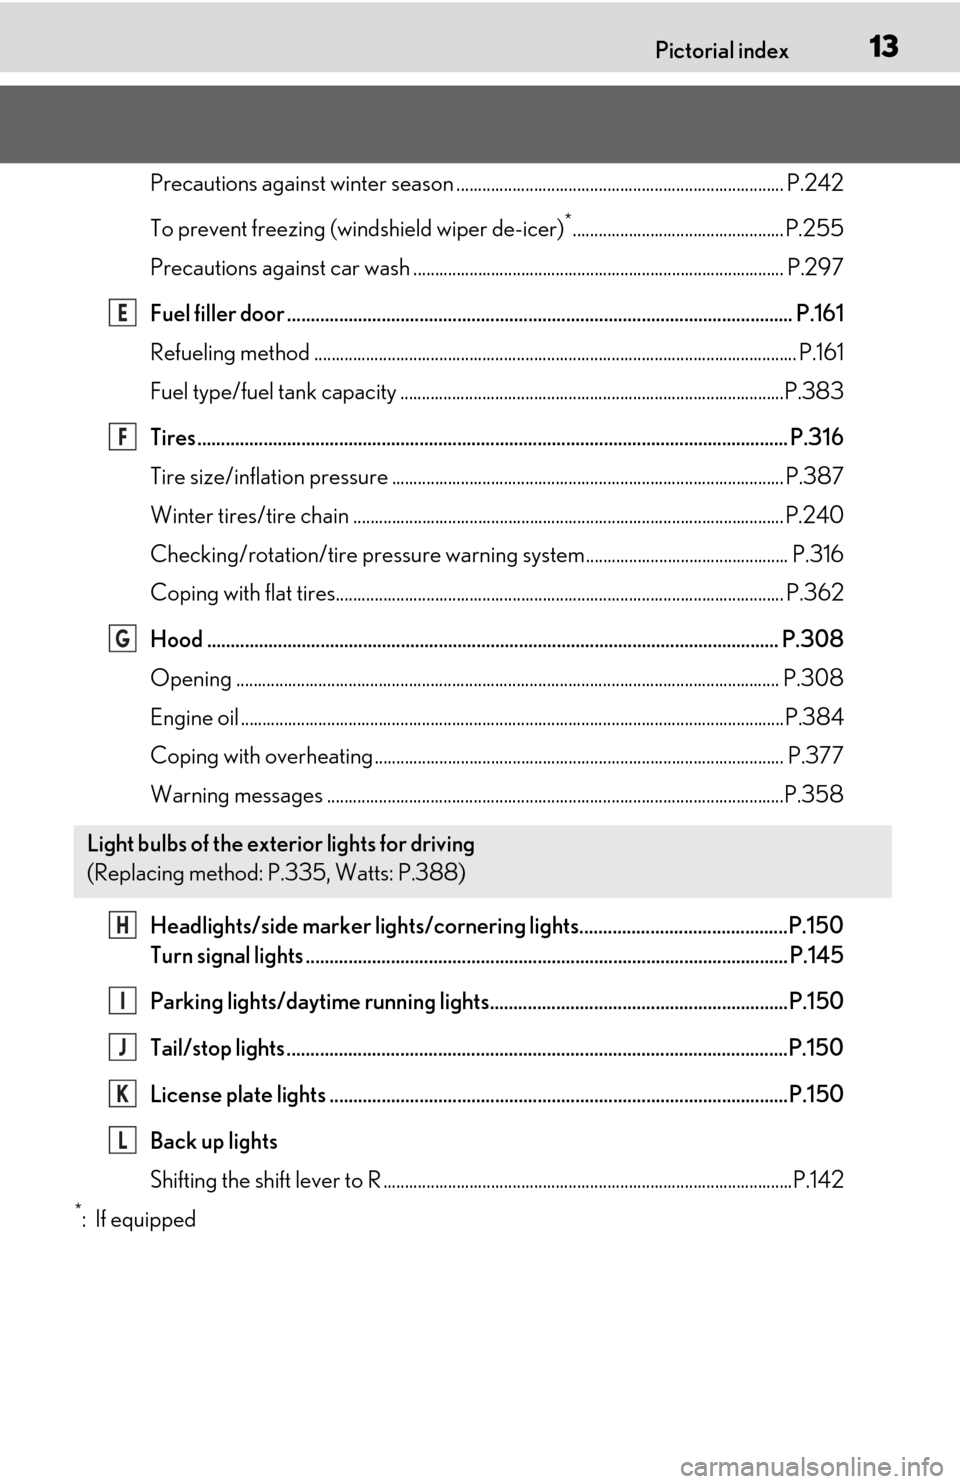
Fuel filler door ........................................................................................................... P.16 1
Refueling method ............................................................................................................... .P.161
Fuel type/fuel tank capacity ...... ...................................................................................P.383
Tires.......................................................................................................................... ... P.316
Tire size/inflation pressure ............................ ............................................................... P.387
Winter tires/tire chain .................................................................................................... P.24 0
Checking/rotation/tire pressure warning system............................................... P.316
Coping with flat tires........................................................................................................ P .362
Hood ......................................................................................................................... P. 308
Opening .............................................................................................................................. P.308
Engine oil ..................................................................................................................... .........P.384
Coping with overheating ............................................................................................... P.377
Warning messages ..........................................................................................................P.358
Headlights/side marker lights/cornering lights............................................P.150
Turn signal lights ...................................................................................................... P.145
Parking lights/daytime running lights...............................................................P.150
Tail/stop lights ..........................................................................................................P.150
License plate lights .................................................................................................P.150
Back up lights
Shifting the shift lever to R ...............................................................................................P.1 42
*:If equipped
Light bulbs of the exterior lights for driving
(Replacing method: P.335, Watts: P.388)
E
F
G
H
I
J
K
L
Page 41 of 444
411-1. For safe use
1
For safety and security
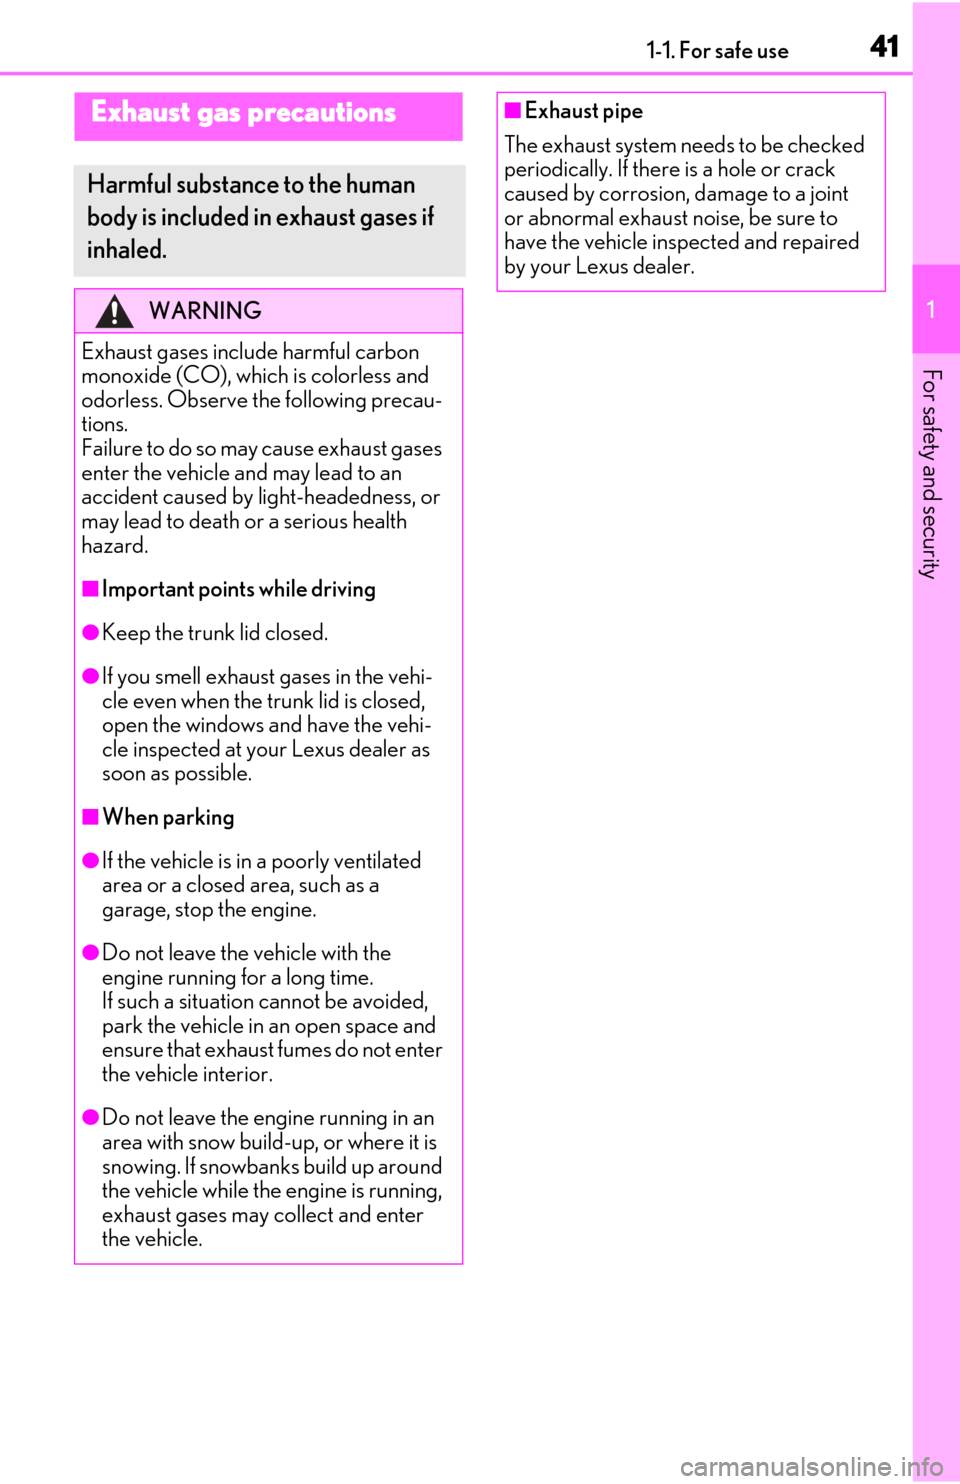
Exhaust gas precautions
Harmful substance to the human
body is included in exhaust gases if
inhaled.
WARNING
Exhaust gases include harmful carbon
monoxide (CO), which is colorless and
odorless. Observe the following precau-
tions.
Failure to do so may cause exhaust gases
enter the vehicle and may lead to an
accident caused by light-headedness, or
may lead to death or a serious health
hazard.
■Important points while driving
●Keep the trunk lid closed.
●If you smell exhaust gases in the vehi-
cle even when the trunk lid is closed,
open the windows and have the vehi-
cle inspected at your Lexus dealer as
soon as possible.
■When parking
●If the vehicle is in a poorly ventilated
area or a closed area, such as a
garage, stop the engine.
●Do not leave the vehicle with the
engine running for a long time.
If such a situation cannot be avoided,
park the vehicle in an open space and
ensure that exhaust fumes do not enter
the vehicle interior.
●Do not leave the engine running in an
area with snow build-up, or where it is
snowing. If snowbanks build up around
the vehicle while the engine is running,
exhaust gases may collect and enter
the vehicle.
■Exhaust pipe
The exhaust system needs to be checked
periodically. If there is a hole or crack
caused by corrosion, damage to a joint
or abnormal exhaust noise, be sure to
have the vehicle inspected and repaired
by your Lexus dealer.
Page 56 of 444
561-3. Theft deterrent system
■Items to check before locking the
vehicle
To prevent unexpected triggering of
the alarm and vehicle theft, make sure
of the following:
Nobody is in the vehicle.
The windows and moon roof (if
equipped) or panoramic moon roof
(if equipped) are closed before the
alarm is set.
No valuables or other personal
items are left in the vehicle.
■Setting
Close the doors, trunk and hood, and
lock all the doors. The system will be set automatically after 30 seconds.
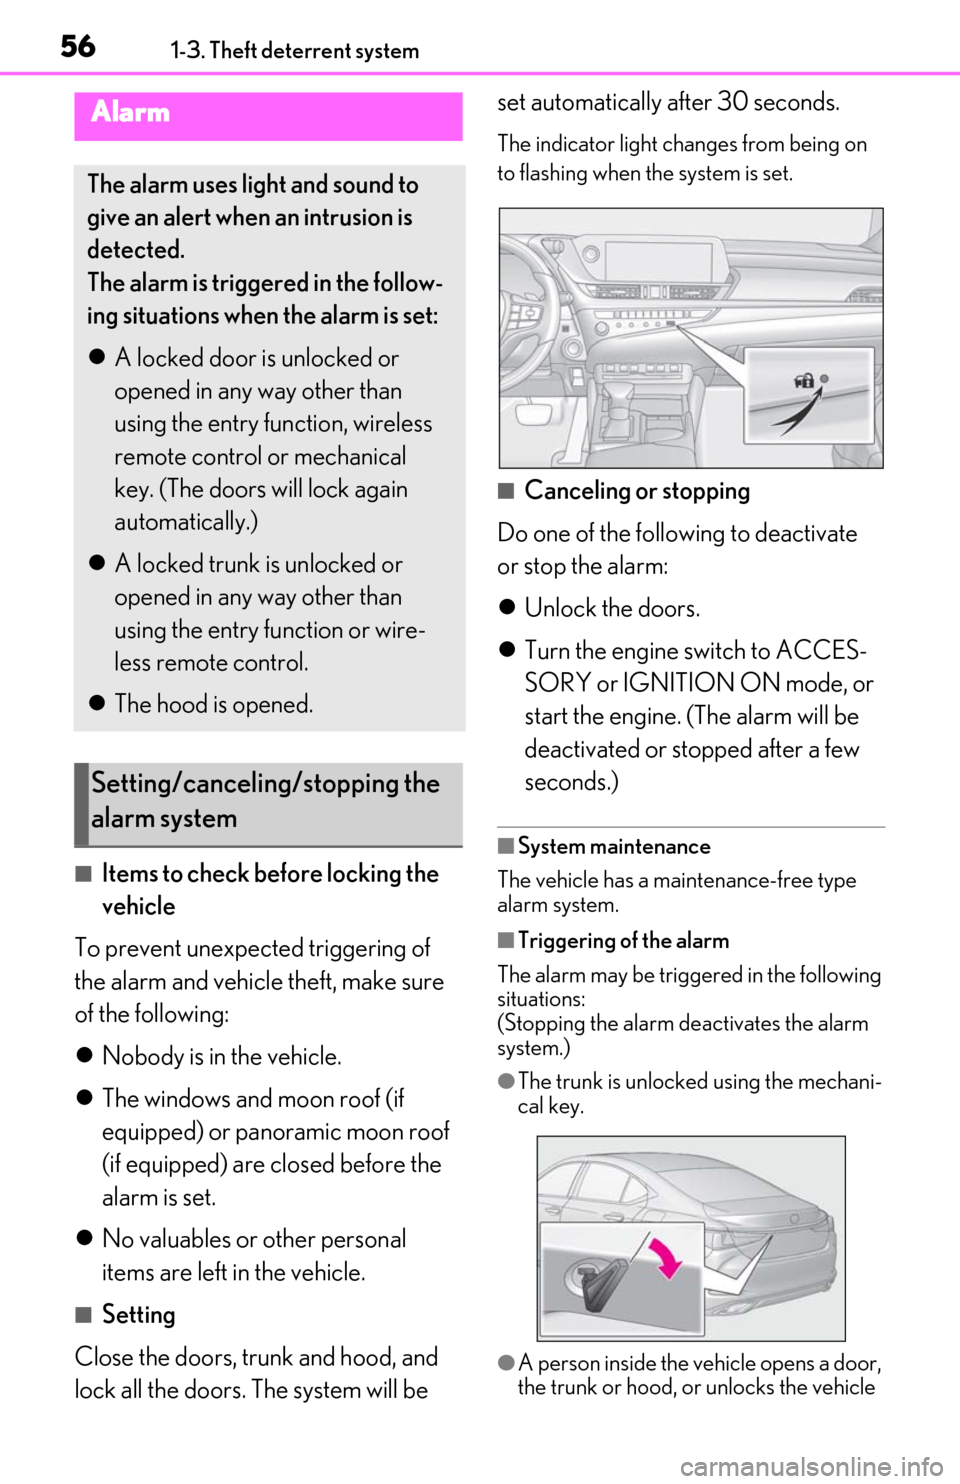
The indicator light changes from being on
to flashing when the system is set.
■Canceling or stopping
Do one of the following to deactivate
or stop the alarm:
Unlock the doors.
Turn the engine switch to ACCES-
SORY or IGNITION ON mode, or
start the engine. (The alarm will be
deactivated or stopped after a few
seconds.)
■System maintenance
The vehicle has a maintenance-free type
alarm system.
■Triggering of the alarm
The alarm may be triggered in the following
situations:
(Stopping the alarm deactivates the alarm
system.)
●The trunk is unlocked using the mechani-
cal key.
●A person inside the vehicle opens a door,
the trunk or hood, or unlocks the vehicle
Alarm
The alarm uses light and sound to
give an alert when an intrusion is
detected.
The alarm is triggered in the follow-
ing situations when the alarm is set:
A locked door is unlocked or
opened in any way other than
using the entry function, wireless
remote control or mechanical
key. (The doors will lock again
automatically.)
A locked trunk is unlocked or
opened in any way other than
using the entry function or wire-
less remote control.
The hood is opened.
Setting/canceling/stopping the
alarm system
Page 62 of 444
622-1. Instrument cluster
*1: These lights come on when the engine switch is turned to IGNITION ON
mode to indicate that a system check is
being performed. They will go off after
the engine is on, or after a few seconds.
There may be a malfunction in a system
if the lights do not come on, or go off.
Have the vehicle inspected by your
Lexus dealer.
*2: This light illuminates on the multi-infor- mation display.
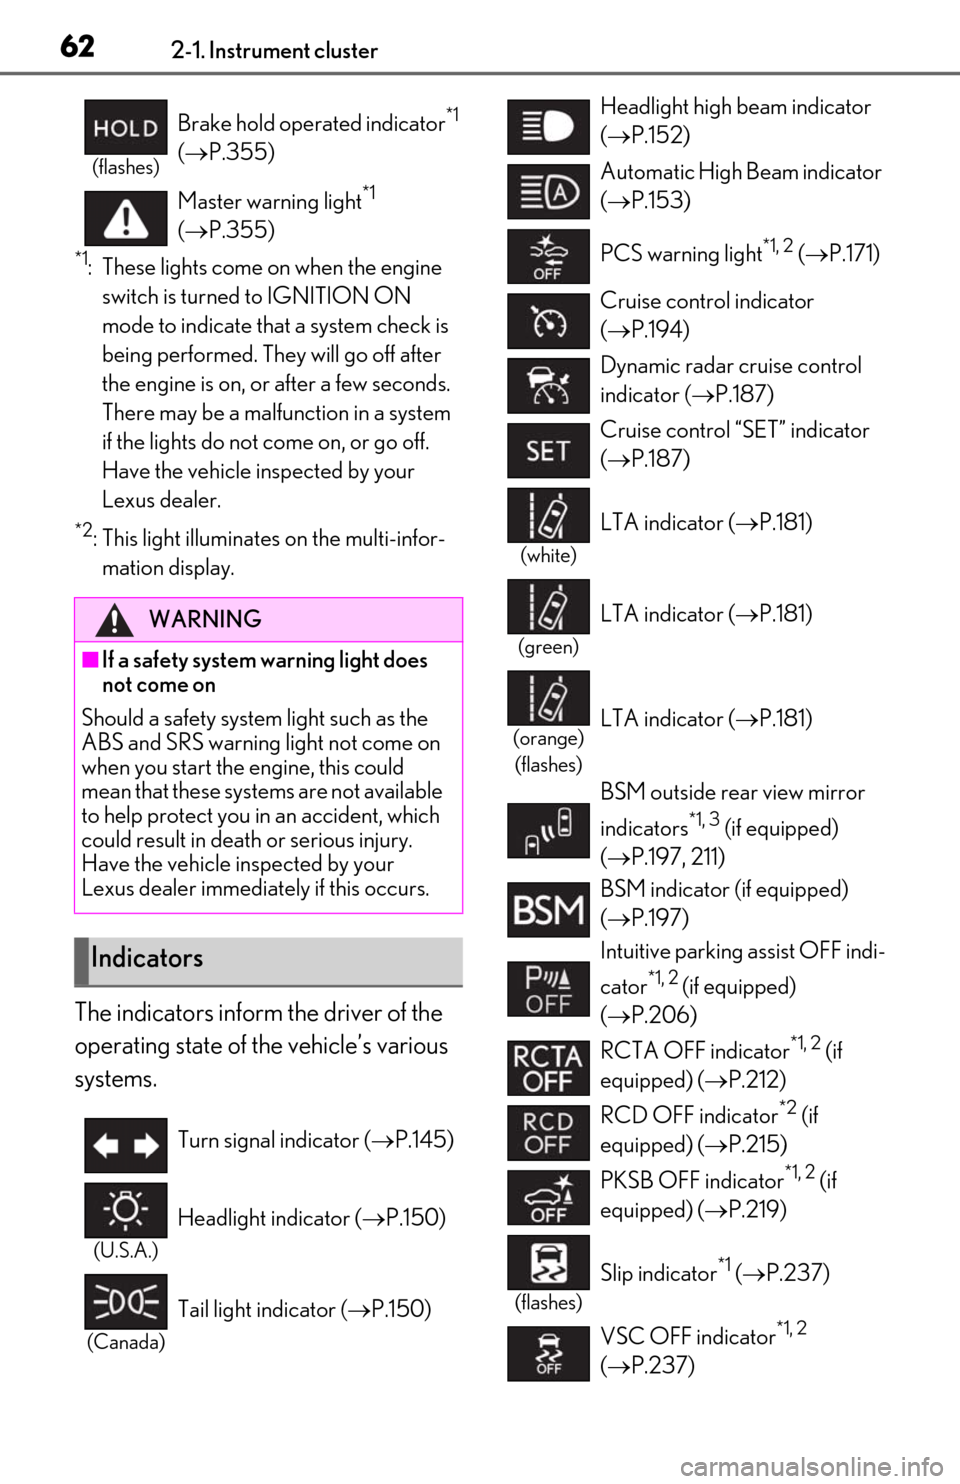
The indicators inform the driver of the
operating state of the vehicle’s various
systems.
(flashes)
Brake hold operated indicator*1
( P.355)
Master warning light
*1
( P.355)
WARNING
■If a safety system warning light does
not come on
Should a safety system light such as the
ABS and SRS warning light not come on
when you start the engine, this could
mean that these systems are not available
to help protect you in an accident, which
could result in death or serious injury.
Have the vehicle inspected by your
Lexus dealer immediately if this occurs.
Indicators
Turn signal indicator ( P.145)
(U.S.A.)
Headlight indicator ( P.150)
(Canada)
Tail light indicator ( P.150)
Headlight high beam indicator
( P.152)
Automatic High Beam indicator
( P.153)
PCS warning light
*1, 2 ( P.171)
Cruise control indicator
( P.194)
Dynamic radar cruise control
indicator ( P.187)
Cruise control “SET” indicator
( P.187)
(white)
LTA indicator ( P.181)
(green)
LTA indicator (P.181)
(orange)
(flashes)LTA indicator ( P.181)
BSM outside rear view mirror
indicators
*1, 3 (if equipped)
( P.197, 211)
BSM indicator (if equipped)
( P.197)
Intuitive parking assist OFF indi-
cator
*1, 2 (if equipped)
( P.206)
RCTA OFF indicator
*1, 2 (if
equipped) ( P.212)
RCD OFF indicator
*2 (if
equipped) ( P.215)
PKSB OFF indicator
*1, 2 (if
equipped) ( P.219)
(flashes)
Slip indicator*1 ( P.237)
VSC OFF indicator
*1, 2
( P.237)
Page 63 of 444
632-1. Instrument cluster
2
Vehicle status information and indicators
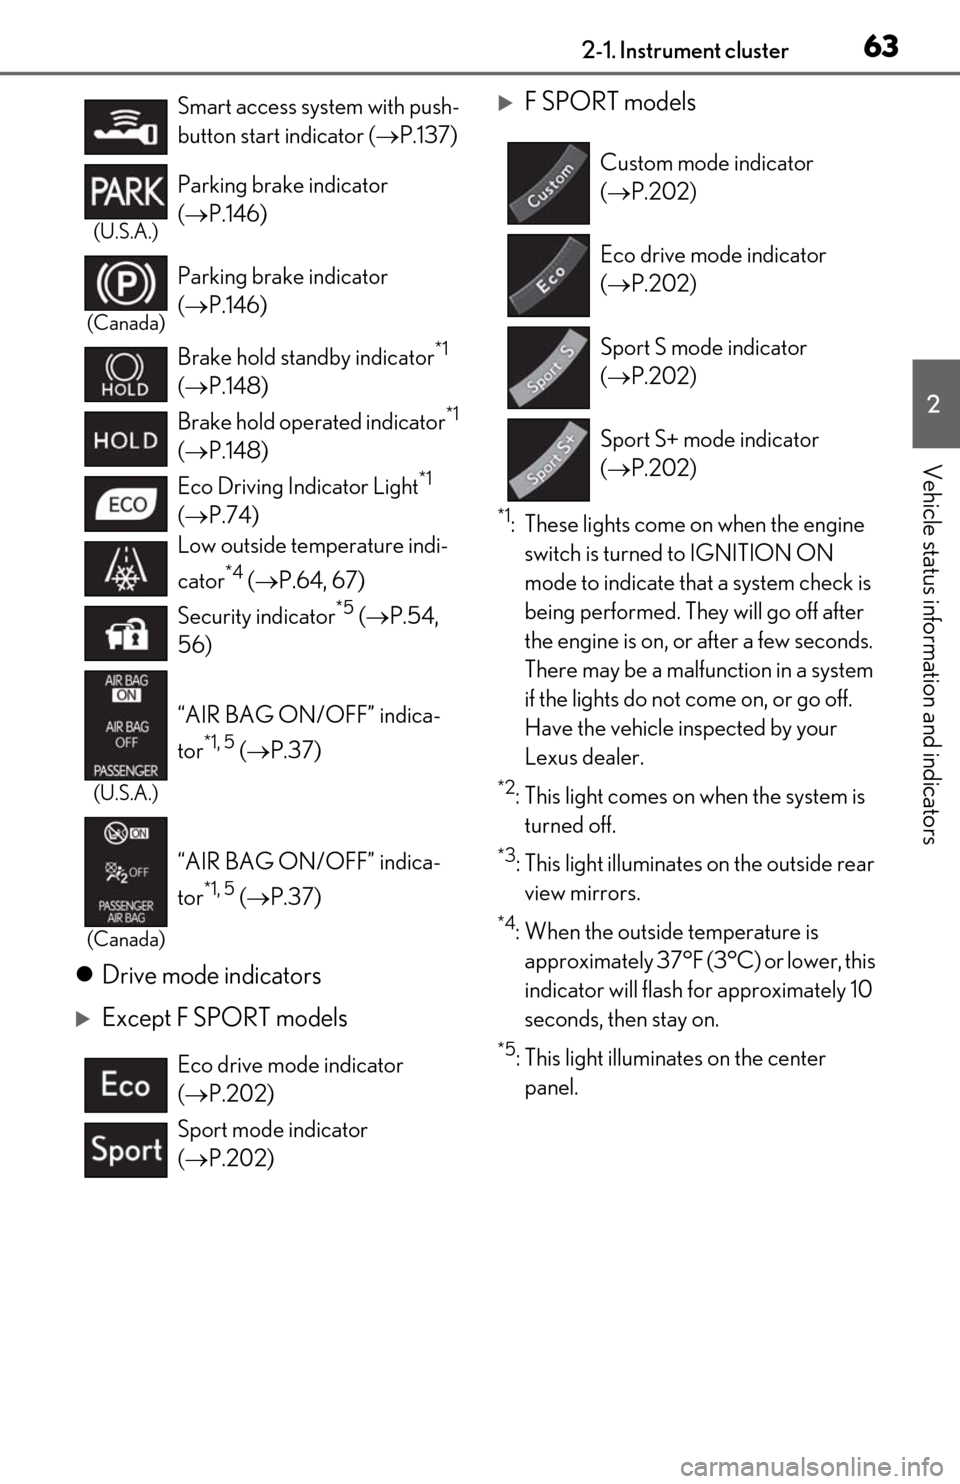
Drive mode indicators
Except F SPORT models
F SPORT models
*1: These lights come on when the engine
switch is turned to IGNITION ON
mode to indicate that a system check is
being performed. They will go off after
the engine is on, or after a few seconds.
There may be a malfunction in a system
if the lights do not come on, or go off.
Have the vehicle inspected by your
Lexus dealer.
*2: This light comes on when the system is turned off.
*3: This light illuminates on the outside rear view mirrors.
*4: When the outside temperature is approximately 37°F (3°C) or lower, this
indicator will flash for approximately 10
seconds, then stay on.
*5: This light illuminates on the center panel.
Smart access system with push-
button start indicator (
P.137)
(U.S.A.)
Parking brake indicator
( P.146)
(Canada)
Parking brake indicator
( P.146)
Brake hold standby indicator
*1
( P.148)
Brake hold operated indicator
*1
( P.148)
Eco Driving Indicator Light
*1
( P.74)
Low outside temperature indi-
cator
*4 ( P.64, 67)
Security indicator
*5 ( P.54,
56)
(U.S.A.)
“AIR BAG ON/OFF” indica-
tor
*1, 5 ( P.37)
(Canada)
“AIR BAG ON/OFF” indica-
tor
*1, 5 ( P.37)
Eco drive mode indicator
( P.202)
Sport mode indicator
( P.202)
Custom mode indicator
( P.202)
Eco drive mode indicator
( P.202)
Sport S mode indicator
( P.202)
Sport S+ mode indicator
( P.202)
Page 70 of 444
702-1. Instrument cluster
■Display items
Odometer
Displays the total distance the vehicle has
been driven.
Trip meter A/trip meter B
Displays the distance the vehicle has been
driven since the meter was last reset. Trip
meters A and B can be used to record and
display different distances independently.
Distance until next engine oil change
Displays the distance the vehicle can be
driven until an oil change is necessary.
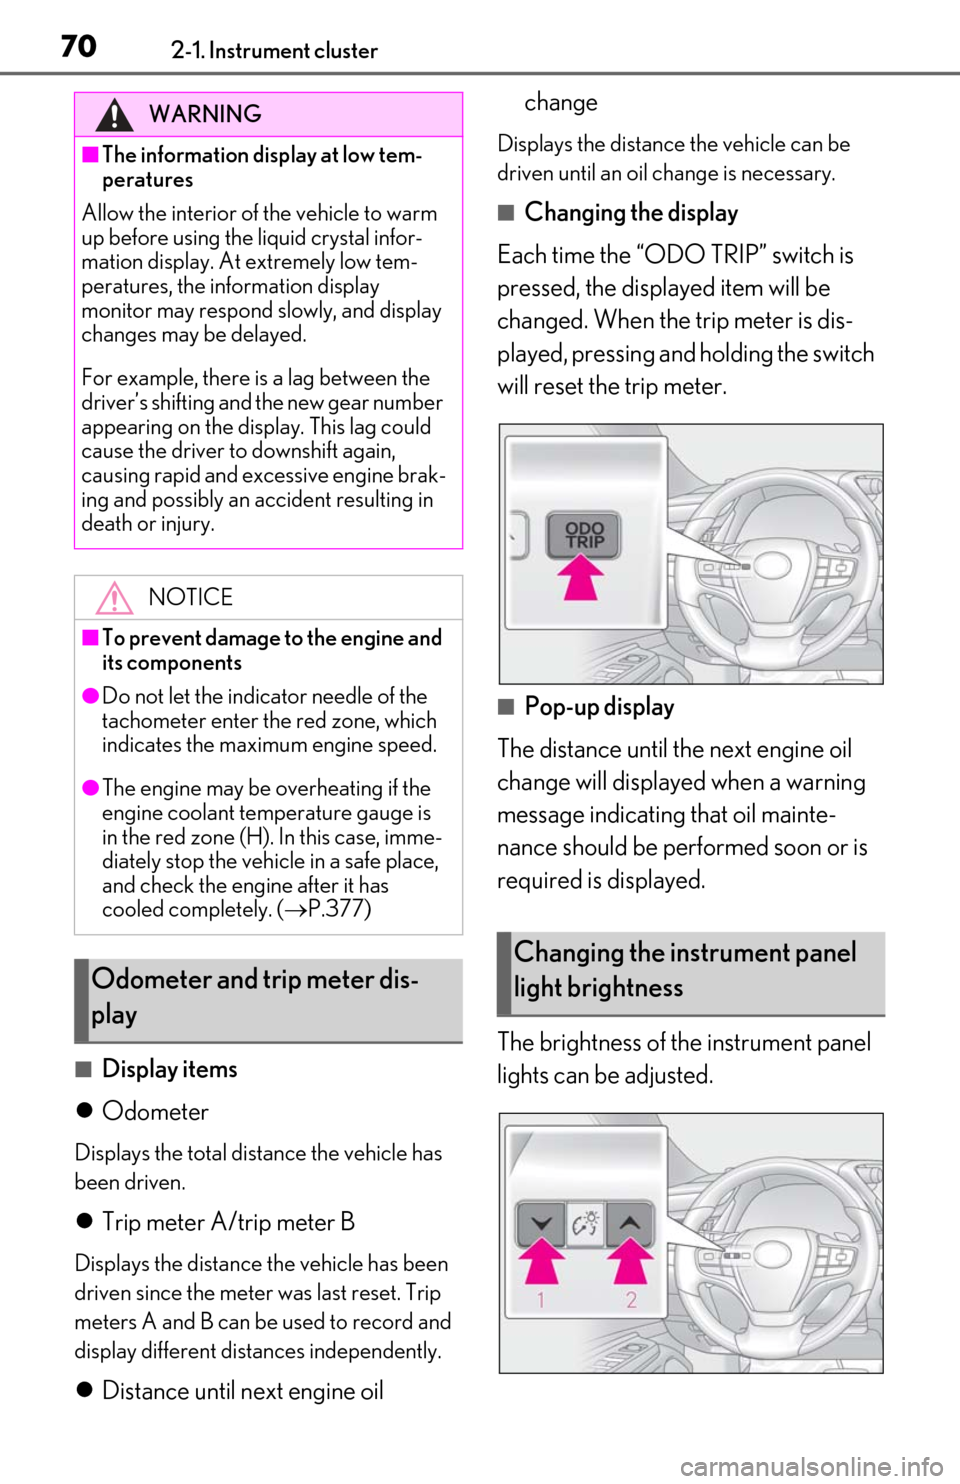
■Changing the display
Each time the “ODO TRIP” switch is
pressed, the displayed item will be
changed. When the trip meter is dis-
played, pressing and holding the switch
will reset the trip meter.
■Pop-up display
The distance until the next engine oil
change will displayed when a warning
message indicating that oil mainte-
nance should be performed soon or is
required is displayed.
The brightness of the instrument panel
lights can be adjusted.
WARNING
■The information display at low tem-
peratures
Allow the interior of the vehicle to warm
up before using the liquid crystal infor-
mation display. At extremely low tem-
peratures, the in formation display
monitor may respond slowly, and display
changes may be delayed.
For example, there is a lag between the
driver’s shifting and the new gear number
appearing on the display. This lag could
cause the driver to downshift again,
causing rapid and excessive engine brak-
ing and possibly an accident resulting in
death or injury.
NOTICE
■To prevent damage to the engine and
its components
●Do not let the indicator needle of the
tachometer enter the red zone, which
indicates the maximum engine speed.
●The engine may be overheating if the
engine coolant temperature gauge is
in the red zone (H). In this case, imme-
diately stop the vehicle in a safe place,
and check the engine after it has
cooled completely. ( P.377)
Odometer and trip meter dis-
play
Changing the instrument panel
light brightness
Page 89 of 444
893-2. Opening, closing and locking the doors and trunk
3
Before driving
3-2.Opening, closing and locking the doors and trunk
■Smart access system with push-
button start
Carry the electronic key to enable this
function.
1 Grip the driver’s door handle to
unlock the door. Holding the
driver’s door ha ndle for approxi-
mately 2 seconds unlocks all the
doors. Grip the passenger’s door
handle to unlock all the doors.
*
Make sure to touch the sensor on the back
of the handle.
The doors cannot be unlocked for 3 sec-
onds after the doors are locked.
*: The door unlock settings can be changed.
2 Touch the lock sensor (the indenta-
tion on the upper part of the door
handle) to lock all the doors.
Check that the door is securely locked.
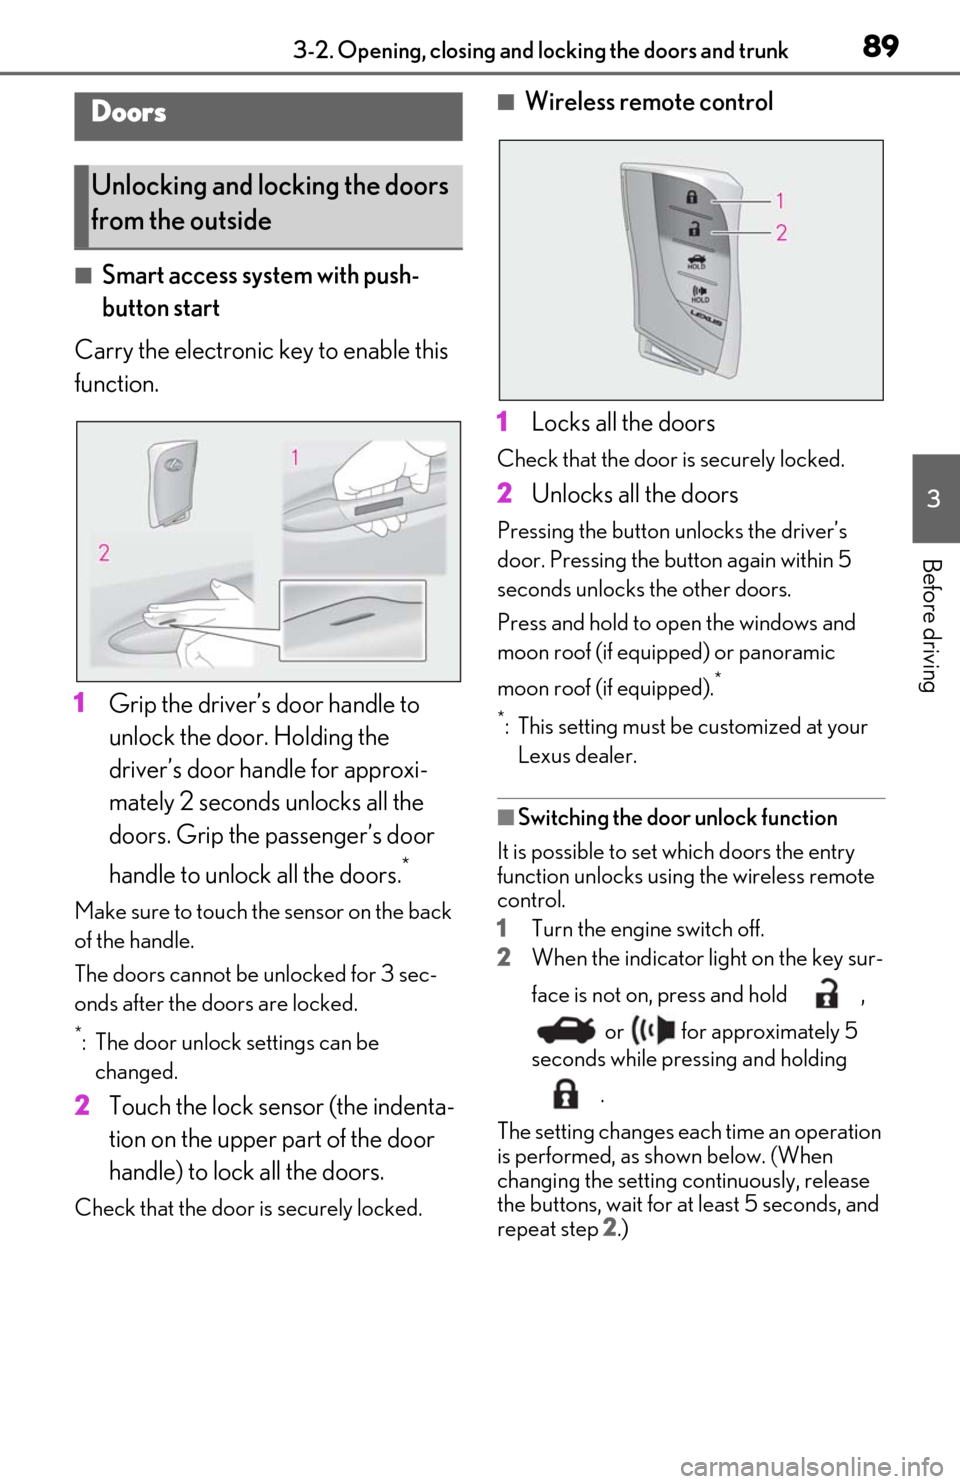
■Wireless remote control
1 Locks all the doors
Check that the door is securely locked.
2Unlocks all the doors
Pressing the button unlocks the driver’s
door. Pressing the button again within 5
seconds unlocks the other doors.
Press and hold to open the windows and
moon roof (if equipped) or panoramic
moon roof (if equipped).
*
*
: This setting must be customized at your Lexus dealer.
■Switching the door unlock function
It is possible to set which doors the entry
function unlocks using the wireless remote
control.
1 Turn the engine switch off.
2 When the indicator light on the key sur-
face is not on, press and hold ,
or for approximately 5
seconds while pre ssing and holding
.
The setting changes each time an operation
is performed, as shown below. (When
changing the setting continuously, release
the buttons, wait for at least 5 seconds, and
repeat step 2 .)
Doors
Unlocking and locking the doors
from the outside
Page 94 of 444
943-2. Opening, closing and locking the doors and trunk
WARNING
●Vehicles without power trunk lid:
When closing the trunk lid, make sure
to press it lightly on its outer surface. If
the trunk grip is used to fully close the
trunk lid, it may result in hands or arms
being caught.
●Do not attach any accessories other
than genuine Lexus parts to the trunk
lid. Such additional weight on the trunk
lid may cause the lid to suddenly shut
again after it is opened.
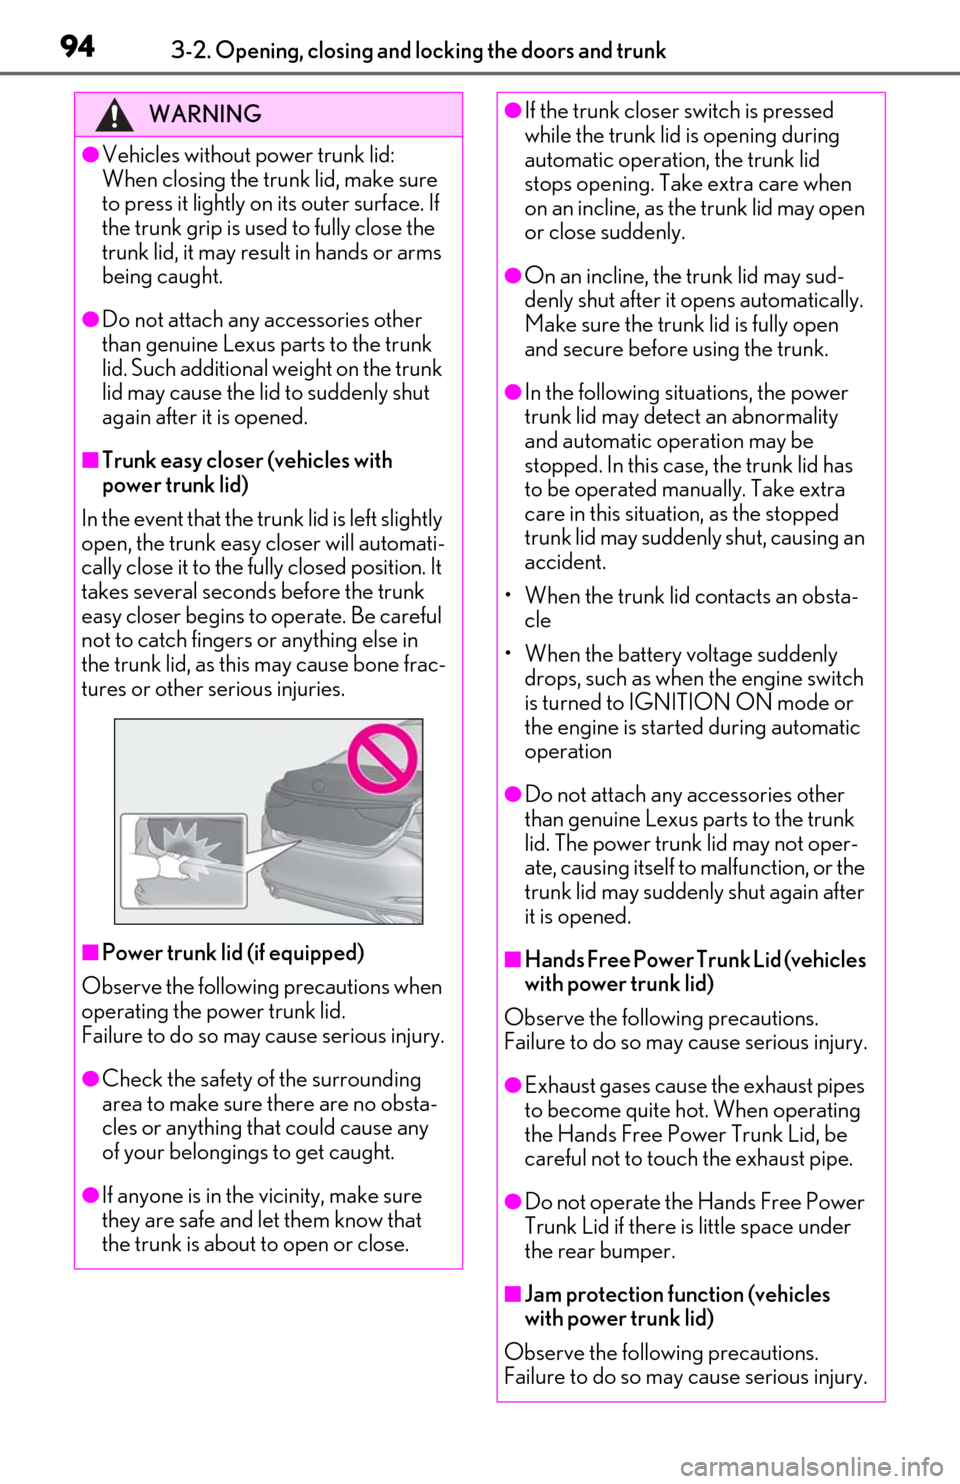
■Trunk easy closer (vehicles with
power trunk lid)
In the event that the trun k lid is left slightly
open, the trunk easy closer will automati-
cally close it to the fully closed position. It
takes several seconds before the trunk
easy closer begins to operate. Be careful
not to catch fingers or anything else in
the trunk lid, as this may cause bone frac-
tures or other serious injuries.
■Power trunk lid (if equipped)
Observe the following precautions when
operating the power trunk lid.
Failure to do so may cause serious injury.
●Check the safety of the surrounding
area to make sure there are no obsta-
cles or anything that could cause any
of your belongings to get caught.
●If anyone is in the vicinity, make sure
they are safe and let them know that
the trunk is about to open or close.
●If the trunk closer switch is pressed
while the trunk lid is opening during
automatic operation, the trunk lid
stops opening. Take extra care when
on an incline, as the trunk lid may open
or close suddenly.
●On an incline, the trunk lid may sud-
denly shut after it opens automatically.
Make sure the trunk lid is fully open
and secure before using the trunk.
●In the following situations, the power
trunk lid may detect an abnormality
and automatic operation may be
stopped. In this case, the trunk lid has
to be operated manually. Take extra
care in this situat ion, as the stopped
trunk lid may suddenly shut, causing an
accident.
• When the trunk lid contacts an obsta- cle
• When the battery voltage suddenly drops, such as when the engine switch
is turned to IGNITION ON mode or
the engine is started during automatic
operation
●Do not attach any accessories other
than genuine Lexus parts to the trunk
lid. The power trunk lid may not oper-
ate, causing itself to malfunction, or the
trunk lid may suddenly shut again after
it is opened.
■Hands Free Power Trunk Lid (vehicles
with power trunk lid)
Observe the following precautions.
Failure to do so may cause serious injury.
●Exhaust gases cause the exhaust pipes
to become quite hot. When operating
the Hands Free Power Trunk Lid, be
careful not to touch the exhaust pipe.
●Do not operate the Hands Free Power
Trunk Lid if there is little space under
the rear bumper.
■Jam protection function (vehicles
with power trunk lid)
Observe the following precautions.
Failure to do so may cause serious injury.
Page 109 of 444
1093-3. Adjusting the seats
3
Before driving
button is pressed, press button “1”,
“2” or “3” until the buzzer sounds.
If the selected button has already been
preset, the previously recorded position
will be overwritten.
■Seat positions that can be memorized
( P.107)
The positions adjusted by the following pro-
cedure can be recorded:
●Seat position adjustment
●Seatback angle adjustment
●Seat cushion (front) angle adjustment
●Vertical height adjustment
■In order to correctly use the driving
position memory function
If a seat position is already in the furthest
possible position and the seat is operated in
the same direction, the recorded position
may be slightly different when it is recalled.
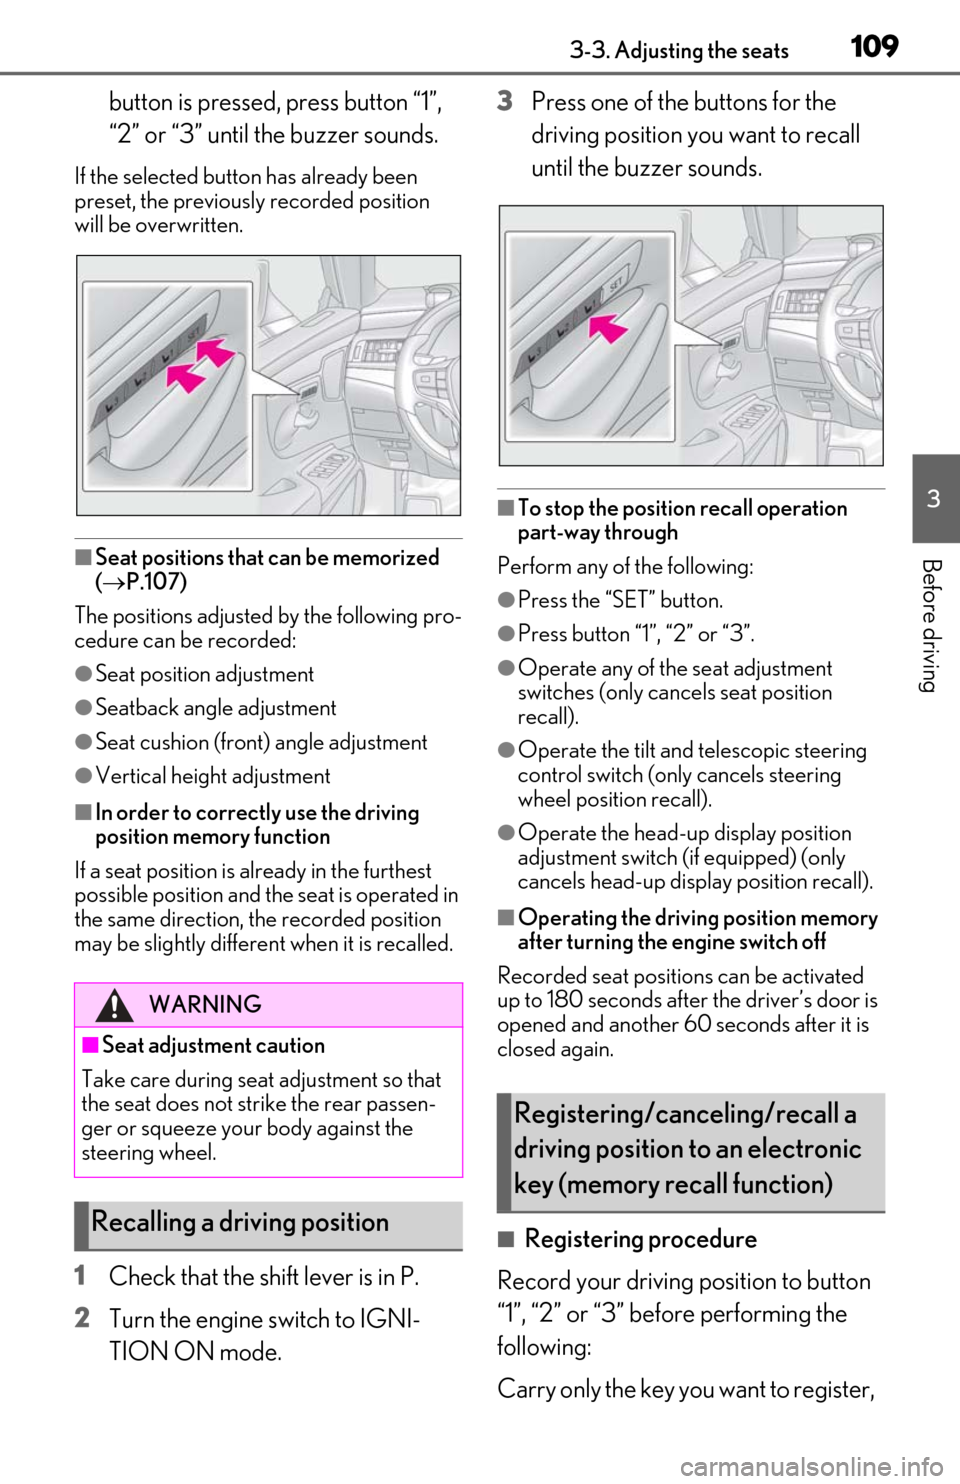
1 Check that the shift lever is in P.
2 Turn the engine switch to IGNI-
TION ON mode. 3
Press one of the buttons for the
driving position you want to recall
until the buzzer sounds.
■To stop the position recall operation
part-way through
Perform any of the following:
●Press the “SET” button.
●Press button “1”, “2” or “3”.
●Operate any of the seat adjustment
switches (only cancels seat position
recall).
●Operate the tilt and telescopic steering
control switch (onl y cancels steering
wheel position recall).
●Operate the head-up display position
adjustment switch (if equipped) (only
cancels head-up display position recall).
■Operating the driving position memory
after turning the engine switch off
Recorded seat positions can be activated
up to 180 seconds after the driver’s door is
opened and another 60 seconds after it is
closed again.
■Registering procedure
Record your driving position to button
“1”, “2” or “3” before performing the
following:
Carry only the key yo u want to register,
WARNING
■Seat adjustment caution
Take care during seat adjustment so that
the seat does not strike the rear passen-
ger or squeeze your body against the
steering wheel.
Recalling a driving position
Registering/canceling/recall a
driving position to an electronic
key (memory recall function)