fuel pressure Lexus ES350 2019 Owner's Manual / LEXUS 2019 ES350 OWNER'S MANUAL (OM06130U)
[x] Cancel search | Manufacturer: LEXUS, Model Year: 2019, Model line: ES350, Model: Lexus ES350 2019Pages: 444, PDF Size: 14.22 MB
Page 1 of 444

1
2
3
4
5
6
7
8
9
Pictorial indexSearch by illustration
For safety
and securityMake sure to read through them
(Main topics: Child seat, theft deterrent system)
Vehicle status
information and
indicatorsReading driving-related information
(Main topics: Meters, multi-information display)
Before drivingOpening and closing the doors and windows,
adjustment before driving
(Main topics: Keys, doors, seats, power windows)
DrivingOperations and advice which are necessary for driving
(Main topics: Starting engine, refueling)
Interior featuresUsage of the interior features
(Main topics: Air conditioner, storage features)
Maintenance
and careCaring for your vehicle and maintenance procedures
(Main topics: Interior and exterior, light bulbs)
When trouble
arisesWhat to do in case of malfunction and emergency
(Main topics: Battery discharge, flat tire)
Vehicle
specificationsVehicle specifications, customizable features
(Main topics: Fuel, oil, tire inflation pressure)
For ownersReporting safety defects for U.S. owners, and seat belt,
SRS airbag and headlight aim instructions for Canadian
owners
IndexSearch by symptom
Search alphabetically
Page 4 of 444
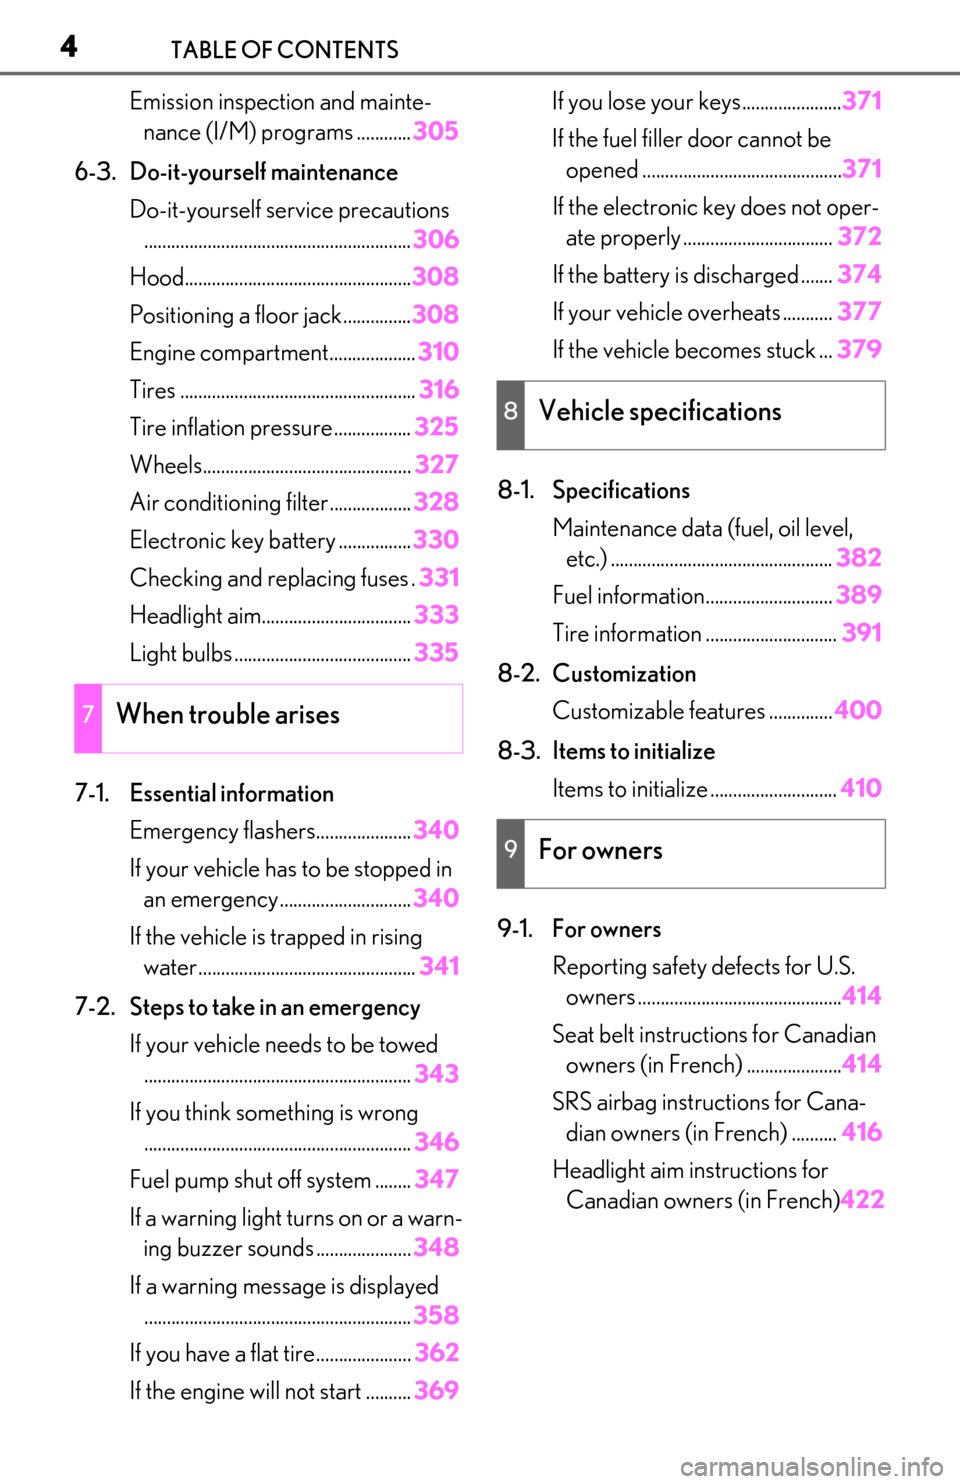
4TABLE OF CONTENTS
Emission inspection and mainte-nance (I/M) programs ............ 305
6-3. Do-it-yourself maintenance Do-it-yourself service precautions........................................................... 306
Hood.................................................. 308
Positioning a floor jack............... 308
Engine compartment................... 310
Tires .................................................... 316
Tire inflation pressure ................. 325
Wheels.............................................. 327
Air conditioning filter..................328
Electronic key battery ................ 330
Checking and replacing fuses . 331
Headlight aim................................. 333
Light bulbs ....................................... 335
7-1. Essential information Emergency flashers..................... 340
If your vehicle has to be stopped in an emergency ............................. 340
If the vehicle is trapped in rising water................................................ 341
7-2. Steps to take in an emergency If your vehicle needs to be towed........................................................... 343
If you think something is wrong ........................................................... 346
Fuel pump shut off system ........ 347
If a warning light turns on or a warn- ing buzzer sounds ..................... 348
If a warning message is displayed ........................................................... 358
If you have a flat tire..................... 362
If the engine wi ll not start .......... 369If you lose your keys......................
371
If the fuel filler door cannot be opened ............................................ 371
If the electronic key does not oper- ate properly ................................. 372
If the battery is discharged ....... 374
If your vehicle overheats ........... 377
If the vehicle becomes stuck ... 379
8-1. Specifications Maintenance data (fuel, oil level, etc.) ................................................. 382
Fuel information............................ 389
Tire information ............................. 391
8-2. Customization Customizable features .............. 400
8-3. Items to initialize Items to initialize ............................ 410
9-1. For owners Reporting safety defects for U.S. owners ............................................. 414
Seat belt instructions for Canadian owners (in French) ..................... 414
SRS airbag instructions for Cana- dian owners (in French) .......... 416
Headlight aim instructions for Canadian owners (in French) 422
7When trouble arises
8Vehicle specifications
9For owners
Page 13 of 444
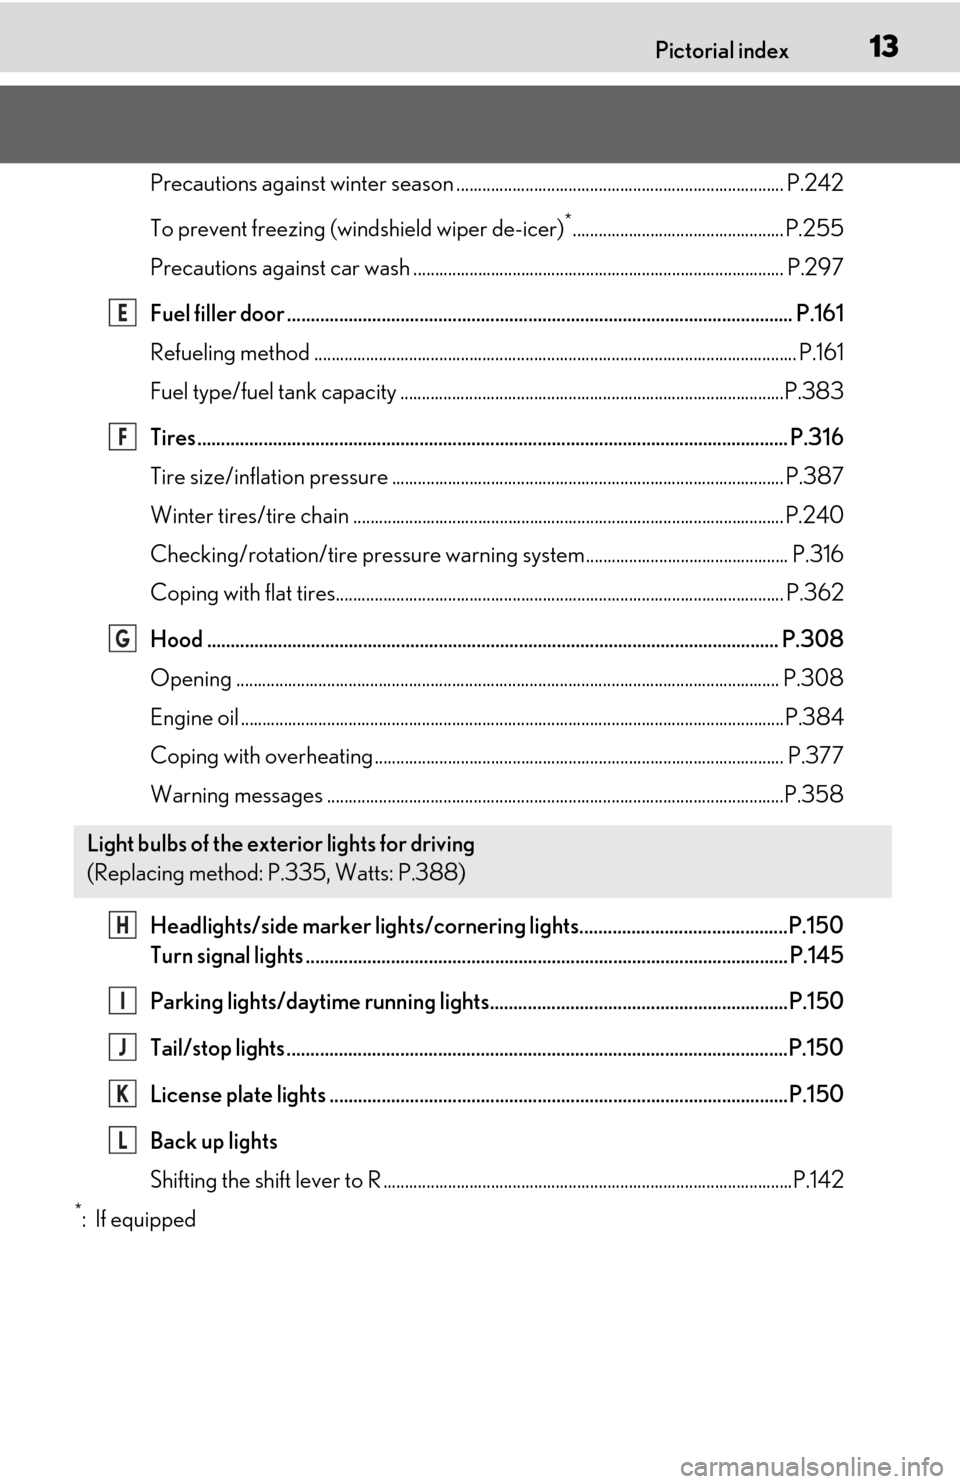
13Pictorial index
Precautions against winter season ............................................................................ P.242
To prevent freezing (windshield wiper de-icer)
*................................................. P.255
Precautions against car wash ...................................................................................... P.297
Fuel filler door ........................................................................................................... P.16 1
Refueling method ............................................................................................................... .P.161
Fuel type/fuel tank capacity ...... ...................................................................................P.383
Tires.......................................................................................................................... ... P.316
Tire size/inflation pressure ............................ ............................................................... P.387
Winter tires/tire chain .................................................................................................... P.24 0
Checking/rotation/tire pressure warning system............................................... P.316
Coping with flat tires........................................................................................................ P .362
Hood ......................................................................................................................... P. 308
Opening .............................................................................................................................. P.308
Engine oil ..................................................................................................................... .........P.384
Coping with overheating ............................................................................................... P.377
Warning messages ..........................................................................................................P.358
Headlights/side marker lights/cornering lights............................................P.150
Turn signal lights ...................................................................................................... P.145
Parking lights/daytime running lights...............................................................P.150
Tail/stop lights ..........................................................................................................P.150
License plate lights .................................................................................................P.150
Back up lights
Shifting the shift lever to R ...............................................................................................P.1 42
*:If equipped
Light bulbs of the exterior lights for driving
(Replacing method: P.335, Watts: P.388)
E
F
G
H
I
J
K
L
Page 61 of 444
612-1. Instrument cluster
2
Vehicle status information and indicators
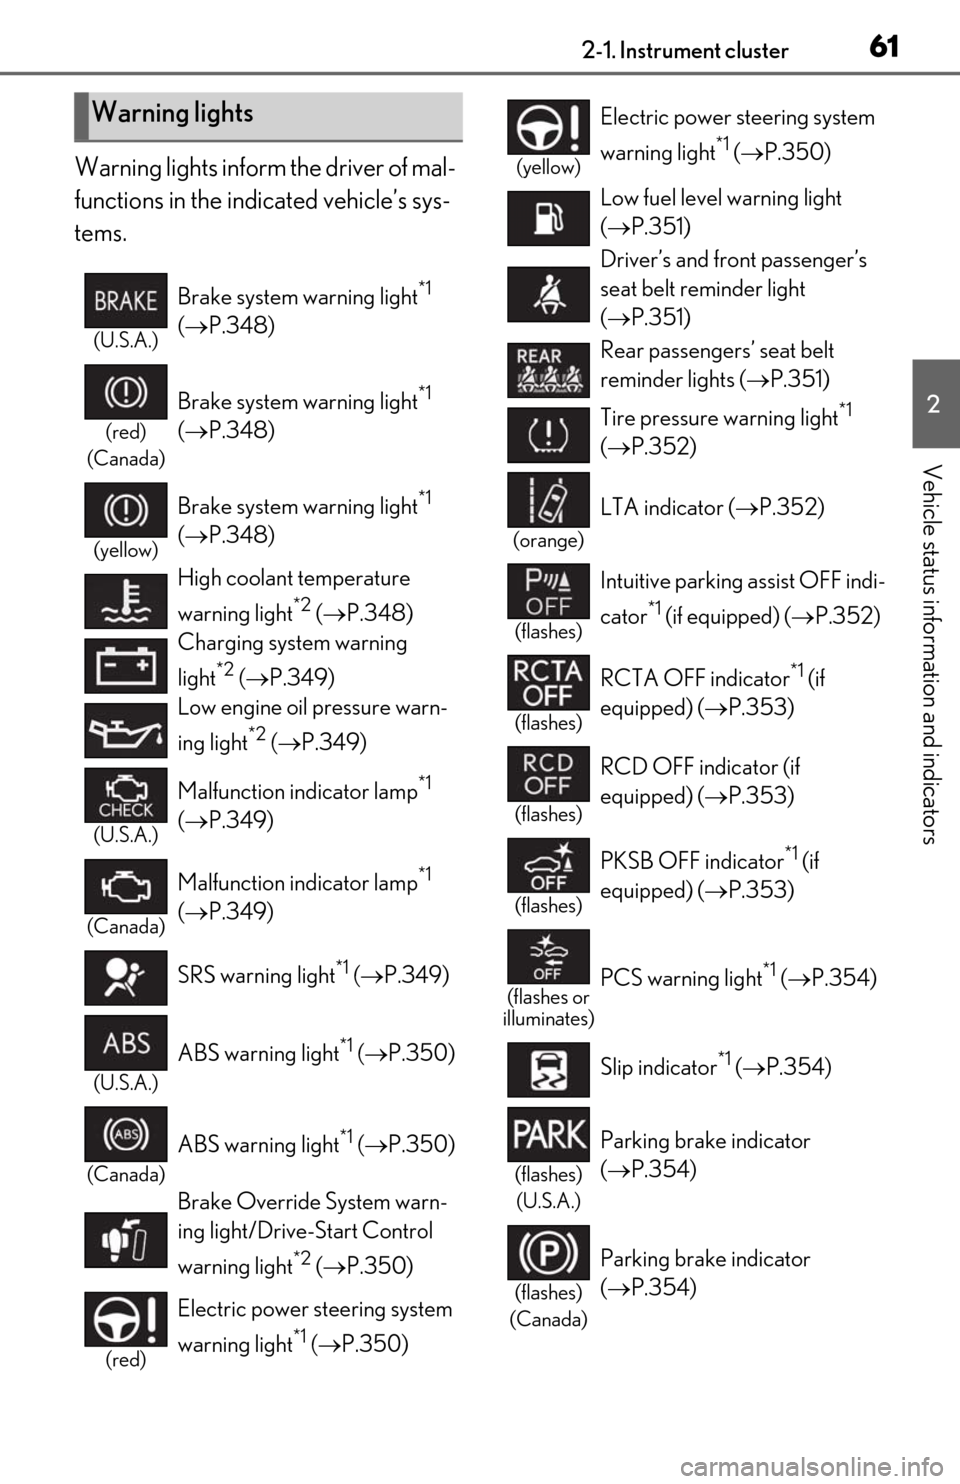
Warning lights inform the driver of mal-
functions in the indicated vehicle’s sys-
tems.
Warning lights
(U.S.A.)
Brake system warning light*1
( P.348)
(red)
(Canada)
Brake system warning light*1
( P.348)
(yellow)
Brake system warning light*1
( P.348)
High coolant temperature
warning light
*2 ( P.348)
Charging system warning
light
*2 ( P.349)
Low engine oil pressure warn-
ing light
*2 ( P.349)
(U.S.A.)
Malfunction indicator lamp*1
( P.349)
(Canada)
Malfunction indicator lamp*1
( P.349)
SRS warning light
*1 ( P.349)
(U.S.A.)
ABS warning light*1 ( P.350)
(Canada)
ABS warning light*1 ( P.350)
Brake Override System warn-
ing light/Drive-Start Control
warning light
*2 ( P.350)
(red)
Electric power st eering system
warning light
*1 ( P.350)
(yellow)
Electric power steering system
warning light
*1 ( P.350)
Low fuel level warning light
( P.351)
Driver’s and front passenger’s
seat belt re minder light
( P.351)
Rear passengers’ seat belt
reminder lights ( P.351)
Tire pressure warning light
*1
( P.352)
(orange)
LTA indicator ( P.352)
(flashes)
Intuitive parking assist OFF indi-
cator
*1 (if equipped) (P.352)
(flashes)
RCTA OFF indicator*1 (if
equipped) ( P.353)
(flashes)
RCD OFF indicator (if
equipped) (P.353)
(flashes)
PKSB OFF indicator*1 (if
equipped) ( P.353)
(flashes or
illuminates)PCS warning light*1 ( P.354)
Slip indicator
*1 ( P.354)
(flashes)
(U.S.A.)
Parking brake indicator
( P.354)
(flashes)
(Canada)
Parking brake indicator
( P.354)
Page 73 of 444
732-1. Instrument cluster
2
Vehicle status information and indicators
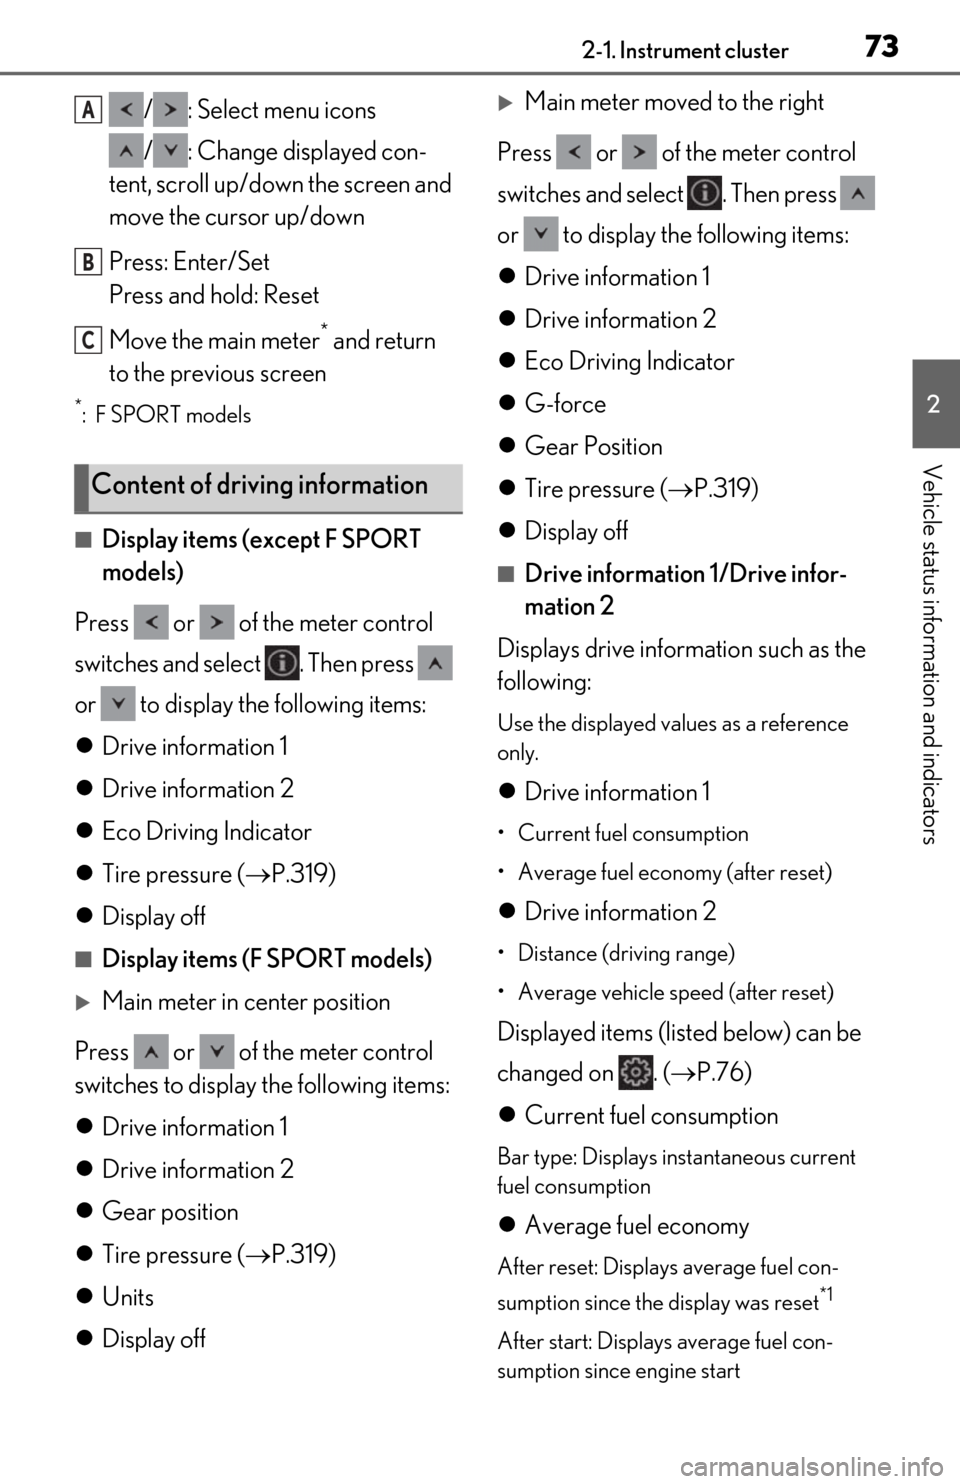
/ : Select menu icons
/ : Change displayed con-
tent, scroll up/down the screen and
move the cursor up/down
Press: Enter/Set
Press and hold: Reset
Move the main meter
* and return
to the previous screen
*:F SPORT models
■Display items (except F SPORT
models)
Press or of the meter control
switches and select . Then press
or to display the following items:
Drive information 1
Drive information 2
Eco Driving Indicator
Tire pressure ( P.319)
Display off
■Display items (F SPORT models)
Main meter in center position
Press or of the meter control
switches to display the following items:
Drive information 1
Drive information 2
Gear position
Tire pressure ( P.319)
Units
Display off
Main meter moved to the right
Press or of the meter control
switches and select . Then press
or to display the following items:
Drive information 1
Drive information 2
Eco Driving Indicator
G-force
Gear Position
Tire pressure ( P.319)
Display off
■Drive information 1/Drive infor-
mation 2
Displays drive information such as the
following:
Use the displayed values as a reference
only.
Drive information 1
• Current fuel consumption
• Average fuel economy (after reset)
Drive information 2
• Distance (driving range)
• Average vehicle speed (after reset)
Displayed items (listed below) can be
changed on . ( P.76)
Current fuel consumption
Bar type: Displays instantaneous current
fuel consumption
Average fuel economy
After reset: Displays average fuel con-
sumption since the display was reset
*1
After start: Displays average fuel con-
sumption since engine start
Content of driving information
A
B
C
Page 74 of 444
742-1. Instrument cluster
After refuel: Displays average fuel con-
sumption since refuel
Average vehicle speed
After reset: Displays average vehicle
speed since the display was reset
*1
After start: Displays average vehicle speed
since engine start
Elapsed time
After reset: Displays elapsed time since the
display was reset
*1
After start: Displays elapsed time since
engine start
Distance
Driving range: Displays driving range with
remaining fuel
*2, 3
After start: Displays the distance driven
since engine start
Other
Blank: No item
*1: To reset, display the desired item and
press and hold “OK” of the meter con-
trol switches.
*2: This distance is computed based on your average fuel consumption. As a
result, the actual distance that can be
driven may differ from that displayed.
*3: When only a small amount of fuel is added to the tank, the display may not
be updated.
When refueling, turn the engine switch
off. If the vehicle is refueled without
turning the engine switch off, the display
may not be updated.
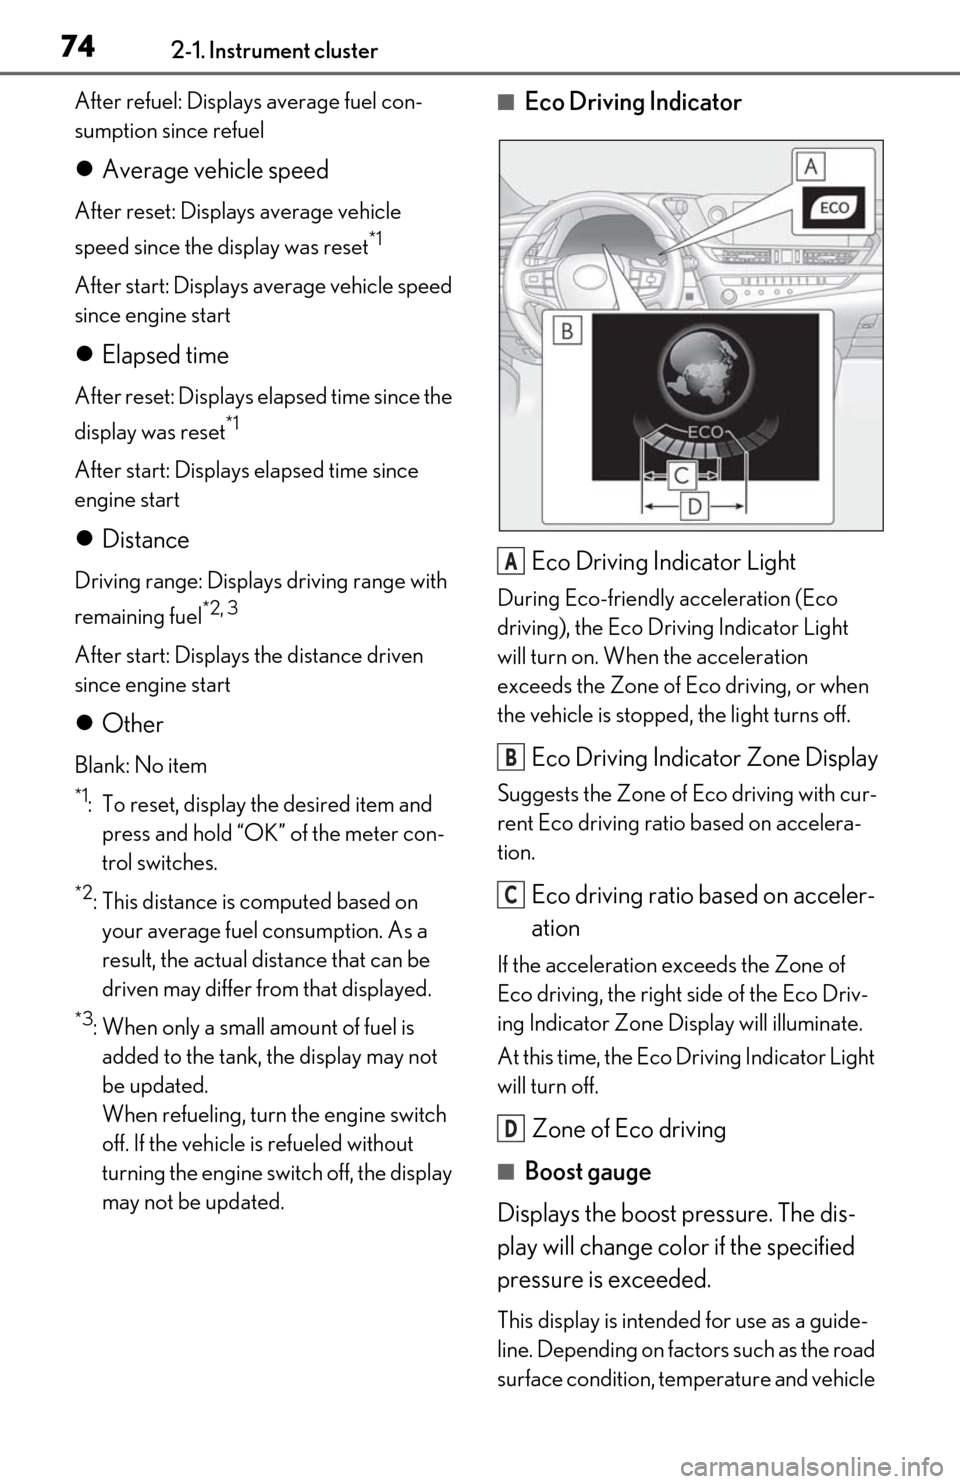
■Eco Driving Indicator
Eco Driving Indicator Light
During Eco-friendly acceleration (Eco
driving), the Eco Driving Indicator Light
will turn on. When the acceleration
exceeds the Zone of Eco driving, or when
the vehicle is stopped, the light turns off.
Eco Driving Indicator Zone Display
Suggests the Zone of Eco driving with cur-
rent Eco driving ratio based on accelera-
tion.
Eco driving ratio based on acceler-
ation
If the acceleration exceeds the Zone of
Eco driving, the right side of the Eco Driv-
ing Indicator Zone Display will illuminate.
At this time, the Eco Driving Indicator Light
will turn off.
Zone of Eco driving
■Boost gauge
Displays the boost pressure. The dis-
play will change color if the specified
pressure is exceeded.
This display is intended for use as a guide-
line. Depending on fact ors such as the road
surface condition, temperature and vehicle
A
B
C
D
Page 296 of 444
2966-1. Maintenance and care
6-1.Maintenance and care
Working from top to bottom, liber-
ally apply water to the vehicle body,
wheel wells and underside of the
vehicle to remove any dirt and dust.
Wash the vehicle body using a
sponge or soft cloth, such as a
chamois.
For hard-to-remove marks, use car
wash soap and rinse thoroughly with
water.
Wipe away any water.
Wax the vehicle when the water-
proof coating deteriorates.
If water does not bead on a clean surface,
apply wax when the vehicle body is cool.
■Self-restoring coat
The vehicle body has a self-restoring coat-
ing that is resistant to small surface
scratches caused in a car wash etc.
●The coating lasts for 5 to 8 years from
when the vehicle is delivered from the
plant.
●The restoration time differs depending on
the depth of the scratch and outside tem-
perature.
The restoration time may become
shorter when the coating is warmed by
applying warm water.
●Deep scratches caused by keys, coins,
etc. cannot be restored.
●Do not use wax that contain abrasives.
■Automatic car washes
●Fold the mirrors befo re washing the vehi-
cle. Start washing from the front of the
vehicle. Make sure to extend the mirrors
before driving.
●Brushes used in automatic car washes
may scratch the vehicle body and dam-
age the paint.
●Rear spoiler (if equipped) may not be
washable in some automatic car washes.
There may also be an increased risk of
damage to vehicle.
■High pressure car washes
●Do not allow the nozzles of the car wash
to come within close proximity of the win-
dows.
●Before using the car wash, check that the
fuel filler door on your vehicle is closed
properly.
■Notes for the smart access system with
push-button start
If the door handle becomes wet while the
electronic key is within the effective range,
the door may lock and unlock repeatedly. In
that case, follow the following correction
procedures to wash the vehicle:
●Place the key in a position 6 ft. (2 m) or
more separate from the vehicle while the
vehicle is being wash ed. (Take care to
ensure that the key is not stolen.)
●Set the electronic key to battery-saving
mode to disable the smart access system
with push-button start. ( P.101)
■Aluminum wheels
●Remove any dirt immediately by using a
neutral detergent.
●Wash detergent off with water immedi-
ately after use.
●To protect the paint from damage, make
sure to observe the following precau-
tions.
• Do not use acidic, alkaline or abrasive
detergent
• Do not use hard brushes
• Do not use detergent on the wheels when they are hot, such as after driving or park-
ing in hot weather
Cleaning and protecting the
vehicle exterior
Perform cleaning in a manner
appropriate to each component
and its material.
Cleaning instructions
Page 307 of 444
3076-3. Do-it-yourself maintenance
6
Maintenance and care
Tire inflation
pressure
( P.325)• Tire pressure gauge
• Compressed air source
Washer fluid
( P.315)
• Water or washer fluid
containing antifreeze
(for winter use)
• Funnel (used only for adding water or washer
fluid)
WARNING
The engine compartment contains many
mechanisms and fluids that may move
suddenly, become hot, or become elec-
trically energized. To avoid death or seri-
ous injury, observe the following
precautions.
■When working on the engine com-
partment
●Keep hands, clothi ng and tools away
from the moving fan and engine drive
belt.
●Be careful not to touch the engine,
radiator, exhaust manifold, etc. right
after driving as they may be hot. Oil
and other fluids may also be hot.
●Do not leave anything that may burn
easily, such as paper and rags, in the
engine compartment.
●Do not smoke, cause sparks or expose
an open flame to fuel or the battery.
Fuel and battery fumes are flammable.
■When working near the electric cool-
ing fan or radiator grille
Be sure the engine switch is off.
With the engine switch in IGNITION
ON mode, the electric cooling fan may
automatically start to run if the air condi-
tioning is on and/or the coolant tempera-
ture is high. ( P.313)
ItemsParts and tools■Safety glasses
Wear safety glasses to prevent flying or
falling material, fluid spray, etc. from get-
ting in your eyes.
NOTICE
■If you remove the air cleaner filter
Driving with the air cleaner filter
removed may cause excessive engine
wear due to dirt in the air.
Page 325 of 444
3256-3. Do-it-yourself maintenance
6
Maintenance and care
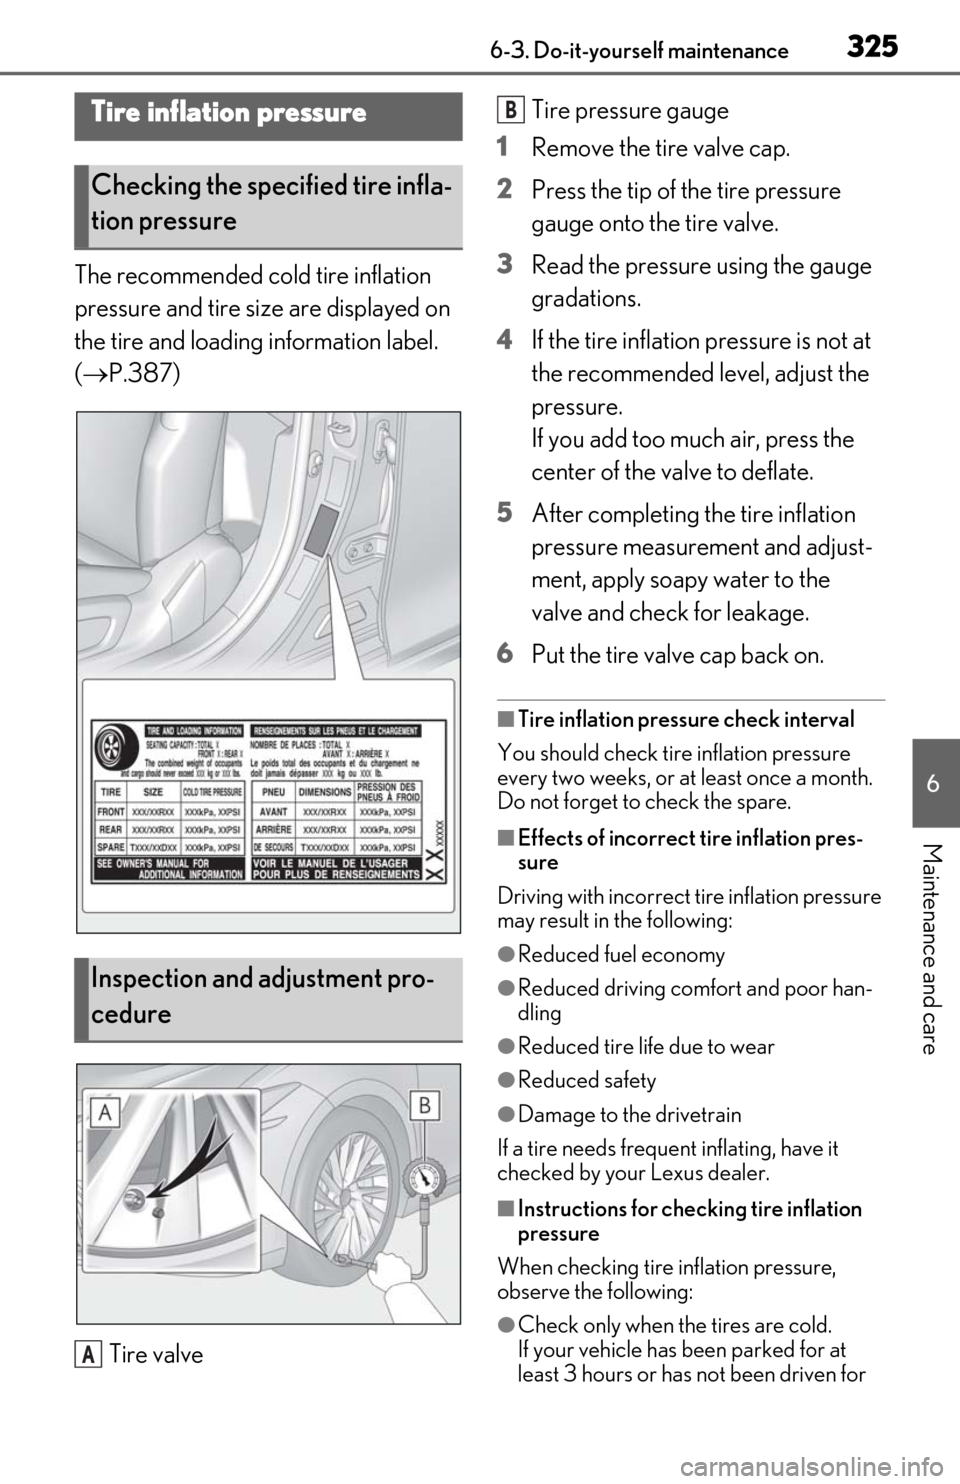
The recommended cold tire inflation
pressure and tire size are displayed on
the tire and loading information label.
( P.387)
Tire valve Tire pressure gauge
1 Remove the tire valve cap.
2 Press the tip of the tire pressure
gauge onto the tire valve.
3 Read the pressure using the gauge
gradations.
4 If the tire inflation pressure is not at
the recommended level, adjust the
pressure.
If you add too much air, press the
center of the valve to deflate.
5 After completing the tire inflation
pressure measurement and adjust-
ment, apply soapy water to the
valve and check for leakage.
6 Put the tire valve cap back on.
■Tire inflation pressure check interval
You should check tire inflation pressure
every two weeks, or at least once a month.
Do not forget to check the spare.
■Effects of incorrect tire inflation pres-
sure
Driving with incorrect ti re inflation pressure
may result in the following:
●Reduced fuel economy
●Reduced driving comfort and poor han-
dling
●Reduced tire life due to wear
●Reduced safety
●Damage to the drivetrain
If a tire needs frequent inflating, have it
checked by your Lexus dealer.
■Instructions for checking tire inflation
pressure
When checking tire inflation pressure,
observe the following:
●Check only when the tires are cold.
If your vehicle has been parked for at
least 3 hours or has not been driven for
Tire inflation pressure
Checking the specified tire infla-
tion pressure
Inspection and adjustment pro-
cedure
A
B
Page 355 of 444
3557-2. Steps to take in an emergency
7
When trouble arises
■Brake hold operated indicator (warning buzzer)
■Master warning light (warning buzzer)
■Warning buzzer
In some cases, the bu zzer may not be heard
due to being in a noisy location or audio
sound.
■Front passenger detection sensor, seat
belt reminder and warning buzzer
●If luggage is placed on the front passen-
ger seat, the front passenger detection
sensor may cause th e warning light to
flash and the warning buzzer to sound
even if a passenger is not sitting in the
seat.
●If a cushion is placed on the seat, the sen-
sor may not detect a passenger, and the
warning light may not operate properly.
■SRS warning light
This warning light system monitors the air-
bag sensor assembly, fr ont impact sensors,
side impact sensors (front door), side
impact sensors (front), side impact sensors
(rear), driver’s seat position sensor, driver’s
seat belt buckle switch, front passenger
occupant classification system (ECU and
sensors), “AIR BAG ON” indicator light,
“AIR BAG OFF” indicator light, front pas-
senger’s seat belt buc kle switch, seat belt
pretensioners, airbags, interconnecting wir-
ing and power sources.
■If the malfunction indicator lamp comes
on while driving
First check the following:
●Is the fuel tank empty? If it is, fill the fuel tank immediately.
●Is the fuel tank cap loose?
If it is, tighten it securely.
The light will go off after several driving
trips.
If the light does not go off even after several
trips, contact your Lexus dealer as soon as
possible.
■Electric power steering system warning
light (warning buzzer)
When the battery charge becomes insuffi-
cient or the voltage temporarily drops, the
electric power steering system warning
light may come on and the warning buzzer
may sound.
■When the tire pressure warning light
comes on
Inspect the tires to check if a tire is punc-
tured.
If a tire is punctured: P.362
If none of the tires are punctured:
Turn the engine switch off then turn it to
IGNITION ON mode. Check if the tire
pressure warning light comes on or blinks.
Warning lightDetails/Actions
(flashes)
Indicates a malfunction in the brake hold system
Have the vehicle inspected by your Lexus dealer immediately.
Warning lightDetails/Actions
A buzzer sounds and the warning ligh t comes on and flashes to indicate
that the master warning system has detected a malfunction.
P.358