display Lexus ES350 2020 Owner's Manual / LEXUS 2020 ES350 FROM OCT. 2019 PROD. OWNER'S MANUAL (OM06194U)
[x] Cancel search | Manufacturer: LEXUS, Model Year: 2020, Model line: ES350, Model: Lexus ES350 2020Pages: 450, PDF Size: 9.81 MB
Page 297 of 450
2955-6. Using the other interior features
5
Interior features
*: If equipped
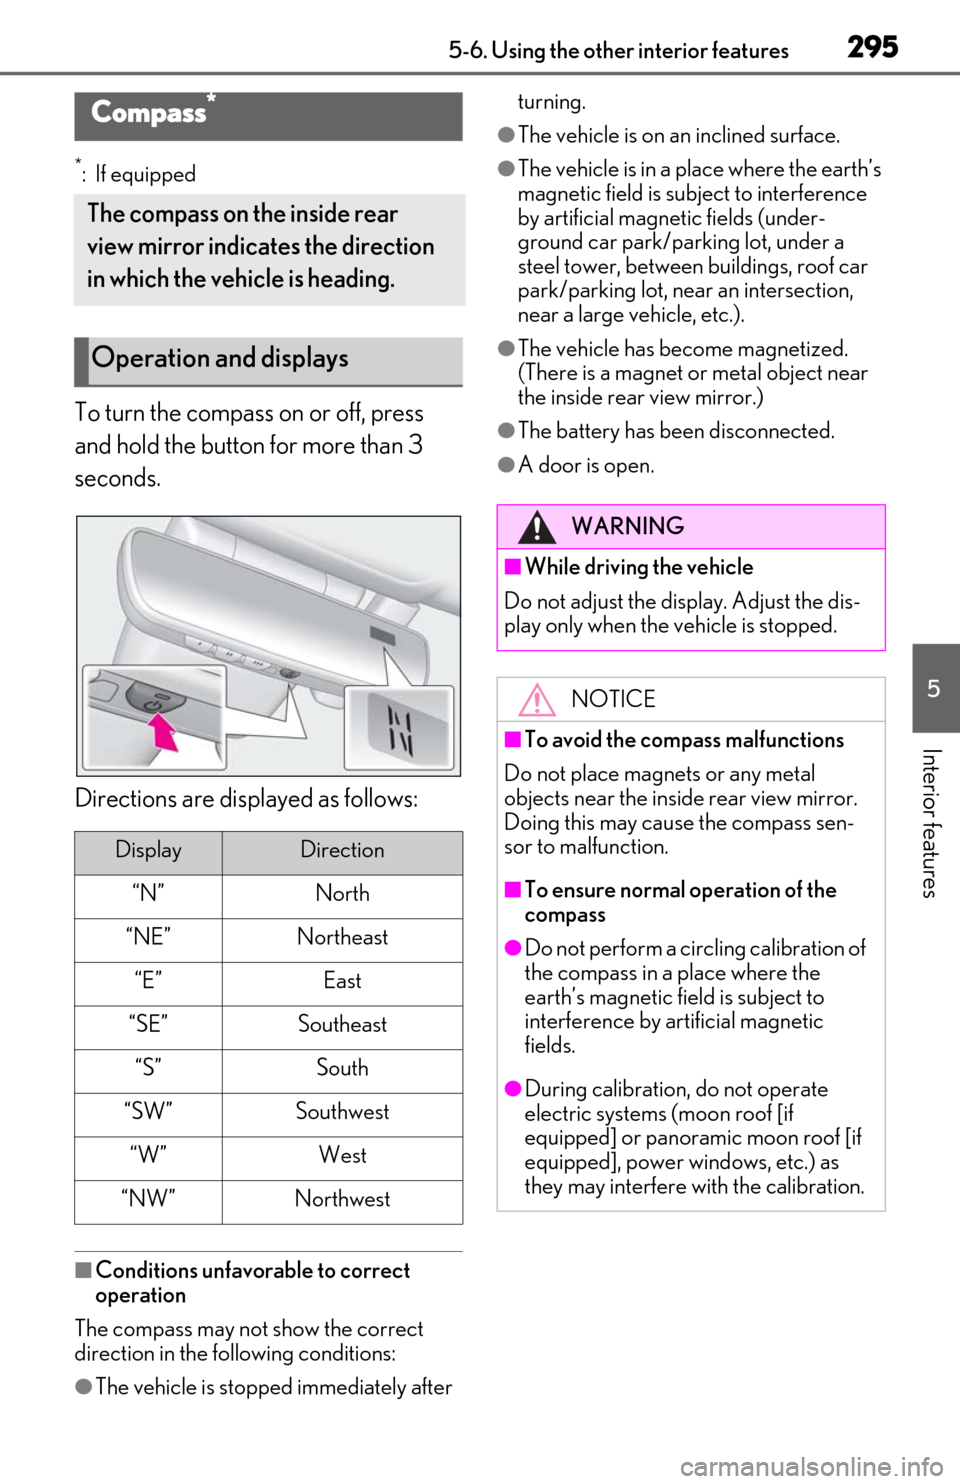
To turn the compass on or off, press
and hold the button for more than 3
seconds.
Directions are displayed as follows:
â Conditions unfavorable to correct
operation
The compass may not show the correct
direction in the following conditions:
âThe vehicle is stopped immediately after turning.
âThe vehicle is on an inclined surface.
âThe vehicle is in a place where the earthâs
magnetic field is subject to interference
by artificial magnetic fields (under-
ground car park/parking lot, under a
steel tower, between buildings, roof car
park/parking lot, near an intersection,
near a large vehicle, etc.).
âThe vehicle has become magnetized.
(There is a magnet or
metal object near
the inside rear view mirror.)
âThe battery has been disconnected.
âA door is open.
Compass*
The compass on the inside rear
view mirror indicates the direction
in which the vehicle is heading.
Operation and displays
DisplayDirection
âNâNorth
âNEâNortheast
âEâEast
âSEâSoutheast
âSâSouth
âSWâSouthwest
âWâWest
âNWâNorthwest
WARNING
â While driving the vehicle
Do not adjust the display. Adjust the dis-
play only when the vehicle is stopped.
NOTICE
â To avoid the compass malfunctions
Do not place magnets or any metal
objects near the inside rear view mirror.
Doing this may cause the compass sen-
sor to malfunction.
â To ensure normal operation of the
compass
âDo not perform a circling calibration of
the compass in a place where the
earthâs magnetic field is subject to
interference by artificial magnetic
fields.
âDuring calibration, do not operate
electric systems (moon roof [if
equipped] or panoramic moon roof [if
equipped], power windows, etc.) as
they may interfere with the calibration.
Page 298 of 450
2965-6. Using the other interior features
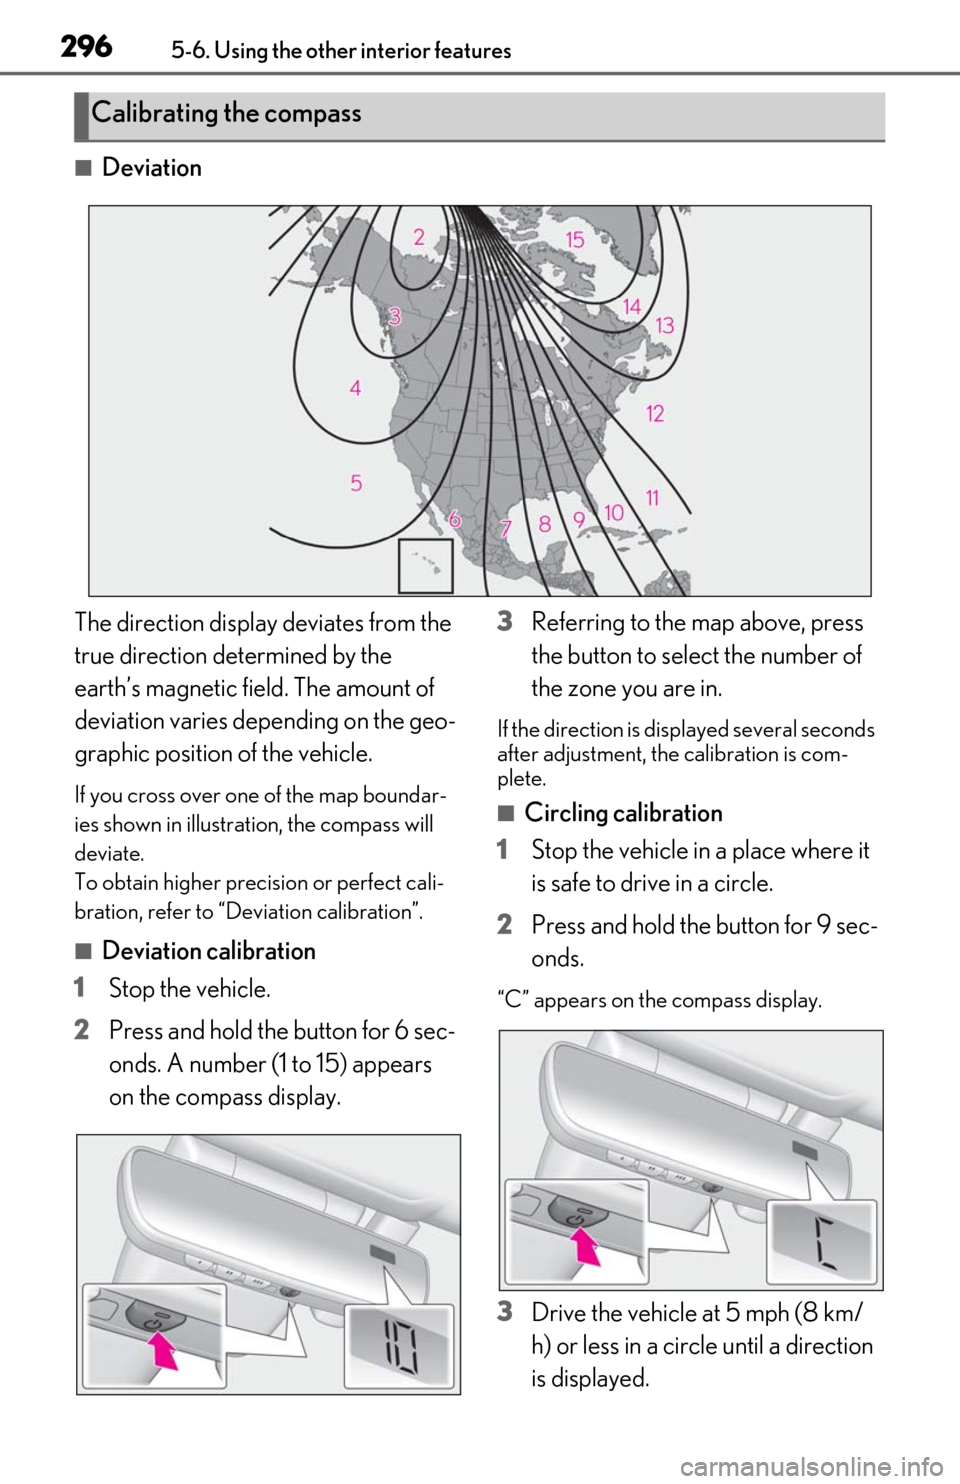
â Deviation
The direction display deviates from the
true direction determined by the
earthâs magnetic field. The amount of
deviation varies depending on the geo-
graphic position of the vehicle.
If you cross over one of the map boundar-
ies shown in illustration, the compass will
deviate.
To obtain higher prec ision or perfect cali-
bration, refer to âDeviation calibrationâ.
â Deviation calibration
1 Stop the vehicle.
2 Press and hold the button for 6 sec-
onds. A number (1 to 15) appears
on the compass display. 3
Referring to the map above, press
the button to select the number of
the zone you are in.
If the direction is displayed several seconds
after adjustment, the calibration is com-
plete.
â Circling calibration
1 Stop the vehicle in a place where it
is safe to drive in a circle.
2 Press and hold the button for 9 sec-
onds.
âCâ appears on the compass display.
3Drive the vehicle at 5 mph (8 km/
h) or less in a circle until a direction
is displayed.
Calibrating the compass
Page 299 of 450
2975-6. Using the other interior features
5
Interior features
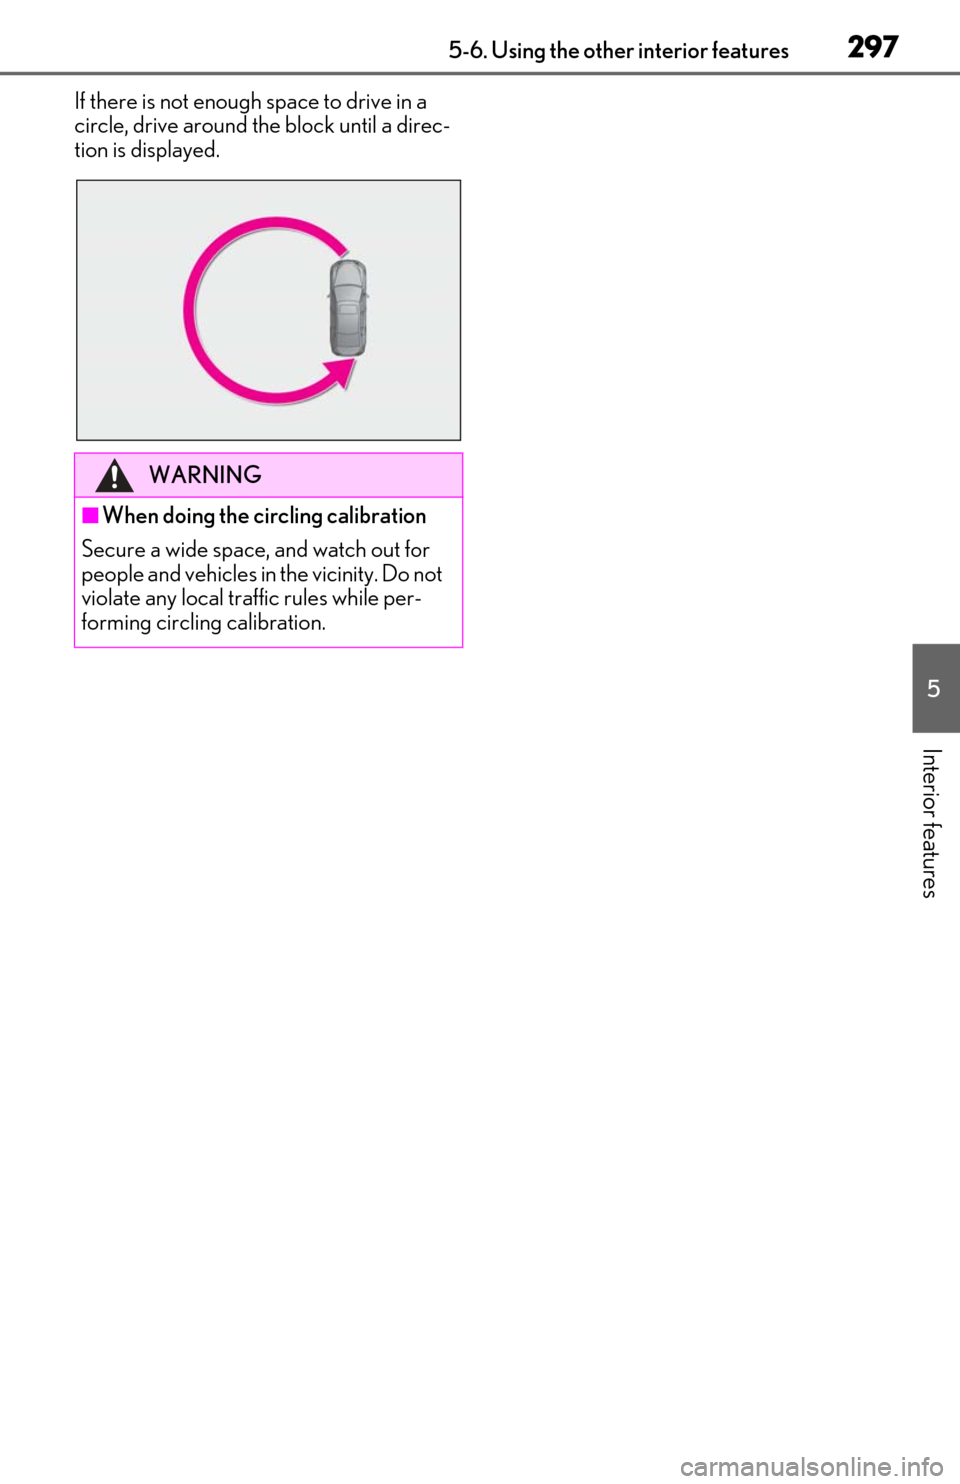
If there is not enough space to drive in a
circle, drive around the block until a direc-
tion is displayed.
WARNING
â When doing the circling calibration
Secure a wide space, and watch out for
people and vehicles in the vicinity. Do not
violate any local traffic rules while per-
forming circling calibration.
Page 318 of 450
3166-3. Do-it-yourself maintenance
âWhen driving at high engine speeds or
with a heavy load, or when driving while
accelerating or decelerating frequently
âWhen leaving the engine idling for a long
time, or when driving frequently through
heavy traffic
â After changing the engine oil
The engine oil maintenance data should be
reset. Perform the following procedures:
1
While the vehicle is stopped, press
of the meter control switches.
2
Press or of the meter control
switches, and select .
3
Press or of the meter control
switches, select âVeh icle Settingsâ, and
then press âOKâ.
4
Press or of the meter control
switches, select âOil Maintenanceâ, and
then press âOKâ.
5
Select âYesâ and then press âOKâ.
A message will be displayed on the multi-
information display.
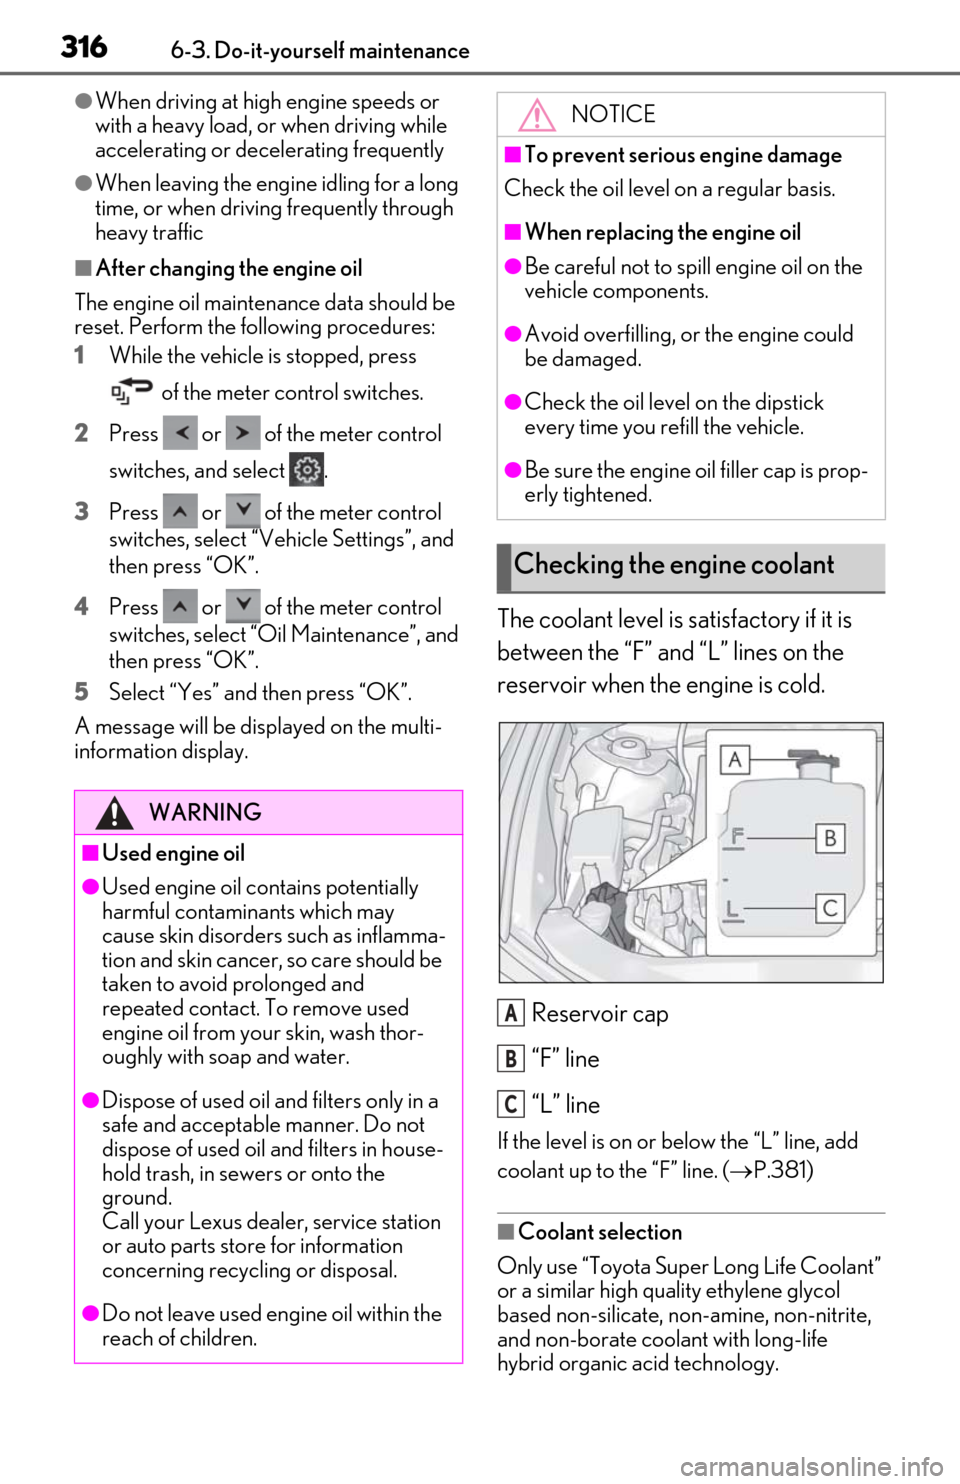
The coolant level is satisfactory if it is
between the âFâ and âLâ lines on the
reservoir when the engine is cold.
Reservoir cap
âFâ line
âLâ line
If the level is on or below the âLâ line, add
coolant up to the âFâ line. ( ďŽP.381)
â Coolant selection
Only use âToyota Super Long Life Coolantâ
or a similar high qua lity ethylene glycol
based non-silicate, non-amine, non-nitrite,
and non-borate coolant with long-life
hybrid organic acid technology.
WARNING
â Used engine oil
âUsed engine oil contains potentially
harmful contaminants which may
cause skin disorders such as inflamma-
tion and skin cancer, so care should be
taken to avoid prolonged and
repeated contact. To remove used
engine oil from your skin, wash thor-
oughly with soap and water.
âDispose of used oil and filters only in a
safe and acceptable manner. Do not
dispose of used oil and filters in house-
hold trash, in sewers or onto the
ground.
Call your Lexus dealer, service station
or auto parts store for information
concerning recycling or disposal.
âDo not leave used engine oil within the
reach of children.
NOTICE
â To prevent serious engine damage
Check the oil level on a regular basis.
â When replacing the engine oil
âBe careful not to spill engine oil on the
vehicle components.
âAvoid overfilling, or the engine could
be damaged.
âCheck the oil level on the dipstick
every time you refill the vehicle.
âBe sure the engine o il filler cap is prop-
erly tightened.
Checking the engine coolant
A
B
C
Page 321 of 450
3196-3. Do-it-yourself maintenance
6
Maintenance and care
turn off the power before disconnect the
battery. Take extra care when connecting
the battery if the engine switch mode
prior to discharge is unknown.
If the engine will not st art even after multiple
attempts at all methods above, contact your
Lexus dealer.
If any washer does not work or âWind-
shield Washer Fluid Lowâ is shown on
the multi-information display, the
washer tank may be empty. Add
WARNING
â Chemicals in the battery
Battery contains poisonous and corro-
sive sulfuric acid and may produce
hydrogen gas which is flammable and
explosive. To reduce the risk of death or
serious injury, take the following precau-
tions while working on or near the bat-
tery:
âDo not cause sparks by touching the
battery terminals with tools.
âDo not smoke or light a match near the
battery.
âAvoid contact with eyes, skin and
clothes.
âNever inhale or swallow electrolyte.
âWear protective safety glasses when
working near the battery.
âKeep children away from the battery.
â Where to safely charge the battery
Always charge the battery in an open
area. Do not charge the battery in a
garage or closed room where there is
insufficient ventilation.
â How to recharge the battery
Only perform a slow charge (5 A or
less). The battery may explode if charged
at a quicker rate.
â Emergency measures regarding
electrolyte
âIf electrolyte gets in your eyes
Flush your eyes with clean water for at
least 15 minutes and get immediate
medical attention. If possible, continue
to apply water with a sponge or cloth
while traveling to the nearest medical
facility.
âIf electrolyte gets on your skin
Wash the affected area thoroughly. If
you feel pain or burning, get medical
attention immediately.
âIf electrolyte gets on your clothes
It can soak through clothing on to your
skin. Immediately take off the clothing
and follow the procedure above if nec-
essary.
âIf you accidentally swallow electrolyte
Drink a large quantity of water or milk.
Get emergency medical attention
immediately.
â When there is insufficient battery
fluid
Do not use if there is insufficient fluid in
the battery. There is a possible danger
that the battery may explode.
NOTICE
â When recharging the battery
Never recharge the battery while the
engine is running. Also, be sure all acces-
sories are turned off.
â When adding distilled water
Avoid overfilling. Water spilled during
battery recharging may cause corrosion.
Adding the washer fluid
Page 325 of 450
3236-3. Do-it-yourself maintenance
6
Maintenance and care
Your vehicle is equipped with a tire
pressure warning system that uses tire
pressure warning valves and transmit-
ters to detect low tire inflation pressure
before serious problems arise.
ďŹIf the tire pressure drops below a
predetermined level, the driver is
warned by a screen display and a
warning light. (ďŽ P.356)
ďŹ The tire pressure detected by the
tire pressure warning system can be
displayed on the multi-information
display. ( ďŽP.77)
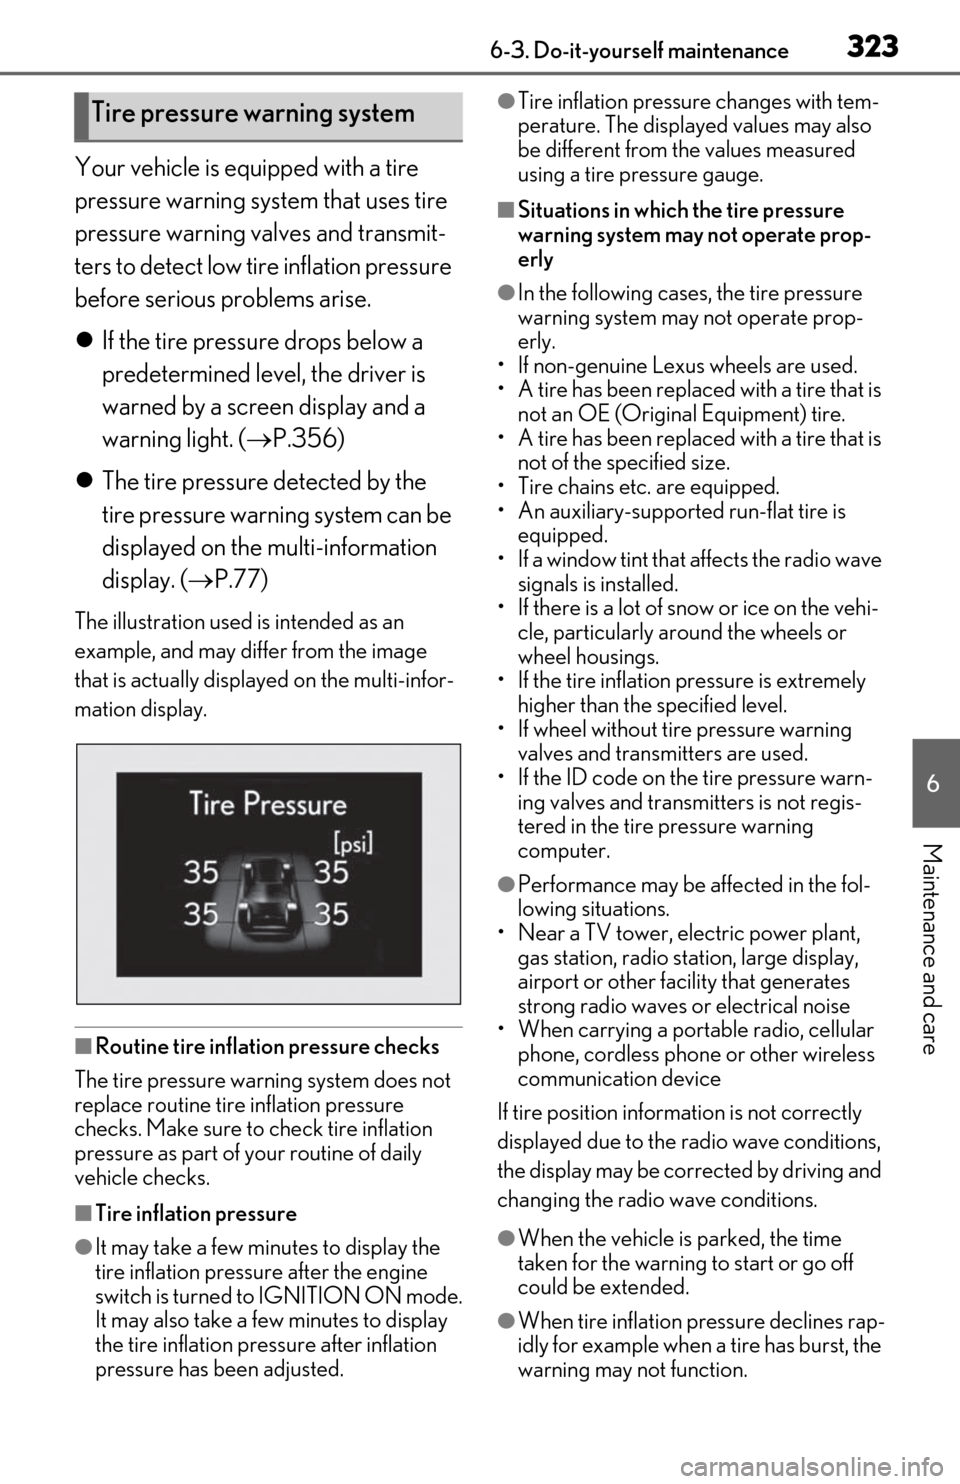
The illustration used is intended as an
example, and may differ from the image
that is actually displayed on the multi-infor-
mation display.
â Routine tire inflation pressure checks
The tire pressure warning system does not
replace routine tire inflation pressure
checks. Make sure to check tire inflation
pressure as part of your routine of daily
vehicle checks.
â Tire inflation pressure
âIt may take a few minutes to display the
tire inflation pressure after the engine
switch is turned to IGNITION ON mode.
It may also take a few minutes to display
the tire inflation pres sure after inflation
pressure has been adjusted.
âTire inflation pressure changes with tem-
perature. The displayed values may also
be different from the values measured
using a tire pressure gauge.
â Situations in which the tire pressure
warning system may not operate prop-
erly
âIn the following cases, the tire pressure
warning system may not operate prop-
erly.
⢠If non-genuine Lexus wheels are used.
⢠A tire has been replaced with a tire that is not an OE (Original Equipment) tire.
⢠A tire has been replaced with a tire that is not of the specified size.
⢠Tire chains etc. are equipped.
⢠An auxiliary-supported run-flat tire is
equipped.
⢠If a window tint that affects the radio wave
signals is installed.
⢠If there is a lot of snow or ice on the vehi- cle, particularly around the wheels or
wheel housings.
⢠If the tire inflation pressure is extremely higher than the specified level.
⢠If wheel without tire pressure warning
valves and transmitters are used.
⢠If the ID code on the tire pressure warn- ing valves and transmitters is not regis-
tered in the tire pressure warning
computer.
âPerformance may be af fected in the fol-
lowing situations.
⢠Near a TV tower, electric power plant,
gas station, radio stat ion, large display,
airport or other fac ility that generates
strong radio waves or electrical noise
⢠When carrying a portable radio, cellular phone, cordless phone or other wireless
communication device
If tire position information is not correctly
displayed due to the radio wave conditions,
the display may be corrected by driving and
changing the radio wave conditions.
âWhen the vehicle is parked, the time
taken for the warning to start or go off
could be extended.
âWhen tire inflation pr essure declines rap-
idly for example when a tire has burst, the
warning may not function.
Tire pressure warning system
Page 328 of 450
3266-3. Do-it-yourself maintenance
â The tire pressure warning system
must be initialized in the following
circumstances:
ďŹ When rotating the tires.
ďŹ When the tire inflation pressure is
changed when changing traveling
speed.
ďŹ When the tire inflation pressure is
changed such as when changing tire
size. (When there are multiple spec-
ified pressures)
ďŹ After registering the ID codes.
(ďŽ P.327)
When the tire pressure warning system
is initialized, the cu rrent tire inflation
pressure is set as the benchmark pres-
sure.
â How to initialize the tire pressure
warning system
1 Park the vehicle in a safe place and
stop the engine for 20 minutes or
more.
Initialization cannot be performed while
the vehicle is moving.
2 Adjust the tire inflation pressure to
the specified cold tire inflation pres-
sure level.
Make sure to adjust th e tire pressure to the
specified cold tire infl ation pressure level.
The tire pressure warning system will oper-
ate based on this pressure level.
3 Start the engine. ( ďŽP.143)
4 Press or of the meter con-
trol switches and select . 5
Press or of the meter con-
trol switches and select âVehicle
Settingsâ, then press âOKâ.
6 Press or of the meter con-
trol switches and select âTPWSâ,
then press âOKâ.
7 Press or of the meter con-
trol switches and select âSet Pres-
sureâ. Then press and hold âOKâ
until the tire pressure warning light
starts blinking.
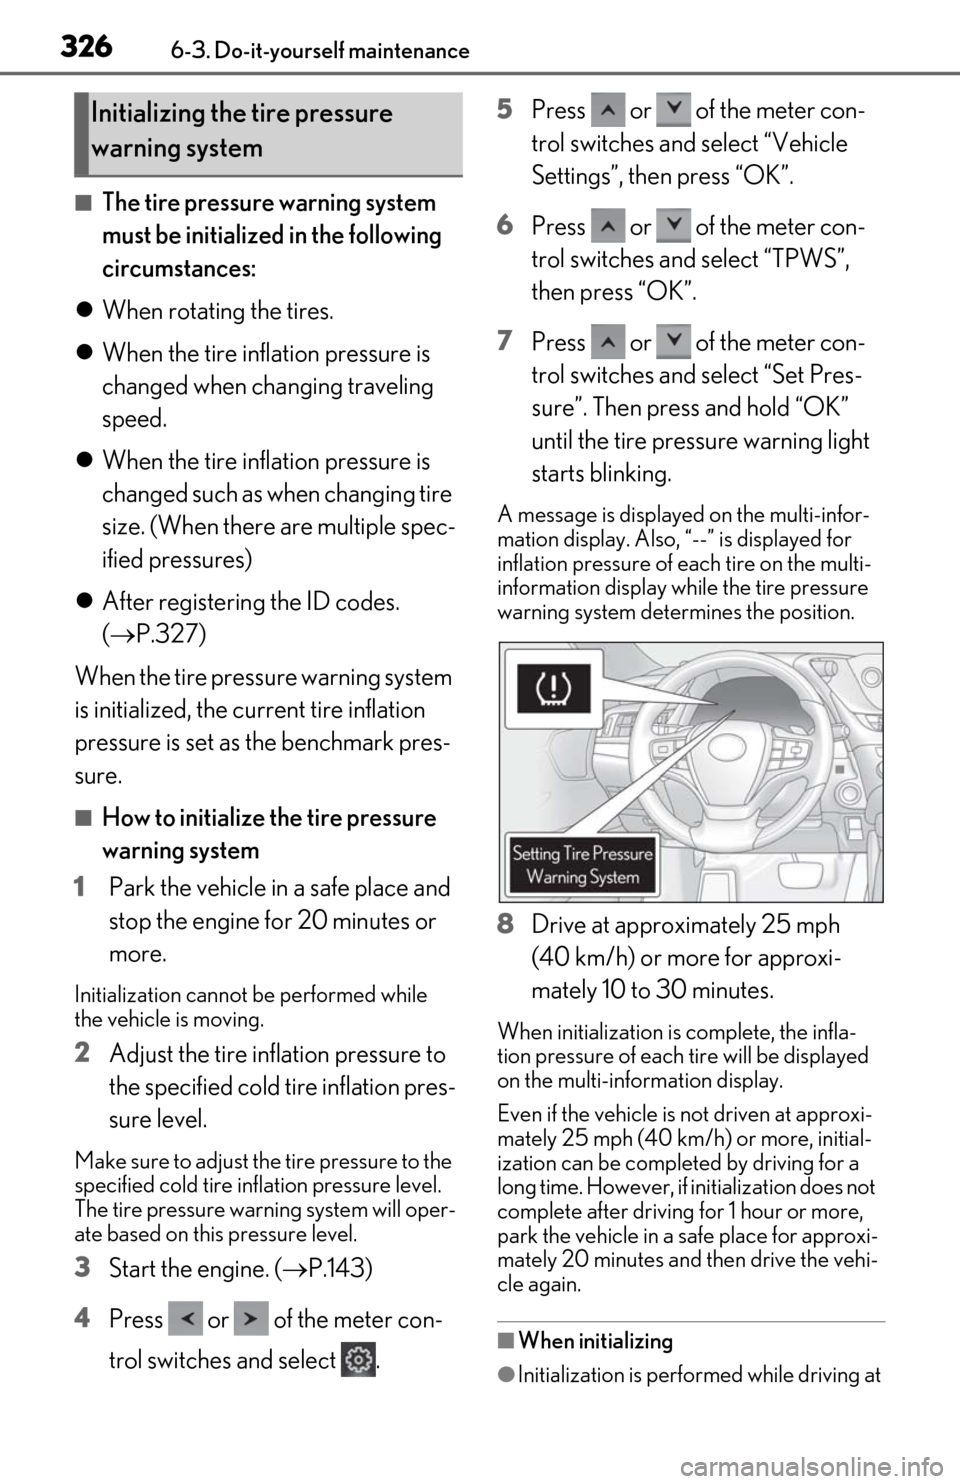
A message is displayed on the multi-infor-
mation display. Also, â--â is displayed for
inflation pressure of each tire on the multi-
information display while the tire pressure
warning system determines the position.
8Drive at approximately 25 mph
(40 km/h) or more for approxi-
mately 10 to 30 minutes.
When initialization is complete, the infla-
tion pressure of each tire will be displayed
on the multi-information display.
Even if the vehicle is not driven at approxi-
mately 25 mph (40 km/h) or more, initial-
ization can be completed by driving for a
long time. However, if initialization does not
complete after driving for 1 hour or more,
park the vehicle in a safe place for approxi-
mately 20 minutes and then drive the vehi-
cle again.
â When initializing
âInitialization is performed while driving at
Initializing the tire pressure
warning system
Page 329 of 450
3276-3. Do-it-yourself maintenance
6
Maintenance and care
a vehicle speed of approximately 25 mph
(40 km/h) or more.
âMake sure to carry out initialization after
adjusting the tire inflation pressure.
Also, make sure the tires are cold before
carrying out initialization or tire inflation
pressure adjustment.
âThe tire pressure warning system can be
initialized by yourse lf, but depending on
the driving conditions and driving envi-
ronment, initialization may take some
time to complete.
â The initialization operation
âIf you have accidentally turned the engine
switch off during initialization, it is not
necessary to manually restart the initial-
ization again, as initialization will restart
automatically the next time the engine
switch is turned to IGNITION ON mode.
âIf you accidentally perform initialization
when initialization is not necessary, adjust
the tire inflation pres sure to the specified
level when the tires are cold, and conduct
initialization again.
âWhile the position of each tire is being
determined and the inflation pressures
are not being displayed on the multi-
information display, if the inflation pres-
sure of a tire drops, the tire pressure
warning light will come on.
â If the tire pressure warning system is not
initialized properly
âIn the following situations, initialization
may take longer than usual to be com-
pleted or may not be possible. Normally,
initialization completes within approxi-
mately 30 minutes.
⢠Vehicle is not driven at approximately 25 mph (40 km/h) or more
⢠Vehicle is driven on unpaved roads
⢠Vehicle is driven near other vehicles and system cannot recognize tire pressure
warning valve and tran smitters of your
vehicle over those of other vehicles
If initialization does not complete after driv-
ing for 1 hour or more, park the vehicle in a
safe place for approximately 20 minutes
and then drive the vehicle again.
âIf the vehicle is reversed during initializa- tion, the data up to that point is reset, so
perform the initiali
zation procedure
again from the beginning.
âIn the following situations, initialization
will not be started or was not completed
properly and the system will not operate
properly. Perform the initialization proce-
dure again.
⢠If, when attempting to start initialization,
the tire pressure warning light does not
blink 3 times.
⢠If, when the vehicle has been driven for
about 20 minutes after performing ini-
tialization, the tire pressure warning light
blinks for approximately 1 minute and
then illuminates.
If initialization canno t be completed after
performing the above procedure, contact
your Lexus dealer.
Every tire pressure warning valve and
transmitter has a unique ID code.
When replacing a tire pressure warn-
ing valve and transmitter, it is necessary
to register the ID code.
When registering the ID codes, per-
form the following procedure.
1
Park the vehicle in a safe place, wait
for approximately 20 minutes, and
then start the engine. ( ďŽP.143)
WARNING
â When initializing the tire pressure
warning system
Do not initialize tire inflation pressure
without first adjusting the tire inflation
pressure to the specified level. Other-
wise, the tire pressure warning light may
not come on even if the tire inflation pres-
sure is low, or it may come on when the
tire inflation pressure is actually normal.
Registering ID codes
Page 330 of 450
3286-3. Do-it-yourself maintenance
2Press or of the meter con-
trol switches and select .
3 Press or of the meter con-
trol switches and select âVehicle
Settingsâ, and then press âOKâ.
4 Press or of the meter con-
trol switches an d select âTPWSâ,
and then press âOKâ.
5 Press or of the meter con-
trol switches and select âChange
Wheel Setâ. Then press and hold
âOKâ until the tire pressure warning
light starts slowly blinking 3 times.
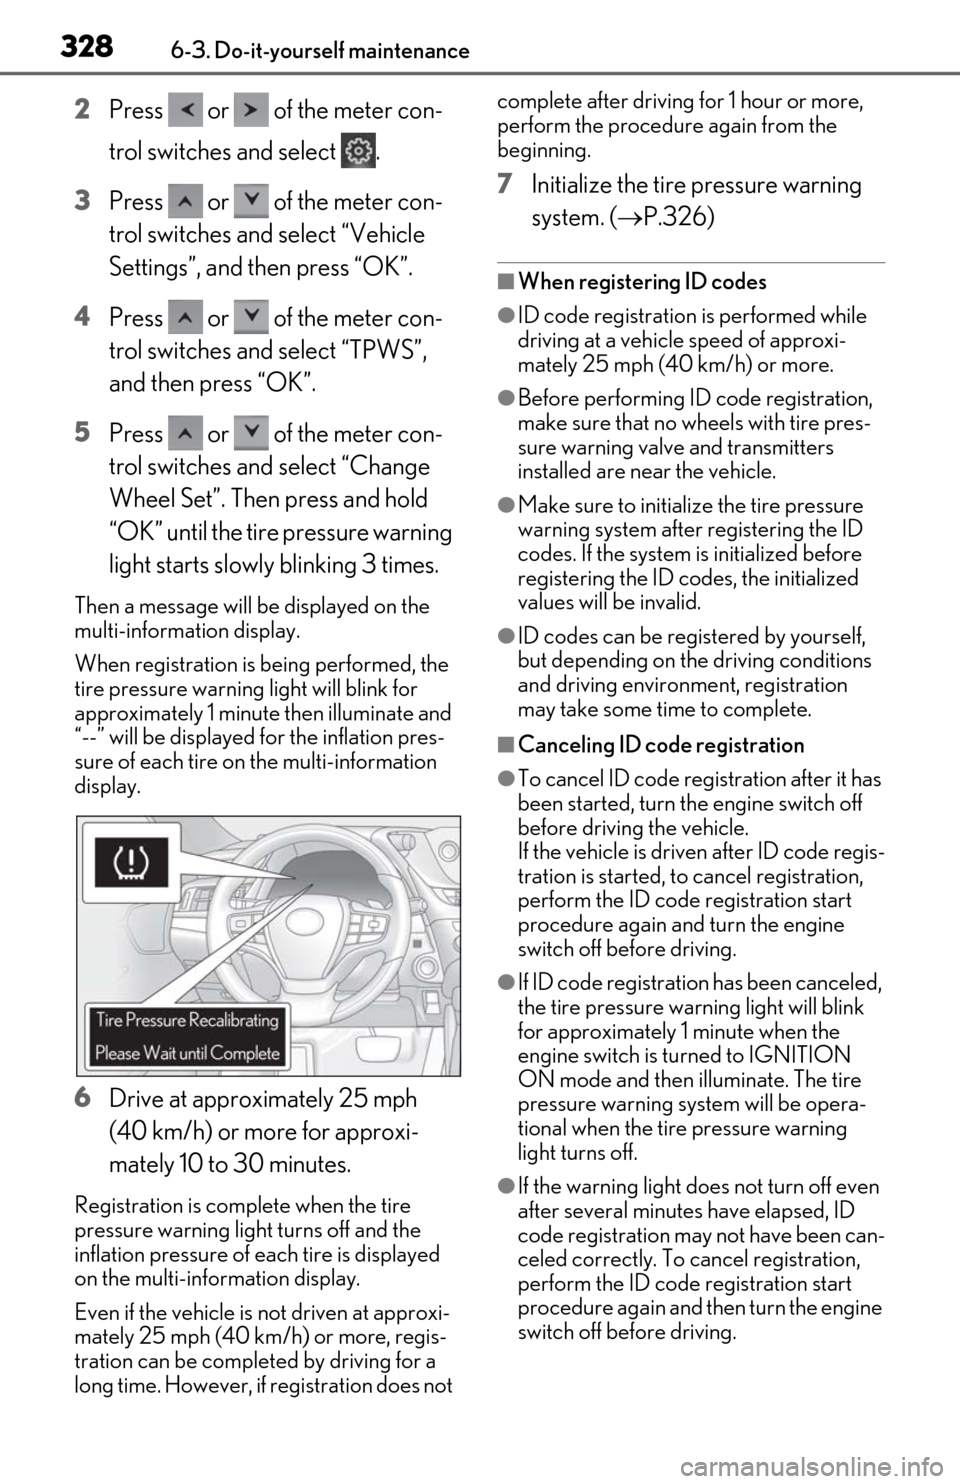
Then a message will be displayed on the
multi-information display.
When registration is being performed, the
tire pressure warning light will blink for
approximately 1 minute then illuminate and
â--â will be displayed for the inflation pres-
sure of each tire on the multi-information
display.
6Drive at approximately 25 mph
(40 km/h) or more for approxi-
mately 10 to 30 minutes.
Registration is complete when the tire
pressure warning light turns off and the
inflation pressure of each tire is displayed
on the multi-information display.
Even if the vehicle is not driven at approxi-
mately 25 mph (40 km /h) or more, regis-
tration can be completed by driving for a
long time. However, if registration does not complete after driving for 1 hour or more,
perform the procedure again from the
beginning.
7
Initialize the tire pressure warning
system. ( ďŽP.326)
â When registering ID codes
âID code registration is performed while
driving at a vehicle speed of approxi-
mately 25 mph (40 km/h) or more.
âBefore performing ID code registration,
make sure that no wheels with tire pres-
sure warning valve and transmitters
installed are near the vehicle.
âMake sure to initializ e the tire pressure
warning system after registering the ID
codes. If the system is initialized before
registering the ID codes, the initialized
values will be invalid.
âID codes can be registered by yourself,
but depending on the driving conditions
and driving environment, registration
may take some time to complete.
â Canceling ID code registration
âTo cancel ID code regi stration after it has
been started, turn the engine switch off
before driving the vehicle.
If the vehicle is driven after ID code regis-
tration is started, to cancel registration,
perform the ID code registration start
procedure again and turn the engine
switch off before driving.
âIf ID code registration has been canceled,
the tire pressure warning light will blink
for approximately 1 minute when the
engine switch is tu rned to IGNITION
ON mode and then illuminate. The tire
pressure warning system will be opera-
tional when the tire pressure warning
light turns off.
âIf the warning light does not turn off even
after several minutes have elapsed, ID
code registration may not have been can-
celed correctly. To cancel registration,
perform the ID code registration start
procedure again and then turn the engine
switch off before driving.
Page 331 of 450
3296-3. Do-it-yourself maintenance
6
Maintenance and care
â If ID codes are not registered properly
âIn the following situations, ID code regis-
tration may take longer than usual to be
completed or may not be possible. Nor-
mally, registration completes within
approximately 30 minutes.
⢠Vehicle is not parked for approximately 20 minutes or more before driving
⢠Vehicle is not driven at approximately 25
mph (40 km/h) or more
⢠Vehicle is driven on unpaved roads
⢠Vehicle is driven near other vehicles and
system cannot recognize tire pressure
warning valve and tran smitters of your
vehicle over those of other vehicles
⢠Wheel with tire pressure warning valve and transmitter installed is inside or near
the vehicle
If registration does not complete after driv-
ing for 1 hour or more, perform the ID code
registration procedure again from the
beginning.
âIf the vehicle is reve rsed during registra-
tion, the data up to that point is reset, so
perform the registrati on procedure again
from the beginning.
âIn the following situations, ID code regis-
tration will not be started or was not com-
pleted properly and the system will not
operate properly. Perform the ID code
registration procedure again.
⢠If, when attempting to start ID code regis-
tration, the tire pressure warning light
does not blink slowly 3 times.
⢠If, when the vehicle has been driven for
about 20 minutes after performing ID
code registration, the tire pressure warn-
ing light blinks for approximately 1 minute
and then illuminates.
âIf ID code registration cannot be com-
pleted after performing the above proce-
dure, contact your Lexus dealer.
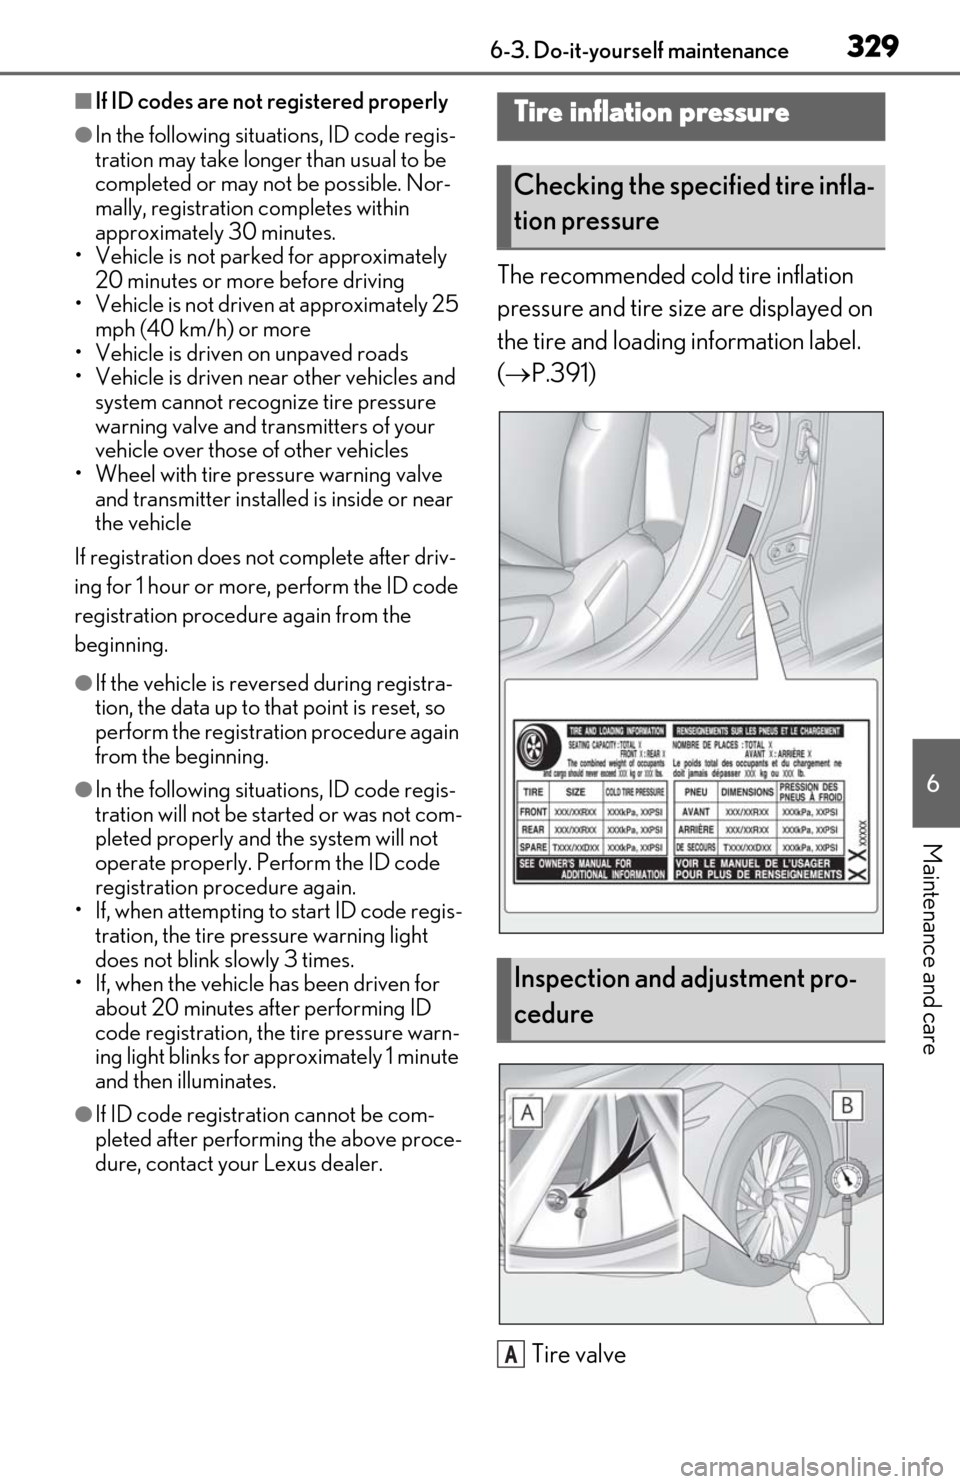
The recommended cold tire inflation
pressure and tire size are displayed on
the tire and loading information label.
(ďŽ P.391)
Tire valve
Tire inflation pressure
Checking the specified tire infla-
tion pressure
Inspection and adjustment pro-
cedure
A