light Lexus ES350 2020 Owner's Manual / LEXUS 2020 ES350 FROM OCT. 2019 PROD. OWNER'S MANUAL (OM06194U)
[x] Cancel search | Manufacturer: LEXUS, Model Year: 2020, Model line: ES350, Model: Lexus ES350 2020Pages: 450, PDF Size: 9.81 MB
Page 301 of 450
299
6
6
Maintenance and care
Maintenance and care
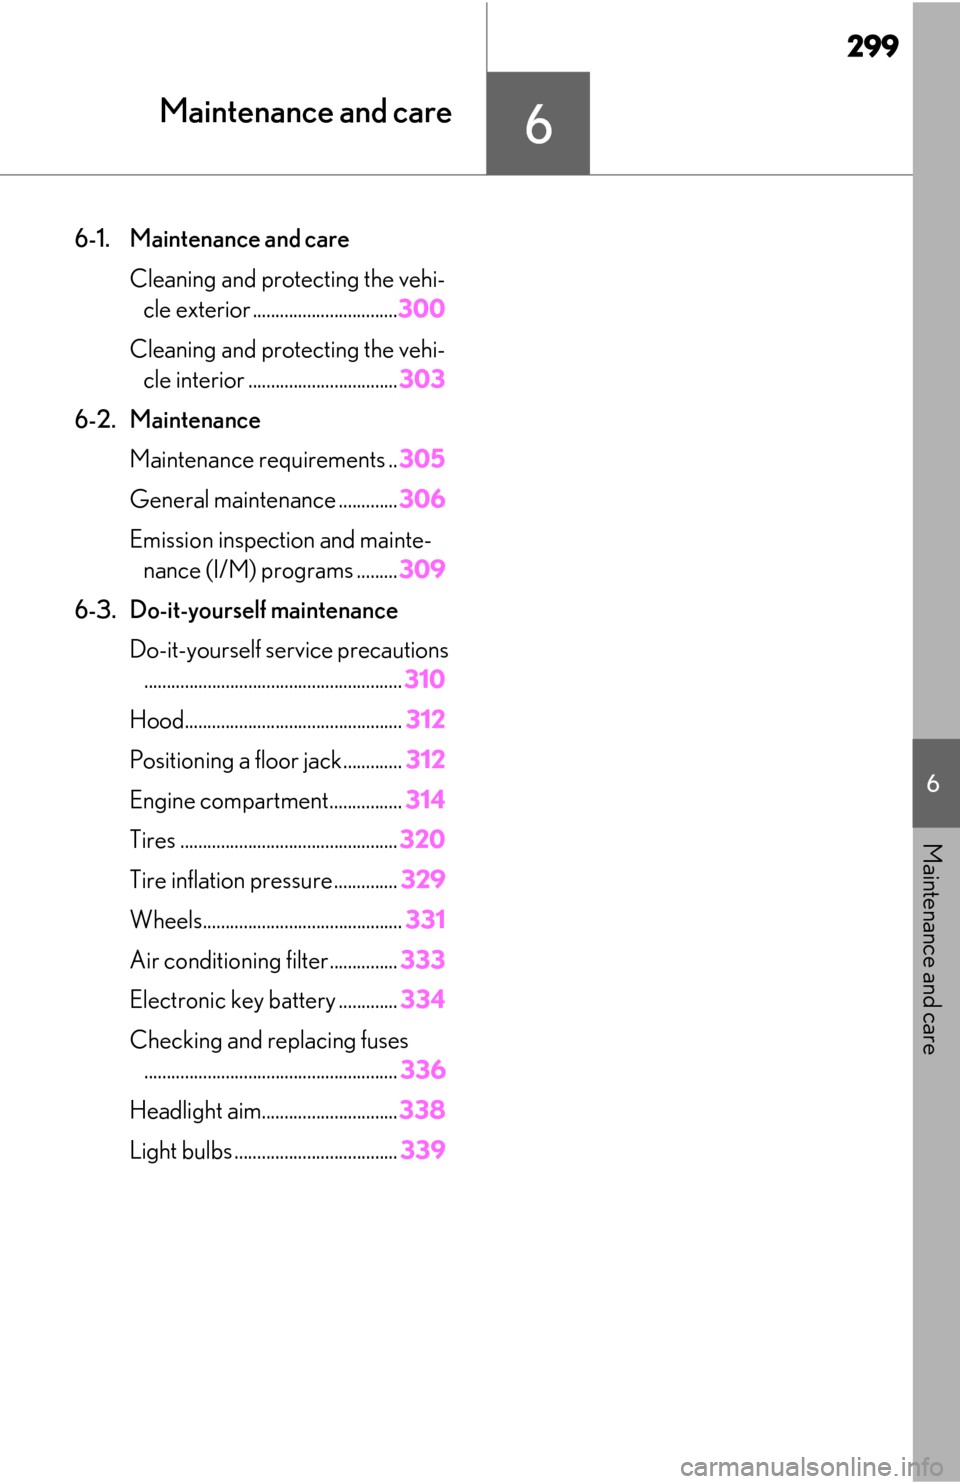
6-1. Maintenance and careCleaning and protecting the vehi-cle exterior ................................ 300
Cleaning and protecting the vehi- cle interior ................................. 303
6-2. Maintenance Maintenance requirements .. 305
General maintenance ............. 306
Emission inspection and mainte- nance (I/M) programs ......... 309
6-3. Do-it-yourself maintenance Do-it-yourself service precautions......................................................... 310
Hood................................................ 312
Positioning a floor jack............. 312
Engine compartment................ 314
Tires ................................................ 320
Tire inflation pressure .............. 329
Wheels............................................ 331
Air conditioning filter...............333
Electronic key battery ............. 334
Checking and replacing fuses ........................................................ 336
Headlight aim.............................. 338
Light bulbs .................................... 339
Page 304 of 450
3026-1. Maintenance and care
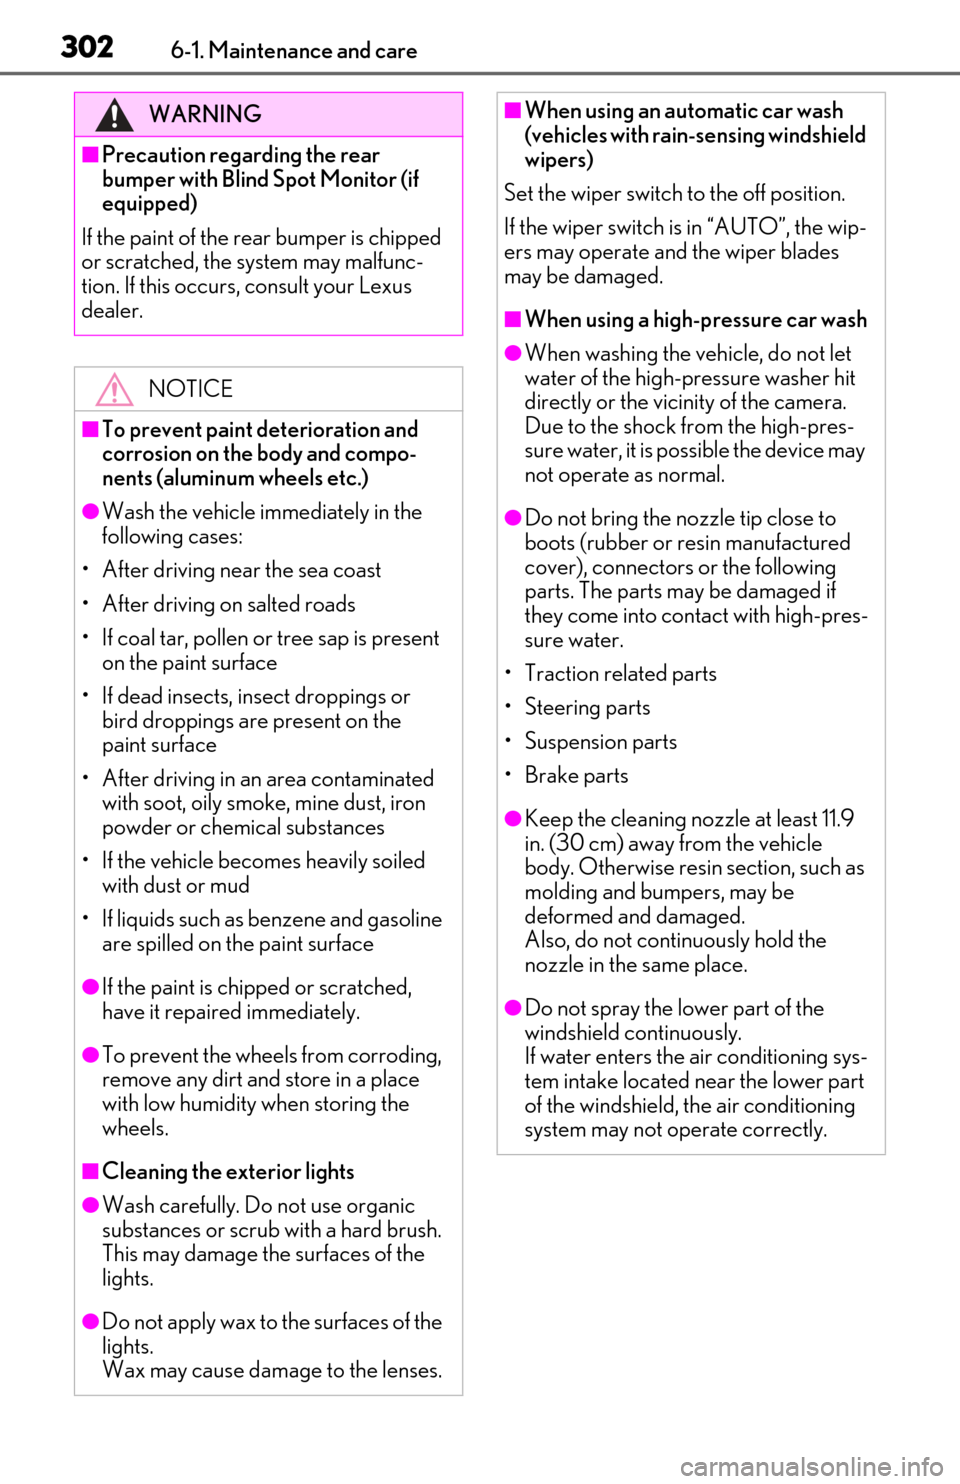
WARNING
■Precaution regarding the rear
bumper with Blind Spot Monitor (if
equipped)
If the paint of the rear bumper is chipped
or scratched, the system may malfunc-
tion. If this occurs, consult your Lexus
dealer.
NOTICE
■To prevent paint deterioration and
corrosion on the body and compo-
nents (aluminum wheels etc.)
●Wash the vehicle immediately in the
following cases:
• After driving near the sea coast
• After driving on salted roads
• If coal tar, pollen or tree sap is present on the paint surface
• If dead insects, insect droppings or bird droppings are present on the
paint surface
• After driving in an area contaminated with soot, oily smoke, mine dust, iron
powder or chemical substances
• If the vehicle becomes heavily soiled with dust or mud
• If liquids such as benzene and gasoline are spilled on the paint surface
●If the paint is chip ped or scratched,
have it repaired immediately.
●To prevent the wheels from corroding,
remove any dirt and store in a place
with low humidity when storing the
wheels.
■Cleaning the exterior lights
●Wash carefully. Do not use organic
substances or scrub with a hard brush.
This may damage the surfaces of the
lights.
●Do not apply wax to the surfaces of the
lights.
Wax may cause damage to the lenses.
■When using an automatic car wash
(vehicles with rain-sensing windshield
wipers)
Set the wiper switch to the off position.
If the wiper switch is in “AUTO”, the wip-
ers may operate and the wiper blades
may be damaged.
■When using a high-pressure car wash
●When washing the vehicle, do not let
water of the high-p ressure washer hit
directly or the vicinity of the camera.
Due to the shock from the high-pres-
sure water, it is possible the device may
not operate as normal.
●Do not bring the nozzle tip close to
boots (rubber or resin manufactured
cover), connectors or the following
parts. The parts may be damaged if
they come into contact with high-pres-
sure water.
• Traction related parts
• Steering parts
• Suspension parts
• Brake parts
●Keep the cleaning nozzle at least 11.9
in. (30 cm) away from the vehicle
body. Otherwise resin section, such as
molding and bumpers, may be
deformed and damaged.
Also, do not continuously hold the
nozzle in the same place.
●Do not spray the lower part of the
windshield continuously.
If water enters the air conditioning sys-
tem intake located near the lower part
of the windshield, th e air conditioning
system may not operate correctly.
Page 306 of 450
3046-1. Maintenance and care
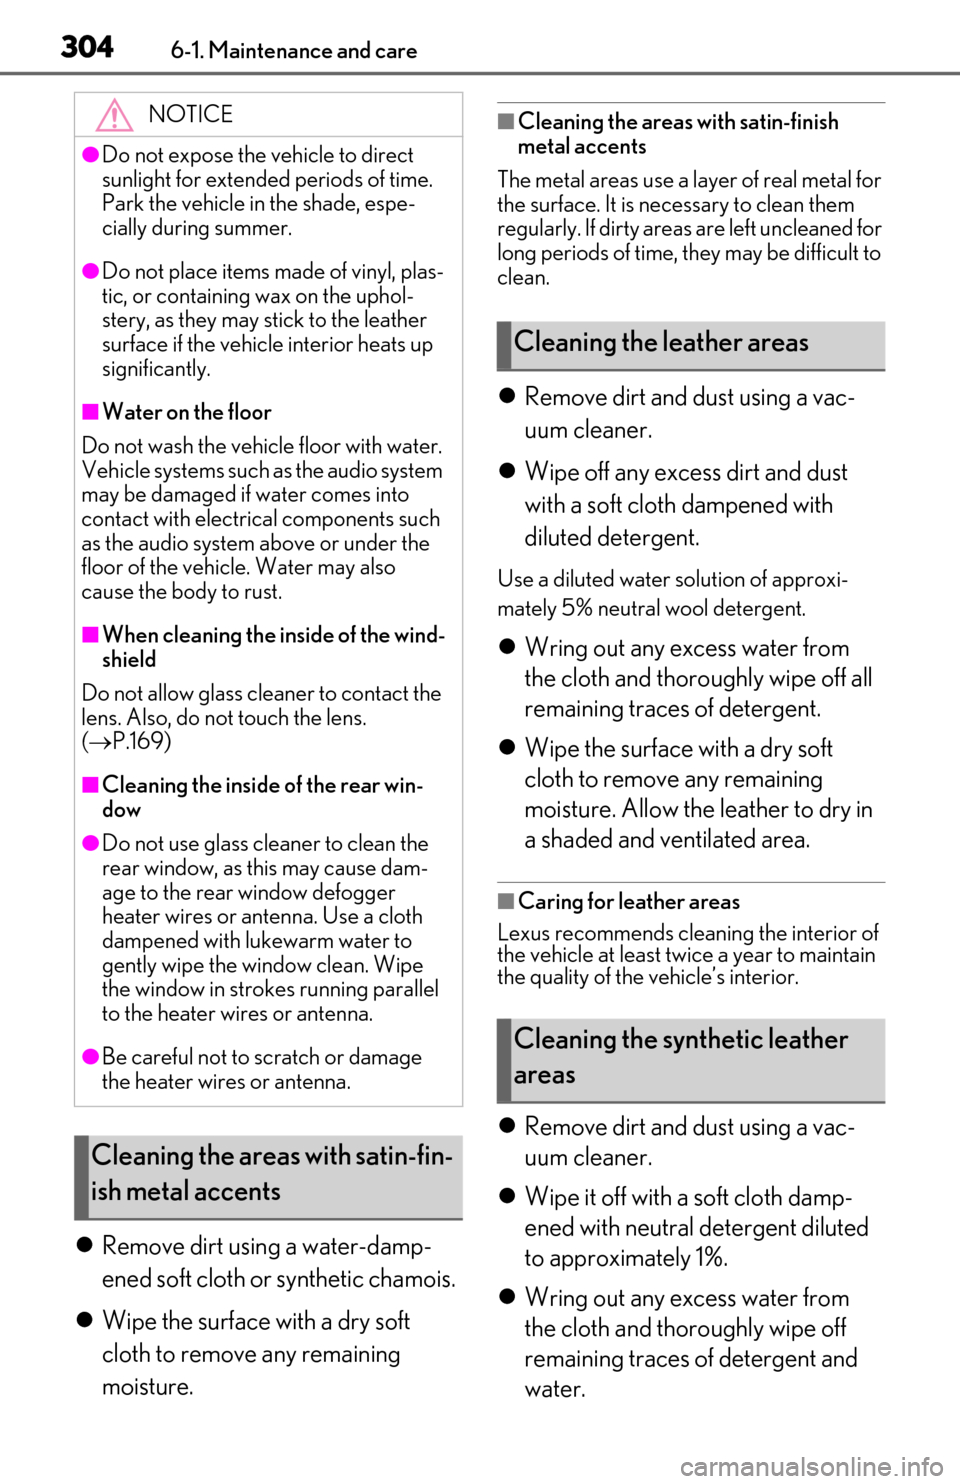
Remove dirt using a water-damp-
ened soft cloth or synthetic chamois.
Wipe the surface with a dry soft
cloth to remove any remaining
moisture.
■Cleaning the areas with satin-finish
metal accents
The metal areas use a layer of real metal for
the surface. It is necessary to clean them
regularly. If dirty area s are left uncleaned for
long periods of time, they may be difficult to
clean.
Remove dirt and dust using a vac-
uum cleaner.
Wipe off any excess dirt and dust
with a soft cloth dampened with
diluted detergent.
Use a diluted water solution of approxi-
mately 5% neutral wool detergent.
Wring out any excess water from
the cloth and thoroughly wipe off all
remaining traces of detergent.
Wipe the surface with a dry soft
cloth to remove any remaining
moisture. Allow the leather to dry in
a shaded and ventilated area.
■Caring for leather areas
Lexus recommends cleani ng the interior of
the vehicle at least twice a year to maintain
the quality of the vehicle’s interior.
Remove dirt and dust using a vac-
uum cleaner.
Wipe it off with a soft cloth damp-
ened with neutral detergent diluted
to approximately 1%.
Wring out any excess water from
the cloth and thoroughly wipe off
remaining traces of detergent and
water.
NOTICE
●Do not expose the vehicle to direct
sunlight for extended periods of time.
Park the vehicle in the shade, espe-
cially during summer.
●Do not place items made of vinyl, plas-
tic, or containing wax on the uphol-
stery, as they may stick to the leather
surface if the vehicle interior heats up
significantly.
■Water on the floor
Do not wash the vehicle floor with water.
Vehicle systems such as the audio system
may be damaged if water comes into
contact with electrical components such
as the audio system above or under the
floor of the vehicle. Water may also
cause the body to rust.
■When cleaning the inside of the wind-
shield
Do not allow glass cleaner to contact the
lens. Also, do not touch the lens.
( P.169)
■Cleaning the inside of the rear win-
dow
●Do not use glass cleaner to clean the
rear window, as this may cause dam-
age to the rear window defogger
heater wires or antenna. Use a cloth
dampened with lukewarm water to
gently wipe the window clean. Wipe
the window in strokes running parallel
to the heater wires or antenna.
●Be careful not to scratch or damage
the heater wires or antenna.
Cleaning the areas with satin-fin-
ish metal accents
Cleaning the leather areas
Cleaning the synthetic leather
areas
Page 309 of 450
3076-2. Maintenance
6
Maintenance and care
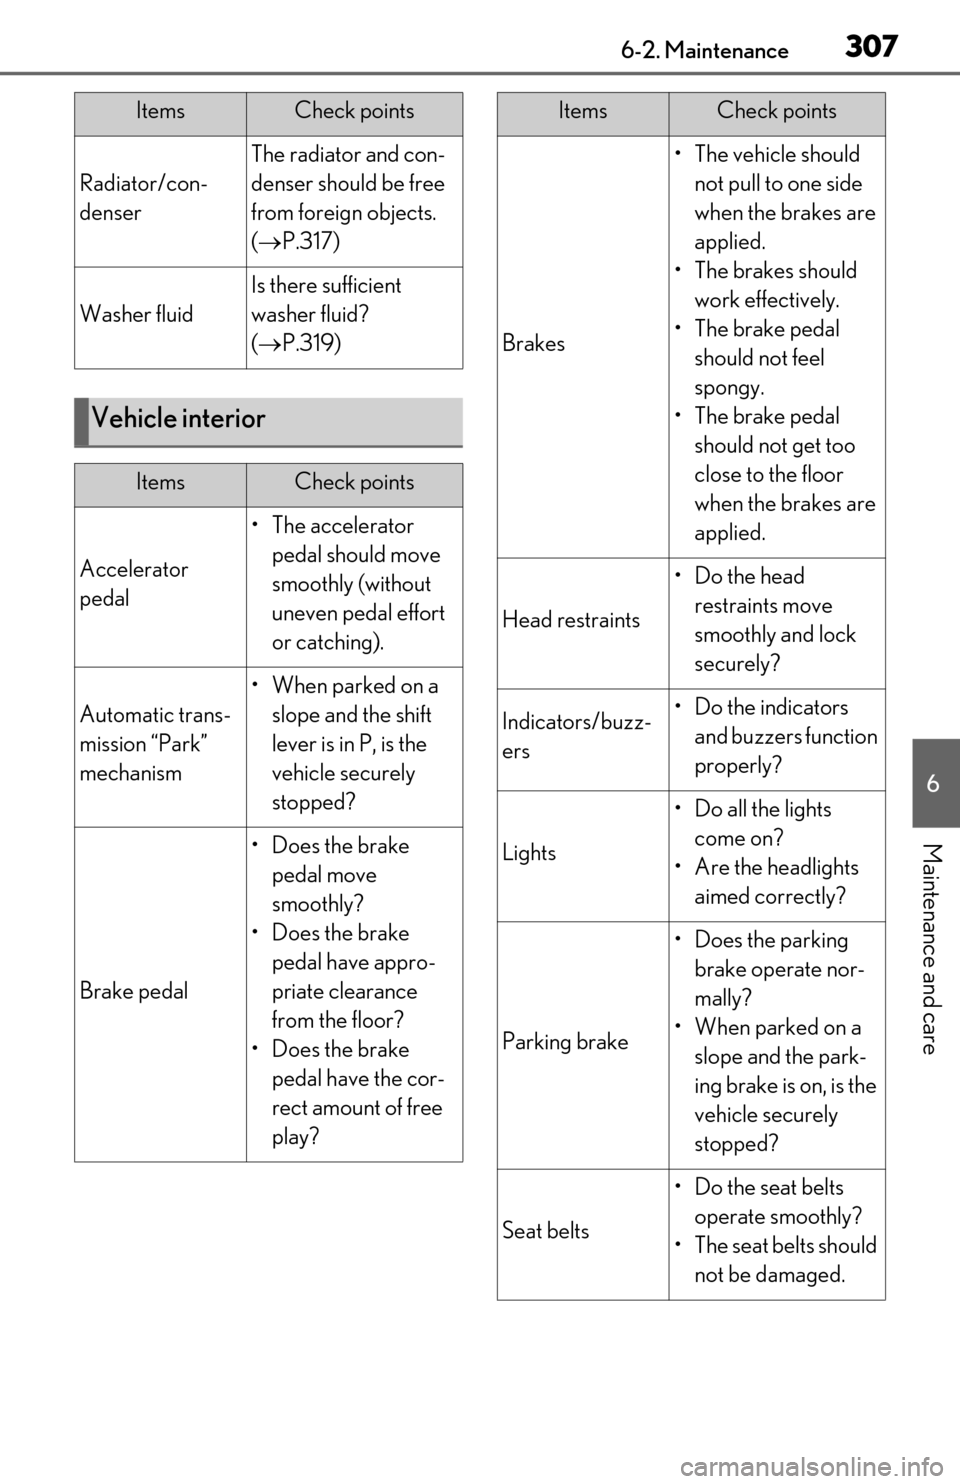
Radiator/con-
denser
The radiator and con-
denser should be free
from foreign objects.
( P.317)
Washer fluid
Is there sufficient
washer fluid?
( P.319)
Vehicle interior
ItemsCheck points
Accelerator
pedal
• The accelerator
pedal should move
smoothly (without
uneven pedal effort
or catching).
Automatic trans-
mission “Park”
mechanism
•When parked on a slope and the shift
lever is in P, is the
vehicle securely
stopped?
Brake pedal
•Does the brake pedal move
smoothly?
•Does the brake pedal have appro-
priate clearance
from the floor?
•Does the brake pedal have the cor-
rect amount of free
play?
ItemsCheck points
Brakes
•The vehicle should not pull to one side
when the brakes are
applied.
• The brakes should work effectively.
• The brake pedal should not feel
spongy.
• The brake pedal should not get too
close to the floor
when the brakes are
applied.
Head restraints
•Do the head restraints move
smoothly and lock
securely?
Indicators/buzz-
ers•Do the indicators and buzzers function
properly?
Lights
• Do all the lights come on?
• Are the headlights aimed correctly?
Parking brake
• Does the parking brake operate nor-
mally?
• When parked on a slope and the park-
ing brake is on, is the
vehicle securely
stopped?
Seat belts
• Do the seat belts operate smoothly?
• The seat belts should not be damaged.
ItemsCheck points
Page 312 of 450
3106-3. Do-it-yourself maintenance
6-3.Do-it-yourself maintenance
Do-it-yourself service pre-
cautions
If you perform maintenance by
yourself, be sure to follow the cor-
rect procedure as given in these
sections.
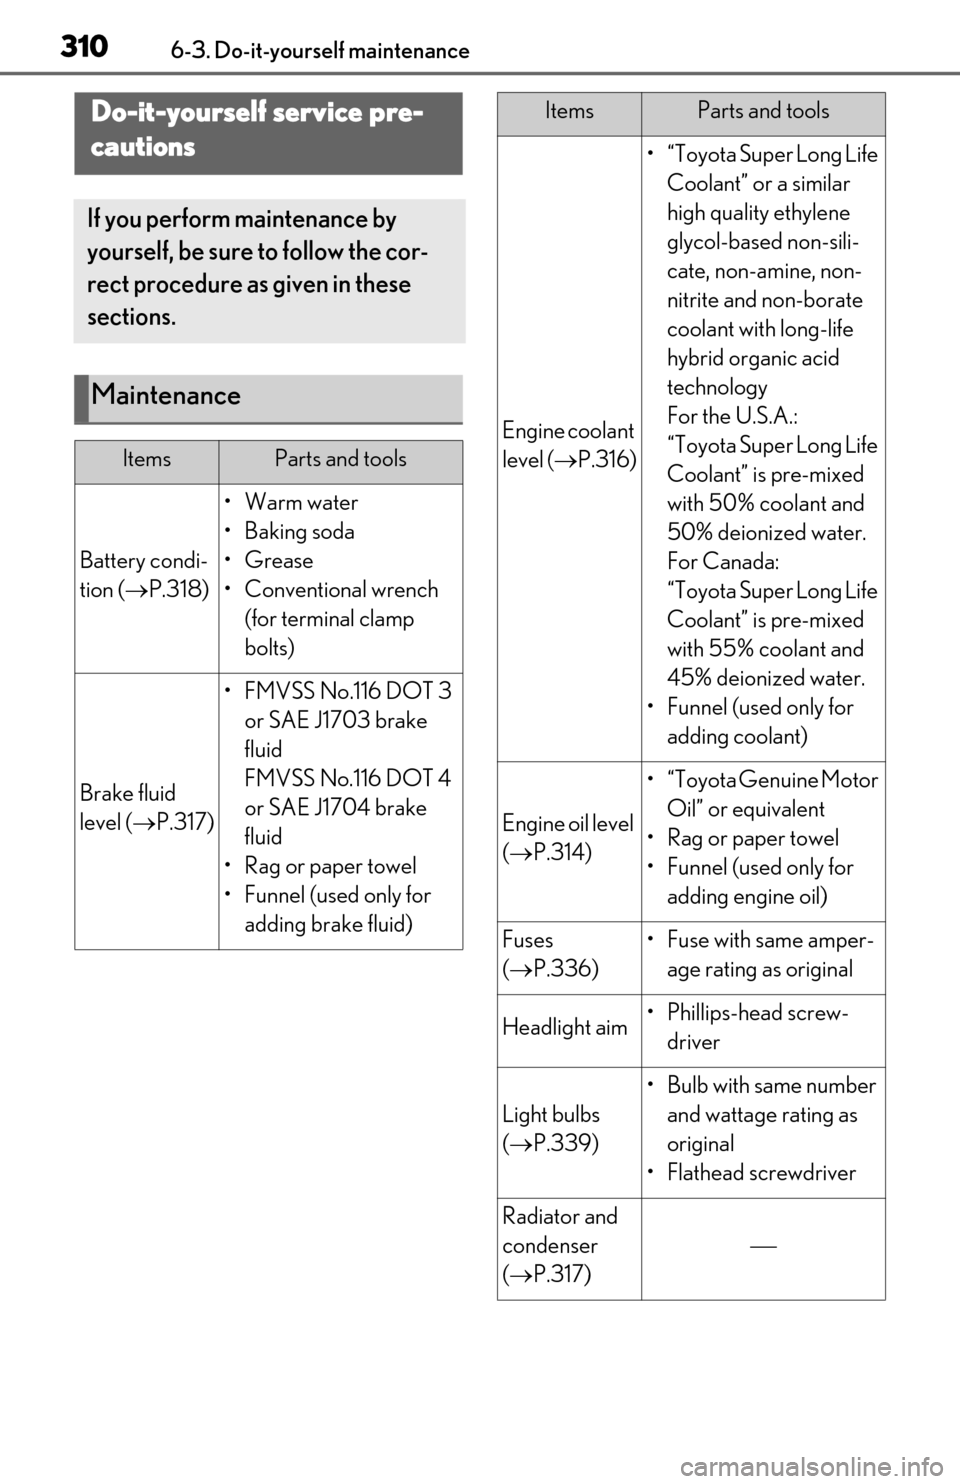
Maintenance
ItemsParts and tools
Battery condi-
tion (P.318)
•Warm water
•Baking soda
•Grease
• Conventional wrench
(for terminal clamp
bolts)
Brake fluid
level ( P.317)
• FMVSS No.116 DOT 3
or SAE J1703 brake
fluid
FMVSS No.116 DOT 4
or SAE J1704 brake
fluid
• Rag or paper towel
• Funnel (used only for adding brake fluid)
Engine coolant
level ( P.316)
•“Toyota Super Long Life
Coolant” or a similar
high quality ethylene
glycol-based non-sili-
cate, non-amine, non-
nitrite and non-borate
coolant with long-life
hybrid organic acid
technology
For the U.S.A.:
“Toyota Super Long Life
Coolant” is pre-mixed
with 50% coolant and
50% deionized water.
For Canada:
“Toyota Super Long Life
Coolant” is pre-mixed
with 55% coolant and
45% deionized water.
• Funnel (used only for adding coolant)
Engine oil level
( P.314)
•“Toyota Genuine Motor
Oil” or equivalent
•Rag or paper towel
• Funnel (used only for adding engine oil)
Fuses
( P.336)• Fuse with same amper-
age rating as original
Headlight aim• Phillips-head screw-driver
Light bulbs
( P.339)
•Bulb with same number
and wattage rating as
original
• Flathead sc rewdriver
Radiator and
condenser
( P.317)
ItemsParts and tools
Page 314 of 450
3126-3. Do-it-yourself maintenance
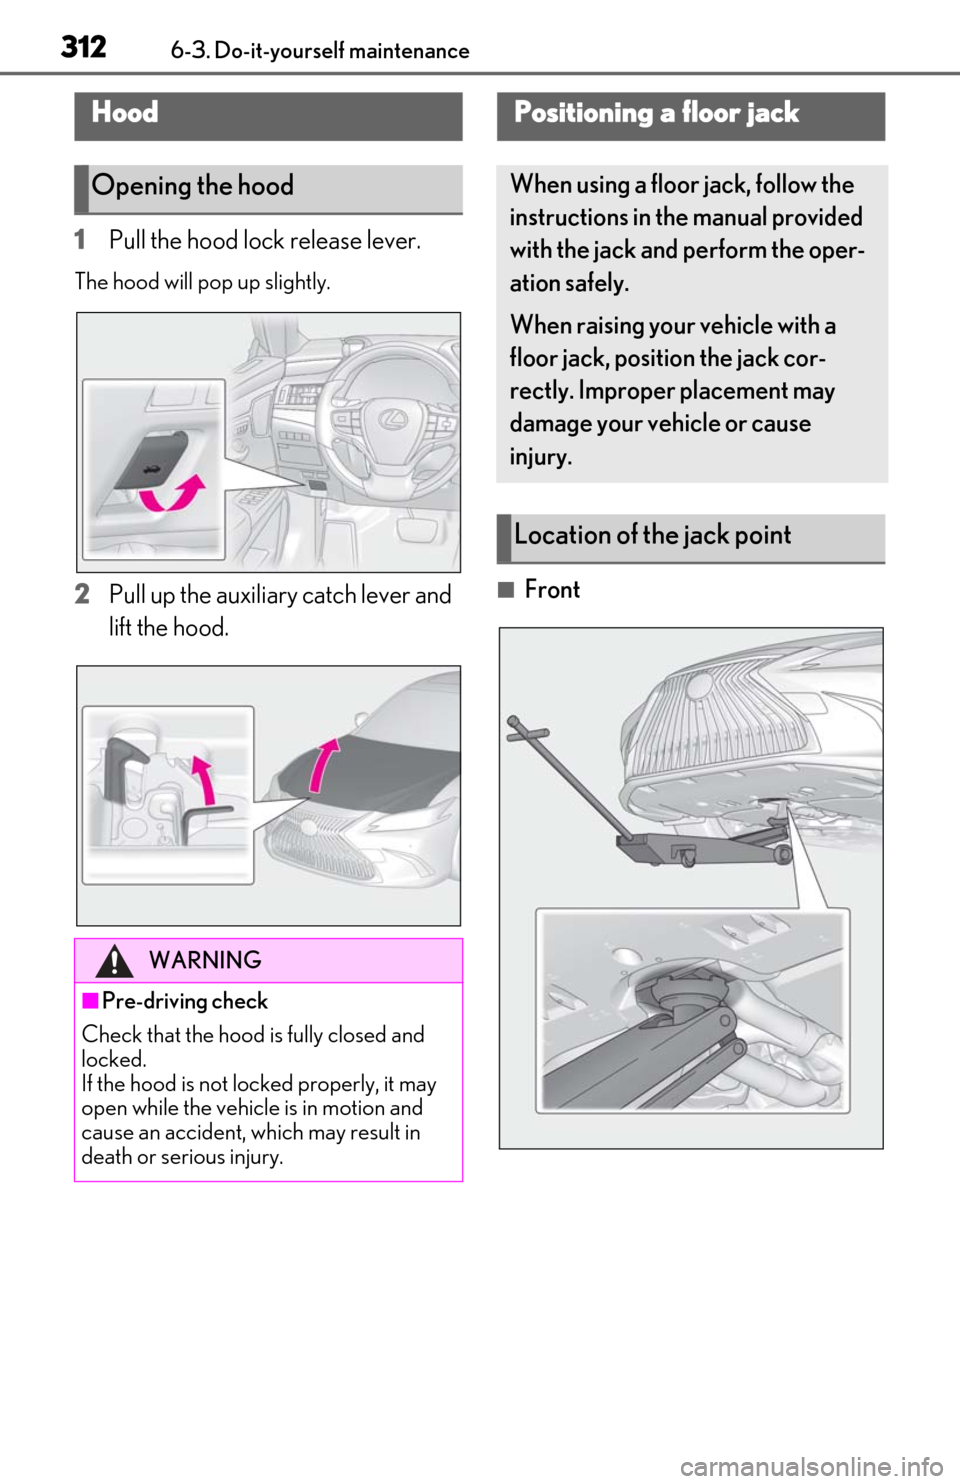
1Pull the hood lock release lever.
The hood will pop up slightly.
2Pull up the auxiliary catch lever and
lift the hood.■Front
Hood
Opening the hood
WARNING
■Pre-driving check
Check that the hood is fully closed and
locked.
If the hood is not locked properly, it may
open while the vehicle is in motion and
cause an accident, which may result in
death or serious injury.
Positioning a floor jack
When using a floor jack, follow the
instructions in the manual provided
with the jack and perform the oper-
ation safely.
When raising your vehicle with a
floor jack, position the jack cor-
rectly. Improper placement may
damage your vehicle or cause
injury.
Location of the jack point
Page 320 of 450
3186-3. Do-it-yourself maintenance
■Brake fluid can absorb moisture from
the air
Excess moisture in the brake fluid can cause
a dangerous loss of braking efficiency. Use
only newly opened brake fluid.
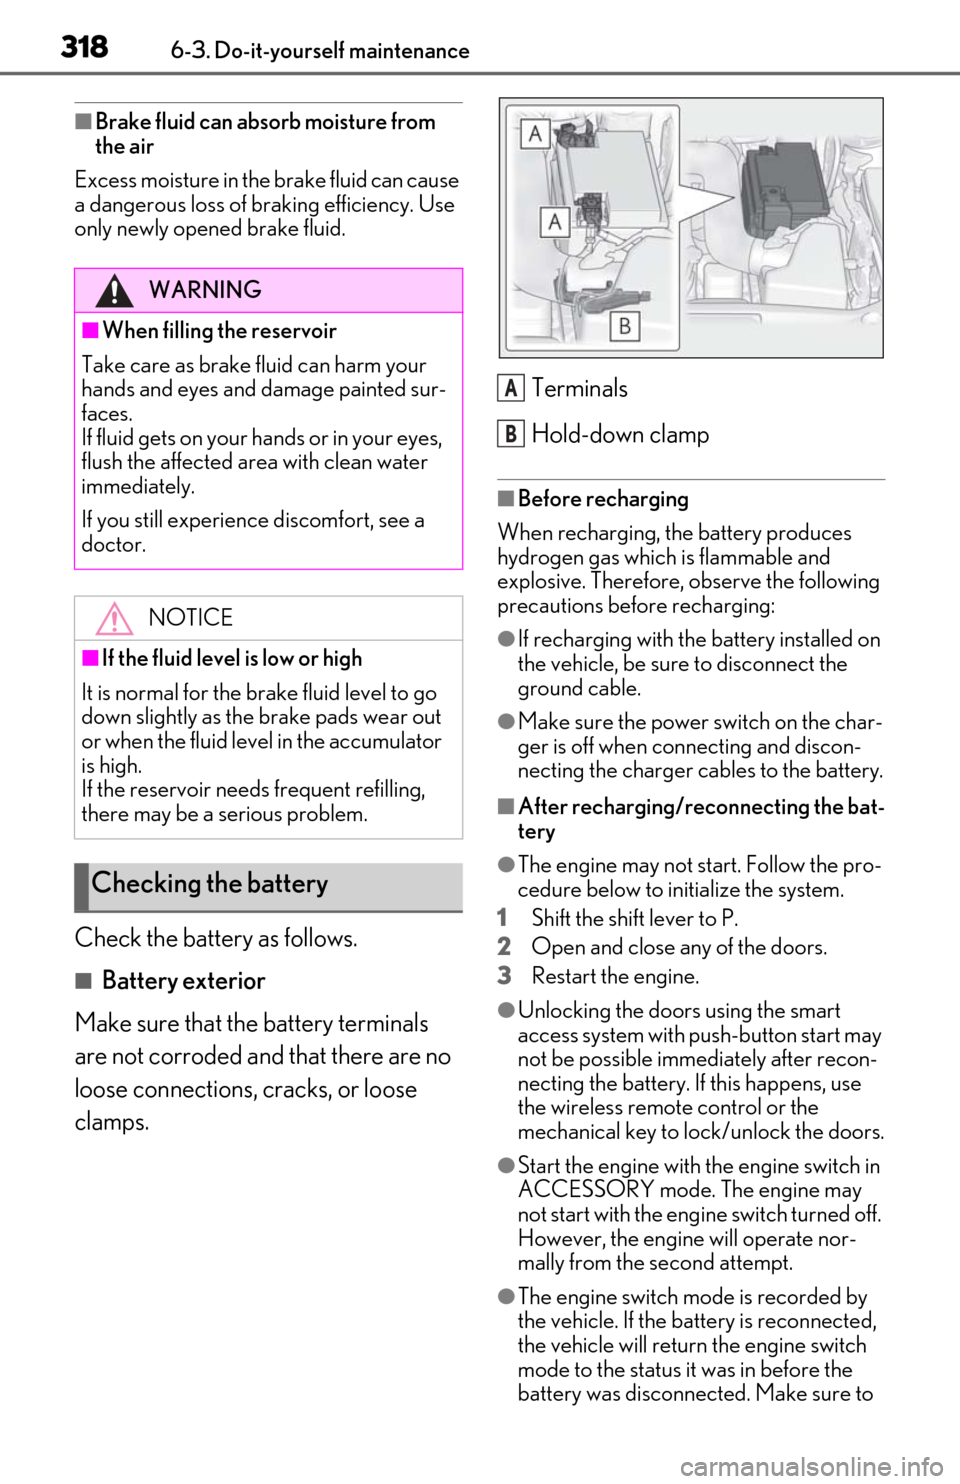
Check the battery as follows.
■Battery exterior
Make sure that the battery terminals
are not corroded and that there are no
loose connections, cracks, or loose
clamps. Terminals
Hold-down clamp
■Before recharging
When recharging, the battery produces
hydrogen gas which is flammable and
explosive. Therefore, observe the following
precautions before recharging:
●If recharging with the battery installed on
the vehicle, be sure to disconnect the
ground cable.
●Make sure the power switch on the char-
ger is off when connecting and discon-
necting the charger cables to the battery.
■After recharging/reconnecting the bat-
tery
●The engine may not start. Follow the pro-
cedure below to initialize the system.
1
Shift the shift lever to P.
2
Open and close any of the doors.
3
Restart the engine.
●Unlocking the doors using the smart
access system with pu sh-button start may
not be possible immediately after recon-
necting the battery. If this happens, use
the wireless remote control or the
mechanical key to lock/unlock the doors.
●Start the engine with the engine switch in
ACCESSORY mode. The engine may
not start with the engine switch turned off.
However, the engine will operate nor-
mally from the second attempt.
●The engine switch mode is recorded by
the vehicle. If the battery is reconnected,
the vehicle will return the engine switch
mode to the status it was in before the
battery was disconnected. Make sure to
WARNING
■When filling the reservoir
Take care as brake fluid can harm your
hands and eyes and damage painted sur-
faces.
If fluid gets on your hands or in your eyes,
flush the affected area with clean water
immediately.
If you still experience discomfort, see a
doctor.
NOTICE
■If the fluid level is low or high
It is normal for the brake fluid level to go
down slightly as the brake pads wear out
or when the fluid level in the accumulator
is high.
If the reservoir need s frequent refilling,
there may be a serious problem.
Checking the battery
A
B
Page 321 of 450
3196-3. Do-it-yourself maintenance
6
Maintenance and care
turn off the power before disconnect the
battery. Take extra care when connecting
the battery if the engine switch mode
prior to discharge is unknown.
If the engine will not st art even after multiple
attempts at all methods above, contact your
Lexus dealer.
If any washer does not work or “Wind-
shield Washer Fluid Low” is shown on
the multi-information display, the
washer tank may be empty. Add
WARNING
■Chemicals in the battery
Battery contains poisonous and corro-
sive sulfuric acid and may produce
hydrogen gas which is flammable and
explosive. To reduce the risk of death or
serious injury, take the following precau-
tions while working on or near the bat-
tery:
●Do not cause sparks by touching the
battery terminals with tools.
●Do not smoke or light a match near the
battery.
●Avoid contact with eyes, skin and
clothes.
●Never inhale or swallow electrolyte.
●Wear protective safety glasses when
working near the battery.
●Keep children away from the battery.
■Where to safely charge the battery
Always charge the battery in an open
area. Do not charge the battery in a
garage or closed room where there is
insufficient ventilation.
■How to recharge the battery
Only perform a slow charge (5 A or
less). The battery may explode if charged
at a quicker rate.
■Emergency measures regarding
electrolyte
●If electrolyte gets in your eyes
Flush your eyes with clean water for at
least 15 minutes and get immediate
medical attention. If possible, continue
to apply water with a sponge or cloth
while traveling to the nearest medical
facility.
●If electrolyte gets on your skin
Wash the affected area thoroughly. If
you feel pain or burning, get medical
attention immediately.
●If electrolyte gets on your clothes
It can soak through clothing on to your
skin. Immediately take off the clothing
and follow the procedure above if nec-
essary.
●If you accidentally swallow electrolyte
Drink a large quantity of water or milk.
Get emergency medical attention
immediately.
■When there is insufficient battery
fluid
Do not use if there is insufficient fluid in
the battery. There is a possible danger
that the battery may explode.
NOTICE
■When recharging the battery
Never recharge the battery while the
engine is running. Also, be sure all acces-
sories are turned off.
■When adding distilled water
Avoid overfilling. Water spilled during
battery recharging may cause corrosion.
Adding the washer fluid
Page 325 of 450
3236-3. Do-it-yourself maintenance
6
Maintenance and care
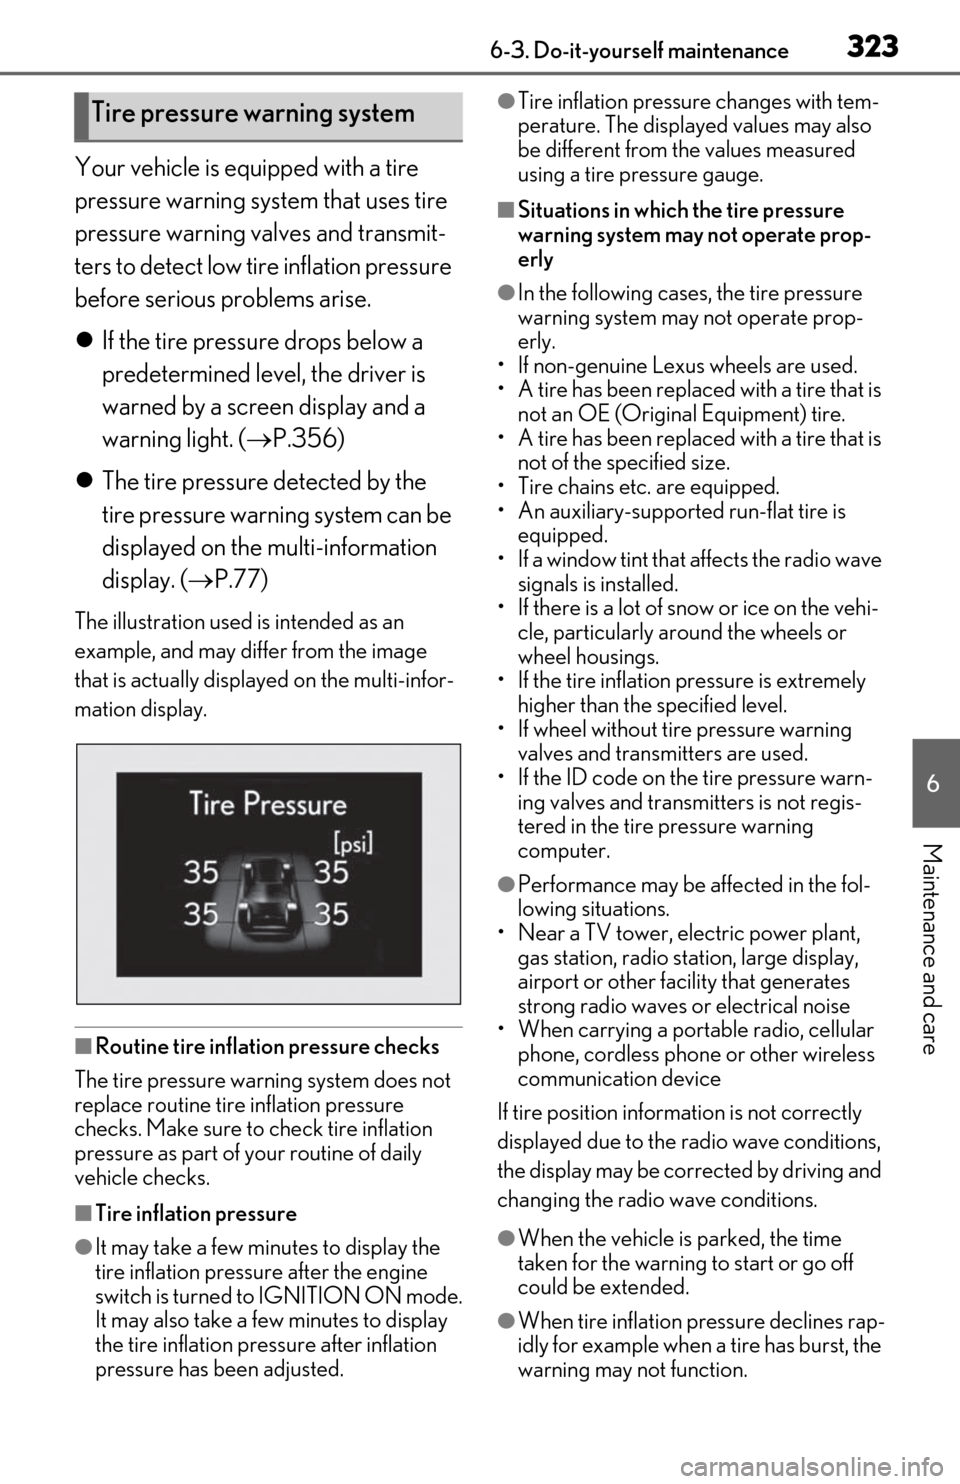
Your vehicle is equipped with a tire
pressure warning system that uses tire
pressure warning valves and transmit-
ters to detect low tire inflation pressure
before serious problems arise.
If the tire pressure drops below a
predetermined level, the driver is
warned by a screen display and a
warning light. ( P.356)
The tire pressure detected by the
tire pressure warning system can be
displayed on the multi-information
display. ( P.77)
The illustration used is intended as an
example, and may differ from the image
that is actually displayed on the multi-infor-
mation display.
■Routine tire inflation pressure checks
The tire pressure warning system does not
replace routine tire inflation pressure
checks. Make sure to check tire inflation
pressure as part of your routine of daily
vehicle checks.
■Tire inflation pressure
●It may take a few minutes to display the
tire inflation pressure after the engine
switch is turned to IGNITION ON mode.
It may also take a few minutes to display
the tire inflation pres sure after inflation
pressure has been adjusted.
●Tire inflation pressure changes with tem-
perature. The displayed values may also
be different from the values measured
using a tire pressure gauge.
■Situations in which the tire pressure
warning system may not operate prop-
erly
●In the following cases, the tire pressure
warning system may not operate prop-
erly.
• If non-genuine Lexus wheels are used.
• A tire has been replaced with a tire that is not an OE (Original Equipment) tire.
• A tire has been replaced with a tire that is not of the specified size.
• Tire chains etc. are equipped.
• An auxiliary-supported run-flat tire is
equipped.
• If a window tint that affects the radio wave
signals is installed.
• If there is a lot of snow or ice on the vehi- cle, particularly around the wheels or
wheel housings.
• If the tire inflation pressure is extremely higher than the specified level.
• If wheel without tire pressure warning
valves and transmitters are used.
• If the ID code on the tire pressure warn- ing valves and transmitters is not regis-
tered in the tire pressure warning
computer.
●Performance may be af fected in the fol-
lowing situations.
• Near a TV tower, electric power plant,
gas station, radio stat ion, large display,
airport or other fac ility that generates
strong radio waves or electrical noise
• When carrying a portable radio, cellular phone, cordless phone or other wireless
communication device
If tire position information is not correctly
displayed due to the radio wave conditions,
the display may be corrected by driving and
changing the radio wave conditions.
●When the vehicle is parked, the time
taken for the warning to start or go off
could be extended.
●When tire inflation pr essure declines rap-
idly for example when a tire has burst, the
warning may not function.
Tire pressure warning system
Page 327 of 450
3256-3. Do-it-yourself maintenance
6
Maintenance and care
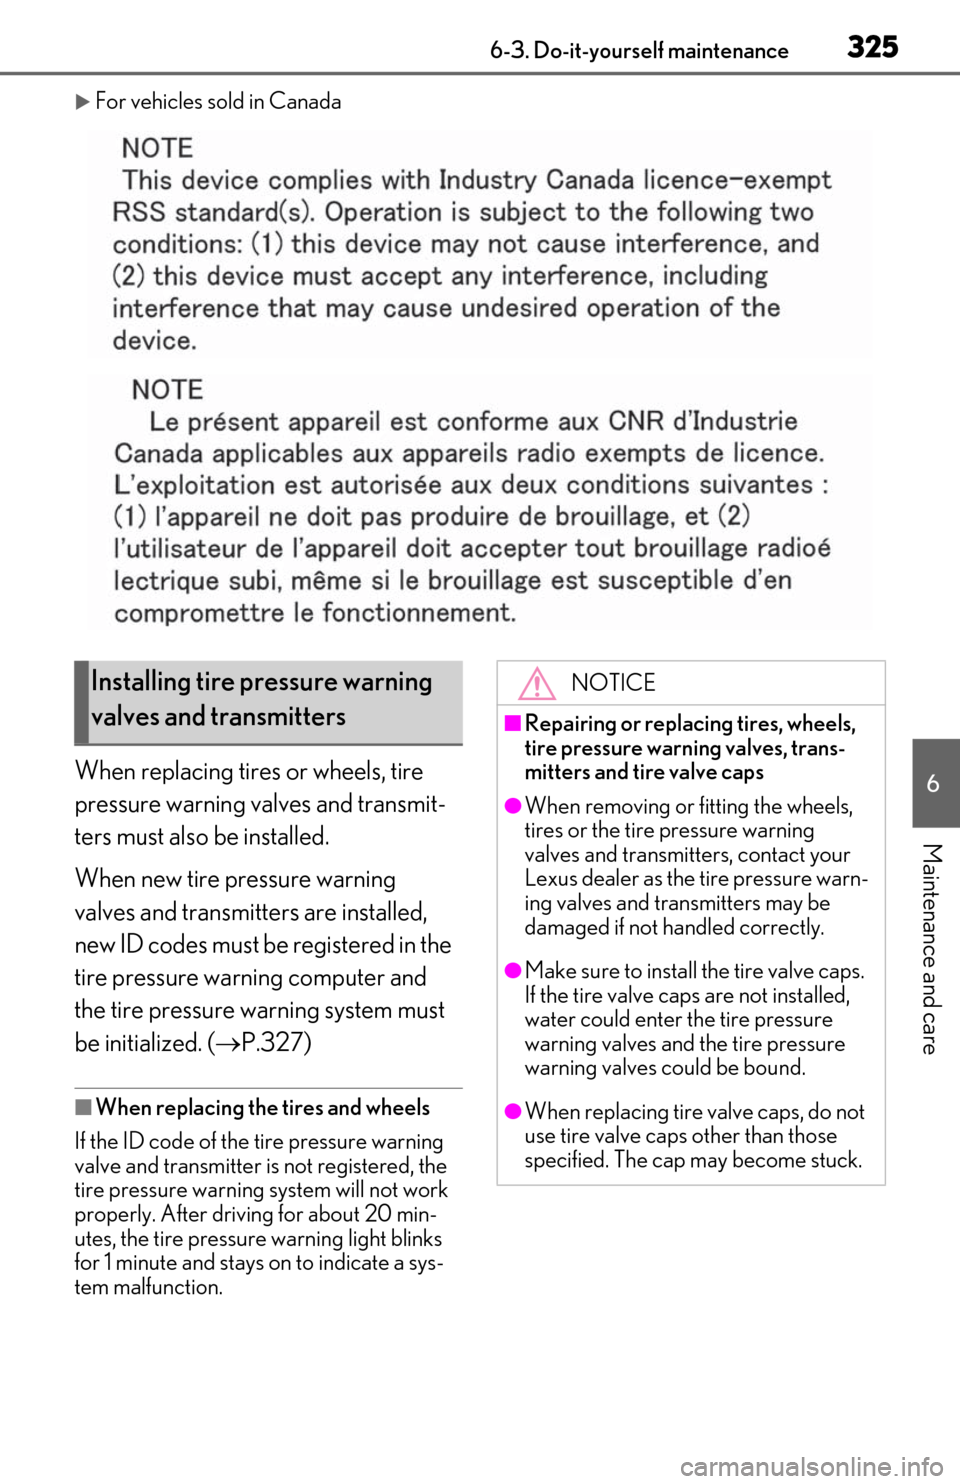
For vehicles sold in Canada
When replacing tires or wheels, tire
pressure warning valves and transmit-
ters must also be installed.
When new tire pressure warning
valves and transmitters are installed,
new ID codes must be registered in the
tire pressure warning computer and
the tire pressure warning system must
be initialized. ( P.327)
■When replacing the tires and wheels
If the ID code of the tire pressure warning
valve and transmitter is not registered, the
tire pressure warning system will not work
properly. After driving for about 20 min-
utes, the tire pressure warning light blinks
for 1 minute and stays on to indicate a sys-
tem malfunction.
Installing tire pressure warning
valves and transmittersNOTICE
■Repairing or replac ing tires, wheels,
tire pressure warning valves, trans-
mitters and tire valve caps
●When removing or fitting the wheels,
tires or the tire pressure warning
valves and transmitters, contact your
Lexus dealer as the tire pressure warn-
ing valves and transmitters may be
damaged if not handled correctly.
●Make sure to install the tire valve caps.
If the tire valve caps are not installed,
water could enter the tire pressure
warning valves and the tire pressure
warning valves could be bound.
●When replacing tire valve caps, do not
use tire valve caps other than those
specified. The cap may become stuck.