ESP Lexus ES350 2020 / LEXUS 2020 ES350 FROM OCT. 2019 PROD. (OM06194U) User Guide
[x] Cancel search | Manufacturer: LEXUS, Model Year: 2020, Model line: ES350, Model: Lexus ES350 2020Pages: 450, PDF Size: 9.81 MB
Page 58 of 450
581-3. Lexus Enform
“SOS” button in your vehicle for fur-
ther subscription details.
The United States
1-800-25-LEXUS (1-800-255-3987)
Canada
1-800-26-LEXUS (1-800-265-3987)
Puerto Rico
1-877-539-8777
■Safety Connect Serv ices Information
●Phone calls using the vehicles Blue-
tooth® technology will not be possible
during Safety Connect.
●Safety Connect is available beginning Fall
2009 on select Lexus models (in the
contiguous United States only). Contact
with the Safety Connect response center
is dependent upon the telematics device
being in operative co ndition, cellular con-
nection availability, and GPS satellite sig-
nal reception, which ca n limit the ability to
reach the response center or receive
emergency service support. Enrollment
and Telematics Subscription Service
Agreement required. A variety of sub-
scription terms is available; charges vary
by subscription term selected and loca-
tion.
●Automatic Collision Notification, Emer-
gency Assistance and Stolen Vehicle
Location will function in the United
States, including Hawaii and Alaska,
Puerto Rico and in Canada, and
Enhanced Roadside Assistance will func-
tion in the United States, Puerto Rico and
in Canada.
●Automatic Collision Notification, Emer-
gency Assistance, Stolen Vehicle and
Enhanced Road Assist ance will not func-
tion in the United St ates Virgin Islands.
For vehicles first sold in the USVI, no
Safety Connect services will function in
and outside the United States Virgin
Islands.
●Safety Connect services are not subject
to section 255 of the Telecommunica-
tions Act and the device is not TTY com- patible.
■Languages
The Safety Connect re sponse center will
offer support in mult iple languages. The
Safety Connect system will offer voice
prompts in English, Spanish, and French.
Please indicate your language of choice
when enrolling.
■When contacting the response center
You may be unable to contact the response
center if the network is busy.
When the engine switch is turned to
IGNITION ON mode, the red indica-
tor light comes on for 2 seconds then
turns off. Afterward, the green indica-
tor light comes on, indicating that the
service is active.
The following indicator light patterns
indicate specific system usage condi-
tions:
Green indicator light on = Active
service
Green indicator light flashing =
Safety Connect call in process
Red indicator light (except at vehi-
cle start-up) = System malfunction
(contact your Lexus dealer)
No indicator light (off) = Safety
Connect service not active
■Automatic Collision Notification
In case of either airbag deployment or
severe rear-end collision, the system is
designed to automatically call the
Safety Connect LED light Indi-
cators
Safety Connect services
Page 59 of 450
591-3. Lexus Enform
1
For safety and security
response center. The responding agent
receives the vehicle’s location and
attempts to speak with the vehicle
occupants to assess the level of emer-
gency. If the occupants are unable to
communicate, the agent automatically
treats the call as an emergency, con-
tacts the nearest emergency services
provider to describe the situation, and
requests that assistance be sent to the
location.
■Stolen Vehicle Location
If your vehicle is stolen, Safety Connect
can work with local authorities to assist
them in locating and recovering the
vehicle. After filing a police report, call
the Safety Connect response center at
1-800-25-LEXUS (1-800-255-
3987) in the United States, 1-877-
539-8777 in Puerto Rico or 1-800-
265-3987 in Canada, and follow the
prompts for Safety Connect to initiate
this service.
In addition to assisting law enforce-
ment with recovery of a stolen vehicle,
Safety-Connect-equipped vehicle
location data may, under certain cir-
cumstances, be shared with third par-
ties to locate your vehicle. Further
information is available at Lexus.com.
■Emergency Assistance Button
(“SOS”)
In the event of an emergency on the
road, push the “SOS” button to reach
the Safety Connect response center.
The answering agent will determine
your vehicle’s location, assess the
emergency, and dispatch the neces-
sary assistance required.
If you accidentally press the “SOS” button,
tell the response-center agent that you are
not experiencing an emergency.
■Enhanced Roadside Assistance
Enhanced Roadside Assistance adds
GPS data to the already included war-
ranty-based Lexus roadside service.
Subscribers can press the “SOS” but-
ton to reach a Safety Connect
response-center agent, who can help
with a wide range of needs, such as:
towing, flat tire, fuel delivery, etc. For a
description of the Roadside Assistance
services and their limitations, please
see the Safety Connect Terms and
Conditions, which are available at
Lexus.com.
Important! Read this information about
exposure to radio frequency signals
before using Safety Connect;
The Safety Connect system installed in
your vehicle is a low-power radio trans-
mitter and receiver. It receives and also
sends out radio frequency (RF) signals.
In August 1996, the Federal Commu-
nications Commission (FCC) adopted
RF exposure guidelines with safety lev-
els for mobile wireless phones. Those
guidelines are consistent with the
safety standards previously set by the
following U.S. and international stan-
dards bodies.
ANSI (American National Stan-
dards Institute) C95.1 [1992]
Safety information for Safety
Connect
Page 73 of 450
712-1. Instrument cluster
2
Vehicle status information and indicators
Shift position and shift range (P.147)
Odometer and trip meter display ( P.71)
■Outside temperature display
●In the following situations, the correct
outside temperature may not be dis-
played, or the display may take longer
than normal to change:
• When stopped, or driving at low speeds (less than 12 mph [20 km/h])
• When the outside temperature has changed suddenly (at the entrance/exit of
a garage, tunnel, etc.)
●When “--” or “E” is displayed, the system
may be malfunctioning. Take your vehicle
to your Lexus dealer.
■Liquid crystal display
P.78
■Customization
The gauges and meters can be customized
on of the multi-information display.
( P.82)
■Display items
Odometer
Displays the total distance the vehicle has
been driven.
Trip meter A/trip meter B
Displays the distance the vehicle has been
driven since the meter was last reset. Trip
meters A and B can be used to record and
display different distances independently.
Distance until next engine oil
change
Displays the distance the vehicle can be
driven until an oil change is necessary.
■Changing the display
Each time the “ODO TRIP” switch is
pressed, the displayed item will be
changed. When the trip meter is dis-
played, pressing and holding the switch
will reset the trip meter.
H
I
WARNING
■The information display at low tem-
peratures
Allow the interior of the vehicle to warm
up before using the liquid crystal infor-
mation display. At extremely low tem-
peratures, the information display
monitor may respond slowly, and display
changes may be delayed.
For example, there is a lag between the
driver’s shifting and the new gear number
appearing on the display. This lag could
cause the driver to downshift again,
causing rapid and excessive engine brak-
ing and possibly an accident resulting in
death or injury.
NOTICE
■To prevent damage to the engine and
its components
●Do not let the indicator needle of the
tachometer enter the red zone, which
indicates the maximum engine speed.
●The engine may be overheating if the
engine coolant temperature gauge is
in the red zone (H). In this case, imme-
diately stop the vehicle in a safe place,
and check the engine after it has
cooled completely. ( P.381)
Odometer and trip meter dis-
play
Page 78 of 450
762-1. Instrument cluster
■Display items
Odometer
Displays the total distance the vehicle has
been driven.
Trip meter A/trip meter B
Displays the distance the vehicle has been
driven since the meter was last reset. Trip
meters A and B can be used to record and
display different distances independently.
Distance until next engine oil change
Displays the distance the vehicle can be
driven until an oil change is necessary.
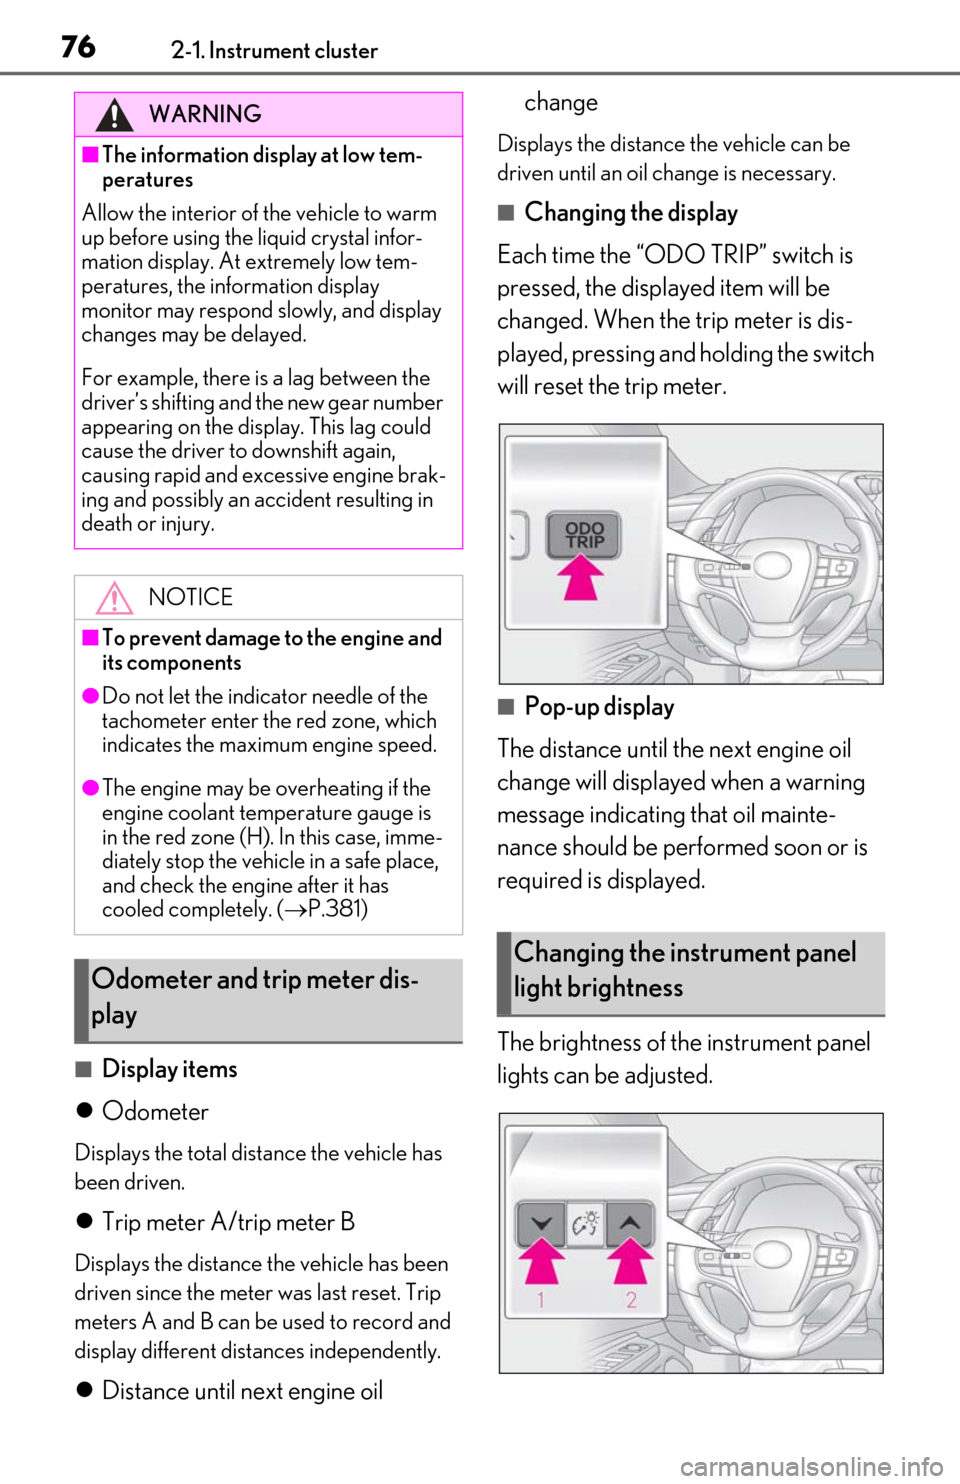
■Changing the display
Each time the “ODO TRIP” switch is
pressed, the displayed item will be
changed. When the trip meter is dis-
played, pressing and holding the switch
will reset the trip meter.
■Pop-up display
The distance until the next engine oil
change will displayed when a warning
message indicating that oil mainte-
nance should be performed soon or is
required is displayed.
The brightness of the instrument panel
lights can be adjusted.
WARNING
■The information display at low tem-
peratures
Allow the interior of the vehicle to warm
up before using the liquid crystal infor-
mation display. At extremely low tem-
peratures, the information display
monitor may respond slowly, and display
changes may be delayed.
For example, there is a lag between the
driver’s shifting and the new gear number
appearing on the display. This lag could
cause the driver to downshift again,
causing rapid and excessive engine brak-
ing and possibly an accident resulting in
death or injury.
NOTICE
■To prevent damage to the engine and
its components
●Do not let the indicator needle of the
tachometer enter the red zone, which
indicates the maximum engine speed.
●The engine may be overheating if the
engine coolant temperature gauge is
in the red zone (H). In this case, imme-
diately stop the vehicle in a safe place,
and check the engine after it has
cooled completely. ( P.381)
Odometer and trip meter dis-
play
Changing the instrument panel
light brightness
Page 84 of 450
822-1. Instrument cluster
Select to display the operational status
of the following systems:
LTA (Lane Tracing Assist) ( P.182)
Dynamic radar cruise control with
full-speed range ( P.193)
RSA (Road Sign Assist) (if
equipped) ( P.191)
■Meter display settings that can be
changed
Language
Select to change th e language displayed.
Units
Select to change the units of measure dis-
played.
Speedometer display (except F
SPORT models)
Select to set the display of the speedome-
ter to digital or analog.
Drive information 1/Drive informa-
tion 2
Select to select up to 2 items ( P.79) that
will be displayed on ea ch Drive information
screen (Drive information 1 screen and
Drive information 2 screen) respectively.
Clock
Select to switch be tween 12-hour display
and 24-hour display.
Pop-up display
Select to enable/disable some pop-up dis-
plays for each relevant system.
Accent color
Select to change the accent color on the
screen, such as the cursor color.
Rev indicator (F SPORT models)
• Select to enable/disable the rev indica-
tor.
• Select to set the engine speed at which the rev indicator (amber) will begin to be
displayed.
Rev peak (F SPORT models)
Select to enable/disable the rev peak.
Eco Driving Indicator Light
Select to enable/disable the Eco Driving
Indicator Light.
Default setting
Select to reset the meter display settings to
the default setting.
■Vehicle functions and settings that
can be changed
P.404
■Suspension of the settings display
●Some settings cannot be changed while
driving. When changing settings, park
the vehicle in a safe place.
●If a warning message is displayed, opera-
tion of the settings display will be sus-
pended.
Driving support system informa-
tion display
Settings display
WARNING
■Cautions during setting up the dis-
play
As the engine needs to be running
during setting up the display, en sure that
the vehicle is parked in a place with ade-
quate ventilation. In a closed area such as
a garage, exhaust gases including harm-
ful carbon monoxide (CO) may collect
and enter the vehicle. This may lead to
death or a serious health hazard.
Page 85 of 450

832-1. Instrument cluster
2
Vehicle status information and indicators
Displays suggestions to the driver in
the following situations. To select a
response to a displayed suggestion,
use the meter control switches.
■Suggestion to turn off the head-
lights
If the headlights are left on for a certain
amount of time with the headlight
switch in after the engine switch
has been turned off, a suggestion mes-
sage will be displayed asking if you
wish to turn the headlights off.
To turn the headlights off, select “Yes”.
If a front door is opened after the engine
switch is turned off, this suggestion mes-
sage will not be displayed.
■Customization
Some functions can be customized.
( P.404) NOTICE
■During setting up the display
To prevent battery discharge, ensure that
the engine is running while setting up the
display features.
Suggestion function
Page 87 of 450
852-1. Instrument cluster
2
Vehicle status information and indicators
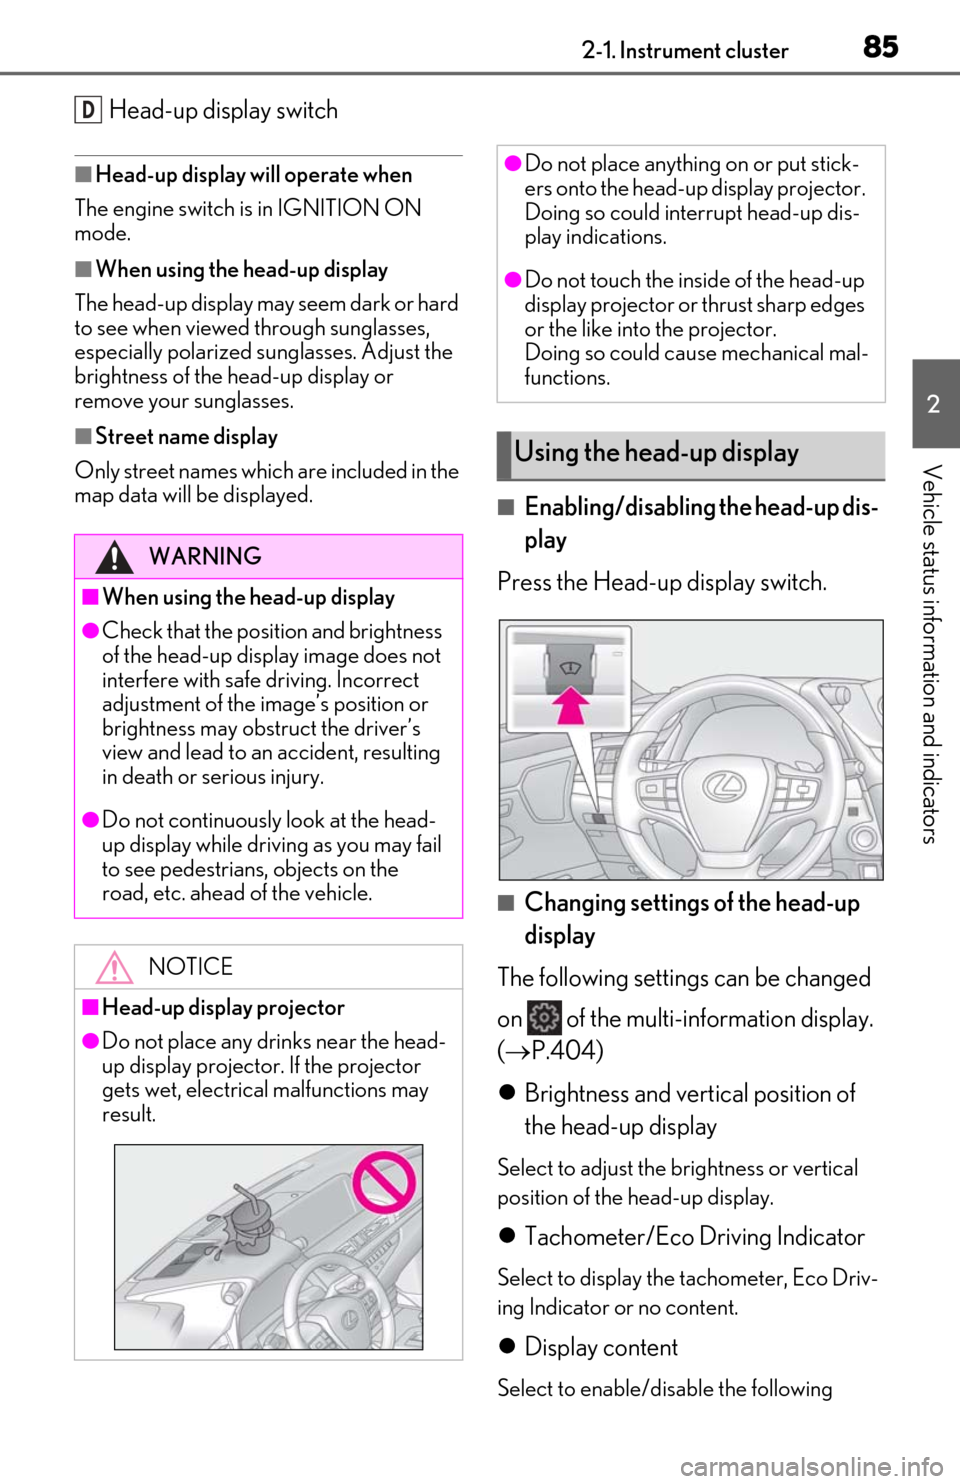
Head-up display switch
■Head-up display will operate when
The engine switch is in IGNITION ON
mode.
■When using the head-up display
The head-up display may seem dark or hard
to see when viewed through sunglasses,
especially polarized su nglasses. Adjust the
brightness of the head-up display or
remove your sunglasses.
■Street name display
Only street names whic h are included in the
map data will be displayed.
■Enabling/disabling the head-up dis-
play
Press the Head-up display switch.
■Changing settings of the head-up
display
The following settings can be changed
on of the multi-information display.
( P.404)
Brightness and vert ical position of
the head-up display
Select to adjust the brightness or vertical
position of the head-up display.
Tachometer/Eco Driving Indicator
Select to display the tachometer, Eco Driv-
ing Indicator or no content.
Display content
Select to enable/disable the following
D
WARNING
■When using the head-up display
●Check that the position and brightness
of the head-up display image does not
interfere with safe driving. Incorrect
adjustment of the image’s position or
brightness may obstruct the driver’s
view and lead to an accident, resulting
in death or serious injury.
●Do not continuously look at the head-
up display while driving as you may fail
to see pedestrians, objects on the
road, etc. ahead of the vehicle.
NOTICE
■Head-up display projector
●Do not place any drinks near the head-
up display projector. If the projector
gets wet, electrical malfunctions may
result.
●Do not place anything on or put stick-
ers onto the head-up display projector.
Doing so could interrupt head-up dis-
play indications.
●Do not touch the inside of the head-up
display projector or thrust sharp edges
or the like into the projector.
Doing so could cause mechanical mal-
functions.
Using the head-up display
Page 99 of 450
973-2. Opening, closing and locking the doors and trunk
3
Before driving
button start or wireless remote control.
Lock or unlock the doors using the
mechanical key. (P.376)
■Customization
Settings (e.g. unlocking function using a
key) can be changed.
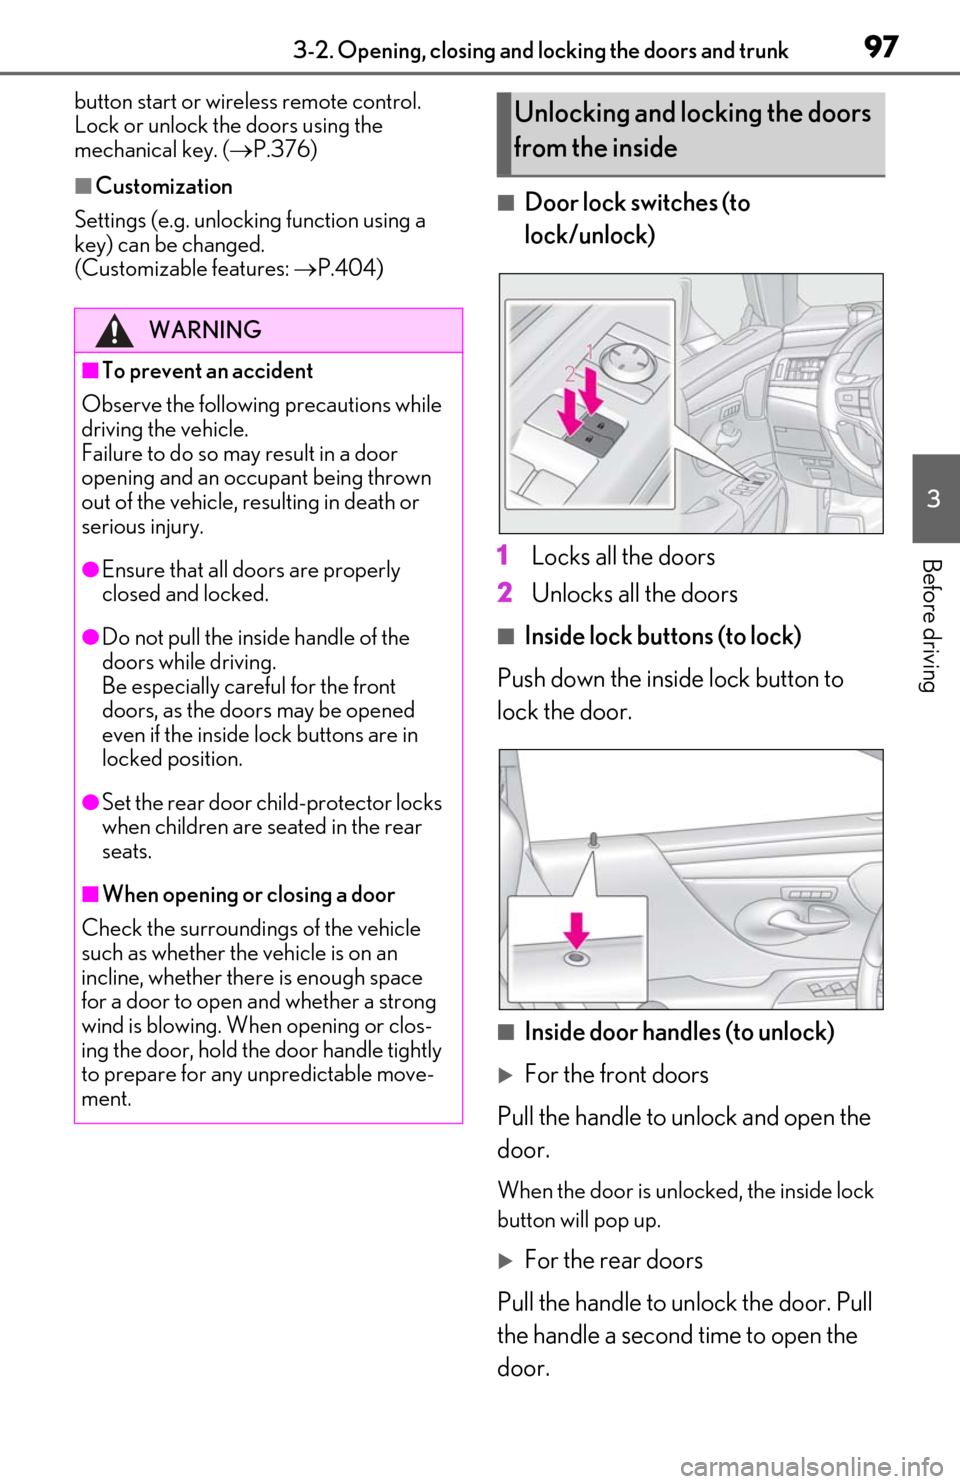
(Customizable features: P.404)■Door lock switches (to
lock/unlock)
1
Locks all the doors
2
Unlocks all the doors
■Inside lock buttons (to lock)
Push down the inside lock button to
lock the door.
■Inside door handles (to unlock)
For the front doors
Pull the handle to unlock and open the
door.
When the door is unlo cked, the inside lock
button will pop up.
For the rear doors
Pull the handle to unlock the door. Pull
the handle a second time to open the
door.
WARNING
■To prevent an accident
Observe the following precautions while
driving the vehicle.
Failure to do so may result in a door
opening and an occupant being thrown
out of the vehicle, re sulting in death or
serious injury.
●Ensure that all doors are properly
closed and locked.
●Do not pull the inside handle of the
doors while driving.
Be especially careful for the front
doors, as the doors may be opened
even if the inside lock buttons are in
locked position.
●Set the rear door ch ild-protector locks
when children are seated in the rear
seats.
■When opening or closing a door
Check the surroundings of the vehicle
such as whether the vehicle is on an
incline, whether ther e is enough space
for a door to open and whether a strong
wind is blowing. When opening or clos-
ing the door, hold the door handle tightly
to prepare for any unpredictable move-
ment.
Unlocking and locking the doors
from the inside
Page 119 of 450
1173-3. Adjusting the seats
3
Before driving
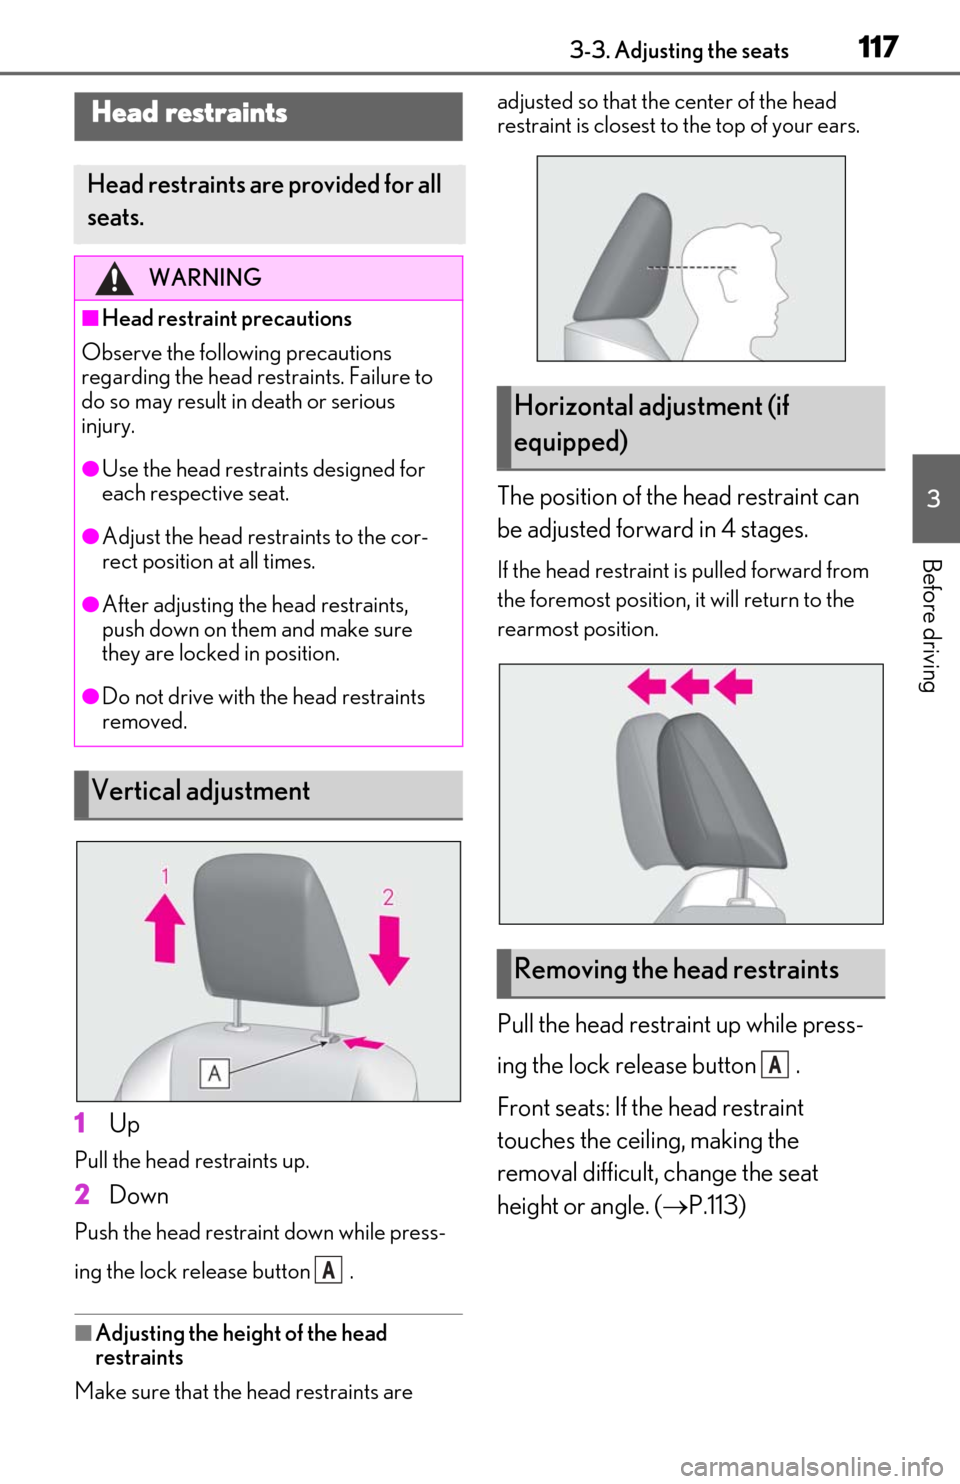
1Up
Pull the head restraints up.
2Down
Push the head restraint down while press-
ing the lock release button .
■Adjusting the height of the head
restraints
Make sure that the head restraints are adjusted so that the center of the head
restraint is closest to the top of your ears.
The position of the head restraint can
be adjusted forward in 4 stages.
If the head restraint
is pulled forward from
the foremost position, it will return to the
rearmost position.
Pull the head restraint up while press-
ing the lock release button .
Front seats: If the head restraint
touches the ceiling, making the
removal difficult, change the seat
height or angle. ( P.113)
Head restraints
Head restraints are provided for all
seats.
WARNING
■Head restraint precautions
Observe the following precautions
regarding the head re straints. Failure to
do so may result in death or serious
injury.
●Use the head restraints designed for
each respective seat.
●Adjust the head restraints to the cor-
rect position at all times.
●After adjusting the head restraints,
push down on them and make sure
they are locked in position.
●Do not drive with the head restraints
removed.
Vertical adjustment
A
Horizontal adjustment (if
equipped)
Removing the head restraints
A
Page 122 of 450
1203-4. Adjusting the steering wheel and mirrors
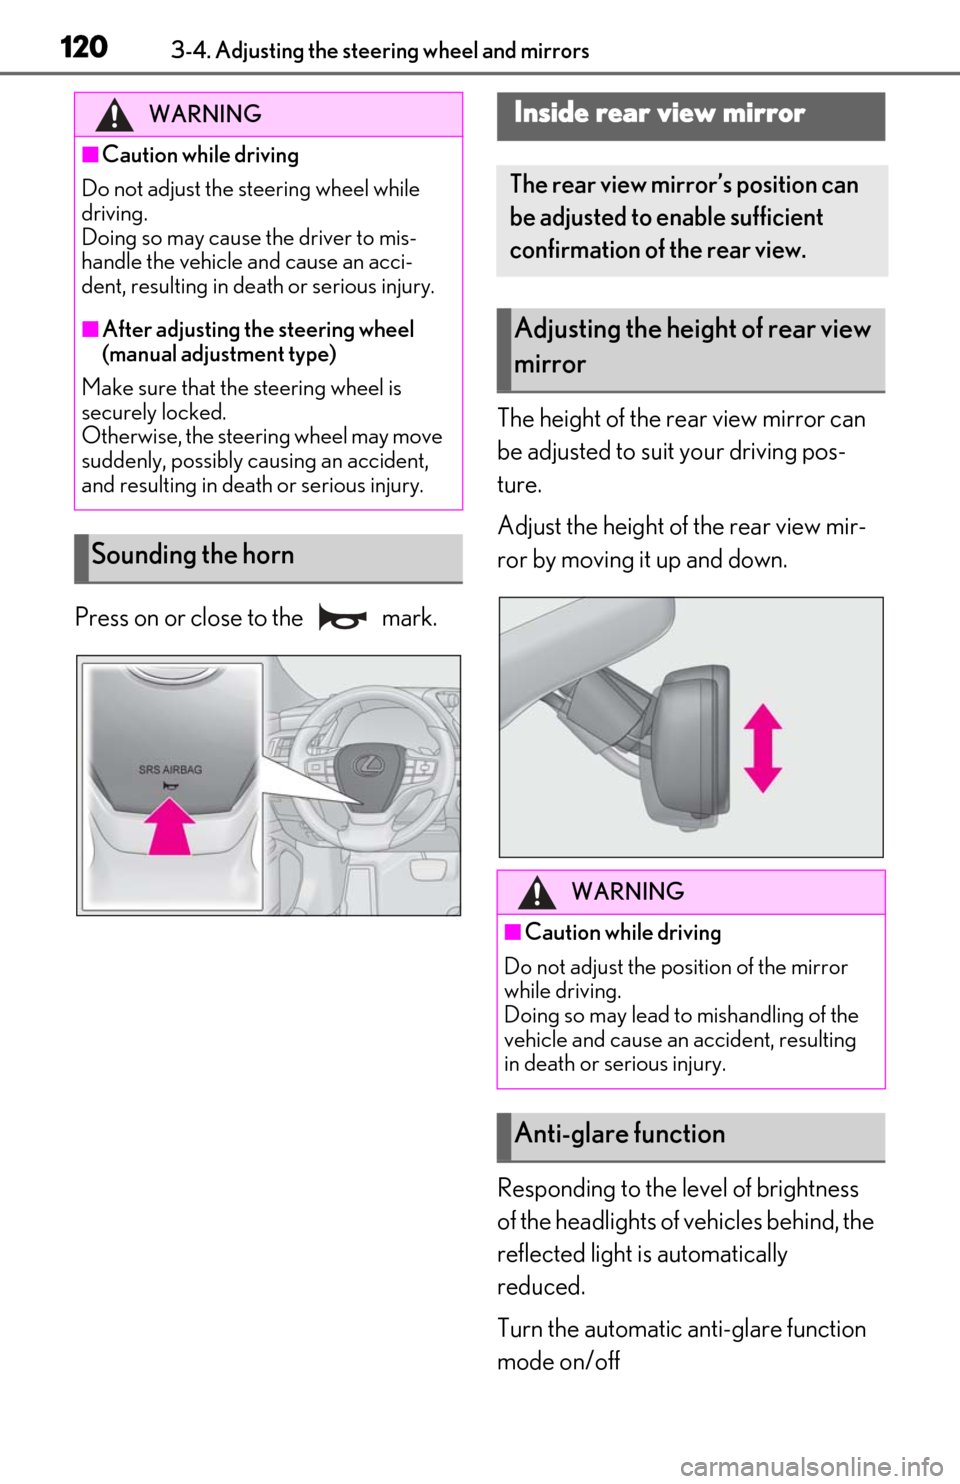
Press on or close to the mark.The height of the rear view mirror can
be adjusted to suit your driving pos-
ture.
Adjust the height of the rear view mir-
ror by moving it up and down.
Responding to the level of brightness
of the headlights of vehicles behind, the
reflected light is automatically
reduced.
Turn the automatic anti-glare function
mode on/off
WARNING
■Caution while driving
Do not adjust the steering wheel while
driving.
Doing so may cause the driver to mis-
handle the vehicle and cause an acci-
dent, resulting in death or serious injury.
■After adjusting the steering wheel
(manual adjustment type)
Make sure that the steering wheel is
securely locked.
Otherwise, the steering wheel may move
suddenly, possibly causing an accident,
and resulting in death or serious injury.
Sounding the horn
Inside rear view mirror
The rear view mirror’s position can
be adjusted to enable sufficient
confirmation of the rear view.
Adjusting the heig ht of rear view
mirror
WARNING
■Caution while driving
Do not adjust the position of the mirror
while driving.
Doing so may lead to mishandling of the
vehicle and cause an accident, resulting
in death or serious injury.
Anti-glare function