ECU Lexus GS F 2016 Workshop Manual
[x] Cancel search | Manufacturer: LEXUS, Model Year: 2016, Model line: GS F, Model: Lexus GS F 2016Pages: 628, PDF Size: 8.83 MB
Page 390 of 628
388
GS350_200t_GS F_OM_OM30E86U_(U)6-2. Maintenance
Vehicle interior
ItemsCheck points
Accelerator pedal• The accelerator pedal should move smoothly
(without uneven pedal effort or catching).
Automatic transmission “Park”
mechanism• When parked on a slope and the shift lever is in P,is the vehicle securely stopped?
Brake pedal
• Does the brake pedal move smoothly?
• Does the brake pedal have appropriate clearance
from the floor? ( →P. 5 4 9 )
• Does the brake pedal have the correct amount of free play? ( →P. 5 4 9 )
Brakes
• The vehicle should not pull to one side when the
brakes are applied.
• The brakes should work effectively.
• The brake pedal should not feel spongy.
• The brake pedal should not get too close to the floor when the brakes are applied.
Head restraints• Do the head restraints move smoothly and locksecurely?
Indicators/buzzers• Do the indicators and buzzers function properly?
Lights• Do all the lights come on?
• Are the headlights aimed correctly? ( →P. 4 3 5 )
Parking brake• Moves smoothly?
• When parked on a slope and the parking brake is
on, is the vehicle securely stopped?
Seat belts• Do the seat belts operate smoothly?
• The seat belts should not be damaged.
Seats• Do the seat controls operate properly?
Steering wheel
• Does the steering wheel rotate smoothly?
• Does the steering wheel have the correct amountof free play?
• There should not be any strange sounds coming from the steering wheel.
Page 402 of 628

400
GS350_200t_GS F_OM_OM30E86U_(U)6-3. Do-it-yourself maintenance
■Installing the clips
Push up center portion
Insert
Press
1
2
3
NOTICE
■Checking the engine compartment cover after installation
Make sure that the cover is securely installed in its original position.
Page 441 of 628
GS350_200t_GS F_OM_OM30E86U_(U)
4396-3. Do-it-yourself maintenance
6
Maintenance and care
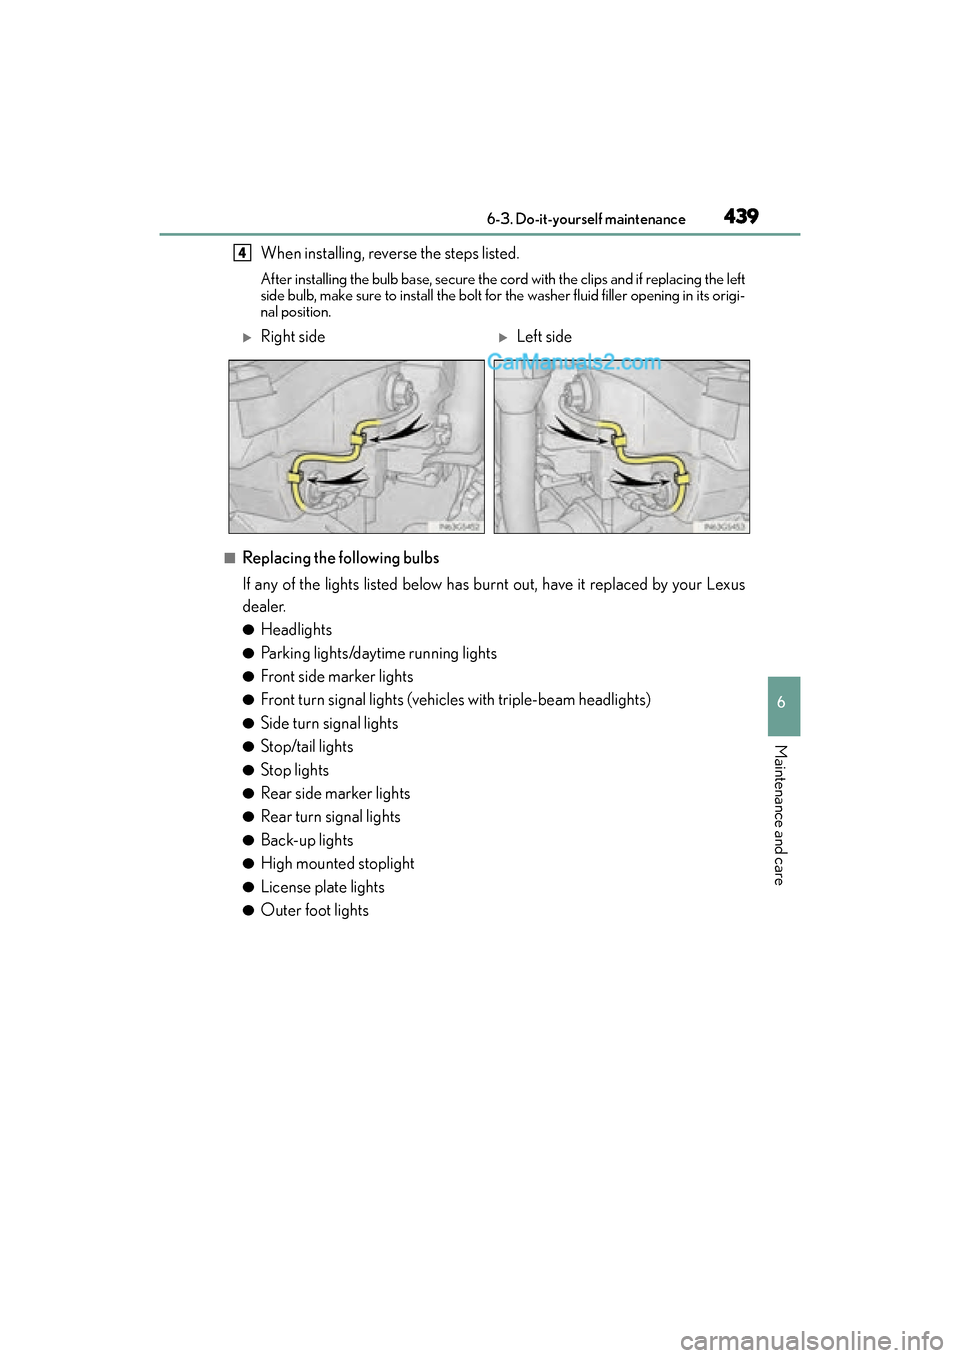
When installing, reverse the steps listed.
After installing the bulb base, secure the cord with the clips and if replacing the left
side bulb, make sure to install the bolt for the washer fluid filler opening in its origi-
nal position.
■Replacing the following bulbs
If any of the lights listed below has burnt out, have it replaced by your Lexus
dealer.
●Headlights
●Parking lights/daytime running lights
●Front side marker lights
●Front turn signal lights (vehicles with triple-beam headlights)
●Side turn signal lights
●Stop/tail lights
●Stop lights
●Rear side marker lights
●Rear turn signal lights
●Back-up lights
●High mounted stoplight
●License plate lights
●Outer foot lights
4
�XRight side�XLeft side
Page 442 of 628
440
GS350_200t_GS F_OM_OM30E86U_(U)6-3. Do-it-yourself maintenance
■LED Lights
The lights other than the front turn signal lig
ht (vehicles with single-beam headlights) and
outer foot lights each consist of a number of LEDs. If any of the LEDs burn out, take your
vehicle to your Lexus dealer to have the light replaced.
■Condensation build-up on the inside of the lens
Temporary condensation build-up on the inside of the headlight lens does not indicate a
malfunction. Contact your Lexus dealer for more information in the following situations:
●Large drops of water have built up on the inside of the lens.
●Water has built up inside the headlight.
■When replacing light bulbs
→ P. 4 3 4
WA R N I N G
■Replacing light bulbs
●Turn off the lights. Do not attempt to replace the bulb immediately after turning off the
lights.
The bulbs become very hot and may cause burns.
●Do not touch the glass portion of the light bulb with bare hands. When it is unavoid-
able to hold the glass portion, use and hold with a clean dry cloth to avoid getting
moisture and oils on the bulb.
Also, if the bulb is scratched or dropped, it may blow out or crack.
●Fully install light bulbs and any parts used to secure them. Failure to do so may result
in heat damage, fire, or water entering th e headlight unit. This may damage the head-
lights or cause condensation to build up on the lens.
■To prevent damage or fire
●Make sure bulbs are fully seated and locked.
●Check the wattage of the bulb before installing to prevent heat damage.
Page 445 of 628

443
GS350_200t_GS F_OM_OM30E86U_(U)
7
When trouble arises
7-1. Essential information
If your vehicle has to be stopped in an emergency
Steadily step on the brake pedal with both feet and firmly depress it.
Do not pump the brake pedal repeatedly as this will increase the effort required to
slow the vehicle.
Shift the shift lever to N.
�XIf the shift lever is shifted to N
After slowing down, stop the vehicle in a safe place by the road.
Stop the engine.
�XIf the shift lever cannot be shifted to N
Keep depressing the brake pedal with both feet to reduce vehicle speed as
much as possible.
To stop the engine, press and hold
the engine switch for 2 consecutive
seconds or more, or press it briefly 3
times or more in succession.
Stop the vehicle in a safe place by the road.
Only in an emergency, such as if it becomes impossible to stop the vehicle in
the normal way, stop the vehicle using the following procedure:
1
2
3
4
3
Press and hold for 2 seconds or more
or press briefly 3 times or more
4
WA R N I N G
■If the engine has to be turned off while driving
Power assist for the brakes and steering wheel will be lo st, making the brake pedal
harder to depress and the steering wheel heavier to turn. Decelerate as much as possi-
ble before turning off the engine.
5
Page 447 of 628

4457-2. Steps to take in an emergency
GS350_200t_GS F_OM_OM30E86U_(U)
7
When trouble arises
If your vehicle is transported by a flatbed truck, it should be tied down at the loca-
tions shown in the illustration.
If you use chains or cables to tie down your vehicle, the angles shaded in black
must be 45 °.
Do not overly tighten the tie downs or the vehicle may be damaged.
If a tow truck is not available in an emergency, your vehicle may be temporarily
towed using cables or chains secured to the emergency towing eyelets. This
should only be attempted on hard surfaced roads for at most 50 miles (80 km)
at under 18 mph (30 km/h).
A driver must be in the vehicle to steer and operate the brakes. The vehicle’s
wheels, drive train, axles, steering and brakes must be in good condition.
Using a flatbed truck
�XGS350/GS200t�XGS F
�XGS350/GS200t�XGS F
Emergency towing
Page 449 of 628

4477-2. Steps to take in an emergency
GS350_200t_GS F_OM_OM30E86U_(U)
7
When trouble arises
Tighten down the towing eyelet
securely using a wheel nut wrench
or hard metal bar.
Securely attach cables or chains to the towing eyelet.
Take care not to damage the vehicle body.
Enter the vehicle being towed and start the engine.
If the engine does not start, turn the engine switch to IGNITION ON mode.
Shift the shift lever to N and release the parking brake.
When the shift lever cannot be shifted: →P. 5 1 7
■While towing
If the engine is not running, the power assist for the brakes and steering will not function,
making steering and braking more difficult.
■Wheel nut wrench
Wheel nut wrench is installed in trunk. ( →P. 4 9 2 , 5 0 3 )
4
5
6
7
Page 450 of 628

4487-2. Steps to take in an emergency
GS350_200t_GS F_OM_OM30E86U_(U)
WA R N I N G
Observe the following precautions.
Failure to do so may result in death or serious injury.
■When towing the vehicle
■While towing
●When towing using cables or chains, avoid sudden starts, etc. which place excessive
stress on the towing eyelets, cables or chains. The towing eyelets, cables or chains
may become damaged, broken debris may hit people, and cause serious damage.
●Do not turn the engine switch off.
There is a possibility that the steering wh eel is locked and cannot be operated.
■Installing towing eyelets to the vehicle
Make sure that towing eyelets are installed securely.
If not securely installed, towing eyelets may come loose during towing.
2WD models:
Be sure to transport the vehicle with all four
wheels raised off the ground. If the vehicle is
towed with the tires contacting the ground, the
drivetrain and related parts may be damaged
or an accident may occur due to a change in
direction of the vehicle.
AW D m o d e l s :
Be sure to transport the vehicle with all four
wheels raised off the ground. If the vehicle is
towed with the tires contacting the ground, the
drivetrain or related parts may be damaged,
the vehicle may fly off the truck.
Page 451 of 628
4497-2. Steps to take in an emergency
GS350_200t_GS F_OM_OM30E86U_(U)
7
When trouble arises
NOTICE
■To prevent damage to the vehicle when towing using a wheel-lift type truck
●Do not tow the vehicle from the rear when the engine switch is off. The steering lock
mechanism is not strong enough to hold the front wheels straight.
●When raising the vehicle, ensure adequate ground clearance for towing at the oppo-
site end of the raised vehicle. Without adequate clearance, the vehicle could be dam-
aged while being towed.
■To prevent damage to the vehicle when towing with a sling-type truck
Do not tow with a sling-type truck, either from the front or rear.
■To prevent damage to the vehicle during emergency towing
Do not secure cables or chains to the suspension components.
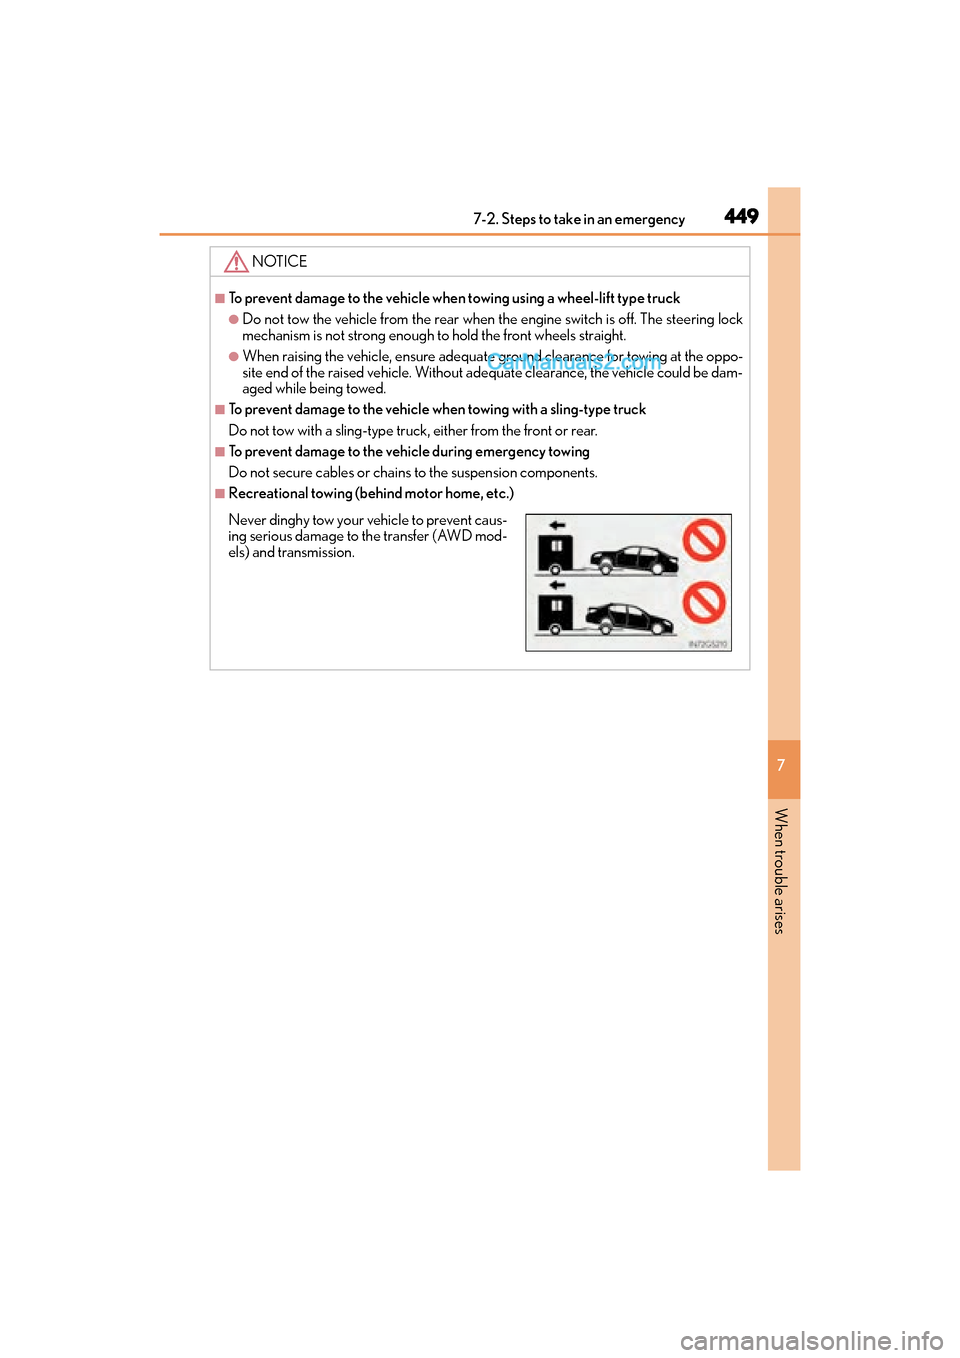
■Recreational towing (behind motor home, etc.)
Never dinghy tow your vehicle to prevent caus-
ing serious damage to the transfer (AWD mod-
els) and transmission.
Page 458 of 628
4567-2. Steps to take in an emergency
GS350_200t_GS F_OM_OM30E86U_(U)
■SRS warning light
This warning light system monitors the airbag sensor assembly, front impact sensors, side
impact sensors (front door), side impact sensors (front), side impact sensors (rear),
driver’s seat position sensor, driver’s seat belt buckle switch, front passenger occupant
classification system, “AIR BAG ON” indicat or light, “AIR BAG OFF” indicator light,
front passenger’s seat belt buckle switch, seat belt pretensioner assemblies, airbags,
interconnecting wiring and power sources. (→ P. 4 3 )
■Front passenger detection sensor, seat belt reminder and warning buzzer
If luggage is placed on the front passenger seat, the front passenger detection sensor
may cause the warning light to flash and the warning buzzer to sound even if a passenger
is not sitting in the seat.
■If the malfunction indicator lamp comes on while driving
First check the following:
●Is the fuel tank empty?
If it is, fill the fuel tank immediately.
●Is the fuel tank cap loose?
If it is, tighten it securely.
The light will go off after several driving trips.
If the light does not go off even after several trips, contact your Lexus dealer as soon as
possible.
■Electric power steering system warning light (warning buzzer)
When the battery charge becomes insufficient or the voltage temporarily drops, the
electric power steering system warning light may come on and the warning buzzer may
sound.
■When the tire pressure warning light comes on
Check the tire inflation pressure and adjust to the appropriate level. Initializing the tire
pressure warning system will not turn off the tire pressure warning light.
■The tire pressure warning light may come on due to natural causes
The tire pressure warning light may come on due to natural causes such as natural air
leaks and tire inflation pressure changes caused by temperature. In this case, adjusting
the tire inflation pressure will turn off the warning light (after a few minutes).
■When a tire is replaced with a spare tire
The compact spare tire is not equipped with a tire pressure warning valve and transmit-
ter. If a tire goes flat, the tire pressure warning light will not turn off even though the flat
tire has been replaced with the spare tire.
■Conditions that the tire pressure warning system may not function properly
→ P. 4 1 8
■If the tire pressure warning light freque ntly comes on after blinking for 1 minute
If the tire pressure warning light frequently comes on after blinking for 1 minute when the
engine switch is turned to IGNITION ON mode, have it checked by your Lexus dealer.