engine Lexus GS F 2017 Quick Guide
[x] Cancel search | Manufacturer: LEXUS, Model Year: 2017, Model line: GS F, Model: Lexus GS F 2017Pages: 96, PDF Size: 3.88 MB
Page 2 of 96

GS F_QG_OM30G10U_(U)
1
The Quick Guide is not intended as a substitute for your Owner’s
Manual. We strongly encourage you to review the Owner’s
Manual and supplementary manuals so you will have a better
understanding of your vehicle’ s capabilities and limitations.
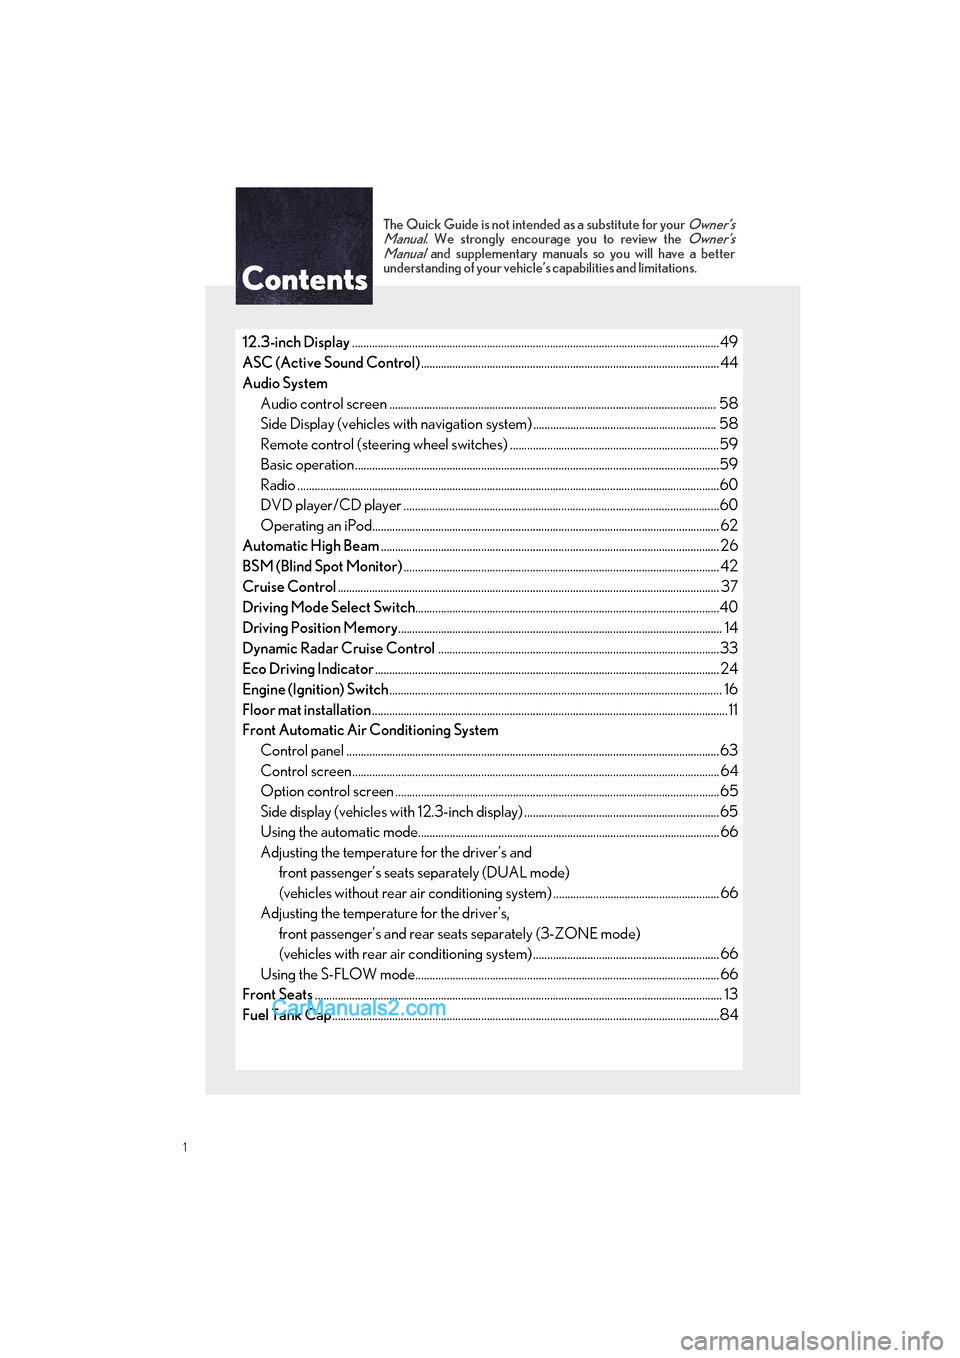
12.3-inch Display............................................................................................................................... .49
ASC (Active Sound Control) ........................................................................................................ 44
Audio System Audio control screen ........................................................................................................... ....... 58
Side Display (vehicles with navigation system) ................................................................ 58
Remote control (steering wheel switches) .........................................................................59
Basic operation ................................................................................................................ ...............59
Radio ...................................................................................................................................................60
DVD player/CD player ........................................................................................................... ...60
Operating an iPod.............................................................................................................. ........... 62
Automatic High Beam ...................................................................................................................... 26
BSM (Blind Spot Monitor) .............................................................................................................. 42
Cruise Control ..................................................................................................................................... 37
Driving Mode Select Switch ..........................................................................................................40
Driving Position Memory ................................................................................................................. 14
Dynamic Radar Cruise Control ..................................................................................................33
Eco Driving Indicator ........................................................................................................................ 24
Engine (Ignition) Switch .................................................................................................................... 16
Floor mat installation ............................................................................................................................11
Front Automatic Air Conditioning System
Control panel .................................................................................................................. ................63
Control screen................................................................................................................. ............... 64
Option control screen .......................................................................................................... .......65
Side display (vehicles with 12.3-inch display) ....................................................................65
Using the automatic mode....................................................................................................... .. 66
Adjusting the temperature for the driver’s and front passenger’s seats separately (DUAL mode)
(vehicles without rear air conditioning system) .......................................................... 66
Adjusting the temperature for the driver’s, front passenger’s and rear se ats separately (3-ZONE mode)
(vehicles with rear air conditioning system) ................................................................. 66
Using the S-FLOW mode.......................................................................................................... 66
Front Seats .............................................................................................................................................. 13
Fuel Tank Cap ............................................................................................................................... ........84
Page 7 of 96

6
GS F_QG_OM30G10U_(U)
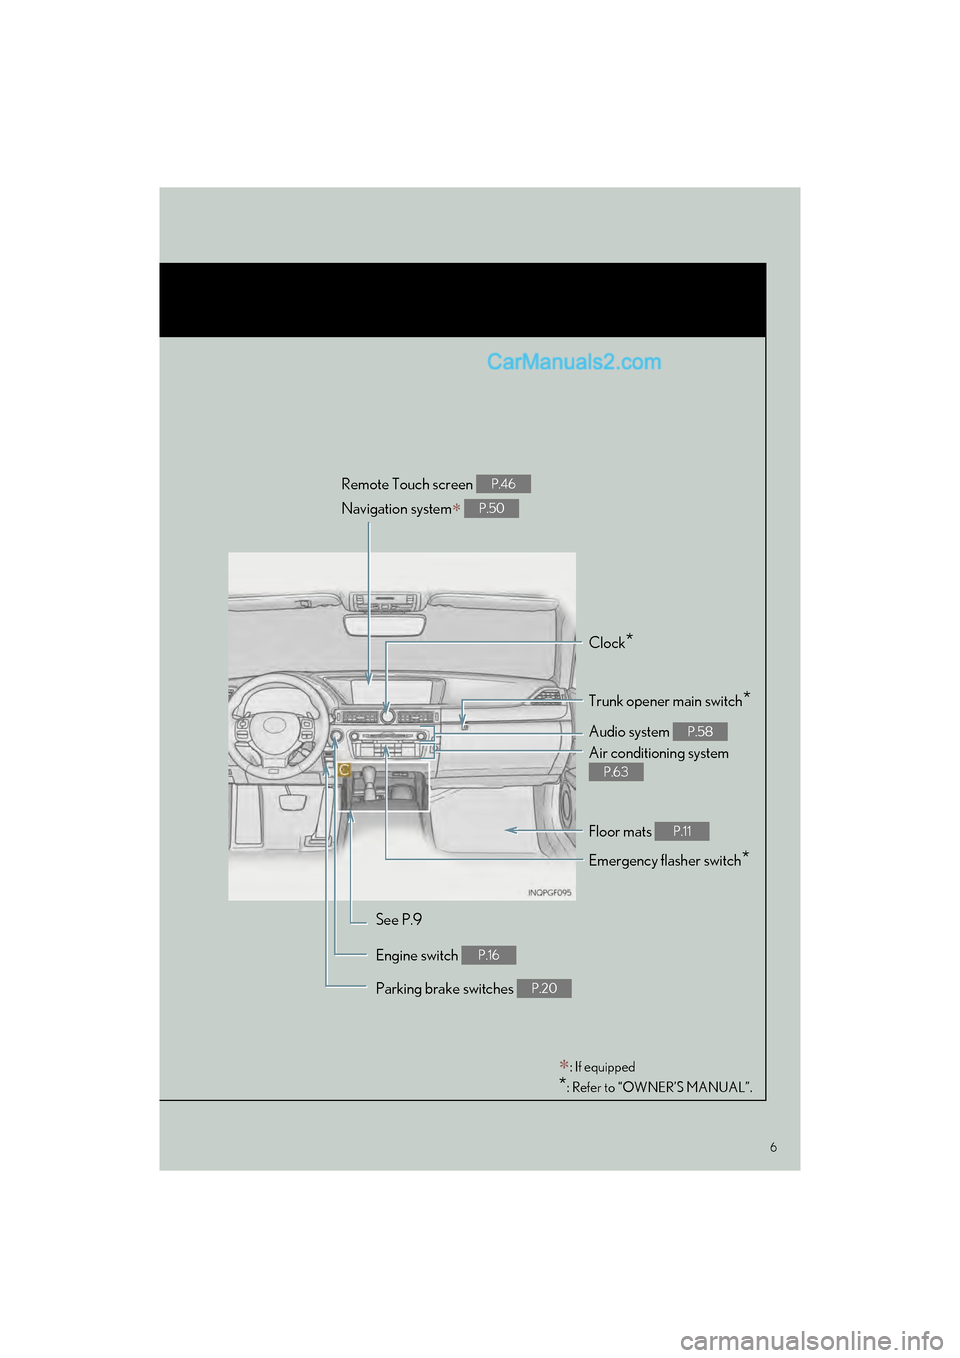
Remote Touch screen
Navigation system
P.46
P.50
Clock*
Trunk opener main switch*
Audio system P.58
Air conditioning system
P.63
Emergency flasher switch*
See P.9
Engine switch
P.16
Parking brake switches P.20
: If equipped
*: Refer to “OWNER’S MANUAL”.
Floor mats P.11
Page 13 of 96

12
GS F_QG_OM30G10U_(U)
Smart Access System with Push-button Start
■Entering and exiting the vehicle
Grip the driver’s door handle to unlock
the door. Grip the passenger’s door
handle to unlock all the doors.
*
Make sure to touch the sensor on the
back of the handle.
The doors cannot be unlocked for
3 seconds after the doors are locked.
*: The door unlock settings can be
changed.
Touch the lock sensor (the indentation
on the upper part of the door handle)
to lock all the doors.Check that the door is securely
locked.
■ Opening the trunk
While carrying the electronic key, press the
button.
When all the doors are unlocked with
the power door lock system, the trunk
can be opened without carrying the
electronic key.
If the vehicle is equipped with a power
trunk opener and closer, the trunk lid
automatically opens fully.
The following operations can be performed simply by carrying the electronic key (includ-
ing the card key) on your person, for exampl e in your pocket. The driver should always
carry the electronic key.
For details on starting the engine, see page 16.
1
2
For details on what to do when the electronic key does not operate properly, see page 88.
Page 15 of 96

14
GS F_QG_OM30G10U_(U)
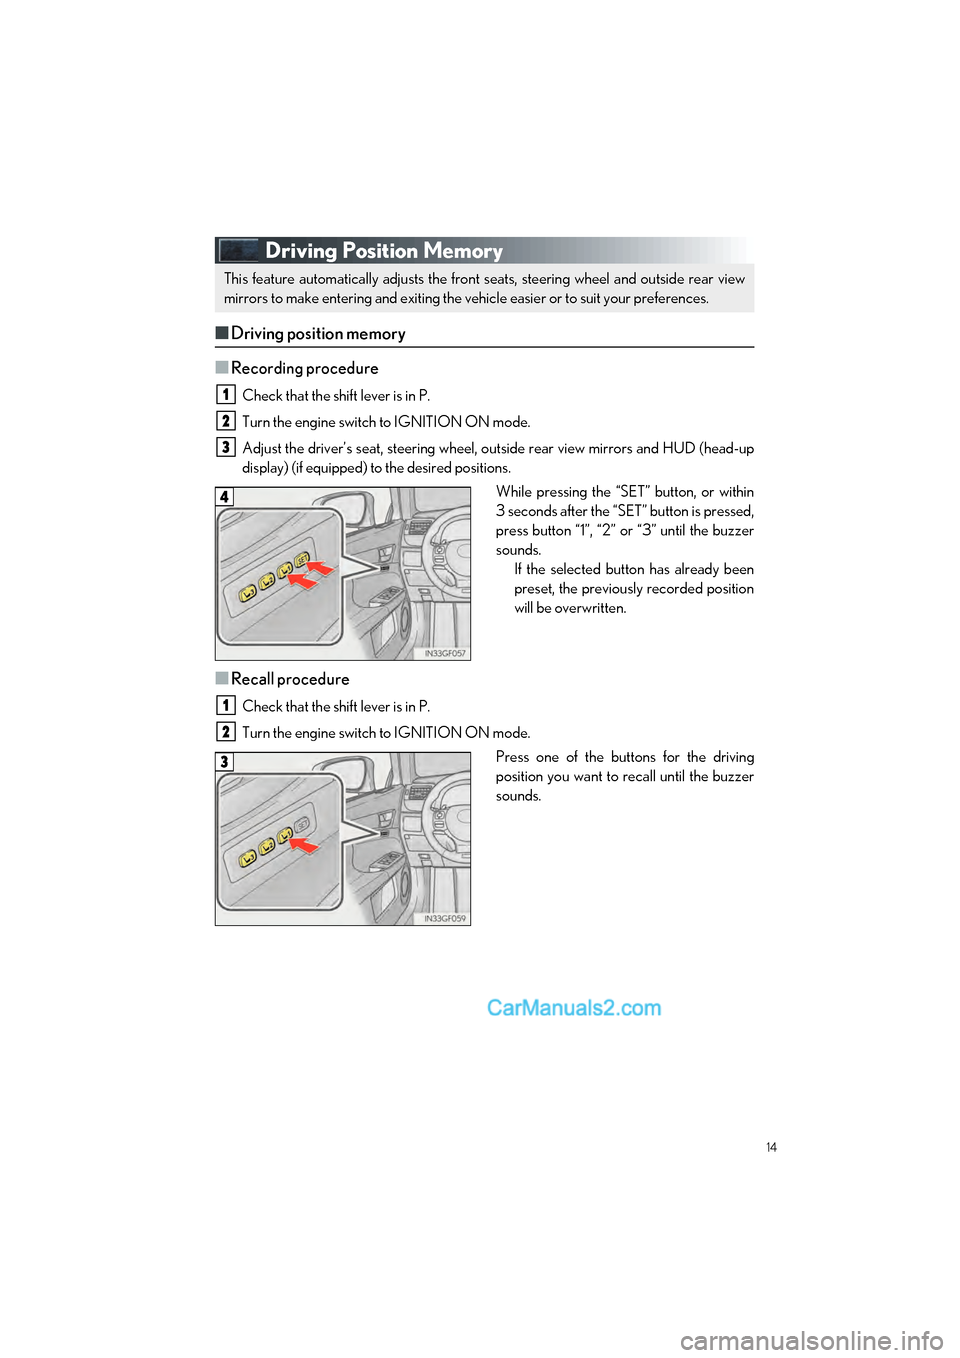
Driving Position Memory
■Driving position memory
■
Recording procedure
Check that the shift lever is in P.
Turn the engine switch to IGNITION ON mode.
Adjust the driver’s seat, steering wheel, outside rear view mirrors and HUD (head-up
display) (if equipped) to the desired positions. While pressing the “SET” button, or within
3 seconds after the “SET” button is pressed,
press button “1”, “2” or “3” until the buzzer
sounds.If the selected button has already been
preset, the previously recorded position
will be overwritten.
■Recall procedure
Check that the shift lever is in P.
Turn the engine switch to IGNITION ON mode.
Press one of the buttons for the driving
position you want to recall until the buzzer
sounds.
This feature automatically adjusts the front seats, steering wheel and outside rear view
mirrors to make entering and exiting the vehicle easier or to suit your preferences.
1
2
3
4
1
2
3
Page 16 of 96

15
GS F_QG_OM30G10U_(U)
■Memory recall function (driver’s side only)
Each electronic key (including a card key) can be registered to recall your preferred driving
position.
■Registering procedure
Check that the shift lever is in P.
Turn the engine switch to IGNITION ON mode.
Recall the driving position that you want to record.
While pressing the recalled button, press
and hold the door lock switch (either lock
or unlock) until the buzzer sounds. If the button could not be registered, the
buzzer sounds continuously for approxi-
mately 3 seconds.1
2
3
4
Page 17 of 96

16
GS F_QG_OM30G10U_(U)
Engine (Ignition) Switch
■Starting the engine
Press the parking brake switch to
check that the parking brake is set.
( P. 2 0 )
Parking brake indicator will come on.
Check that the shift lever is set in P.
Firmly depress the brake pedal.
and a message will be dis-
played on the multi-information dis-
play. If it is not displayed, the engine
cannot be started.
Press the engine switch shortly and
firmly. When operating the engine switch,
one short, firm press is enough.
It is not necessary to press and hold
the switch.
The engine will crank until it starts or
for up to 30 seconds, whichever is
less.
Continue depressing the brake pedal
until the engine is completely started.
The engine can be started from any
engine switch mode.
Performing the following operations when carrying the electronic key on your person
starts the engine or changes engine switch modes.
1
2
3
4
Page 18 of 96

17
GS F_QG_OM30G10U_(U)
■Stopping the engine
Stop the vehicle.
Set the parking brake ( P.20), and shift the shift lever to P.
Press the engine switch.
Release the brake pedal and check that “POWER ON” on the multi-information dis-
play is off.
■ Changing engine switch modes
Modes can be changed by pressing the engine switch with brake pedal released. (The mode
changes each time the switch is pressed.)
Off
*
The emergency flashers can be used.
“POWER ON” will not be displayed on
the multi-information display.
ACCESSORY mode Some electrical components such as the
audio system can be used.
“POWER ON” will be displayed on the
multi-information display.
IGNITION ON mode All electrical components can be used.
“POWER ON” will be displayed on the
multi-information display.
*: If the shift lever is in a position other than
P when turning off the engine, the
engine switch will be turned to ACCES-
SORY mode, not to off.
1
2
3
4
Page 19 of 96

18
GS F_QG_OM30G10U_(U)
■If your vehicle has to be stopped in an emergency
Only in an emergency, such as if it becomes impossible to stop the vehicle in the normal way,
stop the vehicle using the following procedure:
Steadily step on the brake pedal with both feet and firmly depress it.
Do not pump the brake pedal repeatedly as th is will increase the effort required to slow
the vehicle.
Shift the shift lever to N.
If the shift lever is shifted to N
After slowing down, stop the vehicle in a safe place by the road.
Stop the engine.
If the shift lever cannot be shifted to N
Keep depressing the brake pedal with both feet to reduce vehicle speed as much as
possible.
To stop the engine, press and hold the
engine switch for 2 consecutive seconds or
more, or press it briefly 3 times or more in
succession.
Stop the vehicle in a safe place by the road.
1
2
3
4
3
Press and hold for 2 seconds or more
or press briefly 3 times or more
4
5
Page 26 of 96

25
GS F_QG_OM30G10U_(U)
Headlights
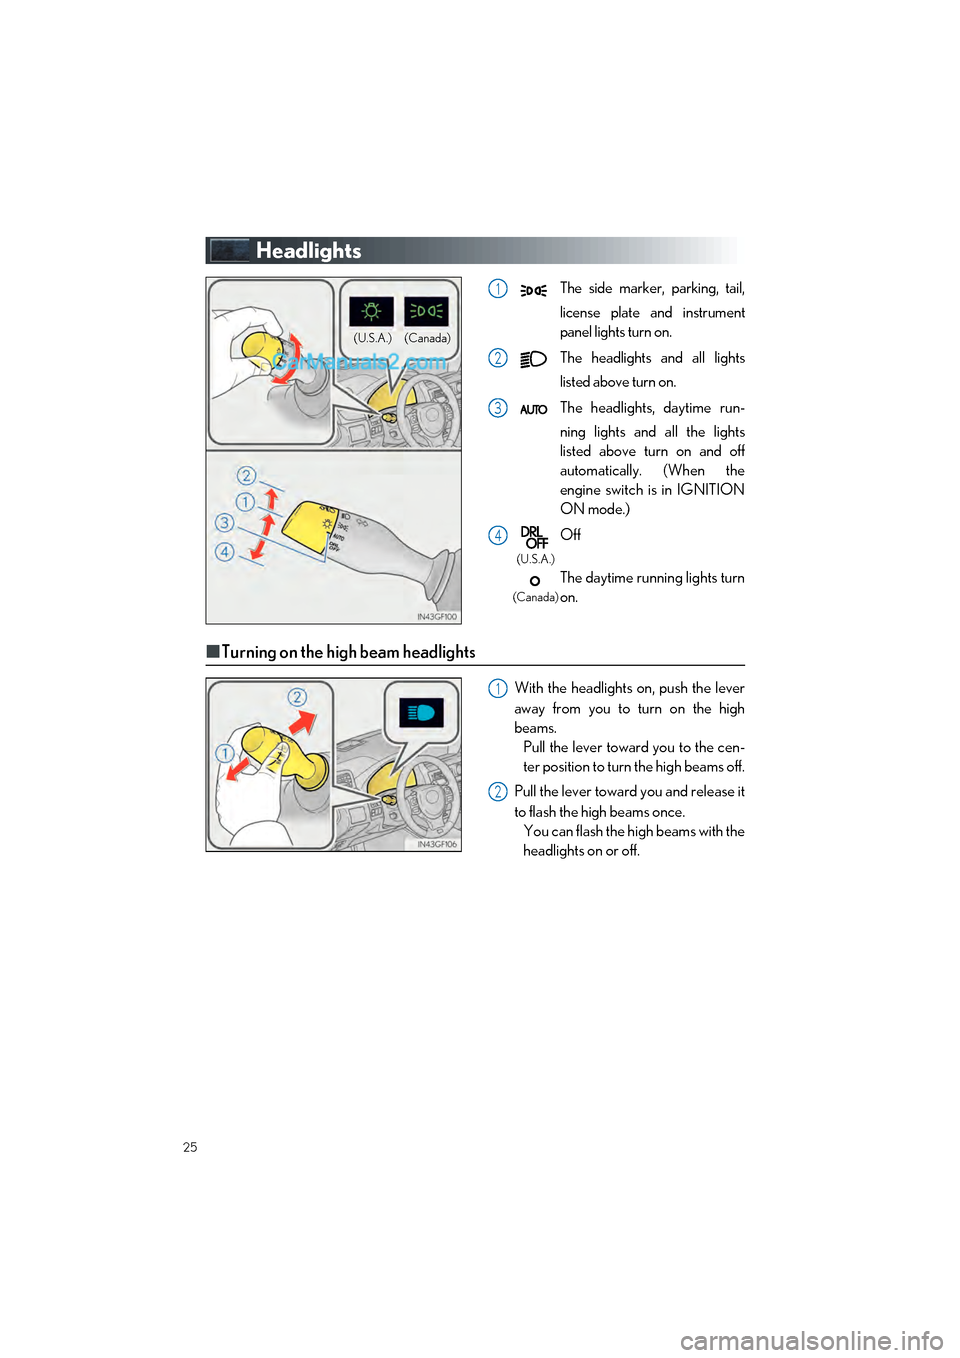
The side marker, parking, tail,
license plate and instrument
panel lights turn on.
The headlights and all lights
listed above turn on.
The headlights, daytime run-
ning lights and all the lights
listed above turn on and off
automatically. (When the
engine switch is in IGNITION
ON mode.)
Off
The daytime running lights turn
on.
■Turning on the high beam headlights
With the headlights on, push the lever
away from you to turn on the high
beams.
Pull the lever toward you to the cen-
ter position to turn the high beams off.
Pull the lever toward you and release it
to flash the high beams once. You can flash the high beams with the
headlights on or off.
(Canada)
(U.S.A.)
1
2
3
4
(U.S.A.)
(Canada)
1
2
Page 33 of 96

32
GS F_QG_OM30G10U_(U)
LDA (Lane Departure Alert with
steering control) (if equipped)
■Turning LDA system on
Press the LDA switch to turn the LDA sys-
tem on.
The LDA indicator illuminates and a
message is displayed on the multi-infor-
mation display.
Press the LDA switch again to turn the
LDA system off.
When the LDA system is turned on or
off, operation of the LDA system contin-
ues in the same condition the next time
the engine is started.
When driving on highways and freeways with wh ite (yellow) lines, this function alerts the
driver when the vehicle might depart from it s lane and provides assistance by operating
the steering wheel to keep the vehicle in its lane.
The LDA system recognizes visible white (ye llow) lines with the camera sensor on the
upper portion of the front windshield.