Lexus GS300 2003 Electrical Components
GS300 2003
Lexus
Lexus
https://www.carmanualsonline.info/img/36/13073/w960_13073-0.png
Lexus GS300 2003 Electrical Components
Trending: warning lights, fuse box, fog light, heater, oil, maintenance, power steering
Page 11 of 22
It is a good idea to purchase a set of spare fuses and keep them
in your vehicle for emergencies.
If the new fuse immediately blows out, there is a problem with
the electrical system. Have your Lexus dealer correct it as
soon as possible.
CAUTION
Never use a fuse with a higher amperage rating, or any
other object, in place of a fuse. This may cause
extensive damage and possibly a fire.
CHECKING THE CARTRIDGE TYPE
FUSES
64G019a
�Engine compartment
Page 12 of 22
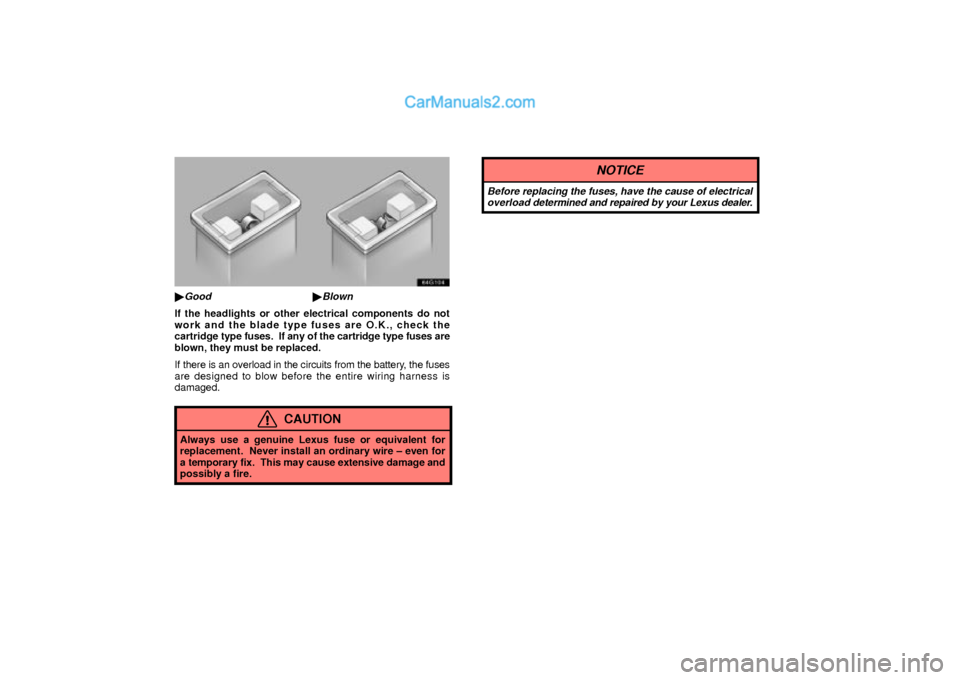
64g104
�Good�Blown
If the headlights or other electrical components do not
work and the blade type fuses are O.K., check the
cartridge type fuses. If any of the cartridge type fuses are
blown, they must be replaced.
If there is an overload in the circuits from the battery, the fuses
are designed to blow before the entire wiring harness is
damaged.
CAUTION
Always use a genuine Lexus fuse or equivalent for
replacement. Never install an ordinary wire ± even for
a temporary fix. This may cause extensive damage and
possibly a fire.
NOTICE
Before replacing the fuses, have the cause of electrical
overload determined and repaired by your Lexus dealer.
Page 13 of 22

ADDING WASHER FLUID
64G009
If the washer tank becomes nearly empty, add washer
fluid.
You may use plain water as washer fluid. However, in cold
areas where temperatures range below the freezing point, use
washer fluid containing antifreeze. This product is available at
your Lexus dealer and most auto parts stores. Follow the
manufacturer's directions for how much to mix with water.
NOTICE
Do not use engine antifreeze or any other substitute
because it may damage your vehicle's paint.
CHECKING THE HEADLIGHT AIM
64G020d
� 1Beam angle gauge
(vertical movement for low beam)
2Beam angle gauge
(horizontal movement for low beam)
3Beam angle gauge
(vertical movement for high beam)
4Beam angle gauge
(horizontal movement for high beam)
Before checking the headlight aim:
1. Be sure that the body around the headlight is not deformed.
2. Park the vehicle on a level spot.
3. The driver gets into the driver's seat and puts the vehicle in
a state readying for a driving (with a full tank).
4. Bounce the vehicle several times.
Page 14 of 22
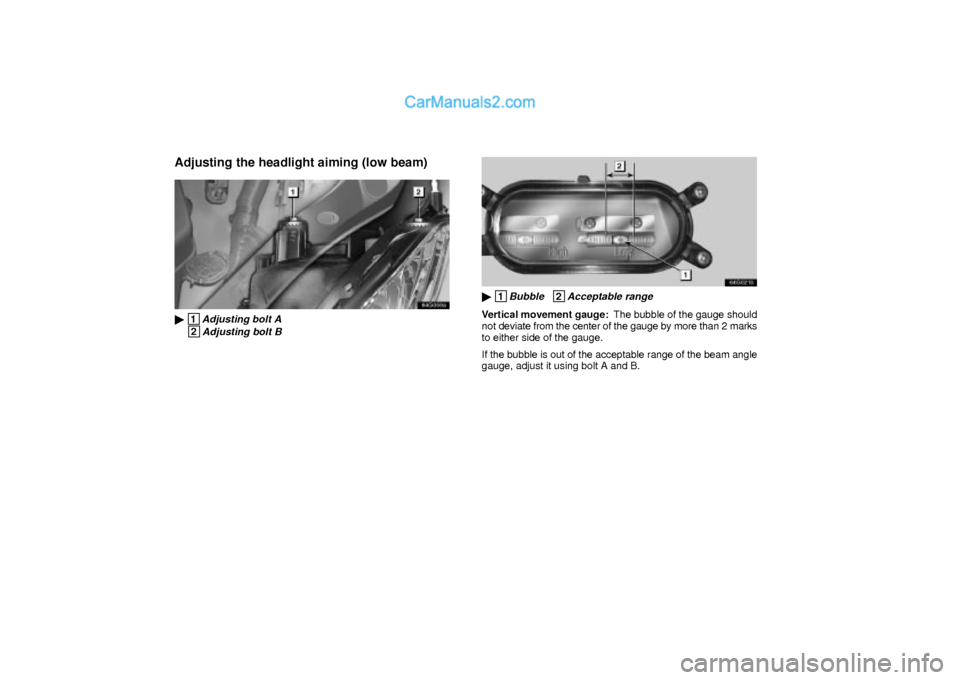
Adjusting the headlight aiming (low beam)
64g059a
� 1Adjusting bolt A
2Adjusting bolt B
64G021b
� 1Bubble 2Acceptable range
Vertical movement gauge: The bubble of the gauge should
not deviate from the center of the gauge by more than 2 marks
to either side of the gauge.
If the bubble is out of the acceptable range of the beam angle
gauge, adjust it using bolt A and B.
Page 15 of 22
64G079a
1. Turn the bolt A in either direction using a Phillips±head
screwdriver. At this time, keep the turning direction and
number of turns in mind.
64g078a
2. Turn the bolt B the same number of turns and in the same
direction as step 1 using a Phillips±head screwdriver.
Page 16 of 22
64G022a
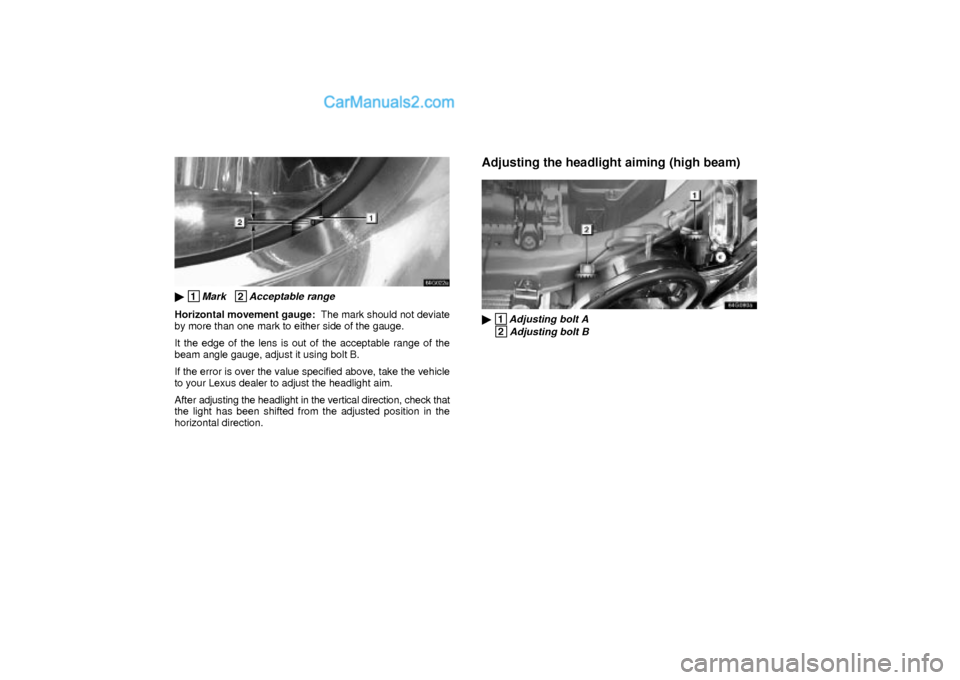
� 1Mark 2Acceptable range
Horizontal movement gauge: The mark should not deviate
by more than one mark to either side of the gauge.
It the edge of the lens is out of the acceptable range of the
beam angle gauge, adjust it using bolt B.
If the error is over the value specified above, take the vehicle
to your Lexus dealer to adjust the headlight aim.
After adjusting the headlight in the vertical direction, check that
the light has been shifted from the adjusted position in the
horizontal direction.
Adjusting the headlight aiming (high beam)
64g080a
� 1Adjusting bolt A
2Adjusting bolt B
Page 17 of 22
64G081
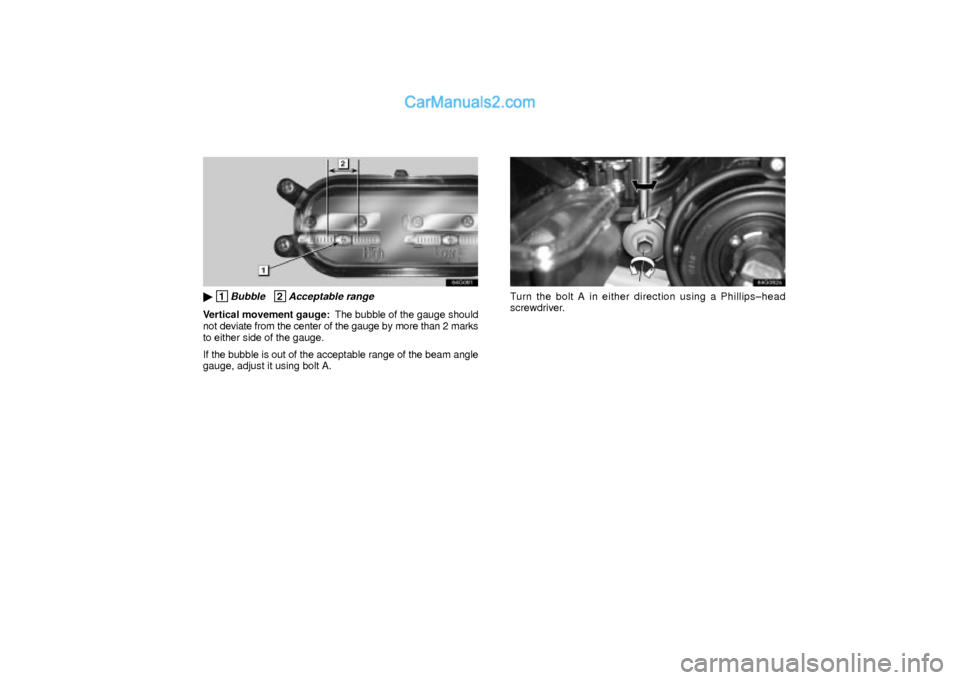
� 1Bubble 2Acceptable range
Vertical movement gauge: The bubble of the gauge should
not deviate from the center of the gauge by more than 2 marks
to either side of the gauge.
If the bubble is out of the acceptable range of the beam angle
gauge, adjust it using bolt A.
64G082a
Turn the bolt A in either direction using a Phillips±head
screwdriver.
Page 18 of 22
64G084
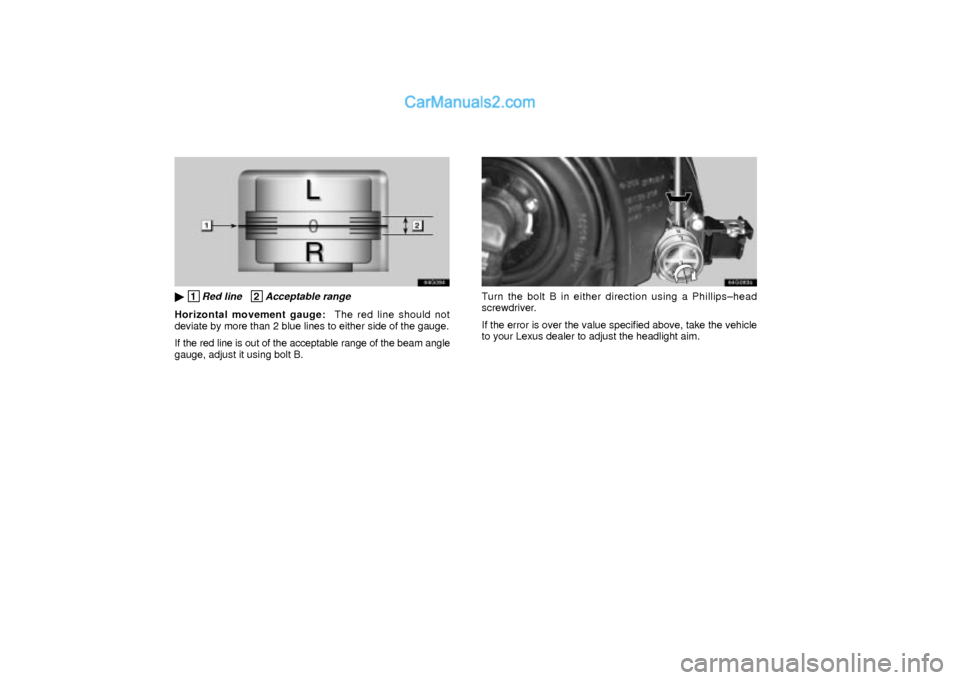
� 1Red line 2Acceptable range
Horizontal movement gauge: The red line should not
deviate by more than 2 blue lines to either side of the gauge.
If the red line is out of the acceptable range of the beam angle
gauge, adjust it using bolt B.
64g083a
Turn the bolt B in either direction using a Phillips±head
screwdriver.
If the error is over the value specified above, take the vehicle
to your Lexus dealer to adjust the headlight aim.
Page 19 of 22

REPLACING LIGHT BULBS
The illustrations on the following pages show the locations of
light bulbs. If it is necessary to replace a bulb, take your vehicle
to your Lexus dealer as soon as possible. Use bulbs with the
bulb numbers and wattage ratings given in the table.
CAUTION
�To prevent burning yourself, do not replace the light
bulbs while they are hot.
�Do not disassemble, repair or take apart the low beam
headlight bulbs, connector, power supply circuits
and rotated components. Or you may be injured by
electric shocks. Call your dealer when the headlights
fail to work or have to be replaced or disposed of.
�Halogen bulbs have pressurized gas inside and
require special handling. They can burst or shatter if
scratched or dropped. Hold a bulb only by its plastic
or metal case. Do not touch the glass part of a bulb
with bare hands.
NOTICE
Only use a bulb of the listed type.
The inside of the lens of exterior lights such as headlights may
temporarily fog up when the lens becomes wet in the rain or in
a car wash. This is not a problem because the fogging is
caused by the temperature difference between the outside and
inside of the lens, just like the windshield fogged up in the rain.
However, if there is a large drop of water on the inside of the
lens, or if there is water pooled inside the light, contact your
Lexus dealer.
Page 20 of 22
LIGHT LOCATION
64G023b
Light Bulbs Bulb No. W Type
1 Headlight (Low beam)
Discharge bulb D2R 35 B
Halogen bulb HB4 51 C
2 Front turn signal light ±±± 21 D
3 Headlight (High beam) HB3 60 A
4 Parking light ±±± 5 D
5 Fog light HB4 51 C
6 Front side marker light 194 3.8 D
64G075a
Light Bulbs Bulb No. W Type
1 Trunk light 194 3.8 D
2 High mounted stoplight ±±± 5 D
3 Tail/stop light ±±± 5/21 D
4 Tail light ±±± 5/21 D
5 Rear turn signal light ±±± 21 D
6 Back±up light 921 16 D
7 Tail/stop light ±±± 5/21 D
8 License plate light ±±± 5 D
Trending: ECU, oil, power steering, stop start, roof, horn, bulb


Discharge bulb D2R 35 B
Halogen bulb HB4 51 C
2 Front turn signal light ±±± 21 D
3 Headlight (High beam) HB3 60 A
4 Parking")