Lexus GS350 2007 Using the front audio system / LEXUS 2007 GS430/350 (OM30A04U) Service Manual
Manufacturer: LEXUS, Model Year: 2007,
Model line: GS350,
Model: Lexus GS350 2007
Pages: 562, PDF Size: 17.95 MB
Lexus GS350 2007 Using the front audio system / LEXUS 2007 GS430/350 (OM30A04U) Service Manual
GS350 2007
Lexus
Lexus
https://www.carmanualsonline.info/img/36/15301/w960_15301-0.png
Lexus GS350 2007 Using the front audio system / LEXUS 2007 GS430/350 (OM30A04U) Service Manual
Trending: garage door opener, ECO mode, ground clearance, adding oil, bulb, air filter, change language
Page 41 of 562
21
1
1-2. Opening, closing and locking the doors and trunk
Before driving
Tr u n k
The trunk can be opened using the trun k opener, entry function or wireless
remote control.
■ Smart access system with push-button start
P.
5
■ W
ireless remote control
P.
1 4
■ T
runk opener
Open the trunk lid.
Page 42 of 562
22
1-2. Opening, closing and locking the doors and trunk
Luggage security system
The trunk opener feature using the trunk opener switch, wireless remote
control and smart access system with push-button start can be disabled
by turning off a switch inside the glove box. This function allows you to
keep valuables safety locked in the trunk when leaving a key with a park -
ing attendant.
Enabled
Disabled
After turning off the trunk opener main s
witch, lock the glove box using
the mechanical key. Take the mechanic al key for your own use and pro-
vide the attendant with the electronic key only. ( P. 2 )
Page 43 of 562
23
1-2. Opening, closing and locking the doors and trunk
1
Before driving
■Tr u n k l i d c l o s e r
In the event that the trunk lid is left sligh
tly open (not latched properly), the trunk
easy closer will automatically close it to the fully closed position.
■Tr u n k l i g h t
When the trunk light switch is set to ON, t
he trunk light turns on when the trunk is
opened.
■Tr u n k h a n d l e
■Internal trunk release lever
■Using the mechanical key
The trunk can be also opened using the mechanical key. ( P.
4 8 6 )
ON
OFF
Use the trunk handle when closing the trunk.
The trunk lid can be opened by pulling down
on the glow-in-the-dark lever located on the
inside of trunk lid.
The lever will continue to glow for some time
after the trunk lid is closed.
Page 44 of 562
24
1-2. Opening, closing and locking the doors and trunk
CAUTION
■Caution while driving
Keep the trunk lid closed.
This not only keeps personal belongings fr om being thrown out, but also prevents
exhaust gases from entering the vehicle.
■When children are in the vehicle
Never leave children unattended in the vehi cle as they may lock themselves in the
vehicle or trunk, which coul d cause the child to overheat or suffocate resulting in
death or serious injury.
■When the trunk has not been fully closed
Be careful that your fingers do not get caught by the trunk lid when it is closing auto-
matically.
NOTICE
■To avoid damage to the trunk lid closer
Do not apply excessive force when the closer is operating.
Page 45 of 562
25
1
Before driving
1-3. Adjustable components
Front seats
Seat position fore/aft control switch
For driver’s seat only: Height of the head restraint also moves upward or
downward with the seat movement.
Seatback angle control switch
Seat cushion (front) angle control switch
Vertical height control switch
Lumbar support control switch
Page 46 of 562
26
1-3. Adjustable components
CAUTION
■Reclining adjustment
Do not recline the seat more than necessary when the vehicle is in motion, to
reduce the risk of sliding under the lap belt.
If the seat is too reclined during an accide nt, the lap belt may slide past the hips and
apply restraint forces directly to the abdomen or your neck may contact the shoul-
der belt, increasing the risk of death or serious injury.
■When adjusting the front passenger’s seat from the driver’s seat
Wait until a passenger is seated or have go tten off the front passenger’s seat before
operating the switch to avoid injuring the passenger.
Page 47 of 562
27
1
1-3. Adjustable components
Before driving
Driving position memory system (if equipped)
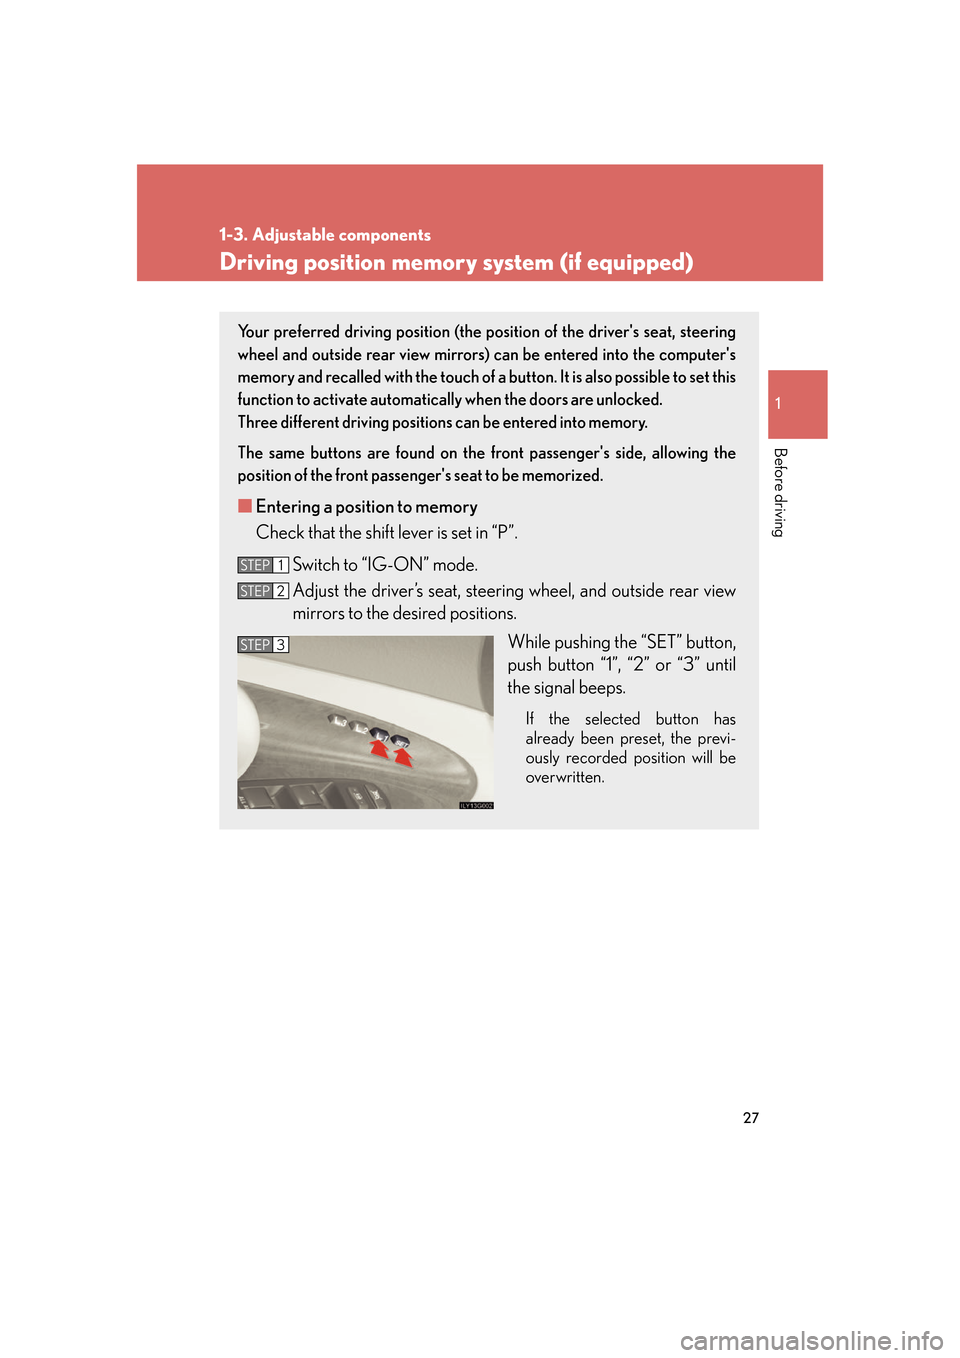
Your preferred driving position (the position of the driver's seat, steering
wheel and outside rear view mirrors) can be entered into the computer's
memory and recalled with the touch of a button. It is also possible to set this
function to activate automatically when the doors are unlocked.
Three different driving positions can be entered into memory.
The same buttons are found on the front passenger's side, allowing the
position of the fr
ont passenger's seat to be memorized.
■Entering a position to memory
Check that the shift lever is set in “P”.
Switch to “IG-ON” mode.
Adjust the driver’s seat, steering wheel, and outside r
ear view
mirrors to the desired positions.
While pushing the “SET” button,
push button
“1”, “2” or “3” until
the signal beeps.
If the selected button has
already been preset, the previ -
ously recorded position will be
o
verwritten.
STEP1
STEP2
STEP3STEP3
Page 48 of 562
28
1-3. Adjustable components
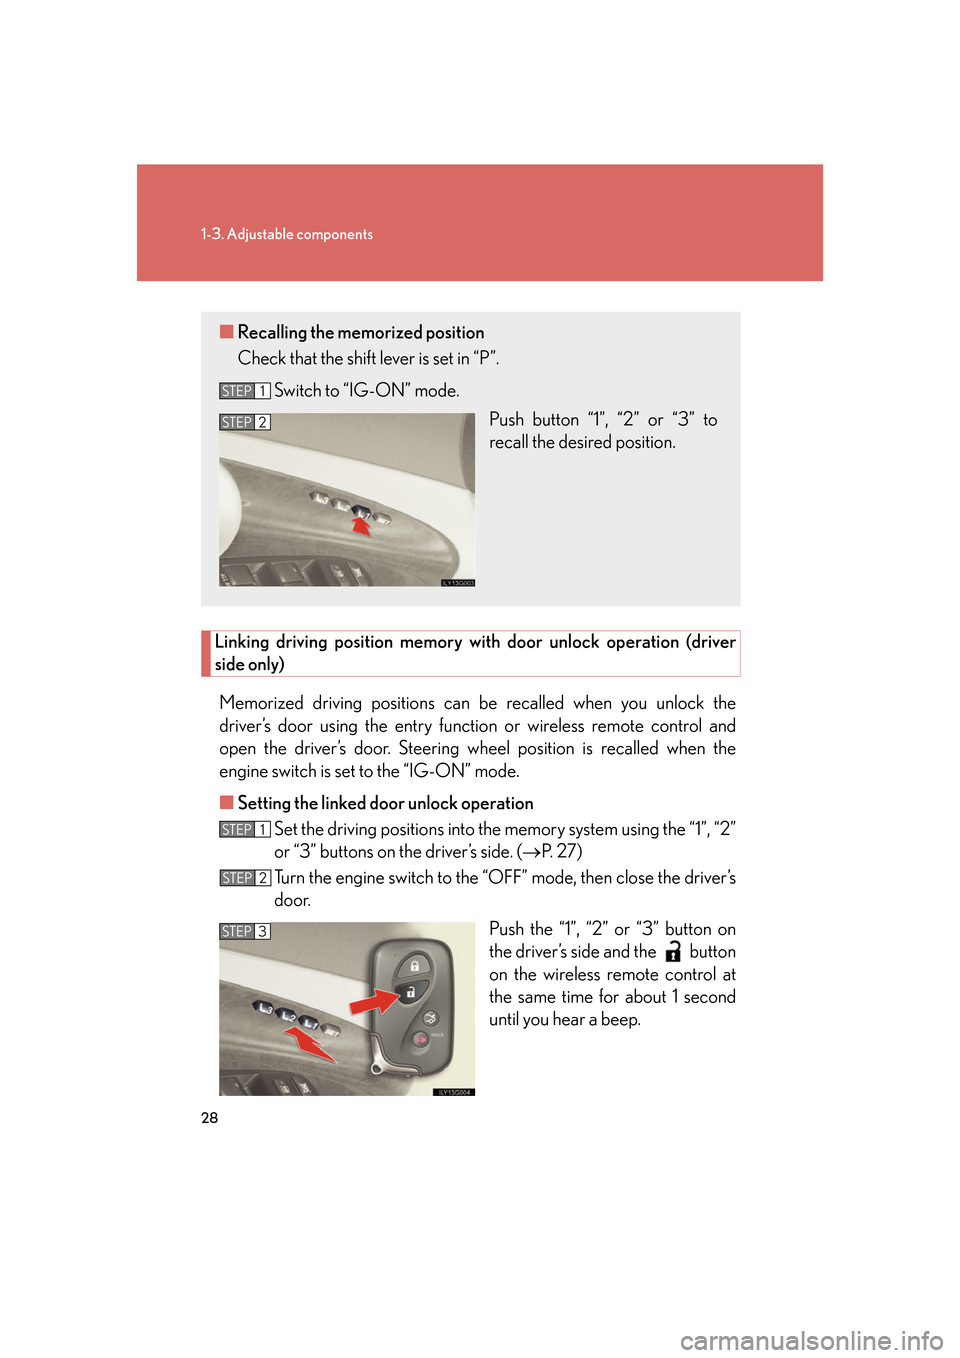
Linking driving position memory with door unlock operation (driver
side only)
Memorized driving positions can be recalled when you unlock the
driver’s door using the entry functi on or wireless remote control and
open the driver’s door. Steering wh eel position is recalled when the
engine switch is set to the “IG-ON” mode.
■ Setting the link
ed door unlock operation
Set the driving positions into the memor
y system using the “1”, “2”
or “3” buttons on the driver’s side. ( P. 2 7 )
Turn the engine switch to the “O FF” mode, then close the driv
er’s
door.
Push the “1”, “2” or “3” button on
the driv
er’s side and the button
on the wireless remote control at
the same time for about 1 second
until you hear a beep.
■Recalling the memorized position
Check that the shift lever is set in “P”.
Switch to “IG-ON” mode. Push button “1”, “2” or “3” to
r
ecall the desired position.
STEP1
STEP2
STEP1
STEP2
STEP3
Page 49 of 562

29
1-3. Adjustable components
1
Before driving
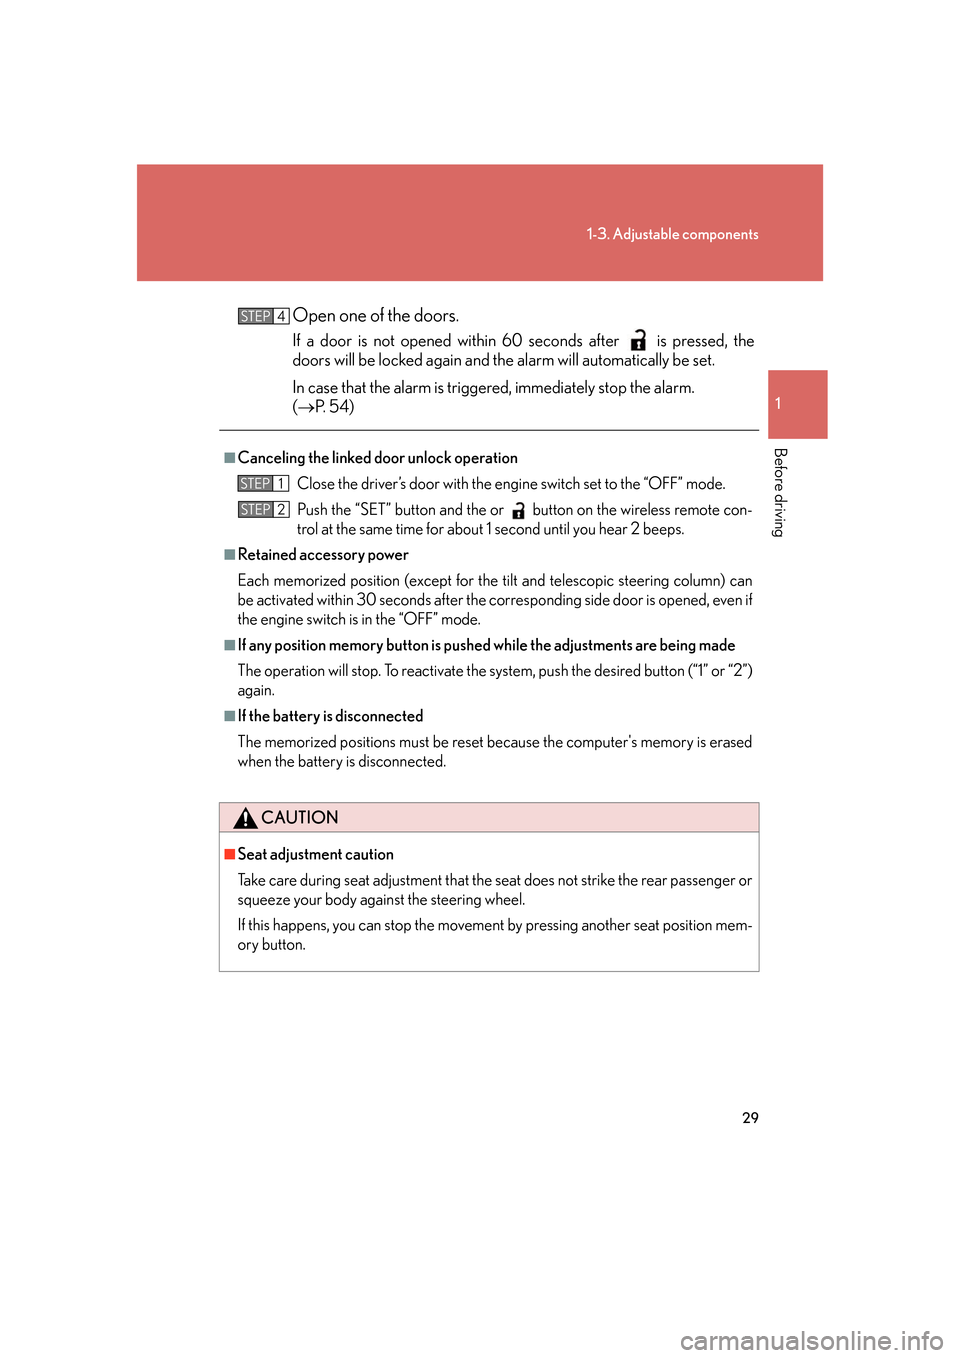
Open one of the doors.
If a door is not opened within 60 seconds after is pressed, the
doors will be locked again and the alarm will automatically be set.
In case that the alarm is triggered, immediately stop the alarm.
( P. 5 4 )
■Canceling the linked do or unlock operation
Close the driver’s door with the en gine switch set
to the “OFF” mode.
Push the “SET” button and the or button on the wireless remote con-
trol at the same time for about 1 second until you hear 2 beeps.
■Retained accessory power
Each memorized position (except for the tilt and telescopic steering column) can
b
e activated within 30 seconds after the co rresponding side door is opened, even if
the engine switch is in the “OFF” mode.
■If any position memory button is push ed while the adjustments are being made
The operation will stop. To reactivate the sy st
em, push the desired button (“1” or “2”)
again.
■If the battery is disconnected
The memorized positions must be reset be cause the computer's memory is erased
when the battery is disconnected.
CAUTION
■Seat adjustment caution
Take care during seat adjustment that the seat does not strike the rear passenger or
squeeze your body against the steering wheel.
If this happens, you can stop the movement by pressing another seat position mem-
ory button.
STEP4
STEP1
STEP2
Page 50 of 562
30
1-3. Adjustable components
Head restraints
■Vertical adjustment
Driver’s seat
Head restraint height can be
adjusted automatically along
with the seat position adjust-
ment. ( P. 2 5)
Front passenger’s and rear seats Grip head restraint and move
it up or down.
Push and hold the lock release
button when lowering the head
restraint.
Grip head restraint and
remove while holding the
lock r
elease button.
■ Horiz
ontal adjustment
Front and outboard rear seats
Grip head restraint and twist to
tilt for
ward or backward.
Lock
release
button
Trending: power steering, fold seats, emergency towing, lumbar support, tire size, phone, maintenance schedule


