reset Lexus GS350 2013 Warranty and Services Guide / LEXUS 2013 GS350 (OM30C34U) User Guide
[x] Cancel search | Manufacturer: LEXUS, Model Year: 2013, Model line: GS350, Model: Lexus GS350 2013Pages: 828, PDF Size: 10.43 MB
Page 391 of 828
GS350_U (OM30C34U)
3915-3. Using the audio system
5
Interior features
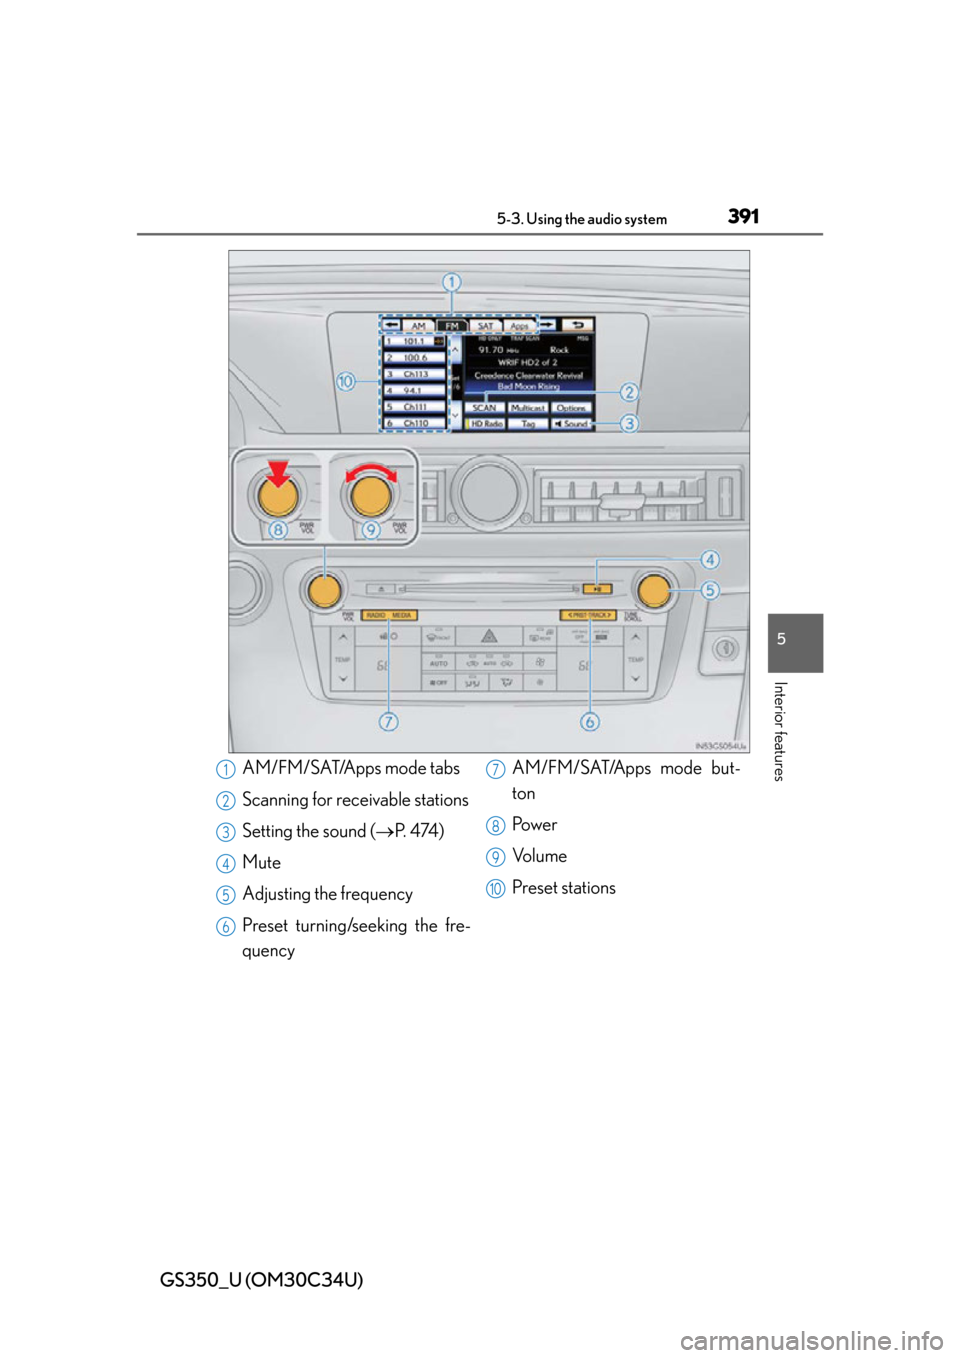
AM/FM/SAT/Apps mode tabs
Scanning for receivable stations
Setting the sound (P. 4 74 )
Mute
Adjusting the frequency
Preset turning/seeking the fre-
quency AM/FM/SAT/Apps mode but-
ton
Po w e r
Vo l u m e
Preset stations1
2
3
4
5
6
7
8
9
10
Page 392 of 828
392
GS350_U (OM30C34U)
5-3. Using the audio system
■Seek tuning
Press and hold “<” or “>” on the “PRST•TRACK” button.
■Manual tuning
Turn the “TUNE/SCROLL” knob.
■Preset stations
Select the desired preset stations (1 - 6).
Change the page by using “” or “ ” on the screen.
Press “<” or “>” on the “PRST•TRACK” button.
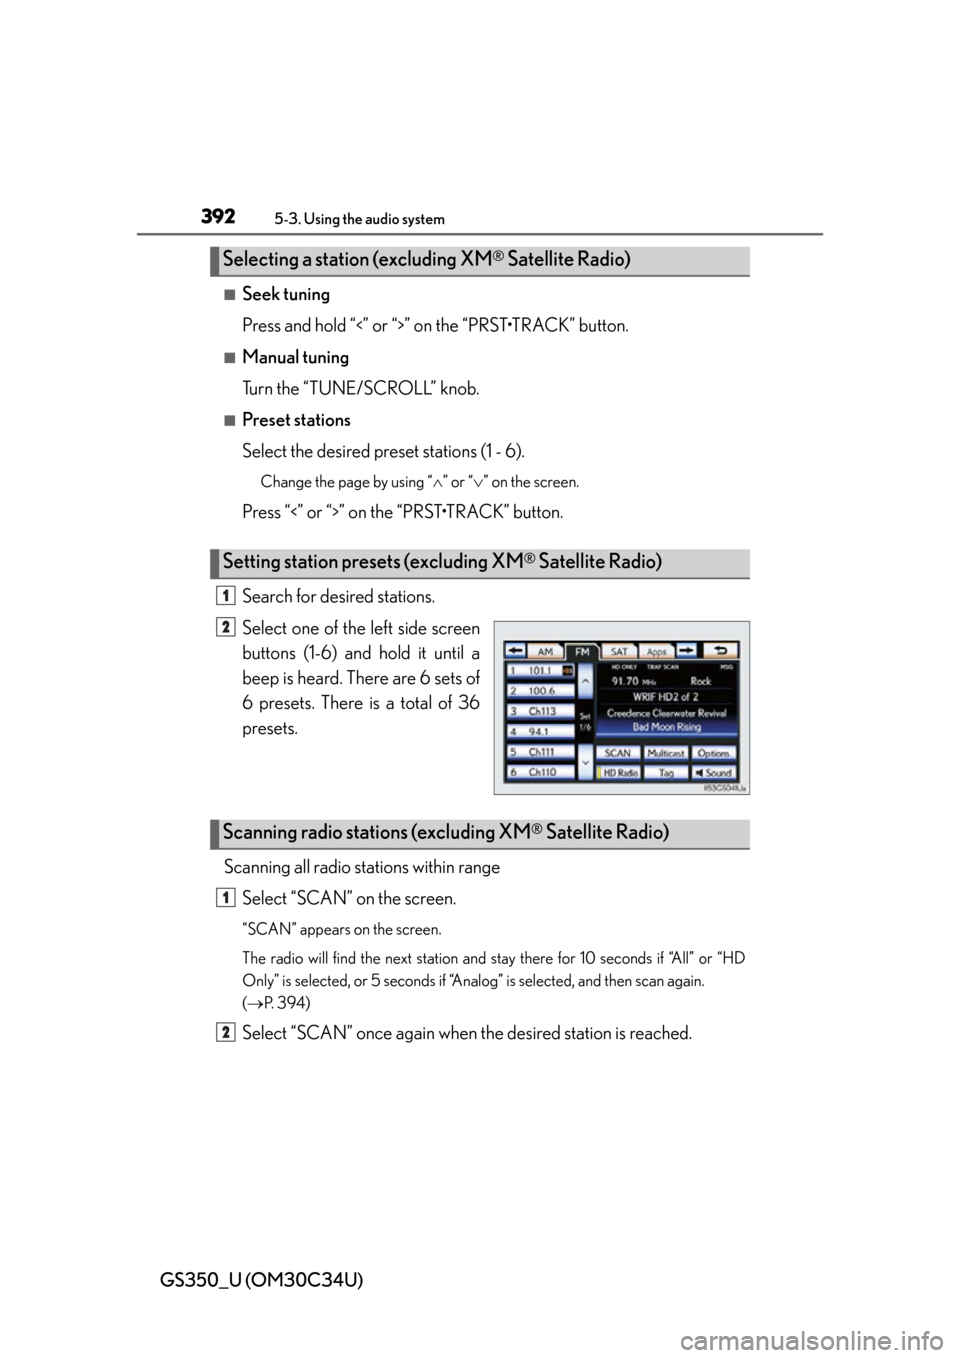
Search for desired stations.
Select one of the left side screen
buttons (1-6) and hold it until a
beep is heard. There are 6 sets of
6 presets. There is a total of 36
presets.
Scanning all radio stations within range Select “SCAN” on the screen.
“SCAN” appears on the screen.
The radio will find the next station and st ay there for 10 seconds if “All” or “HD
Only” is selected, or 5 seconds if “Analo g” is selected, and then scan again.
( P. 3 9 4 )
Select “SCAN” once again when the desired station is reached.
Selecting a station (excluding XM® Satellite Radio)
Setting station presets (excluding XM® Satellite Radio)
1
2
Scanning radio stations (excluding XM® Satellite Radio)
1
2
Page 398 of 828
398
GS350_U (OM30C34U)
5-3. Using the audio system
■Receiving XM® Satellite Radio
Press the “RADIO” button.
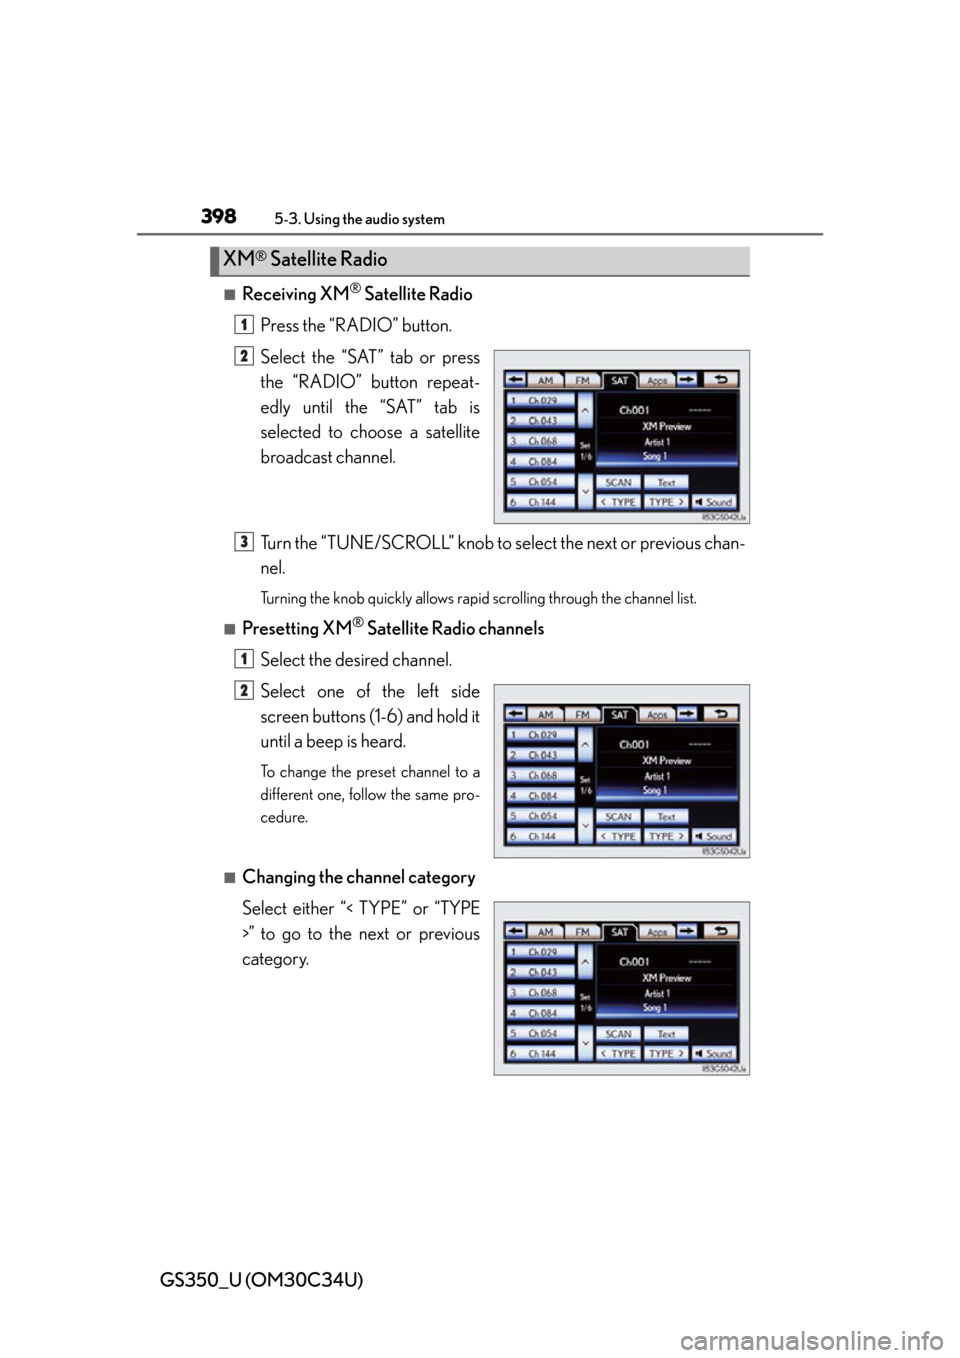
Select the “SAT” tab or press
the “RADIO” button repeat-
edly until the “SAT” tab is
selected to choo se a satellite
broadcast channel.
Turn the “TUNE/SCROLL” knob to select the next or previous chan-
nel.
Turning the knob quickly allows rapid scrolling through the channel list.
■Presetting XM® Satellite Radio channels
Select the desired channel.
Select one of the left side
screen buttons (1-6) and hold it
until a beep is heard.
To change the preset channel to a
different one, follow the same pro-
cedure.
■Changing the channel category
Select either “< TYPE” or “TYPE
>” to go to the next or previous
category.
XM® Satellite Radio
1
2
3
1
2
Page 401 of 828
GS350_U (OM30C34U)
4015-3. Using the audio system
5
Interior features
■If you select
The display returns to the previous screen.
■When the battery is disconnected
All preset stations are erased.
■Reception sensitivity
●Cargo loaded on the roof luggage carrier, especially metal objects, may adversely
affect the reception of XM® Satellite Radio.
●Maintaining perfect radio reception at all times is difficult due to the continually
changing position of the antenna, differences in signal stre ngth and surrounding
objects, such as trains, transmitters, etc.
●The radio antenna is mounted inside the rear quarter window. To maintain clear
radio reception, do not attach metallic window tinting or other metallic objects to
the antenna wire mounted inside the rear quarter window.
■HD Radio™ Technology troubleshooting guide
ExperienceCauseAction
Mismatch of time align-
ment- a user may hear a
short period of program-
ming replayed or an
echo, stutter or skip.The radio stations analog
and digital volume are not
properly aligned or the
station is in ballgame
mode.
None, radio broadcast
issue. A user can contact
the radio station.
Sound fades, blending in
and out.Radio is shifting between
analog and digital audio.
Reception issue, may
clear-up as the vehicle
continues to be driven.
Selecting “Analog” can
force radio in an analog
audio.
Audio mute condition
when an HD2 /HD3 mul-
ticast channel had been
playing.The radio does not have
access to digital signals at
the moment.
This is normal behavior,
wait until the digital signal
returns. If out of the cov-
erage area, seek a new
station.
Audio mute delay when
selecting an HD2 /HD3
multicast channel preset.
The digital multicast con-
tent is not available until
HD Radio™ broadcast
can be decoded and
make the audio available.
This takes up to 7 sec-
onds.
This is normal behavior,
wait for the audio to
become available.
Page 418 of 828

418
GS350_U (OM30C34U)
5-3. Using the audio system
■Audio CD
Select “RAND” on the screen.
“RAND” appears on the screen.
To cancel, select “RAND” again.
■MP3/WMA disc
●Playing files from a particular folder in random order
Each time “RAND” is selected, the mode changes as follows:
random (1 folder random) folder random (1 disc random) off
●Playing all the files on a disc in random order
Select “RAND” repeatedly unt il “FLD.RAND” appears on the
screen.
To cancel, select “RAND” again.
When a file is skipped or the system is inoperative, select “RAND” to reset.
Random playback
Page 477 of 828
477
GS350_U (OM30C34U)5-3. Using the audio system
5
Interior features
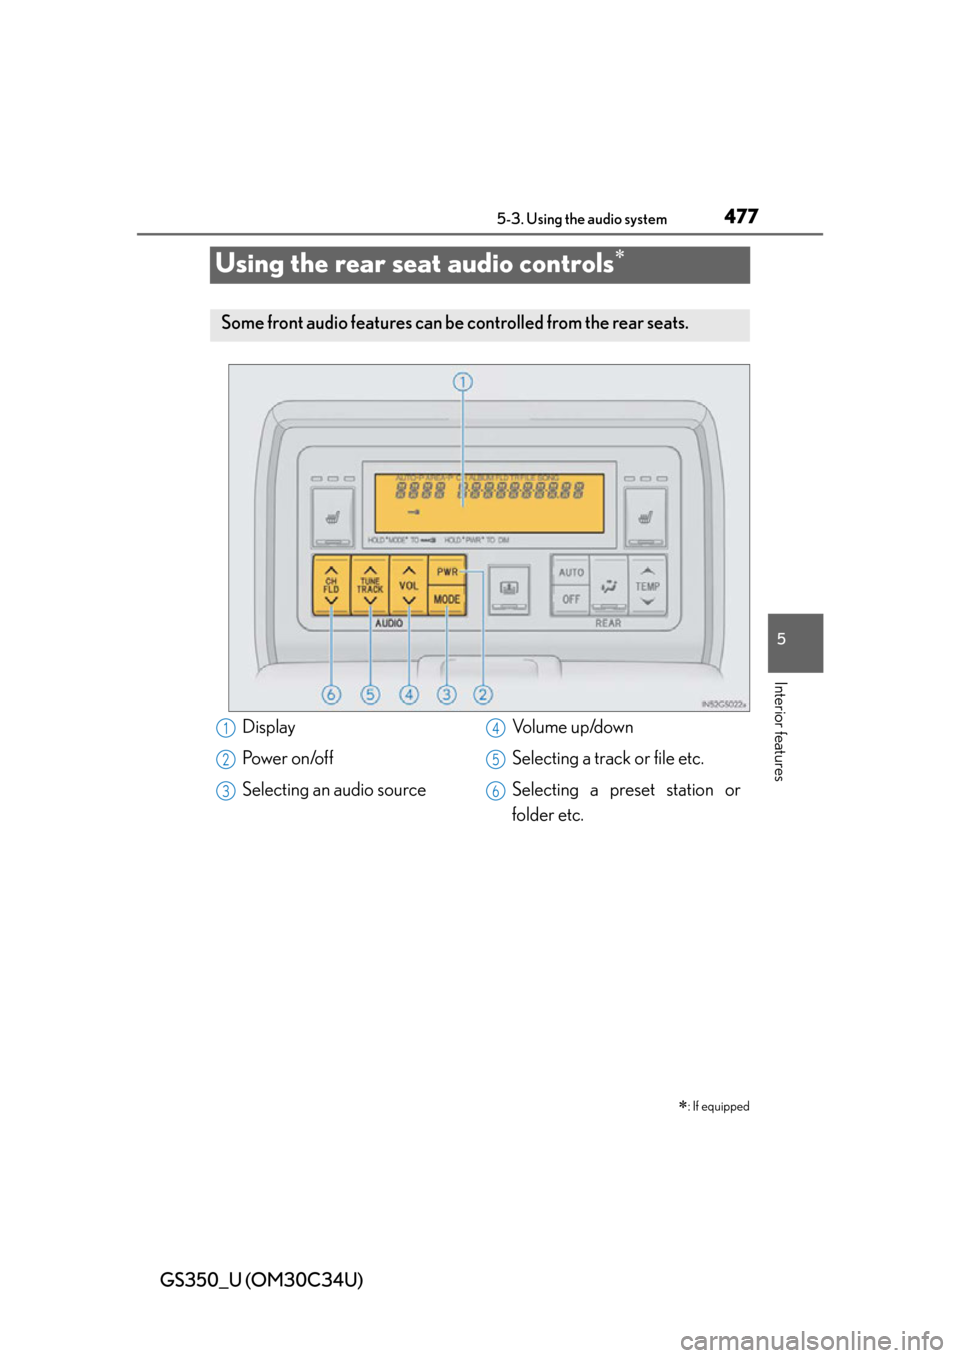
Using the rear seat audio controls
: If equipped
Some front audio features can be controlled from the rear seats.
Display
Power on/off
Selecting an audio source Vo l u m e u p /d o w n
Selecting a track or file etc.
Selecting a preset station or
folder etc.1
2
3
4
5
6
Page 479 of 828
GS350_U (OM30C34U)
4795-3. Using the audio system
5
Interior features
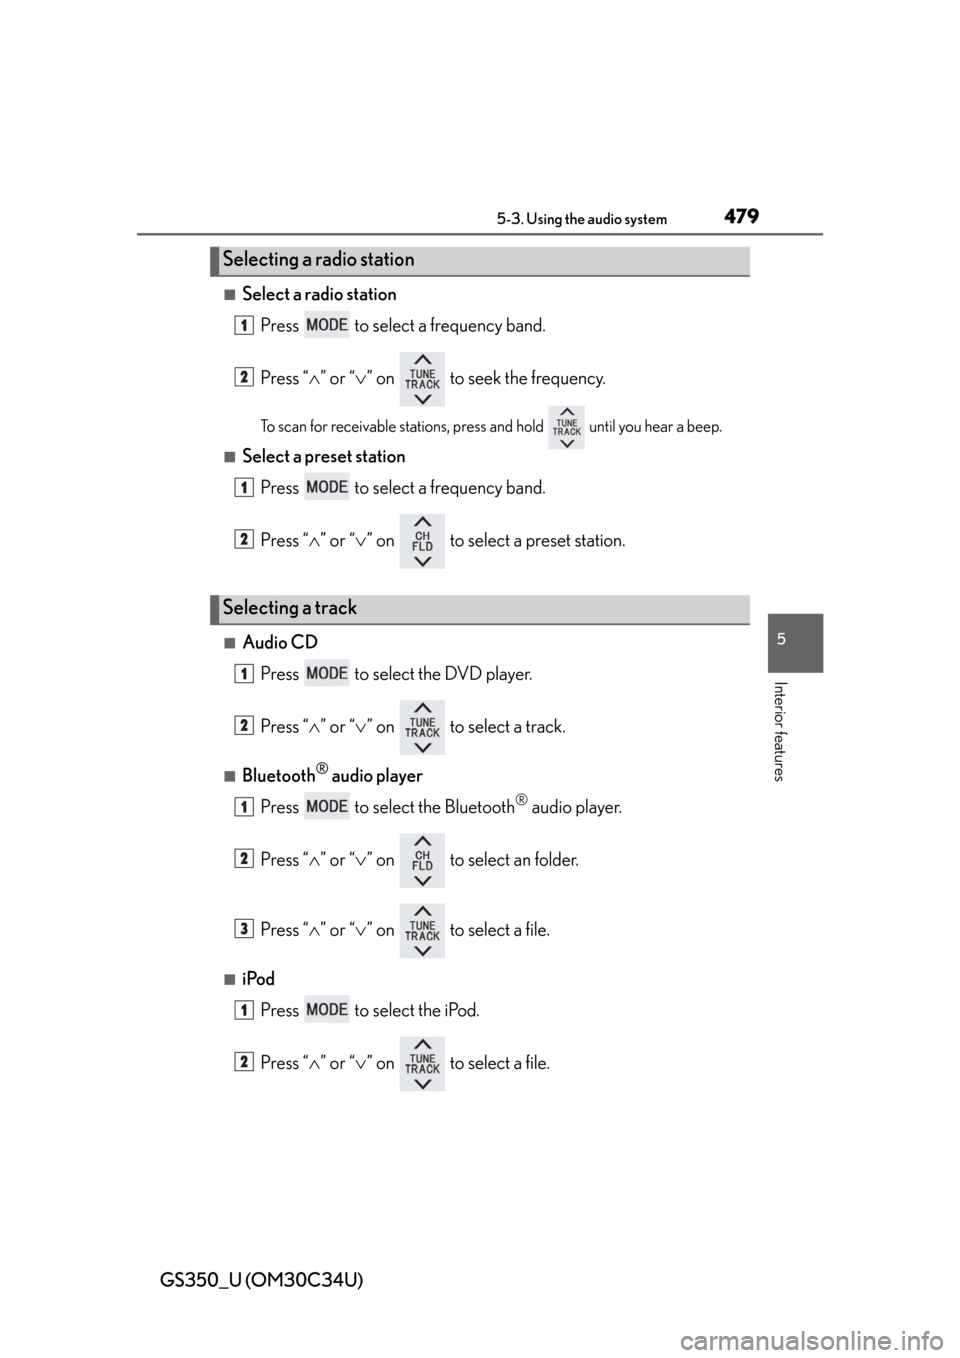
■Select a radio stationPress to select a frequency band.
Press “ ” or “ ” on to seek the frequency.
To scan for receivable stations, press and hold until you hear a beep.
■Select a preset station
Press to select a frequency band.
Press “ ” or “ ” on to select a preset station.
■Audio CD
Press to select the DVD player.
Press “ ” or “ ” on to select a track.
■Bluetooth® audio player
Press to select the Bluetooth
® audio player.
Press “ ” or “ ” on to select an folder.
Press “ ” or “ ” on to select a file.
■iPod
Press to select the iPod.
Press “ ” or “ ” on to select a file.
Selecting a radio station
Selecting a track
1
2
1
2
1
2
1
2
3
1
2
Page 483 of 828
GS350_U (OM30C34U)
4835-3. Using the audio system
5
Interior features
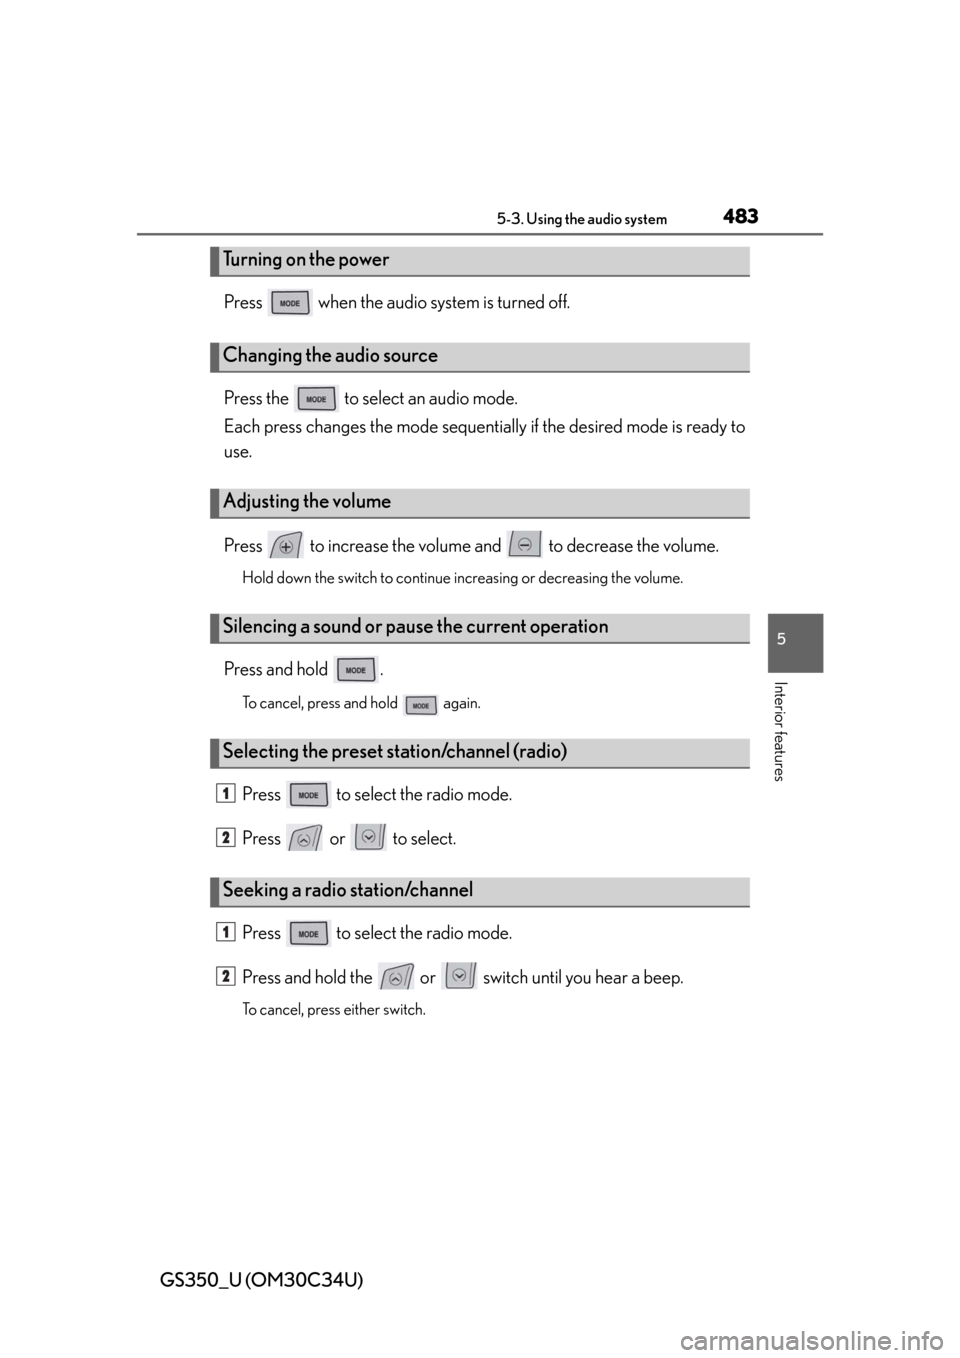
Press when the audio system is turned off.
Press the to select an audio mode.
Each press changes the mode sequentially if the desired mode is ready to
use.
Press to increase the volume and to decrease the volume.
Hold down the switch to continue increasing or decreasing the volume.
Press and hold .
To cancel, press and hold again.
Press to select the radio mode.
Press or to select.
Press to select the radio mode.
Press and hold the or switch until you hear a beep.
To cancel, press either switch.
Tu r n i n g o n t h e p o w e r
Changing the audio source
Adjusting the volume
Silencing a sound or paus e the current operation
Selecting the preset station/channel (radio)
Seeking a radio station/channel
1
2
1
2
Page 602 of 828

602
GS350_U (OM30C34U)
6-2. Maintenance
■Repair and replacement
It is recommended that genuine Lexus parts be used for repairs to ensure perfor-
mance of each system. If non-Lexus parts are used in replacement or if a repair shop
other than a Lexus dealer performs repairs, confirm the warranty coverage.
■Reset the maintenance data (U.S.A. only)
After the required maintenance is performed according to the maintenance sched-
ule, please reset the maintenance data.
To reset the data, follow th e procedure described below:
Switch the display to the trip meter “A” ( P. 80) when the engine is running.
Turn the engine switch off.
While pressing the “ODO TRIP” button ( P. 80), turn the engine switch to the
IGNITION ON mode (do not start the engine because otherwise the reset mode
will be canceled).
■Allow inspection and repairs to be performed by a Lexus dealer
●Lexus technicians are well-trained specialist s and are kept up to date with the latest
service information. They are well informed about the operations of all systems on
your vehicle.
●Keep a copy of the repair order. It proves that the maintenance that has been per-
formed is under warranty coverage. If any problem should arise while your vehicle
is under warranty, your Lexus dealer will promptly take care of it. The message shown in the illustration will
appear on the display.
Continue to press and hold the button until
the trip meter displays “000000”.
1
2
3
Page 632 of 828
632
GS350_U (OM30C34U)
6-3. Do-it-yourself maintenance
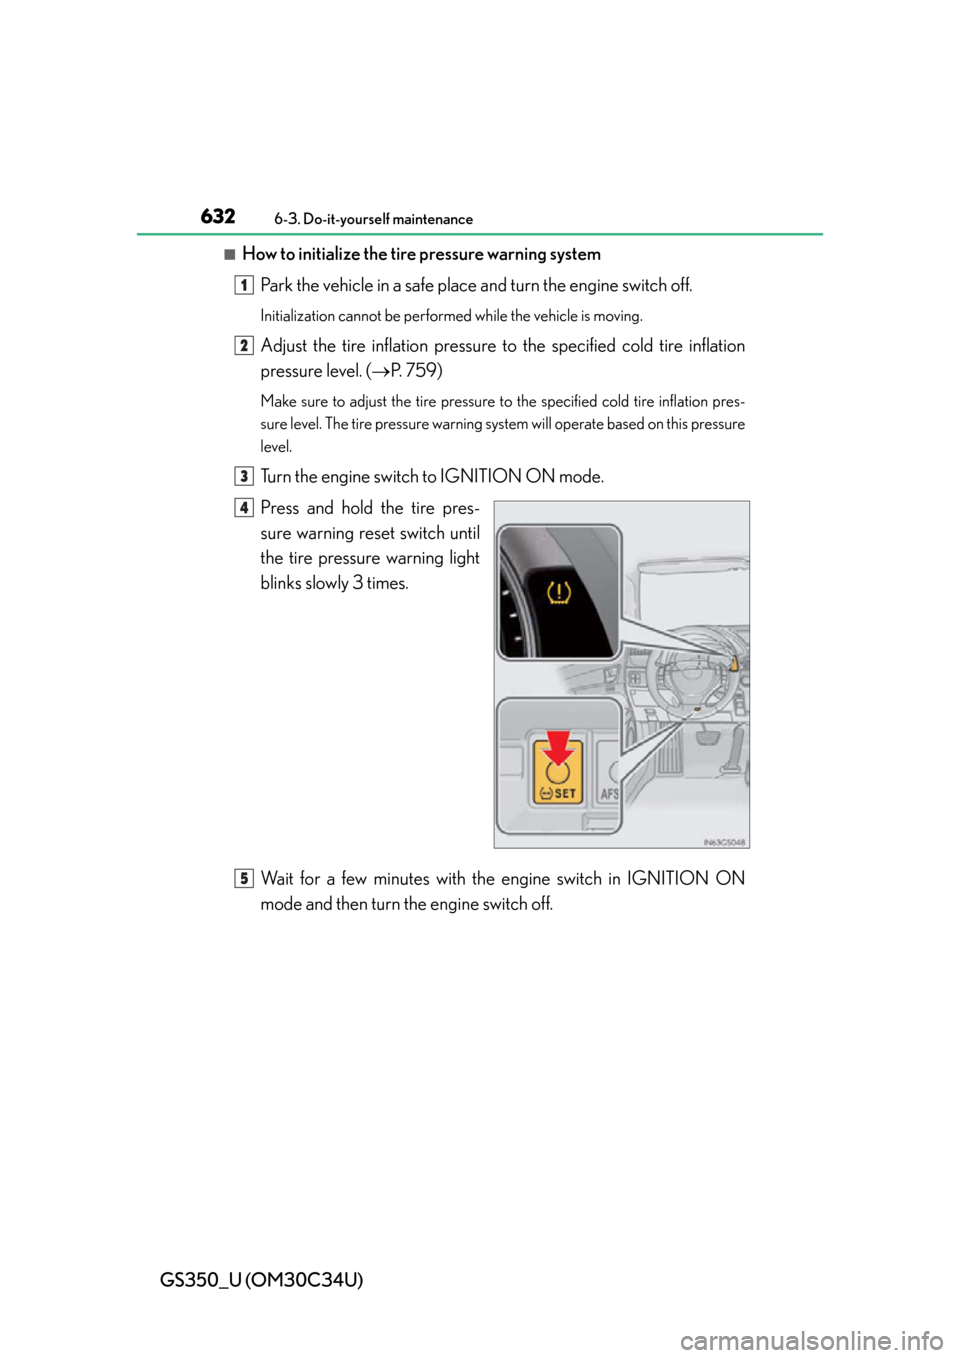
■How to initialize the tire pressure warning systemPark the vehicle in a safe place and turn the engine switch off.
Initialization cannot be performed while the vehicle is moving.
Adjust the tire inflation pressure to the specified cold tire inflation
pressure level. ( P. 7 5 9 )
Make sure to adjust the tire pressure to the specified cold tire inflation pres-
sure level. The tire pressure warning sy stem will operate based on this pressure
level.
Turn the engine switch to IGNITION ON mode.
Press and hold the tire pres-
sure warning reset switch until
the tire pressure warning light
blinks slowly 3 times.
Wait for a few minutes with th e engine switch in IGNITION ON
mode and then turn the engine switch off.
1
2
3
4
5